The description below shows how you can convert a Raspberry Pi with a GSM modem to USB into a gateway for sending SMS via the web interface. The project was created using PHP and C #. The software that communicates with the modem is written in C #, and the web front-end in PHP. In addition, the system is equipped with a PostgreSQL database, which is used to store the history of sent SMSes. The GSM modem requires a SIM card - the cost of the card and the messages sent depends on the operator.
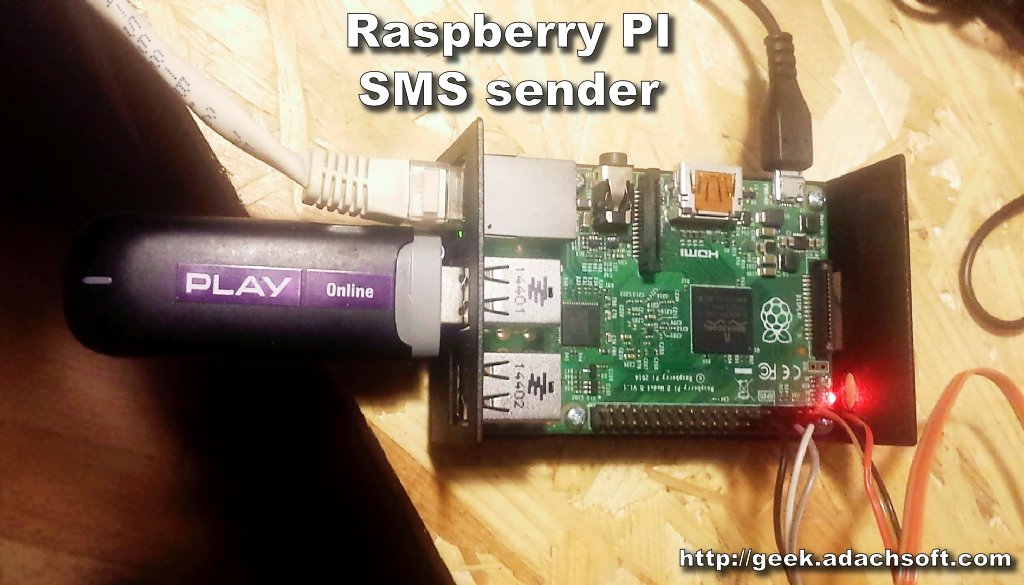
Step 1: Required items You only need two devices: Raspberry Pi and a USB GSM modem with an active network card.
Step 2: Software requirements Before we start struggling with the program on Raspberry Pi we must install:
* Apache2
* PHP
* PHP PDO
* PHP PostgreSQL
* Mono for C #
To install the Apache2 packages in the console, type:
Then we insalize PHP:
Immediately afterwards, the PostgreSQL database:
And mono:
Step 3: GSM modem for USB and Raspberry Pi First, connect the GSM modem to a free USB port and enter the lsusb command in the console. We should see our modem; e.g:
Bus 001 Device 005: ID 12d1:1506 Huawei Technologies Co., Ltd. E398 LTE/UMTS/GSM Modem/Networkcard
The serial port used by the modem will be described as / dev / ttyUSB0, so if we use the command:
we will see a list of devices of this type:
/dev/ttyUSB0 /dev/ttyUSB1 /dev/ttyUSB2
We can now test AT commands on our USB modem. To this end, we will install minicom, which will allow us to send commands to it. In the terminal enter:
After installing the minicom we need to configure it. Enter the following command in the terminal:
In the settings we select "Serial port setup" and if all configurations match, press "OK".
Step 4: Creating the database Now we need to create a PostgreSQL database in which we will store information about sent SMSes. The table has the following fields:
| Field name | Description |
| sms_id | Message ID number |
| date_insert | Date the entry was added |
| date_send | Date of sending the SMS |
| number | Recipient's phone number |
| message | Message content |
| date_error | If an error occurred - the date it occurred |
| date_cancel | Field informing about cancellation of sending an SMS |
And it is defined as follows:
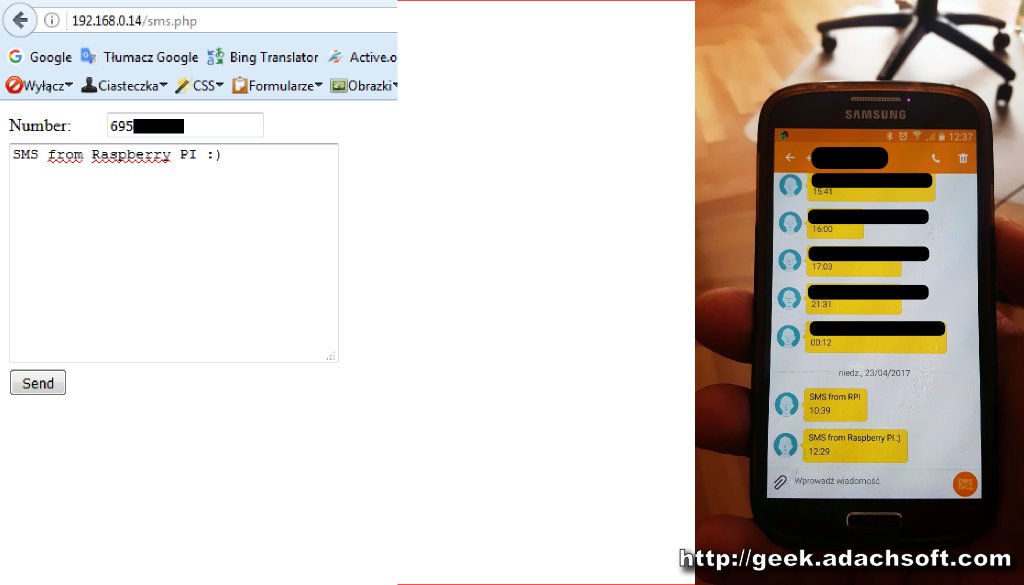
Step 5: Form for sending text messages Before we can use the following script, we must configure the connection to the database server. The author of the design uses an external server, but there is no problem to host the database locally on the Raspberry Pi.
We need to complete the following data in the script:
The script itself is very simple - it contains a form for sending an SMS. Sent messages are saved in the "sms" table described above.
Step 6: Software for sending SMS Software that supports GSM modem is written in C #. To be able to use programs created in this language under Linux, we must have Mono installed. First, we need to configure several constants with database login data in the program:
The entire project in C # can be downloaded
here .
The project was compiled in MonoDevelop under Windows and then copied to 'Raspberry'. After compilation, we create an SMS-cronb folder in the home folder and copy the following files from the project there: Mono.Security.dll, Npgsql.dll and SMS-cron.exe.
Then open the crontab:
and add a single-line entry there and save:
* * * * * ./home/pi/SMS-cron/SMS-cron.exe
\
Thanks to this, every minute SMS-cron will start and check and the "sms" table with new SMSes to be sent.
The SMS gateway is ready
Source:
http://geek.adachsoft.com/home/article/id/20/n/Raspberry-PI-SMS-sender/refid/fb

Comments
I do not see that this gate has the ability to receive text messages, only send. It is probably better to use Gammu SMSD on Linux, it can act as a deamon, it supports various databases, it can use files... [Read more]
Some time ago I wrote a soft that allows you to turn your Android phone into an SMS gateway (commands are sent using REST). If interested, please refer to http://www.elektroda.pl/rtvforum/topic3253249.html... [Read more]
And is it sometimes easier and cheaper to use such a module? Cost 3.41 $ + 2 for esp8266 as an http / rest server. http://obrazki.elektroda.pl/7298882300_1495017741_thumb.jpg [Read more]
Hello, as an educational project - OK for practical use - I recommend smstools and a few tricks for saving the memory card in Rpi. Ser @ fin [Read more]
You still need to write soft. [Read more]
You are welcome, Sim800l there is a simple control after AT, and as for esp I recommend it esp-open-rtos . Regards. [Read more]
AT commands are not a problem, but for this you have to make an additional interface, preferably with an address book, correspondence lists etc. with more ESP can soften, the more that the SPIFFS memory... [Read more]
where can you buy one of the above solutions? [Read more]