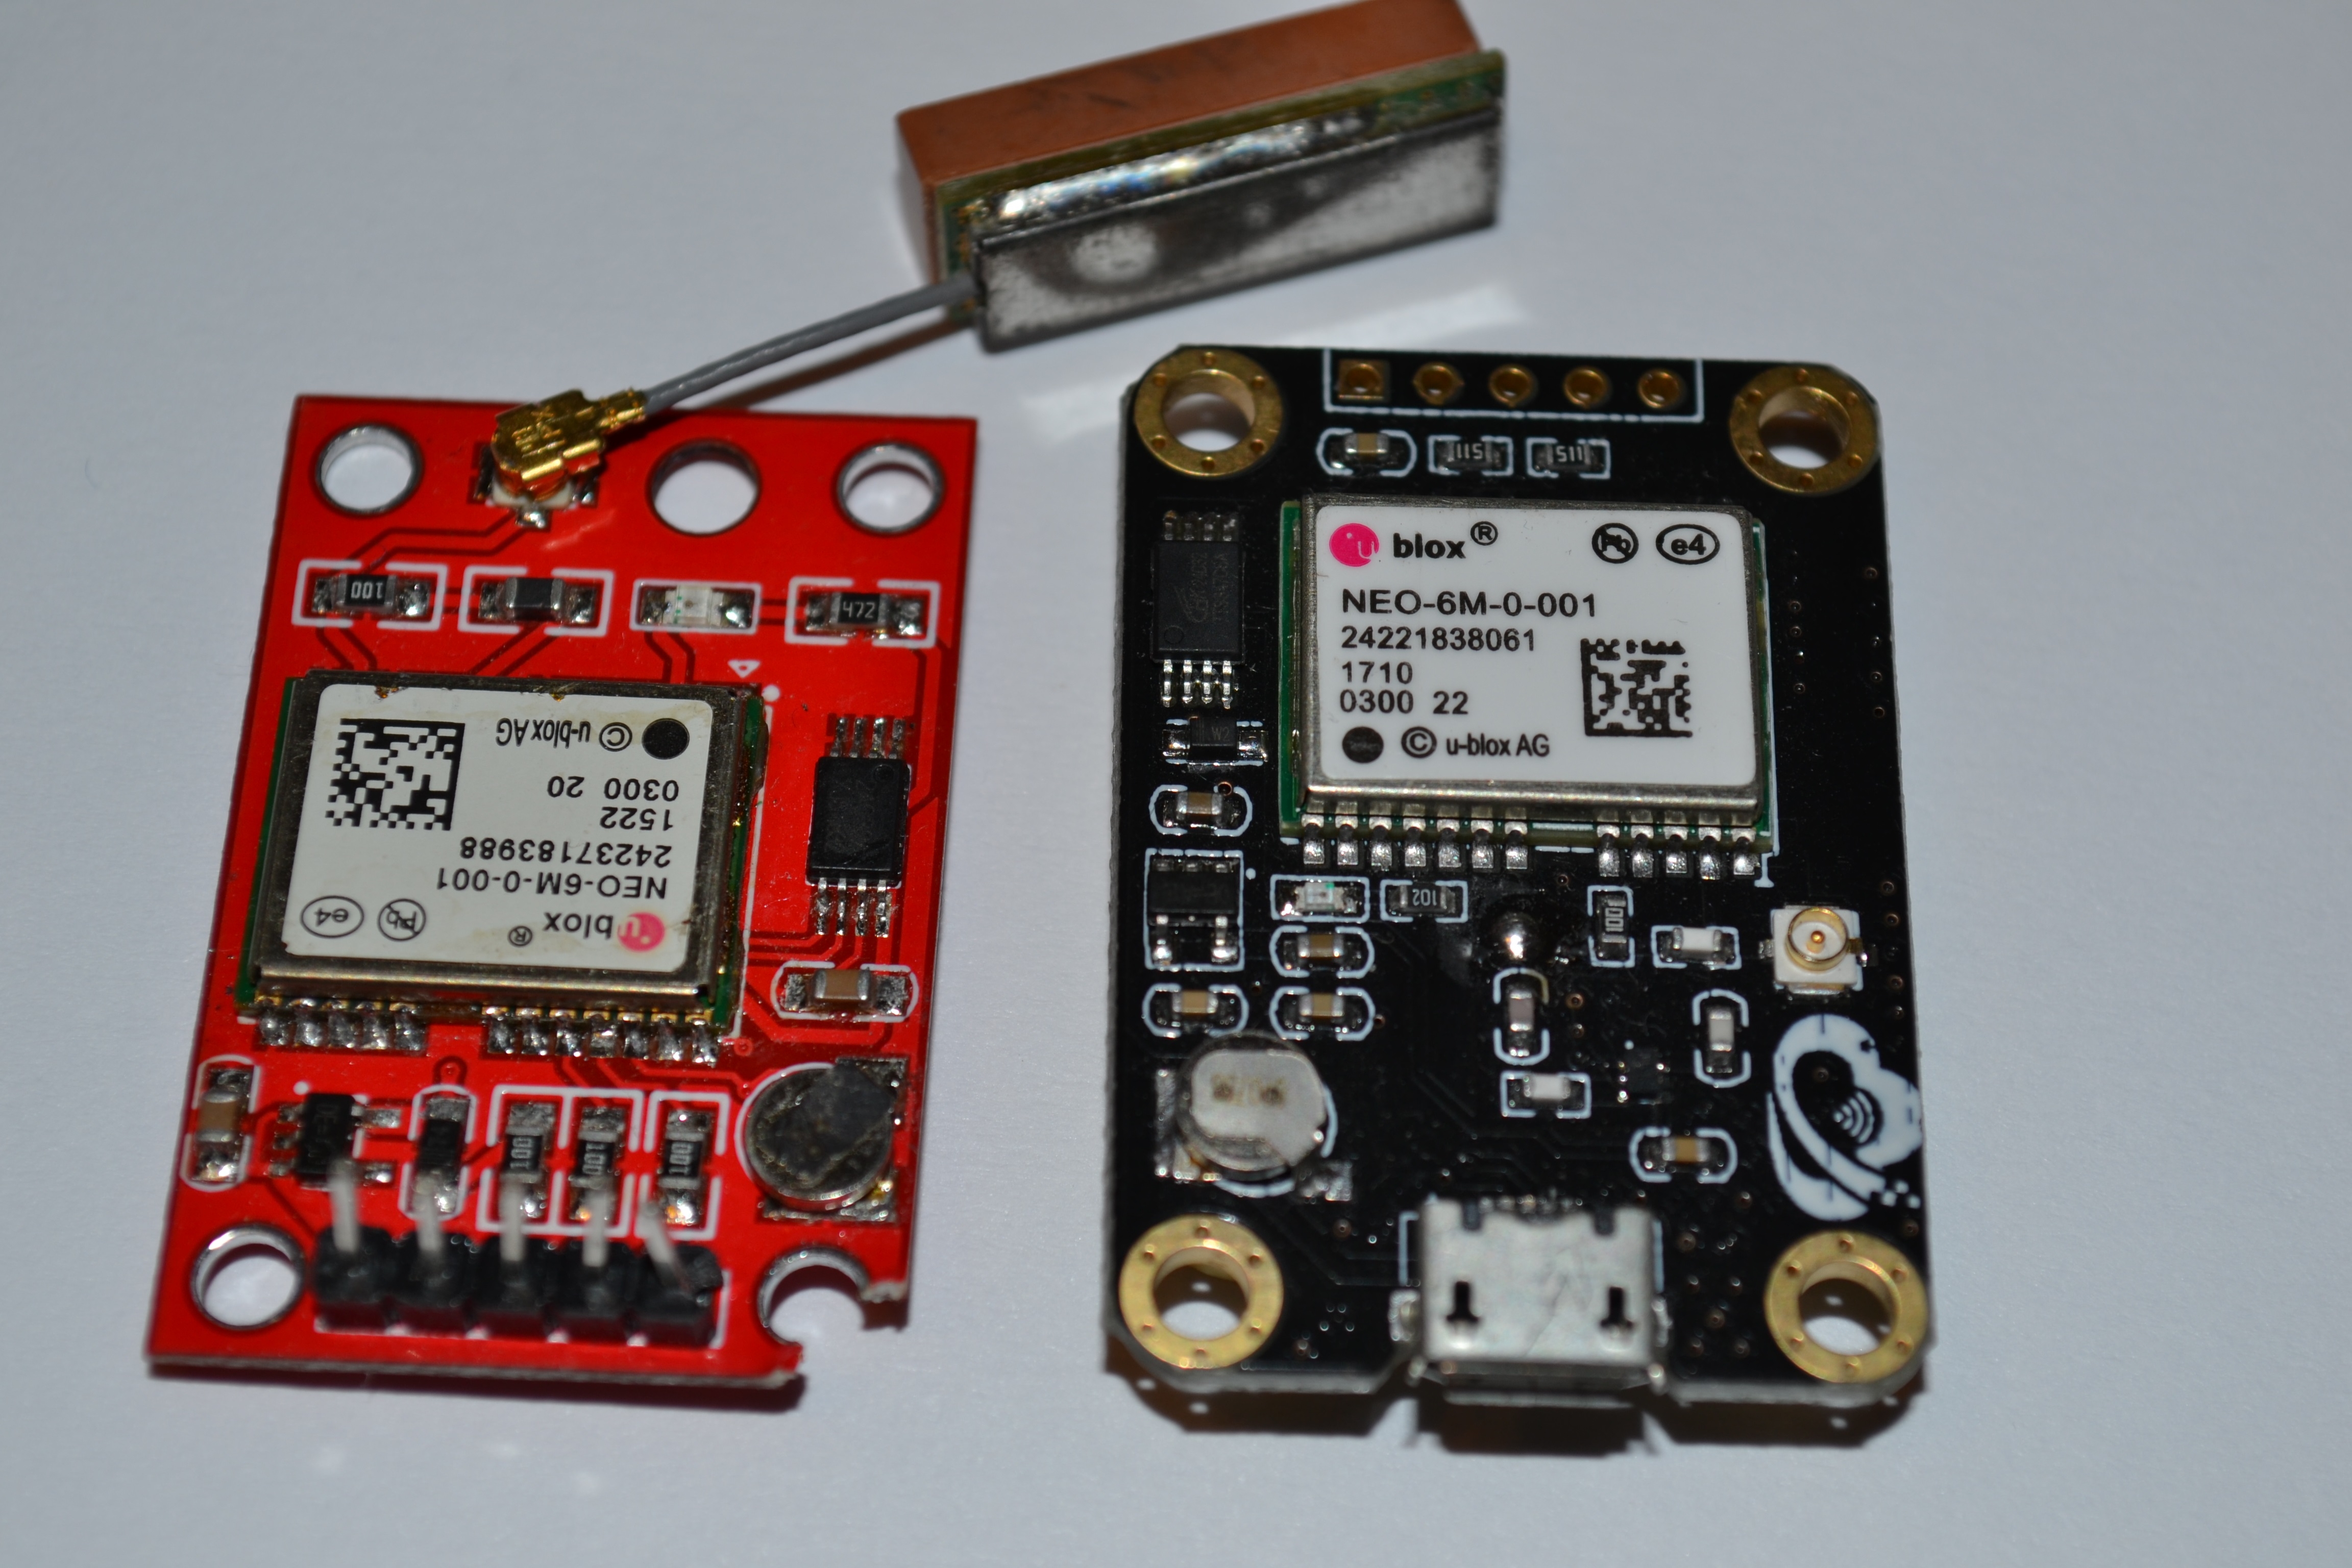
Today I would like to present a brief comparison of the two NEO-6M GPS modules. The difference between these modules is the use of a different PCB and a different antenna.
The described modules in the pictures below.
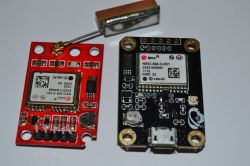
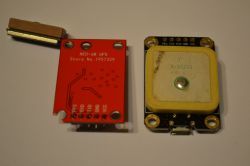
Older version on the left, newer on the right.
I described the first of them some time ago. You can find this description at this link:
https://www.elektroda.pl/rtvforum/topic3472049.html Looking at today's prices, I can say that the module in China has increased a bit more, while on Allegro the price has changed significantly.
Today, for such a module on Aliexpress, together with the shipment, we have to spend about $ 3.73 with the antenna and on Allegro, the cheapest module with shipment costs PLN 56. The module is available with two different solder mask colors - red and black.
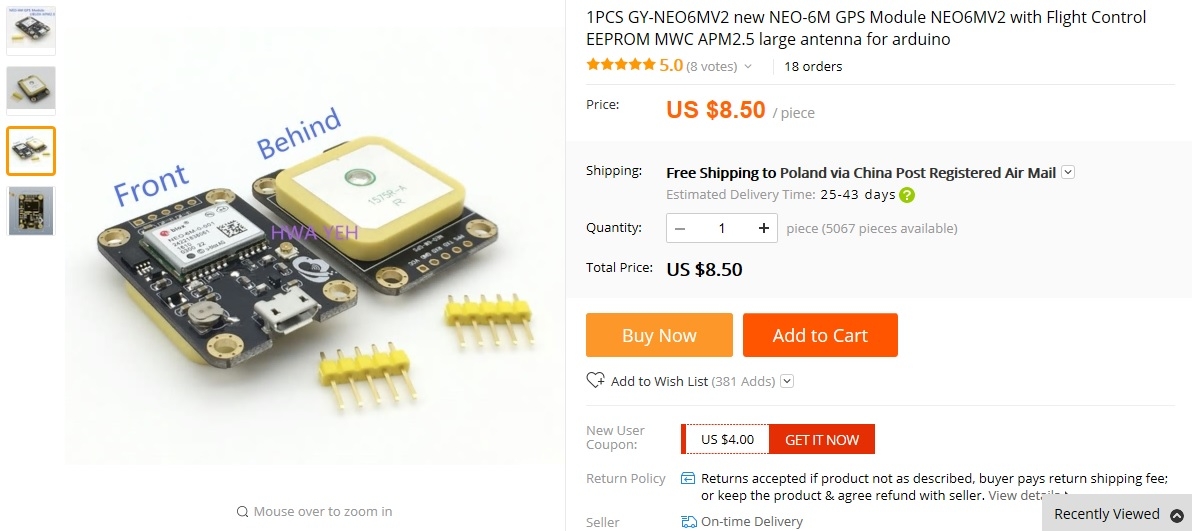
The cost of the second version of the module is about $ 8.5 including shipping.

As of today, I do not see any offers for sale of this version on Allegro.
How are the modules different from each other?
At first glance, as I mentioned above, a PCB.
The new module is slightly larger, its dimensions are 37x26x8mm, the dimensions of the old receiver are 36x24x12mm, the dimensions of the antenna are 21x6x7mm.
The new module has a soldered antenna into the PCB, it is much larger compared to the older version. It has the shape of a rectangle with a side length of 25mm. Another difference is the built-in Micro-B USB socket, of course we still have a 5-pin goldpin socket for communication and power as in the previous version of the receiver.
On the surface, that's it, the heart of the receiver was the same, i.e. the NEO-6M-0-001 from Ublox.
What does an additional USB socket give us? Well, here it makes our work with this receiver much easier. Thanks to the USB socket, we can power our module and communicate with it without additional devices as in the previous version, where a UART converter was needed, eg FT232. You only need a USB cable to start working with the receiver. There is no UART converter on the PCB, just look at the documentation of the NEO-6M system to see that this system has a UART interface that is led out to pins 5 and 6, which are here connected directly to the USB socket. Nothing prevents you from adding or soldering a USB cable to a module that does not have a USB socket, eliminating the need to use a UART converter.
After connecting the cable to the socket and installing the drivers, we only need to find in the device manager under which virtual COM port our module is.
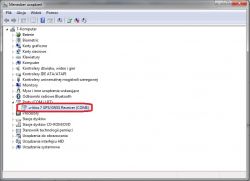
In the case of Windows 7 we do not need drivers, the system already has the appropriate drivers. In the case of Windows XP you will need the appropriate drivers, I do not know how it will be with newer operating systems. To do this, just install the U-center program from the U-blox website and the system will find the drivers itself after connecting the receiver to the computer. In the attachment at the bottom you will find the package with the program, the program can also be downloaded from the manufacturer's website at this link:
https://www.u-blox.com/en 
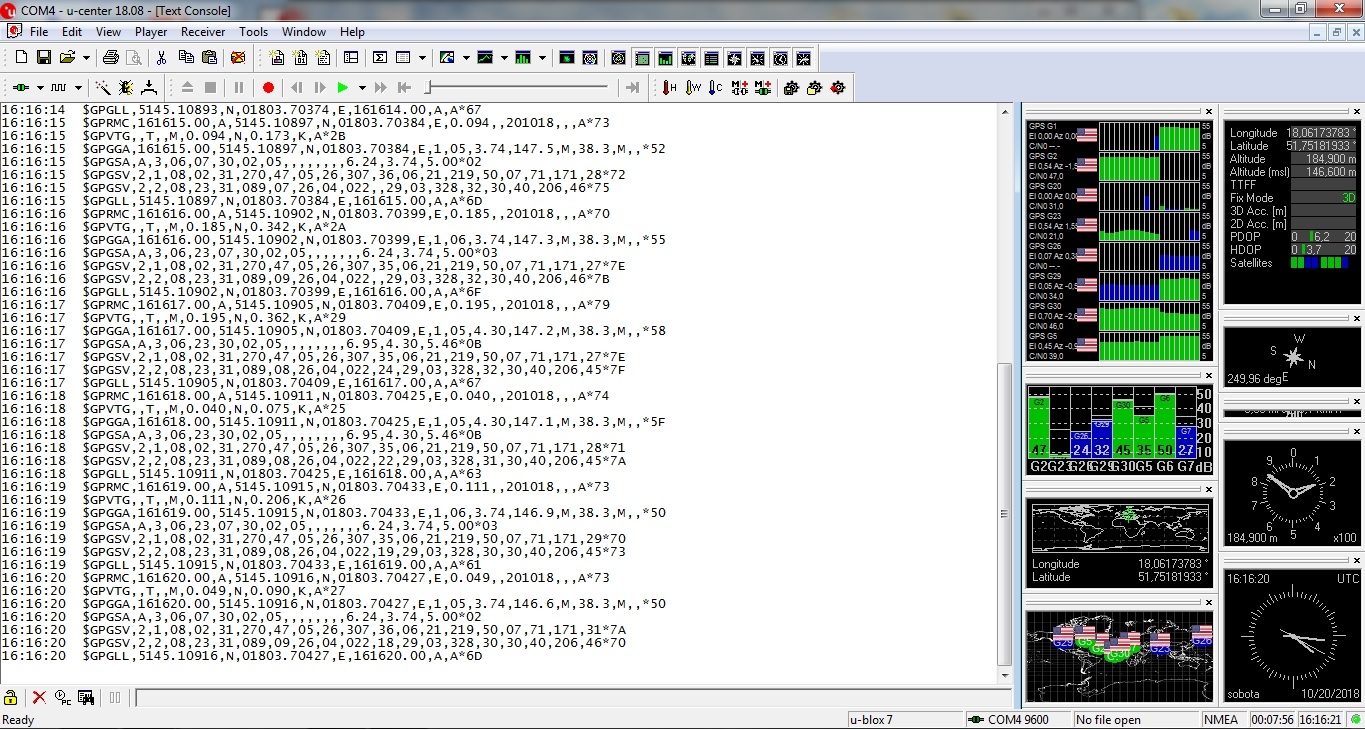
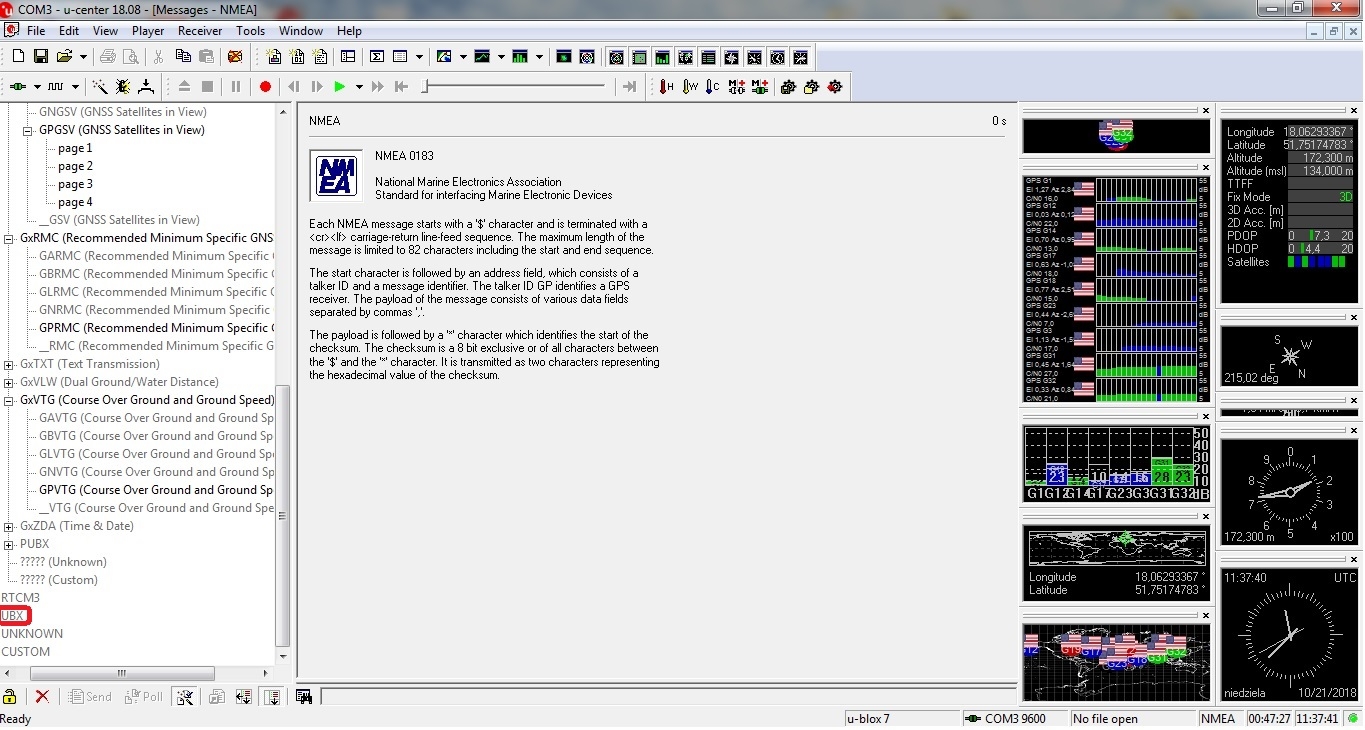
In the program we have a visualization of the data that our module receives, here we can see how many satellites it sees, how strong the signal is, etc.
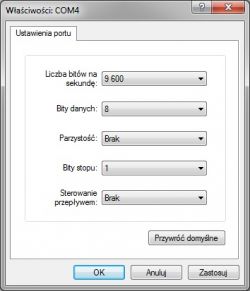
When we have the drivers installed and the receiver correctly detected by the system, just use the program, e.g.. HyperTerminal, set the port number shown in the manager and give the same settings as with the older version of the module.
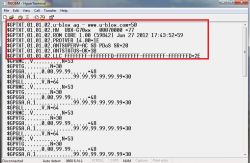
Our new receiver uses exactly the same NMEA protocol as the old receiver.
The only difference that can be noticed is the data frame marked with the $ GPTXT tags.
Current consumption with USB power is about 50mA before catching a FIX and about 40mA after catching a FIX. As a reminder, let me mention that the older version uses 60 and 50mA respectively.
I did not notice a difference in determining the accuracy of the position - after entering the coordinates into GooglMaps from both receivers, the position on the map is identical. The same goes for e.g. movement speed.
Cold start time. For the old module, it is usually a dozen or so minutes, although there were cases that after about one and a half minutes I could enjoy the blinking LED, i.e. catching the FIX.
According to the documentation, a cold start is about 27 seconds, my new copy catches the FIX in a cold start in about 30-35 seconds in a cloudless sky.
A cold start for a receiver that cannot see the sky, e.g. in an apartment about 2 meters from the window, takes several minutes.
I did a few more tries to see the difference for a warm start. Here it turns out that, for example, the old receiver finds its position after about 6 seconds, when we give it power again after a 2-minute break. The new one again takes more than 30 seconds to catch the position. I tried several times and it does not matter if the receiver was previously powered for 30 minutes or for example 2 minutes. It turns out that, apparently, the battery in my newer version is damaged.
For example, after an hour of operation of the receiver and disconnecting it from the power supply, the battery is only 1.5V and after a few seconds it drops to zero. Of course, the rechargeable battery has power when working from the USB socket because during operation we have over 3V there. The older version is better but also does not last as much as a few months ago. As of today, it is only a few minutes. Maybe discharging the battery to zero shortens its life.
Summing up, I think it is worth giving a pair of zlotys more for a larger antenna, which will allow for faster positioning. The USB port makes working with the receiver much easier and relieves the need for a UART converter.
How to change the baud rate
BAUDRATE ?
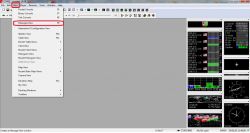
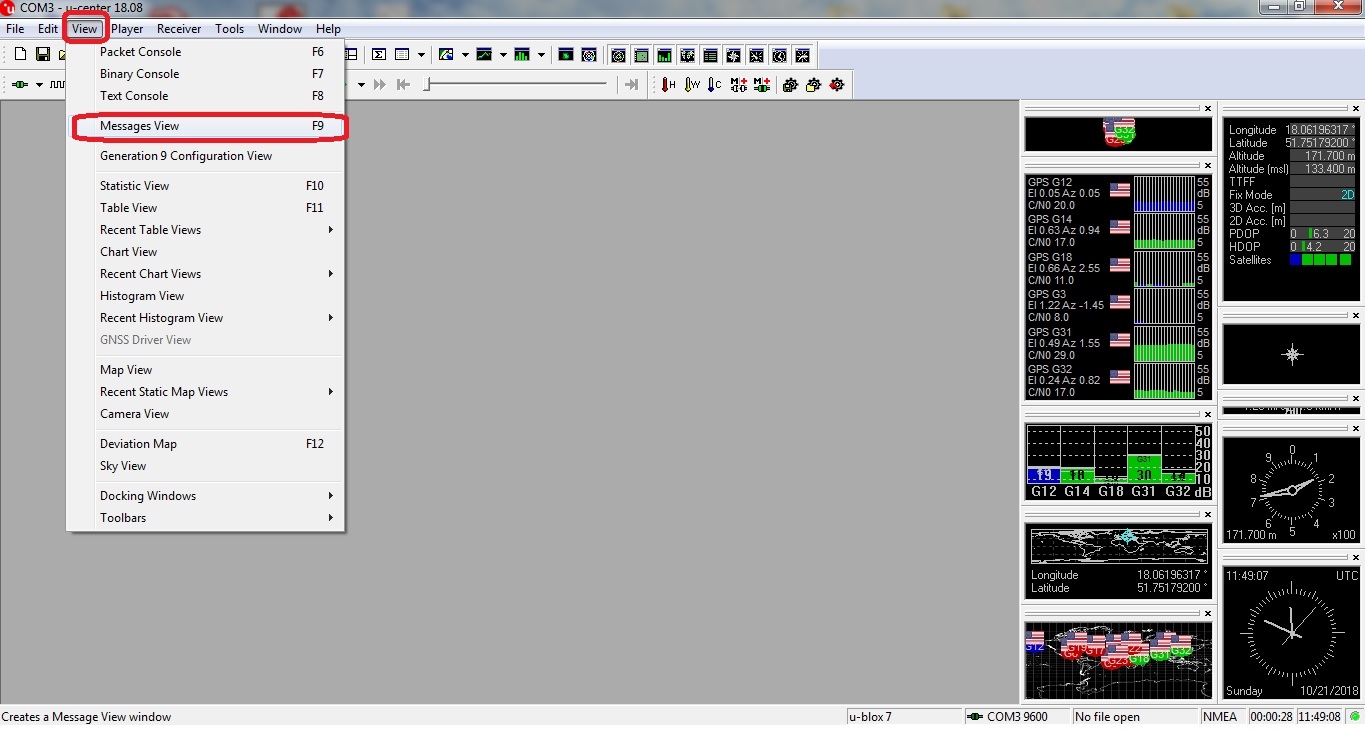
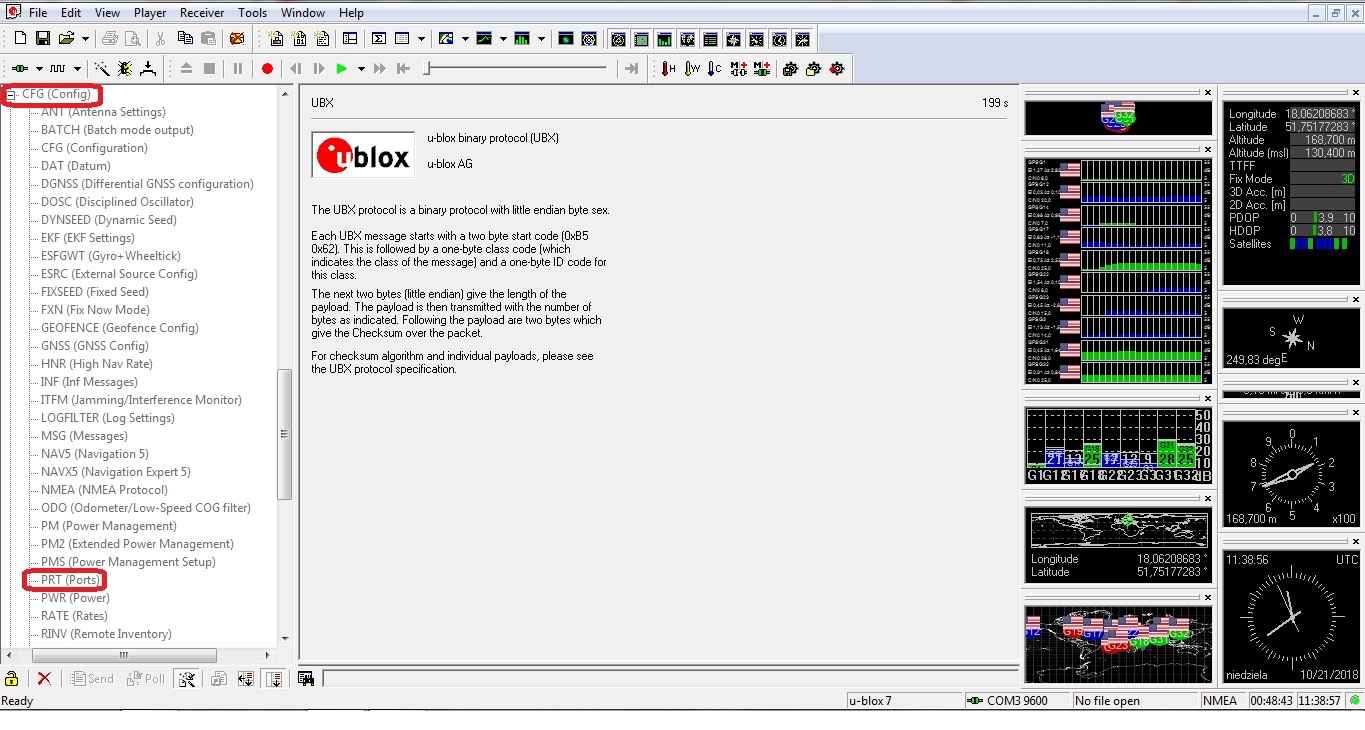
We launch the U-center program.
We connect to our receiver.
We select in the tab
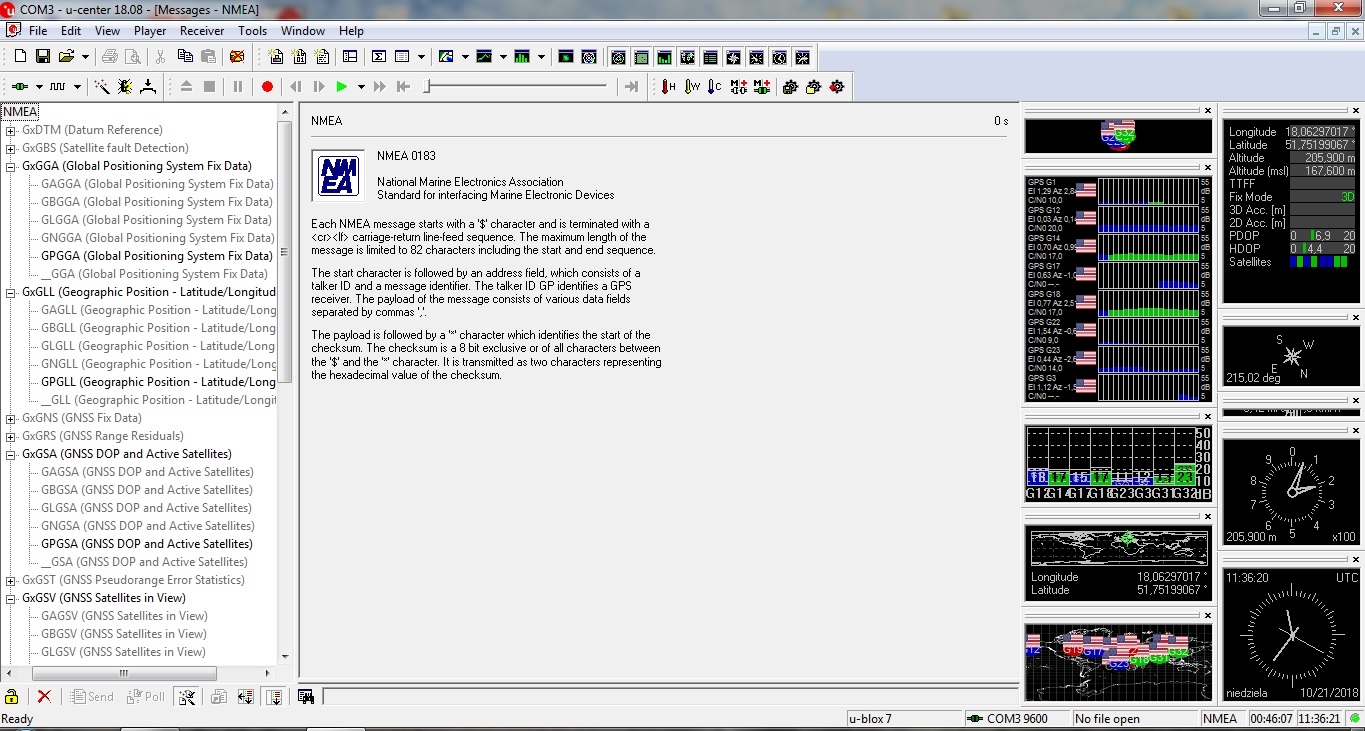
VIEV MESAGES VIEW or just hit F9.
Then move the slider down.
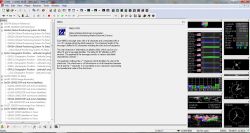
We choose from the list
UBX 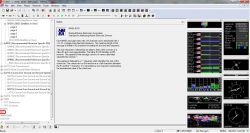
Then we choose
CFG (CONFIG) and next
PRT (PORTS) 
We open up
BAUDRATE and from the list we choose the speed we want to work with.
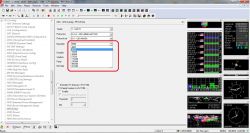
After selecting the appropriate speed, press the button
SEND in the lower left corner of the window and our receiver resets.
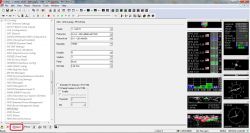
From now on, the communication speed is as we have chosen. Unfortunately, after cutting the power, the settings will return to previously saved. To permanently save the speed selected by us, we must go to
CFG (CONFIGURATION) by moving the slider a little higher. Here we have to choose
SAVE CURRET CONFIGURATION in the window
DEVICES choose
0-BBR and
1-FLASH and once again save this configuration by sending it to the receiver, i.e. by clicking the button
SEND at the bottom of the window on the left. From now on, we will be able to work with the receiver at the speed we choose, even after disconnecting the power supply.
PS. Looking for current prices, I noticed that for the price of about $ 1.2 you can buy a housing for the NEO6M receiver from Asian friends. I remember when about 10 years ago I bought a similar receiver (I do not know what was inside because I did not unscrew it) for the amount of about PLN 200, fearing the accuracy of the indications. I based my concerns on the price comparison of the receiver and ordinary GPS navigation. It turned out that the fears were unnecessary because such a receiver, after connecting to a laptop and starting AutoMapa, led to the destination without fail.
I think that such a receiver nowadays, with the popularity of smartphones, will probably not be useful to anyone as an extension of the laptop with navigation, but you can use it, for example, to build your own GPS tracker.


Comments
Interesting review. I am trying to build a GPS module for the Nikon d5100. If you manage to use usb and change the baud rate, such a module is enough. [Read more]
It's a pity you didn't compare the newer N8M modules. 6M is quite old, for example, it lacks Glonass, Galileo, etc. I use N8M and N6M and there is a gap between them when it comes to the time of... [Read more]
Does the N8N have the ability to receive GPS + Glonass together? Do you have to choose either GPS or Glonass? [Read more]
GGK , I did not think anyone would want to change the baud rate so I did not describe it. This can be done, for example, with the U-center program. I added a description to the article. Jarus13... [Read more]
It would be interesting to compare the M8N and M8P-2 with RTK. 2.5 cm accuracy with RTK. [Read more]
How does the Chinese version of this module compare to the original one? I think you need to get RTK support from somewhere. [Read more]
You need 2 M8P-2s and pair them with a radio modem. In a word, make your own reference station. I am using the M8N (rather not the original :) from the Polish auction site and is accurate, but while... [Read more]
@ftdi , I do not have such a problem, I used the M8N in the quadrocopter and with the auto landing the error was up to 10cm. When testing on a desk about 3m away from the window, the accuracy was about... [Read more]
M8N what is the real accuracy? It is possible that in the open space of about 50 cm. Has anyone tried to fasten 2 of these devices in rtk? [Read more]
I did RTK on two M8P-2 with 868 MHz radios, my own reference station and receiver in motion. Drotek ready-made modules. Other elements - what was at hand. After establishing the position (fix) of the... [Read more]
What was the cost of the whole set? What is the real range from the station? [Read more]
The cost of 2 pcs NEO M8P-2-11 GPS Tiny RTK https://store-drotek.com/794-DP0501.html with 2 antennas is about 480 euro including VAT, customs and shipping to pl. The cost of 2 radio modems - in our case,... [Read more]
Hello, I would like to use two Ublox ZED-F9P RTK modules as in the link https://www.u-blox.com/en/product/c099-f9p-application-board One as a mobile station, the other as a base station. I am interested... [Read more]