 Hello my dear.
 I will present here the Aqara door / window opening sensor model MCCGQ11LM. I will pair it with Home Assistant via Zigbee2MQTT, show its operation, interior and present the automation possibilities it offers.
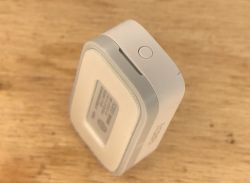
Aqara door opening sensor The sensor was purchased on one of the Polish portals with online sales:
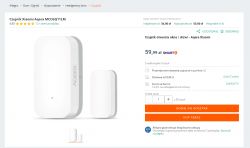
Purchase cost - PLN 60 + shipping.
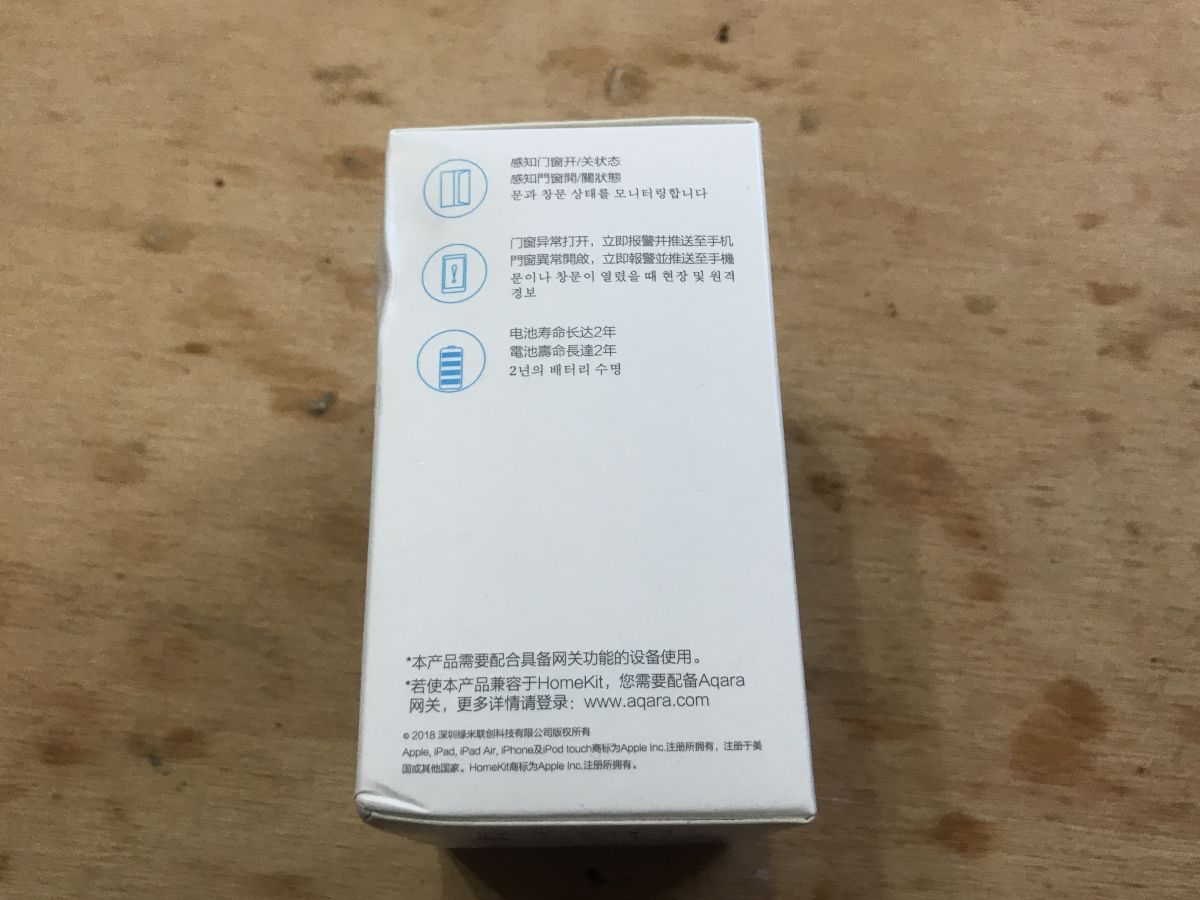
The seller provides the following parameters:
Quote: Brand: Aqara (Xiaomi EcoSystem)
Name: Door & Window Sensor
Model: MCCGQ11LM
Connectivity: Wireless, ZigBee protocol
Power supply: CR1632 battery
Working humidity: 0% ~ 95% RH
Working temperature: -10 ° C ~ 50 ° C
White color
Standard: Q / QLML003-2015
Dimensions: 41 x 22 x 11mm
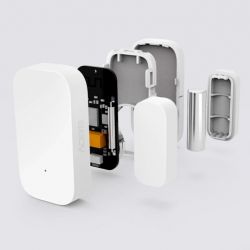
Its structure is also shown:
Normally you need to purchase a Zigbee hub separately to use this sensor, but I will use it with my Home Assistant server.
Related topic about the door opening sensor on WiFi Some time ago I tested a slightly different door opening sensor (a different manufacturer, a different type of communication - WiFi, not ZigBee, and a different power supply). I recommend reading the topic:
https://www.elektroda.pl/rtvforum/topic3771510.html#19211057 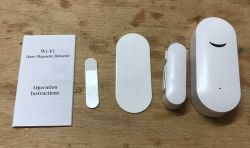 Related topic about another product from the Aqara series
 Some time ago I also tested the Aqara temperature / pressure / humidity sensor model WSDCGQ11LM. I have described my experiences here:
https://www.elektroda.pl/rtvforum/topic3791330.html  Aqara door opening sensor - first impression
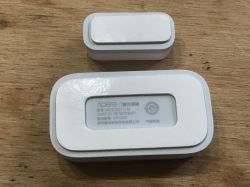
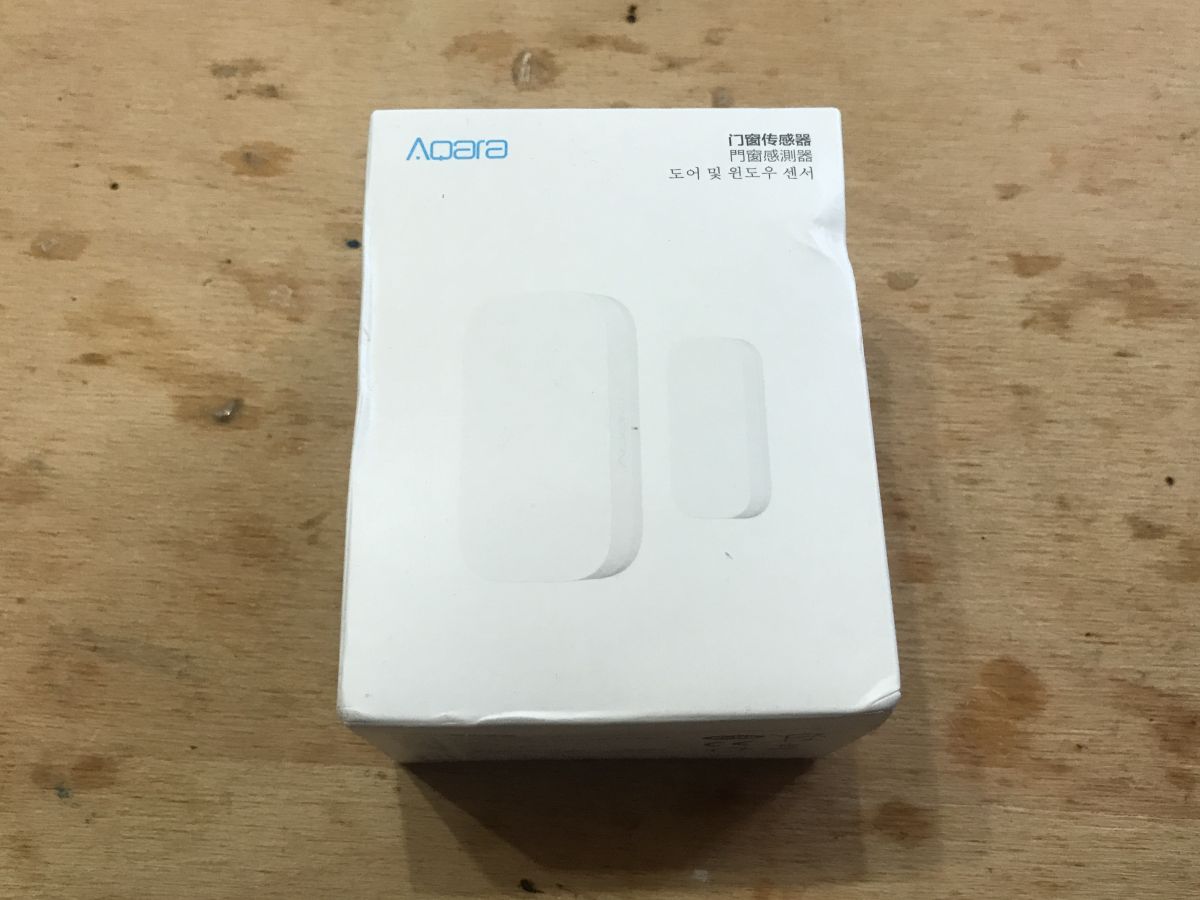
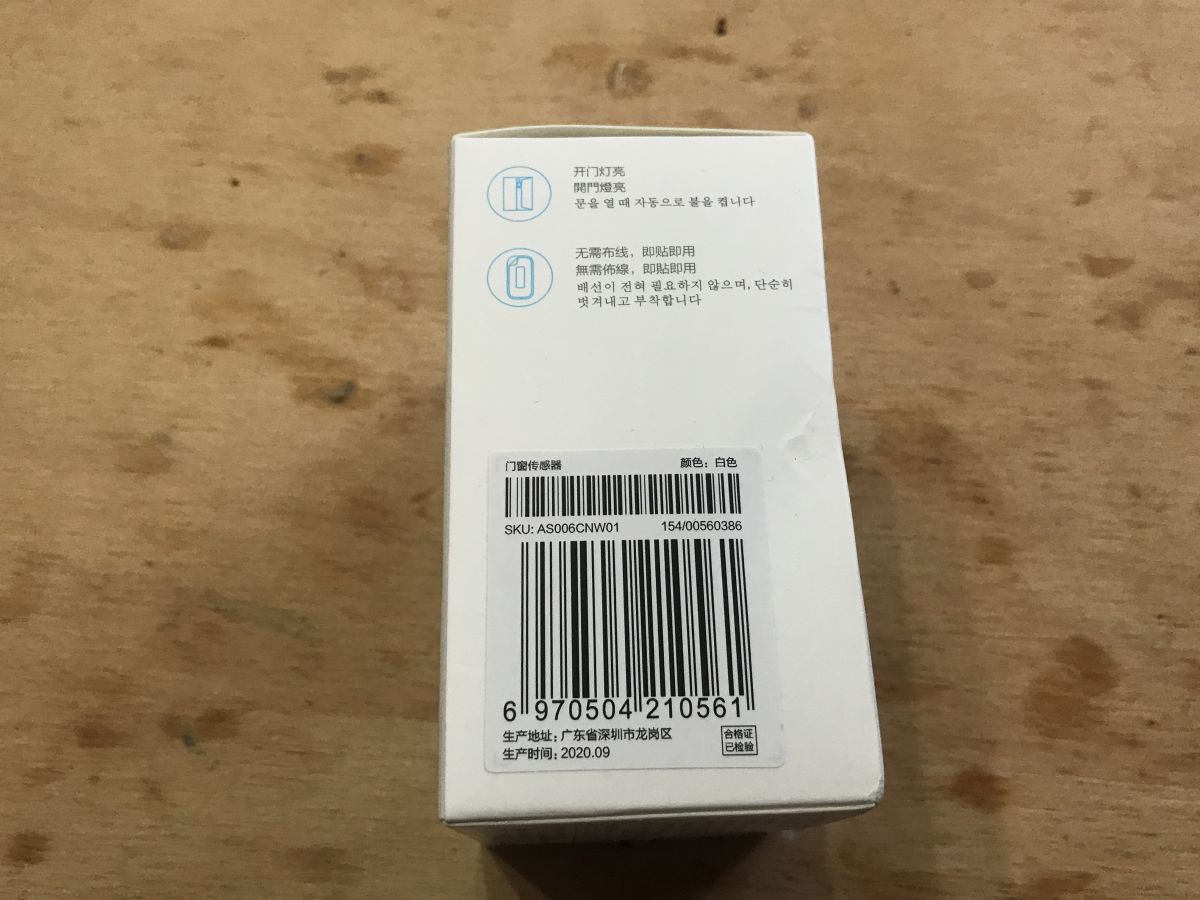
 The product is packed in an aesthetic box, where you can read its exact model name and SKU code:


SKU code: AS006CNW01
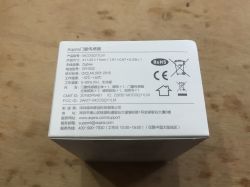
Model: MCCGQ11LM
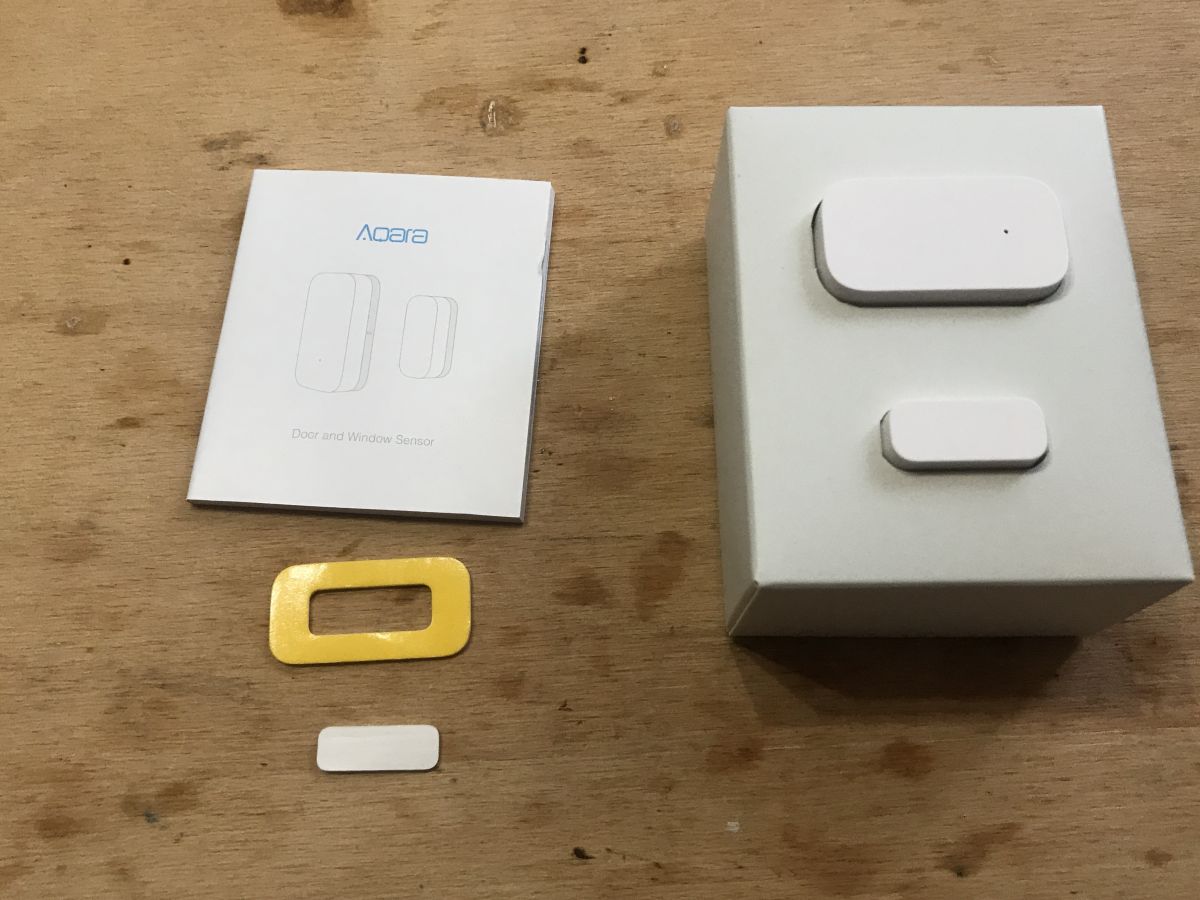
The set includes instructions, a sensor (one part only with a magnet, the other with electronics) and pads to stick it to the door / frame:

Now it's time to pair the sensor with the hub (company or own ...) and attach it to the door.
Aqara door opening sensor - pairing with Home Assistant I do not have the Aqara manufacturer's hub, but fortunately there are also free open-source solutions compatible with this sensor. As a hub, I used CC2531 here:

and on the software side, I used Home Assistant with the Zigbee2mqtt plug.
The detailed Home Assistant tutorial is here:
https://www.elektroda.pl/rtvforum/topic3777098.html#19247020 The sensor was already in the package with the battery. There was nothing to do except press the button on the casing.
After pressing the button, I saw a short balloon message on the Home Assistant website. I saw it before, but in the case of the previous device (temperature, pressure, humidity sensor) I did not have time to take a screenshot. This time I managed to:

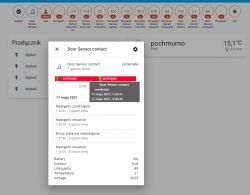
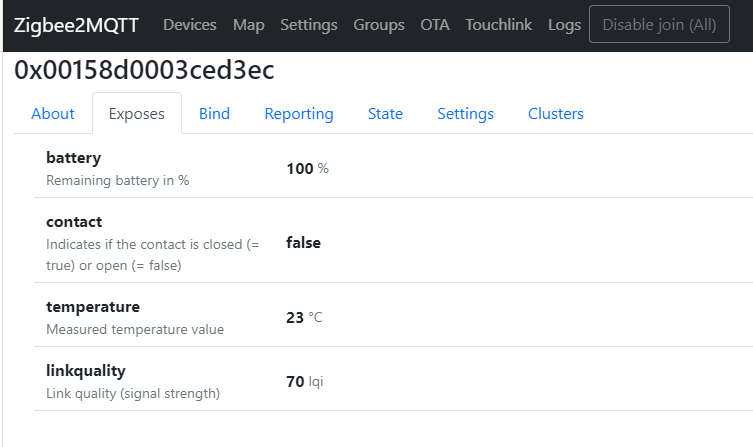
Then a new device appeared in the Zigbee2mqtt tab, MCCGQ11LM (I already had two from this series):

Detailed view of the device:

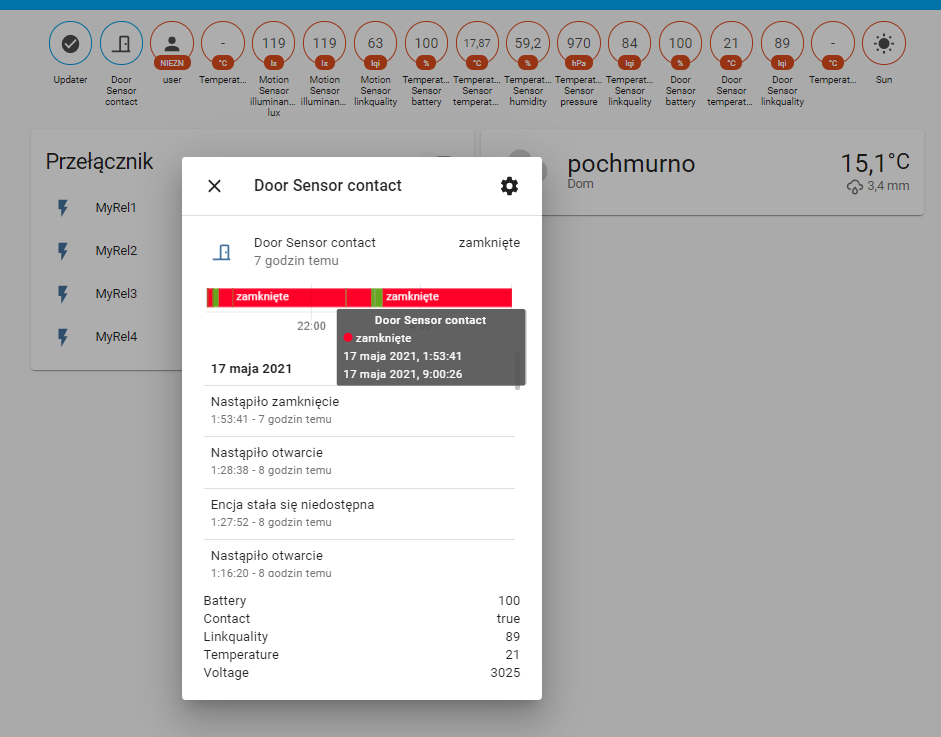
Information provided by the sensor (yes, in the Aqara series, even the door sensor returns the temperature, just like other sensors - motion, humidity, pressure):

The 'contact' variable specifies whether the door is closed (false means open, true means closed).
Same as text from the 'State' tab:
Quote:
{
"battery": 100,
"contact": false,
"linkquality": 70,
"temperature": 23,
"voltage": 3055
}
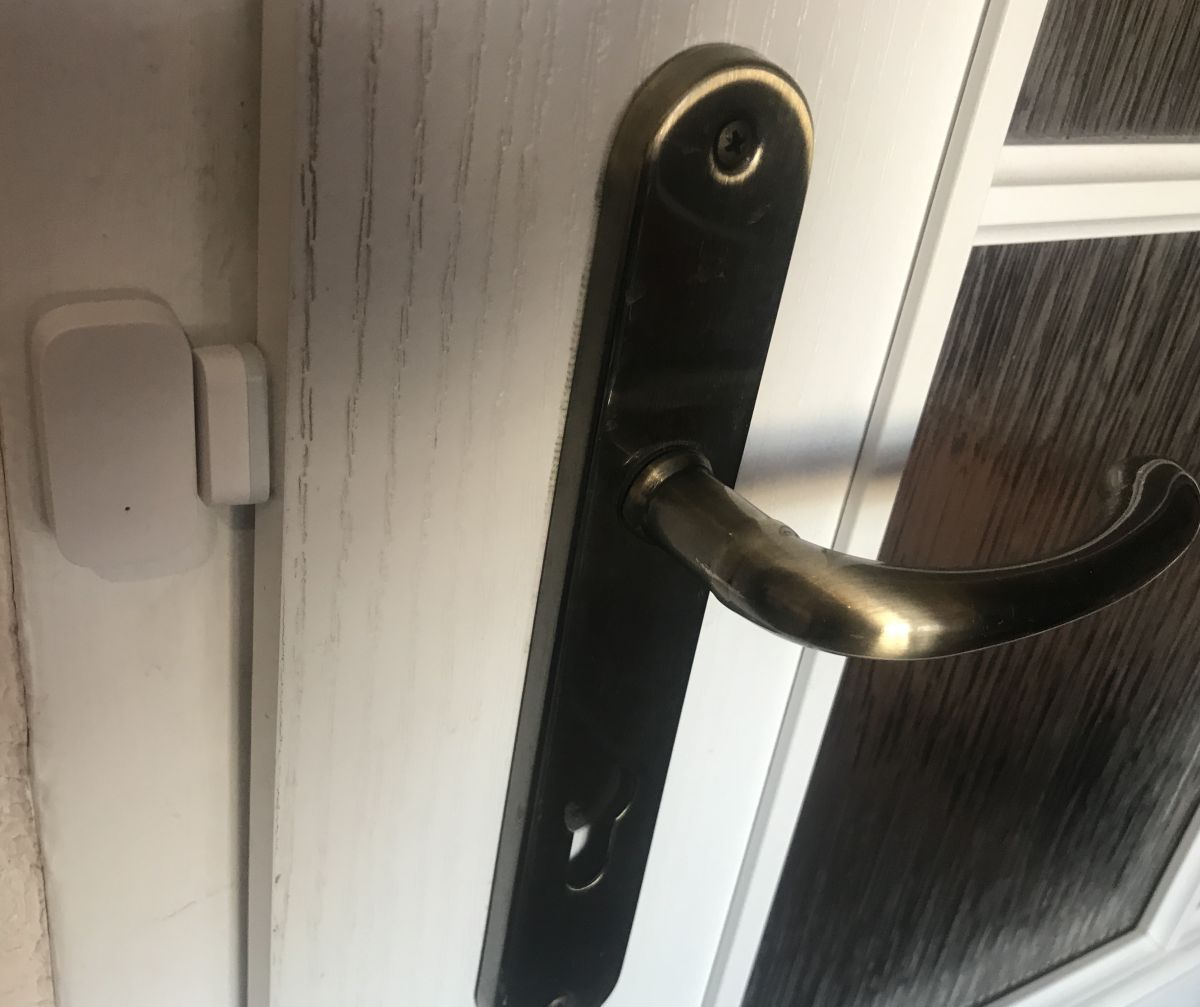
Aqara door opening sensor - mounting on the door The sensor is simply glued to the frame and door. The adhesive surface is pre-applied to the plastic, you just need to expose it. It is really very simple, although I have some concerns about the durability of such a connection.
When assembling, make sure that the lines visible on both parts are facing each other. They mark the position of the magnet and the sensor. They should be adjacent to each other.
Sticky:
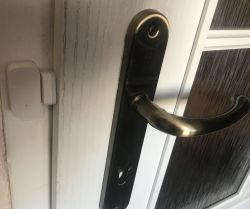
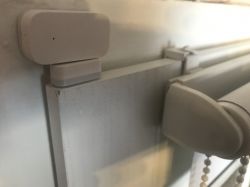
Of course, you can also put it in a less visible place, it doesn't matter:
The distance of detecting the door is about 2 cm:

(i.e. I exaggerated a bit with the proximity of both elements on the door, they could be a bit further and would work the same)
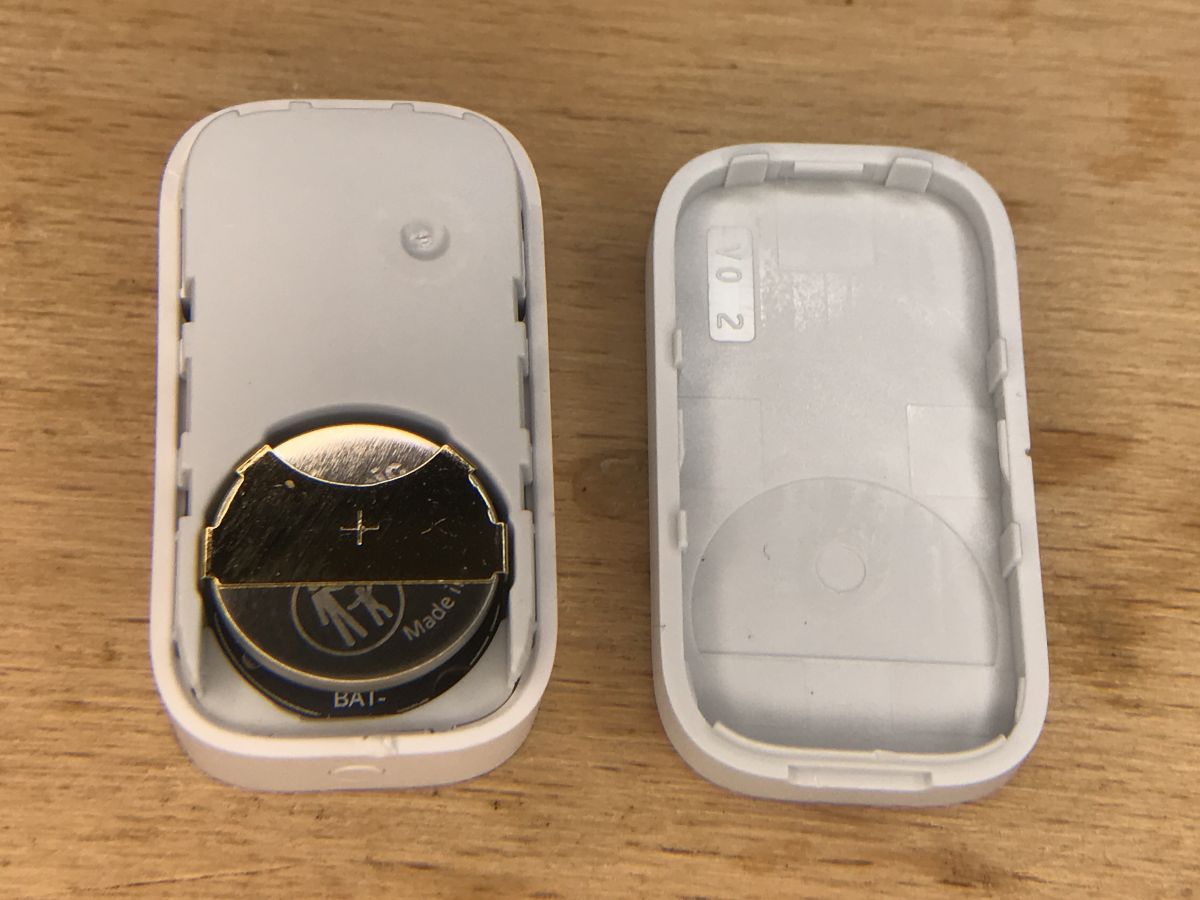
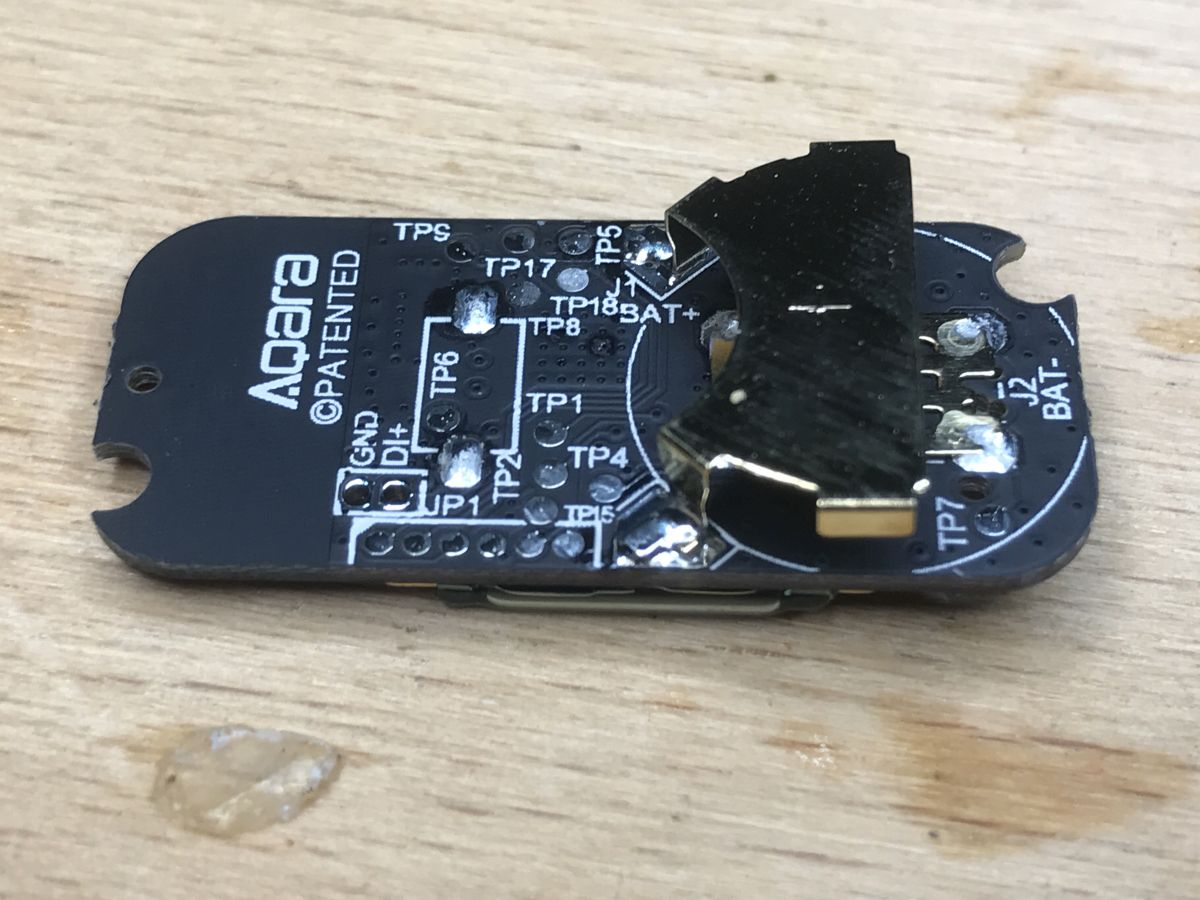
Aqara door opening sensor - interior I got to the sensor by undermining its housing here:
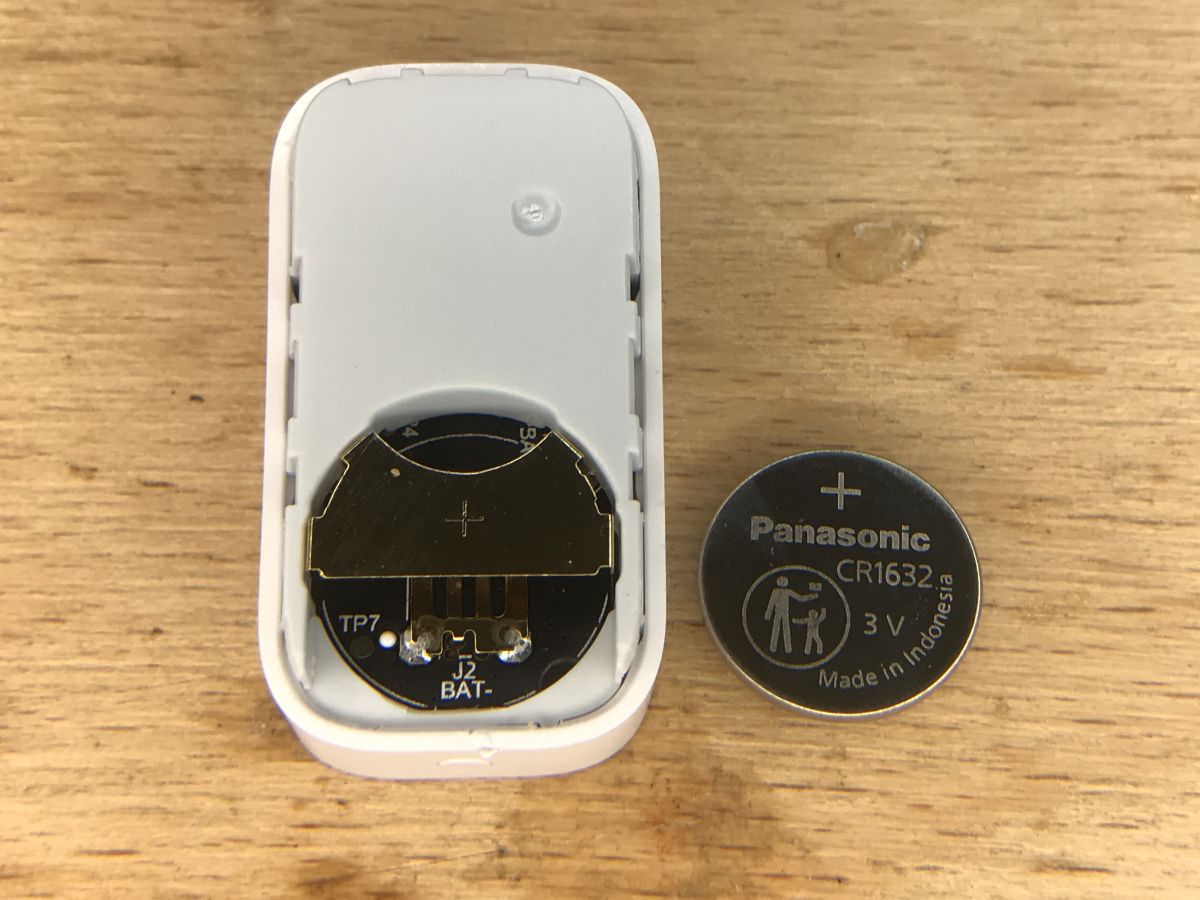
only then can you change the battery:
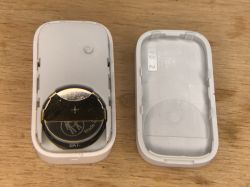
CR1632 (this is the one that was already in it at the time of purchase):

You can get further in the same way - we also question:
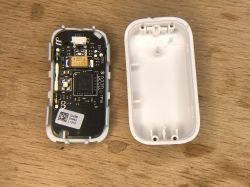
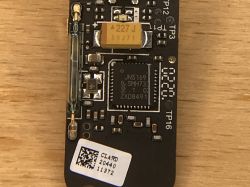
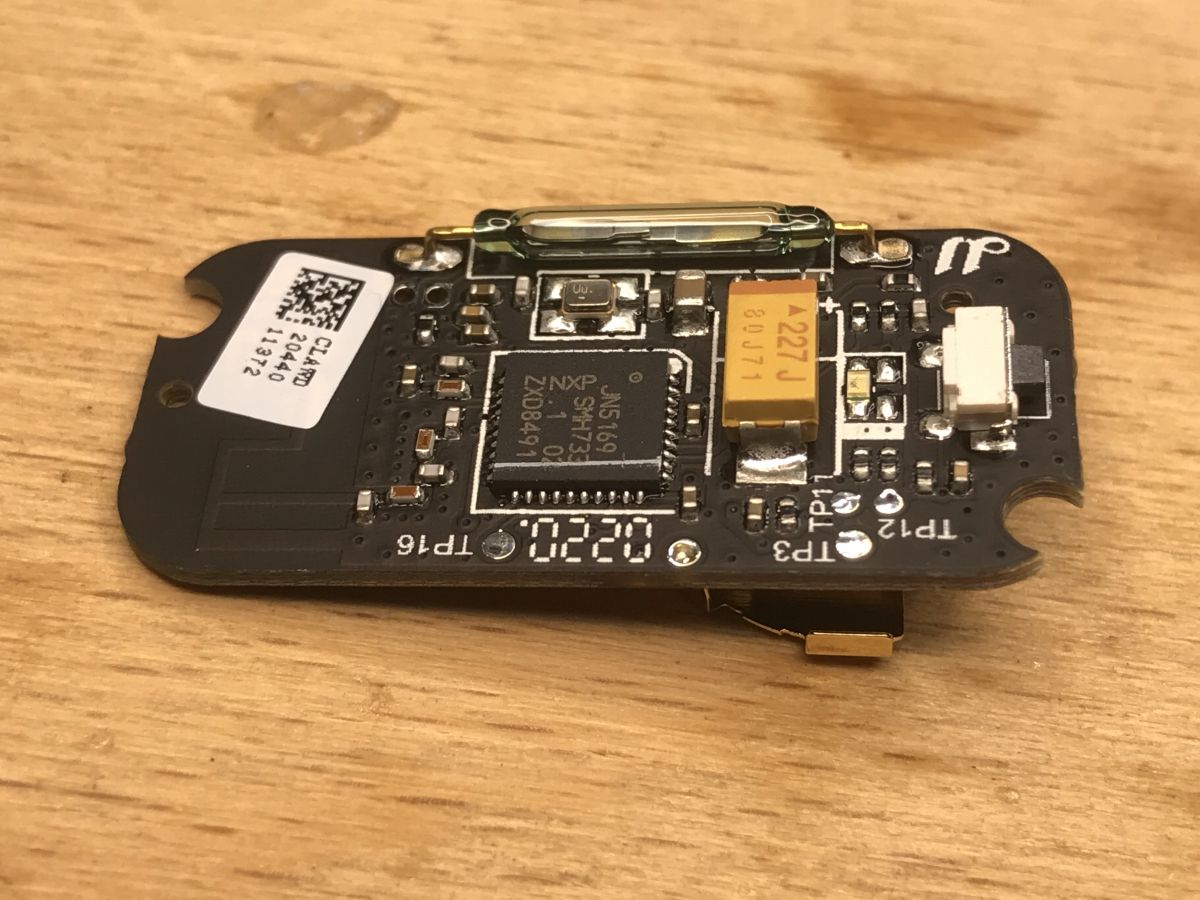
Removed PCBs:

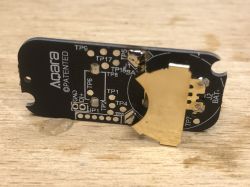
Again, you can see a lot of test points (they probably check whether the sensor works after production, in other Aqara products I also saw them) and a programming connector.
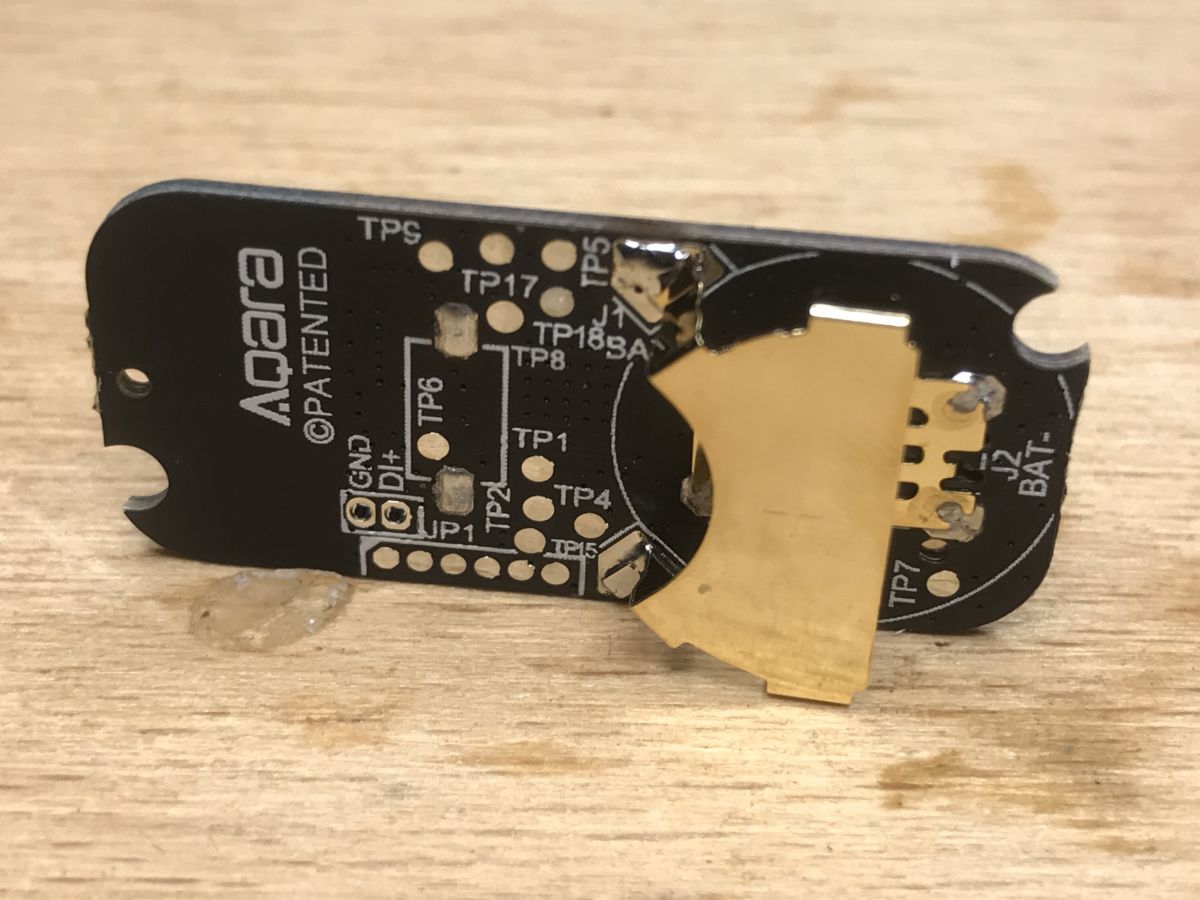
The other side of the plate:
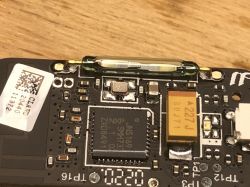
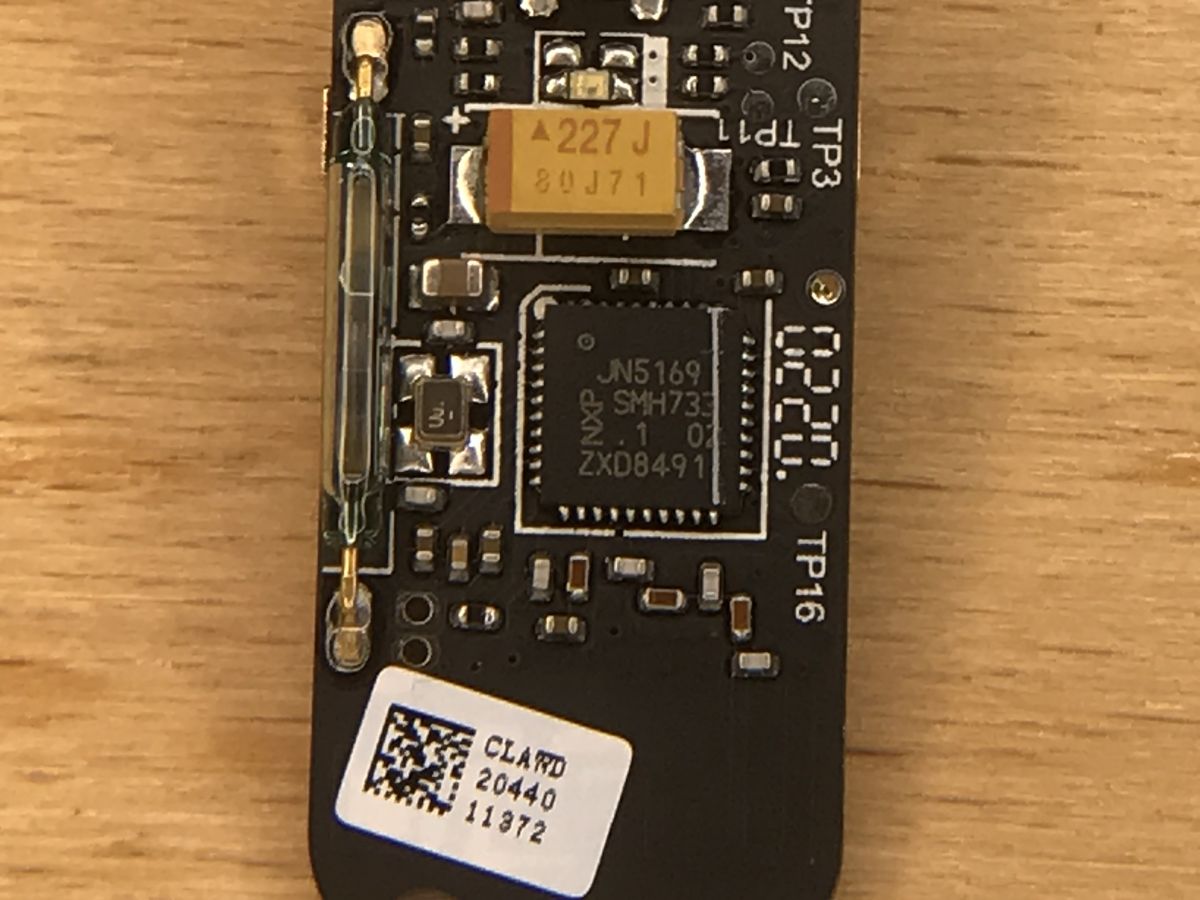
As with the rest of Aqara products, here sits JN5169 from NXP:

next to it there is also a large electrolytic capacitor with the code 227, ie 220 uF. There is also a button, there is an antenna on the board (from the path), a quartz resonator (or clock generator) for JN5169, and a characteristic sensor 'tube', which I also know from other door / window sensors:
(the photo above comes from the topic
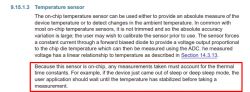
https://www.elektroda.pl/rtvforum/topic3771510.html#19211057) Where's that temperature sensor? After analyzing the interior, I missed one more thing, namely the temperature sensor, after all, there must be one inside, since the module gives its readings. Is it any of the innocent looking SMD components? It seems not. The temperature sensor is probably in JN5169 itself. This also explains why each product in this series has it:

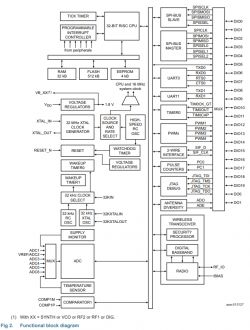
Of course, this has its downsides. The catalog notes openly mention this. The location of the temperature sensor in the system causes the temperature of the system to also affect it and we measure the temperature of the chip more than the environment:
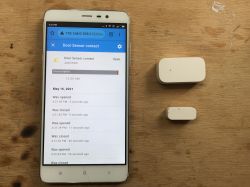
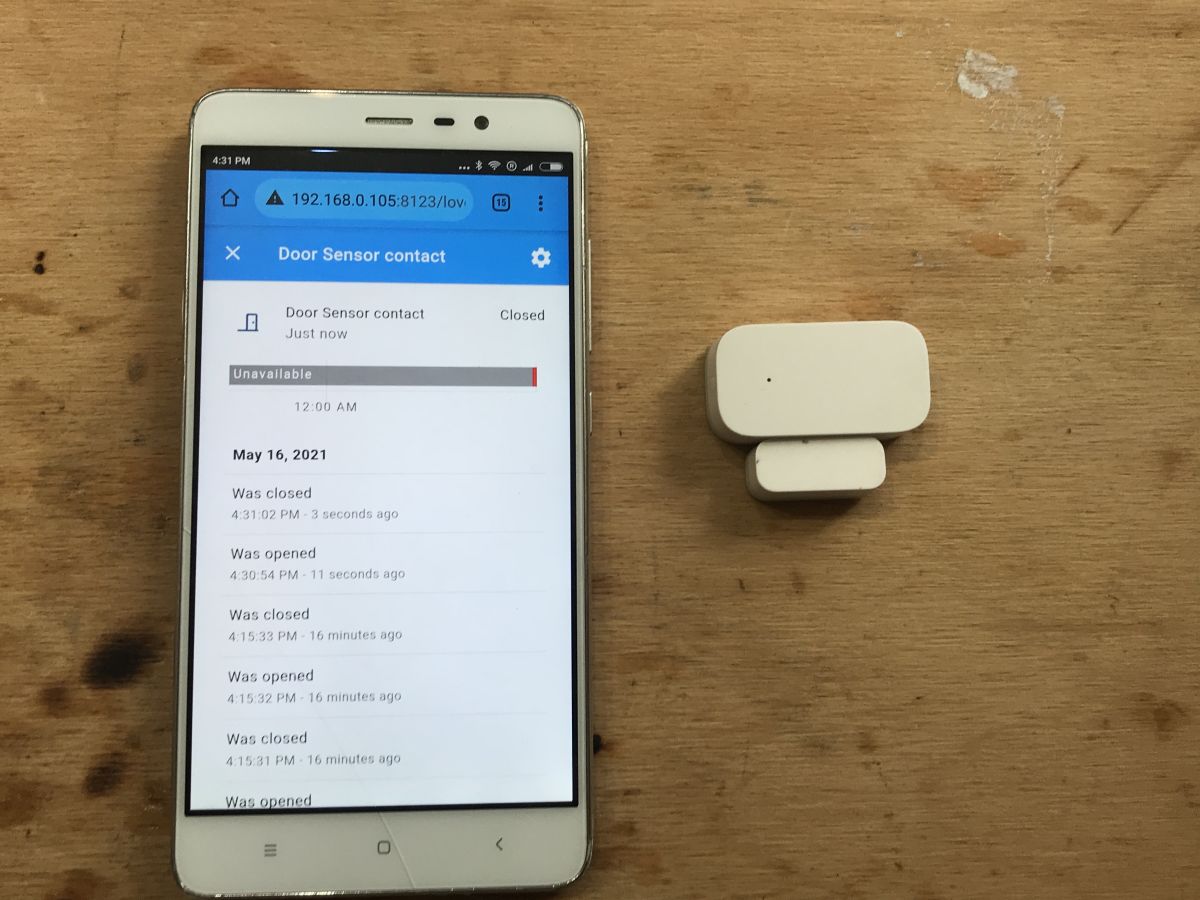
 Home Assistant door status history
 Home Assistant also shows the 24/7 history of the door status from this sensor. This allows you to check whether, for example, someone entered the apartment at a given time. It looks like:
Separately, we have a graph and a separate list of sensor status changes.
And the same for temperature:
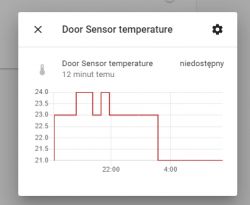
Charts can be better using the appropriate plugin for Home Assistant, but more on that later.
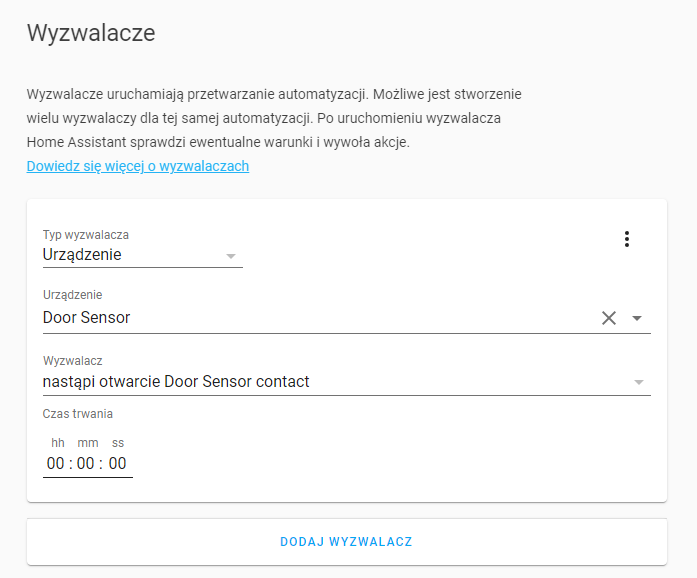
Automations for this sensor in Home Assistant Home Assistant has a common automation system for all the devices it supports and you can base the automation on every parameter provided by these devices.
In this way, first of all, we can trigger events, e.g. by opening or closing a door:
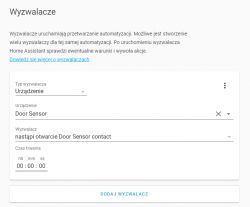
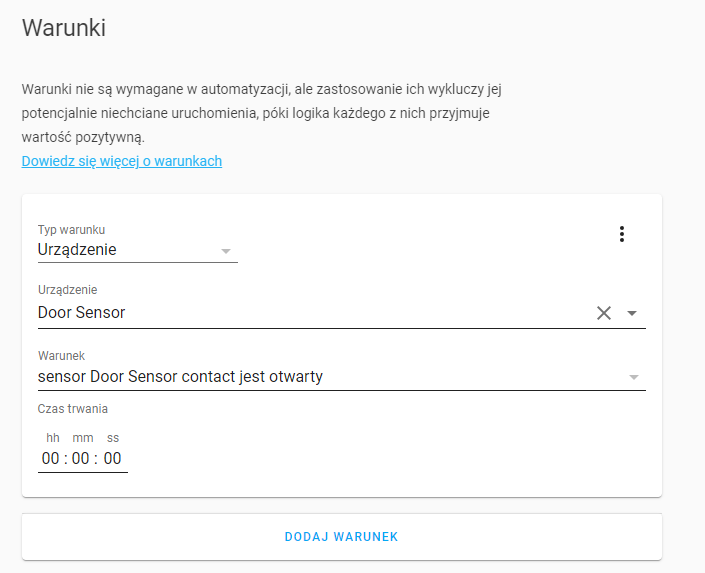
We can also use the door state as a condition for another trigger (i.e. the event triggers e.g. a movement, but an additional condition of the event is that the door is to be closed at this point):
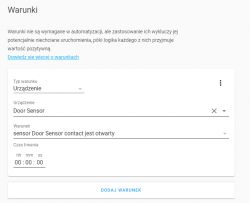
Besides the door status, we also have other variables available, list below:
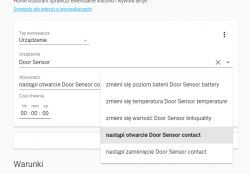
So we can even do things like:
- e.g. triggering an event when the temperature measured by the door sensor drops above X
- e.g. triggering an event when the battery level from the door sensor drops below X%
- e.g. triggering an event when the sensor from the door loses its range (e.g. someone disassembles it ...)
More about triggers:
https://www.home-assistant.io/docs/automation/trigger/ More about the conditions:
https://www.home-assistant.io/docs/scripts/conditions/ My full Home Assistant tutorial with step-by-step descriptions of what and where is configured on the HA interface:
https://www.elektroda.pl/rtvforum/topic3777098.html Summary This sensor seems to me to be a better alternative to the sensors based on WiFi modules I discussed earlier. Its strong point is energy efficiency and smaller size. Zigbee is a plus as well, it is not at all problematic and can be easily used with open source solutions such as Home Assistant. You don't have to rely on the manufacturer's devices.
Unfortunately, it's a bit more expensive than the WiFi alternatives, but that's understandable. Overall, Zigbee products are a bit more expensive.
As an added bonus, this sensor also shows the temperature at the door, although the accuracy of this measurement raises my doubts. But maybe it will come in handy. Information about the temperature is shown by each device from the Aqara series (and I have a door opening sensor, a motion sensor and a pressure / temperature / humidity sensor).
PS: In the next topic in this series, I will discuss the Aqara motion sensor.


Comments