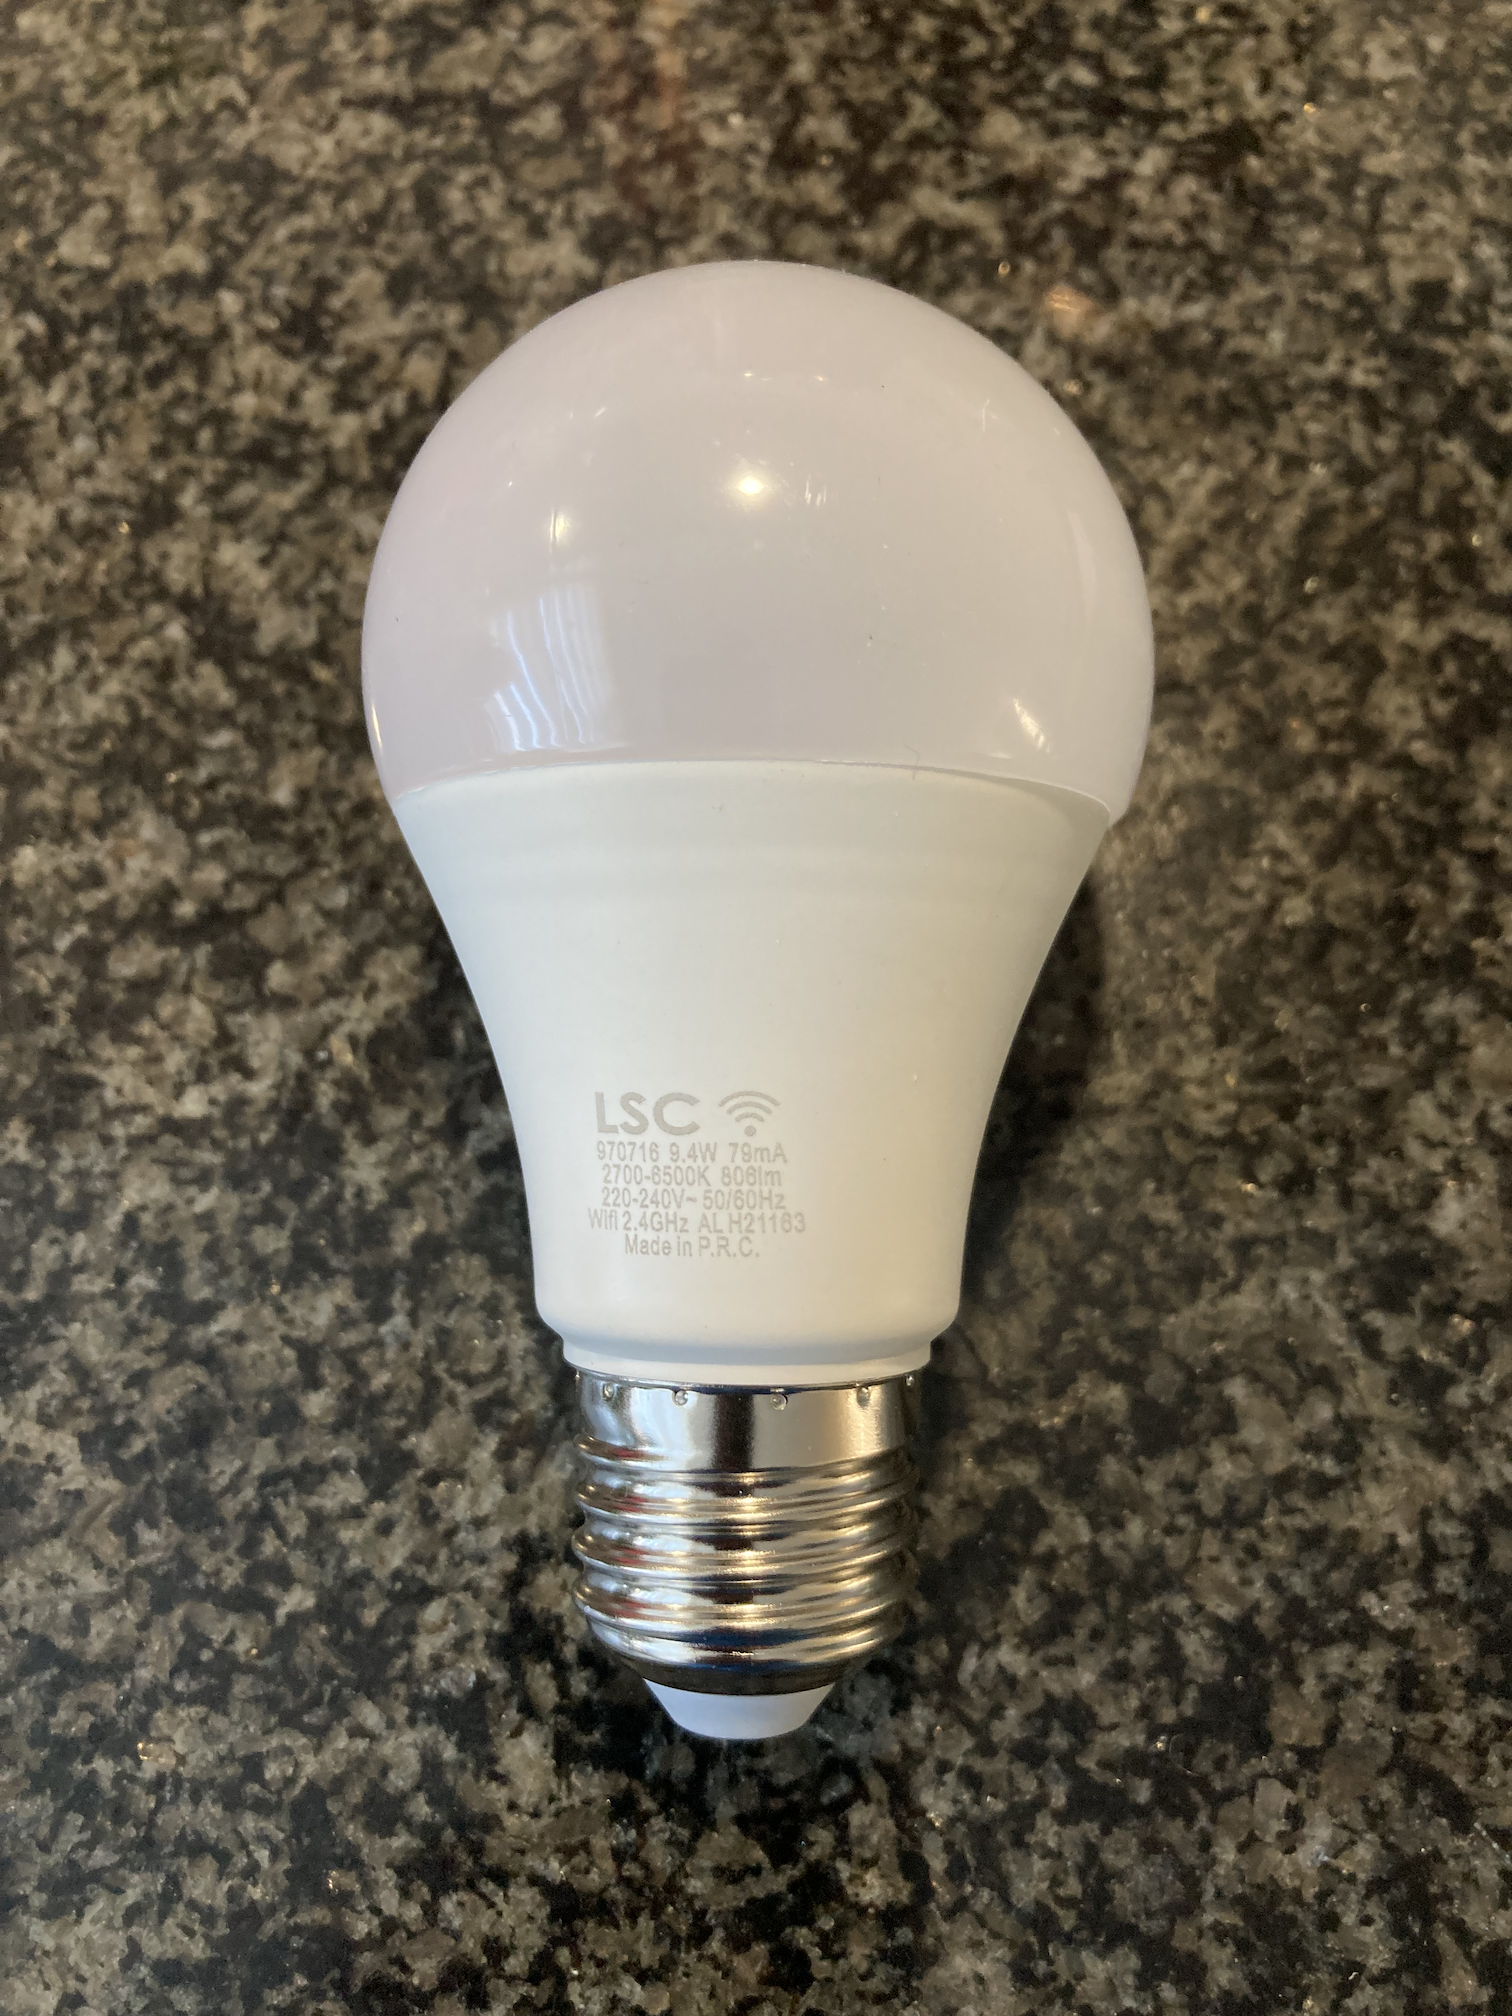
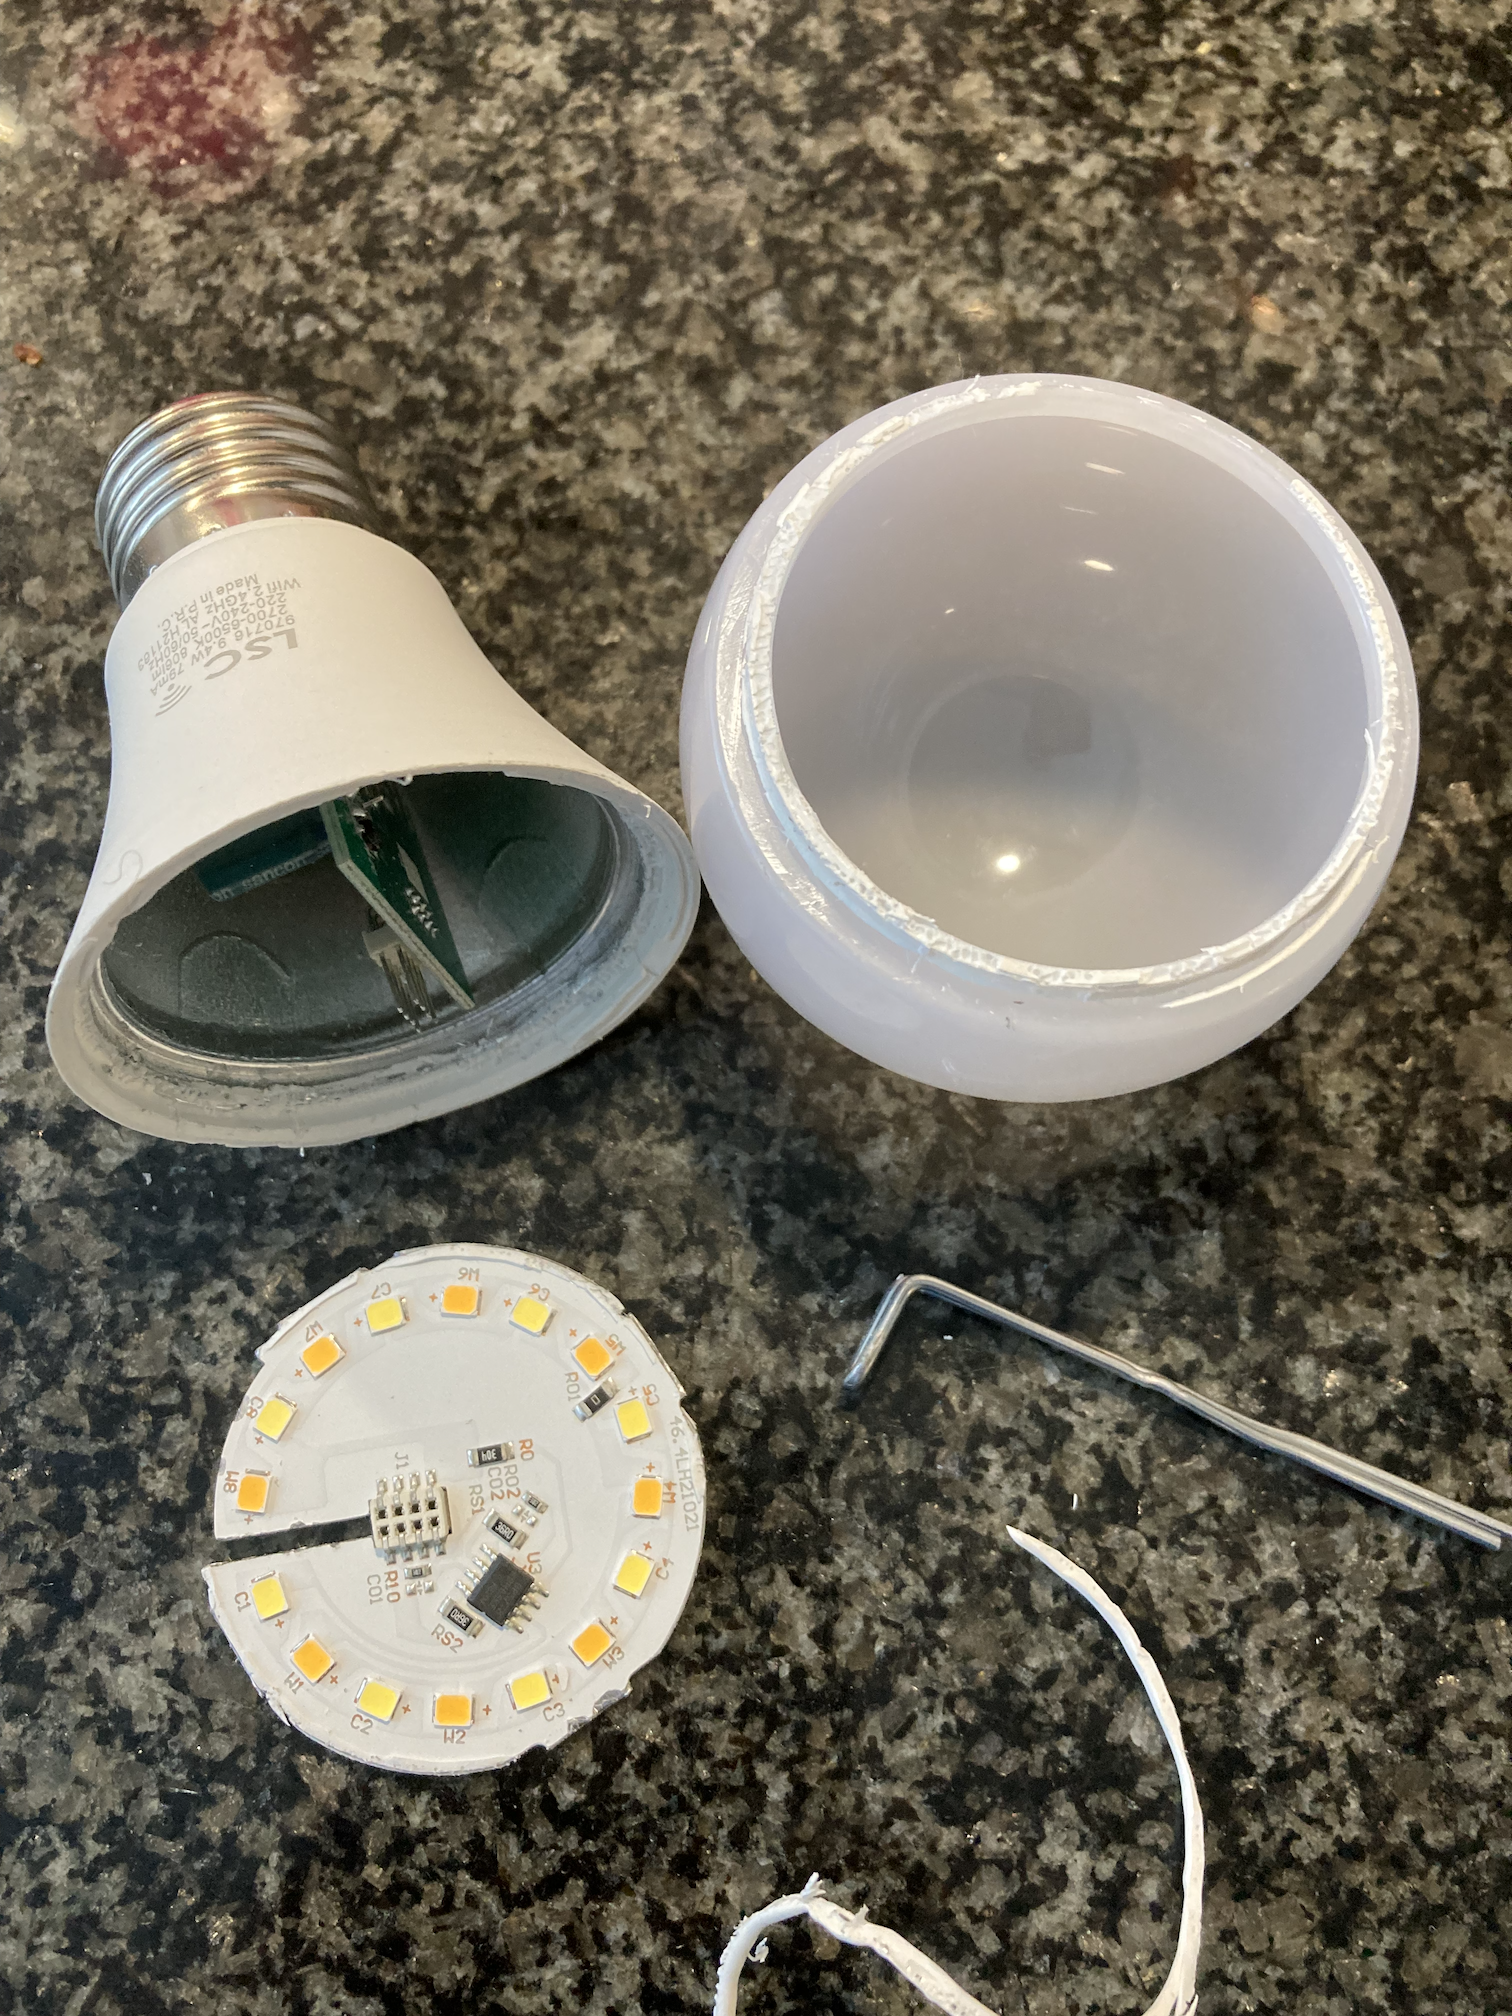
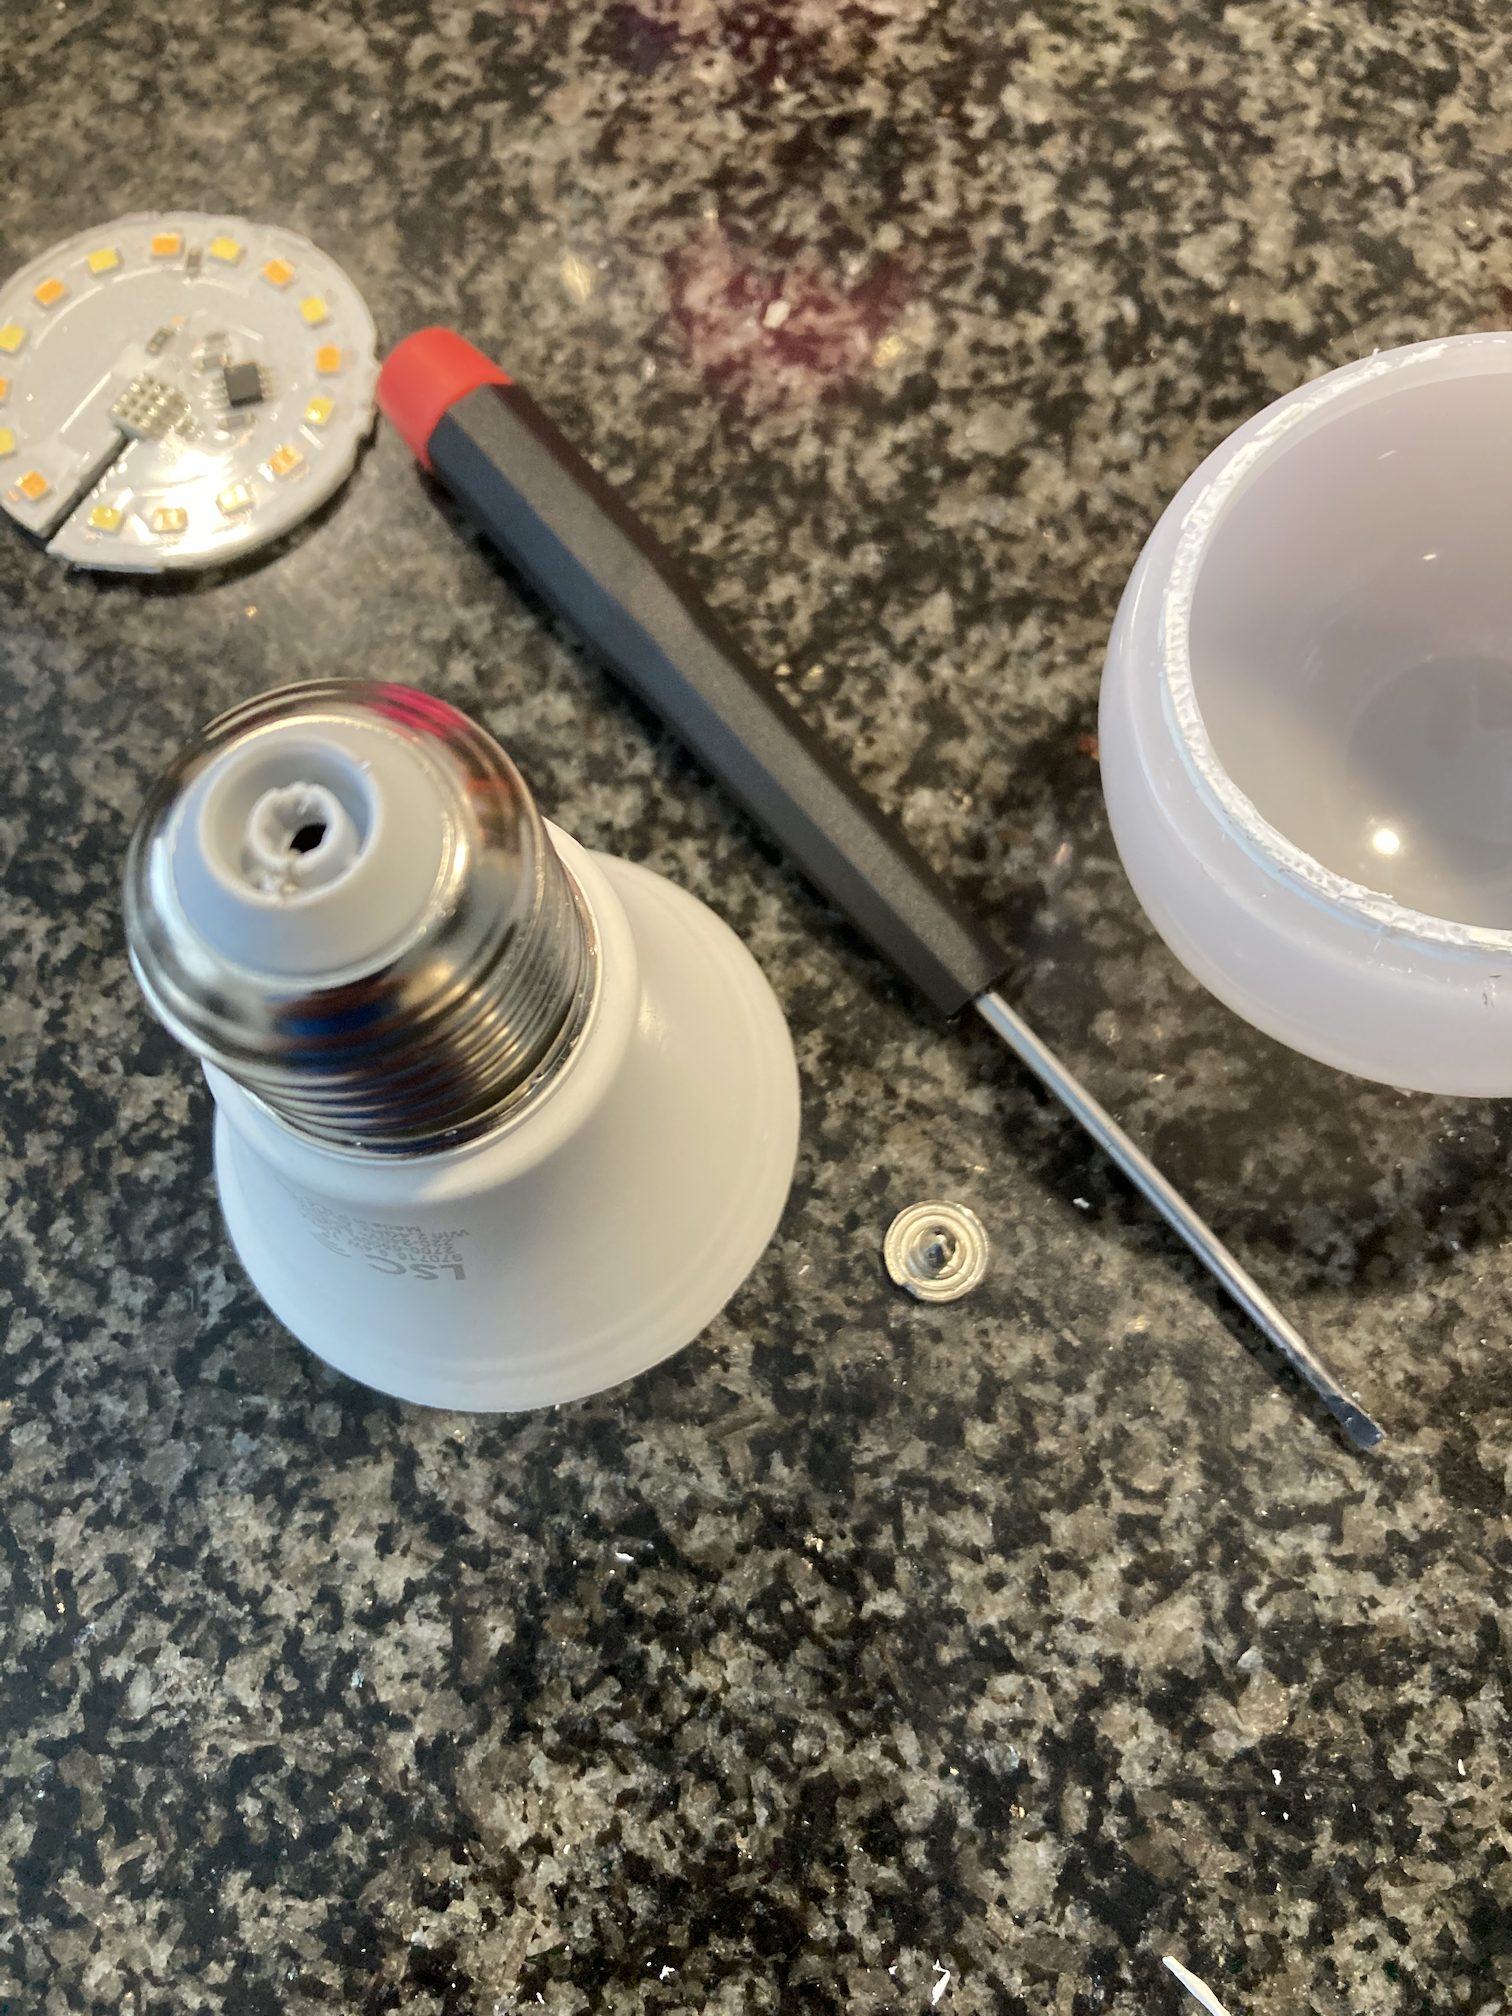
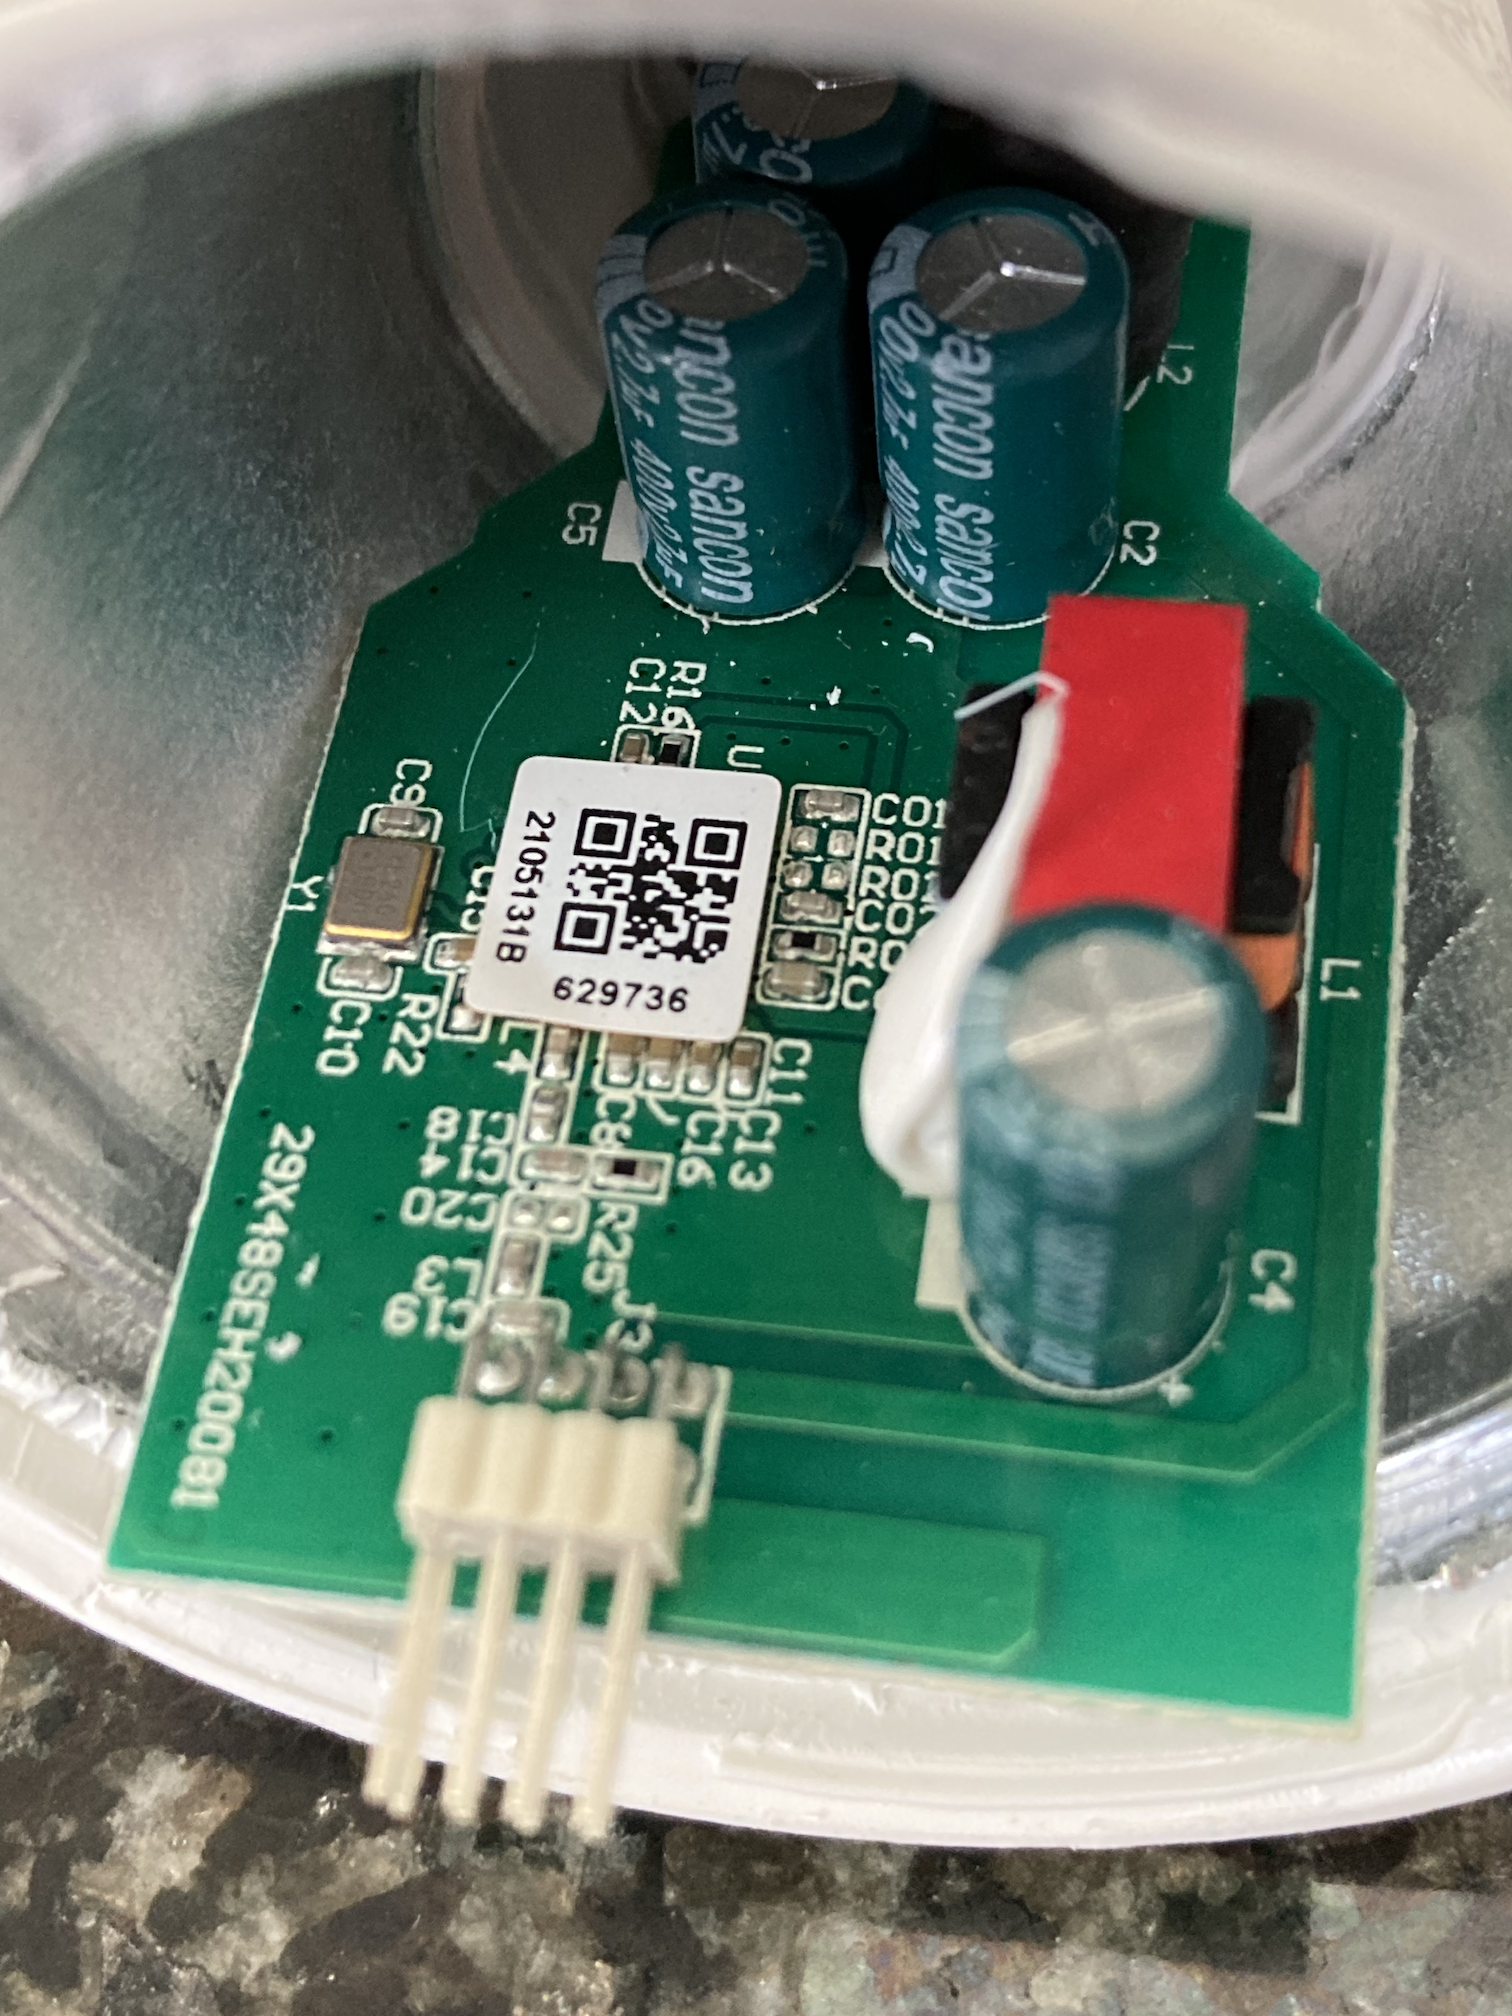
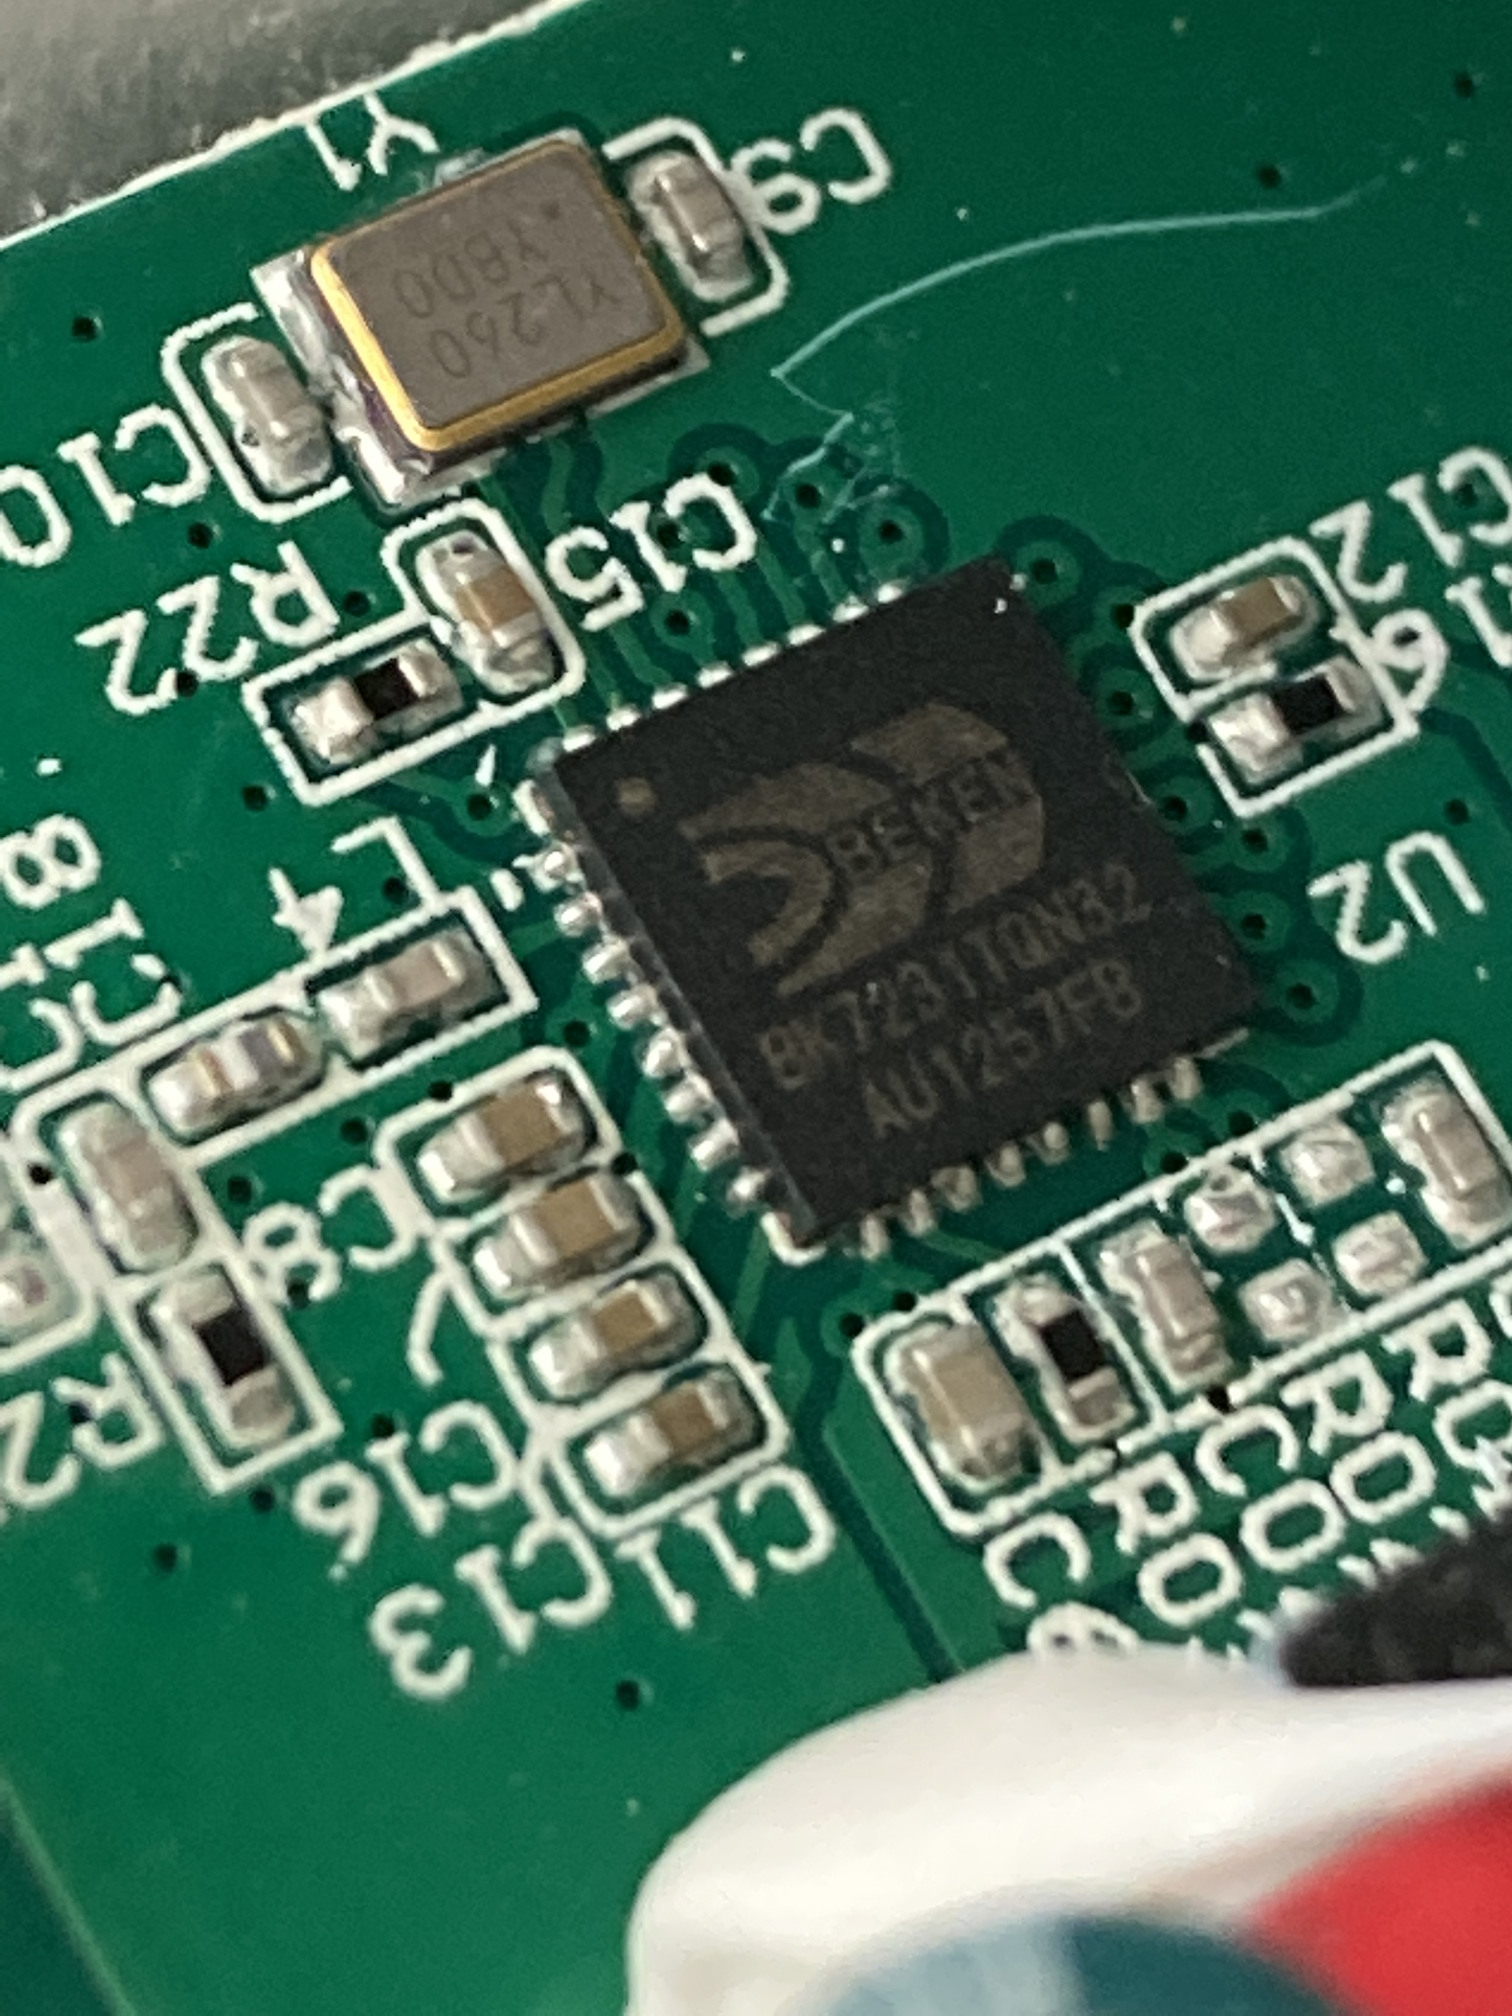
Which microcontroller is inside the current Action LSC Smart E27 806 lm bulb?
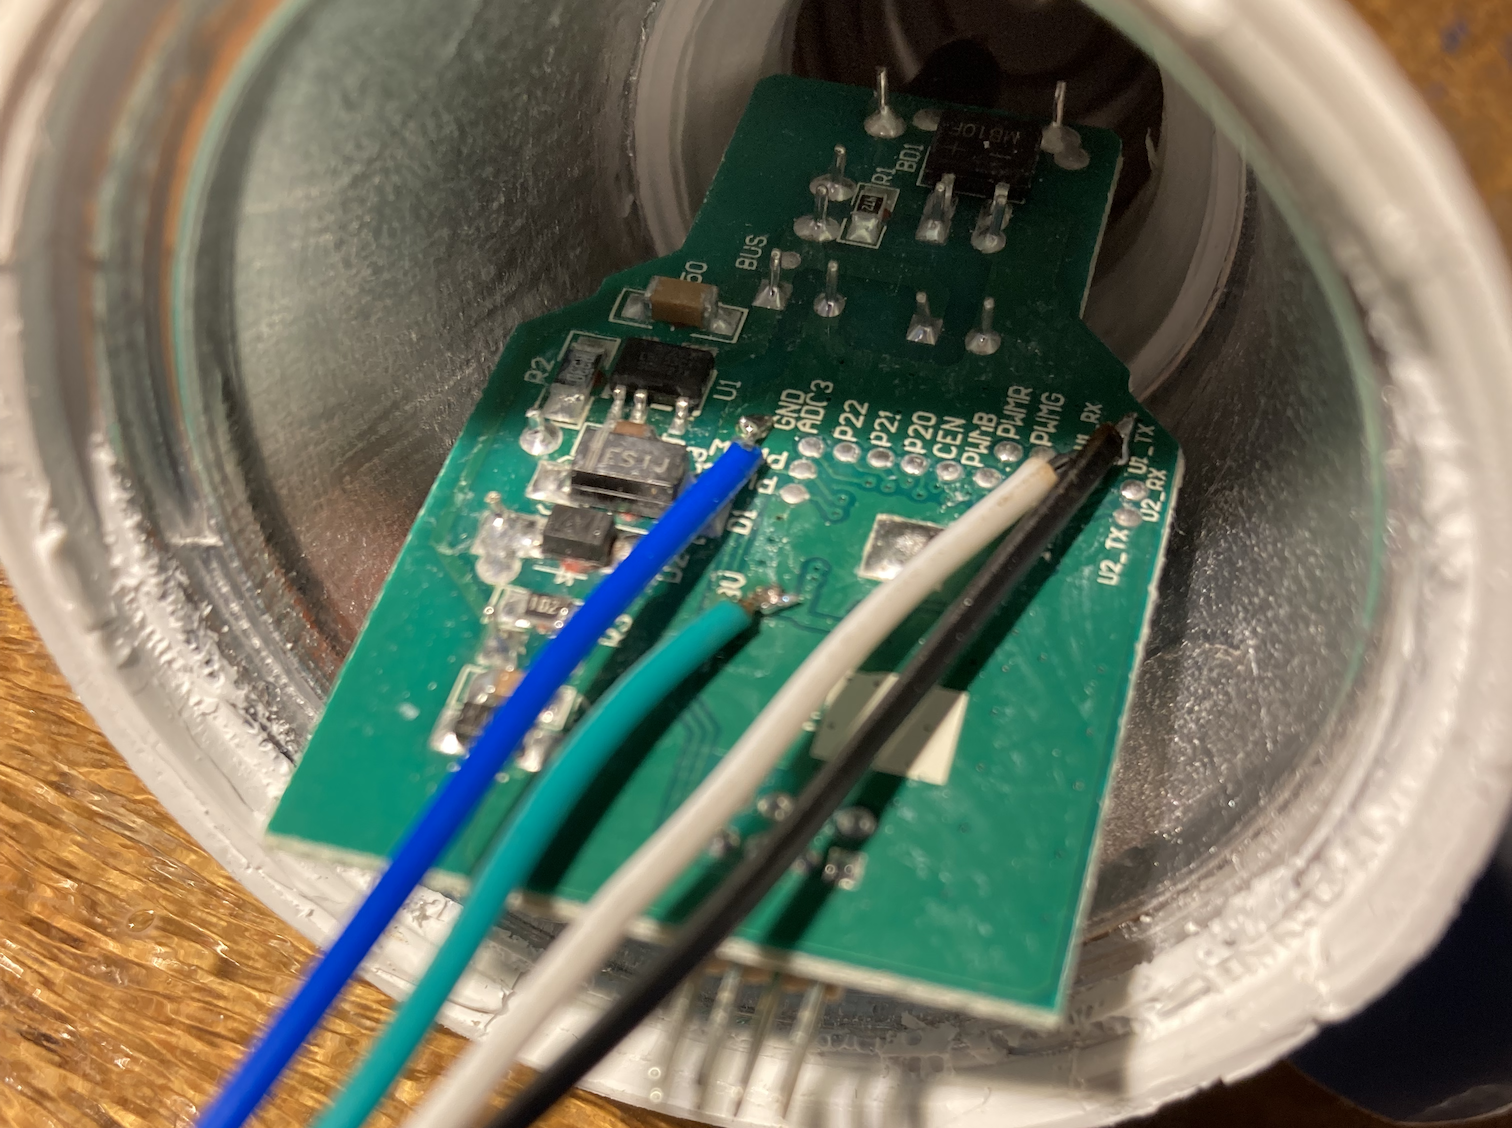
Most 2022-2023 units ship with a BK7231T Wi-Fi SoC once covered by a sticker [Elektroda, Tych0, post #20138269]
Czy wolisz polską wersję strony elektroda?
Nie, dziękuję Przekieruj mnie tam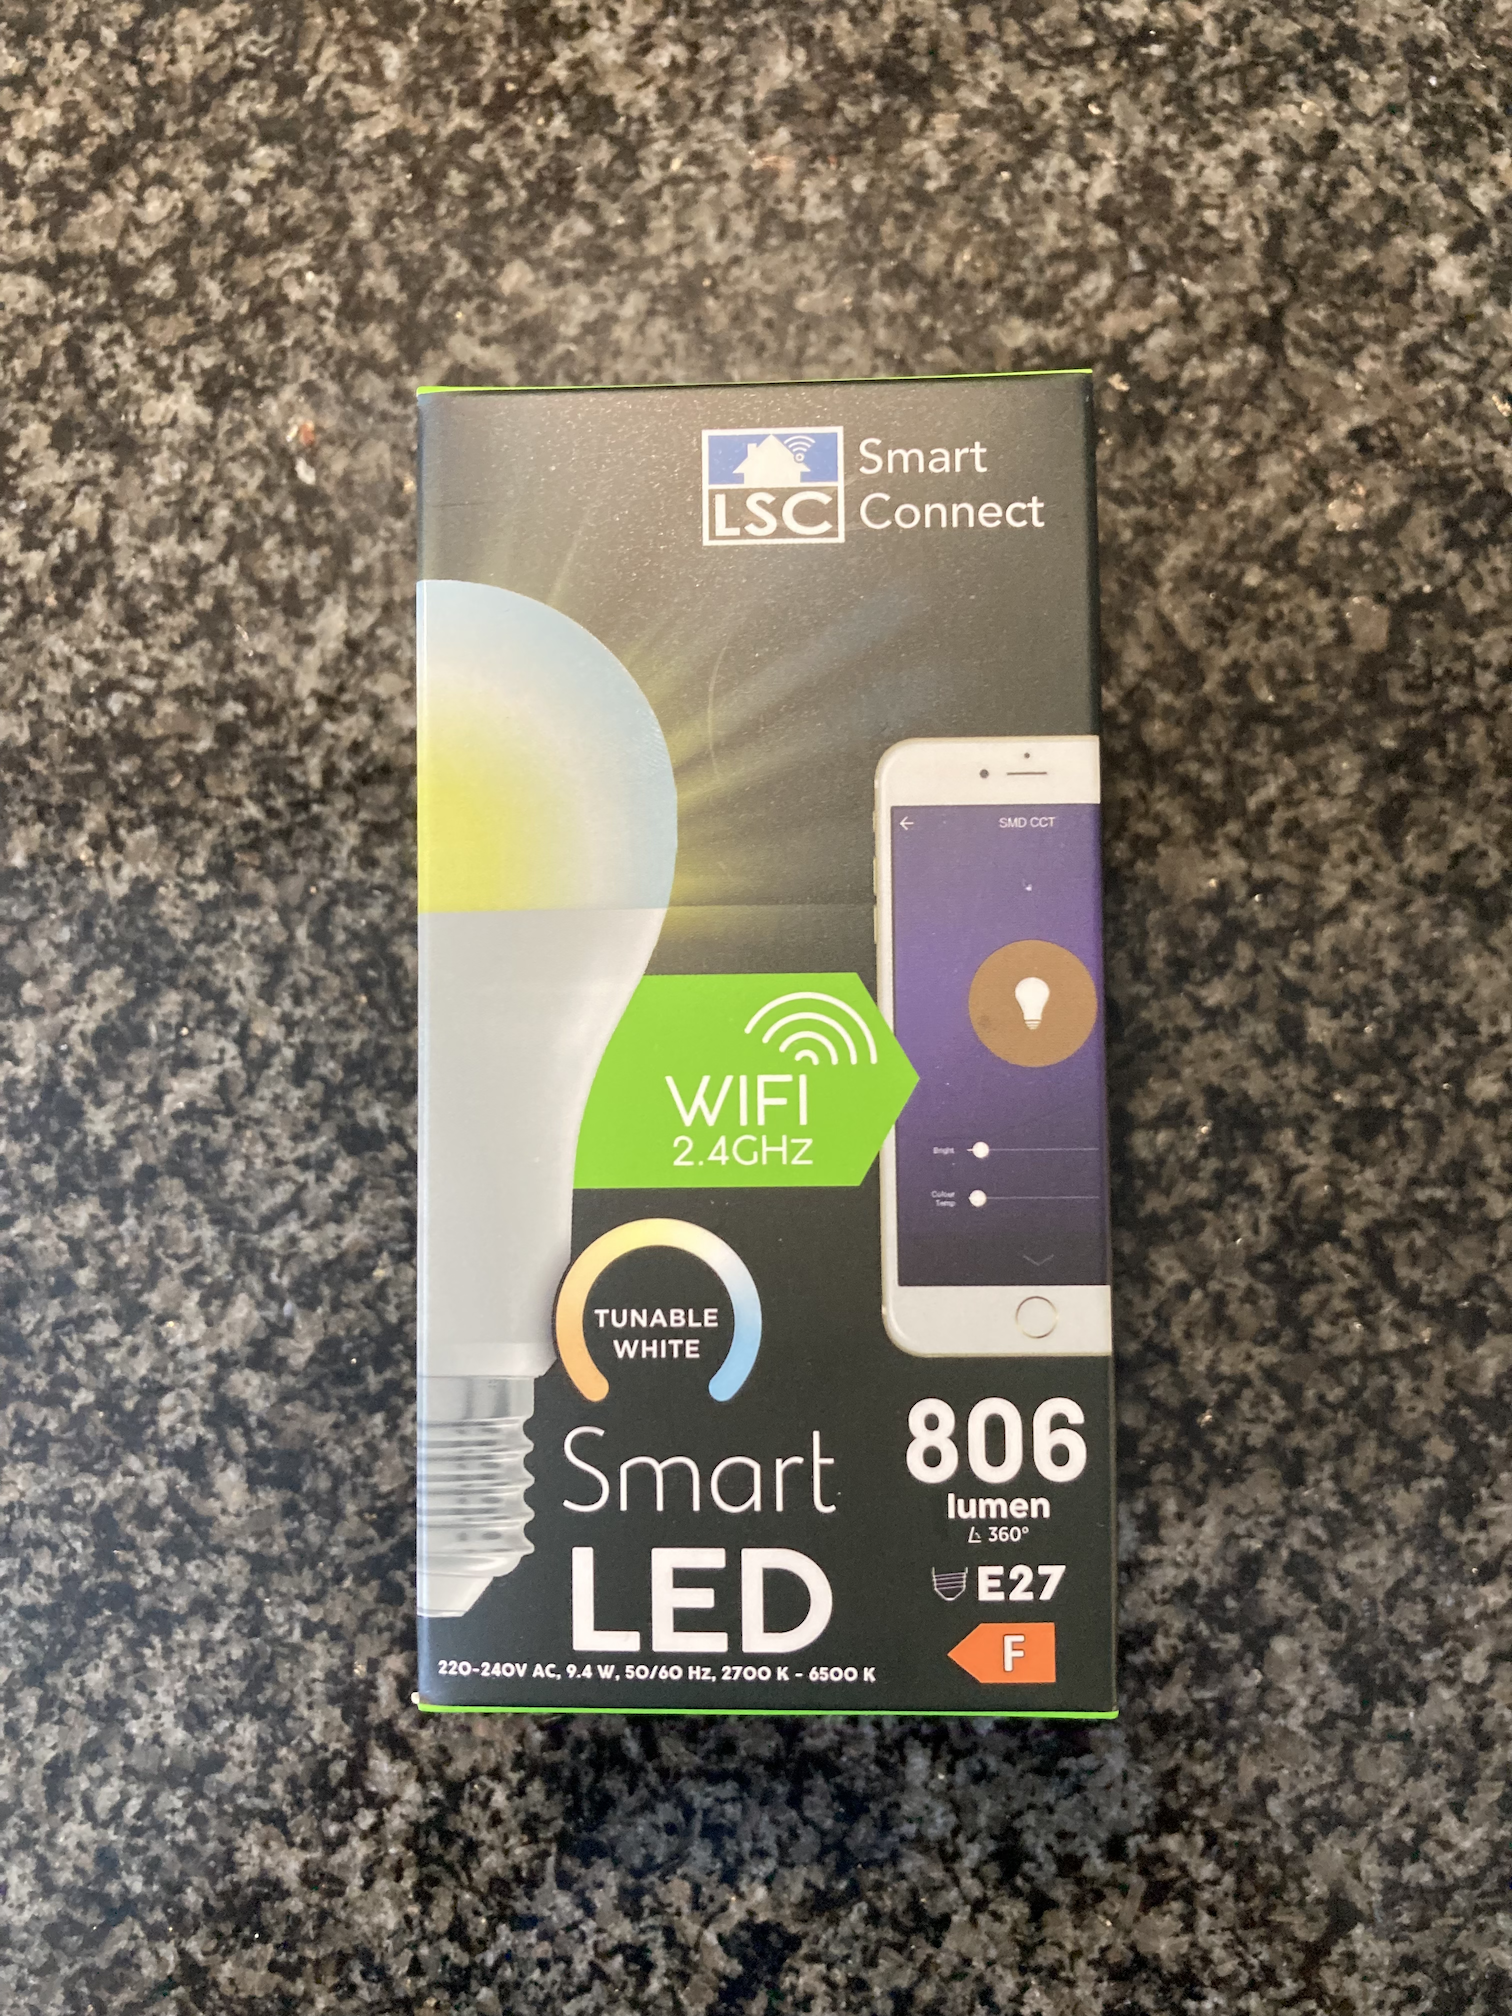


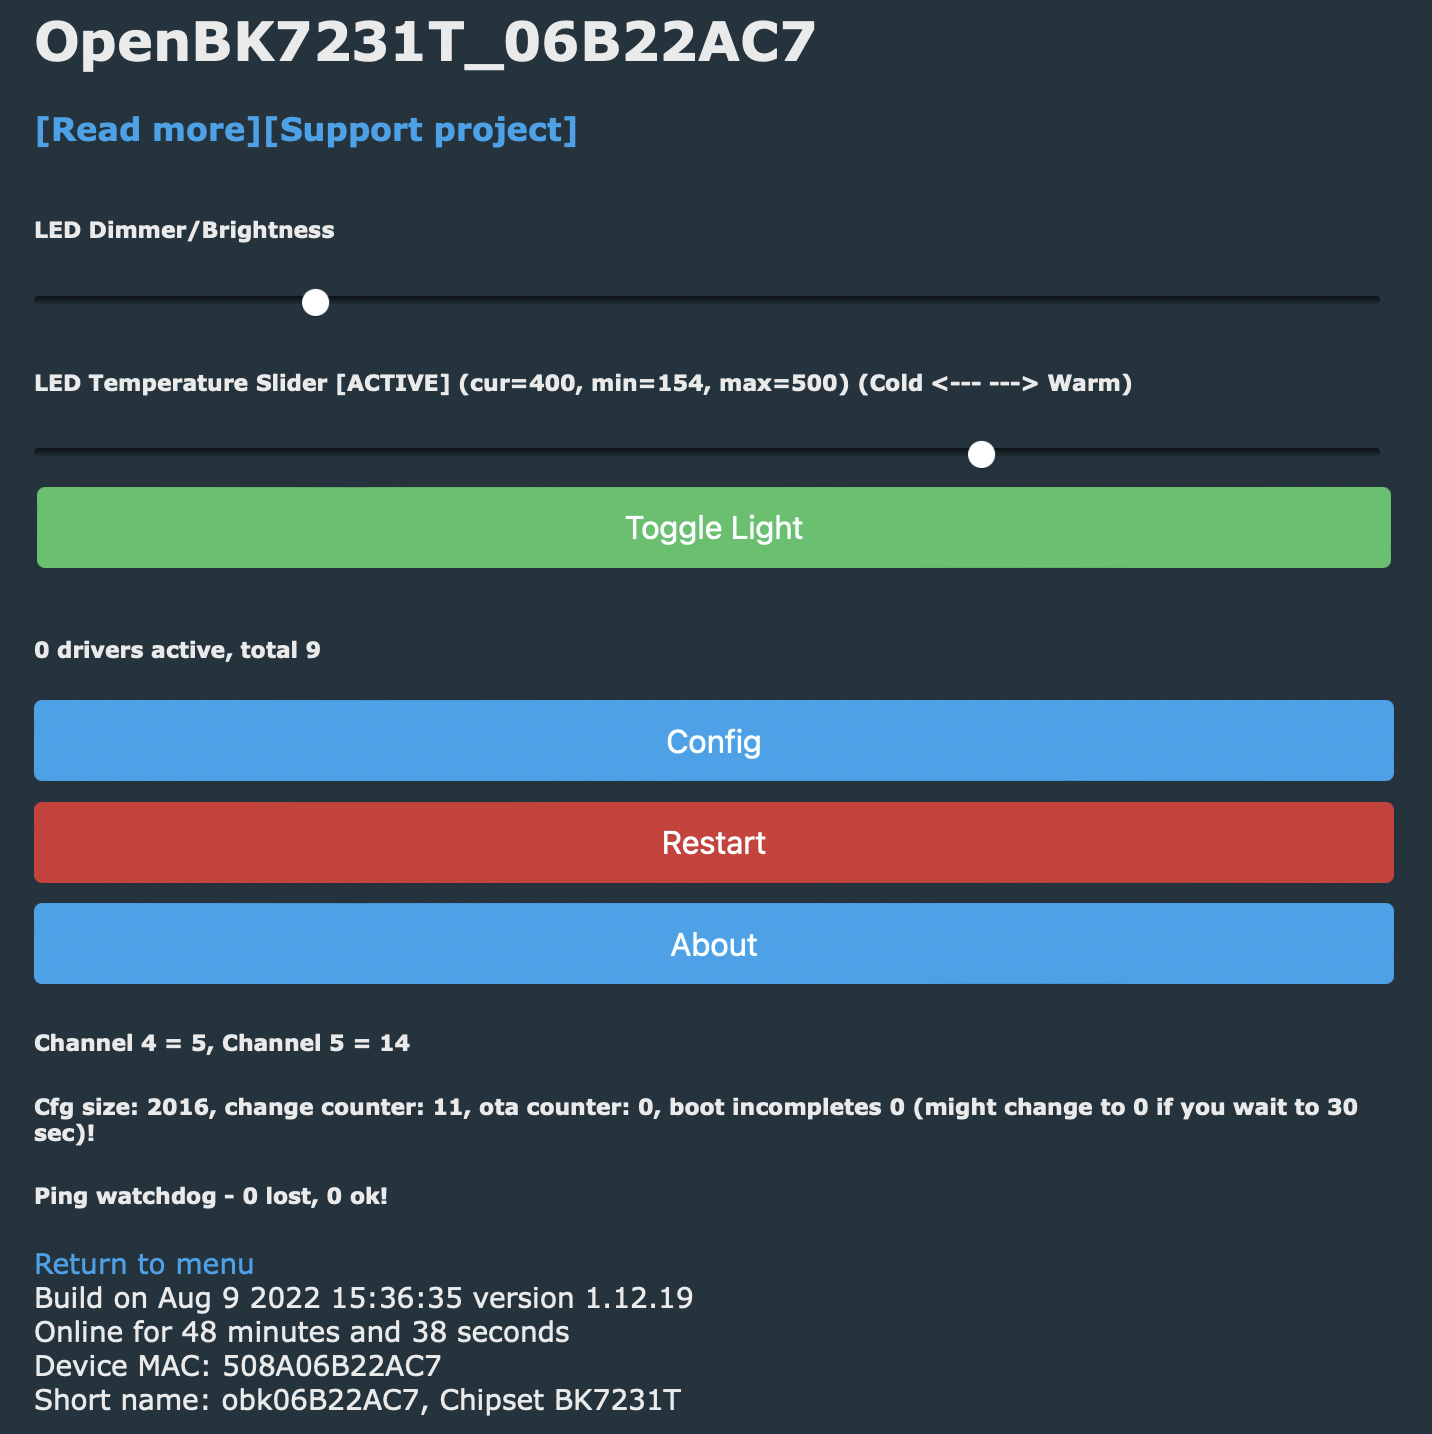
  - platform: mqtt
    name: "obk06B22AC7"
    unique_id: "obk06B22AC7"
    command_topic: "cmnd/obk06B22AC7/led_enableAll"
    state_topic: "obk06B22AC7/led_enableAll/get"
    availability_topic: "obk06B22AC7/connected"
    payload_on: 1
    payload_off: 0
    brightness_command_topic: "cmnd/obk06B22AC7/led_dimmer"
    brightness_scale: 100
    brightness_state_topic: "obk06B22AC7/led_dimmer/get"
    brightness_value_template: "{{value}}"
    color_temp_command_topic: "cmnd/obk06B22AC7/led_temperature"
    color_temp_state_topic: "obk06B22AC7/led_temperature/get"
    retain: false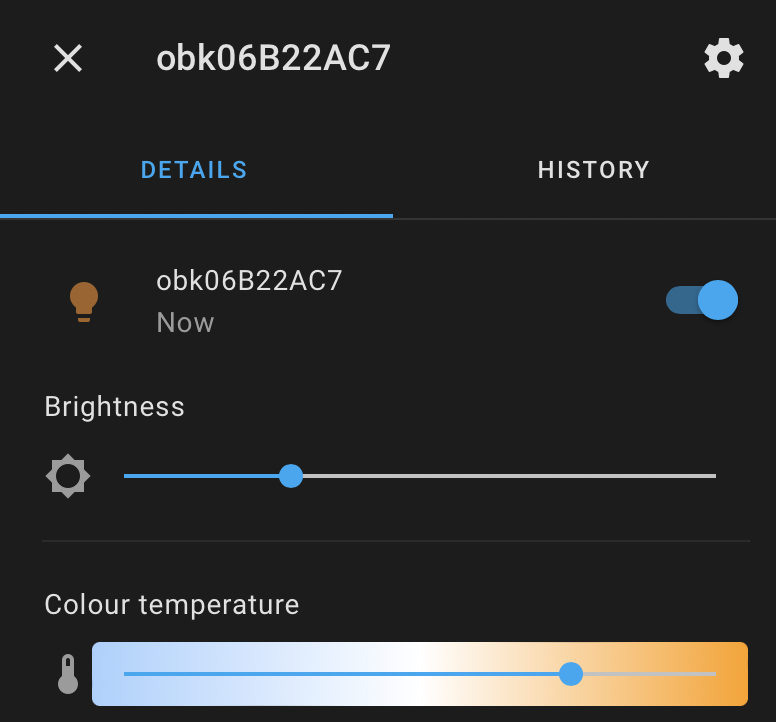
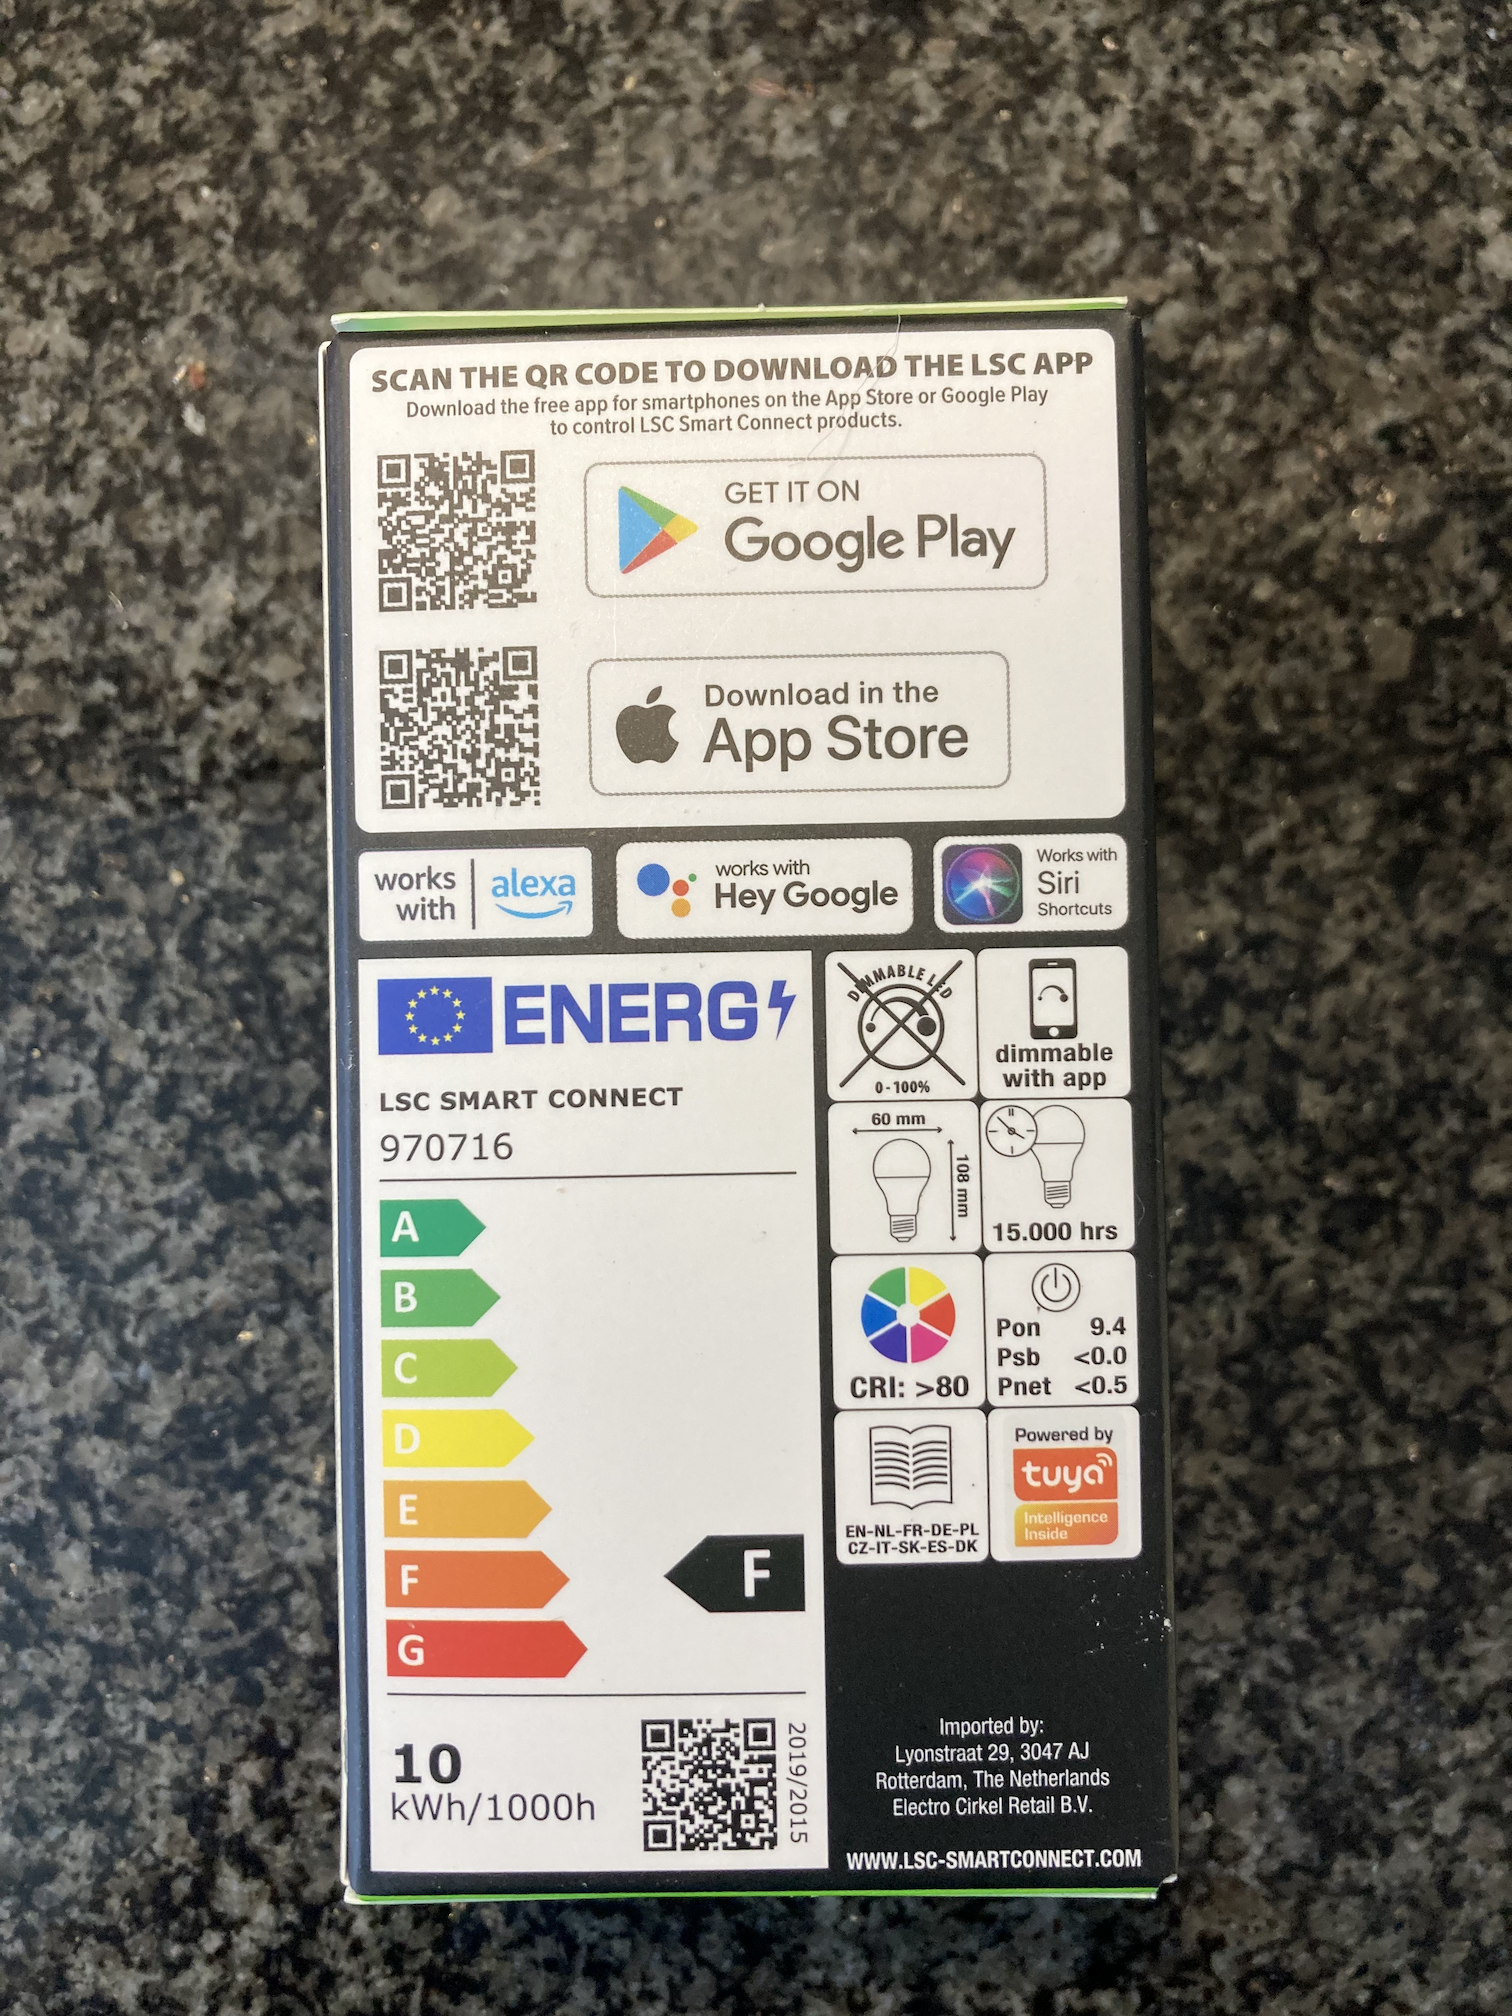
TL;DR: For under €4 you can unlock and local-control the 806 lm LSC Smart E27 bulb in about 5 minutes; “Very nice teardown!” [Elektroda, p.kaczmarek2, post #20138609] Why it matters: open firmware ends cloud lock-in and extends hardware life.
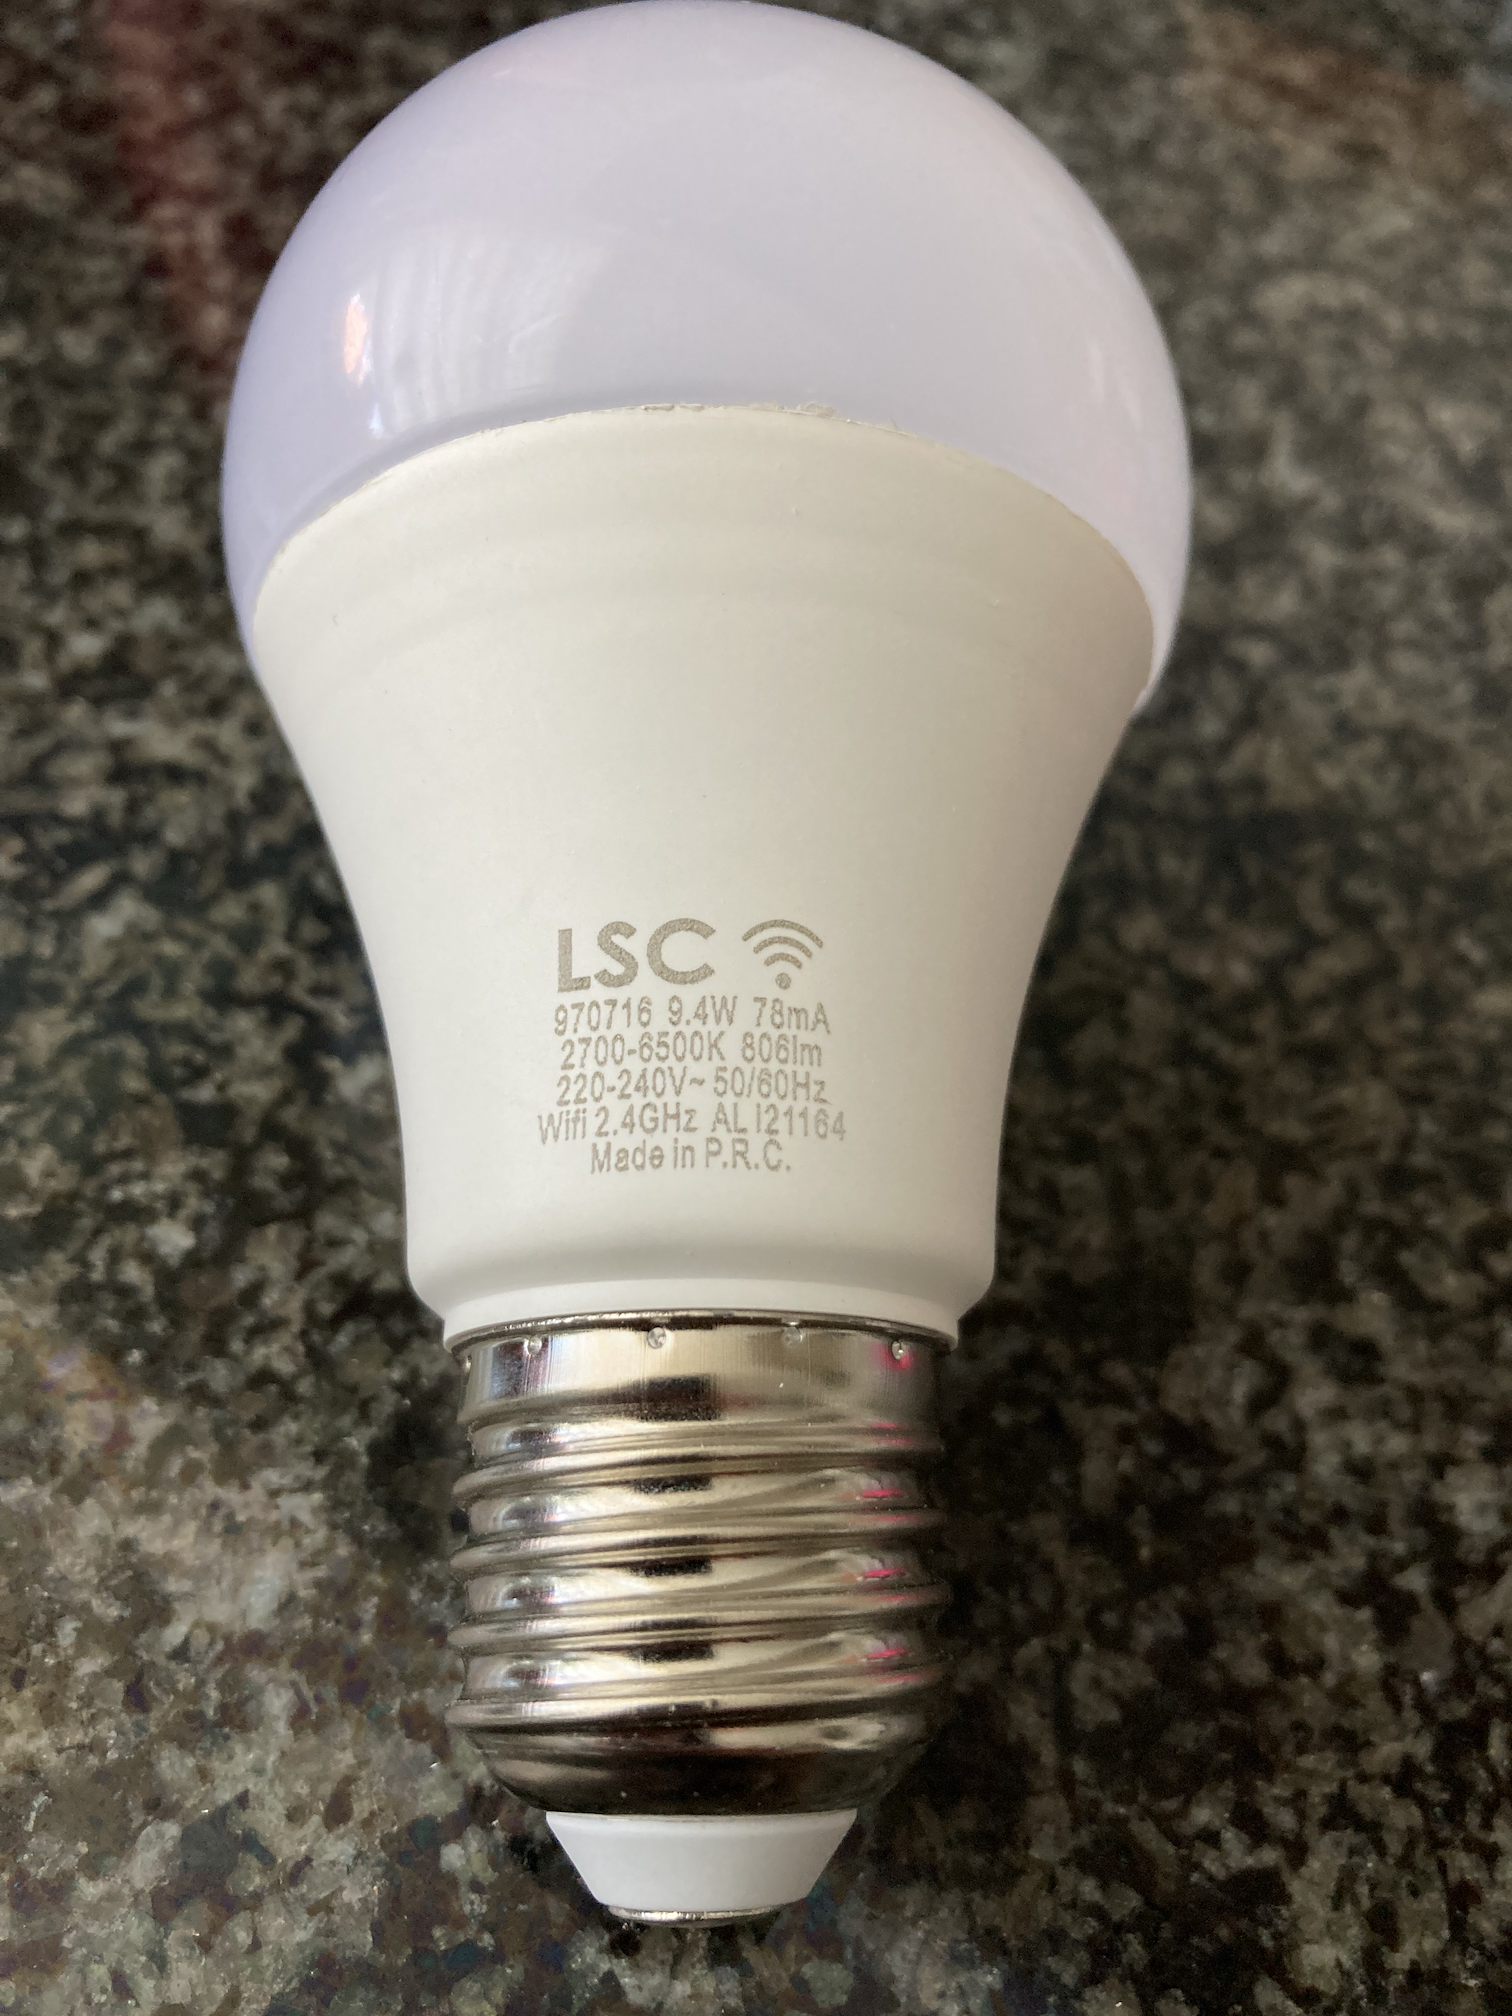
• Output: 806 lm cool-white, 2700–6500 K range [Elektroda, Tych0, post #20138269] • Chipsets: latest stock = BK7231T/N; earlier batches used ESP8266 [Elektroda, C0br4, post #20203263] • Flash paths: UART pads or 2.4 GHz Tuya-Cloudcutter OTA (≈3 min) [Elektroda, TheExperimentator, post #20207356] • PWM-capable pins: 6, 7, 8, 9, 24, 26 (6 total) on BK7231T [Elektroda, p.kaczmarek2, post #20256810] • Store price: €3.99 NL / PLN 18 in PL (Aug 2022) [Elektroda, Tych0, #20138269; gulson, #20141410]
Comments
Very nice teardown! I also have seen Action stores in Poland. This bulb is very cheap as well in my country, it's for about 15 PLN (Polish Zloty). By the way, it might be possible to flash this bulb... [Read more]
Thx. Yes I'm aware of the Cloud Cutter capabilities and for sure it might be able to program your firmware on the device. But what's the fun of that :-) I enjoy opening up these devices desolder modules... [Read more]
Currently in Poland PLN 18, but still very cheap: https://www.action.com/pl-pl/p/inteligentna-arowka-led-lsc-smart-connect/ He's probably in other countries too. Thank you for the presentation... [Read more]
Thanks for more information, they have a set of 3 garden lamps RGB + W for PLN 89, which is quite a nice price, they also have a smart spotlight with a motion sensor. You will have to find a store nearby... [Read more]
Let me know when you buy, photos from inside / tearedown topic is also well known, maybe even a small gift from Electrode could be found for you. I am curious how this motion sensor works, but it will... [Read more]
If you can do a teardown of what's in Action, I'll send you some electrode gifts :) Thank you! [Read more]
If someone does not want to flash, he can integrate this bulb via tuya, you have to build a project on iot.tuya.com. and add it in the tuya app will detect it without any problem. Apparently, the lsc app... [Read more]
I'm buying this bulb a lot and it always came with a esp8266 which I quickly flashed to tasmota. Now they silently changed the chipset to BK7231T and I thought I have to buy much more expensive bulbs to... [Read more]
It is indeed 26. The pin 16 does not even support PWM function. Why do you think they "silently changed the chipset to BK7231T"? [Read more]
My guess would be cost reduction, probably the Beken chips are a few cents or fractions of a cent cheaper than the Espressif chips [Read more]
Maybe it's about licensing problems? [Read more]
Thanks for the nice writeup! Since I bought the same ones (3000272-970716) also in NL my small comment is that flashing directly using Tuya Cloudcutter works perfectly so no need to open the bulb anymore! There... [Read more]
Hi there, i have a very similar bulb, 2000273 instead of 2000272 - it's basically the same bulb but with 1400 instead of 800ish Lumen... After some searching around, from what i gather on the tasmota... [Read more]
Beken chips have 6 possible PWM pins. Have you checked them all? Is your device CW? If none of PWM combinations are working, then you might have a bulb with a dedicated LED driver chip with a variation... [Read more]
Yes, it's a CW device... I did notice this as well, the config page states that "BK7231N/BK7231T supports PWM only on pins 6, 7, 8, 9, 24 and 26!" How would i go about testing the other 'pins' ...do... [Read more]
Well... the simplest way... would be to try setting 6, 7, 8, 9 24 and 26 to "Relay" role and give each of them a separate channel, 6 will be channel 0, 7 channel 1, 8 channel 2, 9 channel 3, 24 channel... [Read more]
Aaaah, i see what you did there. That actually got me somewhere... Turned out, 7 and 8 (once on channel 1 and 2) did the trick. One switched on full white, the other switches on full warm/yellow. Removed... [Read more]
Hey, I uploaded to the bulb 1.12.19 on the AP everything works perfectly. After adding to the HA generated yaml by OPENBK, I can't do automation on this bulb. Bulb not showing in devices. Is it possible... [Read more]
@piotrdobron which HA version? Maybe you need to add Unique ID or Entity ID? [Read more]