54 / 5 000
Resultados da tradução
Hello friends,
I know very little about programming and linux but I have some skills with soldering components but I decided to build a smart house that works locally without internet access, so I started researching and ordered the first product: Smart Plug GIRIER 16A JR- PM01 16A Energy Monitoring.
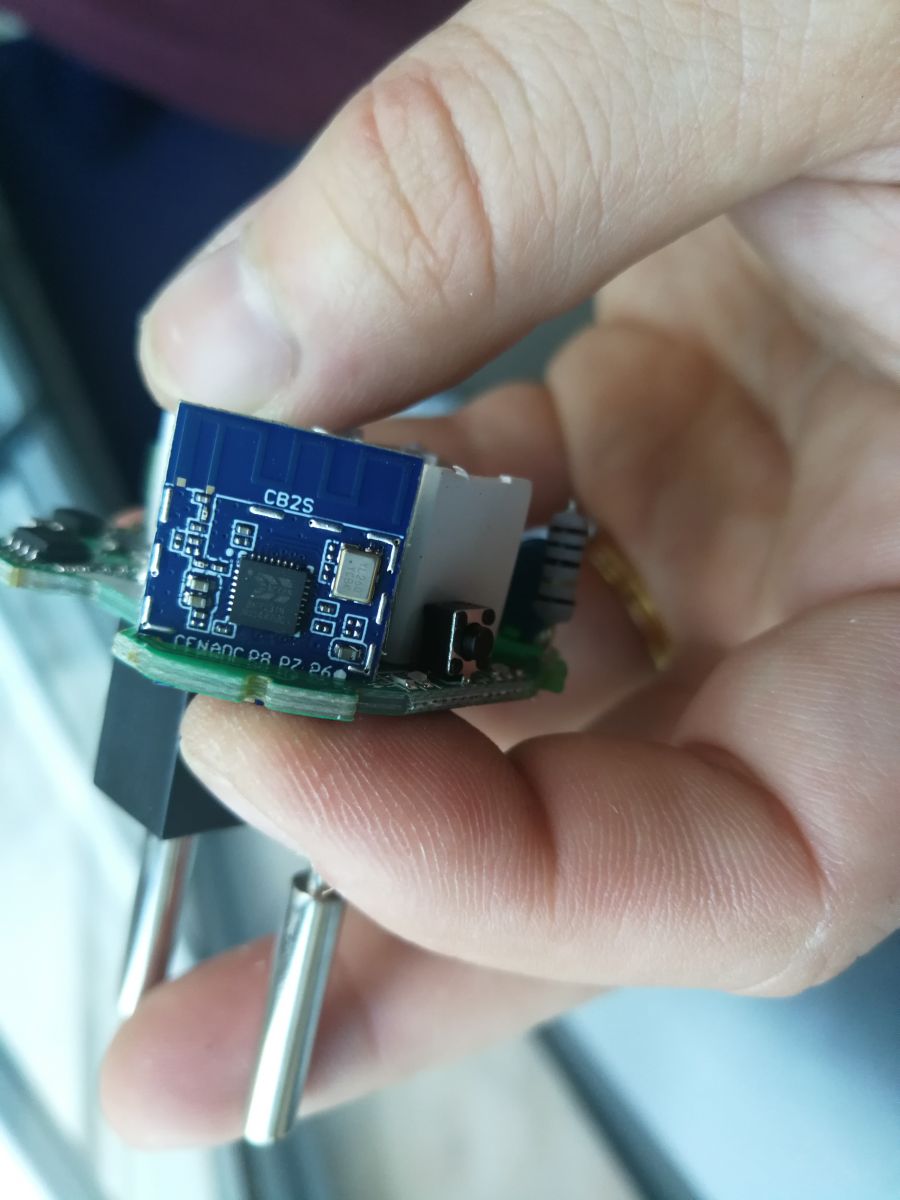
I was going to put the Tasmota firmware because it was the only one I knew but the equipment came with the CB2S / BK7231N chip and I had to research better until I reached this magnificent project.
As I'm a beginner I'll try to explain what I managed to do in a beginner's language, I apologize to the experienced ones.
I bought this smart plug on aliexpress from this seller:
Link
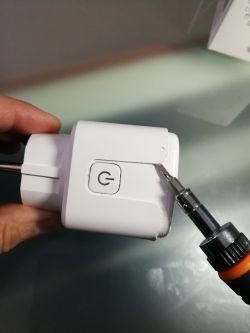
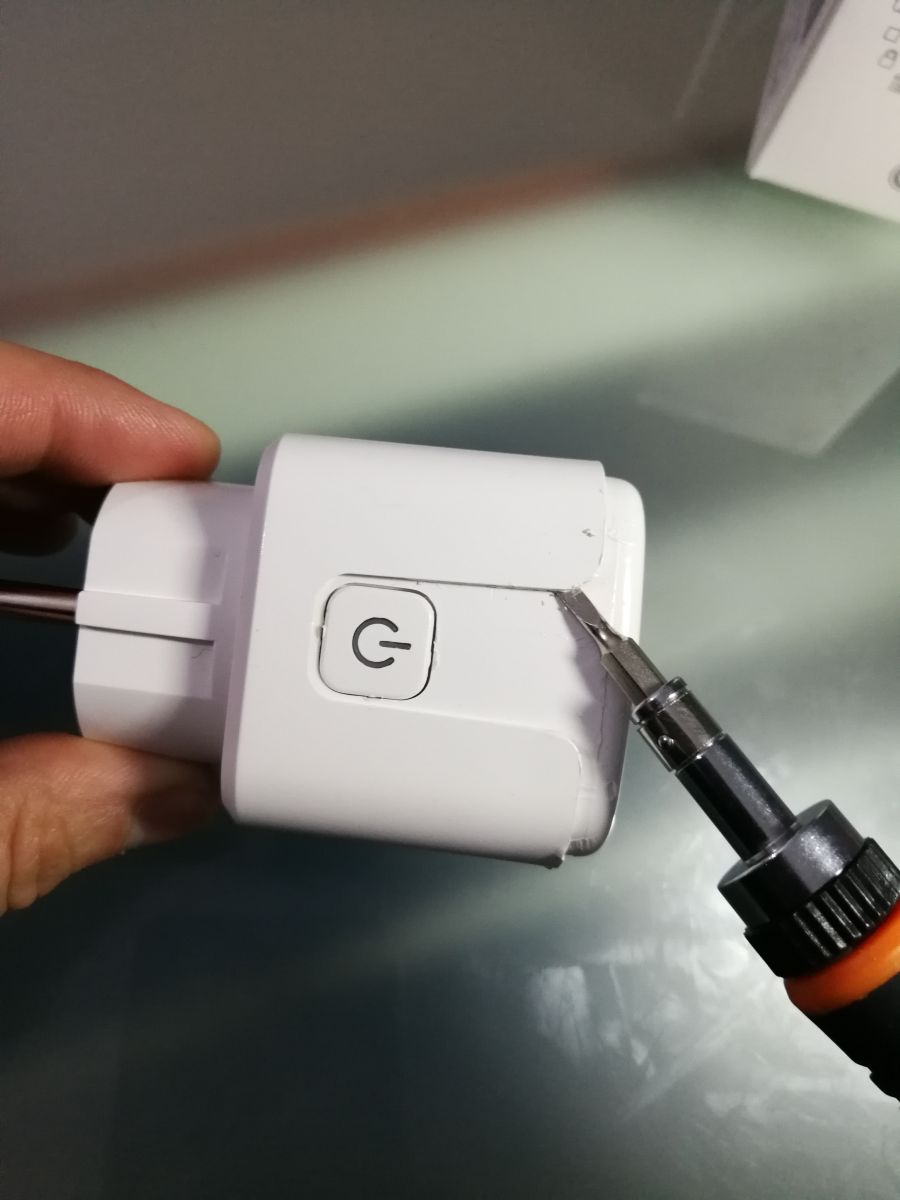
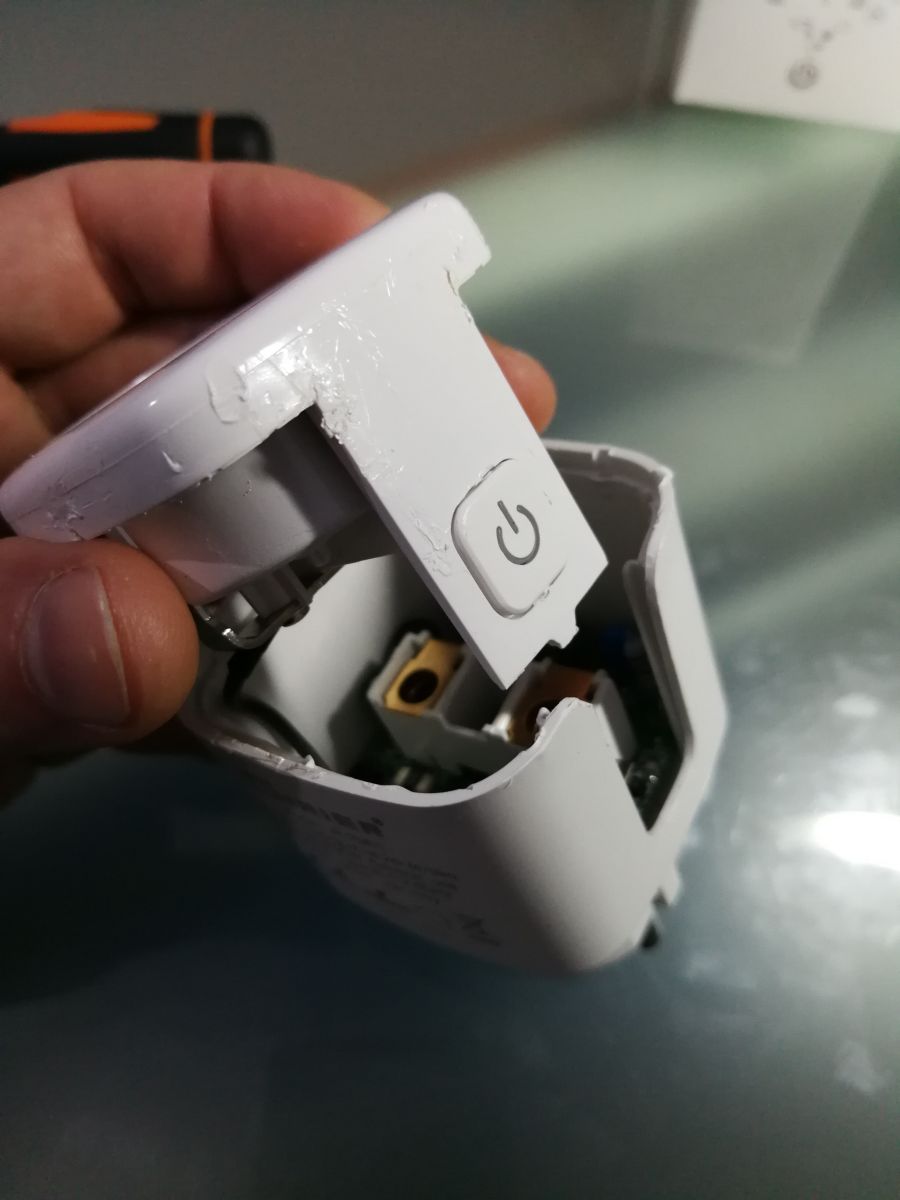
It was the first one I opened and it was difficult to open because it seems that in addition to the fitting it is closed with some glue.


We need to use the hid_download_py program to write to CB2S:
Link
To use this program it is necessary to install Python first.
We need "OpenBK7231N_QIO_1.15.70.bin" or newer firmware from this link:
Link
Create a folder named "py" in c: and copy the files from
hid_download_py to root of "py" folder.
Run the install.bat file to install some necessary dependencies.
Copy the new firmware file "OpenBK7231N_QIO_1.15.70.bin" also to the root of the "Py" folder
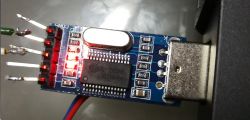
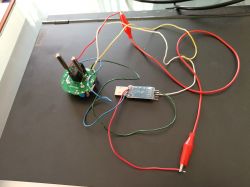
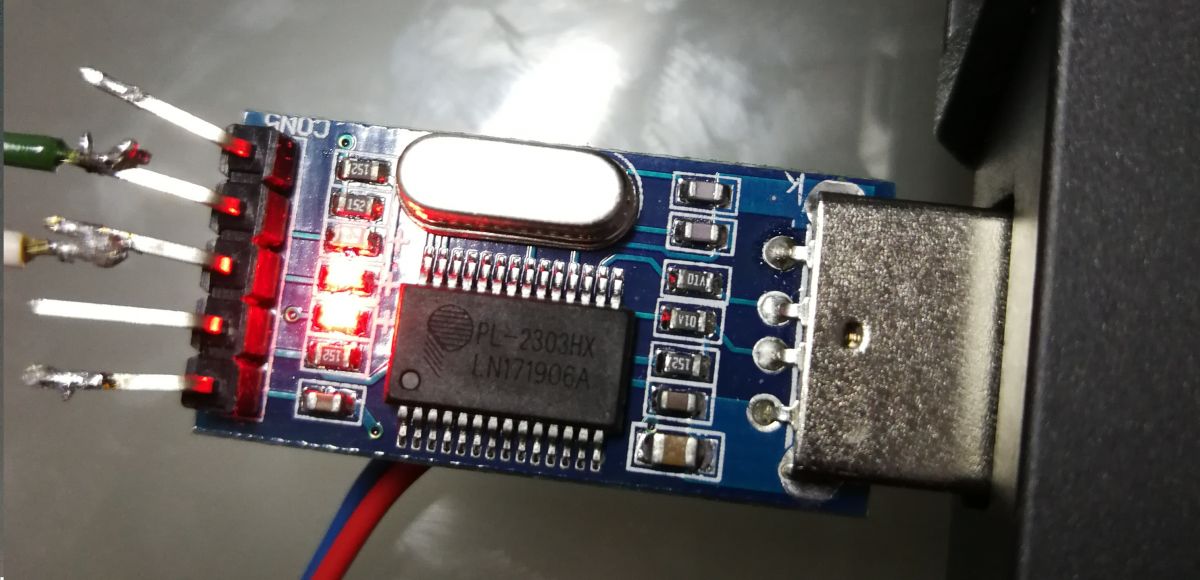
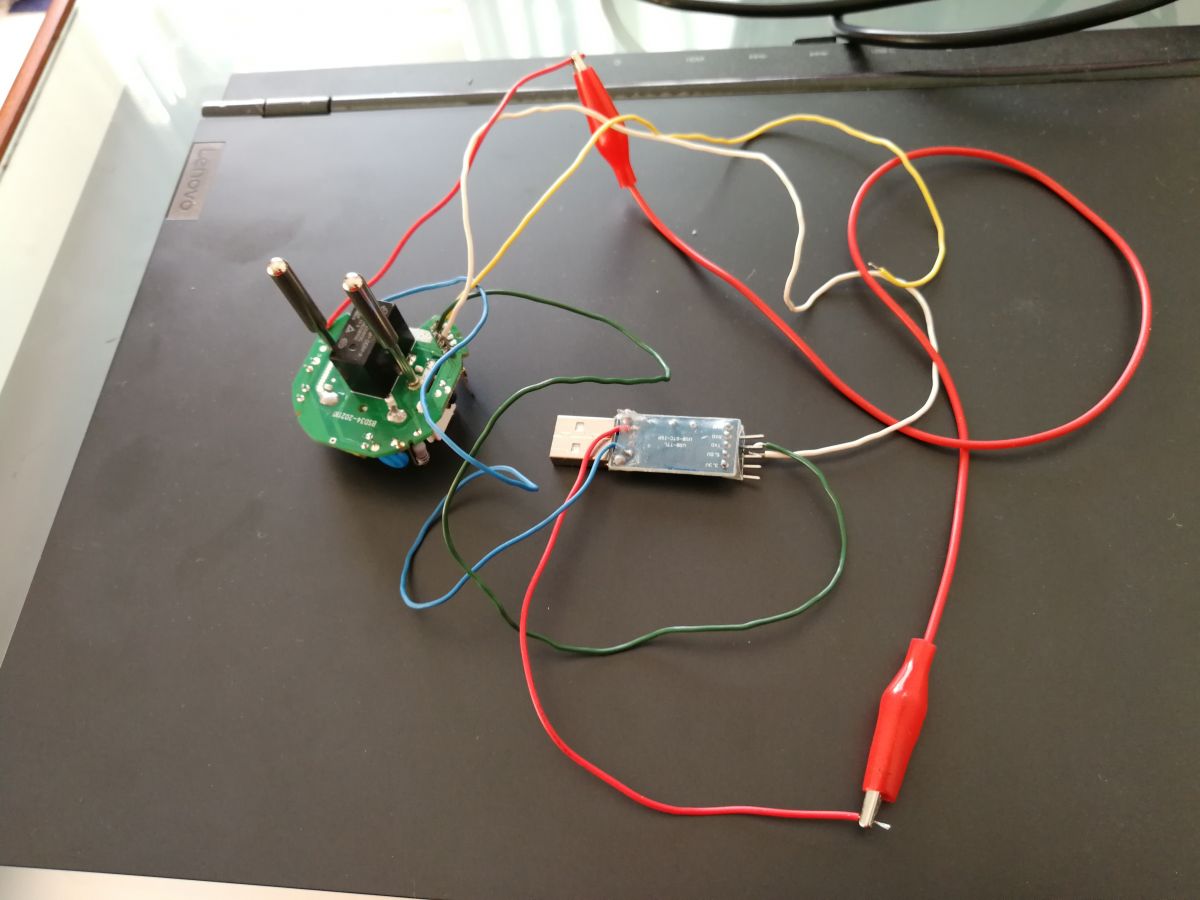
I used this programmer PL-2303HX:
connect the programmer to the computer and install the drivers, ensure the correct drivers are installed.
I use windows 10 and I had problems with the drivers, it is necessary to install the 3.3.2.105 driver manually as shown in these videos:
https://www.youtube.com/watch?v=vsb2k1etImg
https://www.youtube.com/watch?v=Y7JmCKCovMI
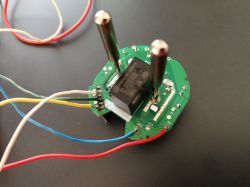
I powered it directly from the computer's USB port using the programmer, I connected +5v and GND from the programmer's USB port to the Smart Plug at the points labeled +5V and GND as in the pictures.
The red +5v power wire should be able to connect and disconnect easily, I recommend using an ON/OFF switch
(I used an alligator clip as shown in the photo) because it will be necessary during the procedure to cut the power supply and reconnect.
I connected it with the white and green wires
TX from programmer to RX from chip (White wire)
RX from programmer to TX from chip ( Green wire)
( the yellow wire that appears in the photo was not used in this case )

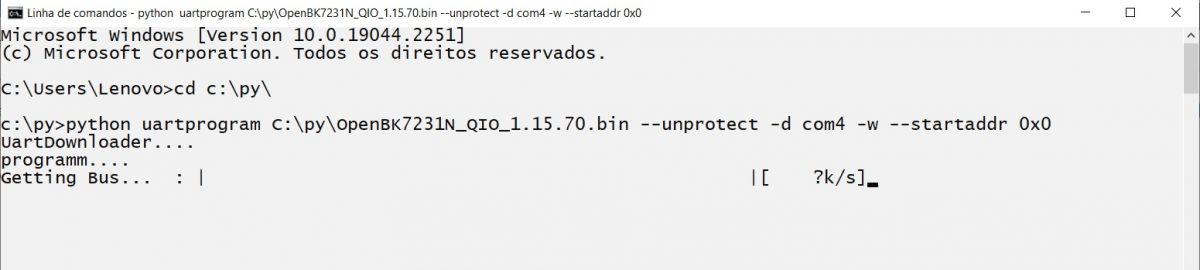
After all the connections have been made and the programmer is connected to the computer, open the Windows CMD and point to the "C:\py" folder and execute the command:
python uartprogram C:\py\OpenBK7231N_QIO_1.15.70.bin --unprotect -d com4 -w --startaddr 0x0
( attention, see which port is being used by the programmer and change the command, if yours is port 3 change the command from "com4" to com3 )
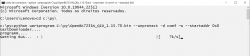
When the message "Getting Buss.. : |" appears
you have to disconnect (or use a button) the +5v power supply and reconnect, when you do that the program continues and will program the chip.
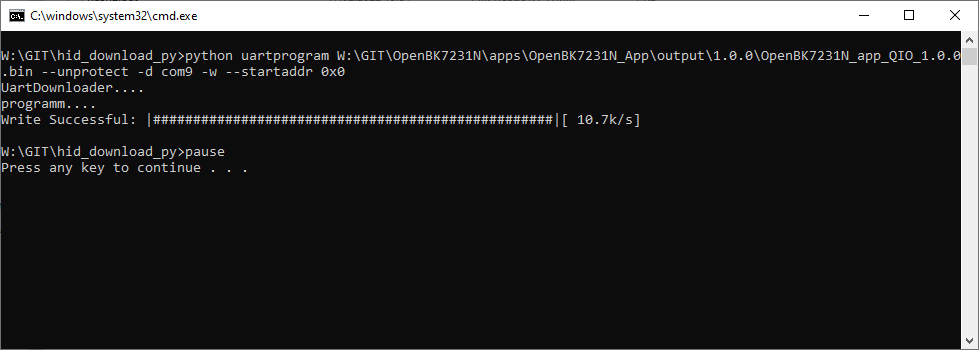
Example of successful programming:
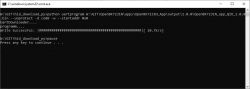
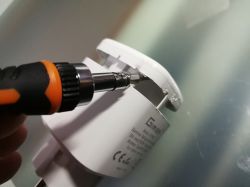
If it went well, you can unsolder and disconnect the wires from the board.
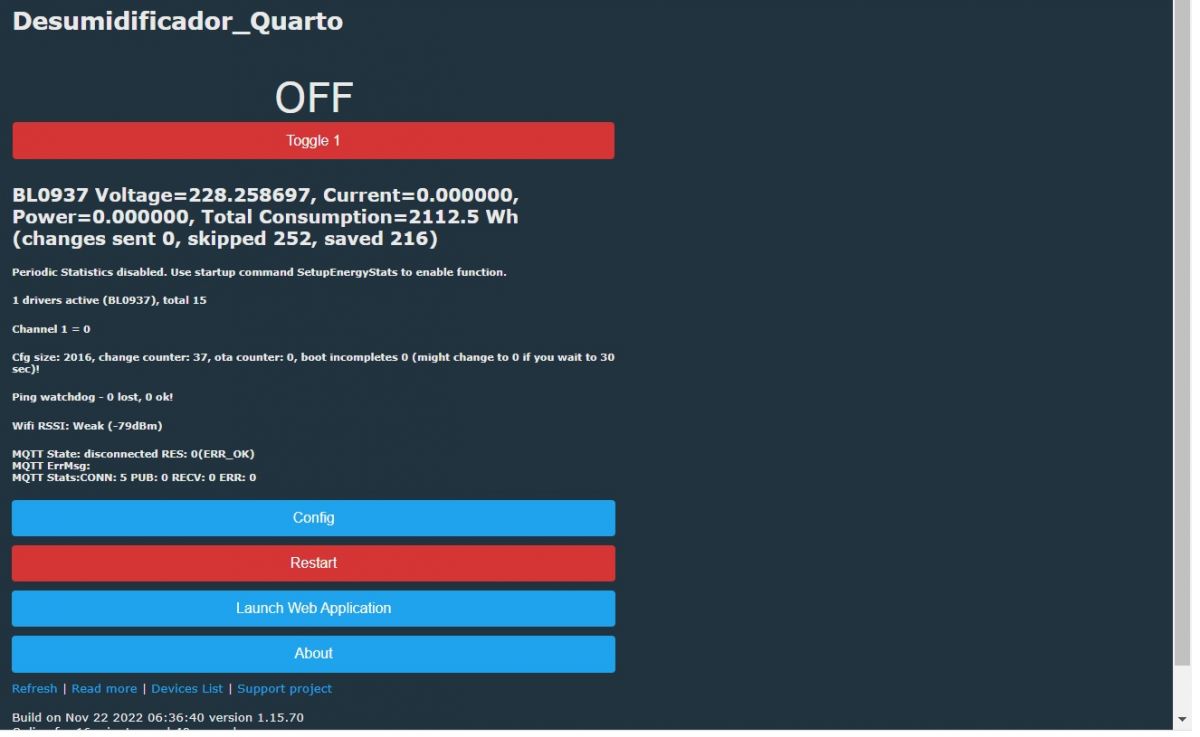
Mount the smart plug and connect it to the electrical plug, a wifi network similar to the SSID OpenBK7231xxxxxx will appear, connect to that network and open the configuration by pointing the browser to 192.168.4.1
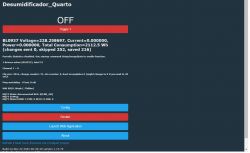
go to "config" then "configure wifi" and configure your wifi (don't make the mistake of writing your SSID and Password).
Once configured, connect to your network that you just configured and try to find out which IP was assigned to the smart plug.
Enter the assigned IP to access the settings again and go to "launch app Application" then in devices chipset choose "BK7231N" and in device choose ELIVCO LSPA9 Power Metering Plug (it was compatible with my GIRIER)
Add in PIN 8 "LED" and "1"

I don't know if the sensors are all working properly but I was able to install this magnificent firmware and connect to the Home assistant and control the relay remotely without internet access.
I will buy one more device, wall switch and try to do the same.
A big thank you to everyone who develops the project and helps to develop it by sharing your knowledge.
I'm sure this project will grow a lot and I want to help with what I can.
Thanks to all participants, it was thanks to tips from several topics in this forum that I was able to make this work.
Despite having been successful, I had many difficulties, I realize that it is a mature project and there are not many tutorials, what exists is very technical for beginners but I see a great future here !!
PS: excuse my english, I'm using a translator. I am Portuguese
Thanks


Comments
Thank you for your report, it turned out great, even with the use of translator. Translators are very good these days. By the way, have you looked into using more advanced stats of power consumption? ... [Read more]
When I select the equipment from the compatible list included in the "ELIVCO LSPA9 Power Metering Plug" firmware, it should have done this configuration automatically. https://obrazki.elektroda.pl/4457466000_1669976299_bigthumb.jpg... [Read more]
NTP time and extra power metering functionalities are not necessary, so they are not enabled by default. It is strongly advised to calibrate the plug. You are using default values which are not perfect... [Read more]
I already enabled NTP in autoexe.bat I'm able to calibrate through the backlog using VoltageSet ; Power set ; CurrentSet but when I restart or disconnect the smart plug and reconnect it loses calibration. Firmware... [Read more]
You most likely have the old commands for setting calibration in "Short startup commands" and they overwrite your calibration. Please remove "VRef" etc etc commands from "Short startup command" and from... [Read more]
Good afternoon. Thank you for your input, it was very helpful in flashing my device. It worked perfectly. Now I would be interested in being able to activate my device through Echo Alexa. I have other... [Read more]
Hello @enbollo , I have looked at the Belkin protocol and it seems relatively simple. I think I could add it for you. However, can you specify two things: 1. do you need that protocol only to turn... [Read more]
Good morning. Thank you for your quick response. As you say, I would only use it to turn the device off and on. I don't know any guide that can help you, sorry, my thing is electronics, I don't have... [Read more]
Hello I have tuya plug like in the first post. https://obrazki.elektroda.pl/5183113500_1682873336_thumb.jpg My config: { "vendor": "Tuya", "bDetailed": "0", "name": "Full Device Name... [Read more]
If Relay is on channel 0, then you should set button on channel 0. The only question is - which GPIO is the button? You can try guessing, checking one by one, or maybe check some other templates.... [Read more]
If you mean original stock firmware backup, I don't have it Added after 3 [minutes]: It was pin 24 on channel 0, now all seems working This full config for tuya smart plug 16a { "vendor":... [Read more]
I got the same plug from Aliexpress. This item Here is the binary of the original firmware: And the template: { "vendor": "Girier", "bDetailed":... [Read more]
cool. for some reason the Easy Flasher omits P24 in extracting config, so that's missing from your template. The pin assignments of 6, 7, 8, 10, 24 & 26 are seen in quite a number of these smart plugs... [Read more]
I noticed that, but the button is working anyways. What is the advantage of programming the button? [Read more]