[TYWE3S-ESP8266] SM-AW713 WiFi controlled valve - interior, firmware change
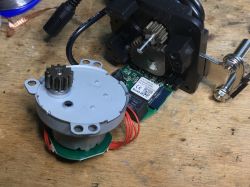 .
.
Here I show the inside and the process of changing the firmware of a clever water/gas valve overlay that allows such a valve to be controlled via WiFi. This controller is commercially available under the name Jinvoo SM-AW713, although distributors often also give it their own designations and the version I ordered was signed as SmartLED 8073. There has already been mention on the forum of its version on BK7231, in this post , but here I will show the ESP-based version.
Purchase of Jinvoo SM-AW713 .
"Smart" WiFi valve controllers can be bought for as little as around £100. The price depends on where you buy. You can also buy it on our Polish auction portal, in which case you will receive the product quickly, but it is slightly more expensive.
 .
.
It should be noted at the outset that the kit you buy does not include the valve. This kit is fitted to the valve already fitted to us .
The whole thing then looks like this:
 .
.
Installation details:
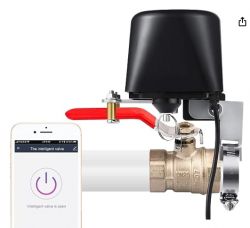 .
.
The whole thing can be controlled via the Tuya app, but we'll want to change that and get cloud-independent.
After placing the order, we receive a box like this:
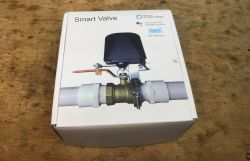
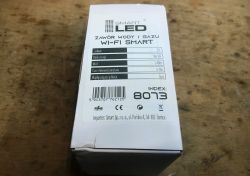
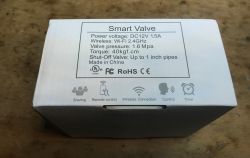 .
.
Kit contents:
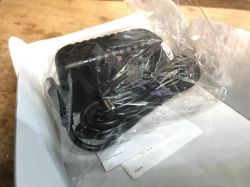
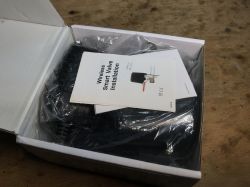
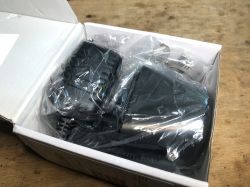
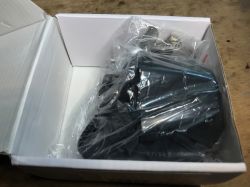 .
.
Even the power supply is included. This is rather a plus, although I would always find one at my place already for this purpose.
Here is the main mechanism, the mounting parts are in the bag:
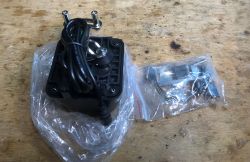 .
.
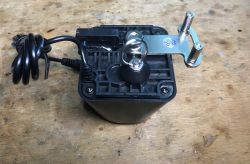 .
.
The case reveals to us the actual model of the device - SM-AW713, this 8073 is just the importer's designation:
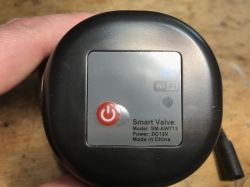 .
.
Instructions (including a description of how to put the device into pairing mode with the Tuya app, but we don't really need that):

 .
.
Interior of Jinvoo SM-AW713 .
Remove the four screws:
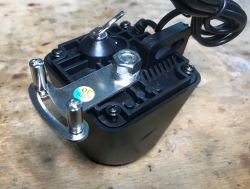 .
.
Interior:
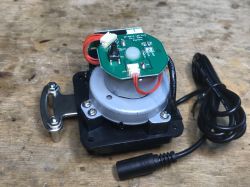
PCB designation: SM-AW713 LED V4.0 FR-4 RoHs E364546
Here we have two separate LEDs, one presumably for the pairing status, the other for the switching status, a pin from switching and a connector for the second board and for the motor (M+ and M-).
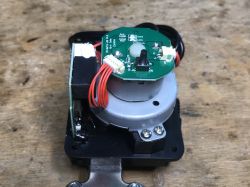
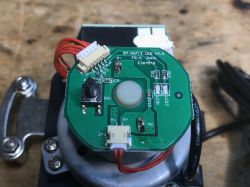 .
.
There is a relay and a WiFi module on the second board:
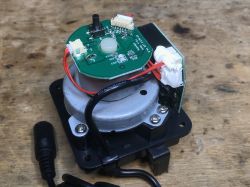
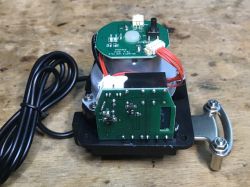 .
.
It turns out that here is a module with ESP, so Tasmota can be uploaded:
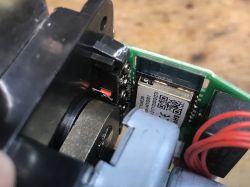
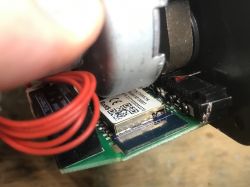 .
.
Changing the Jinvoo SM-AW713 batch .
Due to the difficult access to the WiFi module, it is worth trying tuya-convert first, which still supports some older devices. Tuya-convert allows you to change the batch via WiFi, without soldering cables. Newer ones, unfortunately, are no longer susceptible to this solution.
The SC3-01 SmartLife switch and ESP firmware upload via WIFI (tuya-convert/OTA) .
If, on the other hand, this method doesn't work (or we don't have the WiFi card needed to create an access point), the engine can be removed:
 .
.
and gain slightly better access to the WiFi module:
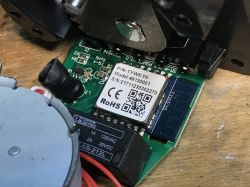 .
.
By the way, here you can see the step-down converter generating 3.3V from the 12V input, this is the operating voltage of the WiFi module. Next to the IC you can also see its coil:
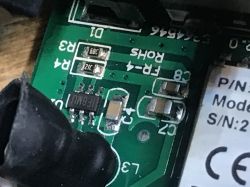 .
.
You can also see the transistor that controls the relay:
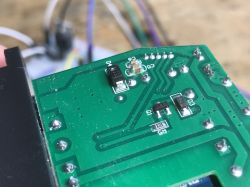 .
.
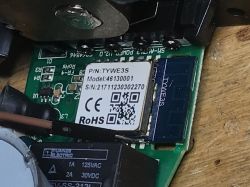
The WiFi module itself:
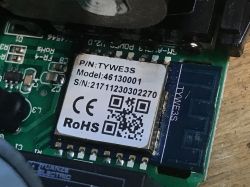
 .
.
This is an ESP8266, so esptool.py will do. TYWE3S pinouts are available on the web, by the way, they are compatible with ESP12. You can read about uploading Tasmota here:
SmartLife switch - test, interior and programming a light switch on WiFi .
You can also use the web-based installer:
How to install Tasmota easily - online installer tasmota.github.io/install via web browser .
Once Tasmota has been uploaded, the template needs to be uploaded:
{"NAME":"Jinvoo Valve","GPIO":[0,0,0,0,0,52,0,0,21,17,0,0,0],"FLAG":0,"BASE":18}The template comes from the Blakadder website, but describing in words here we have:
- LEDs (the first on IO5, the second on IO4)
- button on IO12
- relay on IO13
The operation of this template is really very simple. Simply switching on the relay switches on the valve and vice versa. Of course, everything is done with a certain delay, which, by the way, is stated by the manufacturer itself - about 10 seconds.
Summary .
It turned out that on the firmware side, this gadget is really simple to drive. All you need to do is simply switch on (or off) the relay. The problem, on the other hand, is accessing the programming pads. You have to get there from the UART, unless you get lucky and the tuya-convert works.
An additional plus is the presence of an ESP inside, although I don't know if this too at this distributor won't change in time, as even at our forum there was a post about this device in the BK version . In any case - both versions can be easily flashed and connected to HA.
Do you see any potential practical use for such a gadget? Perhaps it could be paired with a humidity sensor, for example, and turn the water off if a leak is detected, or perhaps you would use it in some other way?


Comments
For five (hehe) years I've been thinking of some way of turning off the water supply in the event of detecting flooding from the water sensors I have under each 'intake', such as the sink, basin, bath,... [Read more]
I've had these Chinese valves paired with flood sensors for 2 years now and it's worked superbly, they've worked more than once when the kids were going crazy in the shower 😜. There is control if there... [Read more]
. Good tip! Indeed a stagnant valve is difficult to move. [Read more]
. How exactly does the motor control work? Are there 'limit' position stops, or is it more based on overload analysis? [Read more]
@krzbor I didn't want to deconstruct it more for analysis but in this photo you can see one of the buttons testing the condition of the gearbox: https://obrazki.elektroda.pl/1848545600_1696061062_thumb.jpg... [Read more]
. So as I am guessing this is a "limit switch" based solution. How does the relay work? Does it work by interchanging the "+" and "-" fed to the motor? I understand that the limiters are not controlled... [Read more]
. Just for quick reference, a branded, PZH approved, NC type, 1" diameter solenoid valve, powered by 12V draws about 30-35W. The same valve with a solenoid on 230V consumes about 25-30W. It can be used... [Read more]
. Valves like this have been around for a good couple of years, they are on supercapacitors so they don't need an external power supply to trigger the closure, and the control is very simple - open... [Read more]
Can you give an example? [Read more]
. https://hpcontrol.pl/elektrozawor-kulowy-1cal-z-silownikiem-a80-lub-a83.html I have the A83 two-wire 230V version 4 years already in operation https://obrazki.elektroda.pl/4487838000_1696092032_thumb.jpg... [Read more]
Thanks! This is exactly what I need :) I see that the valve draws only 6W. This is as acceptable a value as possible. In many installations you should be able to find a spare 0.5A directly in the alarm... [Read more]
As I have already written, it has been working for 4 years and there are no problems, it does not do anything to make it move periodically. The only fact is what they write that if you "play" with the... [Read more]
Have you measured its energy consumption when it is at rest, i.e. when it is fully charged and not moving? If it consumes less than 6W 99.9% of the time, it is a killer for me. The loudness of the valve,... [Read more]
I haven't done measurements, but I suspect it will consume less than 0.2W when idle under power because there is nothing to consume that current there (small inverter and uc). I could do a measurement... [Read more]
I'll buy one for trial + a couple of PP connectors and do a review. The plan - control from the Satel Integra via relay and powered from the APS-412 buffer power supply plus integration with Home Assistant... [Read more]
Let me repeat my question: . Perhaps someone knows the answer? [Read more]
@jarzabek666 very good suggestion, as the 25W from @rox would be overkill for me, although maybe I look at it too harshly.... I, against all odds, have not replaced all the devices in the house with such... [Read more]
I understand that only one GPIO controls a relay, and that relay controls the servo circuit? Maybe I'll say why I'm asking this - I'm wondering if the circuit can be reworked to control any opening angle,... [Read more]
I would like to see such a valve on my DHW pipe. The valve would shut off heating water when the temperature in the tank would be higher than the temperature on the boiler so that the boiler would not... [Read more]