LED clock on WS2812B (NTP)
Hello
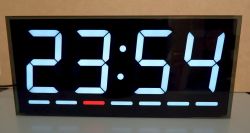
Watches featuring WS2812B have already been published on Elektroda. I would like to present my version. I had some of this tape left over from recent projects and decided to use it. Access to a 3D printer may make this project difficult.
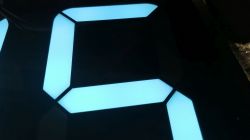
The clock has digits that are 79 mm high. It`s big, but you get used to it. After several experiments, it seems that this height is optimal when using the most popular strip with a density of 60 LED/m. In addition to the dots, there are two diodes (on the tape) per digit segment. I also tested with smaller displays. The minimum height is 45mm (one diode per segment, without removing the LED from the strip).
The clock shows the days of the week in addition to the time. A friend of mine talked me into it and I think it was a good idea. The day display can be placed above or below the numbers. The current time is downloaded from NTP servers every hour by default. Undoubtedly, the advantage of this design is the almost unlimited display in terms of colors and animations. You can also link the display to the calendar and display different patterns on specific dates.
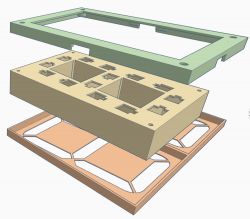
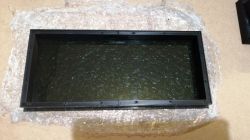
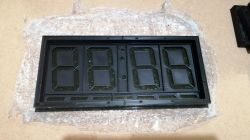
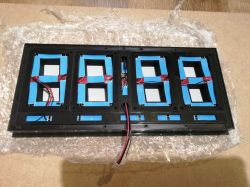
All elements except the back wall (HDF) are printed from PLA. The mounting frame is glued from two parts.
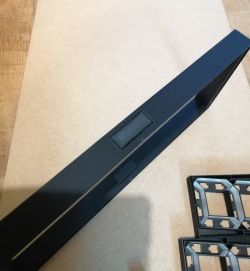
And as a finishing touch, a furniture edge is pressed onto it.
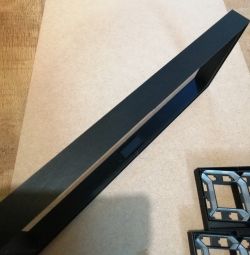
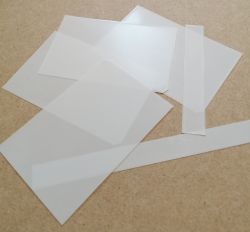
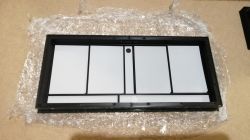
I glued the partition-type elements from the inside with white self-adhesive foil. In my opinion it goes faster than painting white. And the job is clean.
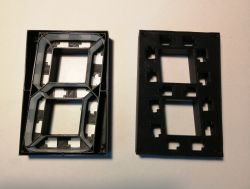
After unsuccessfully searching for white PVC for matte screens, I experimented with a white print. I think it looks quite nice. Up close you can barely see the print threads, but from a distance of several dozen centimeters you have to look closely to see them. And if someone doesn`t know about their existence, they don`t notice them :)
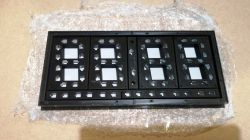
connected sections of tape
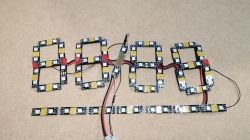
installation
More interesting patterns
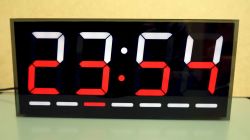
I called this pattern "Patriot". Good for days off from work
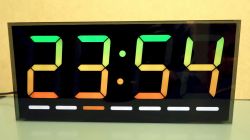
Very slow vertical color change.
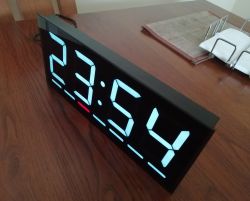
The remaining patterns are different display colors. There are 9 of them.
Electronics:
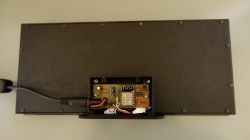
I still have to think about the GUI. I am attaching the development code in the Arduino IDE.
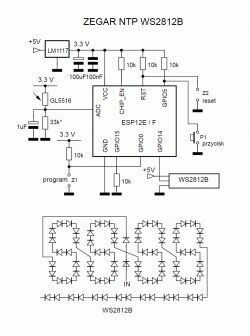
device diagram
Well, that`s it in a nutshell


Comments
Very nice design, but the diagram looks interesting - only a few elements! [Read more]
With the exception of the ADC circuit for auto-adjusting the display brightness, these are the basic elements needed for the proper operation of the ESP8266. [Read more]
The cock is very cool and aesthetic. Would there be a chance to make STL available? Maybe I`d finally have an excuse this Christmas to dust off the printer. :) You can get rid of striations on the focusing... [Read more]
There is no problem with providing *.stl. I`ll tidy it up a bit and share it. I didn`t try anything with acetone. But these stripes are really hard to see. Maybe they even add charm :) . Matte is one layer... [Read more]
Maybe something from a damaged TV matrix would meet the requirements. I used to have these nice 1mm sheets from an older one. Best with CCFL backlighting. Overall, a very nice project. [Read more]
In other projects, I used 0.16 mm thick PVC as mats. 1 mm is much too thick. At this thickness, the light from the segments will be scattered onto adjacent segments. Here, the wall between the segments... [Read more]
Very nice construction. I think that in this case these stripes add charm. [Read more]
Photo in higher resolution. By the way, there were some artifacts that needed to be cleaned around the dots.. :) [Read more]
Acetone for PLA? It will not work, this method only with ABS and ASA. For PLA, chloroform, which you can`t buy, or sodium hydroxide, a strong base that is better not to play with. Efi222 - great idea... [Read more]
Spray plastic works great with PLA. [Read more]
I will add from myself (I am writing from practice) that to print such a matting sheet you need to properly set the table and warm up the entire machine. Without this, each subsequent copy may come out... [Read more]
Well, I`m wondering if a mistake was made there? The ADC in ESP8266 is up to 1V. And from the calculations, the average GL5516 is 7.5kOhm for "bright" to ground 33kOhm, the voltage divider will give 2.9V... [Read more]
You are right - the author did not notice that the ADC is up to 1V. Here is my solution for photoresistor-controlled backlighting Link . I used a large resistor to ground (1M) to achieve high resolution... [Read more]
A wonderful effect, contact me with information about the Parcel Locker and I will send you a small gift. [Read more]
Mr. @Jarzabek and @krzbor, you are 100% right. You can get confused sometimes with ADC. I remembered this 1V range. But somewhere after that it went into the bushes :D The photoresistor is behind a dark... [Read more]
That`s the point - vision works logarithmically and the ADC doesn`t (it`s linear). Using a large resistor gives reasonable results in low light conditions. Of course, in higher lighting there is almost... [Read more]
The characteristics of the ADC in ESP8266 are as below. The maximum input voltage value of 1V should be considered optimistic. https://obrazki.elektroda.pl/9340200400_1702236224_bigthumb.jpg @efi222... [Read more]
This is beyond my scope of knowledge at the moment. But I`ll try to educate myself. Thank you for your tips :) [Read more]
Some time ago, when I was playing with WS2812B diodes, I read that the control signal is 5V and you connect it directly to the ESP, did you have any problems with it? If I remember correctly, the library... [Read more]