The recessed socket, or the water meter receiver in a smart socket
 .
.
Hello,
I recently had my energy meter replaced by Tauron. As it turned out, the new one has remote reading. Therefore, I became interested in the subject of integrating the meter value reading with the Home Assistant. Unfortunately, as it turned out, the model I had installed did not have wMBus support. All that was left, therefore, was an unofficial integration supporting the e-metering service from Tauron.... which, to put it mildly, works very poorly.
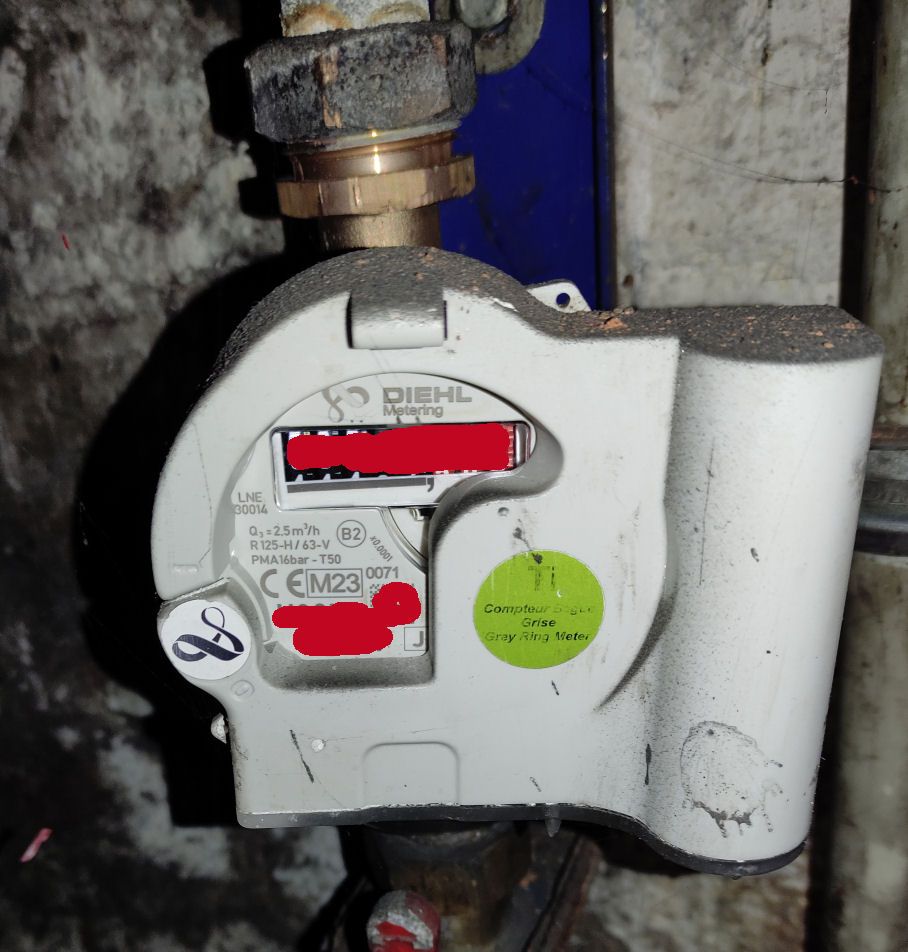
However, since I already have energy reading, I also thought about the water meter. Especially since Gliwice Waterworks has been installing water meters with radio overlays for years. At the moment, these are Diehl brands with an IZAR overlay operating at 868MHz. I read up on what receiving a signal from such a water meter looks like and it turned out to be quite simple. To start with, to check if the meter was transmitting anything I used a DVB-T2 tuner on USB, which I bought quite a long time ago when the terrestrial TV standard was changing. After plugging it in and a piece of bent wire antenna I ran the rtl_sdr program, which almost immediately picked up the messages broadcast by the water meter overlay.... Mine and those of all the neighbours. These messages, called telegrams, can - and in fact should! be encrypted with an AES key. Unfortunately, as is usually the case, the waterworks has not enabled this encryption.
So you can read such a telegram without problems using the wmbusmeters software or by pasting it on https://wmbusmeters.org/.
 .
.
Well, okay, but I felt bad about using the tuner I sometimes use to receive meter data. In addition, from what I've read, continuous listening via the tuner puts quite a strain on the computer.
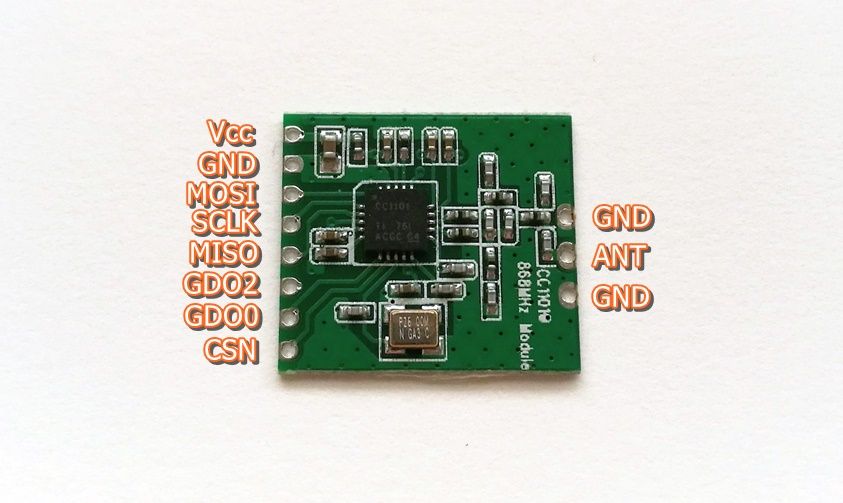
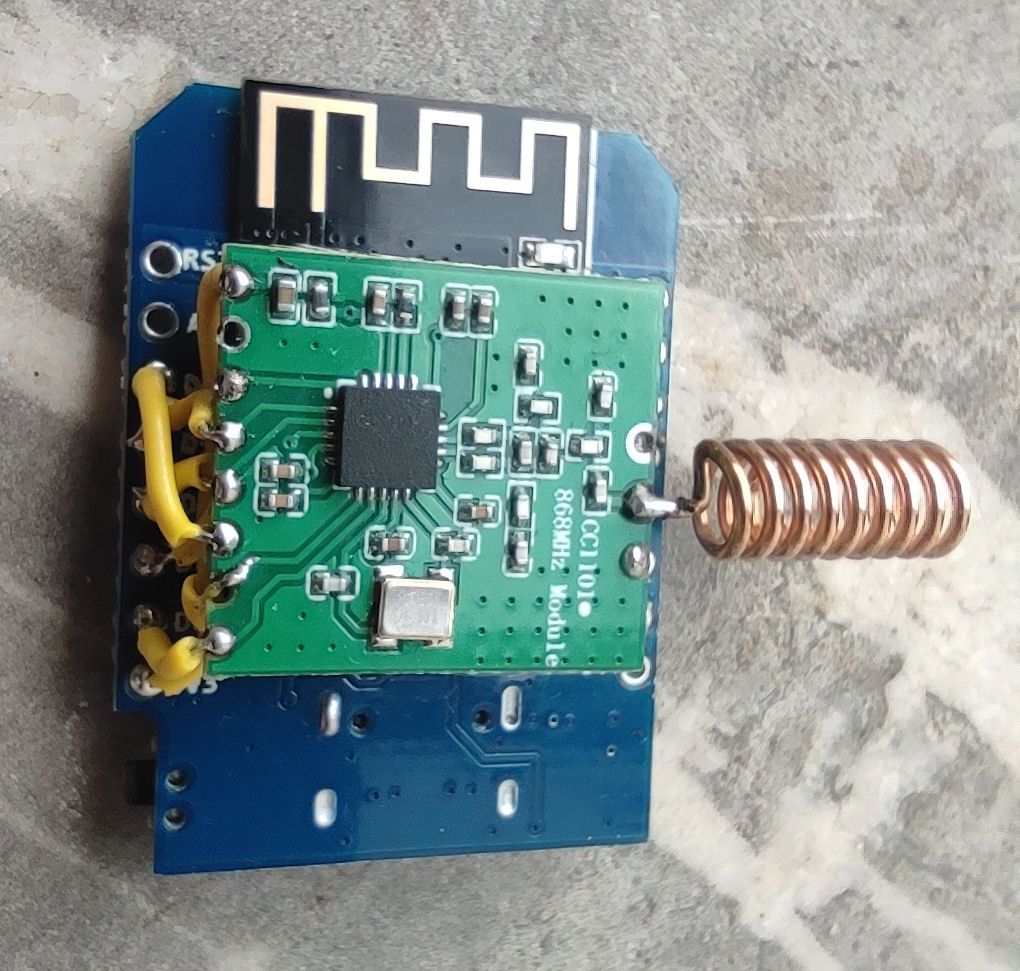
So I looked for other solutions. I found the CC1101 module, which is also suitable for this purpose. Initially, I wanted to connect it to the Raspberry Pi Zero, which lives on in my house and, in fact, gets bored after switching to HA. However, I couldn't find any ready-made solutions, and I didn't really have the desire or skills to figure out how to get it working.
For what it's worth, there are plenty of readymades for using such a module with ESPHome software and ESP series chips. Both the popular ESP8266 and the newer ESP32. Although ESP32 is recommended for this purpose because of its higher performance, I have had several ESP-12F modules based on this older ESP8266.
 .
.
To start with, I soldered together the CC1101 module with the Wemos D1 Mini, which, because of its built-in TTL converter and USB port, is easy to program and therefore to test the code.
 .
.
I used the SzczepanLeon repository version 3.0 for this (newer versions only support ESP32 anymore): https://github.com/SzczepanLeon/esphome-components/tree/version_3
I even found another repository with example code that uses the library from SzczepanLeon, all I had to do was enter my WiFi network details and the serial number of the water meter overlay: https://github.com/zibous/ha-watermeter
I'll just add here that the serial number that the water meter gives - in hexadecimal form, doesn't agree at all with what's on its sticker. I tried recalculating everything that is printed there and nothing matched. Fortunately, I knew the correct number from the receivers on the tuner.
Initially the module did not want to receive anything. I set the logs to DEBUG mode to get as much information as possible. It showed that the software was seeing the radio module and communicating with it (displaying the module version in the logs). I finally found a similar problem on some forum and there it was advised to swap the pin configuration of GDO0 with GDO2 in the program. This helped, the received telegram appeared in the logs! The only thing left to do was to tweak the code under myself and it was done.
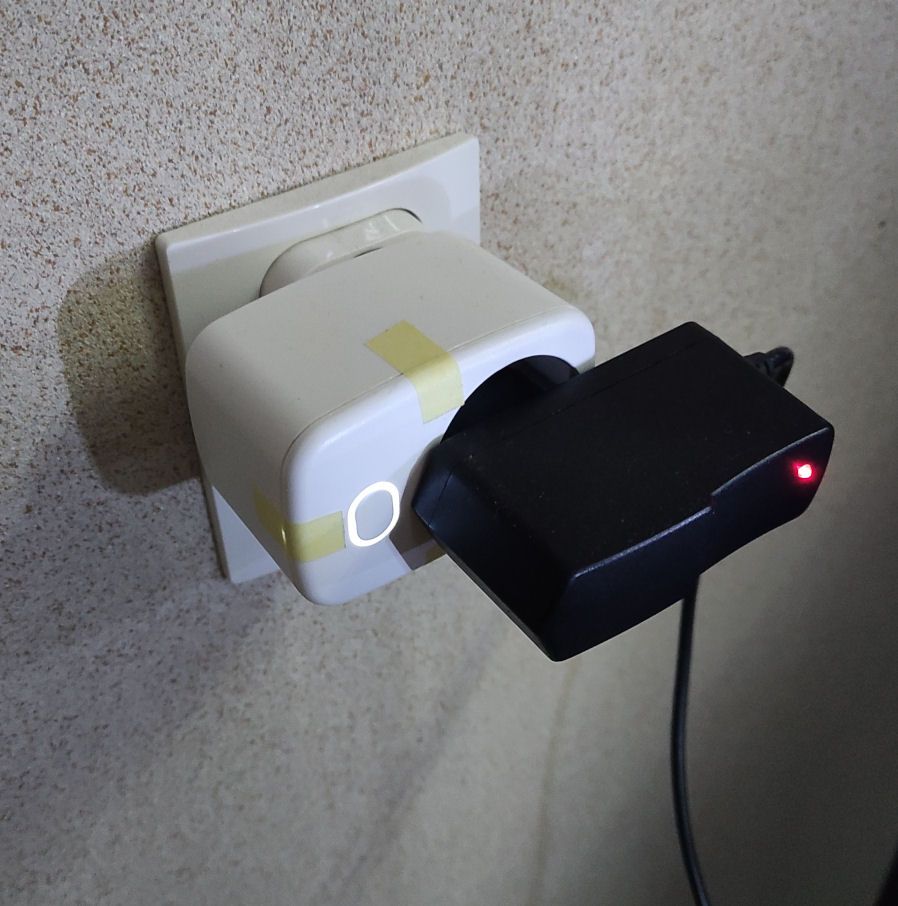
Only... you need a case for such an ESP, you need to power it, and besides, it could do more than just receive a telegram from the counter every now and then. So I came up with the idea of packing it all into a so-called smart socket.
It's off to work...
I once bought sockets in a different housing, larger than the popular ones from Ali: https://pl.aliexpress.com/item/1005006117762417.html
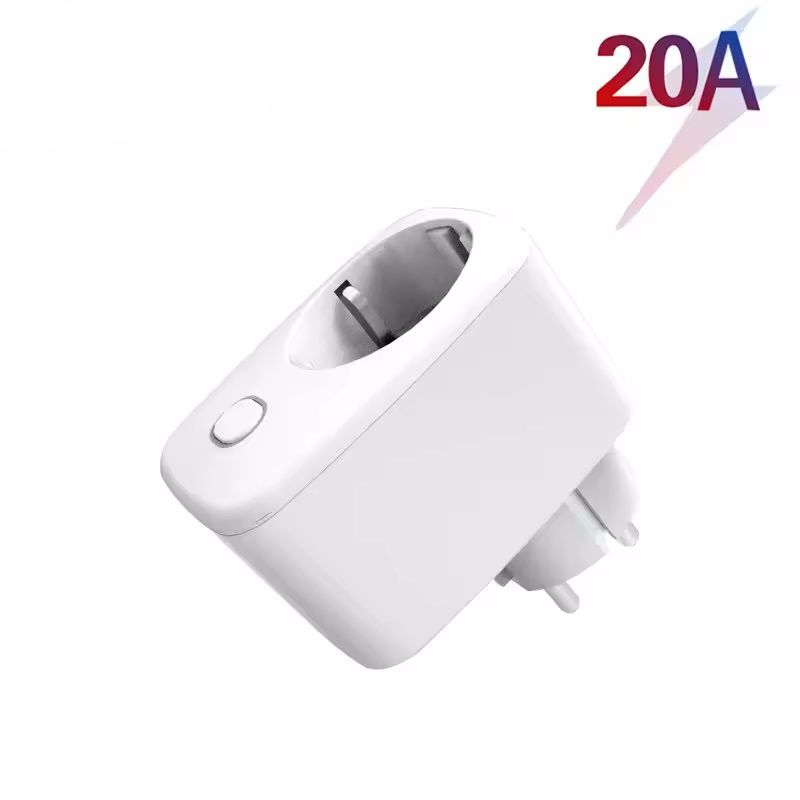
Inside it's the same, just a button and LEDs on the wires, so there's plenty of room.
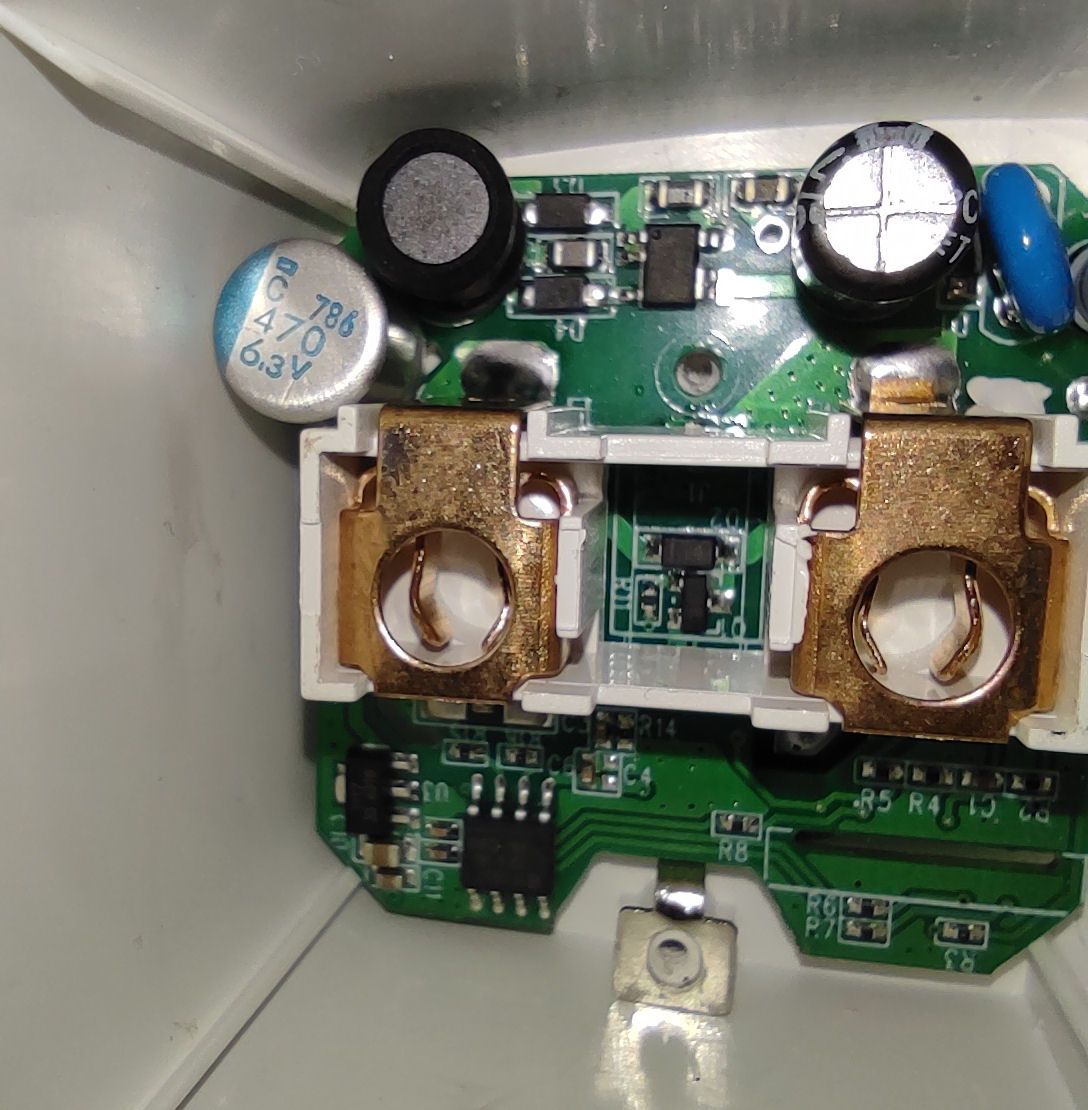
The first thing I did after opening the case was to replace the capacitor on the low voltage side 470uF/10V, because the one that was because of the dimensions and increased current consumption after my modifications would not last long. HERE EXAMPLE .
I managed to stuff a slightly larger and more importantly polymeric one in there, soldered from some motherboard.
 .
.
The second thing was to solder out the original module based on the Beken chip and replace it with an ESP8266. Although there are ready-made modules with ESP-02s, with the same output layout. However, their number was insufficient. The socket itself uses 6 pins (3x BL0937 chip, one each relay, button, led), to which the CC1101 module is another 6 pins. Not enough.
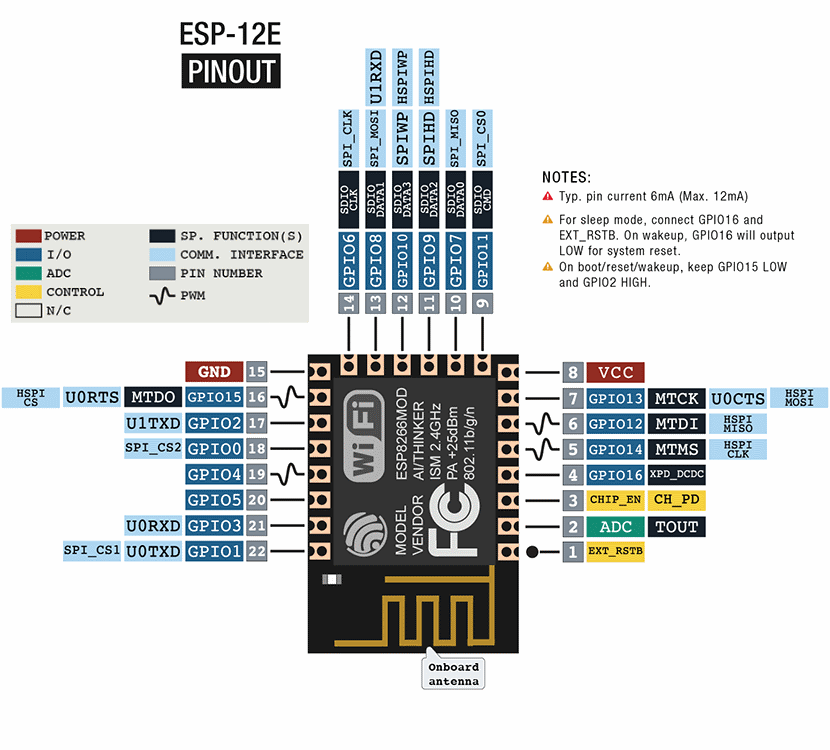
This left the use of the ESP-12F module, which I originally wanted to use to build this receiver. To start with, I programmed it with a basic version of ESPHome, so that I would be able to update it via OTA.
 .
.
Then, using a kynar (a real one! with Teflon insulation!), I soldered it to the socket board. It has basically enough outputs. I write basically because they are quite cumbersome to use. You only have to look at the datasheet to see that this pin has to be in the low state during start-up, that one high, another one can't be used because the internal memory uses it. However, I managed to get the order right so that everything fit.
The only thing left to do was to look for some configuration of such a socket under ESPHome, fortunately there is plenty of it: https://devices.esphome.io/type/plug. After setting the right pins and uploading the software, the socket immediately started working correctly, only the calibration of the BL0937 voltage and current monitoring chip was required.
I then added the CC1101 to the ESP-12F. Here, I already used the same pin order as when trying with the Wemos D1 Mini. And after tacking one code to the other, I had both the socket operation in the program, along with the energy indication and the received values from the water meter.
 .
.
The order of pins used is therefore:
GPIO13 - CC1101 mosi_pin
GPIO12 - CC1101 miso_pin
GPIO14 - CC1101 clk_pin
GPIO15 - CC1101 cs_pin
GPIO16 - CC1101 gdo2_pin
GPIO10 - CC1101 gdo0_pin
GPIO05 - BL0937 cf_pin
GPIO03 - BL0937 cf1_pin
GPIO00 - BL0937 sel_pin
GPIO01 - przycisk
GPIO04 - przekaźnik
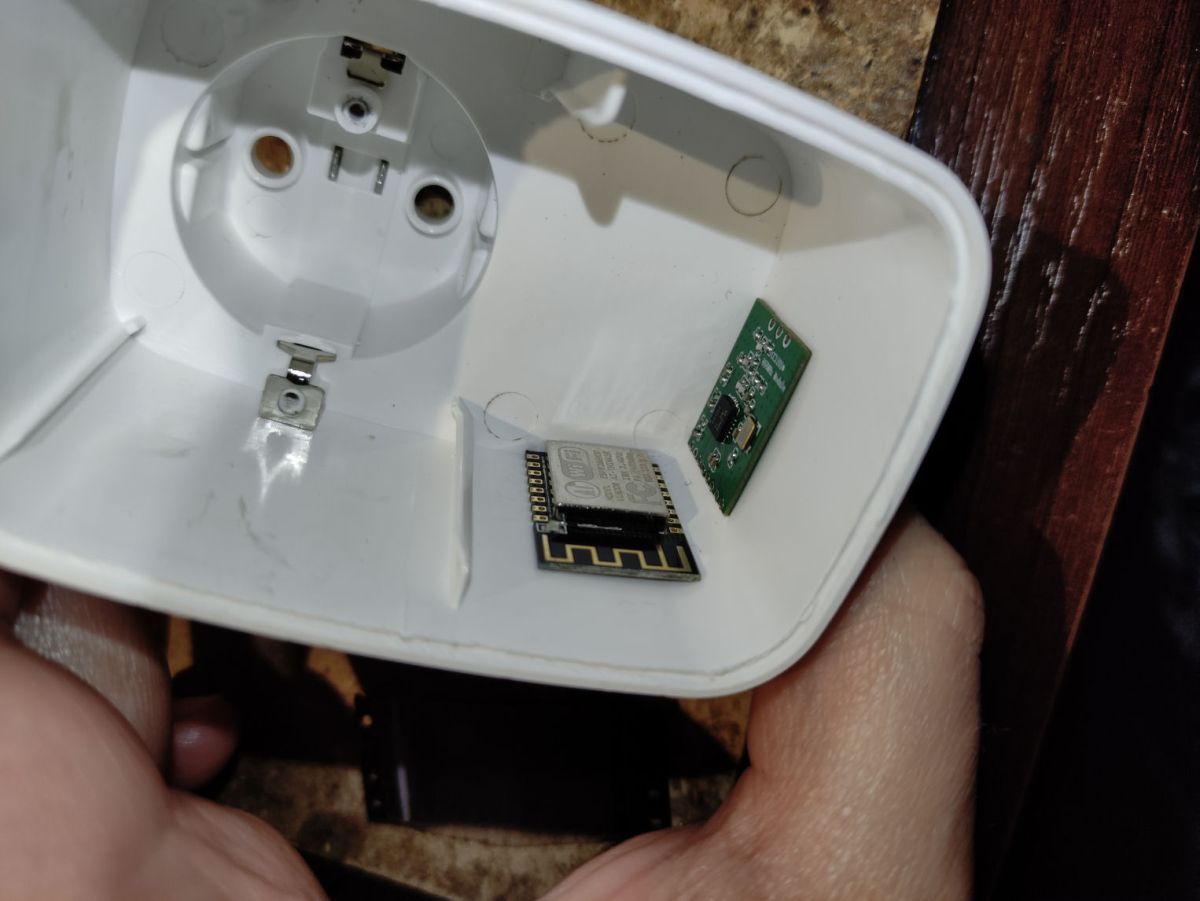
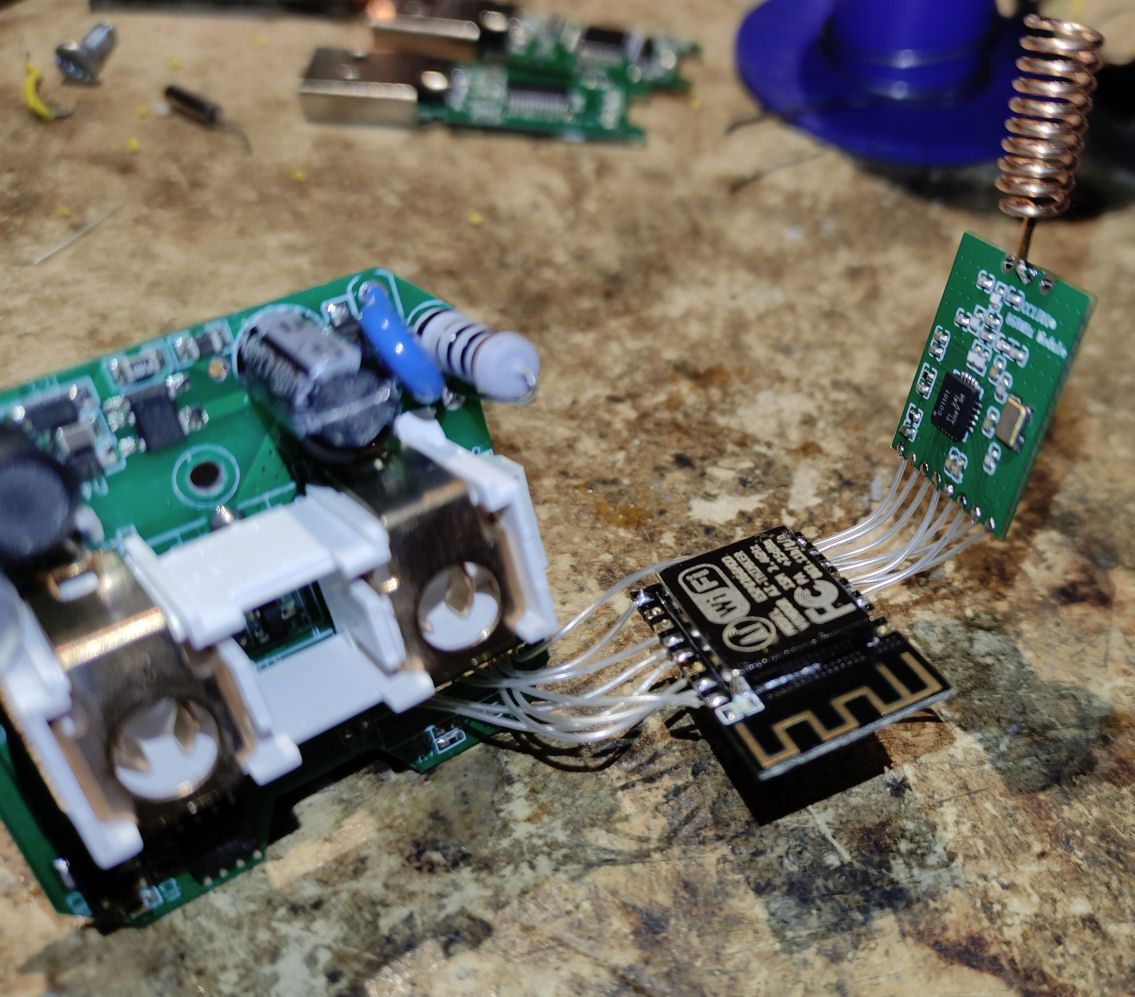
GPIO02 - status ledI glued both additional boards to the casing with double-sided tape and the whole thing looks like this (ultimately the antenna is soldered in front of it though):
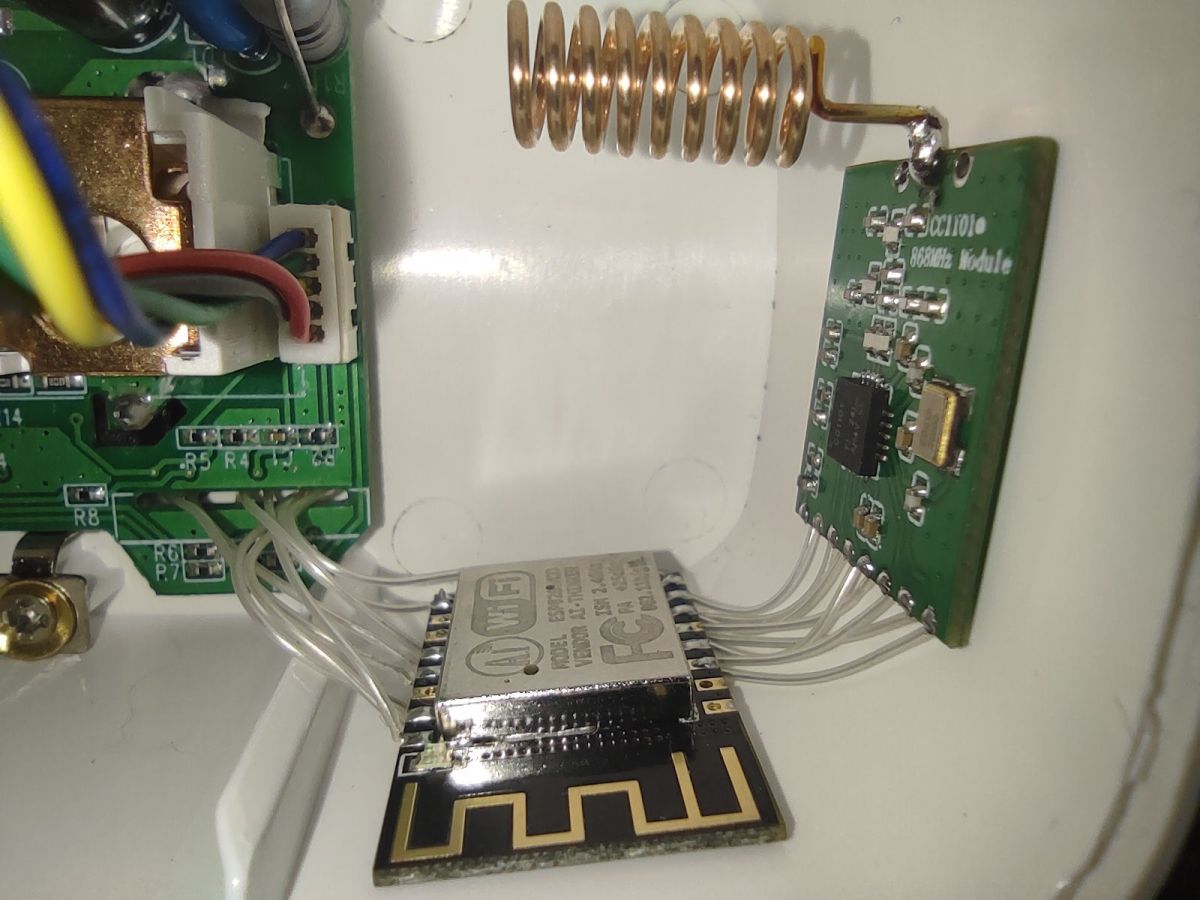 .
.
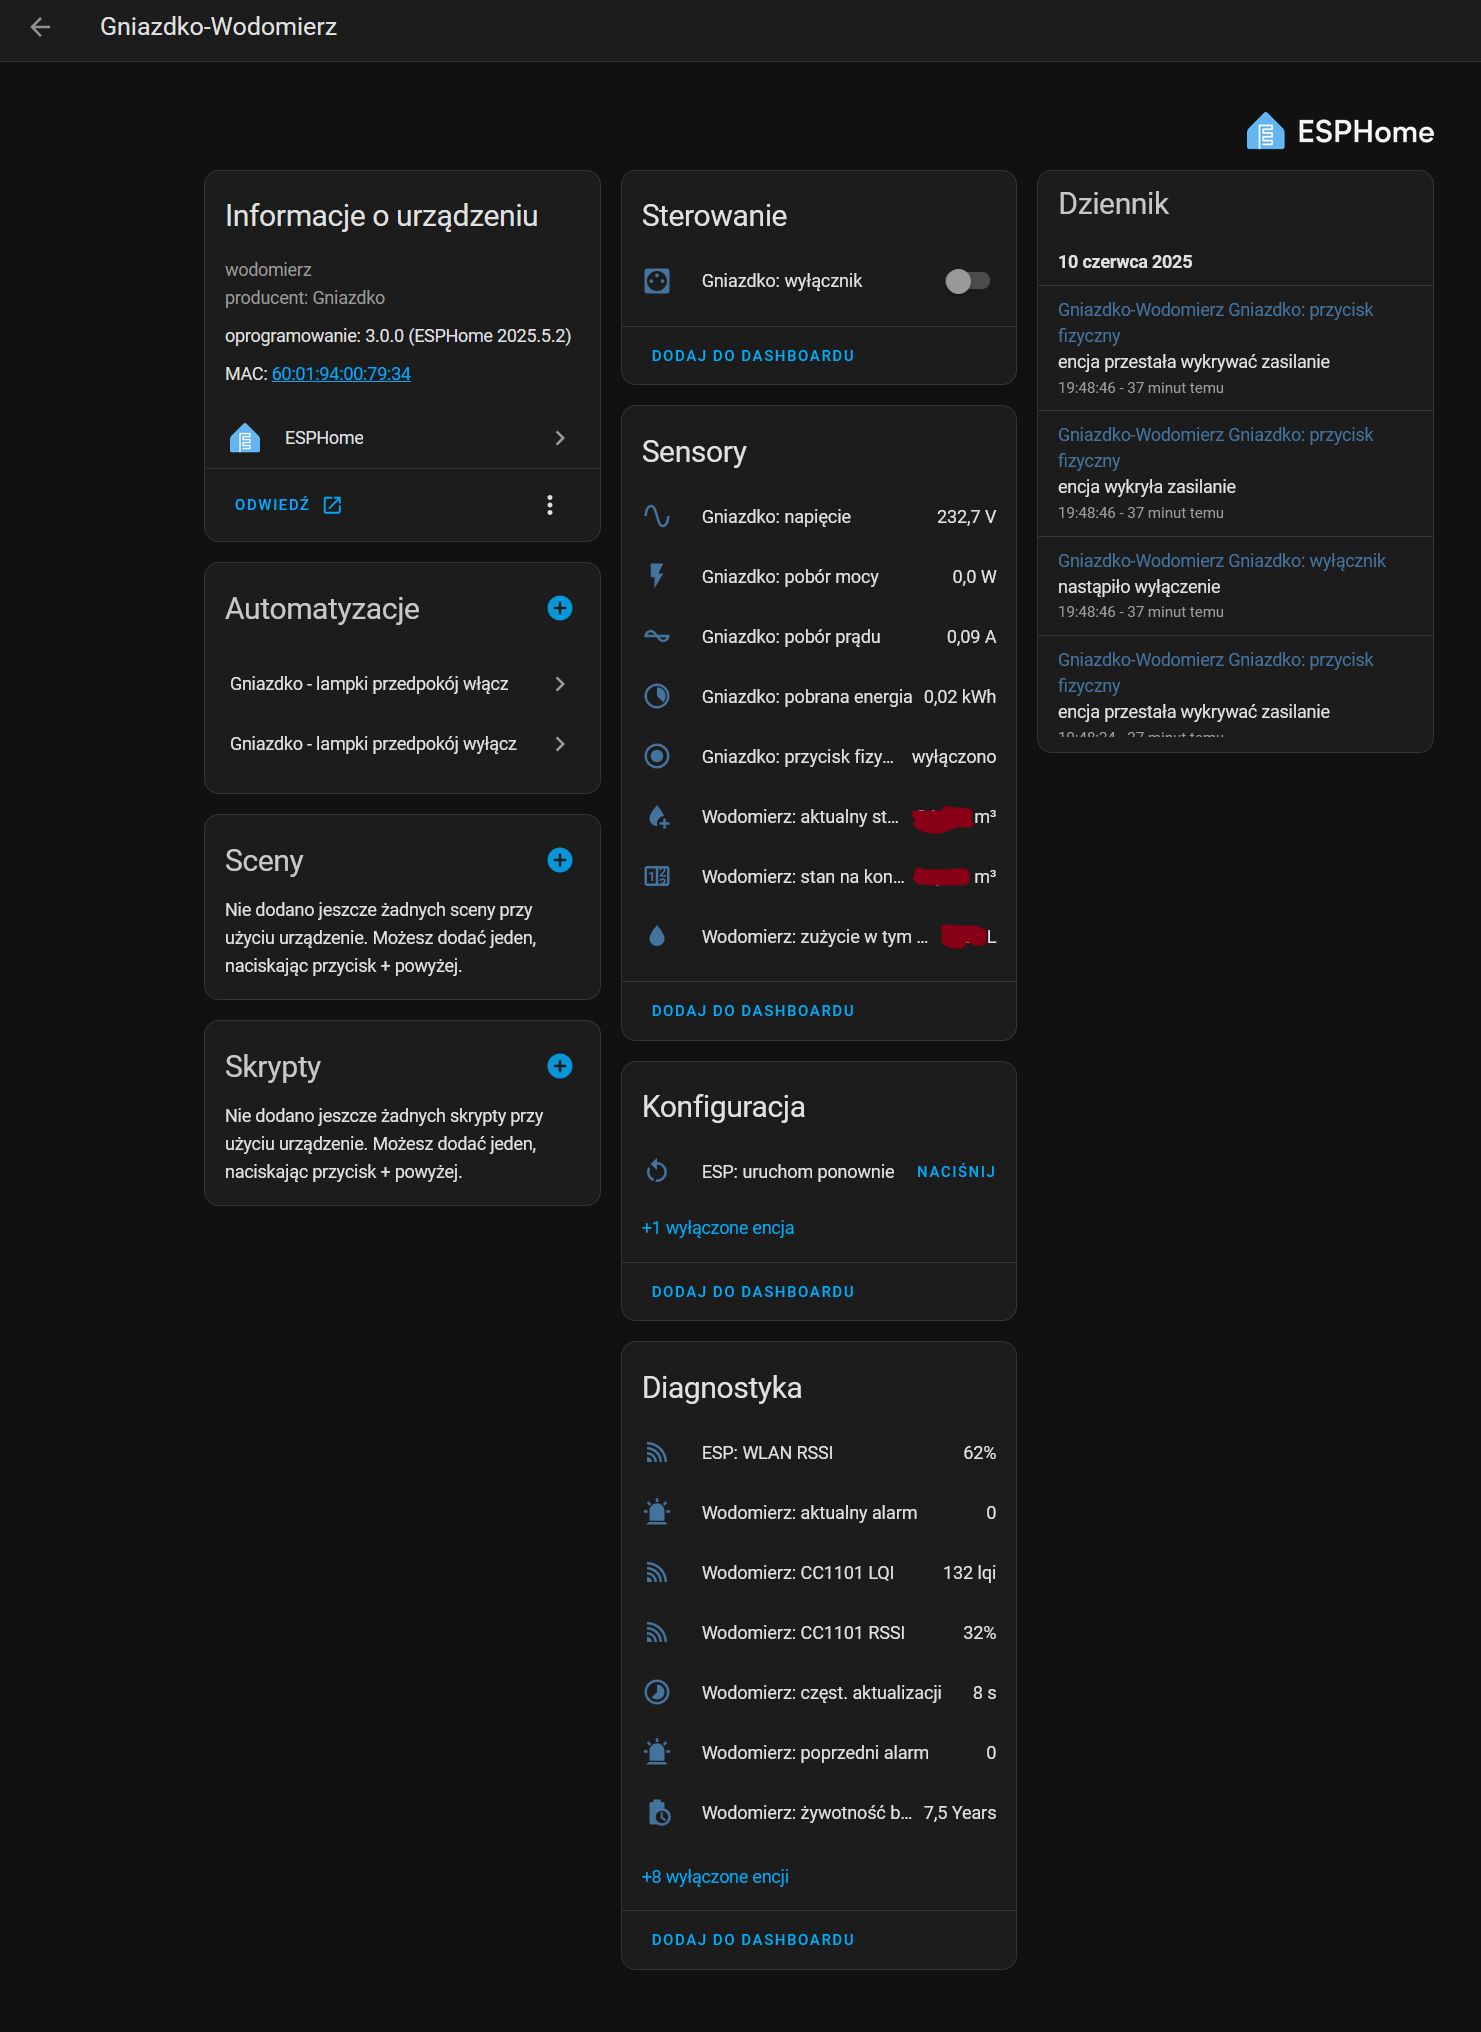
ESPHome integrates seamlessly over its own protocol with Home Assistant, so when I added such a creation I had the relevant entities straight away:
 .
.
The page itself which ESPHome provides, on the other hand, looks like this:
 .
.
The socket has now been alive for about three weeks. So far it has only been glued together with tape. Everything seems to be working properly. The only thing I have done in the meantime is to make small adjustments to the programme. The only drawback so far is the weak signal at the point of use, which means that not every counter telegram is received.

@GUTEK@ wrote 1561 posts with
rating 367 , helped 163 times.
Live in city Gliwice.
Been with us since 2005 year.
Comments
Very interesting, being able to observe consumption is an opportunity to introduce savings when you can see that changing habits generates less consumption. On the one hand, it is bad that the messages... [Read more]
It wouldn't necessarily be impossible, for example Tauron encrypts wMBus communications however through their e-counter service you can obtain the key. They have it described at: https://www.tauron-dystrybucja.pl/liczniki-zdalnego-odczytu/usluga-han Only... [Read more]
Thanks. It's amazing how much information is carried in the ISM bands. I used to get outdoor temperature information like this from a neighbour: TX205D-TH. . [Read more]
Four years ago I described reading water meters using Rpi Link . Maybe someone will find it useful. [Read more]
. Here I have described how this can be done on the RPi: https://www.elektroda.pl/rtvforum/topic4035473.html [Read more]
In the linked topic I don't see a word about using the Raspberry Pi to receive counter telegrams, only about sniffing via HTTP just such a solution on ESPHome as I did myself. It is me personally who... [Read more]
Hello, I have this question. You write that the serial number that gives the water meter, in your case, does not match what is on the sticker. I think I have a similar problem. Admittedly I have a TECHEM... [Read more]
As I wrote, I found my counter using a DVB-T2 tuner on Realtek. You can also use the CC1101 just by changing the configuration in the program code to receive any counter: wmbus: # log_unknown (Optional):... [Read more]