.
Today we will make a simple weather display based on the ESP32. The weather will be retrieved from the internet by using one of the many free weather API type services. The project will not use any DHT11 or BMP280 type sensors, all information will be retrieved from the web via a simple HTTP request. We will also learn here how to use the API keys of the example service and process the response in JSON format.
This topic continues the series on the ESP32-2432S028R:
ESP32 and touchscreen display - tutorial - part 1 - how to program? Basics .
ESP32 and touch display - part 2 - how to draw pixels, lines, shapes, performance issues
ESP32 and touch display - tutorial part 3 - interactions, games and fun .
I have not yet decided to introduce LVGL here, LVGL will appear in the next part.
First we need to decide which of the services available for free we will use. There should be no problem here. Many of these services have some more or less restrictive limits imposed. First of all, the creation of an account is required, which only then gives us access to the so-called "API key". API here is the "application programming interface", i.e. what the application offers to us (what is externally accessible, the interface).
Additionally, even after registration there will probably be some limits, like the maximum number of API requests allowed per e.g. one hour of time, but this is not a problem for us - we are not creating a commercial product, just a small demo for our own use.
So, we look for a 'weather API' on the web and browse the offers....
One that caught my eye:
https://openweathermap.org
Their offer is really rich, and there is of course also a paid API:
https://openweathermap.org/api
but we are interested in the free one. Specifically, I chose the 'CurrentWeather' API, described here:
https://openweathermap.org/current
See the documentation for the expected query format:
https://api.openweathermap.org/data/2.5/weather?lat={lat}&lon={lon}&appid={API key}
.
as well as an example response:
.
So, all we need to do is provide the latitude and longitude (along with our API key) and we already know what the weather is. This can also be plugged into a GPS, but in this theme it will implement the query "rigidly" and display the result.
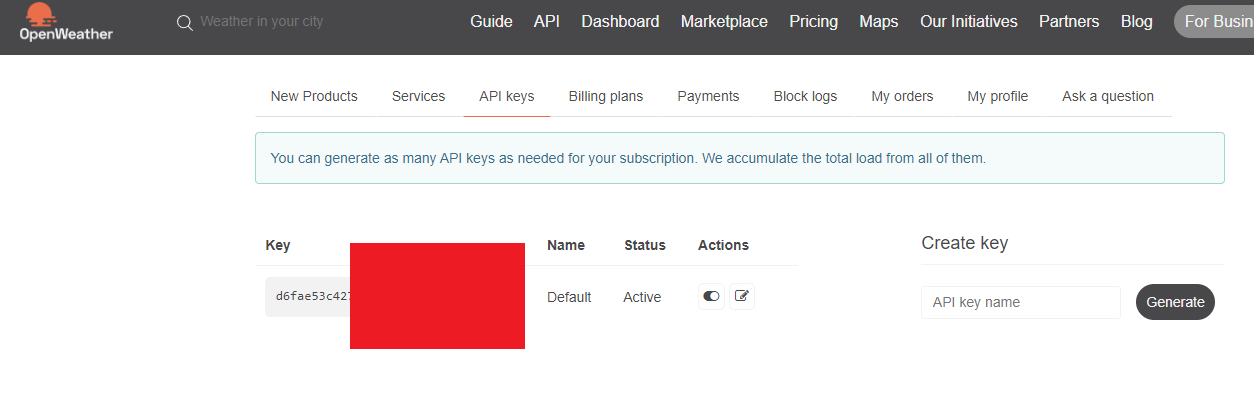
Step 2 - Registration .
So we create an account on openweathermap and according to the instructions on this page we get the API key:
.
Our key will be visible in the API Keys, after a while it should have a status of "Active", but this is deceptive - more on that in a moment.

.
Now that we have the key, it's time to send the HTTP GET.... We already know the format of the arguments and responses from the documentation
Step 3 - Sending HTTP GET .
Examples of sending GET on the web abound. At PlatformIO we have libraries ready for this. It is only up to us to assemble the request URL from our key and the desired location. Sprintf will suffice for this, or perhaps better snprintf (sprintf additionally accepting the size of the target buffer):
.
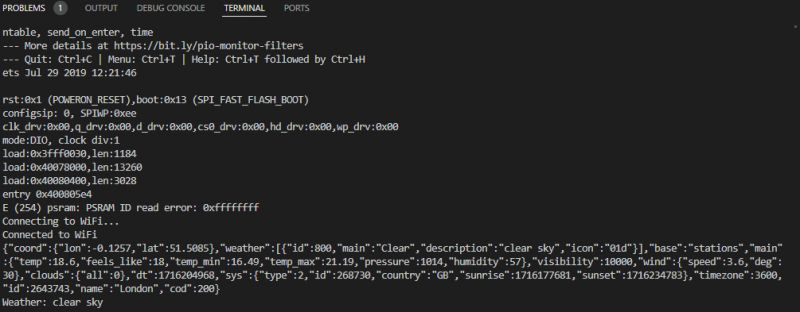
The code above just connects to WiFi and sends an HTTP request with our data. Our key is included. Will it work? What do we get?
Connecting to WiFi...
Connected to WiFi
{"cod":401, "message": "Invalid API key. Please see https://openweathermap.org/faq#error401 for more info."}
.
Surprise, it doesn't work .
Now the question is, what is wrong? This is where familiarity helps.
It is in vain that we are looking for an error in the code.
It is simply that the API key, although marked as active, needs some time to "propagate" to the service provider's servers/CDN, so we just have to wait. When I did this type of project for the first time, I was heavily surprised to find the bug in-house and then find out that it was worth the wait.
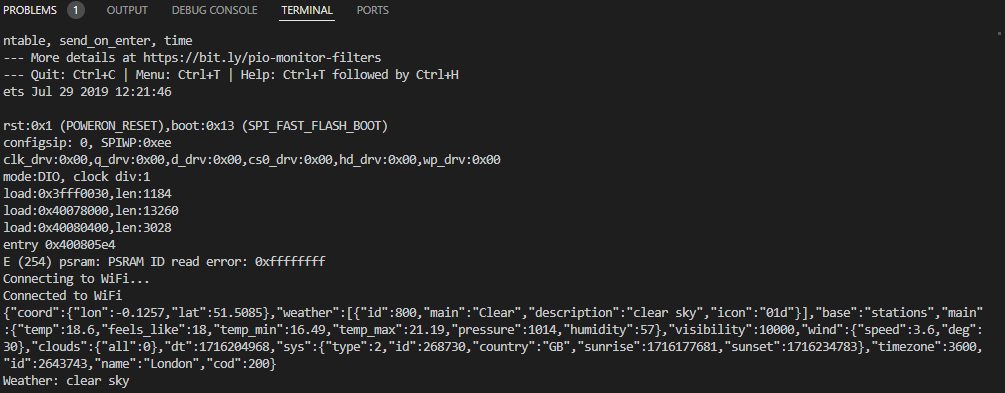
Only after some time will the JSON download correctly for us:
.
Success!
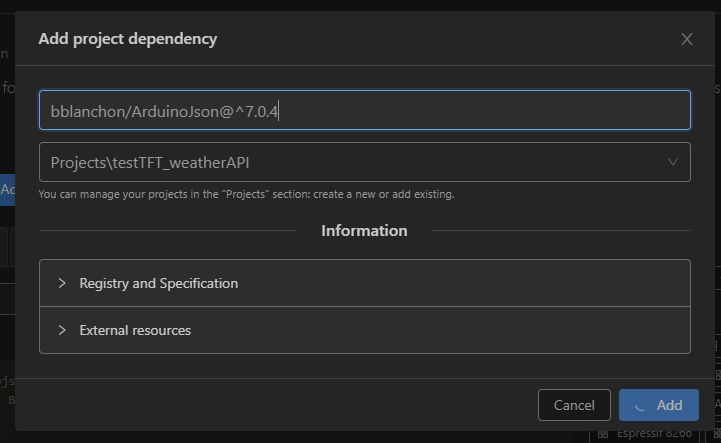
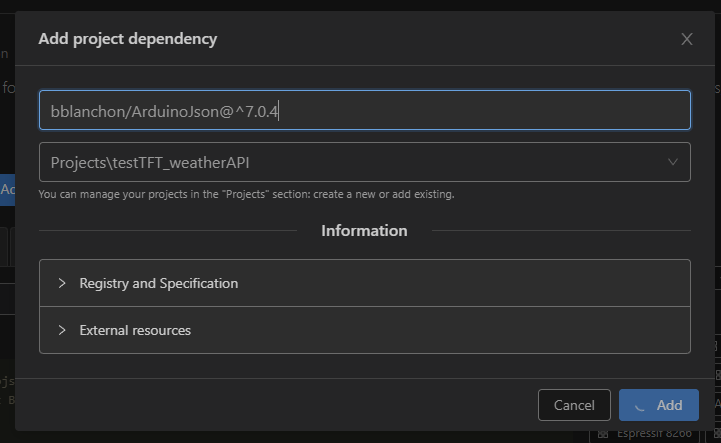
Step 4 - Arduino JSON .
Now we need to parse this text in JSON format somehow. After all, we're not going to manually write a parser that respects brackets, commas and nested objects. We have a ready-made library for this - the ArduinoJSON library, downloadable via PlatformIO:

.

.
.
I leave the installation itself without much comment, I have shown it in detail several times.
Now we need to convert our received text (String) into a JSON representation that is convenient to process.
We use the DynamicJsonDocument class, a class that uses heap memory, but we'll skip the details of how it works. The main thing is that it allows us to dynamically match any object and field of the received JSON text, such as "message":
.
Step 5 - Transfer the data to the screen .
Now all we need to do is skilfully retrieve the data from the objects loaded from the JSON.
Let's consider an example response:
.
How do we get to the 'description' from 'weather'?
First we need to get to the 'weather' array, then to the first element from that array, and then to its 'description' field. In code, it looks like this:
.
Analogously for the temperature and humidity fields, for example:
.
It remains to display them on the screen - but rather we already know
tft.printf ?
I don't think there's much to discuss, here's the complete demo:
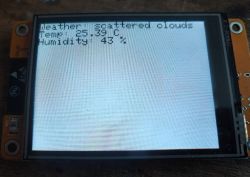
Still let's take a look at some JSON not from the documentation examples, but downloaded by me at the time of writing the code. Here is an excerpt from the console log:
{"coord":{"lon":21.0118,"lat":52.2298},"weather":[{"id":802,"main":"Clouds","description":"scattered clouds","icon":"03d"}],"base":"stations","main":{"temp":25.39,"feels_like":25.11,"temp_min":22.44,"temp_max":27.19,"pressure":1010,"humidity":43},"visibility":10000,"wind":{"speed":3.09,"deg":230},"clouds":{"all":40},"dt":1716205773,"sys":{"type":2,"id":2032856,"country":"PL","sunrise":1716172416,"sunset":1716229901},"timezone":7200,"id":756135,"name":"Warsaw","cod":200}
Weather: scattered clouds
.

.
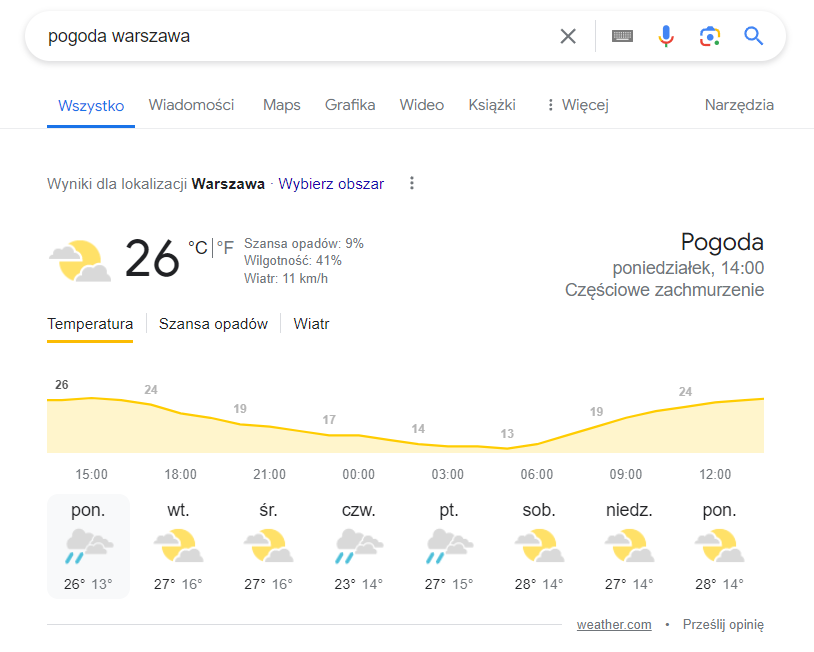
And let's compare with the result from Google:

.
It more or less agrees. The system works!
Summary .
This is how we can download current weather information from the Internet. We can also retrieve various other information in a similar way, as long as we find the right API. Of course, the rules of the API to be used must be respected - we must not exceed the limits imposed on us. In our program, you have to follow this too - as if we were to continue with this project, the delay in the loop would have to be increased. Details are in the API documentation.
For more serious applications, a paid API should be purchased - if only calculated on the number of requests. Then you pay as much as you use. This will certainly be useful for larger and commercial applications.
Similar APIs are also offered by e.g. maps - e.g. downloading information about the map at a given coordinate point (what city, street, etc.).
I invite you to continue the project , you have the code base from me, maybe to modify the display to show the weather as graphics? An icon of clouds, sunshine? Maybe an animation of a thermometer? What do you think?
I invite you to comment, has anyone created this type of reproducible "weather station"? .
PS: I guess the biggest pitfall with projects like this is that there is sometimes a bit of a wait to activate the API key, and it's worth being patient rather than looking for a non-existent bug in the code....


Comments
. I don't want to look in the documentation... ;) Do I understand correctly that we can use our key to check the weather anywhere in the world (given the relevant geographical data)? [Read more]
Yes, you can check any location. The key is not assigned to a location and your location is not checked in any way at the registration stage. The only thing that limits you is the query limit, which... [Read more]
Due to a lot of interest, I decided to make up an additional presentation - using the OpenWeatherMap API on pure sockets and JSON parsing without external libraries . I invite interested parties to... [Read more]