FAQ
TL;DR: Build a beginner FM radio fast: choose ≥4Ω speakers rated above 385 mW; “The LM386 is an integrated audio amplifier.” Start with the shared schematic or an Arduino + RDA5807M project and expand as needed. [Elektroda, gumisie, post #17197381]
Why it matters: This helps first‑time builders choose compatible parts, avoid damage, and plan an upgrade path.
Quick Facts
- LM386 output power: 385 mW (size your speaker and expectations accordingly). [Elektroda, Slawek K., post #17197351]
- Minimum speaker impedance for LM386 builds: 4Ω (lower is not allowed). [Elektroda, gumisie, post #17197381]
- TDA2003 stage: approx. 4 W @ 4Ω or 8 W @ 2Ω for more headroom. [Elektroda, aksakal, post #17197559]
- Arduino + RDA5807M project includes schematics, code, and BOM for beginners. [“EP 11353: Arduino + RDA5807M FM Radio”]
- Only custom part in the analog schematic is the L1 coil, with parameters noted. [Elektroda, aksakal, post #17197242]
Where should a beginner start before building an FM radio?
Begin with the primer thread recommended early in this discussion. It covers fundamentals and parts choices. Read it to reduce guesswork and wiring mistakes. Then select either the analog schematic here or the Arduino route. This will save time and parts. [Elektroda, wojtek 9007, post #17196843]
Where is the simple analog FM radio schematic from this thread?
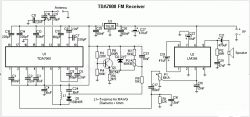
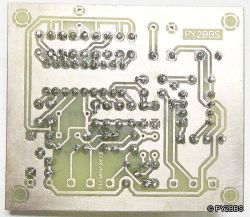
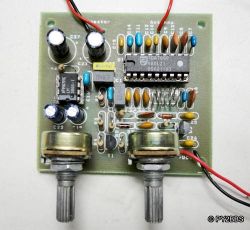
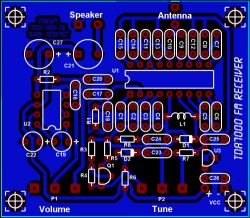
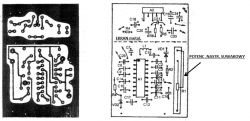
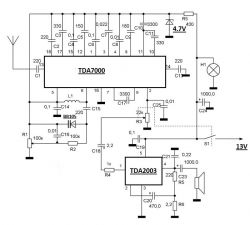
See the schematic and build photos posted in the thread. They outline the tuner, audio stage, and layout. Follow component values exactly. You can replicate it on a universal prototyping board. Save the images locally for reference while wiring. [Elektroda, aksakal, post #17197151]
Is anything custom to make in that analog design?
Yes. Only the L1 coil is custom, and its parameters are on the schematic. All other parts are standard. The shared diagram and photos provide everything required. That makes the project accessible to beginners. [Elektroda, aksakal, post #17197242]
What’s the LM386 output power in this context?
Expect 385 mW from the LM386 here. Use this to size your loudspeaker and power supply. It sets a realistic loudness target. If you need more, upgrade the amplifier stage. [Elektroda, Slawek K., post #17197351]
What speaker should I pair with an LM386?
Choose a speaker with impedance not lower than 4Ω. Pick a power rating above 385 mW to avoid overdrive. “The LM386 is an integrated audio amplifier.” This pairing keeps the build simple and reliable. [Elektroda, gumisie, post #17197381]
Do I still need an extra amplifier when using LM386?
No. LM386 already provides power amplification. Feed it from your radio detector or tuner line out. Observe the minimum 4Ω load. If volume is insufficient, move to a higher‑power amplifier stage. [Elektroda, gumisie, post #17197381]
How can I reach around 4–8 W output?
Use a TDA2003 amplifier stage. You’ll get about 4 W into 4Ω, or around 8 W into 2Ω. Follow the posted schematic variant for wiring. Ensure adequate power supply and heatsinking. [Elektroda, aksakal, post #17197559]
Can I use a 2Ω speaker with these projects?
Yes, with TDA2003 you can use 2Ω and get roughly 8 W. Do not use 2Ω on LM386 builds. Match speaker impedance to the amplifier’s schematic note. [Elektroda, aksakal, post #17197559]
What speaker resistance does the posted analog diagram require?
Use a loudspeaker of at least 4Ω. “As the loudspeaker resistance increases, the output power of the amplifier decreases.” Choose a speaker power rating the amp can safely deliver. This balances volume and reliability. [Elektroda, aksakal, post #17197294]
How do I build a digital FM radio with Arduino and RDA5807M?
Follow the EP project that pairs Arduino with an RDA5807M tuner. It provides a complete schematic, BOM, and ready code. The design supports an LCD and buttons for tuning. It’s well‑suited to beginners and allows future expansion. [“EP 11353: Arduino + RDA5807M FM Radio”]
How do I wire the Arduino Pro Mini to the RDA5807M tuner?
- Connect RDA5807M SDA/SCL to Arduino I2C pins, plus 5 V and GND per the schematic.
- Wire the tuner’s audio outputs to your amplifier input; add LCD and buttons as shown.
- Upload the provided sketch and verify scanning, RDS (if used), and audio. [“EP 11353: Arduino + RDA5807M FM Radio”]
Is there a ready-made keypad/LCD board to speed up the build?
Yes. You can buy the AVT1615 keypad/LCD kit instead of wiring your own. It suits the Arduino RDA5807M project described. This reduces wiring time and common errors. [Elektroda, zster, post #17197674]
Which off-the-shelf modules did the author consider?
Listed modules included: Arduino Pro Mini 16 MHz/5 V, RDA5807M FM tuner module, XH‑M189 2×50 W power amplifier, and LCD 1602. Use these as a modular starting point. Integrate them stepwise and test each stage. [Elektroda, KamazWSA, post #17203921]
Can I build on universal prototyping boards instead of etched PCBs?
Yes. The author planned to assemble on universal boards before learning etching. This approach supports incremental learning and quick changes. Keep wiring short in RF sections to preserve performance. [Elektroda, KamazWSA, post #17196823]
I want about 25 W per channel—what’s the easiest path?
Use a ready‑made class‑D power amplifier module. The thread points to an XH‑M189 2×50 W board that fits after the tuner. Confirm supply voltage and speaker impedance against the module’s documentation. [Elektroda, KamazWSA, post #17203921]
Is there another easy FM radio design recommended here?
Yes. An EP project PDF was praised for simplicity and strong parameters. Review it for a clear schematic and code before building. It’s a good first digital FM project. [Elektroda, volt1, post #17197616]
Is there an even simpler kit option?
Yes. Another user suggested the AVT5540 project as an even easier route. Consider it if you want a minimal build path. [Elektroda, bastek777, post #17198538]


