I. Introduction
Since Microsoft, in subsequent versions of the system, introduced user accounts, the problem that manifested itself in the message began "Access denied" . It turns out that the user does not always have access to a directory (or file) created during the installation of the program.
The problem intensified with the arrival of Windows Vista, which was the first time it was introduced User Account Control . If the user worked under a "normal" account, when installing the program, he had to enter the password for an account with administrator privileges. Later, from his account, he could not modify the files because his account did not have the appropriate permissions, but they can be easily assigned, which I will try to describe.
attention : The description below is applicable to Windows 2000 / XP (PRO version only) / Vista using NTFS file system.
II. Empowerment
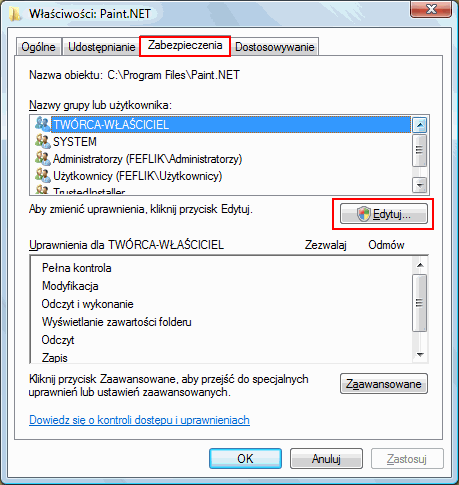
1. In order to assign appropriate permissions to a directory, click on this directory with the right mouse button and select Properties and select a bookmark Security . Then click on the button Edit .
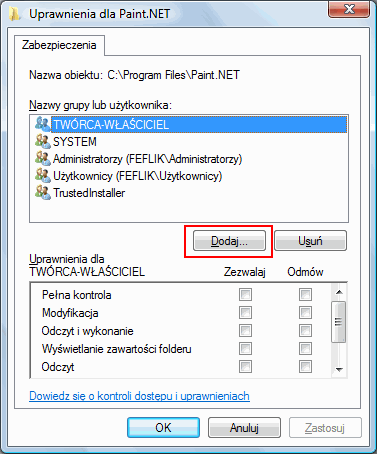
2. In the opened window, select the button Add .
3. In the next window Selecting: Users or Groups we can do two ways. If we know which user we want to assign permissions, we can do it by entering his name in the field Enter the names of the objects to select . Each such name should consist of a computer name and a user name, for example: Komputerek \ Jaś .
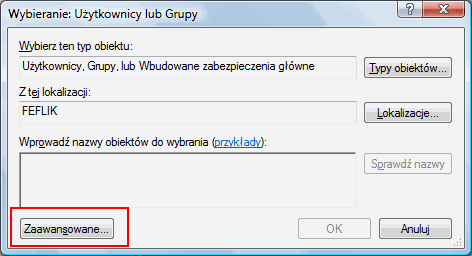
The second way is to select a button Advanced . Another window will open in which we will be able to search for all accounts in the system. Select the button Find it now .
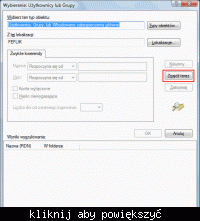
4. In the field Search Results we find a group Authenticated Users . At this point it should be explained why this particular group. Well Authenticated Users are all users who have successfully completed the login process and the system recognized the user.
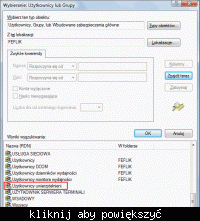
If, in the future, we create another user, it will not be required to add permissions, because the system, after correctly logging in, will automatically grant the appropriate permissions.
5. After selecting the user or group, click on Apply . In the previous window (from point 2 ) a group will be added Authenticated Users . Click on it and in the field Permissions for Authenticated Users mark the box Allow next to option Full control .
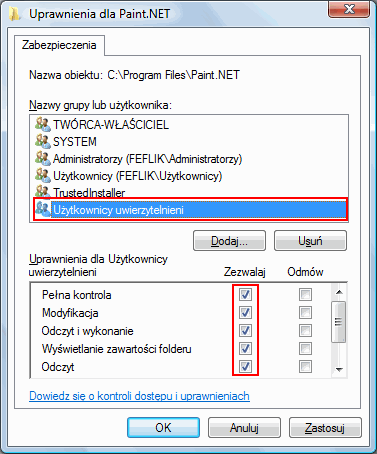
6. The permission granting operation is complete. Click the button in all windows Apply and Approx . If there are a lot of files in the directory, the permission process may take some time.
III. Taking ownership of the directory
In some cases, simply granting permission may not be enough. In this case, you must take ownership of the directory, that is, change the directory owner.
1. To do this, follow the step 1 from the previous chapter, but instead of a button Edit button should be selected Advanced
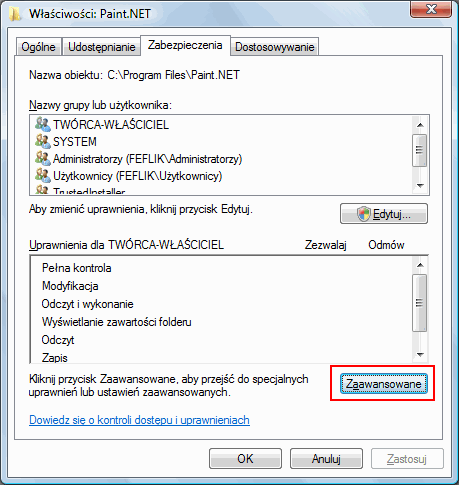
2. Then, in the window Advanced security settings go to the tab Owner and then select the [/ b] Edit [/ b] button.
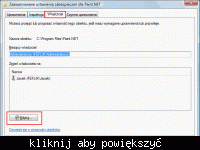
3. If our account is not on the list, select the button Other users and groups .
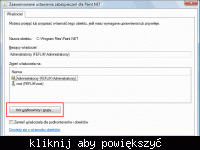
4. A window will appear Selecting: Users or Groups known from the point 3 previous chapter. Follow the same procedure as in the chapter II except that instead of a group Authenticated Users we choose the name of our account, for example Komputerek \ Jaś
IV. Granting permissions from the command line
In Windows Vista, as in XP, you can grant permissions from the command line ( command line ). The command is used for this icacls .
With this command we can keep the current ACL settings ( Access Control List ), as well as you can restore a copy of the settings in case "something" goes wrong.
Thanks to the recommendation icacls we have more control over permissions, but we also have a better chance of breaking something, so before "playing" it is a good idea to make a backup or "play" on some test directory.
V. Additional information
1. Access Control List
2. Description of file sharing and permissions in Windows XP
3. Icacls
-
Pierdoła from Gądki as always, he checked the correctness of the text, for which he is to be thanked.
Since Microsoft, in subsequent versions of the system, introduced user accounts, the problem that manifested itself in the message began "Access denied" . It turns out that the user does not always have access to a directory (or file) created during the installation of the program.
The problem intensified with the arrival of Windows Vista, which was the first time it was introduced User Account Control . If the user worked under a "normal" account, when installing the program, he had to enter the password for an account with administrator privileges. Later, from his account, he could not modify the files because his account did not have the appropriate permissions, but they can be easily assigned, which I will try to describe.
attention : The description below is applicable to Windows 2000 / XP (PRO version only) / Vista using NTFS file system.
II. Empowerment
1. In order to assign appropriate permissions to a directory, click on this directory with the right mouse button and select Properties and select a bookmark Security . Then click on the button Edit .

2. In the opened window, select the button Add .

3. In the next window Selecting: Users or Groups we can do two ways. If we know which user we want to assign permissions, we can do it by entering his name in the field Enter the names of the objects to select . Each such name should consist of a computer name and a user name, for example: Komputerek \ Jaś .

The second way is to select a button Advanced . Another window will open in which we will be able to search for all accounts in the system. Select the button Find it now .

4. In the field Search Results we find a group Authenticated Users . At this point it should be explained why this particular group. Well Authenticated Users are all users who have successfully completed the login process and the system recognized the user.

If, in the future, we create another user, it will not be required to add permissions, because the system, after correctly logging in, will automatically grant the appropriate permissions.
5. After selecting the user or group, click on Apply . In the previous window (from point 2 ) a group will be added Authenticated Users . Click on it and in the field Permissions for Authenticated Users mark the box Allow next to option Full control .

6. The permission granting operation is complete. Click the button in all windows Apply and Approx . If there are a lot of files in the directory, the permission process may take some time.
III. Taking ownership of the directory
In some cases, simply granting permission may not be enough. In this case, you must take ownership of the directory, that is, change the directory owner.
1. To do this, follow the step 1 from the previous chapter, but instead of a button Edit button should be selected Advanced

2. Then, in the window Advanced security settings go to the tab Owner and then select the [/ b] Edit [/ b] button.

3. If our account is not on the list, select the button Other users and groups .

4. A window will appear Selecting: Users or Groups known from the point 3 previous chapter. Follow the same procedure as in the chapter II except that instead of a group Authenticated Users we choose the name of our account, for example Komputerek \ Jaś
IV. Granting permissions from the command line
In Windows Vista, as in XP, you can grant permissions from the command line ( command line ). The command is used for this icacls .
With this command we can keep the current ACL settings ( Access Control List ), as well as you can restore a copy of the settings in case "something" goes wrong.
Thanks to the recommendation icacls we have more control over permissions, but we also have a better chance of breaking something, so before "playing" it is a good idea to make a backup or "play" on some test directory.
V. Additional information
1. Access Control List
2. Description of file sharing and permissions in Windows XP
3. Icacls
-
Pierdoła from Gądki as always, he checked the correctness of the text, for which he is to be thanked.


