logo elektroda
logo elektroda
X
logo elektroda

[Solved] LG F2J6TY1W - Drain from the washing machine to the drain of the bathtub

Scorpion_1982 16053 23
ADVERTISEMENT
Treść została przetłumaczona polish » english Zobacz oryginalną wersję tematu
  • #1 17534722
    Scorpion_1982
    Level 13  
    Hello and welcome.
    I bought a new washing machine, now I'm finally motivated and I have to drain the washing machine, previously, unfortunately, I had to put the hose in the bathtub - and a bottle filled with water would not jump out at the hose. Unfortunately, it was not possible to take a bath during washing as well as always having to clean the bathtub before washing after washing.

    To the point:
    The washing machine is next to the bathtub on the other side of the drain, the bathroom is tiled, the entire bathtub is too. By the bathtub I have a shelf made to a height of 70 cm, i.e. I would make the hole at a height of, say, 65 cm from the floor, my washing machine is supposedly 60 cm, it's about the LG F2J6TY1W model.

    However, here I have questions whether to use a 50mm to 32mm elbow - that is, the entrance would be centrally under the washing machine siphon. Or possibly a 50 by 50mm elbow and rubber as standard and only a siphon.

    At the moment I have a 50 by 32mm elbow and a 50mm pipe, a pair of elbows.
    Which solution will be the best??
    I want to break through this shelf, then the pipe down until I can run the pipe down to the bathtub drain between the bathtub and the tile wall.
    At the bathtub drain, I have revisions, i.e. a plate removed to be able to get to the pipes and drain..
    Or maybe do everything with a 32mm pipe - I'm afraid that it won't be enough in a few years and, for example, it will grow and there will be a problem with the drain.

    Another thing, how do you connect to it??
    The apartment is in a block of flats, so the pipes are probably going on the floor under the bathtub..

    Gentlemen, advise how to do it so that it would be good and most importantly, how to connect to the bathtub drain so that, for example, I do not know, it does not knock out the water ??

    Thank you very much for your help.
    I can add photos if necessary because the washing machine will be standing close to the bathtub, i.e. about 30 cm, maybe 40 from the bathtub..
  • ADVERTISEMENT
  • #2 17534743
    Homo_toxicus
    Level 26  
    Scorpion_1982 wrote:
    .....
    Did you know that the "language of engineers" is PICTURE/diagram/project? Give a photo / drawing - ANYTHING so that we can evaluate it objectively ;-) .
  • #3 17534754
    Scorpion_1982
    Level 13  
    I don't have a schematic, because I'm not a professional, but looking at how they do specs, for example in "Usterka" haha, I prefer to do it myself.

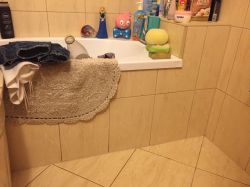
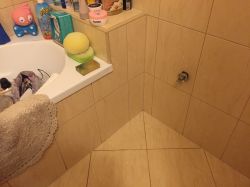
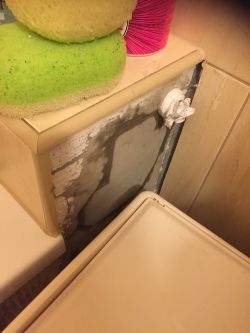
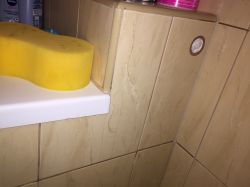
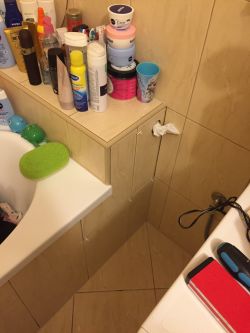
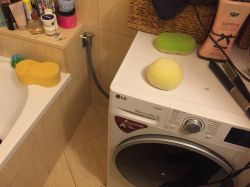
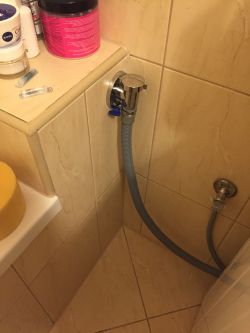
    I'll post a photo - I haven't cleaned things yet, because it's right after disassembling the old washing machine, so there's some trash in the bathtub.

    The drain is on the left side of the tub and the washing machine will be on the right side.
    LG F2J6TY1W - Drain from the washing machine to the drain of the bathtub LG F2J6TY1W - Drain from the washing machine to the drain of the bathtub LG F2J6TY1W - Drain from the washing machine to the drain of the bathtub
    The washing machine has a water valve on the left side, so the distance is short.
    It would be best to do it in the wall, but too much mess..
  • #4 17534758
    zhudomel
    Home appliances specialist
    And is there a sink somewhere?
  • #5 17534760
    Scorpion_1982
    Level 13  
    It's on the other side of the washing machine.
    That is, the washing machine will stand on the right side of the bathtub, on the right wall it faces the sink, but there is a passage in the middle, only the drain in the bathtub remains.
  • ADVERTISEMENT
  • #6 17534787
    Parowy
    Level 22  
    Hi, is this apartment yours or rented?
    If it's yours, you can edit it however you want :)

    I would do it like this:
    In the tub construction, on the right side, there is a hole with a diameter of about 40 mm, from it you can lead the cup of the 32 mm pipe, you can insert the drain from the washing machine into it without any siphons, use only the reducing rubber from 32 to 20 mm.
    You connect the 32 mm pipe under the bathtub with a tee and a reducer to the sewer.
    You can't attach to the bathtub siphon, there is not much anywhere.
    You have to hook up between the siphon and the drain to the sewer.
    You write that you have an inspection plate under the bathtub, remove it and take a picture of the siphon, also describe how the bathtub construction is made (drywall, hollow bricks, bricks, concrete ;) ?).
  • ADVERTISEMENT
  • #7 17534796
    Scorpion_1982
    Level 13  
    Dude, the apartment is mine.
    It's just that I won't buy the same tiles again, and at the moment I don't plan to replace them all.
    That's why I'll only remove the two upper ones by the shelf on the right side and calmly then I will be able to gently chisel or drill for pipes, if they burst, I have a laundry basket in that place anyway, so it won't be very conspicuous that there are two slightly different tiles.

    So you propose to make the entire connection with a 32 mm pipe, not 50 mm?
    50 should somehow be stuffed with some bleed preserved, only that how the damn thing to fasten so that it does not unsealed by accident.

    When I get home from work and download the revision plate, I'll take a picture - I'll send it.
    - The wall is probably made of GK - but I'm not entirely sure, it will turn out how I will dismantle it.

    I have a siphon, it costs pennies and maybe this snake will sit more securely, I have neighbors under my apartment, I would not like to accidentally flood them someday.

    Added after 5 [hours] 39 [minutes]:

    However, some thin foam block, something like ciporex 5 cm thick.
    The connection to the washing machine and the sink looks interesting, a terrible amateur did it.
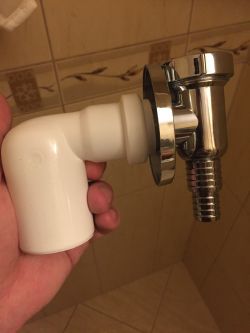
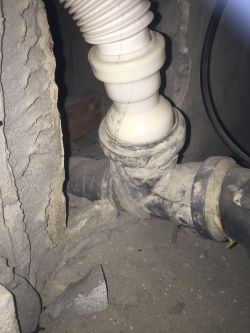
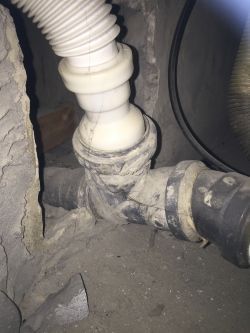
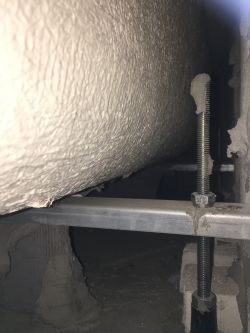
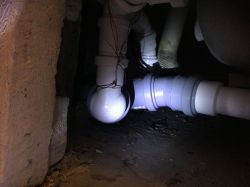
    LG F2J6TY1W - Drain from the washing machine to the drain of the bathtub LG F2J6TY1W - Drain from the washing machine to the drain of the bathtub LG F2J6TY1W - Drain from the washing machine to the drain of the bathtub LG F2J6TY1W - Drain from the washing machine to the drain of the bathtub LG F2J6TY1W - Drain from the washing machine to the drain of the bathtub LG F2J6TY1W - Drain from the washing machine to the drain of the bathtub LG F2J6TY1W - Drain from the washing machine to the drain of the bathtub LG F2J6TY1W - Drain from the washing machine to the drain of the bathtub LG F2J6TY1W - Drain from the washing machine to the drain of the bathtub LG F2J6TY1W - Drain from the washing machine to the drain of the bathtub
  • #8 17535347
    Parowy
    Level 22  
    Scorpion_1982 wrote:
    Dude, the apartment is mine.


    I asked about it because recently a lot of forum users are asking about solving various problems in not their apartments.

    Scorpion_1982 wrote:
    So you propose to make the entire connection with a 32mm pipe and not 50mm?


    Yes, a 32 mm diameter tube will be enough.

    Scorpion_1982 wrote:
    I have a siphon, it costs pennies and maybe this snake will sit more securely,


    I am against these siphons, unnecessary expense (maybe small but still) and element.
    The siphon of the drain from the washing machine is created in the drain hose, so no unpleasant odors will come out.
    In the cup of the fi 32 pipe, plus a rubber reducer, the hose sits rigidly, it will not jump out.
    You need to put it on a slippery paste or dishwashing liquid.
    The rubber reducer should almost completely enter the socket of the 32mm tube, the drain hose from the washing machine should enter about 20-25 mm.

    Scorpion_1982 wrote:
    The connection to the washing machine and the sink looks interesting, a terrible amateur did it


    Honestly, other than the flexible sink drain, I don't see an amateur there.

    LG F2J6TY1W - Drain from the washing machine to the drain of the bathtub

    At this point, an additional tee should be connected to the washing machine drain.

    Scorpion_1982 wrote:
    That's why I'll only take off the top two at the shelf to the right of i


    There, the shelf is probably all filled with aerated concrete, I would aim more at the vertical plate on the side of the bathtub, on the right side, cut in the shape of an inverted letter L, there is probably still a lot of space behind the buildings.
  • #9 17535470
    Scorpion_1982
    Level 13  
    This flexible hose is a washbasin drain, I had a similar drain and a pseudo siphon, I flooded the entire cabinet because it cracked or maybe a mole ate it.
    Anyway, such an invention under the bathtub and a silicone tile - I'm sure that even if it was full of water, I wouldn't know anything about it and the neighbor would be swimming under it.

    I have to buy a few 32-section elements because I took a stupid 50mm one.

    There is a tee that goes into 50mm and has the ability to plug in two 32 because I think I have something like that from the sink, unless there is something between 32 and 50 mm ??
  • #10 17536142
    zhudomel
    Home appliances specialist
    If you have 50's, put them on. I think it's enough to move the tiles on the floor in the corner. If this half is not enough, then the whole left; it will be easier to hide them.
  • #11 17536446
    Parowy
    Level 22  
    Scorpion_1982 wrote:
    There is a tee that goes in 50mm...


    E.g.
    http://www.sanibud.pl/pl/o/czwornik-o50/50/50-1-8-45o

    Maybe there is a manufacturer that makes a 32/50/32 crossover, but it is not necessary, fi 50 in the wheel and a 50/32 plastic reduction is enough.
    You would have to think about how much space you have there and what elements should be used to connect the three drains (bathtub, sink, washing machine).

    zhudomel wrote:
    If you have 50's, put them on.


    You can do it too, fi 32 is enough for the washing machine drain, but it doesn't mean that fi 50 will be too big, you can also use it.
    However, in this particular case, when it will be necessary to stuff the tubes in a tight space, I would recommend fi 32, they are easier to bend slightly and they simply take up less space.

    Scorpion_1982 wrote:
    unless there is something between 32 and 50mm??


    There is also fi 40 mm.

    zhudomel wrote:
    I think it's enough to move the tiles on the floor in the corner.


    If we make a hole in the very corner, there may not be room to maneuver the pipe there.


    Where is the revision plate?
    Can you take a photo?

    P.S
    You can do a test drill :) i.e. in the tile I wrote about earlier, drill a fi 6 mm hole, if it goes through (not into the bathtub) after about 8 cm, it means that there is space for inserting the tube.
    If you are interested, write, I will show you where to drill.
  • #12 17536455
    Homo_toxicus
    Level 26  
    The only way out is to "drill under the bathtub" on the right side of the bathtub. If you have someone "familiar" with the tiles and suporex, with an elegant mask, they will do it for "five with a PLUS" !!!. And under the bathtub you can attach yourself to the installation (with due diligence) so that "the fly does not sit down".

    PS Such "drilling" under the bathtub, so as not to damage the tiles, may take "long time" - that is, slowly and carefully. YOU CAN DO IT WITHOUT NO DAMAGES BUT YOU NEED PATIENCE!!!.
    You can also do it yourself, but if you are not skilled, then avoid powerful tools.

    PS2 - The washing machine can only be placed on the right side of the bathtub? - I'm good? ;-)
  • #13 17536473
    Parowy
    Level 22  
    LG F2J6TY1W - Drain from the washing machine to the drain of the bathtub

    Can you look deeper into the place in this photo?
    It's about how the right side of the bathtub is bricked, this shelf.
  • ADVERTISEMENT
  • #14 17536605
    Homo_toxicus
    Level 26  
    Parowy wrote:
    ...I would do it like this:
    In the tub construction, on the right side, there is a hole with a diameter of about 40 mm, from it you can lead the cup of the 32 mm pipe, you can insert the drain from the washing machine into it without any siphons, use only the reducing rubber from 32 to 20 mm.
    You connect the 32 mm pipe under the bathtub with a tee and a reducer to the sewer.
    You can't attach to the bathtub siphon, there is not much anywhere.
    You have to hook up between the siphon and the drain to the sewer.
    You write that you have an inspection plate under the bathtub, remove it and take a picture of the siphon, also describe how the bathtub construction is made (drywall, hollow bricks, bricks, concrete ;) ?).


    AND THE STINK OF URBAN SEWAGE YOU INHAL UP with every breath

    A siphon or a valve MUST BE!!!
  • #15 17536624
    Anonymous
    Anonymous  
  • #16 17544872
    Scorpion_1982
    Level 13  
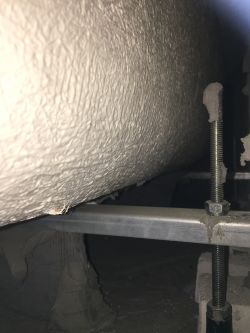
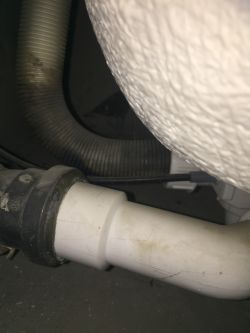
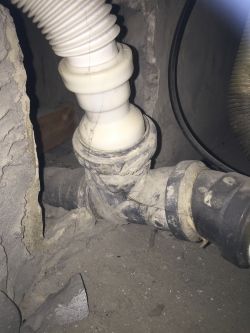
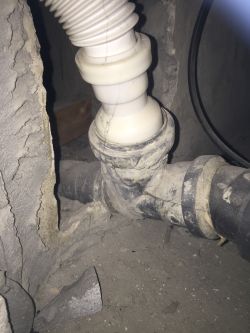
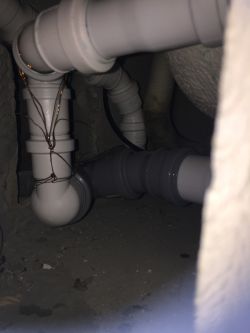
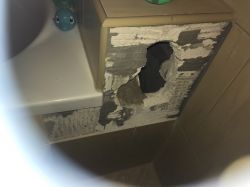
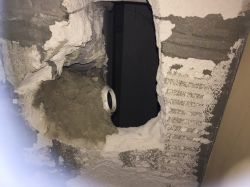
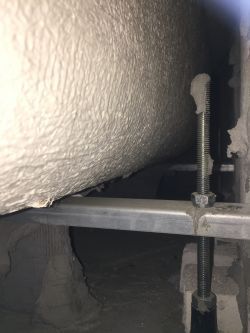
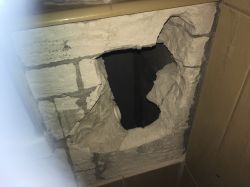
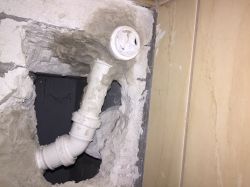
    Gentlemen, two days of lying on the tiles and hammering the wall with a screwdriver and I'm at this stage:

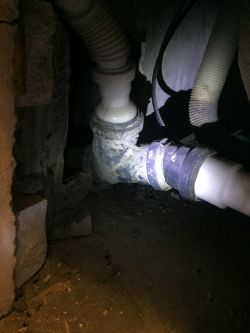
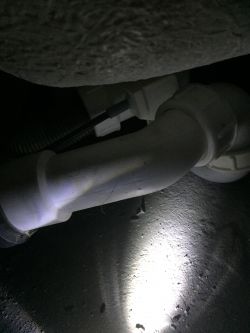
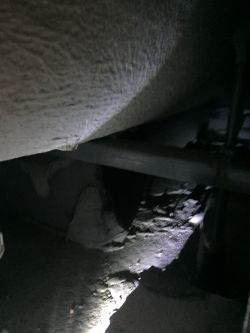
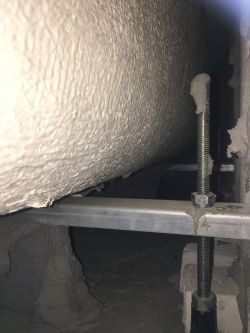
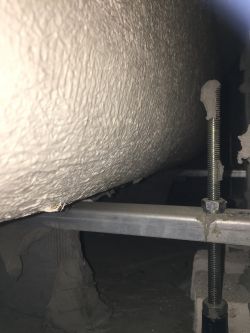
    LG F2J6TY1W - Drain from the washing machine to the drain of the bathtub LG F2J6TY1W - Drain from the washing machine to the drain of the bathtub LG F2J6TY1W - Drain from the washing machine to the drain of the bathtub LG F2J6TY1W - Drain from the washing machine to the drain of the bathtub

    Two tiles couldn't survive they held up like hell.
    I made a drain on a 50/50 tee
    Reductions to 32mm and the drain of the washing machine is not finished yet, also 32mm because I had no chance to push another one there.
    I connected the pipe from three pieces of 50 cm, otherwise I would not have put it under the bathtub for inspection.

    The pipe is plastered on one side, I will now have to somehow lead it above the tile and now three questions.

    1: What to seal this damn hole with. Attaching the tube?
    Two how to protect elbows and connectors from accidental disconnection?? - in some places I used wire, in others tritki.
    Quite some elbows slightly go in and out of each other, I lubricated the seals with dishwashing liquid when assembling.
    3. Should the pipe be supported, e.g. so that it does not bend or unseal? There's not much to put your hands in there and I don't know what to rejuvenate.

    The tightness test of the sink and bathtub is ok, the tightness of the washing machine drain has not yet been checked..

    Thanks alot
  • #17 17545294
    Parowy
    Level 22  
    Wow, good job, that looks nice :)

    (Now I saw where you are from, give my regards to Krościenko on Dunajcem :D )

    Scorpion_1982 wrote:
    ... lead above the plate ...


    I don't really get it, the cup itself in which you will plug the washing machine drain do you want to put over the tiles?
    Personally, I would come out of this tube with an elbow of about 45 degrees, towards the right corner, slightly raised up. Although it also depends on how much space you have for the washing machine.
    You could also pierce the aerated concrete to the very right corner, add a short piece of pipe and then a 90 degree or 67.5 elbow. So that the back of the washing machine does not take up space for the drain, more than is needed.


    Scorpion_1982 wrote:
    1: What to seal this damn hole with. Attaching the tube?


    Gypsum, tile adhesive, drywall adhesive, including bending :)

    Scorpion_1982 wrote:
    Two how to protect elbows and connectors from accidental disconnection??


    I don't think they will unfasten/unsealed, but you can fasten them for peace of mind.
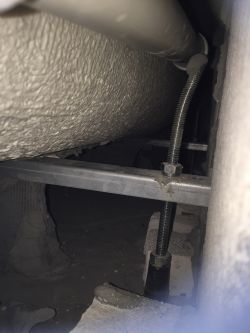
    At the siphon, you have already dealt with the matter, the only section that raises doubts is the unsupported part in the building, between the siphon and the hole on the right, here:

    LG F2J6TY1W - Drain from the washing machine to the drain of the bathtub

    I once practiced something like this, the mounting foam helped, plus a long hose, plus a second person to handle the foam itself, I was aiming with the end of the hose.
    You need to adjust the diameter of the hose to the end of the foam well, and make sure that the hose does not bend along the way, the pressure of the foam can tear it out of the tip on the gun, then the whole bathroom is stained :/
    A zip tie would probably help too.
  • #18 17549012
    Scorpion_1982
    Level 13  
    Gentlemen, how to embed a pvc elbow in a wall,
    I have a bigger hole, I have to pre-fix it so that it doesn't stick out too much later on the tile.
    I tried building gypsum but I can't even apply and adjust the elbows and the gypsum is already binding so it falls off.
    Gypsum putty is only 5mm thick.
    Was there still a gypsum cement mass or something like that?
    What do you embed it with, e.g. electrical boxes etc.
    I want to pre-glue it, I'll make the rest with cell blocks and tile glue, unless it's necessary otherwise, tell me that I wouldn't make a cuckoo.
    I also greet the neighbor. (Steam)
    I have a pipe between the bathtub and the wall for the moment
    LG F2J6TY1W - Drain from the washing machine to the drain of the bathtub

    Thank you very much. LG F2J6TY1W - Drain from the washing machine to the drain of the bathtub and
  • #19 17549075
    Parowy
    Level 22  
    Scorpion_1982 wrote:
    I have a pipe between the bathtub and the wall for the moment


    I wouldn't care too much about it, mounting foam, hose and wio :)

    Scorpion_1982 wrote:
    Gentlemen, how to embed a pvc elbow in a wall,


    The elbow will be in that hole in the upper right corner?
    How would I do it - adjust, cut the tubes, ready elbows, ready to fold, it should hold, but if it is still loose, support it with something, temporarily.
    At the last elbow, first apply a small amount of building gypsum, so as to fix them slightly, even at one point, wait until it hardens. Again, a small amount of plaster to fix it better, little by little until the elbow is stiff enough to brick up the remaining hole
    By fixing with plaster, you make larger and larger portions with each approach.

    P.S
    Personally, I attach things such as cans or elbows and pipes to plaster.
    If you don't manage to make plaster, do it less and thinner, it will bind anyway.

    Scorpion_1982 wrote:
    I want to pre-glue it, I'll make the rest with cell blocks and tile glue, unless it's necessary otherwise, tell me that I wouldn't make a cuckoo.


    There may be a way, I don't see any obstacles :)
  • #20 17549190
    ta_tar
    Level 41  
    Scorpion_1982 wrote:

    Gypsum putty is only 5mm thick.

    Yes, the information is good when it comes to using gypsum putty for making plaster. If you want to combine anything with this or glue it on, you can make a thicker layer. You will have time to set everything freely. I freely use gypsum putty for embedding cans because I have time to set it exactly and evenly to the wall. The only downside is that it takes longer to harden.
  • #21 17549248
    Scorpion_1982
    Level 13  
    Yes, the drain will be in the upper right corner - I already have the tubes released.

    I always placed half of the cans on the construction plaster and the top was already traditional or it depends on what I finished the wall with and this material drinks water like hell.
    I will try to prime it with a deep penetrating soil, maybe then it will not take water from the plaster.

    Gentlemen, should the cup of the tube be flush with the plate or can it protrude 2-3 mm??
  • #22 17549255
    Parowy
    Level 22  
    Scorpion_1982 wrote:
    I will try to prime it with a deep penetrating soil, maybe then it will not take water from the plaster.


    Very good idea.

    Scorpion_1982 wrote:
    Gentlemen, should the cup of the tube be flush with the plate or can it protrude 2-3 mm??


    Maybe even more, but then it takes up space for a washing machine, if you have the opportunity, make it evenly +/- a few mm.
  • #23 17549860
    Scorpion_1982
    Level 13  
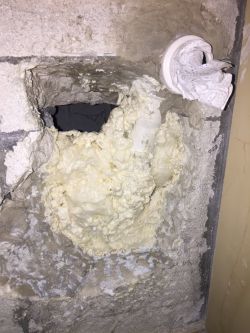
    Gentlemen, I initially foamed low-pressure foam, not everything but the pipe on the sides, now I will put a hollow brick on the atlas in front and I think it should be.
    Now I'm wondering if I shouldn't drown the entire tube in tile adhesive.
    LG F2J6TY1W - Drain from the washing machine to the drain of the bathtub
    LG F2J6TY1W - Drain from the washing machine to the drain of the bathtub
    I removed the excess foam, I wanted it to catch the tubes and the side a bit, I wanted to seal the hole at the top with foam but I would have to wait a lot because it couldn't be done at once.
    I added a cellular brick, or rather a 4 cm strip - in it you cut out places where it blocked me - I folded it on tile glue, I gave quite a lot of it for the foam itself, also for the brick.
    I moistened the block with water so that it wouldn't drink too quickly and the rest was primed twice.
    A bit of glue sucked but I will complete it with the tiles because I will still have to do it to the spirit level, someone made a simple building.
    LG F2J6TY1W - Drain from the washing machine to the drain of the bathtub
    Gentlemen, I finished thanks a lot for the tips - only the hole I had to cut out because I had nothing.
    LG F2J6TY1W - Drain from the washing machine to the drain of the bathtub LG F2J6TY1W - Drain from the washing machine to the drain of the bathtub LG F2J6TY1W - Drain from the washing machine to the drain of the bathtub LG F2J6TY1W - Drain from the washing machine to the drain of the bathtub
    Closing the topic, thanks for participating in the discussion.
  • #24 18128683
    Scorpion_1982
    Level 13  
    As above.

Topic summary

The discussion revolves around the installation of a drainage system for an LG F2J6TY1W washing machine, which is positioned next to a bathtub. The user seeks advice on connecting the washing machine's drain hose to the bathtub's drainage system, specifically whether to use a 50mm to 32mm elbow or a 50mm elbow with a rubber reducer. Various responses suggest using a 32mm pipe for the washing machine drain, emphasizing that a siphon is unnecessary due to the built-in siphon in the washing machine. Users discuss the feasibility of drilling into the wall for pipe installation, the importance of sealing connections to prevent leaks, and the potential for clogging if not properly installed. The conversation includes practical tips on using construction materials like gypsum and tile adhesive for securing pipes and ensuring a stable installation.
Summary generated by the language model.
ADVERTISEMENT