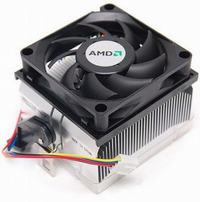
Each of us probably faces this problem.
After a while, the fan becomes unbearably noisy, dirty and a nuisance.
You have spent a certain amount of money on a good fan, but sooner or later each one starts to make noise.
The following tutorial is entirely my authorship. There are no copied texts, photos are taken by me and the described method has been used by me for a long time.
It can be used for processor fans, graphics cards or additional fans for cooling the case. Depending on the specific fan model, it may be slightly different. The main differences are:
fan bearing type,
a metal or plastic split pin used,
another method of securing the axis of the fan blades in the bearing and body of the fan.
To the point .
.
Our hero is a Qoltec SilentLine QF1225 - 12V 0.18A 1500RPM 22dB, dug out of a drawer, not currently used. The bearing used is a double ball bearing.
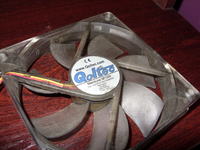
We peel off the sticker with the manufacturer's logo and the technical data of the fan.
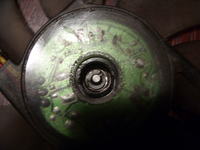
Most often, we find a plastic plug under it, protecting the fan bearing from excess dust. Qoltec did not apply it. The photo shows a plastic pin, the removal of which will give us access to disassemble the fan.
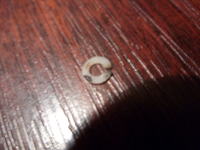
Gently lift the pin with a small screwdriver, taking care that it does not spring back. If the cotter pin is lost, it will not be possible to reassemble the fan correctly! We try not to damage it during disassembly and not to bend it too much. In the case of a plastic pin, straightening it in the fingers is not problematic, while in the case of a metal one, be careful not to break it.
After removing the split pin, the fan blades are gently pushed downwards, while being careful not to lose the bearing. On this fan, the two ball bearings are separated by a spring that can push out one of the bearings. In this case, the dirt kept the bearings in place, so I had no problem .
.
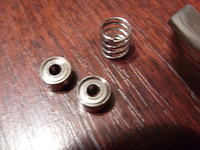
The picture above shows a set of bearings with a spring.
When disassembling the fan, remember on which side your model has the bearing mounted - then you have to put it back there.
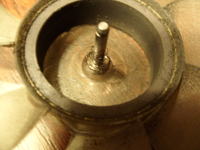
As you can see, I got the fan blades together with the axis.
You can also see how clean they are . The hair which, out of nowhere, found its way on the axis
  .
.
We start cleaning.
I use the CX-80 spray preparation shown in the photo.

Its counterpart is also Ronson or WD-40. It is a preservative and repair agent, but also strongly removes rust and dissolves various dirt.
We clean the fan blades and axle thoroughly, and in hard-to-reach places or in smaller fans, we help ourselves with typical cotton buds.
A little patience and we get the effect as you can see:
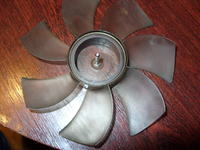
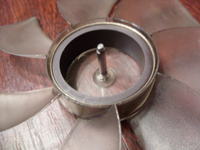
Another element that requires cleaning is the fan body.
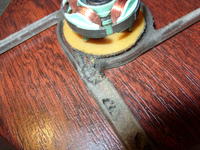
We deal with it similarly to paddles and after a while of work:
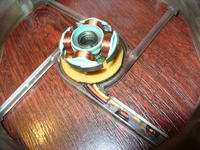
We are now starting to put our patient together.
I remind you of the basics of mechanics that it is not the bearing that rotates on the shaft, but sits steadily on the shaft, and the bearing rings rotate.
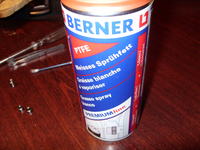
After cleaning the bearings with CX-80 preparation and removing the remnants of the preparation with gasoline, I lubricate the bearings with Teflon spray grease. It is a fast-adhering, water-resistant grease that fulfills its role in the temperature range from -20 ° C to + 110 ° C.
At this point, I also inform you that it is absolutely not advisable to use:
- vegetable (cooking) oil
- typical machine lubricants
- engine oils
I have encountered cases of using the above measures while reading various forums.
As a proven measure, I can recommend the oil attached to sewing machines. It is a very liquid oil with very good lubricating properties.
In my case, the first bearing is mounted on the axis of the blades, the second one at the front of the fan body. Place a spring between the bearings. We put the fan's blades in the spring and put the axle through the second bearing. The whole thing is secured from the front with the previously removed pin. I remind you to do it with feeling.
Also remember that your fan may have a completely different structure, and thus its reassembly depends on its design.
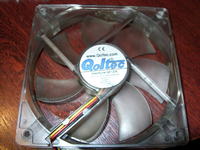
Here you can see our patient after cleaning and assembly.
In my humble opinion, spending 15-20 minutes restoring your fan to condition is definitely more wise than buying a new one. This especially applies to processor fans or graphics cards, the replacement of which is definitely difficult in the case of non-standard cooling design. Often, replacing the fan itself is even impossible and we are forced to replace the entire cooling system.
After a while, the fan becomes unbearably noisy, dirty and a nuisance.
You have spent a certain amount of money on a good fan, but sooner or later each one starts to make noise.
The following tutorial is entirely my authorship. There are no copied texts, photos are taken by me and the described method has been used by me for a long time.
It can be used for processor fans, graphics cards or additional fans for cooling the case. Depending on the specific fan model, it may be slightly different. The main differences are:
fan bearing type,
a metal or plastic split pin used,
another method of securing the axis of the fan blades in the bearing and body of the fan.
To the point
Our hero is a Qoltec SilentLine QF1225 - 12V 0.18A 1500RPM 22dB, dug out of a drawer, not currently used. The bearing used is a double ball bearing.

We peel off the sticker with the manufacturer's logo and the technical data of the fan.

Most often, we find a plastic plug under it, protecting the fan bearing from excess dust. Qoltec did not apply it. The photo shows a plastic pin, the removal of which will give us access to disassemble the fan.

Gently lift the pin with a small screwdriver, taking care that it does not spring back. If the cotter pin is lost, it will not be possible to reassemble the fan correctly! We try not to damage it during disassembly and not to bend it too much. In the case of a plastic pin, straightening it in the fingers is not problematic, while in the case of a metal one, be careful not to break it.
After removing the split pin, the fan blades are gently pushed downwards, while being careful not to lose the bearing. On this fan, the two ball bearings are separated by a spring that can push out one of the bearings. In this case, the dirt kept the bearings in place, so I had no problem

The picture above shows a set of bearings with a spring.
When disassembling the fan, remember on which side your model has the bearing mounted - then you have to put it back there.

As you can see, I got the fan blades together with the axis.
You can also see how clean they are
We start cleaning.
I use the CX-80 spray preparation shown in the photo.

Its counterpart is also Ronson or WD-40. It is a preservative and repair agent, but also strongly removes rust and dissolves various dirt.
We clean the fan blades and axle thoroughly, and in hard-to-reach places or in smaller fans, we help ourselves with typical cotton buds.
A little patience and we get the effect as you can see:


Another element that requires cleaning is the fan body.

We deal with it similarly to paddles and after a while of work:

We are now starting to put our patient together.
I remind you of the basics of mechanics that it is not the bearing that rotates on the shaft, but sits steadily on the shaft, and the bearing rings rotate.
After cleaning the bearings with CX-80 preparation and removing the remnants of the preparation with gasoline, I lubricate the bearings with Teflon spray grease. It is a fast-adhering, water-resistant grease that fulfills its role in the temperature range from -20 ° C to + 110 ° C.

At this point, I also inform you that it is absolutely not advisable to use:
- vegetable (cooking) oil
- typical machine lubricants
- engine oils
I have encountered cases of using the above measures while reading various forums.
As a proven measure, I can recommend the oil attached to sewing machines. It is a very liquid oil with very good lubricating properties.
In my case, the first bearing is mounted on the axis of the blades, the second one at the front of the fan body. Place a spring between the bearings. We put the fan's blades in the spring and put the axle through the second bearing. The whole thing is secured from the front with the previously removed pin. I remind you to do it with feeling.
Also remember that your fan may have a completely different structure, and thus its reassembly depends on its design.
Here you can see our patient after cleaning and assembly.

In my humble opinion, spending 15-20 minutes restoring your fan to condition is definitely more wise than buying a new one. This especially applies to processor fans or graphics cards, the replacement of which is definitely difficult in the case of non-standard cooling design. Often, replacing the fan itself is even impossible and we are forced to replace the entire cooling system.


