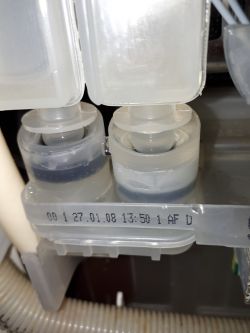
I would like to share information on how to solve the problem of an error in Bosch dishwashers very cheaply. I didn't like the prospect of buying a new dishwasher or calling a service technician for a few 100's. Maybe in Germany such a dishwasher is scrapped and bought a new one, but what we live in is our reality.
Symptoms
During washing, a high temperature is reached in the cavity of the dishwasher and usually after an hour of washing, the display shows error E15 and the tap with water flashes.
Cause of a problem
Repeatedly described leakage at the junction of the dishwasher chamber and a plastic drain pan with pumps and sensors. After about 3 years of use, first, sporadically and in the final stage, water permanently leaks into the dishwasher housing. Water collects in the central part of the bottom where the flood sensor displays the error E15, and then the water is pumped out immediately.
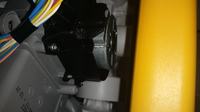
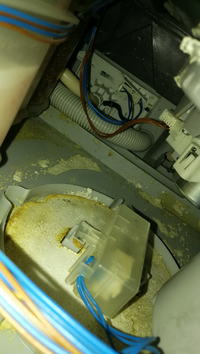
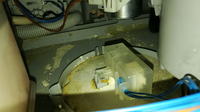
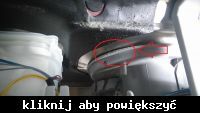
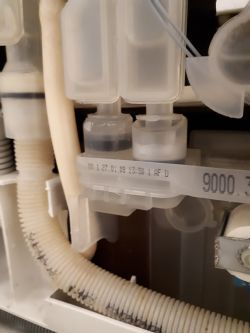
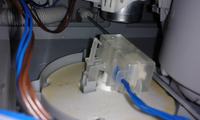
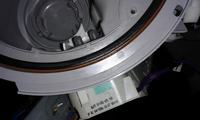
Below is a view of the humidity sensor. It is a disc of polystyrene which, as the water level rises at the bottom of the dishwasher, flows out and presses a small switch.
What will you need?
- Two people (you can also do it yourself, but then he will give more words for "k".
- Flexible installation wire (line) such as ordinary for 1.5 PLN available in any electrical store with a diameter of 2 mm and a length of about 55 cm.
- Set of bits (stars)
- Camera for shooting cables and plugs.
- A hammer and a strong screwdriver (for bending metal pins)
- Combination pliers
- Mass of cloths and paper towels
- A flashlight
- 4-6 man-hours
Sequence of actions
The work is quite hard and requires patience and caution, because in order to get to the mentioned gasket, the entire bottom of the dishwasher must be disassembled. Only then is there free access to the drain pan.
1 Pull out the dishwasher and disconnect it from the water and electricity supplies.
2 Dismantle the metal covers of the dishwasher components (one bolt for each cover). 2 screws on the cover under the door.
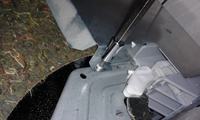
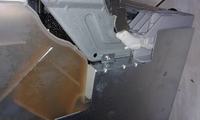
3 Disassemble the green fleece damping mats (in the hole under the door there is also a strip of finely cut mats)
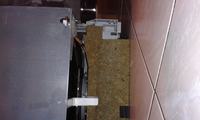
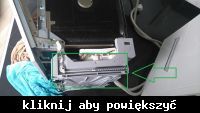
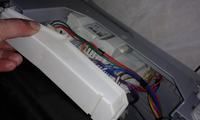
4 Disconnect the power plug in the rear housing and disassemble the driver module. The controller has such an openable plug cover and infirst you need to disassemble the cover (it is attached only on one side, do it with feeling). Note, do not disconnect any plugs from the driver module, there is no such need.

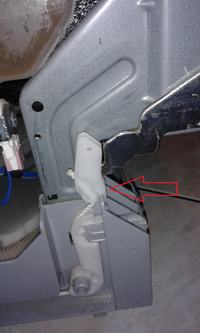
5 Lock the door hinge springs. Note here you need to be very careful because the spring that pulls the door cord is very strong and accidental tearing out of the hooks can hurt your fingers. For the convenience of service technicians, BOSCH has designed special hooks that allow you to disconnect the bottom without removing the springs. Then the taut springs remain in the plastic bottom of the dishwasher and you do not need special devices for tensioning the lines.
6 Turn the dishwasher upside down. Note here you need to have paper towels wipes because a lot of water can spill out.
7 Use a screwdriver, a hammer and pliers to straighten the special pins that will allow you to separate the bottom of the dishwasher from the chamber. 2 pins on the right and left, a total of 4 points.
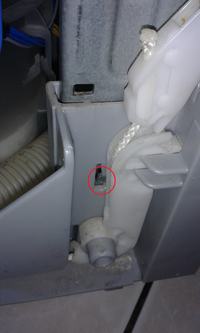
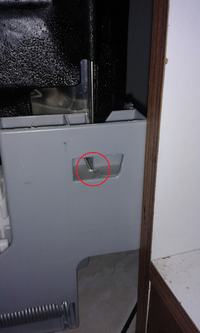
8 Take photos of all electrical plugs (it is better not to regret the film and take a lot of photos). Disconnect the plugs that may be in the way when lifting the bottom of the dishwasher. Generally, all plugs are mechanically different and you can't go wrong, you have to avoid pressing them forcibly and pay attention to the plastic plug locks.
9 When lifting the bottom, some water pipes (connected with rubber o-rings) will slowly release. Water may escape, so you need to protect the electronics and plugs.
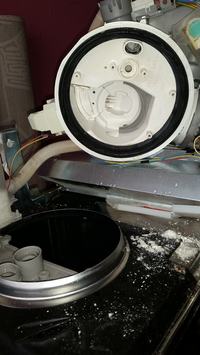
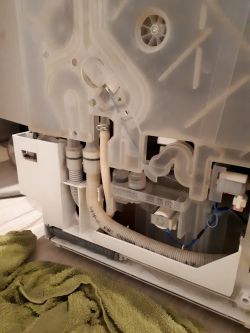
10 If everything went smoothly, we have free access to the drain pan with pumps around the perimeter. The bowl is bolted with 4 stainless steel screws from the inside of the dishwasher chamber. Two screws are under the mesh filter.
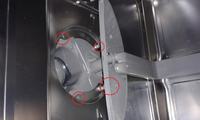
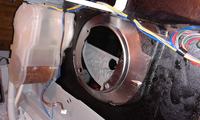
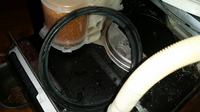
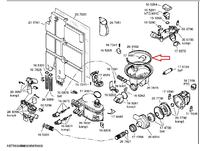
11 Repair of the gasket. This example shows the obvious bad will of the manufacturer. The gasket could be replaceable, but not ... it was integrated with the bowl and the whole element needs to be replaced. More about it here: Link
over time, the rubber lost its properties and slightly decreased its cross-section, which means that at high temperature water flows almost around the entire circumference.
Paradoxically, the fact that it is permanently attached to the bowl allows for a provisional but effective solution to this problem.
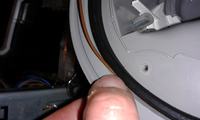
Just gentlyswivel the gasket and insert an electric cable or something similar with a diameter of about 2 mm around the entire circumference of the resulting slot.
After this easy treatment, the inner diameter of the gasket significantly decreases and when it is applied to the opening in the bottom of the chamber, the play is noticeably reduced.
The bowl prepared in this way must be screwed in again with 4 screws and a test wash at 70 ° C should be performed. In my case, the problem is over.
information Searching for a solution to this problem, many times I came across information where it was advised to tilt the dishwasher backwards and the problem disappears. However, I must warn you that this is a very dangerous solution because all covers and gutters protecting the motor contacts are designed so that they fulfill their functions only when water drips perpendicularly. If we tilt the dishwasher, we will only cheat the moisture sensor and the water will flow in an unknown direction. On the other hand, starting a tilted dishwasher may lead to flooding of the motor, contacts, and, as a result, even to a short circuit and fire.
I hope that this solution will extend the life of our dishwashers, and at the same time leave some money in your pocket.
Symptoms
During washing, a high temperature is reached in the cavity of the dishwasher and usually after an hour of washing, the display shows error E15 and the tap with water flashes.
Cause of a problem
Repeatedly described leakage at the junction of the dishwasher chamber and a plastic drain pan with pumps and sensors. After about 3 years of use, first, sporadically and in the final stage, water permanently leaks into the dishwasher housing. Water collects in the central part of the bottom where the flood sensor displays the error E15, and then the water is pumped out immediately.
Below is a view of the humidity sensor. It is a disc of polystyrene which, as the water level rises at the bottom of the dishwasher, flows out and presses a small switch.

What will you need?
- Two people (you can also do it yourself, but then he will give more words for "k".
- Flexible installation wire (line) such as ordinary for 1.5 PLN available in any electrical store with a diameter of 2 mm and a length of about 55 cm.
- Set of bits (stars)
- Camera for shooting cables and plugs.
- A hammer and a strong screwdriver (for bending metal pins)
- Combination pliers
- Mass of cloths and paper towels
- A flashlight
- 4-6 man-hours
Sequence of actions
The work is quite hard and requires patience and caution, because in order to get to the mentioned gasket, the entire bottom of the dishwasher must be disassembled. Only then is there free access to the drain pan.
1 Pull out the dishwasher and disconnect it from the water and electricity supplies.
2 Dismantle the metal covers of the dishwasher components (one bolt for each cover). 2 screws on the cover under the door.


3 Disassemble the green fleece damping mats (in the hole under the door there is also a strip of finely cut mats)

4 Disconnect the power plug in the rear housing and disassemble the driver module. The controller has such an openable plug cover and infirst you need to disassemble the cover (it is attached only on one side, do it with feeling). Note, do not disconnect any plugs from the driver module, there is no such need.


5 Lock the door hinge springs. Note here you need to be very careful because the spring that pulls the door cord is very strong and accidental tearing out of the hooks can hurt your fingers. For the convenience of service technicians, BOSCH has designed special hooks that allow you to disconnect the bottom without removing the springs. Then the taut springs remain in the plastic bottom of the dishwasher and you do not need special devices for tensioning the lines.

6 Turn the dishwasher upside down. Note here you need to have paper towels wipes because a lot of water can spill out.
7 Use a screwdriver, a hammer and pliers to straighten the special pins that will allow you to separate the bottom of the dishwasher from the chamber. 2 pins on the right and left, a total of 4 points.


8 Take photos of all electrical plugs (it is better not to regret the film and take a lot of photos). Disconnect the plugs that may be in the way when lifting the bottom of the dishwasher. Generally, all plugs are mechanically different and you can't go wrong, you have to avoid pressing them forcibly and pay attention to the plastic plug locks.
9 When lifting the bottom, some water pipes (connected with rubber o-rings) will slowly release. Water may escape, so you need to protect the electronics and plugs.
10 If everything went smoothly, we have free access to the drain pan with pumps around the perimeter. The bowl is bolted with 4 stainless steel screws from the inside of the dishwasher chamber. Two screws are under the mesh filter.


11 Repair of the gasket. This example shows the obvious bad will of the manufacturer. The gasket could be replaceable, but not ... it was integrated with the bowl and the whole element needs to be replaced. More about it here: Link
over time, the rubber lost its properties and slightly decreased its cross-section, which means that at high temperature water flows almost around the entire circumference.
Paradoxically, the fact that it is permanently attached to the bowl allows for a provisional but effective solution to this problem.
Just gentlyswivel the gasket and insert an electric cable or something similar with a diameter of about 2 mm around the entire circumference of the resulting slot.
After this easy treatment, the inner diameter of the gasket significantly decreases and when it is applied to the opening in the bottom of the chamber, the play is noticeably reduced.
The bowl prepared in this way must be screwed in again with 4 screws and a test wash at 70 ° C should be performed. In my case, the problem is over.


information Searching for a solution to this problem, many times I came across information where it was advised to tilt the dishwasher backwards and the problem disappears. However, I must warn you that this is a very dangerous solution because all covers and gutters protecting the motor contacts are designed so that they fulfill their functions only when water drips perpendicularly. If we tilt the dishwasher, we will only cheat the moisture sensor and the water will flow in an unknown direction. On the other hand, starting a tilted dishwasher may lead to flooding of the motor, contacts, and, as a result, even to a short circuit and fire.
I hope that this solution will extend the life of our dishwashers, and at the same time leave some money in your pocket.


