When working with several machines, I had a problem with the machine because the looper did not pick up the thread from underneath.
For the record:
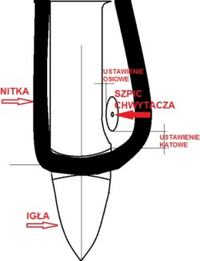
I decided to systematize the knowledge in this topic and give a general way to control this setting.
There are many descriptions of the setup depending on the machine type.
Personally, I divided this process into two important phases that are common to all sewing machines - universal.
1-phase timing of the needle bar in relation to the hook.
2-geometric position of the hook in relation to the needle bar
Both processes have nothing to do with each other.
For a reminder of these phases on the example of the archer 877.
For adjustment, start with a needle No. 120 - new - straight.
The first phase consists in adjusting the hook by rotating it axially in relation to the needle after initial loosening the hook fastening screws.
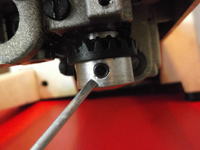
The second phase is to adjust the eccentric sleeves (0.05-0.1 mm) separately for the needle bar and

hook-
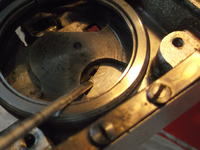
also after loosening the counter screws.
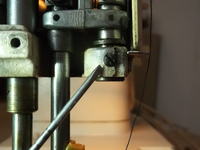
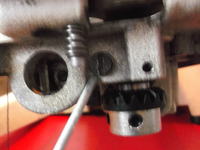
At this point, we can also carry out
adjusting the hook height above the needle eye (about 1 mm above the eye) with a screw visible in the cutout
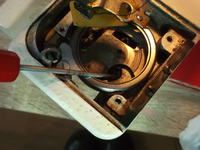
the hook.
Both of these processes should produce the following effect:
-after 2mm of needle bar movement (from lower position) (lower position and 2 mm each is marked on the needle bar with lines in its upper part)
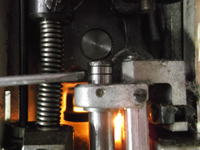
up the hook should be in the needle axis (needle inserted
on the max to the handle and the cut towards the hook) about 1 mm above the eye of the needle and at the same time it should come closer to the needle
at a distance (0.05-0.1 mm) - i.e. the hook of the hook should be in the recess of the needle.
You set all the dimensions correctly, you assemble the machine and it still has problems, e.g. with sewing several layers of fabric (thick materials or rubberized) and what do you do now -
disassembly again and all from the beginning !!!
After assembling the machine, it is unlikely that the cause of sewing errors will be found (e.g. play on the gears) because very little is visible through the mechanical elements that cover and the machine itself
I decided to develop a simple test of correctness of the hook position in relation to the needle
which significantly accelerates the correct adjustment of the machine. Its purpose was to simulate the work of the thread - the looper in real conditions, but with one critical condition - no
thread loop when moving up the needle bar (apparently some materials make it impossible
the formation of this loop in which the hook is to enter). And the most important feature of the test is the fact that it does not require the completion of the machine and there is full visibility of the created stitch. Remove the covering elements from the machine for the test
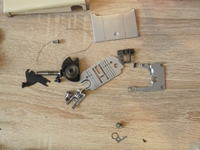
needle-hook work point. When it comes to tools, it is worth having a screwdriver bent at a right angle.
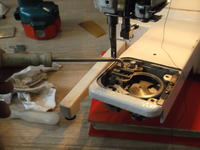
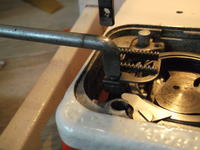
Machine repair is greatly simplified by using the threader.
Of course, the test from the file is performed by turning the wheel with your hand.
As you will see after opening the file, the test is very simple (the simplicity of the method) but I will tell you
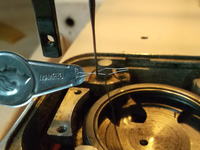 for a short time since I use it, machines really sew like mad and these are materials that I could dream about in the past.

The yellow material in the photos from the protected file is an elastic rubber 3-5 mm thick.
Finally, it is worth checking the given method for taking the thread in the case of a zigzag stitch and shifting the left and right needle. You can also test the 80 needle.
An interesting fact is that most of the machines on the scrap yards and exchanges are sold due to incorrect binding of the stitch by the hook. So if you have such a symptom and the machine is mechanically complete (and the price is decently cheap, do not hesitate and buy it) Often an old machine
will sew better than modern products from the market. Another undeniable thing is the fact that it
an amazing pleasure to be able to adjust a mechanism that was invented almost 2 centuries ago (Elias Howe and Walter Hunt, Singer)
and serves people unchanged until now.
Amateurs of rummaging in old mechanisms are asking for opinions on this test and maybe some descriptions of the problem in digital machines.
For the record:

I decided to systematize the knowledge in this topic and give a general way to control this setting.
There are many descriptions of the setup depending on the machine type.
Personally, I divided this process into two important phases that are common to all sewing machines - universal.
1-phase timing of the needle bar in relation to the hook.
2-geometric position of the hook in relation to the needle bar
Both processes have nothing to do with each other.
For a reminder of these phases on the example of the archer 877.
For adjustment, start with a needle No. 120 - new - straight.
The first phase consists in adjusting the hook by rotating it axially in relation to the needle after initial loosening the hook fastening screws.

The second phase is to adjust the eccentric sleeves (0.05-0.1 mm) separately for the needle bar and

hook-

also after loosening the counter screws.


At this point, we can also carry out
adjusting the hook height above the needle eye (about 1 mm above the eye) with a screw visible in the cutout

the hook.
Both of these processes should produce the following effect:
-after 2mm of needle bar movement (from lower position) (lower position and 2 mm each is marked on the needle bar with lines in its upper part)

up the hook should be in the needle axis (needle inserted
on the max to the handle and the cut towards the hook) about 1 mm above the eye of the needle and at the same time it should come closer to the needle
at a distance (0.05-0.1 mm) - i.e. the hook of the hook should be in the recess of the needle.
You set all the dimensions correctly, you assemble the machine and it still has problems, e.g. with sewing several layers of fabric (thick materials or rubberized) and what do you do now -
disassembly again and all from the beginning !!!
After assembling the machine, it is unlikely that the cause of sewing errors will be found (e.g. play on the gears) because very little is visible through the mechanical elements that cover and the machine itself
I decided to develop a simple test of correctness of the hook position in relation to the needle
which significantly accelerates the correct adjustment of the machine. Its purpose was to simulate the work of the thread - the looper in real conditions, but with one critical condition - no
thread loop when moving up the needle bar (apparently some materials make it impossible
the formation of this loop in which the hook is to enter). And the most important feature of the test is the fact that it does not require the completion of the machine and there is full visibility of the created stitch. Remove the covering elements from the machine for the test

needle-hook work point. When it comes to tools, it is worth having a screwdriver bent at a right angle.


Machine repair is greatly simplified by using the threader.
Of course, the test from the file is performed by turning the wheel with your hand.
As you will see after opening the file, the test is very simple (the simplicity of the method) but I will tell you
 for a short time since I use it, machines really sew like mad and these are materials that I could dream about in the past.
The yellow material in the photos from the protected file is an elastic rubber 3-5 mm thick.
Finally, it is worth checking the given method for taking the thread in the case of a zigzag stitch and shifting the left and right needle. You can also test the 80 needle.
An interesting fact is that most of the machines on the scrap yards and exchanges are sold due to incorrect binding of the stitch by the hook. So if you have such a symptom and the machine is mechanically complete (and the price is decently cheap, do not hesitate and buy it) Often an old machine
will sew better than modern products from the market. Another undeniable thing is the fact that it
an amazing pleasure to be able to adjust a mechanism that was invented almost 2 centuries ago (Elias Howe and Walter Hunt, Singer)
and serves people unchanged until now.
Amateurs of rummaging in old mechanisms are asking for opinions on this test and maybe some descriptions of the problem in digital machines.


