logo elektroda
logo elektroda
X
logo elektroda

[Solved] Satel Integra 128: Launching Control Panel, Alarm Installation & Connecting Sensors for Beginners

dominiksdz 15288 15
ADVERTISEMENT
Treść została przetłumaczona polish » english Zobacz oryginalną wersję tematu
  • #1 16583232
    dominiksdz
    Level 10  
    I warmly welcome. I got on internships in a foreign company dealing in industrial cameras and alarm installations, and on a good day my first project is to launch the Satel Integra 128 alarm control panel (I got it as a Pole and Satel is a Polish company), I will add that my company does not have the concept of Satel, so I'm responsible for that ... I ended my electronic school in Poland, but I'm not a specialist in matters of alarm ... I'm trying now, I try not to harm myself ... so everything goes like blood from my nose ...
    Step by step .... I mounted the control panel to the housing, I connected the acu, the keypad and the ETHM-1 Plus v2.2 modem and the power supply ... Central started ... Satel Integra 128: Launching Control Panel, Alarm Installation & Connecting Sensors for Beginners
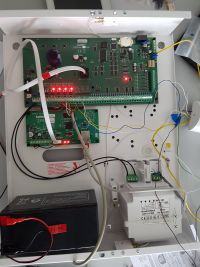
    For this, as the first test I connect the GRAY plus motion sensor along with Satel ADR-64, I also managed it ... Satel Integra 128: Launching Control Panel, Alarm Installation & Connecting Sensors for Beginners
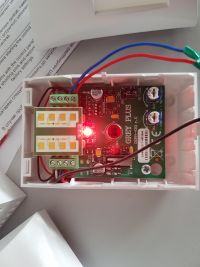
    (black DAT cable with ADR-64, red + power supply, blue minus -) to the center I connected this sensor in places: DAT to DT1, + to + EX1 power supply, power supply - to Com

    now my question, if I have done it correctly so far ???

    I will add that the Satel Integra keypad is currently connected, later the Integra INT-TSH will be

    Added after 5 [minutes]:

    I still have a question, is there someone on the forum, who could help me, for example. Skype, give tutoring with such a name in the field of alarm panels, or any step-by-step videos, naturally not for free, there is nothing in life for free :) to gdansk for Satel training I have too far and I do not have time for that now

    Added after 1 [hour] 45 [minutes]:
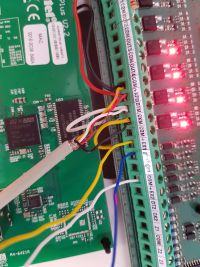
    Satel Integra 128: Launching Control Panel, Alarm Installation & Connecting Sensors for Beginners

    Added after 45 [seconds]:

    connection of the keypad and ETHM-1

    Added after 3 [minutes]:
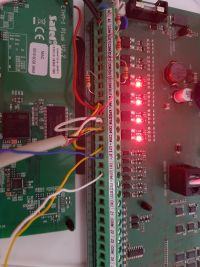
    Satel Integra 128: Launching Control Panel, Alarm Installation & Connecting Sensors for Beginners
  • ADVERTISEMENT
  • #2 16583543
    dariusz.bembenek
    Stationary Alarms specialist
    Immediately ... does it seem to me whether you connected the addressable module directly to the control panel? If so, this is a mistake and it will never work.
    CA-64 MOD, i.e. this tiny white addressable module, should be connected to the addressable zone expander, i.e. INT-ADR. Only this expander is connected to the expander bus (CK1, DT1 or CK2, DT2 - neutral which bus).

    Articles and videos on the web is a bit, if you look for it you will definitely find something.

    Added after 14 [minutes]:

    The other thing is, was there any info in the project that it was going to be implemented on addressable modules? Does one cable fly through all the detectors? Because if someone came up with the idea of giving an addressable input module, but it is not supported, it makes no sense and a waste of money.
  • #3 16584068
    dominiksdz
    Level 10  
    Satel ADR-64 this small mod is wiety in the sensor and from the sensor comes three DAT cables, + 12, com propped to the control panel as in the picture

    Added after 1 [minutes]:

    sensors are addressed in binary code and each has a different address. the building has two floors for each floor, one cable and everything is supposed to go under one, but I will ask tomorrow for the rest of the details
  • ADVERTISEMENT
  • Helpful post
    #4 16584083
    dariusz.bembenek
    Stationary Alarms specialist
    Well, I wrote you - it's bad for 100% and it will never work.

    Added after 1 [minutes]:

    I will repeat - these small white modules (CA-64 ADR-MOD) must be connected to the INT-ADR expander (board with the size of ETHM-1 Plus), not to the control panel (!).
  • #5 16584167
    dominiksdz
    Level 10  
    Thanks for the life of the rescue, tomorrow it will improve, and I will let you know if I succeeded ... this is how an amateur for the professions is taking ... thanks again

    Added after 8 [hours] 28 [minutes]:

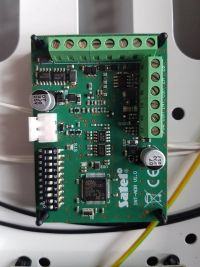
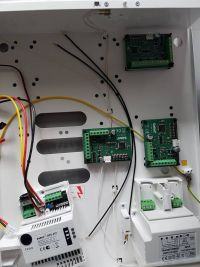
    now I understand why they bought so much ...
    Satel Integra 128: Launching Control Panel, Alarm Installation & Connecting Sensors for Beginners

    for this is another box with three expanders, so I have to sign it today
    Satel Integra 128: Launching Control Panel, Alarm Installation & Connecting Sensors for Beginners
  • #6 16584798
    suworow
    VIP Meritorious for electroda.pl
    Please note that the APT 412 satellite power supply is powered directly from the 230V mains, which means that the "trafok" provided in the housing is unnecessary in this case.
    These modules can not be somehow better deployed?
    A request to correct the spelling in posts, because next time instead of the "rescue wheel" I will be forced to throw an anvil ;)
    greetings
  • #7 16585017
    dominiksdz
    Level 10  
    I apologize for the spelling, but I do not have a Polish keyboard ... And if I write something incorrectly spelling, I am asking for forgiveness, because as a man abroad for a long time he is sitting in his native language he forgets :( But he promises, I will improve :)
    As for the box with modules, I inherited it from my predecessors, who did not talk to our Polish Satel (I do not know if they can be pulled out without damaging anything, if it worked, I would like to improve it because I do not like that)
    And when it comes to Trafo, I know it is unnecessary, it will be dismounted later. And yet the question, because now the APS-412 power module one module using this three-wire cable, and how to later power three modules ?? The cable is just one of this plugin
  • Helpful post
    #8 16585159
    dariusz.bembenek
    Stationary Alarms specialist
    One power supply is supplied directly from the APS-412 (black wire), and the next expanders are powered from the first one (it has + 12V and COM connectors).

    Added after 39 [seconds]:

    You can easily remove the tiles, you only have to do it carefully, but it is reusable (fixing pins).
  • ADVERTISEMENT
  • #9 16596014
    dominiksdz
    Level 10  
    Welcome. I'm sorry that I did not speak, but there were a lot of things on my mind lately. I would like to thank everyone again for help. I managed to start the switchboards. The modules I managed to program and were found and identified in the program. Sensors the same with separate addresses on one wire. My previous predecessors (ie reed switches, smoke detectors etc ...) Remained happy that I managed to run it. So again thanks a lot. In the meantime, I was still busy with Geutebrück G-Scope / 8000-IP8. I have to say that an interesting thing :) I have learned a lot of new :) Today is the end of practice, this is my last day here as an apprentice :) We'll see what will happen next :) I greet everyone cordially. I consider the subject to be finished :) However, for such amateurs as me :P , it can be helpful :)
  • #10 16740775
    dominiksdz
    Level 10  
    Hello it is me again :) I have not been to Poland for a long time, a little family vacation in Poland. I returned after a vacation to the company in which I was doing internships ... and what found out for me good day ... Satel Integra 128 .... as I left it with the end of my internship, I found it today ... But predecessors do not they advised :) And the client is already waiting for his system over 3 months hahahah ... I wonder if someone in Poland would be so forgiving :)

    Added after 19 [minutes]:

    I managed to start the switchboards. Connection via ETHM-1 (address 7) Plus via the Internet I was also able to refer to the DLOADX program. I have addressed and identified two INT-TSH keypads (address 2) and INT-TSG (address 3), this also works. I have two expanders INT-ADR and one INT-E expander at my disposal.
    And now yes: ADR expanders I addressed as address 1 and 8, and expander E address 0.
    The program has been identified and the program sees the exapper. I just do not know why in the program I have access to 16 lines from the control panel and up to 8 from the INT-E expander, that is a total of 24 lines, and I do not have a line extension with INT-ADR expanders ... ?? does anyone have any idea?

    Added after 21 [minutes]:

    I will add that the DIP switch position 10 checked in the position ON and OFF and nothing ... The program can not see the expanders

    Added after 1 [hour] 35 [minutes]:

    I made a short video about the connection ... maybe I did something wrong :)
    www.youtube.com/watch?v=4yaX9qq8OZ4

    Added after 1 [hour] 24 [minutes]:

    and here is a movie from the program
    https://www.youtube.com/watch?v=CdPjQHEBW80
  • ADVERTISEMENT
  • #11 16744635
    IGS

    Level 21  
    So what, you came to PL, he spent 3 months, then he went to the same job not knowing that he is going to finish the job, and the lesson is not done ... congratulations on the approach
  • #12 16745063
    dominiksdz
    Level 10  
    I will not even comment on that ...
  • #13 16747675
    dominiksdz
    Level 10  
    Ok .. I managed to solve the problem with the INT-ADR expanders :)
  • #14 16748053
    suworow
    VIP Meritorious for electroda.pl
    And how? :)
    greetings
  • #15 16748891
    dominiksdz
    Level 10  
    As an amateur, the man learns on errors ... The installation is already established at the customer, ie motion, smoke, and catwitron detectors ... I only have switchboards in the company, Ethm, INT-E, 2xINT-ADR and two INT-manipulators. TSH and INT-TSG. Added to this was the multifunctional keyboard with the INT-SCR-BL proximity card reader. And now the boss introduced me a little bit wrong, because he wanted to program the whole switchboard in the company and go only to the assembly, already the headquarters is ready. That's why I was like when INT-ADR does not see the line .... But now I know that INT-ADR will not see the line since nothing is connected to the expander ...... :)

    Added after 14 [minutes]:

    So you will have to go to the customer and mount the control panels and keypads. Connect everything and program it on the site, any corrections can be made by ETHM or I have to read how it is with this Satela server. I will probably also be programming with programming because I have never done this before, hahahahahahh, but what will I need to learn ... it's a pity that here in the company there is no one who would have something to do with Satel before and could show me everything step by step a step, because if you see something once, how it's done from the beginning, it's easier to know ... and how an amateur starts from the beginning it goes like the blood from the nose .... They are here more on the headquarters of Honeywell, Telenot, Daitem bazu ... And for the first time Satela, but the client chose one, maybe a Polish girl :) So I'm experimenting with Satel and in the meantime I'm learning Honeywell because it's an advantage here :)
  • #16 16893152
    dominiksdz
    Level 10  
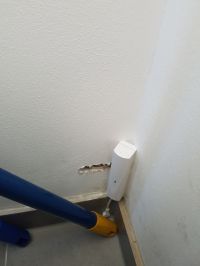
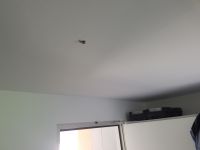
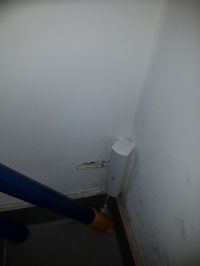
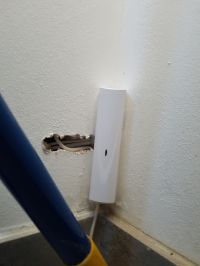
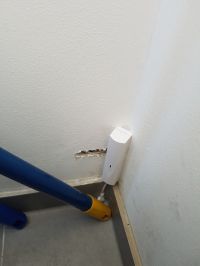
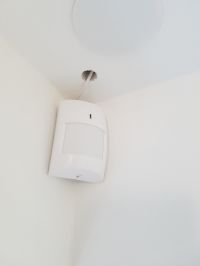
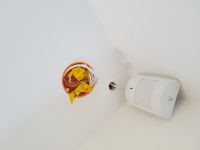
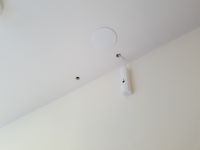
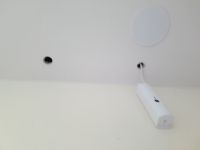
    I warmly welcome. The Satel project landed in the orchard .... It lasted a little .... because it is known in such situations that nothing is done overnight ... Subcontractors odpie ...... lili such disco, that it is difficult to describe it in words, so I have some pictures like: "how should one not install an alarm system ......" Satel Integra 128: Launching Control Panel, Alarm Installation & Connecting Sensors for Beginners Satel Integra 128: Launching Control Panel, Alarm Installation & Connecting Sensors for Beginners Satel Integra 128: Launching Control Panel, Alarm Installation & Connecting Sensors for Beginners Satel Integra 128: Launching Control Panel, Alarm Installation & Connecting Sensors for Beginners Satel Integra 128: Launching Control Panel, Alarm Installation & Connecting Sensors for Beginners Satel Integra 128: Launching Control Panel, Alarm Installation & Connecting Sensors for Beginners Satel Integra 128: Launching Control Panel, Alarm Installation & Connecting Sensors for Beginners Satel Integra 128: Launching Control Panel, Alarm Installation & Connecting Sensors for Beginners Satel Integra 128: Launching Control Panel, Alarm Installation & Connecting Sensors for Beginners Satel Integra 128: Launching Control Panel, Alarm Installation & Connecting Sensors for Beginners
    I devoted a lot of time, to get to what is what .... All 4roof wires ... in white ... I will add only with the subcontractor no longer exists, announced the company's bankruptcy :) The integrated satellite works :) I managed to find all the lines and sensors .... Everything is programmed, but believe me ... ,, I have never made such Puzzles in my life '' Respect for the owner, she showed such patience and understanding ... ' sumaru, everything works :) Satel integra has been tested 110%. Everything that was expected by the client works ... and I can finally sleep ... I do not wish anyone such experience in the adventure with the alarm system that I experienced .... And just enough to spread the wires and write them out well so that the installer knows what
    is what and where it is connected ..... Subcontractors did not notice it ... and in a moment from dreams you can do a nightmare .....

    Thanks for those interested .....

    and tracking topic :)

Topic summary

The discussion revolves around the installation and configuration of the Satel Integra 128 alarm control panel, particularly for a beginner tasked with launching the system. The user initially faced challenges connecting the addressable module (Satel ADR-64) directly to the control panel, which was identified as incorrect. Instead, it should be connected to the INT-ADR expander. The user successfully mounted the control panel, connected the necessary components including the ETHM-1 Plus modem, and began testing with motion sensors. After receiving guidance from forum members, the user managed to program the modules and sensors, confirming their functionality. The conversation also touched on power supply considerations and the importance of proper wiring for the system to operate effectively. Ultimately, the user expressed gratitude for the assistance received and reported successful completion of the project.
Summary generated by the language model.
ADVERTISEMENT