FAQ
TL;DR: For near-100% bubble removal, target ~50 mbar absolute (~0.95 bar vacuum); “your pump should make 950 mbar of underpressure.” [Elektroda, ladamaniac, post #16991283]
Why it matters: This FAQ helps makers and small shops choose gear and steps that reliably clear micro-bubbles in epoxy pours.
Quick Facts
- Target vacuum for epoxy degassing: ~50 mbar absolute ≈ −0.95 bar gauge. [Elektroda, ladamaniac, post #16991283]
- Typical cycle: ~10 minutes under vacuum, brief vent/torch, then ~3 minutes more under vacuum. [Elektroda, satcom666, post #17876743]
- Pre-heat mixes to about 40°C; flame the surface to drop surface tension and pop bubbles. [Elektroda, Mgorski102, post #16986818]
- Epidian 652 struggles in ~1.5 cm pours; use thinner layers or switch resin. [Elektroda, StachCzarnecki, post #17081054]
- Cooling the mold slows cure (~24 h) and suppresses visible bubbling. [Elektroda, Anonymous, post #17012968]
What vacuum level do I actually need for epoxy degassing?
Aim for ~50 mbar absolute pressure, which equals about −0.95 bar on a gauge. That level expands and extracts micro-bubbles effectively. As one expert put it, “your pump should make 950 mbar of underpressure.” Verify your gauge reads near −0.95 bar and holds steady during the foaming phase. Poor seals or weak pumps stall bubble rise. [Elektroda, ladamaniac, post #16991283]
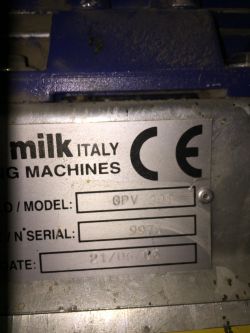
Why won’t a milking-machine pump work for resin?
A milking pump around 50 kPa creates ~500 mbar absolute pressure. Effective degassing needs ~50 mbar absolute. That’s a 10× deeper vacuum than the milker delivers. The mismatch means bubbles won’t fully expand or escape. Choose a pump rated for deep vacuum, not just moderate suction. [Elektroda, Mgorski102, post #16987690]
How should I mix epoxy to avoid adding air?
Keep the mixer head below the liquid surface and avoid a vortex. Use slow, steady strokes or a low-speed paddle that never breaks the surface. This minimizes entrained air at the source, making later degassing faster and cleaner. Scrape cup walls gently to blend without whipping. [Elektroda, buczkog, post #17013560]
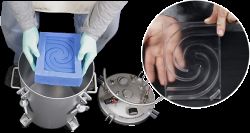
What’s a simple DIY vacuum setup that actually works?
Use a thick steel pot as the chamber, a 10 mm plexiglass lid with a gasket, and a refrigerator compressor as the pump. Add a vacuum gauge to monitor drawdown. This low-cost rig can pull to about −1 atm on the gauge and supports repeat cycles. Ensure all fittings are airtight. [Elektroda, satcom666, post #17876743]
How long should I keep epoxy under vacuum?
Run about 10 minutes to full drawdown, then slowly vent. Briefly flame the surface to lower surface tension. Pull vacuum again for roughly 3 minutes to finish. Watch the foam rise and collapse before venting fully. Time varies with viscosity and batch size. [Elektroda, satcom666, post #17876743]
Should I heat epoxy before or after degassing?
Warm the resin to about 40°C before mixing to lower viscosity, then degas. After pouring, sweep a small torch over the surface to pop residual bubbles. Keep the flame moving to avoid scorching. Heating helps, but excessive heat can speed cure too much. [Elektroda, Mgorski102, post #16986818]
Can a pressure pot help with micro-bubbles after pouring?
Yes. A converted pressure pot can first act as a vacuum chamber, then as a pressure chamber with a compressor. Pressurizing collapses remaining micro-bubbles to invisibility. Many hobbyists use this two-mode approach for clearer casts and smoother surfaces. [Elektroda, DecoDominik, post #17012876]
Is cooling the mold a valid trick to reduce bubbles?
Yes. Chilling the filled mold a few degrees Celsius suppresses bubble formation and rise. Cure time becomes much longer, often around 24 hours before demolding. This helps when equipment is limited but demands patience and dimensional stability. [Elektroda, Anonymous, post #17012968]
Why does my resin ‘boil’ the moment I pull vacuum?
Some batches gas aggressively and foam like beer, even under repeat cycles. This can signal old or moisture-laden resin, or unsuitable formulation. In one case, the material kept bubbling after multiple degassing attempts and was rejected. Replace bad stock early. [Elektroda, satcom666, post #17876743]
What if I just buy a self-degassing casting resin?
That’s a practical workaround. Switching to a casting resin marketed as self-venting can eliminate persistent micro-bubbles when process changes fail. Users report better clarity without extensive equipment. Always verify layer limits and cure schedules before large pours. [Elektroda, Mgorski102, post #17037519]
Is a vibrating table worth trying for epoxy casting?
A vibrating table helps consolidate and de-aerate thick materials like concrete. For epoxy, gentle vibration can nudge bubbles upward after pouring. Use low amplitude to avoid frothing the mix. Combine with vacuum or pressure for best results. [Elektroda, czareqpl, post #16986941]
Can I pour Epidian 652 in thick layers?
Epidian 652 struggles in thicker sections. Reports show a 1.5 cm layer is too much for clear, bubble-free results. Use thinner pours or choose a resin designed for deep casting. Adjust catalyst ratio only per manufacturer guidance. [Elektroda, StachCzarnecki, post #17081054]
What’s a ‘bleeder’ or anti-foam spray, and where to get it?
Anti-foam sprays reduce surface tension and help bubbles release. Hobbyists source them from marketplaces by searching for resin venting or anti-foam products. Apply sparingly per label. Test with your specific resin system before critical parts. [Elektroda, Pawel16146, post #17771114]
What is a cyclone/centrifugal filter here, and does it help?
A small cyclone or centrifugal filter can mediate entrained air or aerosols before or during processing. It’s an accessory idea to improve clarity and keep the system cleaner. Integrate only if your setup benefits from pre-separation. [Elektroda, saskia, post #17012499]
Give me a quick 3-step degassing workflow I can copy today.
- Mix carefully to avoid aeration, then place the cup in the chamber.
- Pull vacuum for ~10 minutes; vent slowly; briefly flame the surface.
- Pull vacuum again for ~3 minutes; then pour or proceed. Monitor foam rise and collapse. [Elektroda, satcom666, post #17876743]
What gauge reading equals ~50 mbar absolute on my setup?
On a standard gauge that reads relative to atmosphere, ~50 mbar absolute corresponds to about −0.95 bar. If your gauge shows near −0.95 bar and holds, you’re in the right window for epoxy degassing. Seal quality matters as much as pump rating. [Elektroda, ladamaniac, post #16991283]


