logo elektroda
logo elektroda
X
logo elektroda

Will the new Arduino support a camera and detect objects? Arduino UNO Q vs AI vision models

p.kaczmarek2 1113 6

TL;DR LABEL_AI_GENERATED

  • Arduino UNO Q combines a Qualcomm Dragonwing QRB2210 Linux single-board computer with an STM32U585 microcontroller, then tests whether it can perform practical webcam object recognition.
  • The board runs Debian with XFCE, uses a USB webcam through a USB-C hub, and executes OpenCV YOLOv4-tiny detection entirely on the CPU without acceleration.
  • YOLOv4-tiny achieved only around 2.5 frames per second, while the UNO Q provides 4 GB LPDDR4 RAM and 32 GB eMMC storage for roughly 200–300 zł.
  • Recognition varied sharply: the model identified a white cup at 97% confidence but repeatedly confused phones, mice, bottles, markers, and brushes with unrelated COCO classes.
  • Thermal imaging measured the QRB2210 at about 60°C under load; CPU-only vision performance and the board’s unclear niche versus a Raspberry Pi remain key concerns.
AI summary based on the discussion. May contain errors.
ADVERTISEMENT
This content has been translated flag-pl » flag-en View the original version here
Listen:
  • Will the new Arduino support a camera and detect objects? Arduino UNO Q vs AI vision models
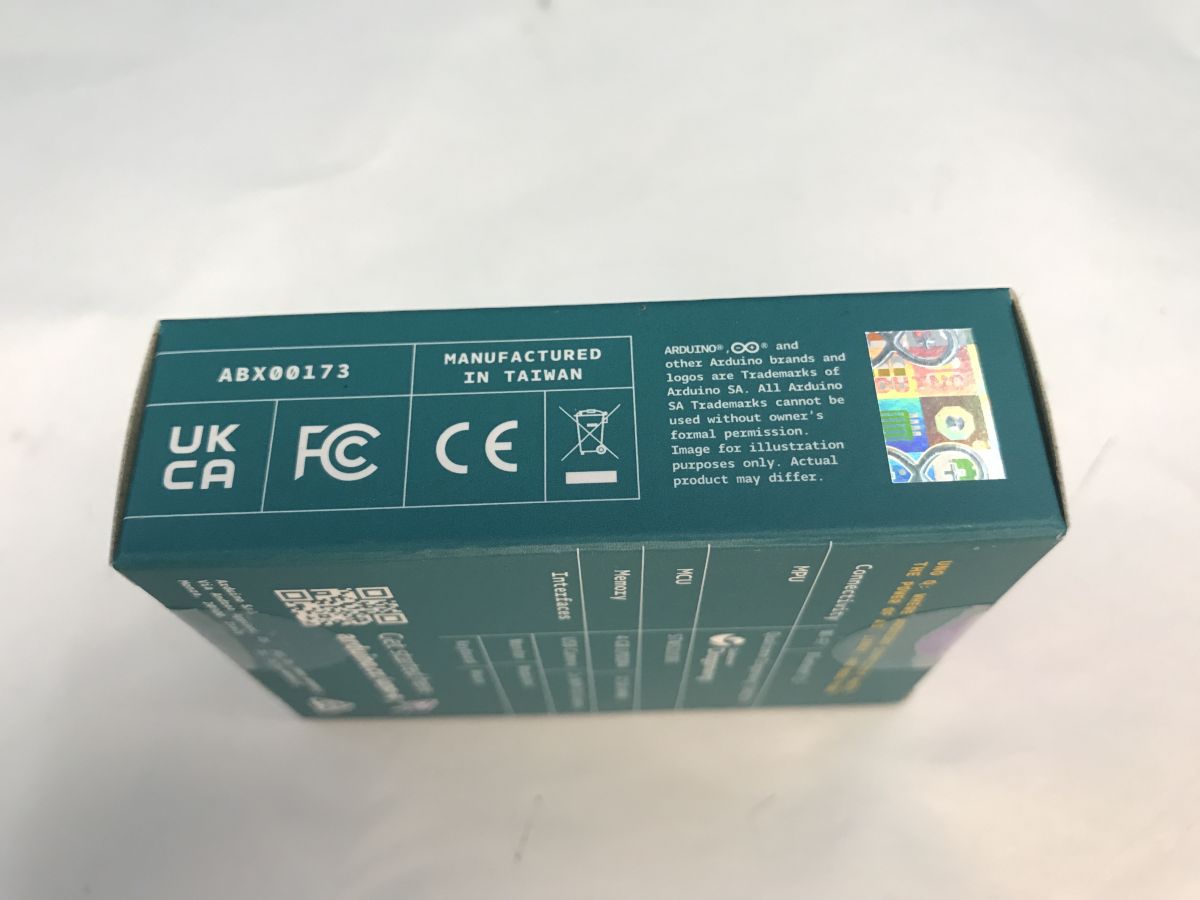
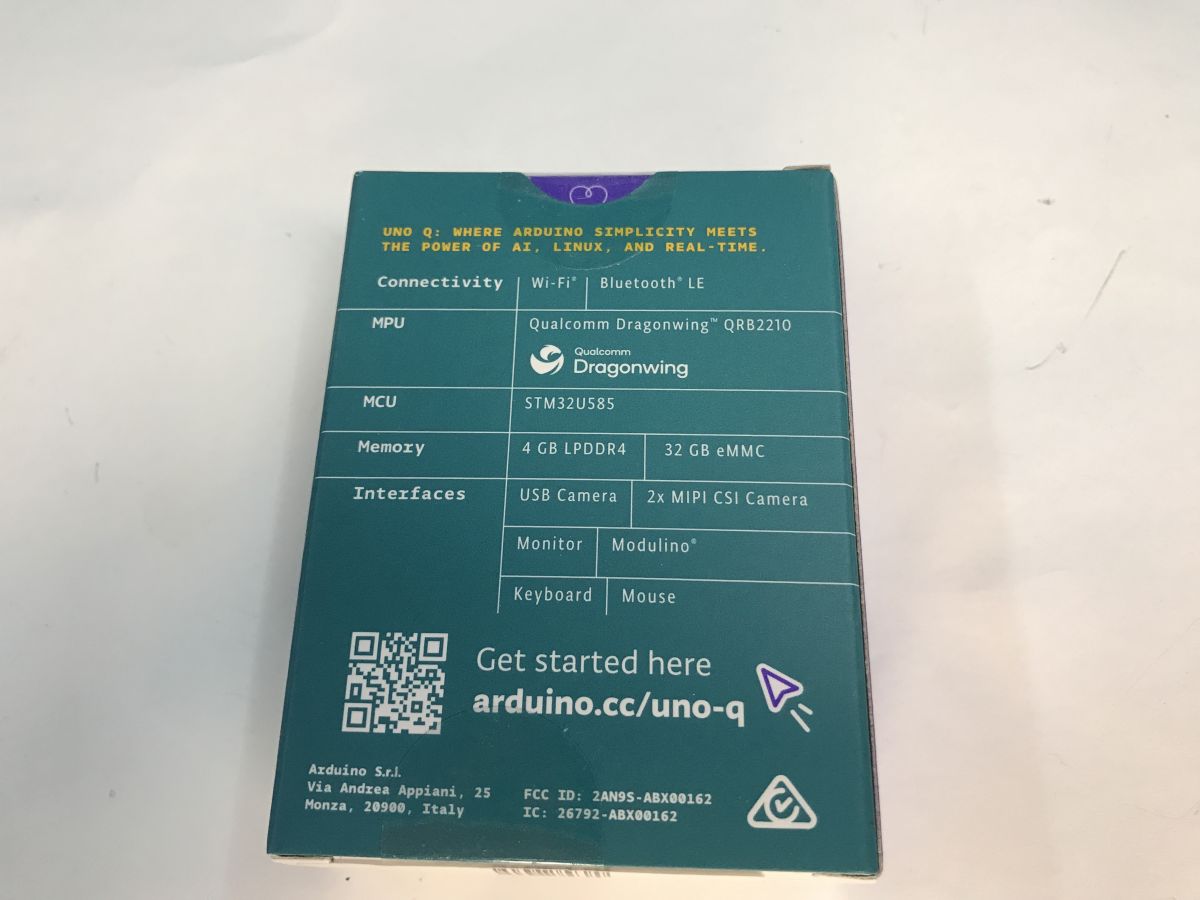
    Is the new Arduino clever enough to tell the difference between a bottle and a mouse, and a mouse and a mobile phone? Today we’re testing a single-board computer from Arduino, equipped with a Qualcomm Dragonwing QRB2210 processor, an STM32U585 microcontroller, 4 GB of LPDDR4 RAM and 32 GB of eMMC storage. Here, I’ll be checking whether and how quickly YOLOv4-tiny runs on it – a lightweight computer vision model that allows for the real-time classification of many different objects from a camera image.
    Will the new Arduino support a camera and detect objects? Arduino UNO Q vs AI vision models Will the new Arduino support a camera and detect objects? Arduino UNO Q vs AI vision models Will the new Arduino support a camera and detect objects? Arduino UNO Q vs AI vision models
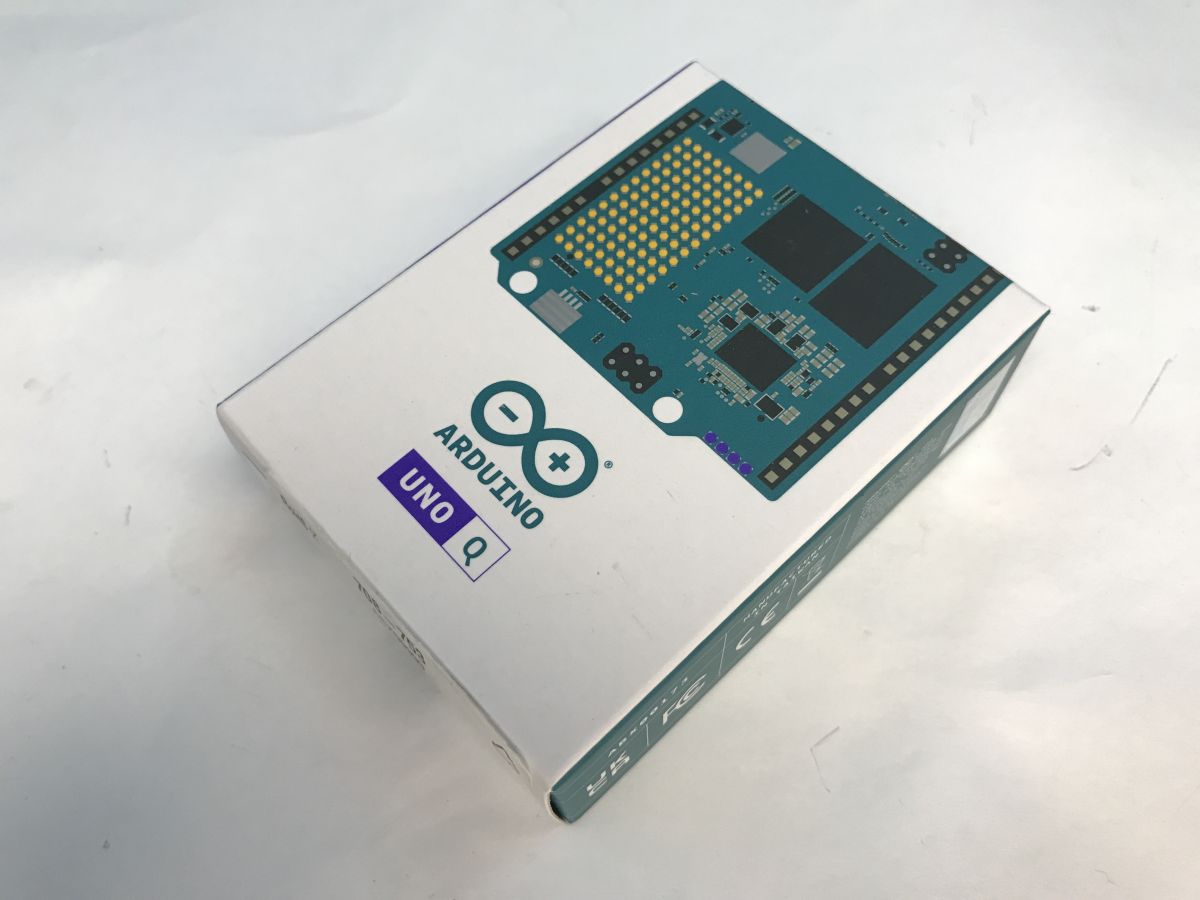
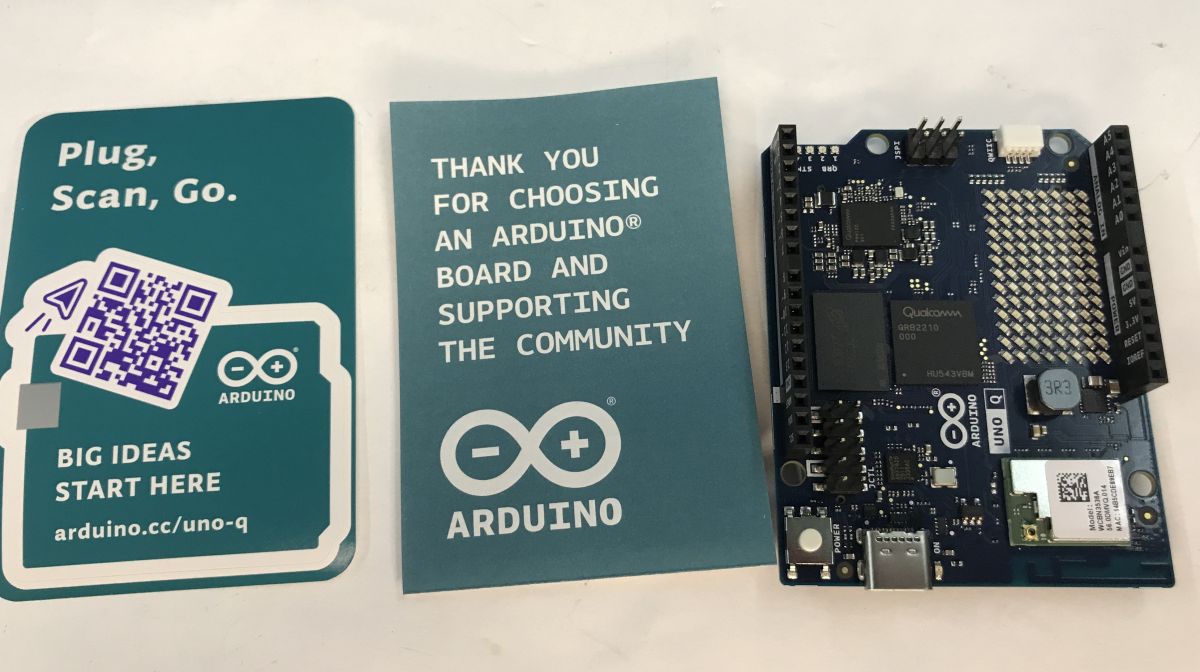
    The Arduino UNO Q was released at the end of last year and costs between 200 and 300 zł in this country.
    Will the new Arduino support a camera and detect objects? Arduino UNO Q vs AI vision models
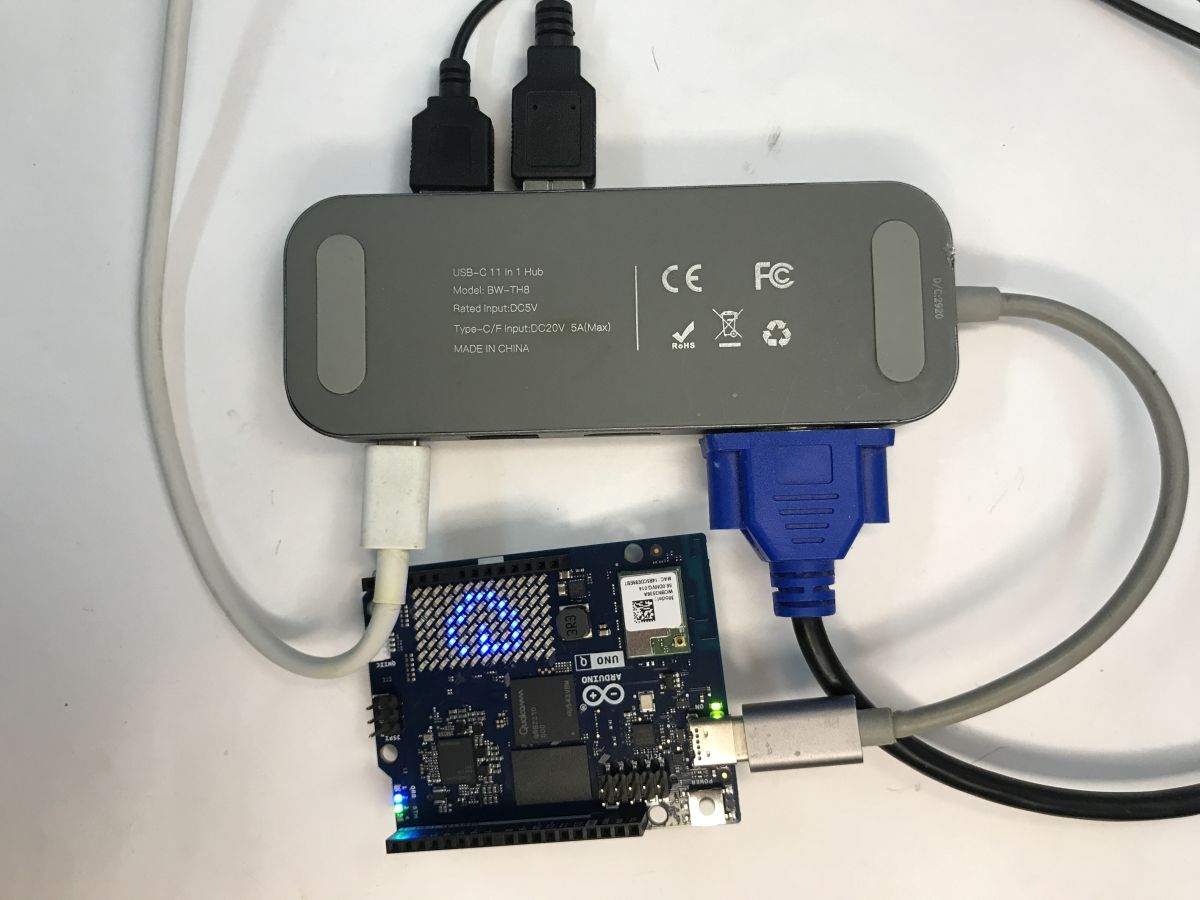
    Let’s start with the initial set-up. Essentially, the whole thing can function like a standard single-board computer. To get it up and running, I connected a multi-port hub (model BW-TH8) to the single USB-C port. This allowed me to connect the power supply, monitor and peripherals, such as a mouse and keyboard, all at the same time.
    Will the new Arduino support a camera and detect objects? Arduino UNO Q vs AI vision models
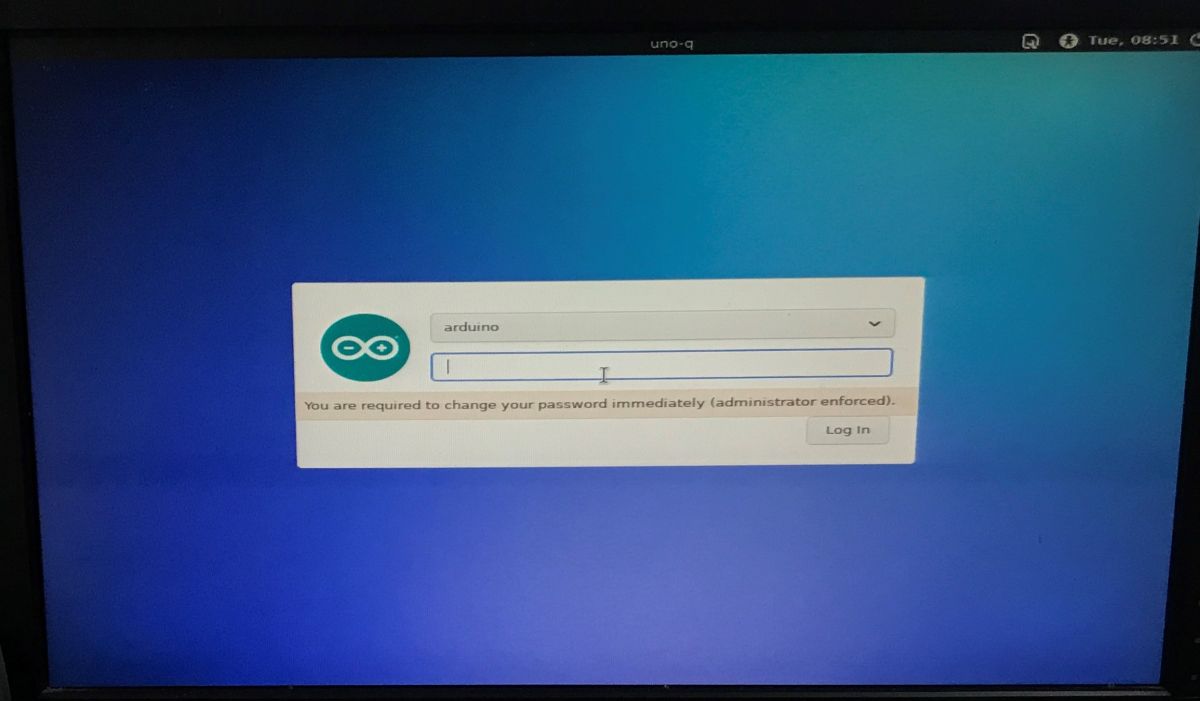
    Normally, the system boots up very quickly and greets us with a login screen. The default username is “arduino”, and on the first attempt to log in, the system immediately prompts us to set our own password.
    Will the new Arduino support a camera and detect objects? Arduino UNO Q vs AI vision models
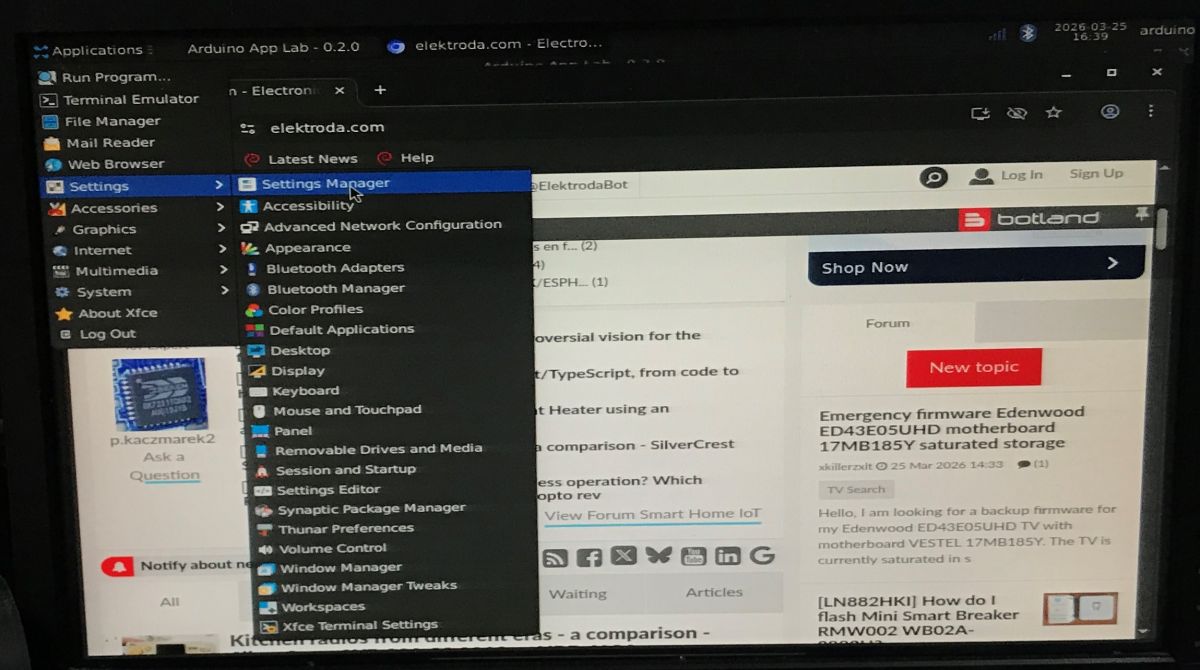
    This gives us access to a fully-fledged graphical environment. As you can see, the lightweight XFCE environment is pre-installed, and we immediately have access to, amongst other things, a web browser (you can browse our forum) and the Arduino App Lab tool.
    Will the new Arduino support a camera and detect objects? Arduino UNO Q vs AI vision models
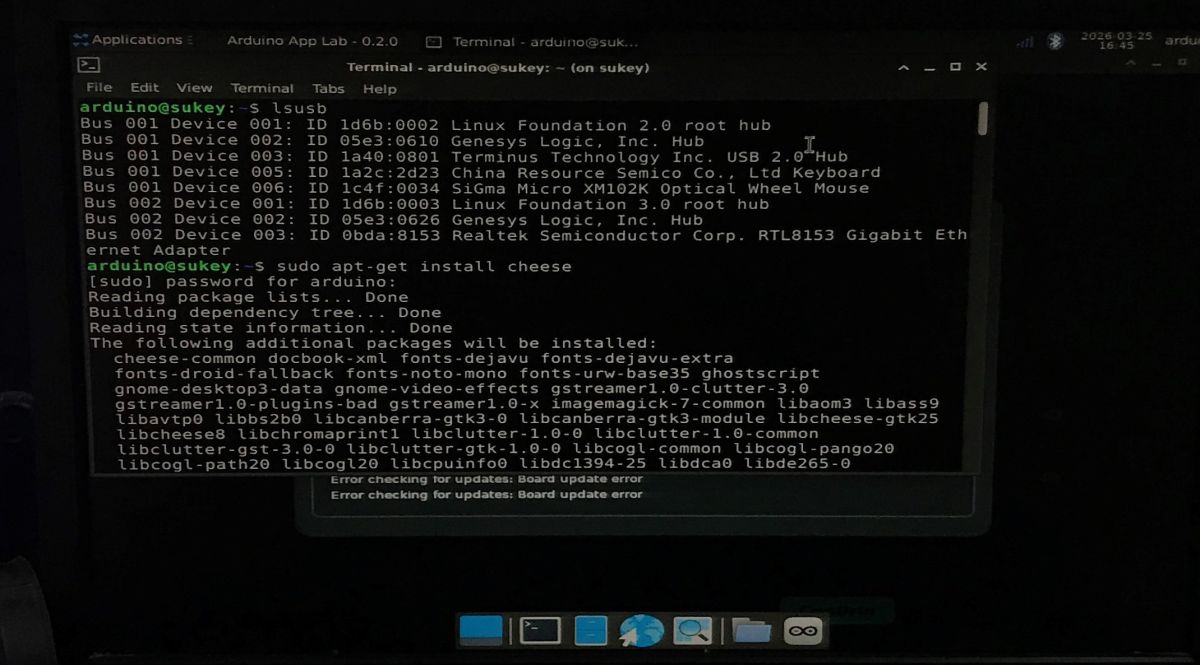
    Now we need to test the USB webcam that’s been connected. As we’re using Linux (Debian), all we need to do is open the built-in terminal. I used the
    lsusb
    command to check whether the system had detected the devices correctly, and then, with a quick
    sudo apt-get install cheese
    command, I installed a popular, simple programme for viewing the webcam feed. The camera works flawlessly.
    Will the new Arduino support a camera and detect objects? Arduino UNO Q vs AI vision models
    Next, we set up the OpenCV demo; more specifically, we install the required libraries and run the detection script. It’s very straightforward. A simplified example:
    Code: Python
    Log in, to see the code


    And now it’s time to move on to the actual tests. What does the camera see?
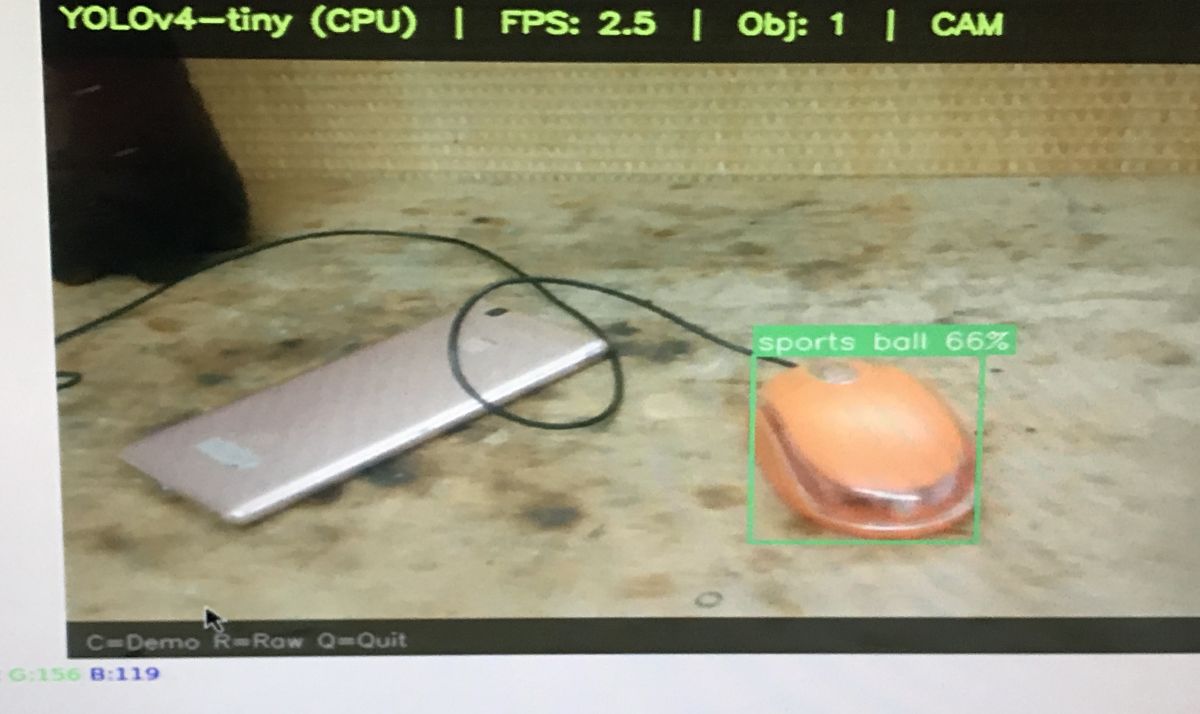
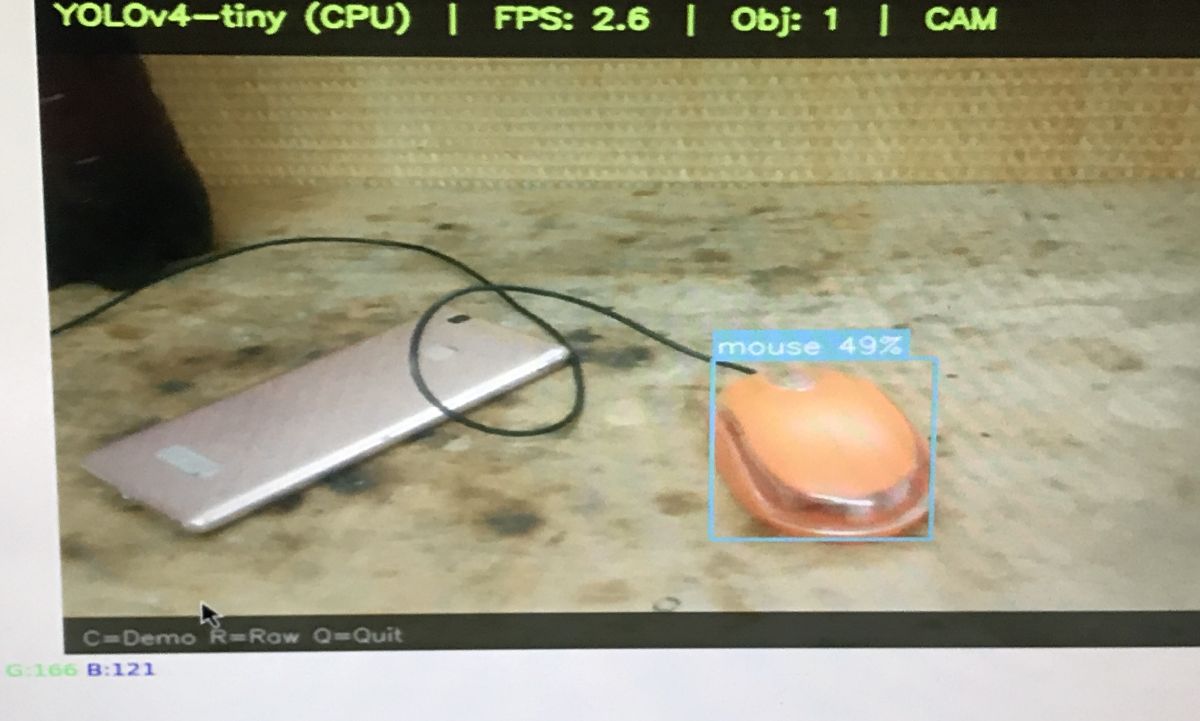
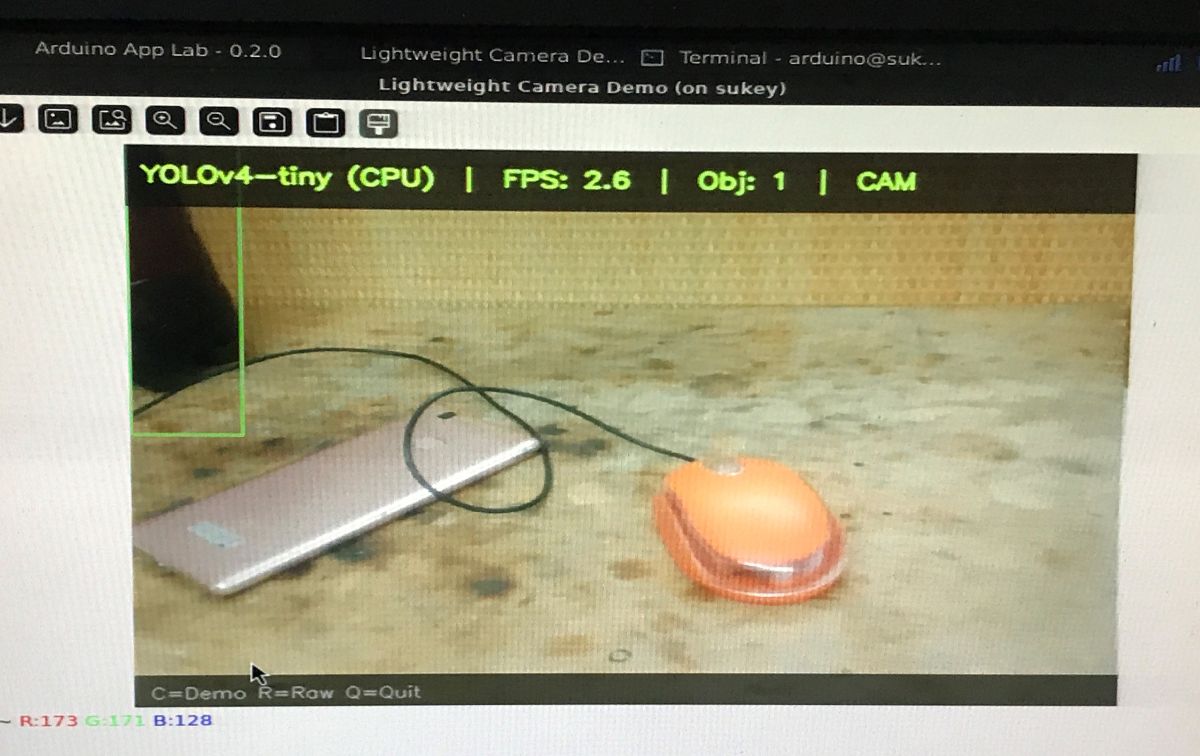
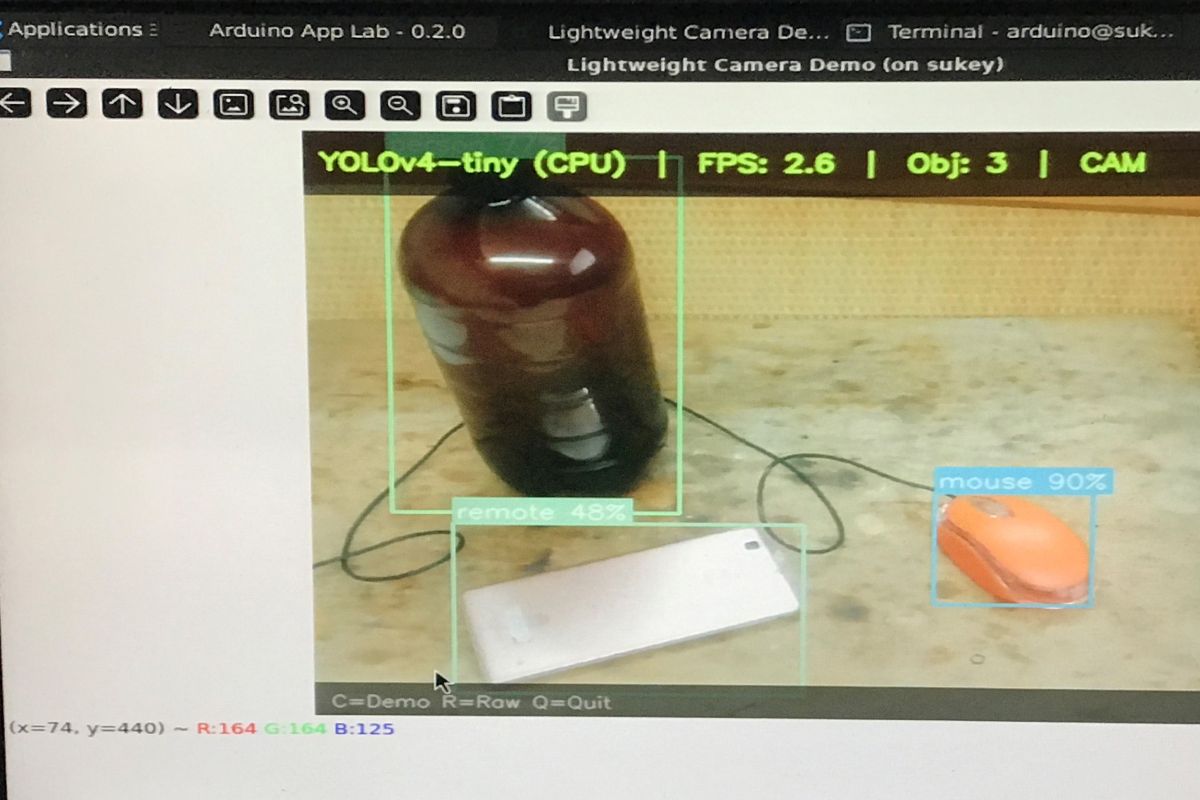
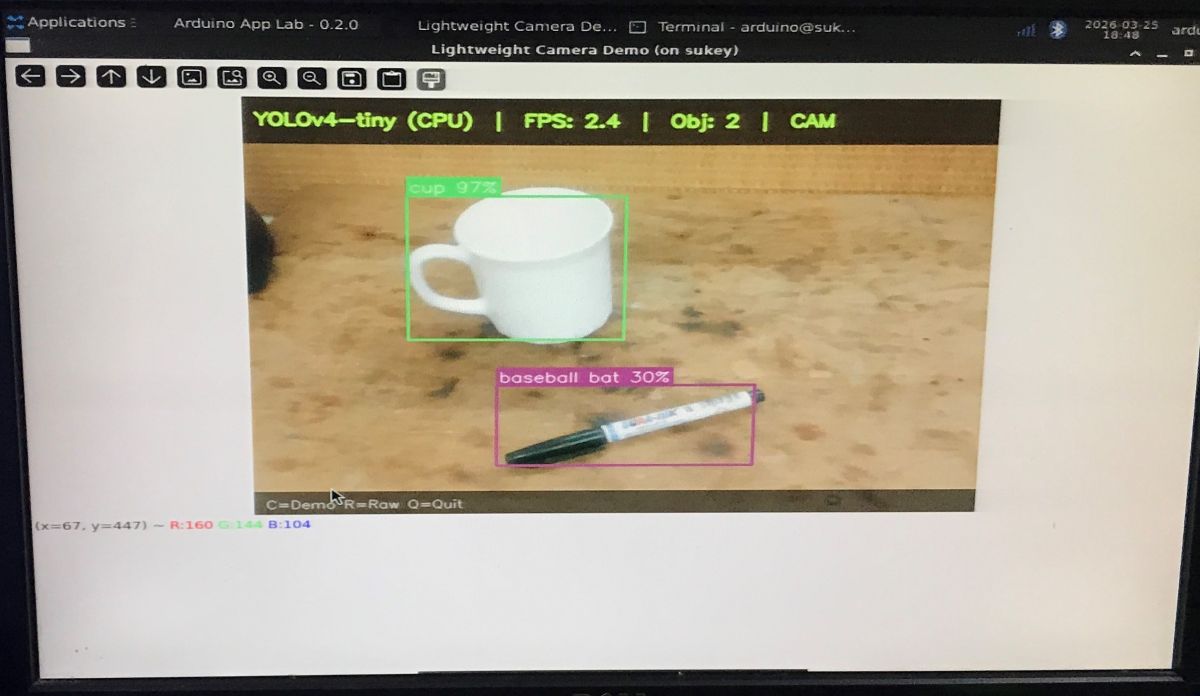
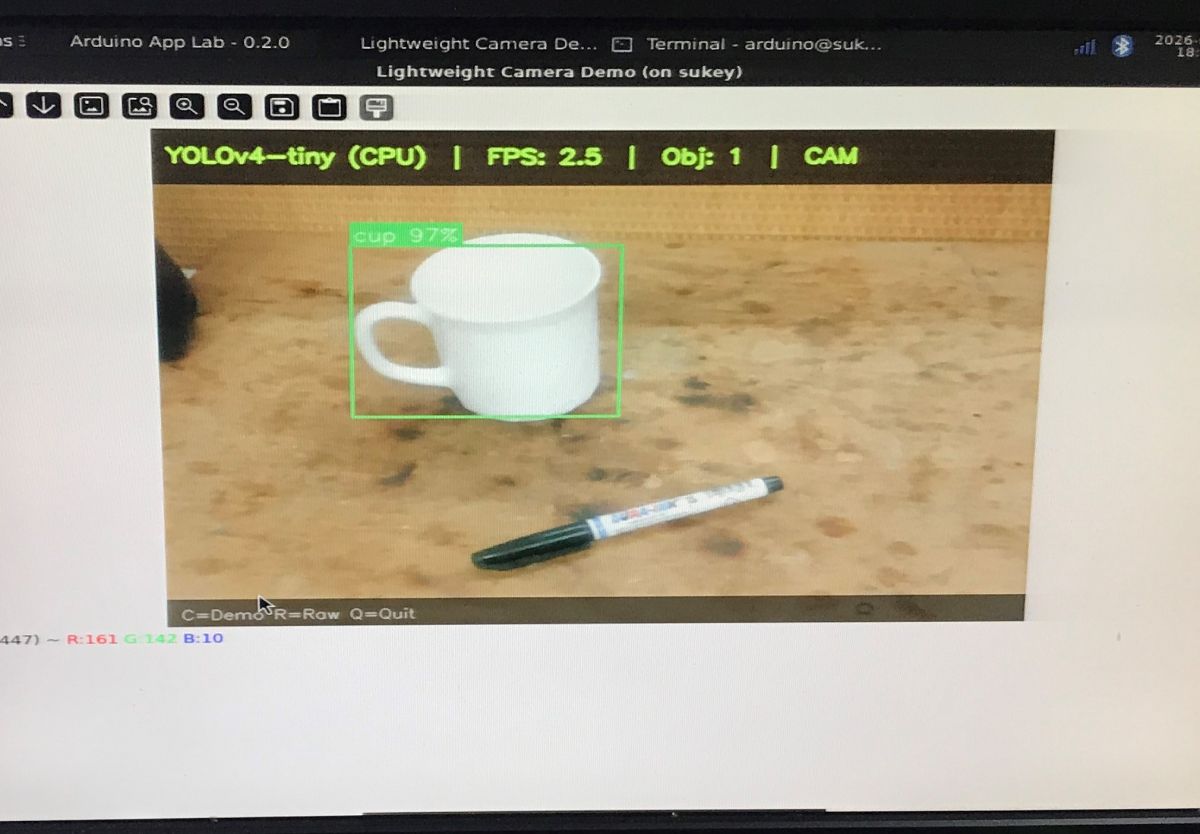
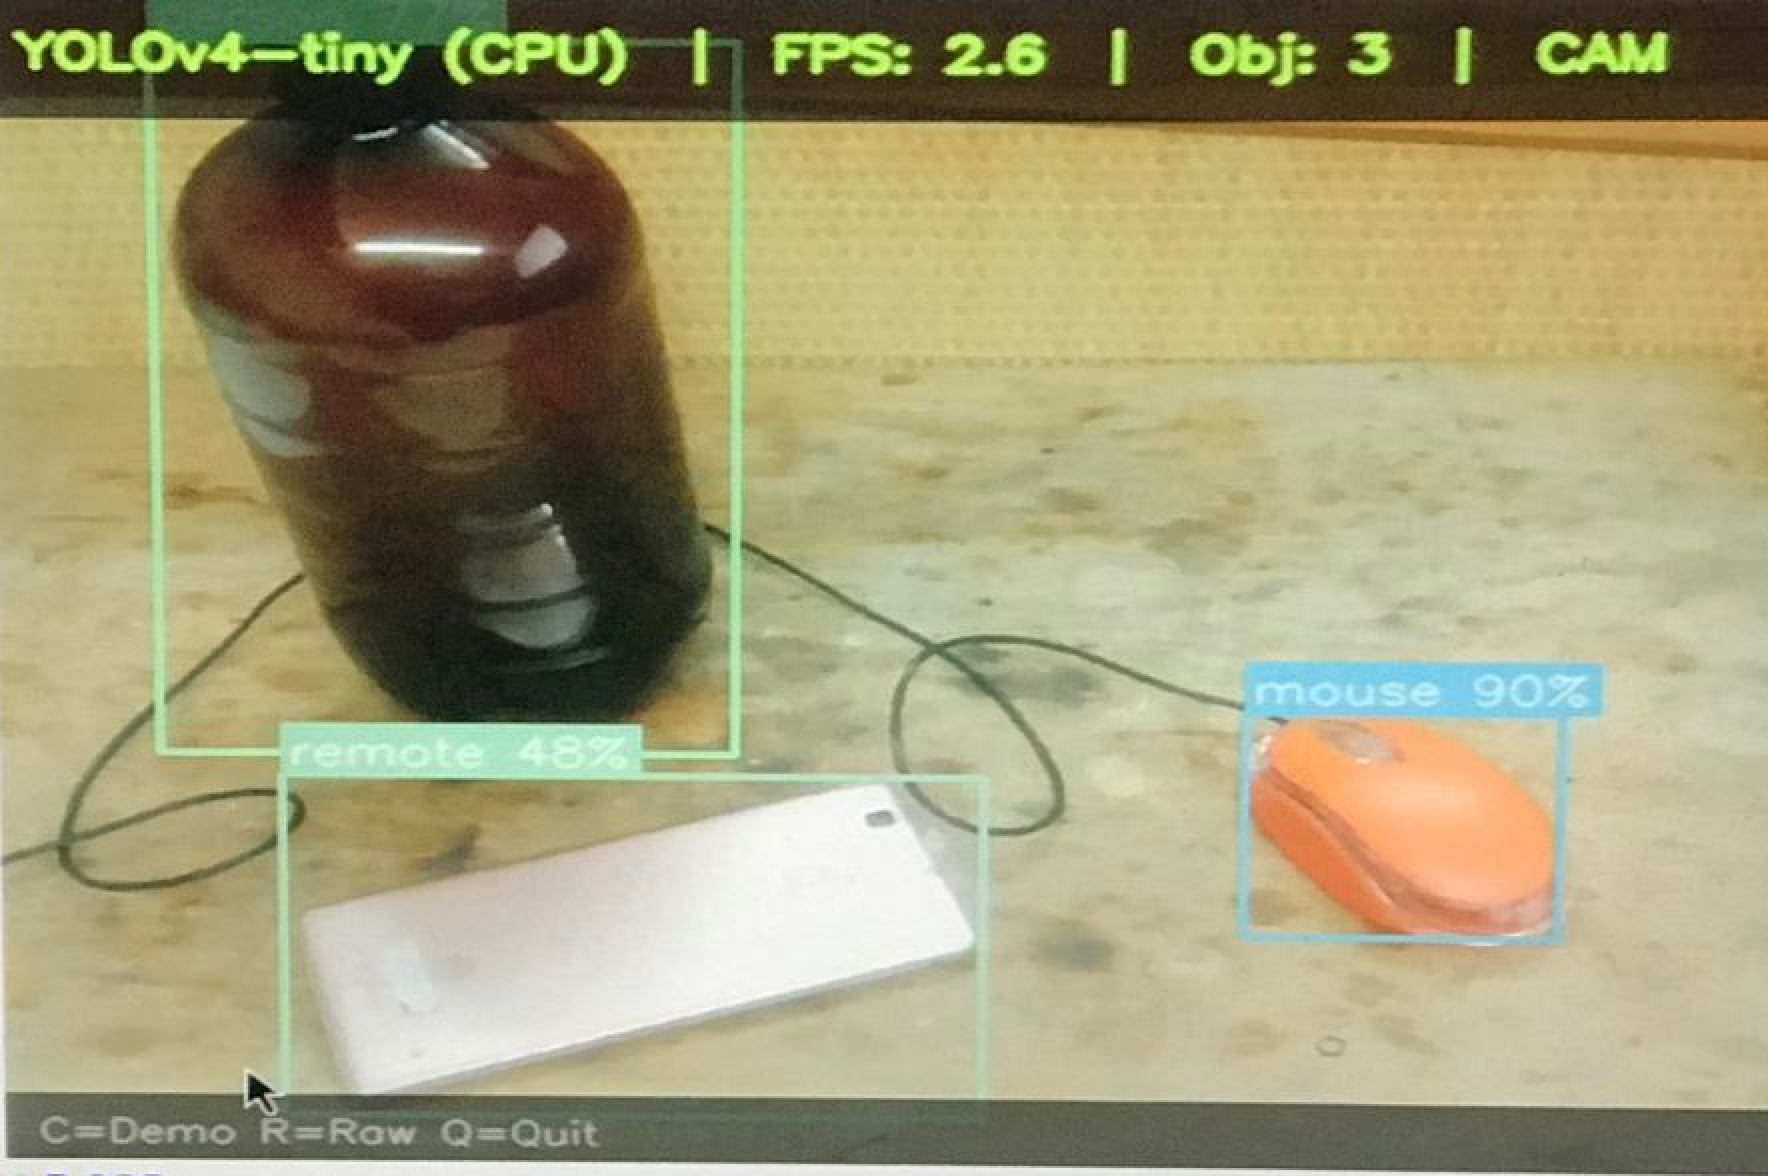
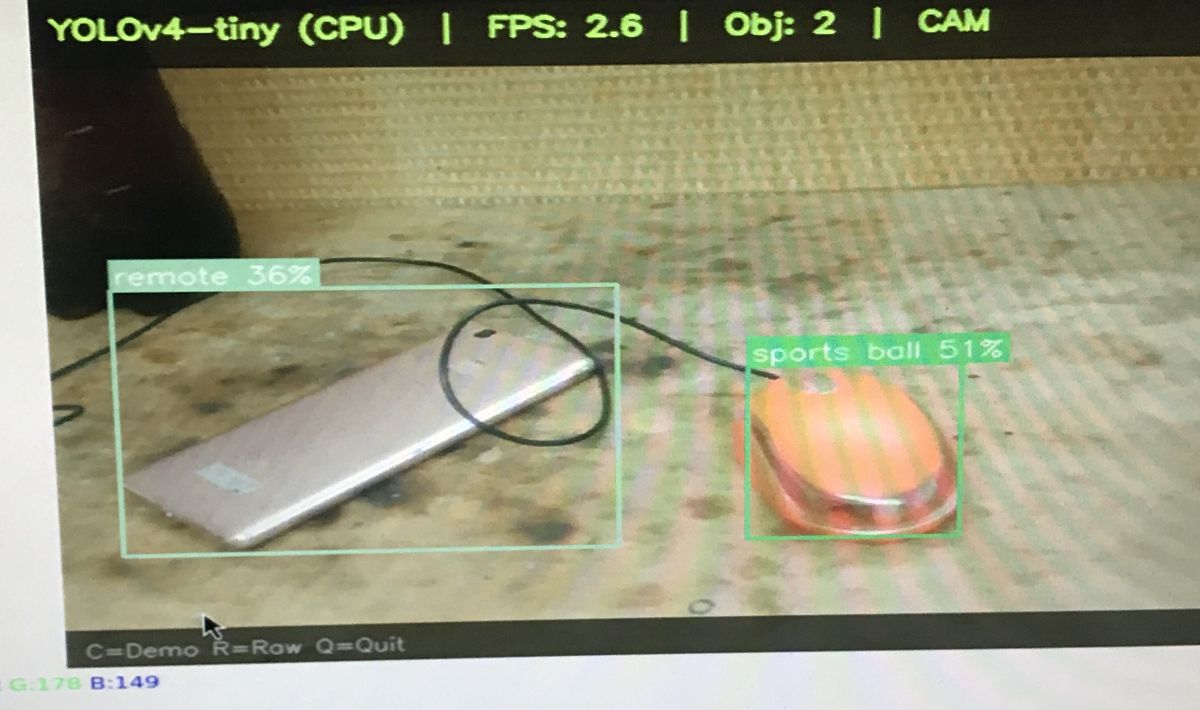
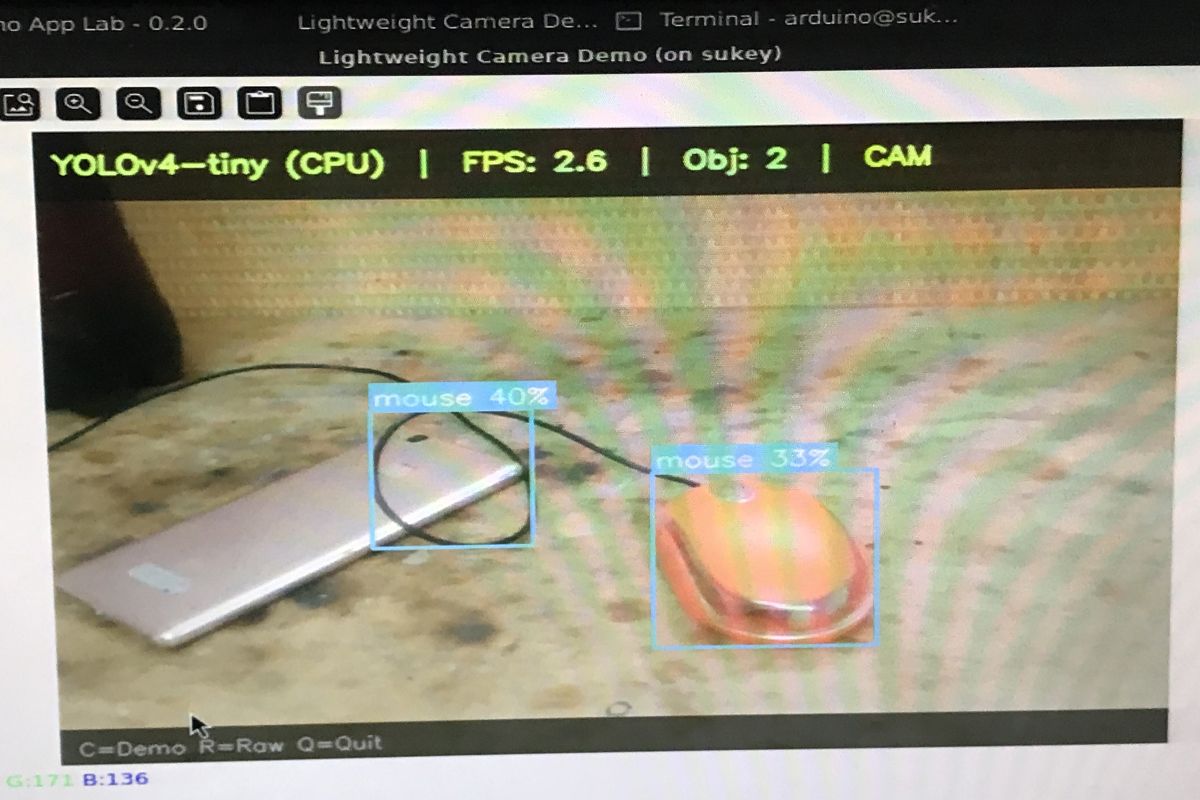
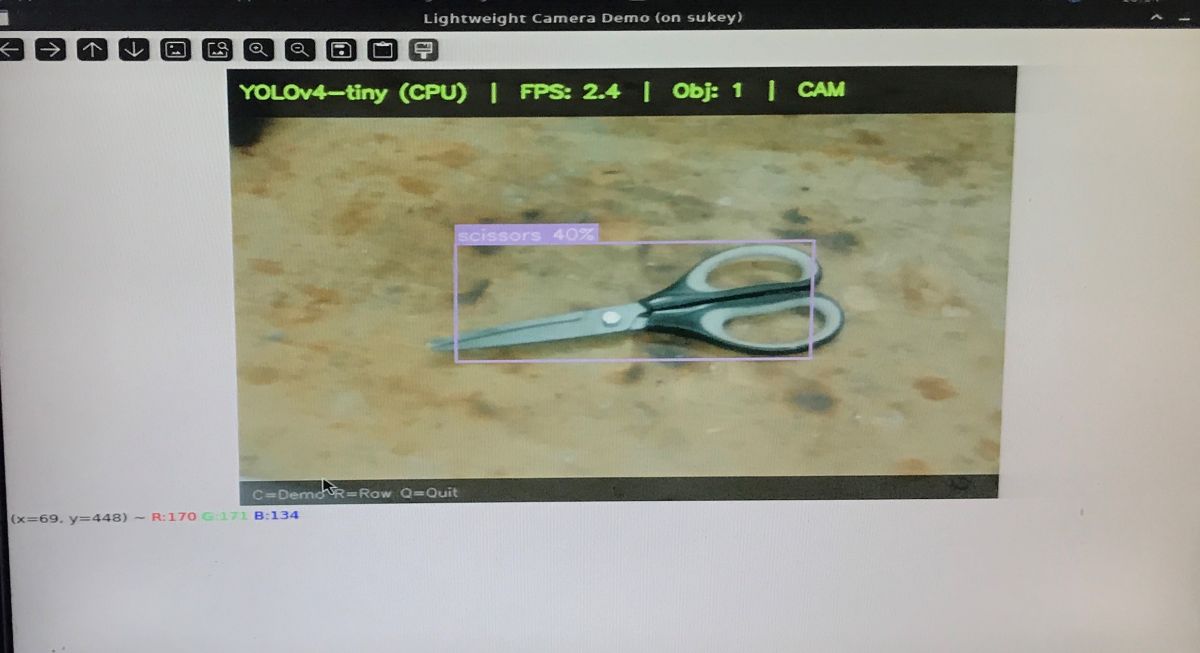
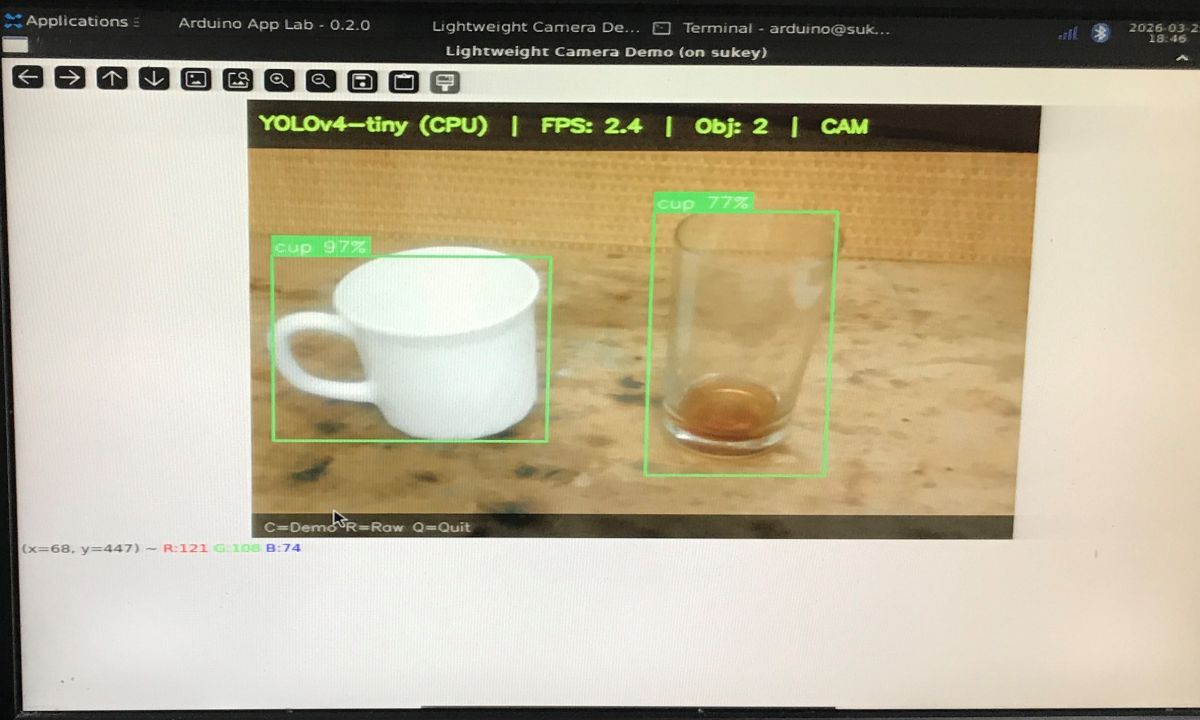
    For convenience, I’ve chosen the smallest model – YOLOV4-tiny, running exclusively on the CPU (without any additional acceleration). Unfortunately, the FPS hovers around 2.5 frames per second, as can be seen in the on-screen statistics.
    Will the new Arduino support a camera and detect objects? Arduino UNO Q vs AI vision models Will the new Arduino support a camera and detect objects? Arduino UNO Q vs AI vision models Will the new Arduino support a camera and detect objects? Arduino UNO Q vs AI vision models
    The first three screenshots show that the algorithm has considerable difficulty recognising objects. A smartphone lying on the desk was identified once as a “remote” (36%), whilst a computer mouse was mistaken twice for a “sports ball” (51% and 66%). It was only in the last screenshot that the mouse was correctly classified as a “mouse”, albeit with a fairly low confidence level of just 49 per cent.
    Will the new Arduino support a camera and detect objects? Arduino UNO Q vs AI vision models Will the new Arduino support a camera and detect objects? Arduino UNO Q vs AI vision models Will the new Arduino support a camera and detect objects? Arduino UNO Q vs AI vision models
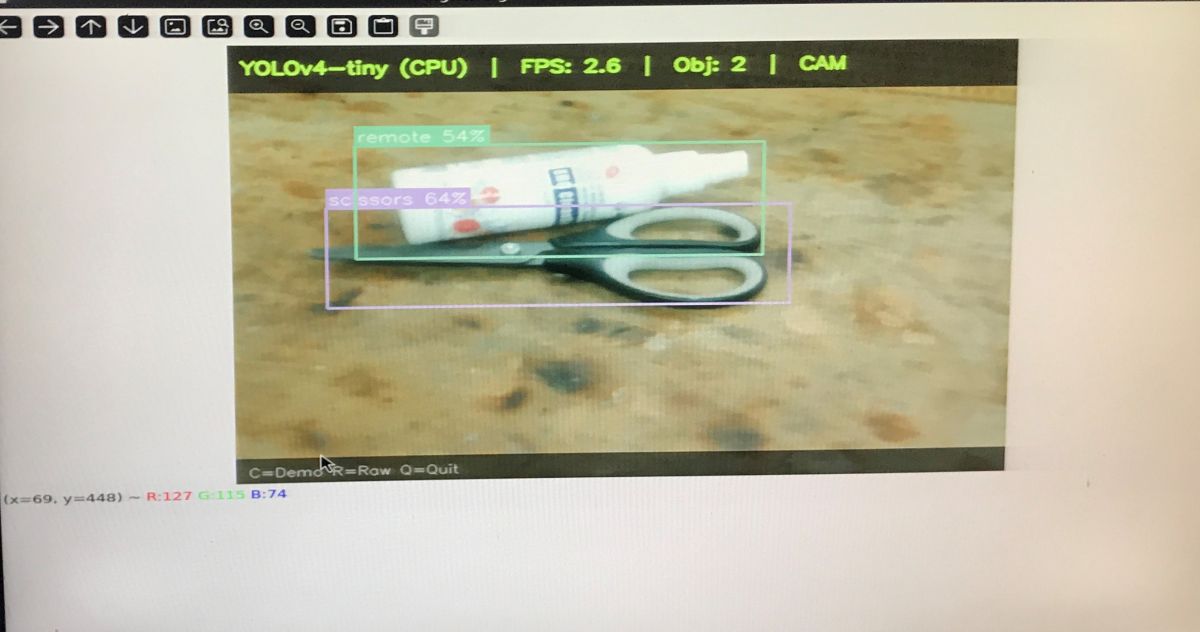
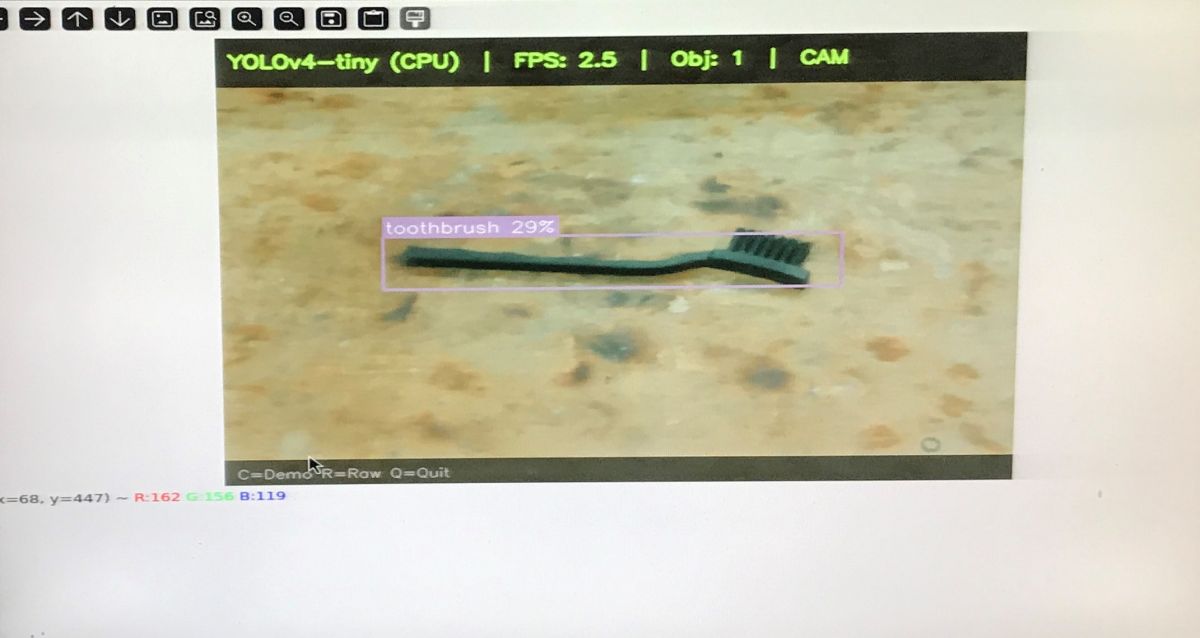
    A moment later, we see another challenge. The scissors lying on the table were initially identified quite accurately (“scissors” 40%), but when I added a white spray bottle, it was recognised as a remote control (“remote” 54%). In the final frame, the small brush was ultimately classified as a “toothbrush”, albeit with a confidence level of just 29%.
    Will the new Arduino support a camera and detect objects? Arduino UNO Q vs AI vision models Will the new Arduino support a camera and detect objects? Arduino UNO Q vs AI vision models Will the new Arduino support a camera and detect objects? Arduino UNO Q vs AI vision models
    Further tests finally yielded some success, but also brought new comical mistakes. The model correctly recognised a white cup (“cup” 97%) and a glass standing next to it (“cup” 77%). Unfortunately, when a marker appeared on the scene instead of the glass, YOLO mistook it for a baseball bat (30%), and in the next shot, it failed to recognise it at all. In each of these situations, however, the cup was consistently identified with 97% accuracy.
    Will the new Arduino support a camera and detect objects? Arduino UNO Q vs AI vision models Will the new Arduino support a camera and detect objects? Arduino UNO Q vs AI vision models Will the new Arduino support a camera and detect objects? Arduino UNO Q vs AI vision models
    I’ll leave my conclusions until the end, though.

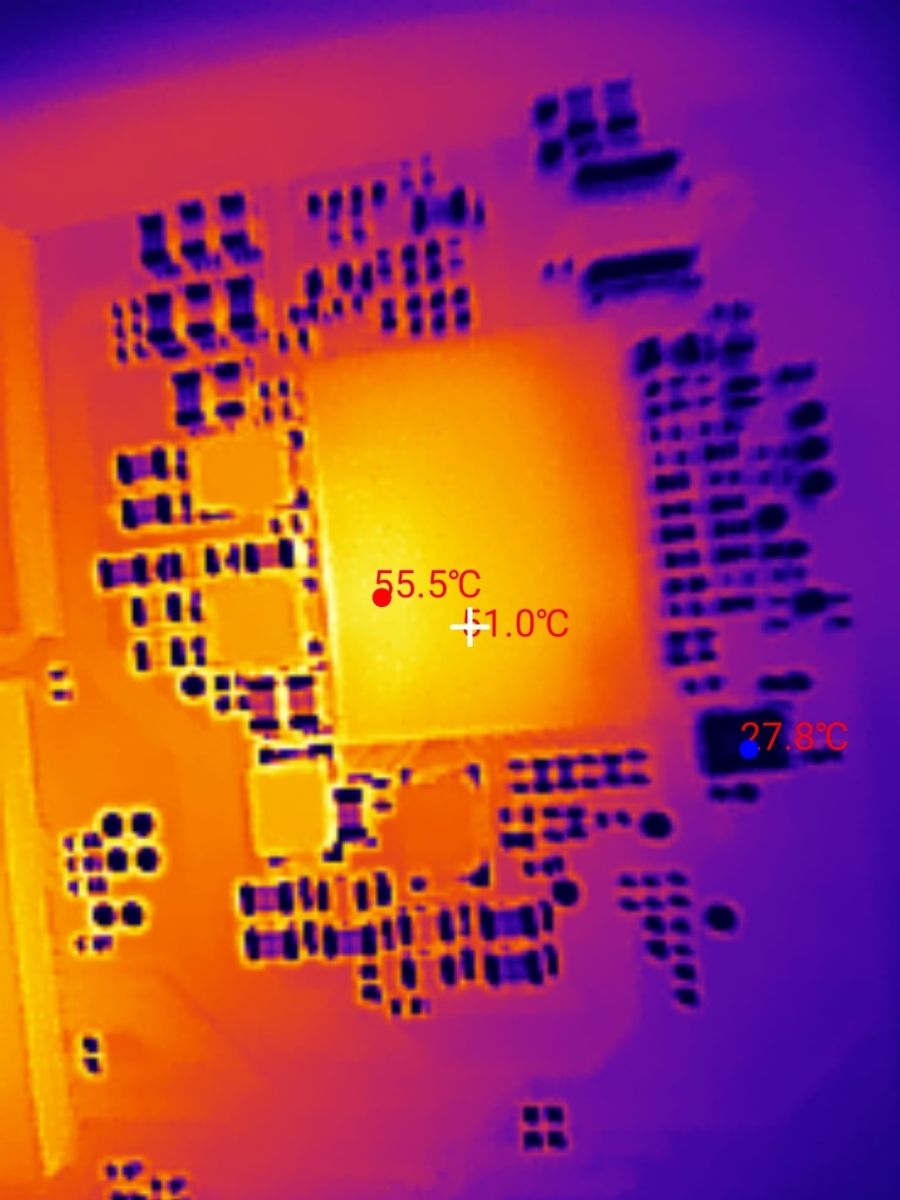
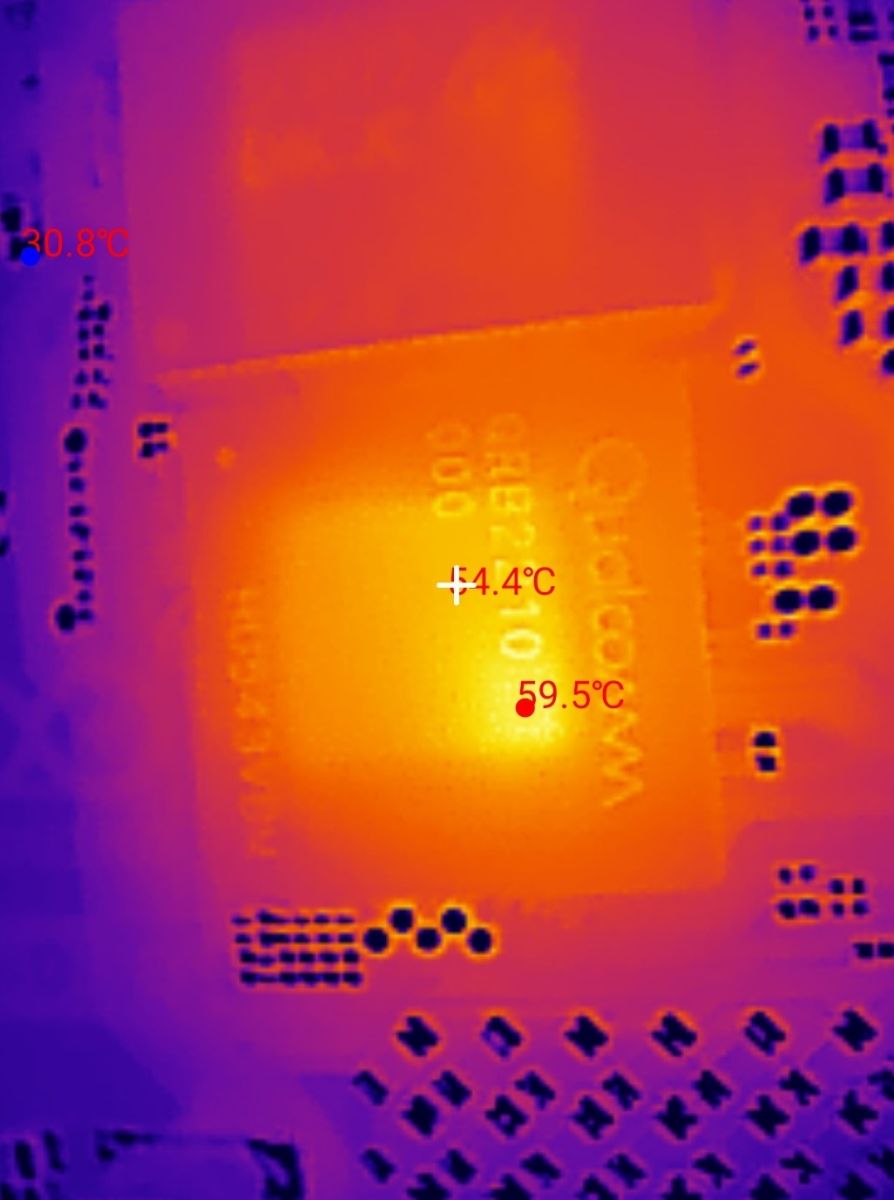
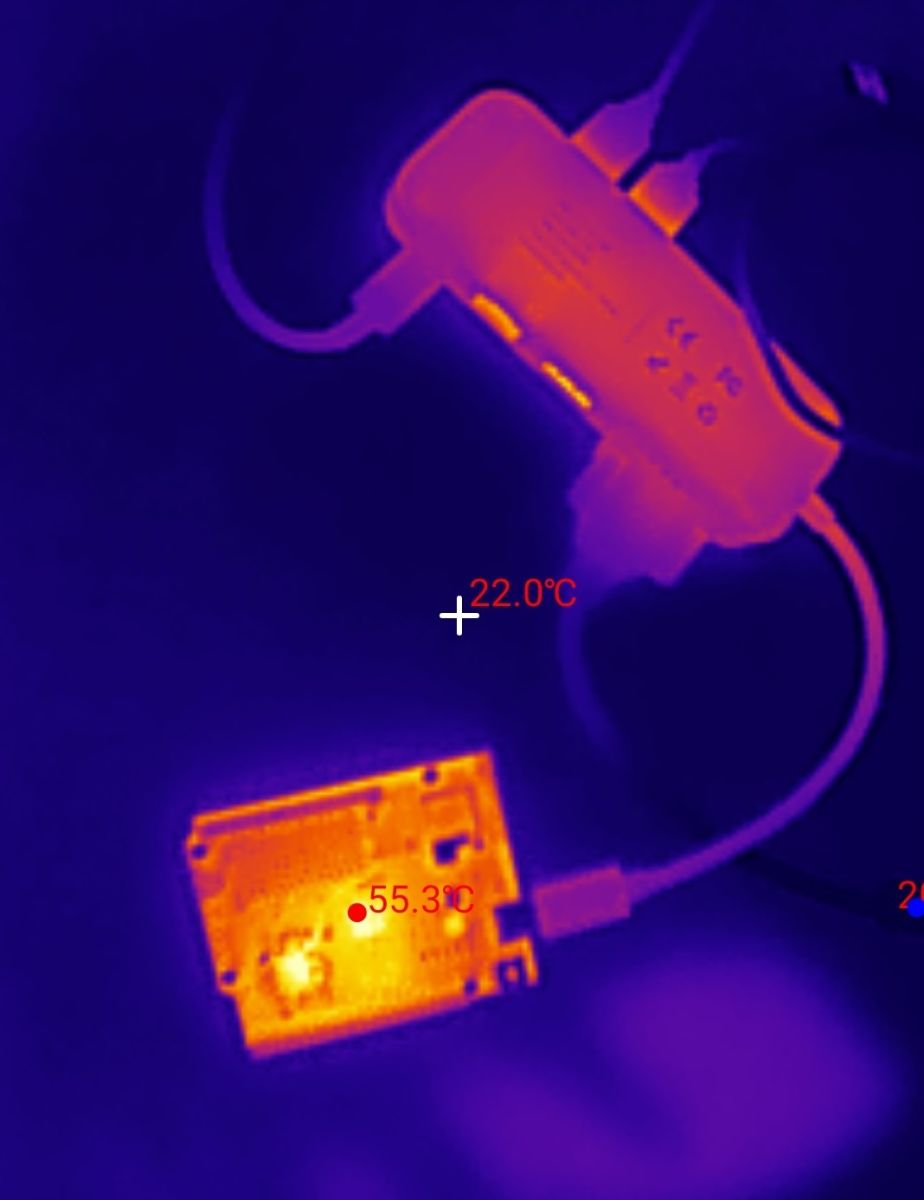
    I also wanted to check how the board copes with heat dissipation under load. Measurements from a thermal imaging camera revealed temperatures in the range of 55–60°C. The hottest component on the front panel was, of course, the Qualcomm QRB2210 chipset, which heated up to around 60°C.
    Will the new Arduino support a camera and detect objects? Arduino UNO Q vs AI vision models Will the new Arduino support a camera and detect objects? Arduino UNO Q vs AI vision models Will the new Arduino support a camera and detect objects? Arduino UNO Q vs AI vision models
    The whole unit heats up fairly evenly and there’s little cause for concern about overheating – the underside of the board registers temperatures of around 57°C. However, it’s always worth ensuring adequate ventilation within the case for more advanced projects.
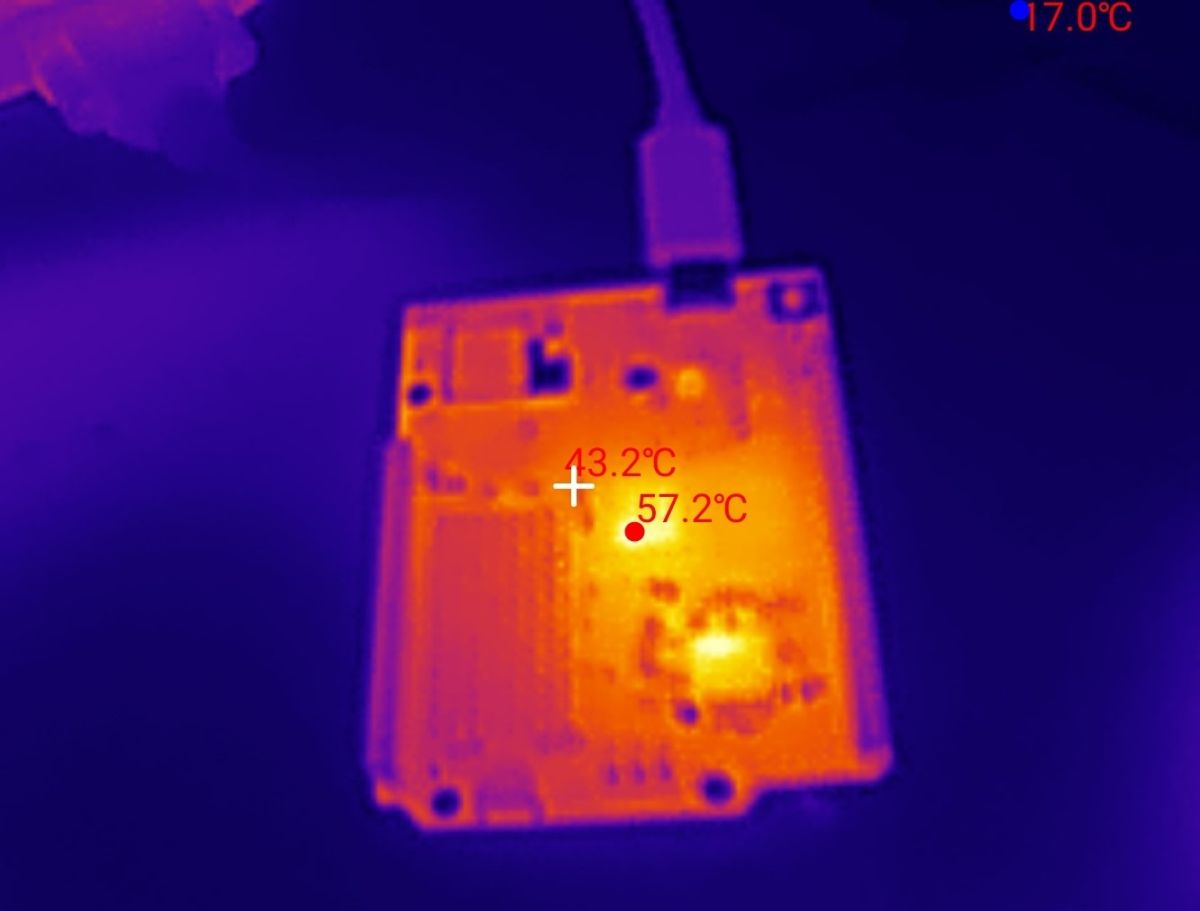
    Will the new Arduino support a camera and detect objects? Arduino UNO Q vs AI vision models

    To sum up , The Arduino UNO Q seems to be an interesting concept for combining the world of microcontrollers with the performance of a simple single-board computer running Linux, a bit like the Raspberry Pi. Although our simple test on the YOLOv4-tiny model showed that using only the CPU for image processing does not yield a reasonable FPS (around 2.5 frames per second) and that using the tiny model results in frequent algorithm errors, the hardware platform itself seems quite interesting. My only issue is with who the target audience for this type of board might be. The classic, simple Arduino fills a gap in the market well, making microcontroller programming accessible in a straightforward way. Similarly, the Raspberry Pi, as a single-board computer, has its own market. But what about this? Is it meant to be an intermediate step? An attempt to keep Arduino enthusiasts loyal to the brand? Or, at this price, wouldn’t it be better to go for a Raspberry Pi? I’ll leave these questions to you – what do you think? Does the Arduino Q make sense?

    Cool? Ranking DIY
    Helpful post? Buy me a coffee.

    About Author
    p.kaczmarek2
    Moderator Smart Home
    Offline 
    p.kaczmarek2 wrote 14803 posts with rating 12965, helped 659 times. Been with us since 2014 year.
  • ADVERTISEMENT
  • #2 21949541
    gulson
    System Administrator
    Posts: 29573
    Help: 150
    Rate: 6144
    In more professional applications, there’s no room for error. So, does that mean you need to use a better model and better equipment?
  • ADVERTISEMENT
  • Proposing comparative benchmarks for OpenVINO vision models

    #3 21949550
    p.kaczmarek2
    Moderator Smart Home
    Posts: 14803
    Help: 659
    Rate: 12965
    There will always be a trade-off between a model’s performance and detection accuracy. I discussed this in a bit more detail in the thread on CSI computers, where I also looked at various OpenVINO models:
    Comparison of single-board computers – PICO, 3.5" and EPIC. PICO and 3.5" tests for AI
    You can do a lot with these models; there’s nothing to stop you from building your own ‘smart’ surveillance camera that detects, for example, people, animals or vehicles.
    Person on grass with a dog; cat on a bench, bicycle and potted plants, with object-detection boxes overlaid.
    Conference room scene with people at a table and a YOLOv8 object-detection overlay with bounding boxes.
    City street with cars and pedestrians, overlaid with YOLO object-detection bounding boxes
    It might be interesting to gather all these types of models in one place – in various sizes (with differing performance levels) – and compare them in a single video to see which one performs best in different situations.
    Helpful post? Buy me a coffee.
  • ADVERTISEMENT
  • Questioning parcel-counting accuracy with touching and stacked boxes

    #4 21950720
    jousto
    Level 17  
    Posts: 187
    Help: 14
    Rate: 51
    I would like to use such a system to count parcels at a sorting centre, which are transported on an 80 cm wide conveyor belt at a speed of 25 cm/sec. The parcels may be placed individually, may move in groups, or may be in contact with one another. In exceptional cases, one parcel (a smaller one) may lie completely or partially on top of another (a larger one). I wonder if this solution can cope with that.
  • ADVERTISEMENT
  • Fine-tune YOLO with manually labeled parcel images

    #5 21950731
    gulson
    System Administrator
    Posts: 29573
    Help: 150
    Rate: 6144
    Hmm, I think I’d start by taking photos, doing an initial classification using a YOLO model, and then fine-tuning it in the areas where it got the count wrong – in other words, labelling them manually. The idea is to get the general model used to the specific characteristics of how the parcels look. Or perhaps there are already pre-trained models specifically for this?

    @ElektrodaBot, can you help with some ideas for the parcels?
  • YOLO counting needs tracking and conveyor-specific training

    #6 21950737
    ElektrodaBot
    AI OpenAI ChatGPT4
    Posts: 8895
    Help: 365
    Rate: 956
    LABEL_AI_GENERATED
    gulson wrote:
    Hmm, I think I’d start by taking photos, doing an initial assessment using the YOLO model, and then fine-tuning it where it got the count wrong – in other words, labelling them manually. The idea is for the general model to...
    Direct reply

    Yes, that’s a very good approach: collecting images from your own footage, initial detection using a pre-trained model, manual correction of errors and iterative fine-tuning which, in practice, is classic active learning / transfer learning . With parcels at a sorting centre, I wouldn’t count on a general-purpose model working in production ‘out of the box’, but it can be a very good starting point.

    Ready-made models and datasets do exist, particularly under search terms such as box detection , cardboard box detection , package detection , conveyor belt boxes . Roboflow Universe has separate projects and datasets for detecting boxes/cartons, including in the context of warehouses, conveyor belts and logistics. These can be used as a starting point, but ultimately you will still need to ‘train’ the model to recognise the specific conveyor belt, camera, lighting and typical parcels from that sorting centre. ( universe.roboflow.com )

    Most importantly: YOLO alone, combined with counting frames in each frame, is not enough . For accurate counting, you will need the following setup:

    Code: text
    Log in, to see the code


    Detailed analysis of the problem

    1. A ready-made model: yes, but more as a starting point

    Ready-made ‘off-the-shelf’ models are available, but they should be treated as a base model , rather than a ready-made industrial solution. Roboflow has example models and collections such as Box Detection , Cardboard Box , Package and label detection , and even projects described as ‘boxes on a conveyor belt’. This could significantly speed up the first version of the system. ( universe.roboflow.com )

    This is what I would do:

    1. Download or test a ready-made model for detecting boxes/parcels.
    2. Record your own video from the conveyor belt: different parcels, different times of day, different lighting conditions, parcels touching each other, parcels sealed with tape, polythene-wrapped parcels, envelopes, and damaged cardboard boxes.
    3. Select the problematic frames – not all of them one by one.
    4. Manually label the parcels.
    5. Fine-tune the model.
    6. Deploy it on the production line and log uncertain cases and counting errors.
    7. Run another training iteration from time to time.

    What you’ve described — ‘re-training at the point where it made a mistake in the count’ — is exactly what yields the greatest benefit in practice. There’s no point in labelling thousands of identical frames where parcels are travelling individually and the model is already coping. We need to collect borderline cases .

    2. Rectangular detection or segmentation?

    For simple cases, classic object detection – i.e.
    bounding boxes
    – is sufficient. The problem arises when the parcels:

    - touch each other at the sides,
    - travel in a group,
    - partially obscure one another,
    - one lies on top of another,
    - are similar in colour to the tape,
    - are wrapped in cling film or have glossy labels.

    In such cases, standard bounding boxes may start to ‘merge’ the parcels together. Therefore, for this application, I would seriously consider instance segmentation , e.g. the YOLO-seg model. Instance segmentation returns not just a rectangle, but a mask/outline of a specific object, which is better suited to separating adjacent packets. Ultralytics documents YOLO11 models in variants including detection, segmentation and OBB, whilst instance segmentation returns masks/outlines of individual objects. ( docs.ultralytics.com )

    Practical recommendation:

    Scenario Recommended approach
    Packages separated by spaces YOLO detection + tracking
    Adjacent packets YOLO-seg or OBB
    Packages at an angle OBB or segmentation
    Package on top of a package segmentation + ideally a 3D/depth camera
    Very high reliability required 2D camera + 3D/depth + possibly auxiliary sensors


    If the parcels are mainly cardboard boxes with distinct edges, you can start with
    YOLO11n-seg
    or
    YOLO11s-seg
    . The
    nano
    version will be faster, whilst
    small
    is usually more accurate. I wouldn’t expect miracles on a CPU, but it might be worth a go on an AI accelerator.

    3. Counting: don’t count detections, only crossings of the line

    This is very important. The YOLO model essentially says, ‘I see a parcel here’ in every frame. If you count all detections, the same parcel will be counted multiple times. You need a tracker , i.e. an algorithm that tracks objects across frames.

    Typical setup:

    1. The model detects parcels.
    2. The tracker assigns identifiers to the parcels:
    ID 1
    ,
    ID 2
    ,
    ID 3
    .
    3. You define a virtual line in the image that runs perpendicular to the conveyor belt.
    4. The counter is incremented only when a parcel with a given ID crosses the line in the correct direction.
    5. Once counted, the ID is added to the ‘already counted’ list.

    Ultralytics YOLO has an object tracking mode and supports trackers such as ByteTrack and BoT-SORT , which are sensible candidates for such a project. ( docs.ultralytics.com )

    Diagram:

    Code: text
    Log in, to see the code


    For counting, it is better to use not the very centre of the frame, but, for example:

    - the centre of the segmentation mask,
    - the lower edge of the object,
    - the point where the mask intersects a line,
    - the time-filtered centroid.

    With overlapping packets, tracking will be more difficult, but it is still significantly better than the ‘number of detections per frame’.

    4. Belt speed versus required FPS

    You have a belt 80 cm wide and travelling at 25 cm/s. If the camera sees, for example, 60 cm of the belt in the direction of movement, the parcel remains in the frame for:

    Code: text
    Log in, to see the code


    With your previous result of approx. 2.5 FPS using YOLOv4-tiny on the CPU, you only get around:

    Code: text
    Log in, to see the code


    This isn’t enough for stable tracking, especially when the vehicles are travelling in a group or momentarily block each other’s view. I’d aim for a minimum of 10–15 FPS , and comfortably up to 20–30 FPS . At 20 FPS, the same parcel would be visible for around 48 frames, which gives the tracker significantly more data.

    In other words: an Arduino UNO Q in CPU mode might be fine for experiments, but for production-level parcel tracking you’ll probably need:

    - AI acceleration on a Qualcomm chip, if it can be put to practical use,
    - or hardware such as a Jetson / mini-PC / Raspberry Pi with an AI accelerator,
    - or an industrial camera / smart vision controller.

    The Raspberry Pi AI Kit is an example of an affordable edge accelerator; it is officially based on the Hailo-8L and is rated at 13 TOPS. ( raspberrypi.com )

    5. The camera, optics and lighting are just as important as the model

    In a sorting centre, it is usually not the model itself that causes the most problems, but the input image:

    - shadows between parcels,
    - reflections from packing tape,
    - black foil envelopes on dark tape,
    - white labels overexposing the image,
    - motion blur,
    - camera vibrations,
    - fluctuating lighting in the hall.

    Practical recommendations:

    1. Camera above the conveyor belt, pointing vertically downwards where possible
    Ideally at 90° to the conveyor belt plane. Less perspective distortion, simpler counting, easier calibration.

    2. Constant, diffused LED lighting
    No spotlights, just even lighting. It’s worth considering LED strips on the sides or a panel/diffuser.

    3. Short exposure time
    For a speed of 0.25 m/s, to ensure the blur is below approx.. 1 mm, the exposure should be around 1/250 s or shorter. This requires strong lighting.

    4. Global shutter, if the budget allows
    A rolling shutter may suffice at 25 cm/s, but in an industrial application, a global shutter camera is a safer option.

    5. Constant geometry
    The camera and lighting must not ‘drift’. Vibrations in the structure will cause false changes in position.

    6. Field of view calibration
    With an 80 cm tape, the camera should be able to see, for example, 90–100 cm in width to allow for a margin. The ROI is then cropped to include only the tape.

    6. Adjacent parcels and parcels stacked on top of each other

    There are three levels of difficulty here.

    Packages separately

    The simplest case. YOLO detect + tracker + counting line should give good results after retraining.

    Packages touching each other

    Here, standard detection may treat two parcels as one. It is worth:

    - using instance segmentation,
    - manually label the masks for each parcel separately,
    - include plenty of examples of touching parcels in the training data,
    - select appropriate NMS/IoU parameters,
    - consider using OBBs if the parcels are rectangular and rotated.

    Parcel on top of a parcel

    This is the most challenging scenario for a 2D camera. If a small parcel is lying on top of a large one and is visible from above, the model can learn to count both. However, if one parcel obscures the other so that it is not visible from any camera, no 2D model will be able to count it — this is a physical limitation, not a programming one.

    In a more industrial version, I would add:

    - a depth/3D camera,
    - a laser profilometer,
    - a second side-view camera,
    - possibly a vision tunnel comprising several cameras.

    3D cameras and machine vision systems are typically used for depth measurement, dimensioning and inspection of objects on conveyors; manufacturers of machine vision systems describe line scan and 3D cameras as solutions for moving objects, measurement and sorting. ( zebra.com )

    7. Can it be done more simply than YOLO?

    In a controlled environment, sometimes yes. If the conveyor belt has a uniform background, the parcels are high-contrast and do not frequently touch one another, classic image processing can be very effective:

    - background subtraction,
    - thresholding,
    - morphological operations,
    - contours,
    - blob analysis,
    - watershed for touching objects.

    OpenCV provides ready-made background subtraction mechanisms for static cameras, as well as classic watershed-type segmentation methods, which can be useful for separating touching objects. ( docs.opencv.org )

    But with real parcels in a sorting centre — different colours, labels, tape, plastic wrap, partial obstructions — traditional computer vision will quickly start to require numerous exceptions. That’s why I’d see it like this:

    Code: text
    Log in, to see the code


    8. How to prepare a dataset

    I wouldn’t start by labelling tens of thousands of photos. It’s better to build a sensible, iterative dataset:

    Stage A — initial data

    - 200–500 images from my own footage,
    - individual parcels,
    - groups of parcels,
    - parcels touching one another,
    - partially out of frame,
    - small and large parcels,
    - various colours and materials.

    Stage B — difficult cases

    - a parcel on top of another parcel,
    - a black plastic bag on dark tape,
    - a white parcel with a white label,
    - parcels with shiny tape,
    - damaged cardboard boxes,
    - non-parcel objects, e.g. the operator’s hand, a tool, a piece of plastic film.

    Stage C — active learning

    The system records frames when:

    - detection confidence is low,
    - the tracker loses the ID,
    - the number of objects changes suddenly,
    - two masks overlap significantly,
    - a parcel is close to the counting line and detection is unstable,
    - the operator manually corrects the result.

    These are the best frames for the next training session.

    9. How to label parcels

    If the aim is simply to count the number of parcels, I wouldn’t complicate the classes. Start with a single class:

    Code: text
    Log in, to see the code


    Only later, if necessary:

    Code: text
    Log in, to see the code


    But the more classes there are, the more data you need to label. For counting, a single
    package
    class is often best.

    For detection:

    - you mark a rectangle around each parcel.

    For segmentation:

    - you mark a polygon/mask for each parcel.

    For parcels that touch each other, segmentation is more labour-intensive, but better suited to the problem.

    10. Proposed system architecture

    Code: text
    Log in, to see the code


    If this is to be integrated into an automation system:

    - send the result via MQTT, Modbus TCP, REST API or to a PLC via a simple protocol,
    - record the time, tracking ID, parcel thumbnail and model confidence,
    - maintain a total count and a count of ‘uncertain events’.

    11. The minimum test I would carry out

    To start with, I would carry out a test without a full implementation:

    1. A camera above the conveyor belt.
    2. Record 30–60 minutes of actual footage.
    3. Manually count the parcels in this section.
    4. Run the ready-made model from Roboflow or YOLO after a quick retraining.
    5. Add a tracker and a counting line.
    6. Compare:
    - the actual count,
    - the counted count,
    - the number missed,
    - the number counted twice,
    - the most common causes of errors.

    Only after such a test will it be clear whether the problem lies mainly with the model, the camera, the lighting, or the way the parcels are organised on the conveyor belt.

    12. My practical recommendation

    If I were you, I would do the following:

    1. Do not start with YOLOv4-tiny on the CPU as the target solution — the FPS is too low and the accuracy is too poor for a sorting plant.
    2. Start with recordings from the actual conveyor belt — this is the most valuable part of the project.
    3. Build the first model as a
    package
    detect
    , to quickly check feasibility.
    4. If packets frequently overlap, switch to
    YOLO-seg
    segmentation
    .
    5. Count only line crossings by the tracked ID , never just detections from a frame.
    6. Log uncertain cases and retrain periodically .
    7. If parcels stacked on top of each other are important for business, add depth/3D or a second camera .

    In short: ready-made models for parcels are available, but the best results will come from a hybrid approach: a ready-made model as a base + your own data + segmentation/tracking + good lighting + active retraining . Only then does such a project have a reasonable chance of success.
    You can call me in any topic by writing @ElektrodaBot. Disclaimer: Some answers provided by the ElektrodaBot may be inaccurate. Elektroda not responsible for accuracy, reliability or completeness of the information presented. All ElektrodaBot responses should be verified by the user. OpenAI can monitor and save information entered after calling ElektrodaBot.
  • #7 21950757
    gulson
    System Administrator
    Posts: 29573
    Help: 150
    Rate: 6144
    Oh blimey, that’s a cool project – I’m jealous that you’ve got the chance to work on something like that.
Listen:
ADVERTISEMENT