logo elektroda
logo elektroda
X
logo elektroda

A simple way to improve the photo quality of our 3D prints (and more)

p.kaczmarek2  4 3981 Cool? (+3)
📢 Listen (AI):

TL;DR

  • Uses Gimp to improve photos of black 3D prints and other dark electronics projects when exposure leaves the subject too dark or the background too bright.
  • Applies Colours → Shadow and highlight to selectively adjust shadows and highlights instead of changing the whole photo’s brightness and contrast.
  • The workflow is demonstrated in Gimp 2.10, using the Shadow and highlight dialog’s slider to tune the image.
  • The adjusted photos reveal print edges, housing imperfections, PCB markings, and battery-slot details much more clearly.
  • Good camera lighting still matters, and the result depends on proper monitor settings and not overdoing the correction.
Generated by the language model.

Hello my dears
Here I would like to share one simple way to improve the quality of photos we have already taken, namely clever light and shadow correction in the program Gimp .
I'm putting this method in the 3D printing related section because the brightness and contrast problem I've encountered most often is with 3D prints made from black filament; but of course this method can also be applied to photos of other things, such as our own electronics projects.

Required software
I will use the free program Gimp version 2.10 to improve the quality of the photos:

It can be downloaded from here:
https://www.gimp.org/downloads/
But I think the same can also be done in other photo and graphic editing programs.

Improving shadows and highlights in Gimp
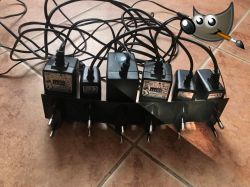
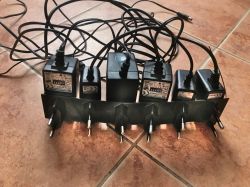
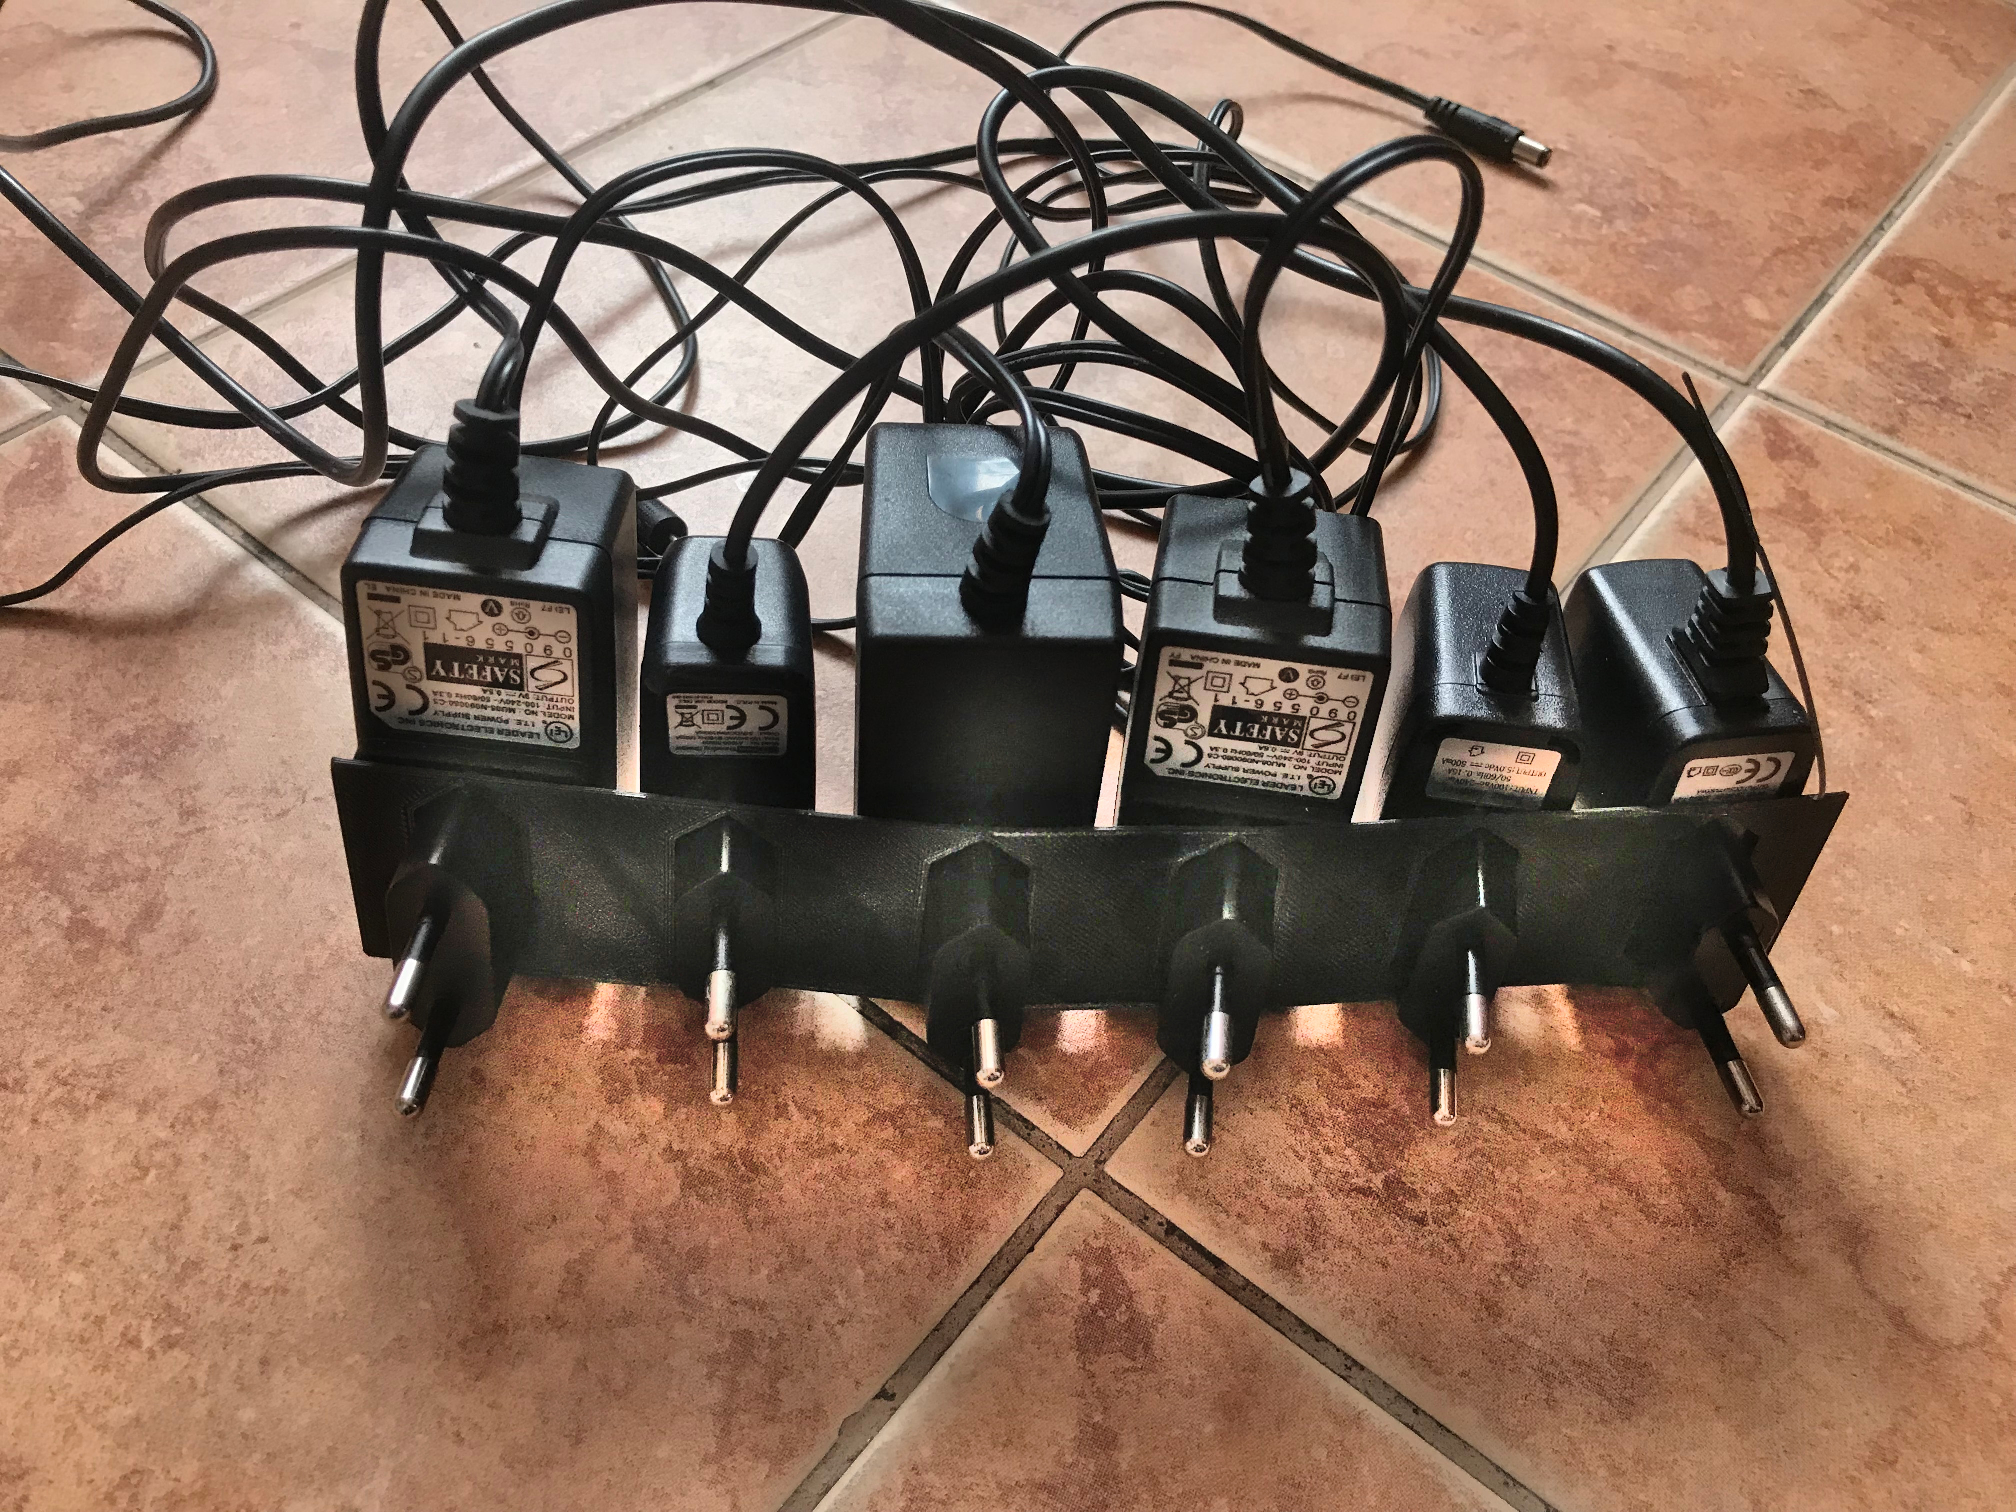
I will take the process of improving the shadows and highlights of the 3D printed photo with an example of a photo of a prototype of my power supply organiser.
The organiser was printed from black filament, which makes it difficult to properly catch the contrast in the photo; with the camera/phone I'm using, this is downright impossible.
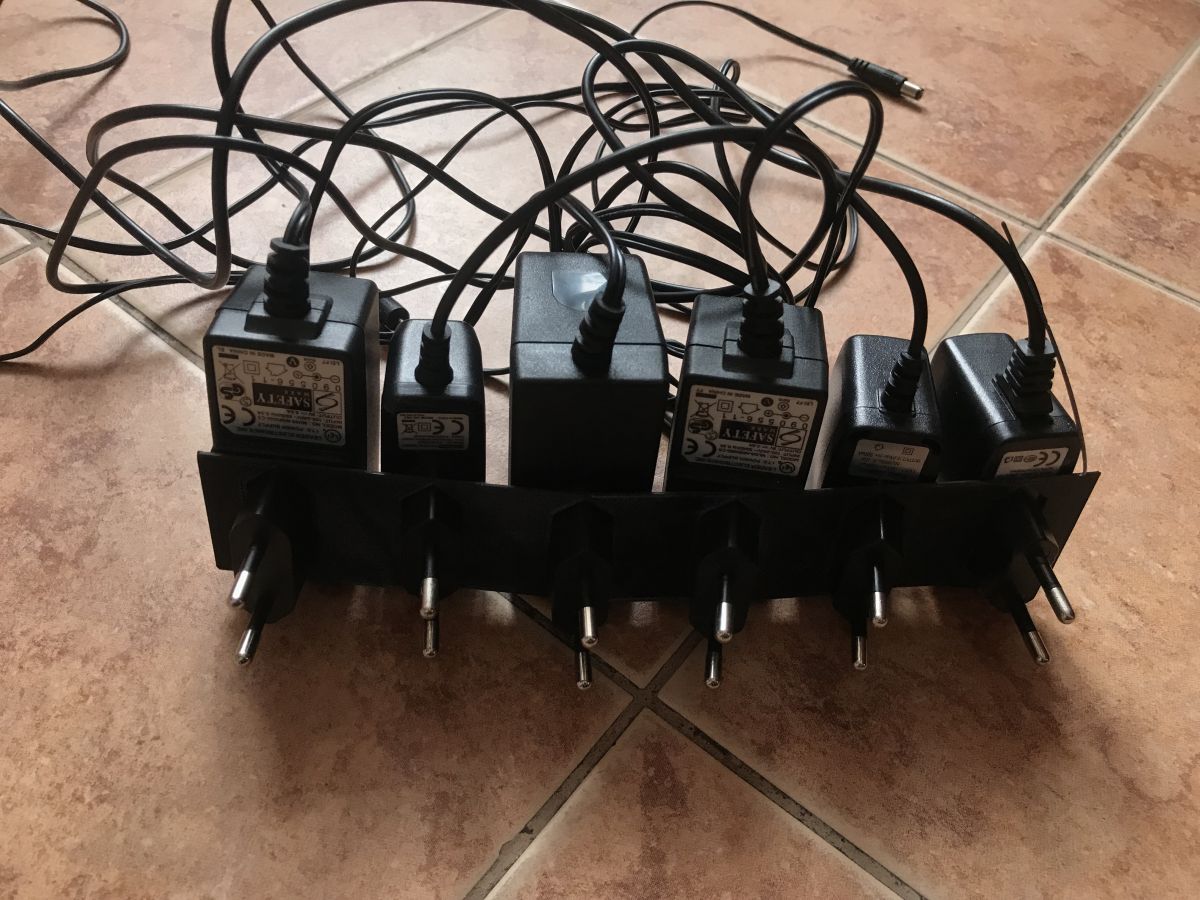
The photo either comes out so that the background is clearly visible and the print is dark:

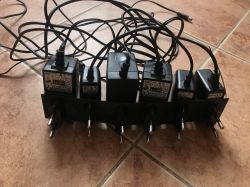
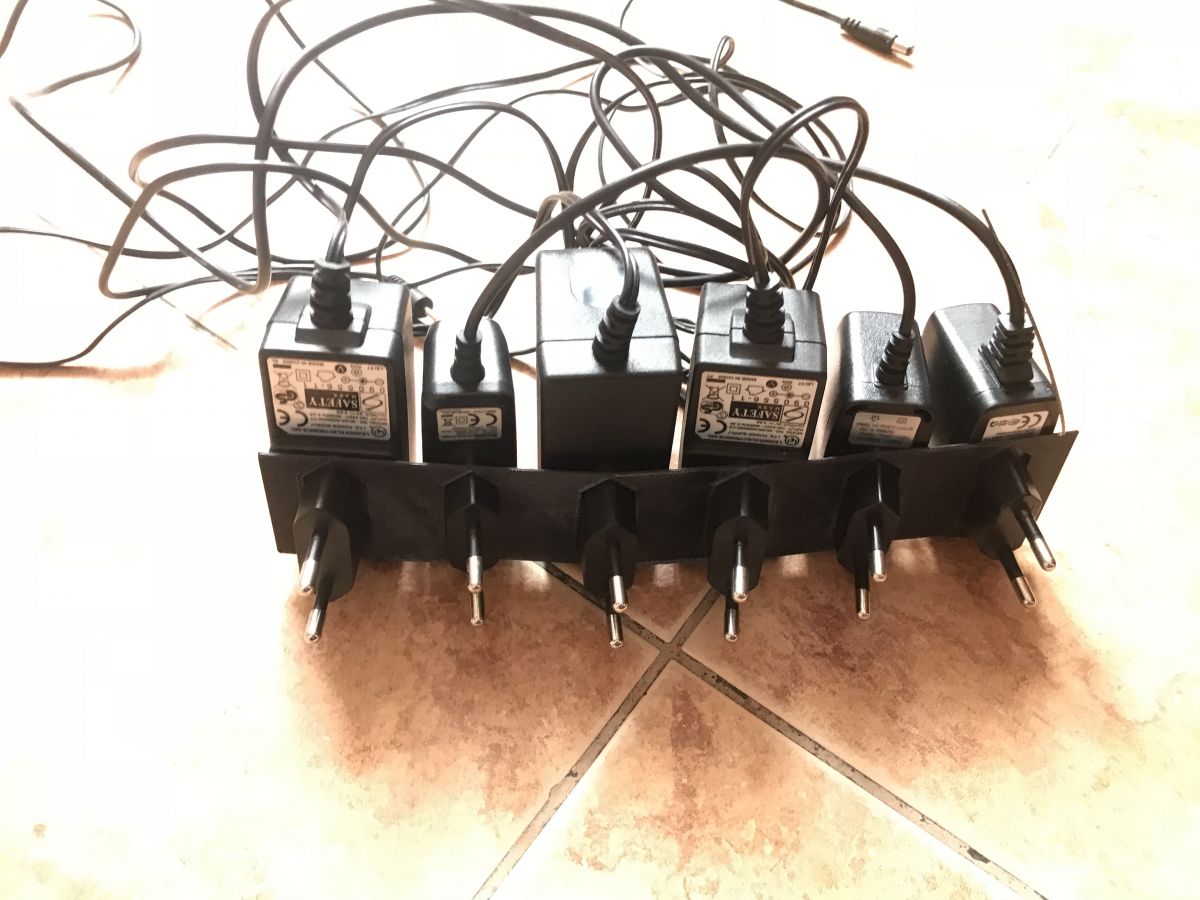
... or so that the printout is adequately bright (you can see its edges) but the background is in turn too bright:

The two images shown above are thus quite poor. But you can easily improve their quality in the program Gimp - just import the first photo (the darker one) into it:

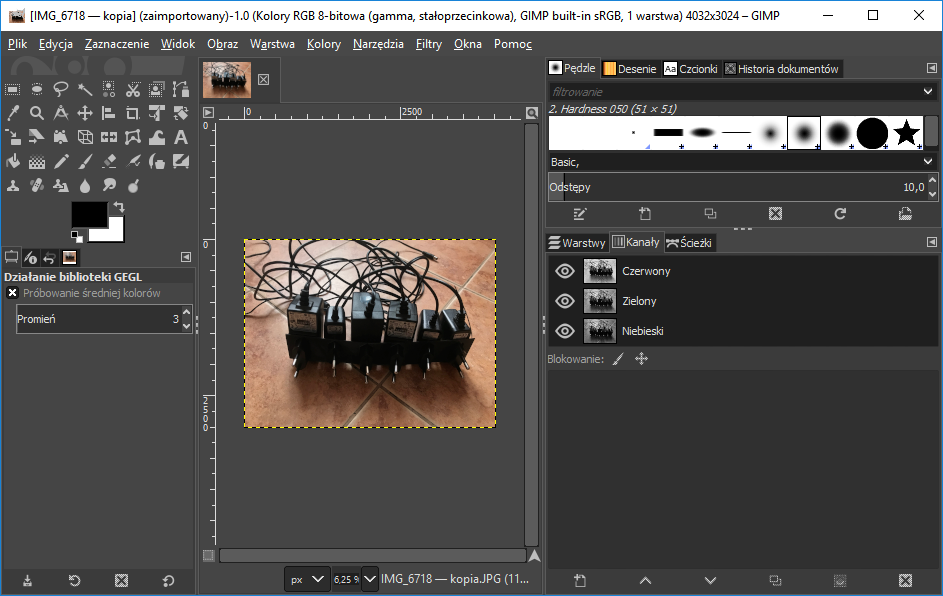
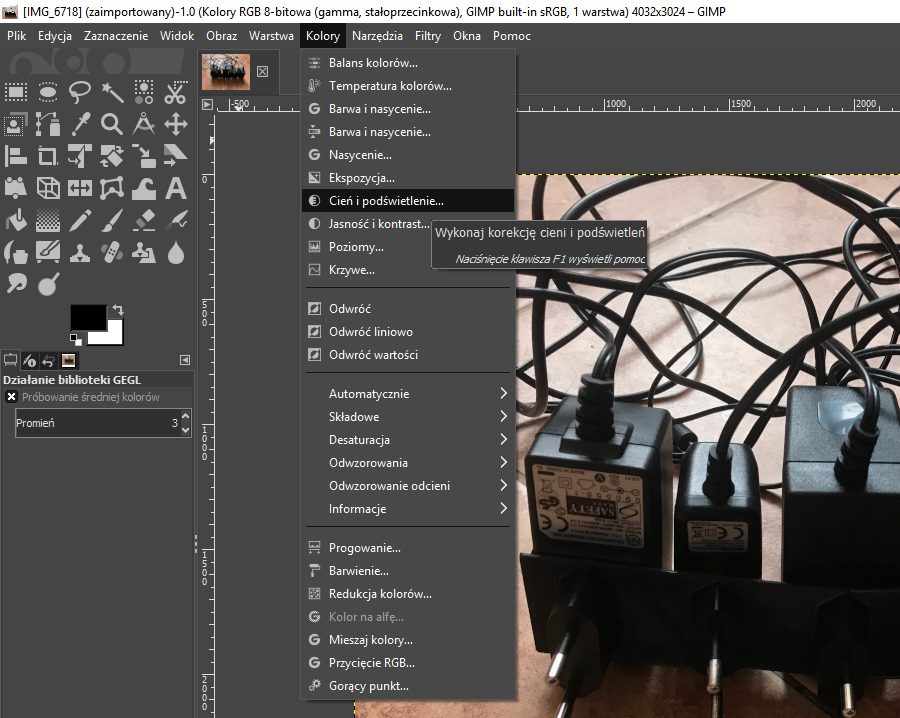
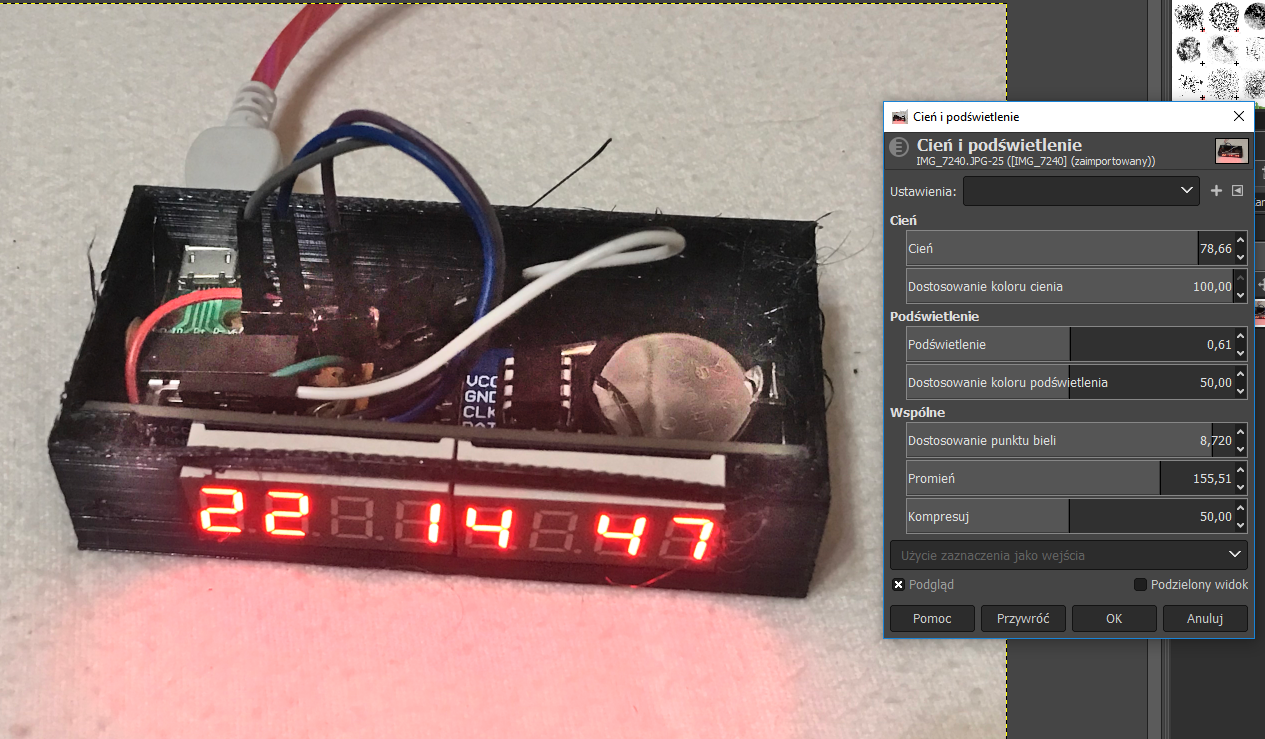
Then you need to open the highlight adjustment tool from the menu Colours->Shadow and highlight:

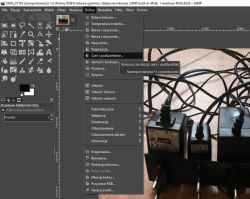
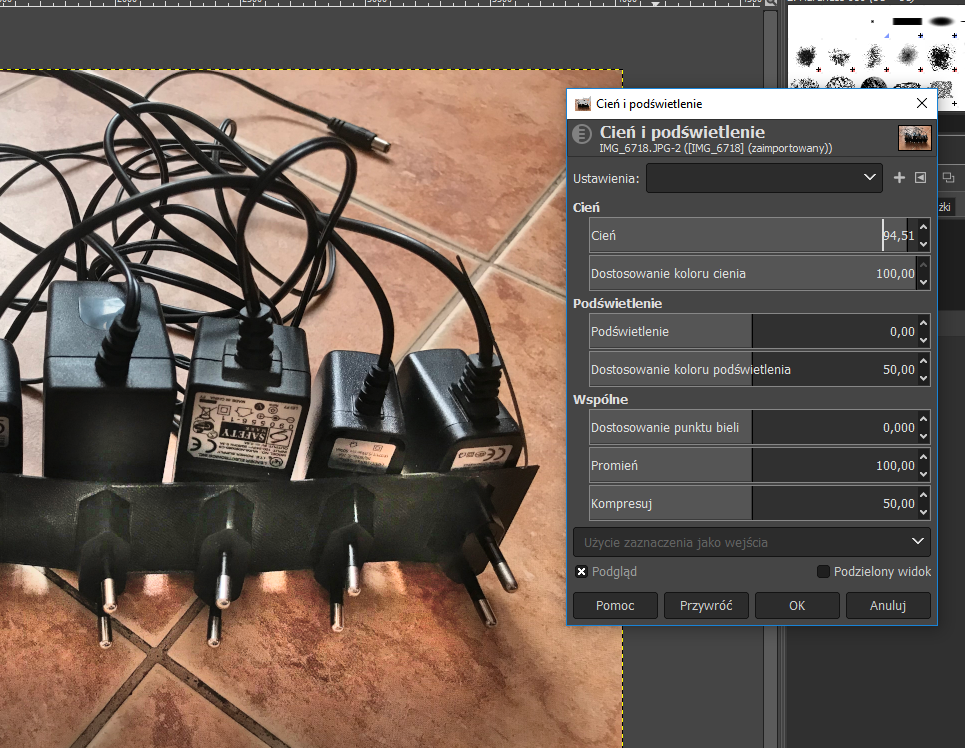
From the newly opened window, select the parameters so that the entire image is reasonably clear and has well visible edges. The most you can do with this is to use the slider highlighted in the screenshot:

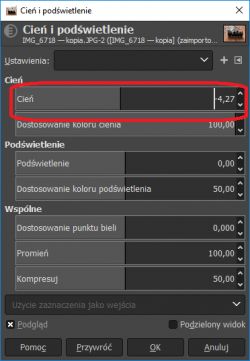
For the example image, I chose this setting:
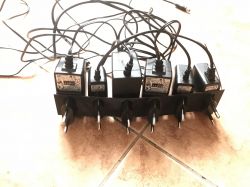
Final result:

In my opinion, it is much better. The 3D printed element is clearly visible, you can see its edges, its shape while maintaining adequate background brightness and contrast.

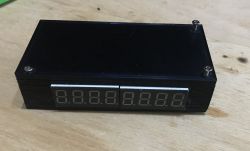
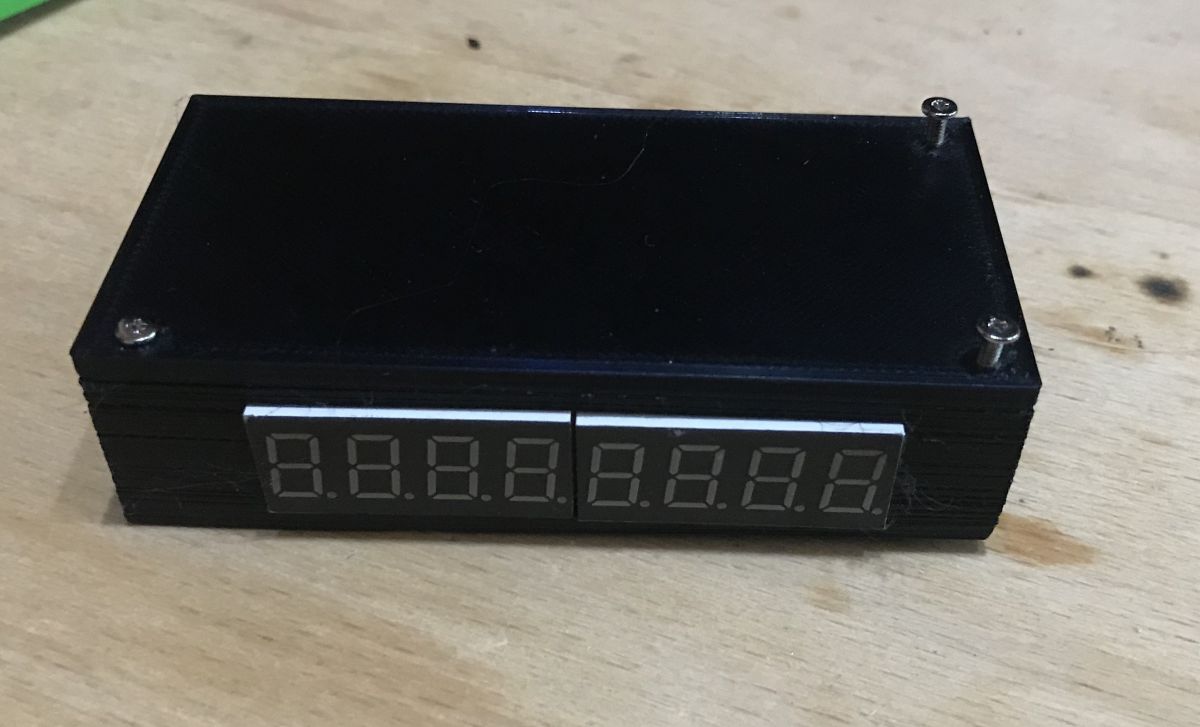
Second example - 3D printed housing of my clock on PIC16F1459
This time without much comment. The method described earlier here also worked well and improved the perceived quality of the photo.
Before:

During/after:

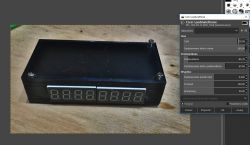
After adjusting the light and shadow balance appropriately in Gimp you can see the printed housing much better. In the photo you can even see the imperfections in the printout which were caused by the problems I had with the printer at the time.

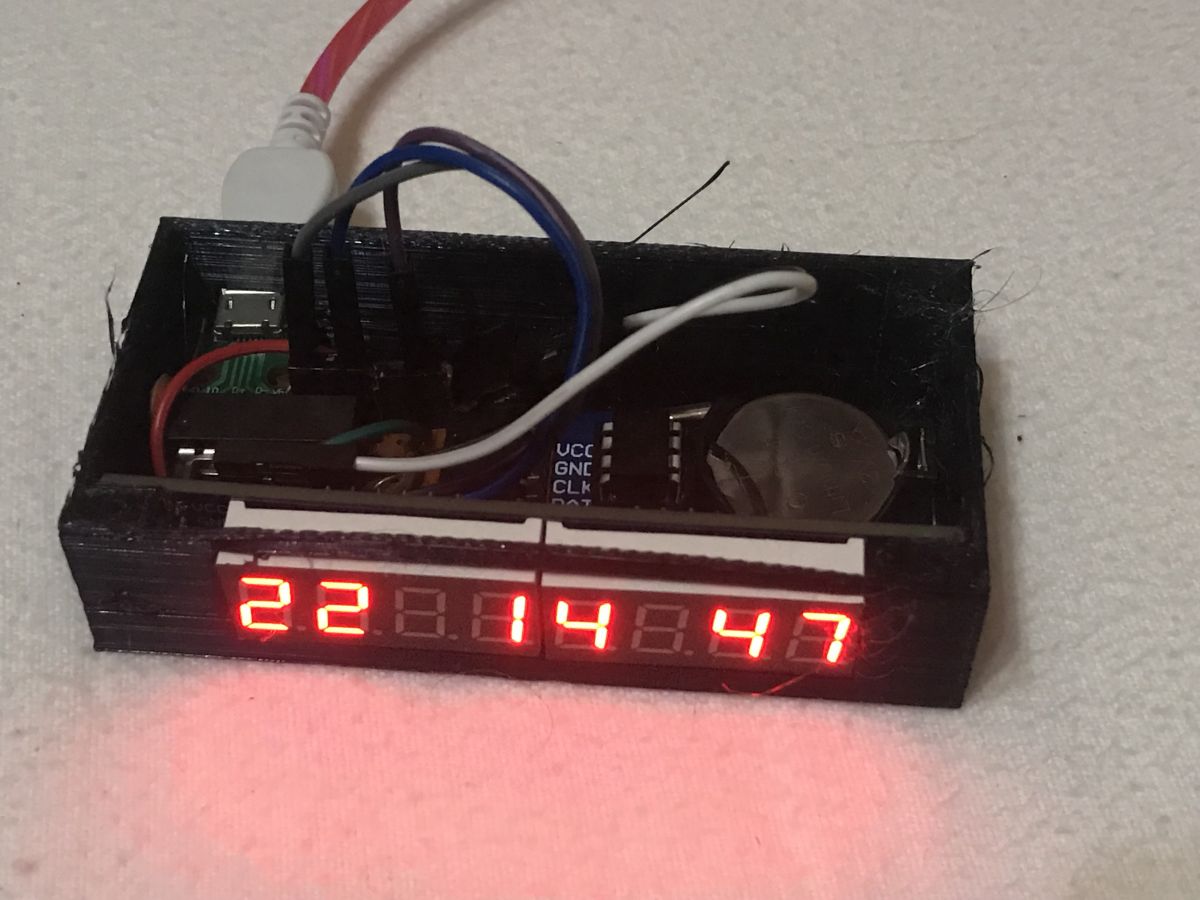
Third example - a more difficult situation with the light source
The method shown here also works when photographing an object that itself emits some light - such as my clock shown here on the PIC :

In the case of this photo, I had to change a little more settings to get a satisfactory result:

After adjusting the light and shadow balance, the photo is much clearer. You can see additional details such as the inscriptions on the USB connector board (D+, D-, etc.), the pins themselves from the surface-soldered USB connector, the outline of the CR2032 battery slot (in the original photo it blended with the background), the inscriptions themselves on this battery....
More information on the design from the photo can be found here: https://www.elektroda.pl/rtvforum/topic3663489.html

Summary
For me, the method described here is sensational and allows to really improve the quality of the photos (especially for photos of 3D prints with black filament and generally dark objects on a lighter background). Sometimes I just can't get the right contrast with the camera and the photos just come out too dark or too light and the method shown here allows me to fix just such photos.
Finally I would like to stress that the process presented here is not equivalent to simply increasing (or decreasing) the brightness/contrast of the whole photo ; the method presented here increases or decreases it selectively , only for the appropriate zones of the photo , this is what gives such a good effect.
Of course, you should also remember not to overdo it and before experimenting with the brightness of a photo you should check the settings of your own monitor - because if you have, for example, an image that is too dark on it, then improving the contrast in your photos is a bit pointless.
And of course, nothing can replace a good camera and good lighting when taking a photo - but if we don't have that, we can always manage somehow through photo processing.
And what ways do you know of to improve the quality of the photos you take? Feel free to discuss.
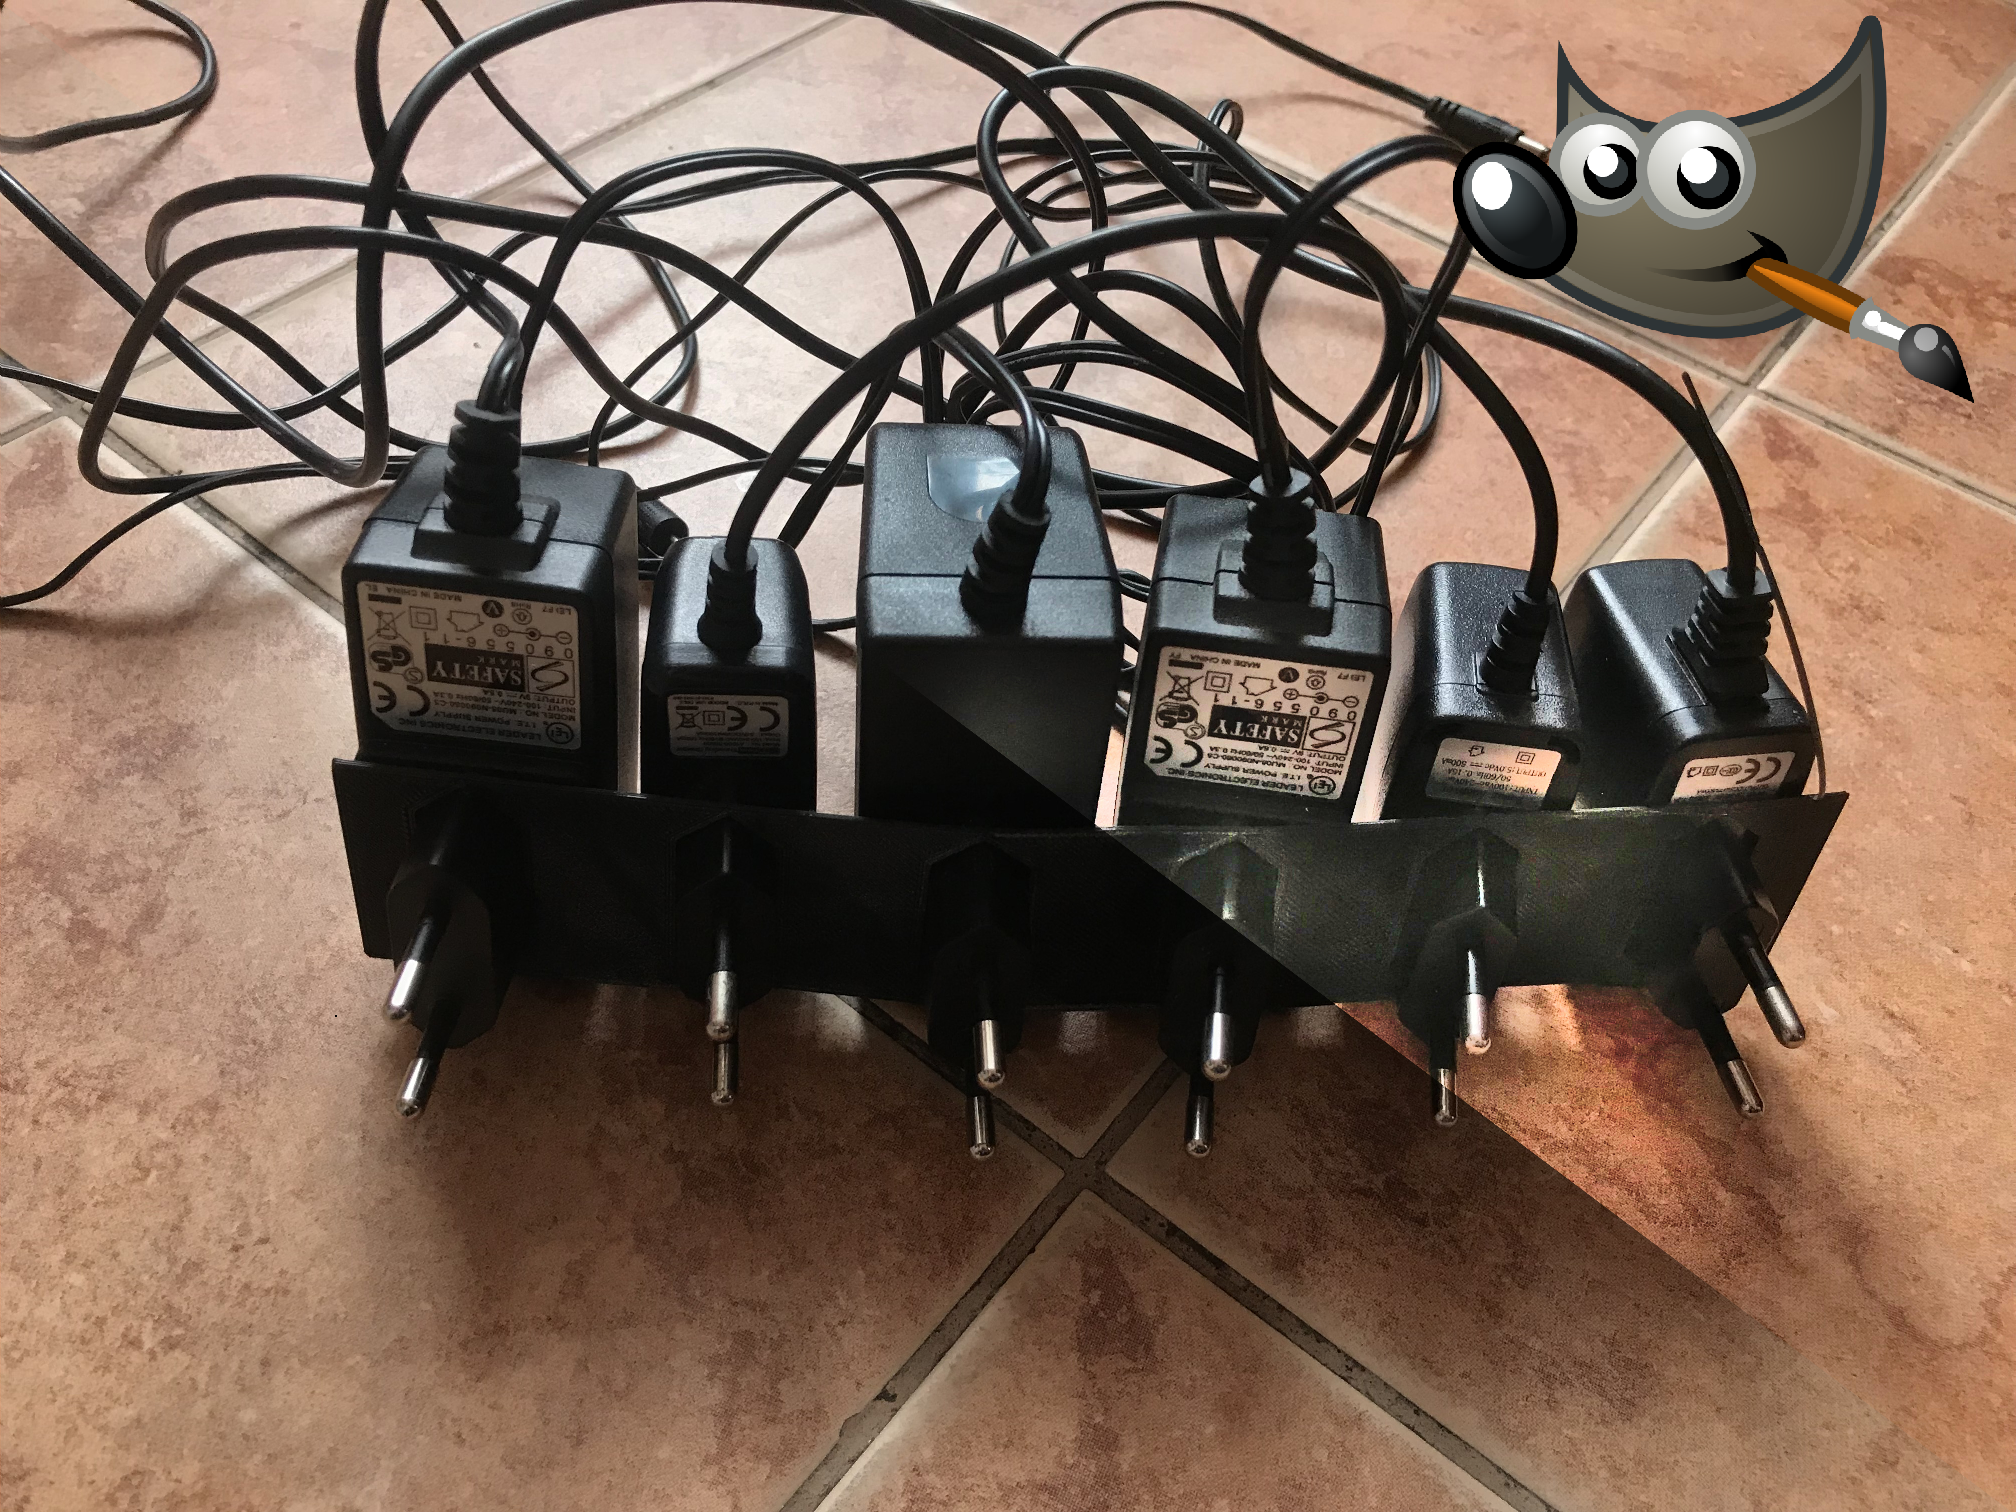
About Author
p.kaczmarek2
p.kaczmarek2 wrote 14406 posts with rating 12345 , helped 650 times. Been with us since 2014 year.

Comments

Euzebiusz23091998 26 May 2020 19:17

I basically profess only one way to get a good photo: -suitably soft lighting -a good setting for this photo (your photo with the chargers I have the impression was taken against the light - surely... [Read more]

dudik56 26 May 2020 20:52

Lighting is key but now shooting in HDR mode mostly gets the job done. [Read more]

prosiak_wej 27 May 2020 15:46

Uniform background (usually a sheet of white bristol), soft light and that's it :) https://obrazki.elektroda.pl/8133091300_1590587076_thumb.jpg https://obrazki.elektroda.pl/4730905700_1590587082_thumb.jpg... [Read more]

fotomh-s 27 May 2020 17:57

When shooting RAWs it is often easy to play around with the options. Software for processing them (it doesn't necessarily have to be PS) offers a lot of settings, you can just adjust things like shadows. JPEG... [Read more]

FAQ

TL;DR: Want clearer photos of dark 3D prints? A free GIMP 2.10 workflow with Shadows–Highlights and one slider, shown across 3 examples, “increases or decreases it selectively…for the appropriate zones.” [Elektroda, p.kaczmarek2, post #18717546]

Why it matters: This FAQ helps makers and electronics hobbyists quickly fix flat, underexposed print photos without new gear.

Quick Facts

How do I fix dark photos of black 3D prints in GIMP?

Open the image in GIMP 2.10. Go to Colors → Shadows-Highlights. Raise Shadows until edges and features appear. Tweak Highlights to protect bright areas. This selective edit restores contrast without blowing out the background. Export as PNG or high‑quality JPEG. [Elektroda, p.kaczmarek2, post #18717546]

Where exactly is the Shadows–Highlights tool in GIMP 2.10?

In the main menu, choose Colors, then select Shadows-Highlights. The dialog includes sliders for Shadows, Highlights, and other refinements. Start with the primary Shadows slider for the biggest gain, then fine-tune. [Elektroda, p.kaczmarek2, post #18717546]

What starting settings should I try for dark prints?

Import the darker exposure. Increase the Shadows slider until part edges and surface texture appear. If the background brightens too much, reduce Highlights slightly. Keep adjustments modest to avoid halos. Save presets for repeat use. [Elektroda, p.kaczmarek2, post #18717546]

Is this different from just increasing brightness or contrast?

Yes. Brightness/contrast lifts the whole image uniformly. Shadows–Highlights targets tonal zones selectively, revealing detail without wrecking the background. As the author notes, it adjusts “only for the appropriate zones.” [Elektroda, p.kaczmarek2, post #18717546]

What lighting setup works best before editing?

Use soft lighting, a suitable background, and avoid shooting against the light. Position lights to reduce harsh shadows and reflections. Many phones have manual controls; use them to balance exposure and ISO. Good capture reduces heavy editing later. [Elektroda, Euzebiusz23091998, post #18720102]

What is a shadowless (light) box, and can I DIY one?

A shadowless box diffuses light from multiple sides for even, soft illumination. DIY it with white bristol or paper and a few desk lamps. Place the print centered on the uniform background for clean edges and minimal glare. [Elektroda, prosiak_wej, post #18721834]

Should I use HDR mode on my phone for 3D prints?

Yes, try HDR for scenes with bright backgrounds and dark parts. HDR combines exposures to retain highlights and shadow detail. It often solves contrast issues before editing. “Lighting is key but shooting in HDR…gets the job done.” [Elektroda, dudik56, post #18720316]

RAW vs JPEG for documenting prints—what should I choose?

Use RAW when available. RAW preserves sensor data and gives room to lift shadows cleanly. JPEG is already processed and compressed, limiting recovery. Many editors besides Photoshop handle RAW files efficiently. [Elektroda, fotomh-s, post #18722115]

How do I use flash without harsh glare on glossy parts?

Bounce the flash off a white ceiling or wall. Avoid pointing it directly at the subject. Mix ambient light with flash for natural results. On some cameras, flash priority forces around 1/250s, which can overpower ambient. Use manual exposure instead. [Elektroda, fotomh-s, post #18722115]

Why do my photos look bad when the window is behind the subject?

That is backlighting. The bright window raises scene contrast, pushing your subject into deep shadow. Move the subject, change angles, or add soft front lighting. A good setting prevents unrecoverable noise and blown highlights. [Elektroda, Euzebiusz23091998, post #18720102]

Quick how-to: three steps to rescue a too-dark shot in GIMP?

  1. Open the darker exposure in GIMP 2.10.
  2. Colors → Shadows-Highlights; raise Shadows, tame Highlights.
  3. Check edges and textures; export when balanced. This three-step flow restores detail fast. [Elektroda, p.kaczmarek2, post #18717546]

What background color makes dark filament edges pop?

Use a uniform white background, like bristol or large paper. The clean, bright surface increases edge contrast and makes features stand out. Keep it smooth and unwrinkled to avoid banding or distractions. [Elektroda, prosiak_wej, post #18721834]
Generated by the language model.
%}