Hello my dears
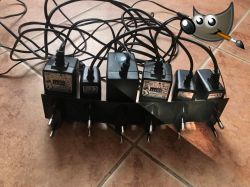
Here I would like to share one simple way to improve the quality of photos we have already taken, namely clever light and shadow correction in the program Gimp .
I'm putting this method in the 3D printing related section because the brightness and contrast problem I've encountered most often is with 3D prints made from black filament; but of course this method can also be applied to photos of other things, such as our own electronics projects.
Required software
I will use the free program Gimp version 2.10 to improve the quality of the photos:

It can be downloaded from here:
https://www.gimp.org/downloads/
But I think the same can also be done in other photo and graphic editing programs.
Improving shadows and highlights in Gimp
I will take the process of improving the shadows and highlights of the 3D printed photo with an example of a photo of a prototype of my power supply organiser.
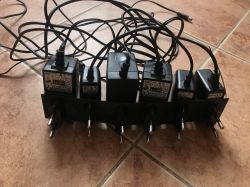
The organiser was printed from black filament, which makes it difficult to properly catch the contrast in the photo; with the camera/phone I'm using, this is downright impossible.
The photo either comes out so that the background is clearly visible and the print is dark:
... or so that the printout is adequately bright (you can see its edges) but the background is in turn too bright:
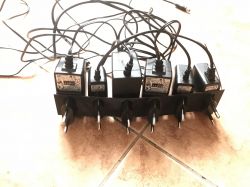
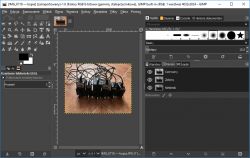
The two images shown above are thus quite poor. But you can easily improve their quality in the program Gimp - just import the first photo (the darker one) into it:
Then you need to open the highlight adjustment tool from the menu Colours->Shadow and highlight:
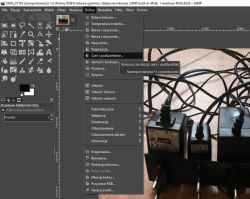
From the newly opened window, select the parameters so that the entire image is reasonably clear and has well visible edges. The most you can do with this is to use the slider highlighted in the screenshot:
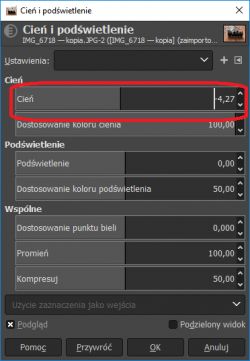
For the example image, I chose this setting:
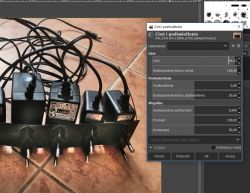
Final result:
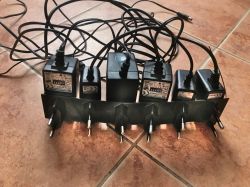
In my opinion, it is much better. The 3D printed element is clearly visible, you can see its edges, its shape while maintaining adequate background brightness and contrast.
Second example - 3D printed housing of my clock on PIC16F1459
This time without much comment. The method described earlier here also worked well and improved the perceived quality of the photo.
Before:
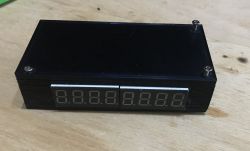
During/after:
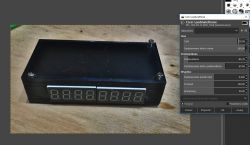
After adjusting the light and shadow balance appropriately in Gimp you can see the printed housing much better. In the photo you can even see the imperfections in the printout which were caused by the problems I had with the printer at the time.
Third example - a more difficult situation with the light source
The method shown here also works when photographing an object that itself emits some light - such as my clock shown here on the PIC :
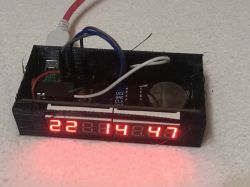
In the case of this photo, I had to change a little more settings to get a satisfactory result:
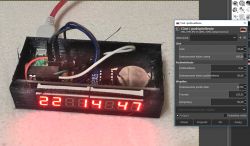
After adjusting the light and shadow balance, the photo is much clearer. You can see additional details such as the inscriptions on the USB connector board (D+, D-, etc.), the pins themselves from the surface-soldered USB connector, the outline of the CR2032 battery slot (in the original photo it blended with the background), the inscriptions themselves on this battery....
More information on the design from the photo can be found here: https://www.elektroda.pl/rtvforum/topic3663489.html
Summary
For me, the method described here is sensational and allows to really improve the quality of the photos (especially for photos of 3D prints with black filament and generally dark objects on a lighter background). Sometimes I just can't get the right contrast with the camera and the photos just come out too dark or too light and the method shown here allows me to fix just such photos.
Finally I would like to stress that the process presented here is not equivalent to simply increasing (or decreasing) the brightness/contrast of the whole photo ; the method presented here increases or decreases it selectively , only for the appropriate zones of the photo , this is what gives such a good effect.
Of course, you should also remember not to overdo it and before experimenting with the brightness of a photo you should check the settings of your own monitor - because if you have, for example, an image that is too dark on it, then improving the contrast in your photos is a bit pointless.
And of course, nothing can replace a good camera and good lighting when taking a photo - but if we don't have that, we can always manage somehow through photo processing.
And what ways do you know of to improve the quality of the photos you take? Feel free to discuss.
Cool? Ranking DIY Helpful post? Buy me a coffee.


