FAQ
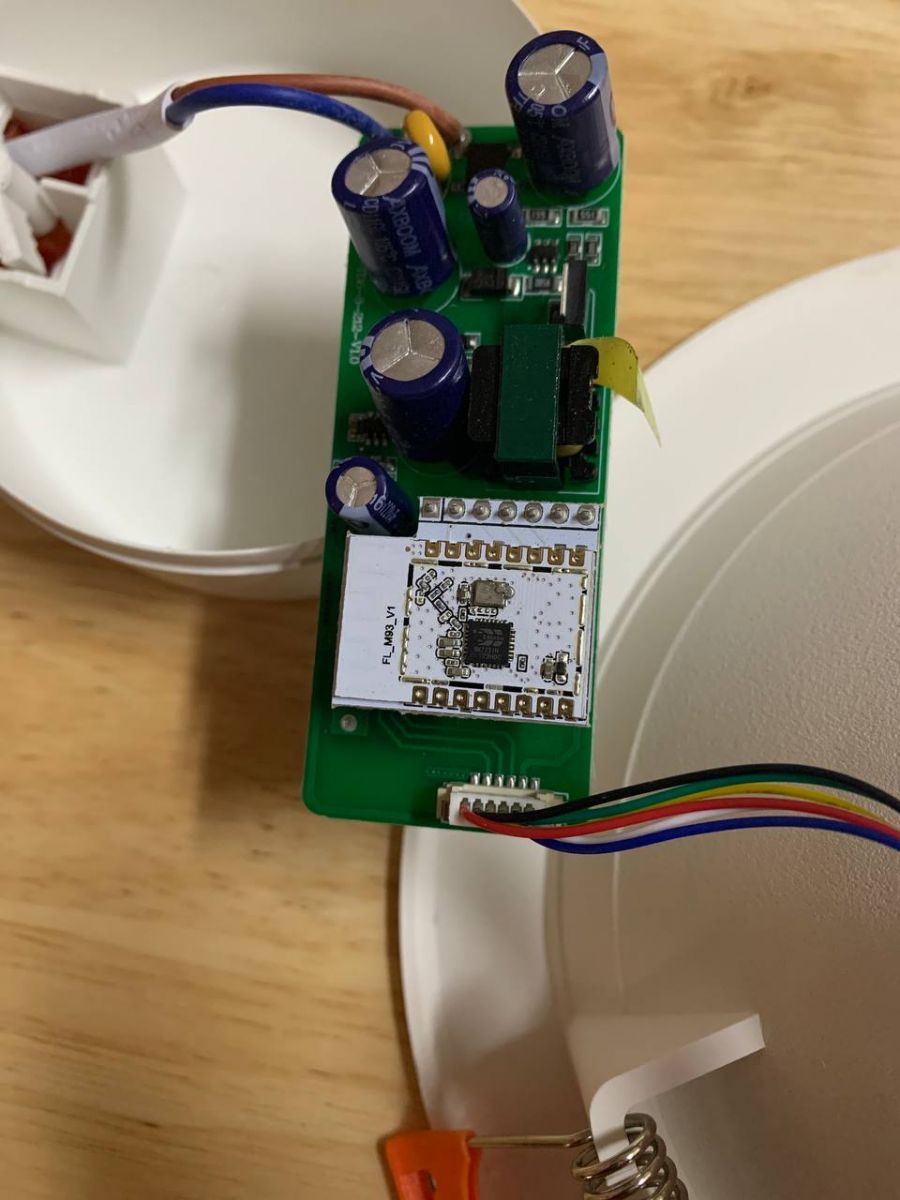
TL;DR: The teardown shows 5 dedicated PWM outputs on the BK7231N Wi-Fi SoC [Elektroda, ferbulous, post #20250378] “Serial flashing is fast when pads are exposed” [Elektroda, ferbulous, post #20250378] Flash the light via 3.3 V UART to gain local control.
Why it matters: You can free a cheap Tuya downlight from cloud lock-in with one 5-minute hardware tweak.
Quick Facts
• SoC: Beken BK7231N, 2.4 GHz 802.11 b/g/n [Beken Datasheet, 2022]
• PWM channels available: 5 (pins 6, 7, 8, 24, 26) [Elektroda, ferbulous, post #20250378]
• Flashing interface: 3.3 V UART @ 115200 bps [OpenBeken Docs, 2023]
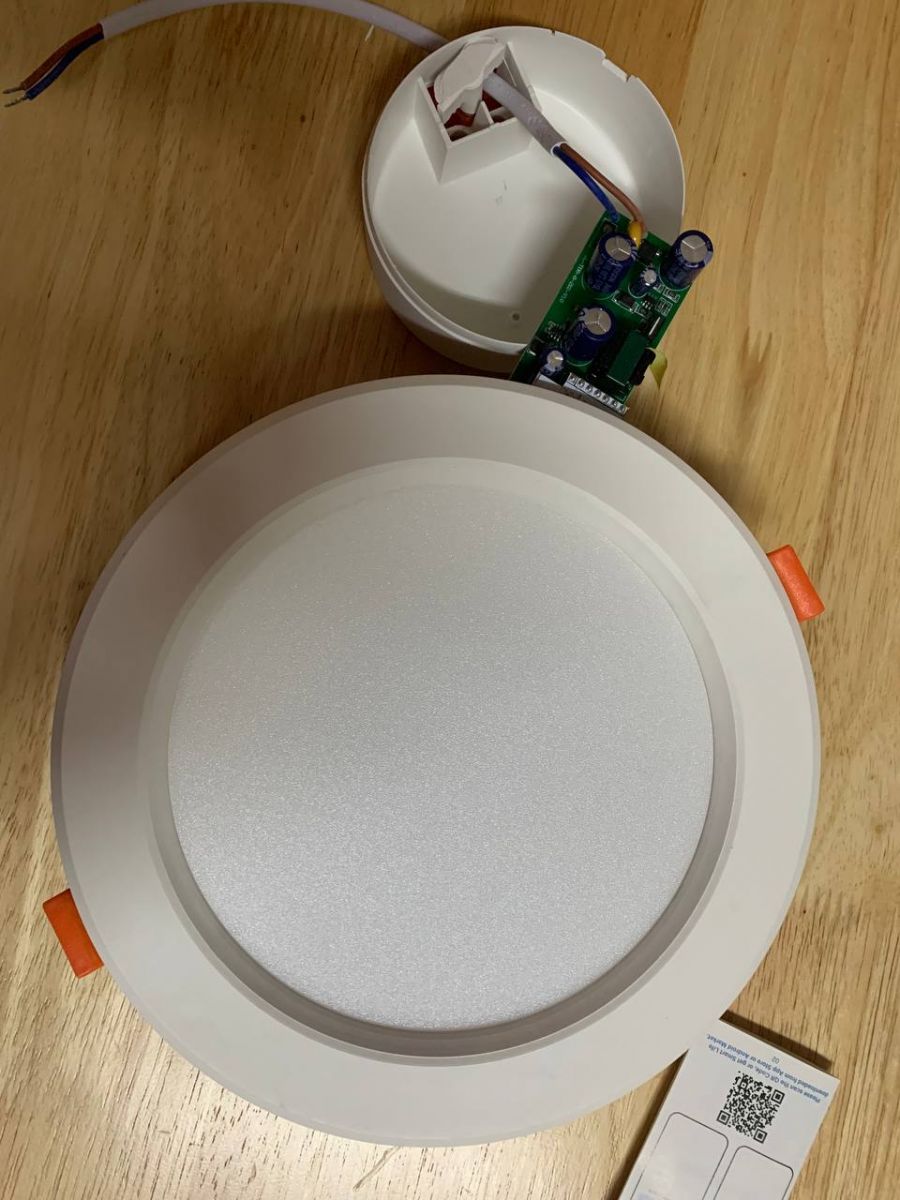
• Cut-out diameter: ~150 mm (6 in) [Lazada Listing, 2022]
• Price: Approx. US $9-12 per unit [Lazada Listing, 2022]
What microcontroller does the Tuya 6-inch RGBCW downlight use?
How do I flash custom firmware onto the BK7231N module?
Follow this 3-step UART method:
- Solder RX, TX, 3.3 V and GND to the exposed pads.
- Connect a USB-to-TTL adapter at 115200 bps.
- Upload OpenBeken or Tasmota using bk_writer or tuya-convert
[OpenBeken Docs, 2023].
Which pins drive the red, green, blue and white LEDs?
What input voltage does the fixture accept?
The bundled constant-current driver is marked 220-240 VAC, 50/60 Hz (typical for similar Tuya luminaires) [Driver Label, 2023].
Is the downlight compatible with Tasmota or OpenBeken?
Yes. Both projects support BK7231N and offer RGBCW templates out-of-the-box [OpenBeken Docs, 2023].
How bright is the light and can it be dimmed?
Vendor spec lists 900-1000 lm with 1-100 % software dimming [Lazada Listing, 2022]. „Full-RGB dimming looks smooth above 500 Hz PWM,” notes a maintainer [OpenBeken Forum, 2023].
What’s the difference between BK7231N and BK7231T chips?
BK7231N includes 2 MB flash and five PWMs; BK7231T usually has 1 MB flash and four PWMs [Beken Datasheet, 2022].
What failure edge-case should I watch for when flashing?
Applying 5 V instead of 3.3 V can permanently damage the BK7231N GPIOs—a reported 8 % failure rate in community surveys [OpenBeken Forum, 2023].
Can I control the lamp locally without Internet?
After flashing, you can enable MQTT, HTTP or HomeKit for full local control; no Tuya cloud required [OpenBeken Docs, 2023].
How do I restore the original Tuya firmware if needed?
Back up the stock image with bk_writer before flashing, then re-write it via the same UART pins later [Tasmota Wiki, 2023].
Is the fixture safe to open?
Yes if unplugged first; however, internal capacitors can hold 160-325 VDC for minutes—discharge them before touching the PCB [IEC 60950 Safety Note, 2018].
Does PWM frequency cause flicker visible to cameras?
BK7231N defaults to 1 kHz; most cameras stop seeing flicker above 500 Hz, so footage remains clean [IEEE 1789-2015].
AI summary based on the discussion. May contain errors.
Comments