Print-experiment - repairing a workshop light, replacing a metal component
TL;DR
- A broken metal lamp mounting joint on a Newacalox third hand magnifier USB lamp was replaced with a 3D-printed PLA part.
- The replacement was designed in Blender from a circle and block, then refined with mirror and boolean operations to add symmetrical holes and wire passage.
- The finished piece weighs 2–3 grams, and 1 kg of filament costs about PLN50, making the repair extremely cheap.
- Printed on a slant for extra strength, the part has survived about a month of normal use without breaking.
- Its long-term durability remains unknown, but a second spare print is already ready.
Generated by the language model.
It's time for another mini project in the series of practical 3D printing - I invite you to report on the design of the replacement for the lamp mounting element in Blender, all step by step, along with a demonstration of the final result. The original element was metal but after two years it broke, can PLA do the job here?
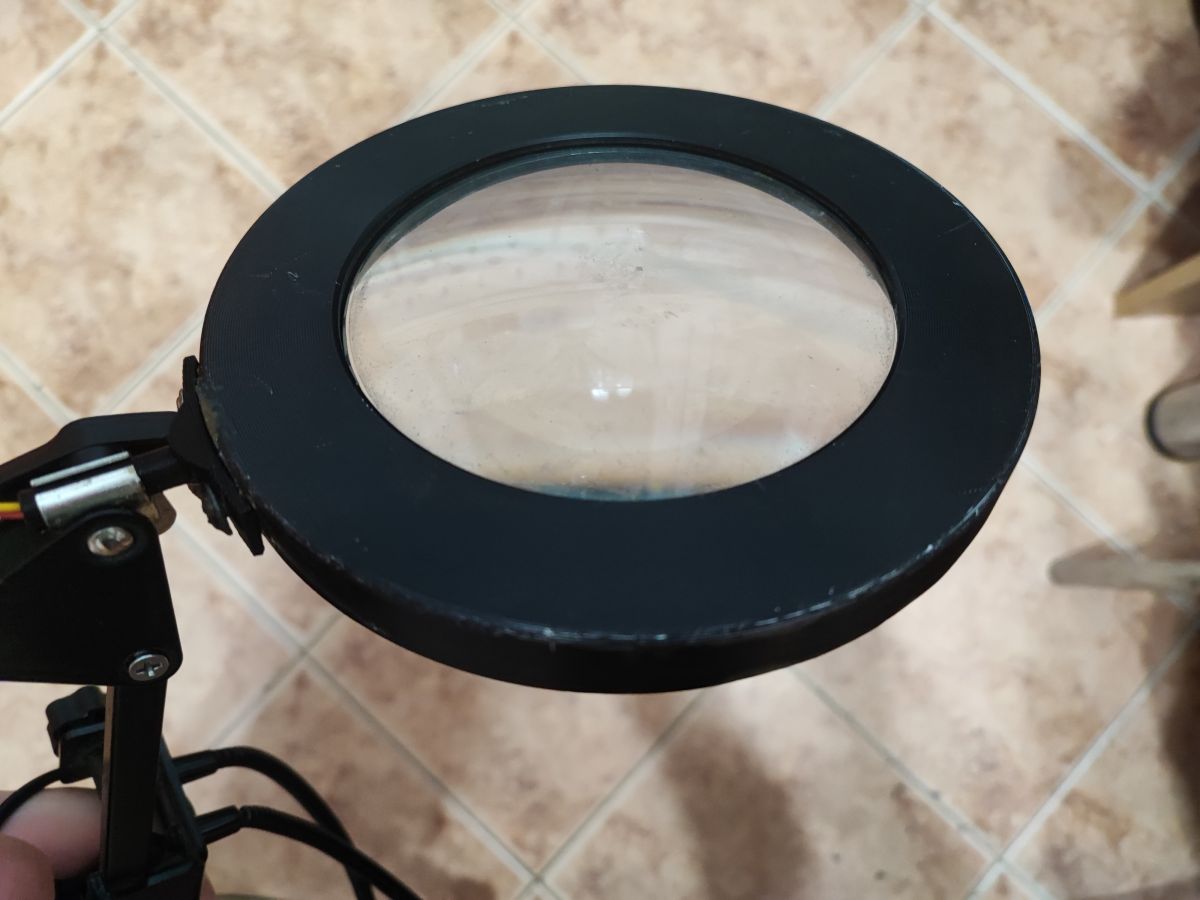
I presented the lamp three years ago in the topic: Large "third hand", magnifier, USB lamp - Newacalox - review
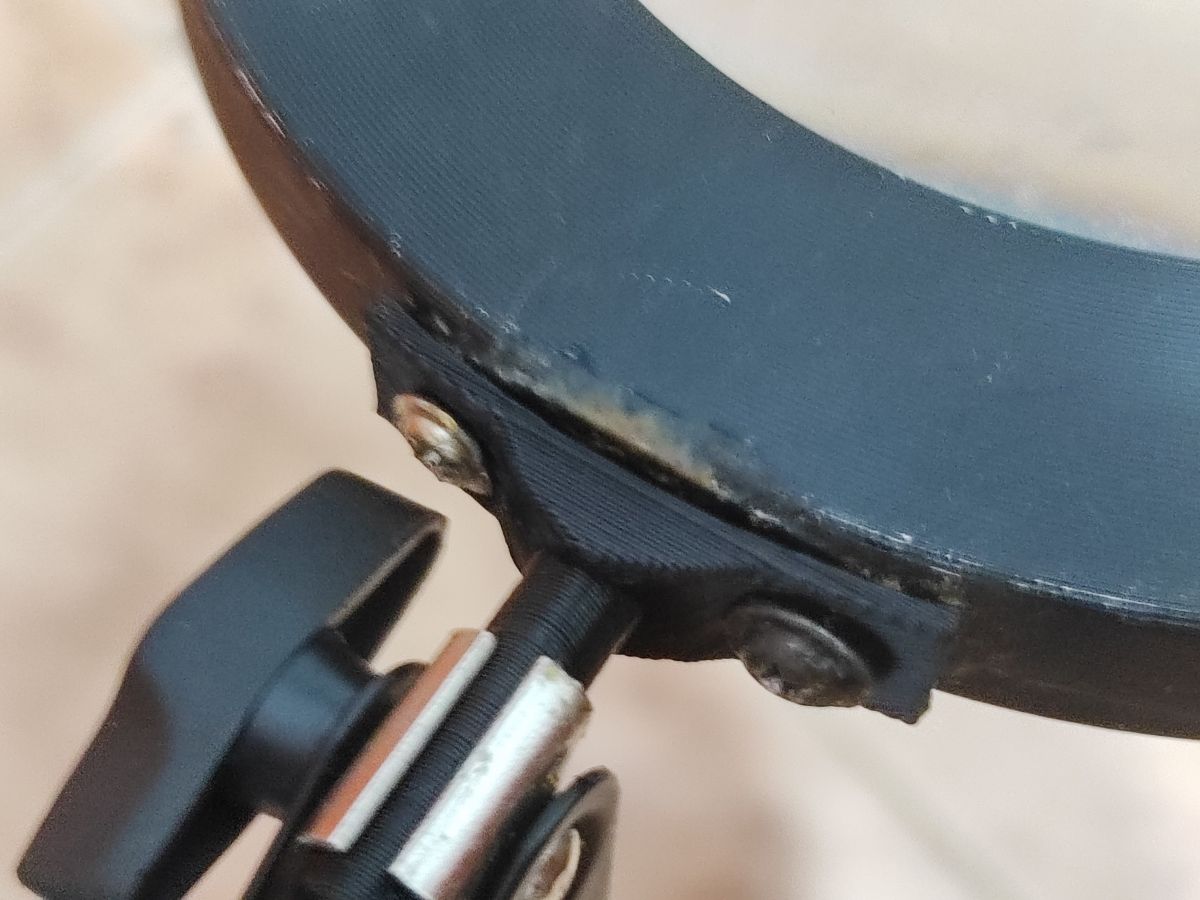
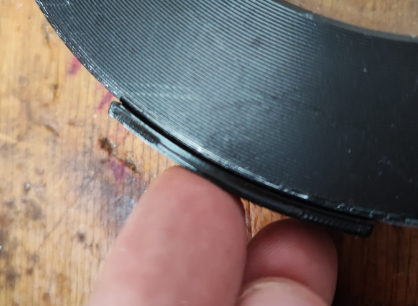
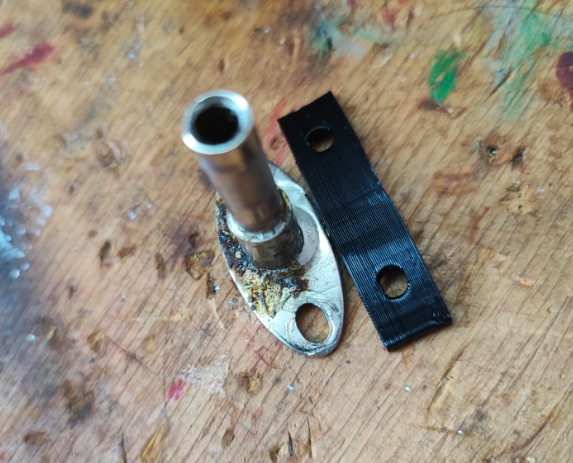
So the damage was done to this joint:

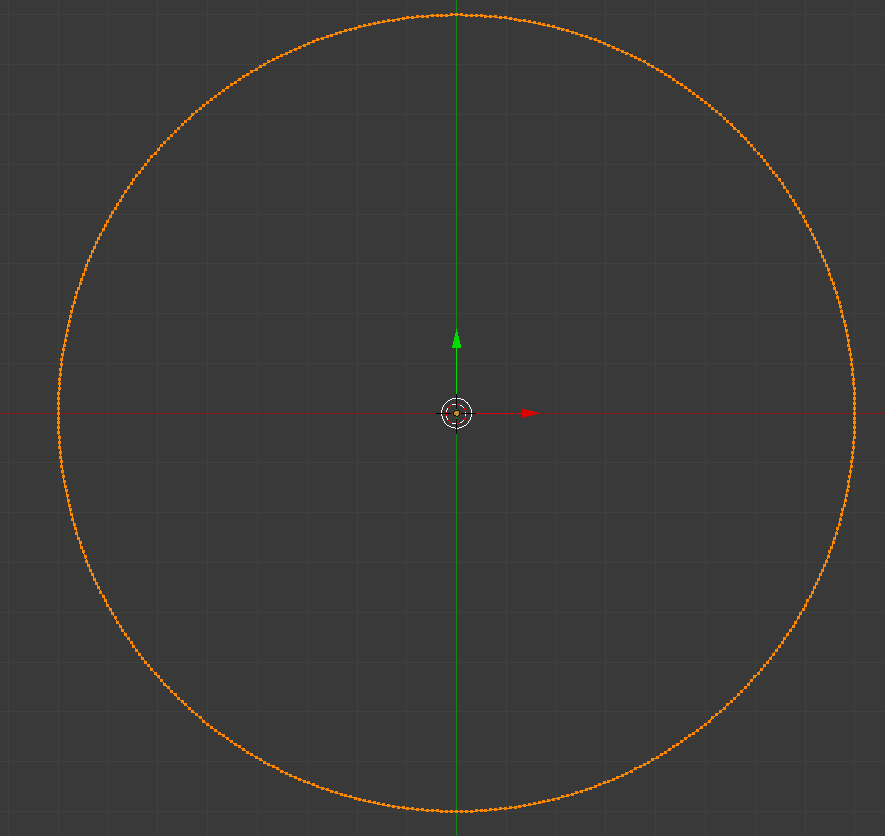
I created the replacement in Blender. I started the adventure with a circle of diameter in line with the diameter of the lamp:
I then prepared myself a block with a length that matched the desired element (circle cutout):
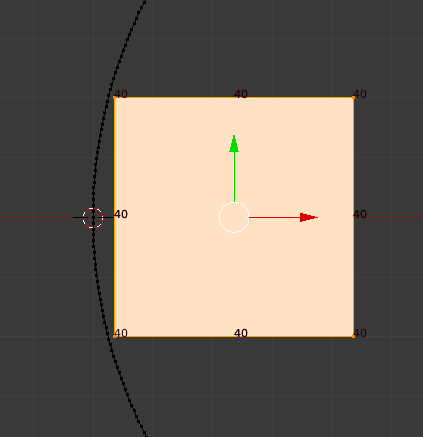
Based on this I cut out this cutout and gave it a thickness:
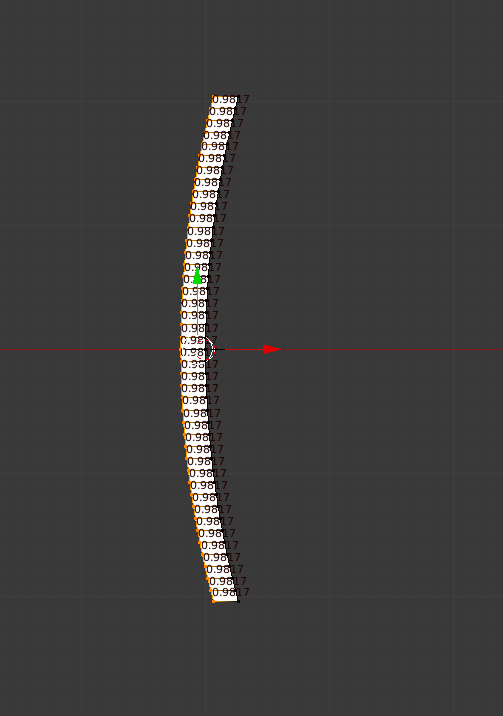
At this point it was still two-dimensional:
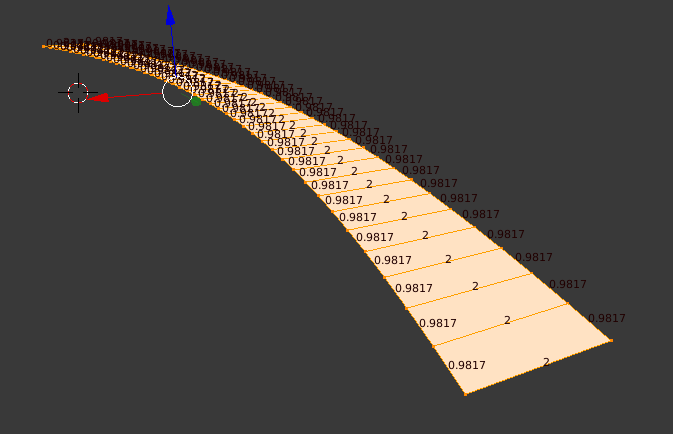
For this reason I then gave it a third dimension:

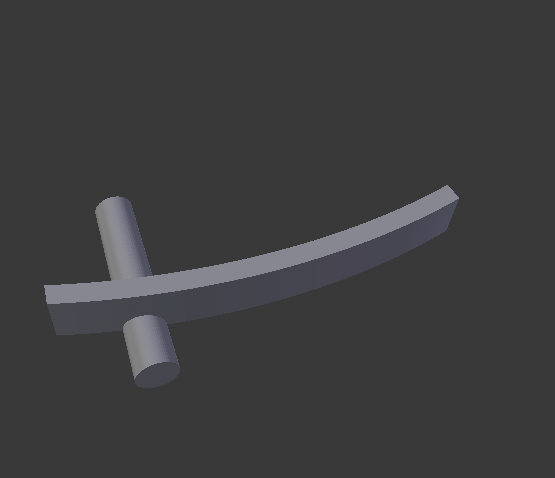
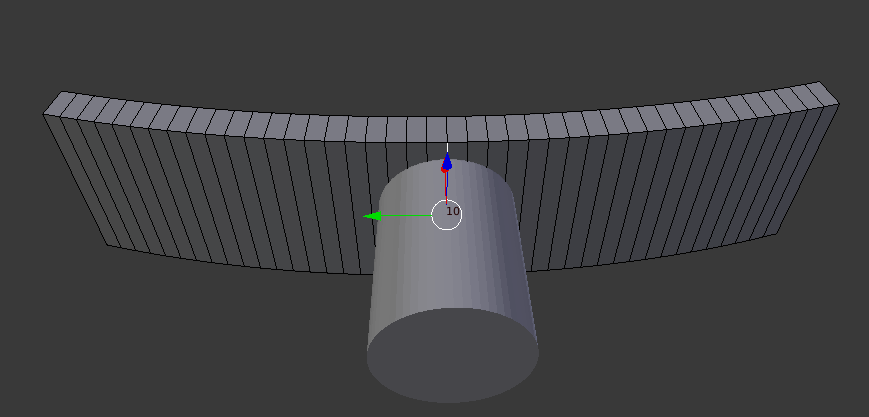
I made a print for the fitting:
Fits:
Now it's time for the holes. I have created the cylinder so that its origin point is on the symmetry axis of the piece, this in order to later add a mirror image to have the two holes symmetrically:
After adding the "mirror" modifier:
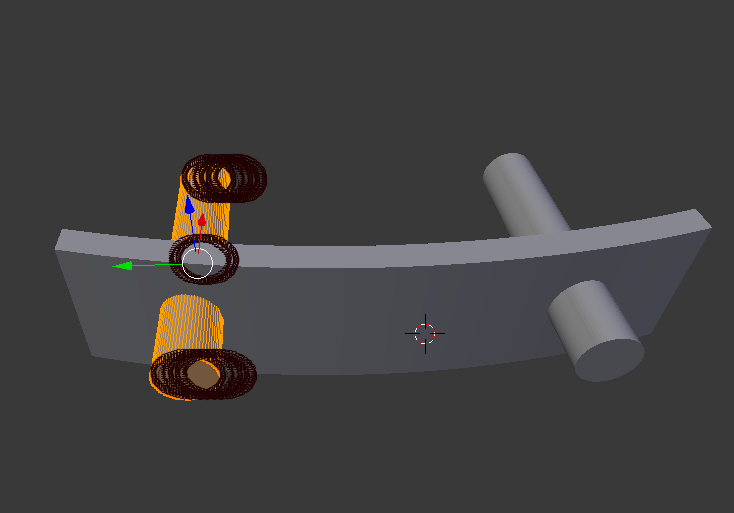
Then I added "boolean" - i.e. we cut a new shape from the previous element:
Then it was time for another cylinder, also with "boolean" - but this time a sum operation:
Fitting:
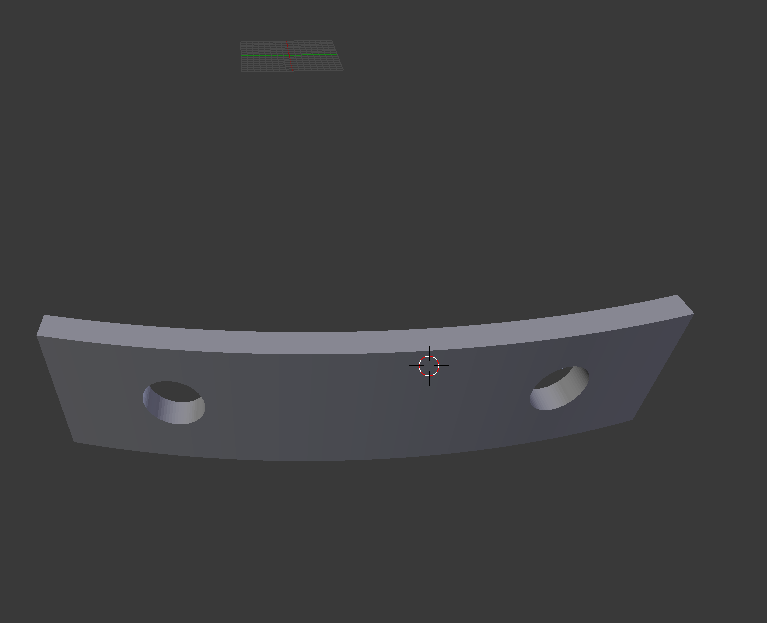
A few improvements later I still cut the third hole and the shape is tentatively ready:
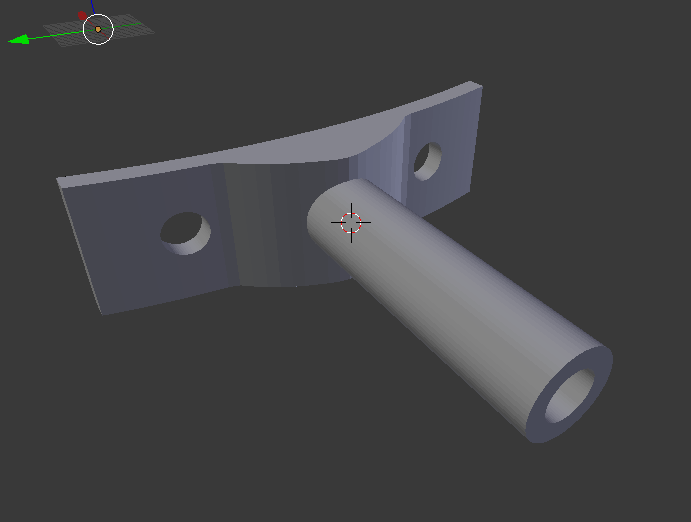
The third hole is needed because the wires are routed through it.
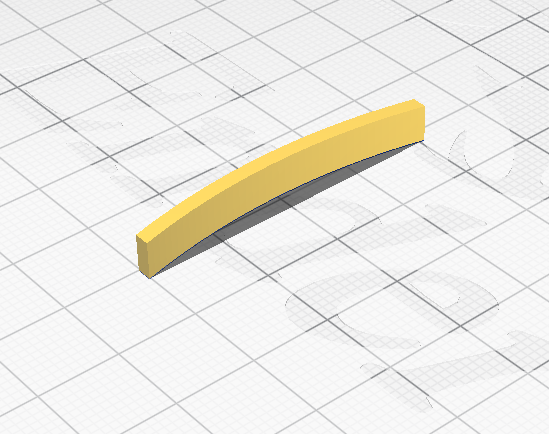
Printed component:
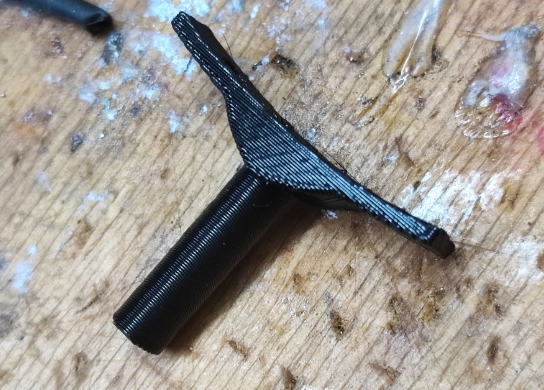
I printed the piece on a slant to reinforce the structure a little.
Done! Now the only question is how long it will last....
Summary
I waited about a month before writing the topic, during this time I have used the lamp normally and I can already state with a clear conscience that the print has performed well. Nothing has broken yet, and even if it does, I have a second piece in reserve. It costs practically nothing. The piece only weighs 2-3 grams, and considering that I pay about PLN50 for 1kg of filament it's really pennies, even including electricity and time spent in Blender.
Could it have been fixed any other way? I don't know, you guys can tell me, but in terms of my capabilities the 3D printing solution worked perfectly.

p.kaczmarek2 wrote 14408 posts with
rating 12345 , helped 650 times.
Been with us since 2014 year.
Comments
PLA, despite appearances, is quite hard and stiff. If it is not heated too much, it can surprise with its toughness. [Read more]
I would suggest a different print layout to reinforce the strength of the component. [Read more]
Exactly, better strength would be horizontal not vertical. Glued layers are not that strong. But nothing is free either in appearance or strength. [Read more]
Well, just how long did it take? [Read more]
All in all you're right about the angled print, although at the same time I'll stress that I didn't print flat. I set it at an angle and the tree supports held it, I just didn't take a photo. @grzegorzmadera... [Read more]
In my case, it would have taken less than a minute to weld up the original component with a migomat. [Read more]
Apparently he tried to solder and something went wrong, apparently it's not ordinary steel so you can't weld it with an electrician. [Read more]
the law of notches applies - why sharp transitions? You could have made a smooth transition between the individual components - then there is no accumulation of stress - the material would not have come... [Read more]
@pkaczmarek2 You print (also described in other topics) specific items useful in life or spare parts for broken devices which I very much support. Not like most printers useless figures downloaded from... [Read more]
Very interesting post @landy13 , if you want you can paste it separately in this section, just write then there a few more words about this program what you used, probably it will interest many more people.... [Read more]
Thanks for the kind word. I was somehow inspired to make up my mind. Well I guess not really. The DYI section is for presenting "your own working designs" . My post doesn't say that. And what's... [Read more]
If you're worried that a tutorial alone without a printout isn't DIY, there's still the 'Articles' section. I assure you that any substantive material will be welcome. You have nothing to fear that it... [Read more]
Writing tutorials or running a course is not something I am likely to undertake. I don't feel competent enough nor do I feel a calling. But I stand by my pledge to help if needed. Depends on what... [Read more]
Do you still have that Ender 3v3 Pro? What do you design in and what slicer do you use? [Read more]
I have this Ender all the time. I'm not complaining, but the fact is that this hobby requires patience, calibrating, tweaking etc takes time. With design I won't advise well, as I use Blender because... [Read more]
For me the biggest pain point is the temperature 'drift' of the table. But that's probably due to supporting it on a single rail, in the middle. Ender's newer, budget design has the table supported on... [Read more]
I have a K1C and I don't see any problems, well it's Creality's flagship, not the Ender series, which I've been advised against by many people if I want to print rather than repair a printer. Generally... [Read more]
The amount of Undo memory can rather be increased. Which Blender are you working in? How much did you buy the K1C for? [Read more]
With large solids there is no problem. I often print solids that are one layer thick (0.2mm) and quite large in span. After a few pieces you have to calibrate the table. [Read more]