Berry scripting for various IoT platforms - tutorial for OBK new script integration part 1
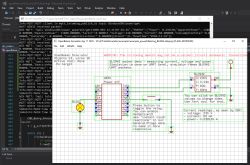
Berry is a lightweight scripting language designed for embedded system. It features dynamically typed, one-pass compiler and interpreter with core’s code size is less than 40KiB which can run on less than 4KiB heap. Thanks to latest OBK integration, Berry can now run on most of new IoT modules, including BK7231, W800/W600, ESP32, BL602, LN882, Realtek. It can also run in OBK Windows simulator, so you can try out Berry easily, along with full MQTT and Home Assistant integration.
For more information about Berry, please see Berry documentation:
https://berry.readthedocs.io/en/latest/index.html
Now let's focus on running Berry in OBK. Currently, there are two options:
Option 1: you can just use OpenBeken Simulator to try Berry on Windows, just get binaries here: https://github.com/openshwprojects/OpenBK7231T_App/releases

Option 2: You can use only builds (no toolchain required) to enable Berry for the platform of your choice, follow this tutorial. Keep in mind that on some platforms you might need to disable some other features in order to keep binary size small enough to run. This is because OBK comes by default with most of the features enabled, so each binary has TuyaMCU driver, LED driver, WS2812 driver with animations, and even Tasmota JSON support, and you most likely will not this kind of thing. So, edit obk_config.h to suit your needs. Just remember - for Berry, you need to enable ENABLE_OBK_BERRY define.
Futhermore, the stack sizes may not be adjusted for Berry currently, so you might need to increase them on your own. There is also still room for optimization in Berry code, for example, some event handlers could be more or less delayed to avoid large stack requirement. This is still subject to change in future.
This tutorial will be based on OBK Windows Simulator, so anyone can run it, even with no IoT devices.
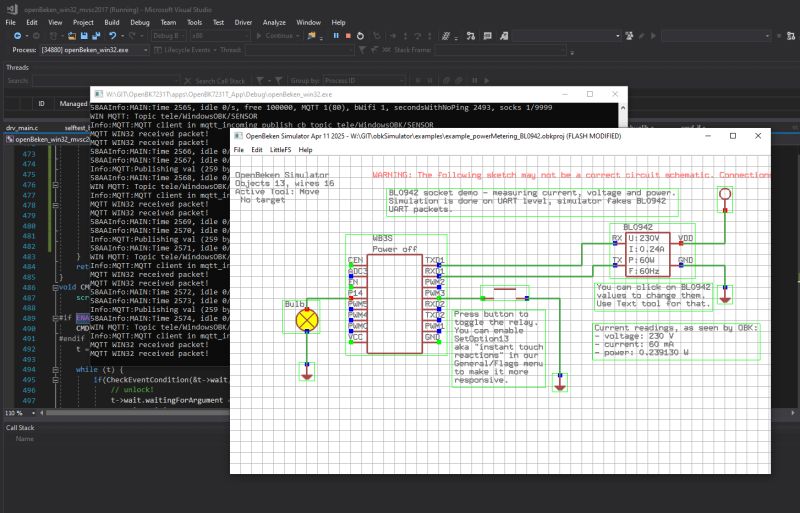
Don't forget to get OBK simulator samples here:
https://github.com/openshwprojects/obkSimulator
They will be used here for demonstration purposes.
I also assume that you know more or less how to run OBK Simulator - it creates a simulation window and virtual device page on your local IP, port 80. For more information, see related Simulator topic.
First Berry steps
Let's start by executing some simple Berry commands in OBK command line:
berry print("Hello, Berry")
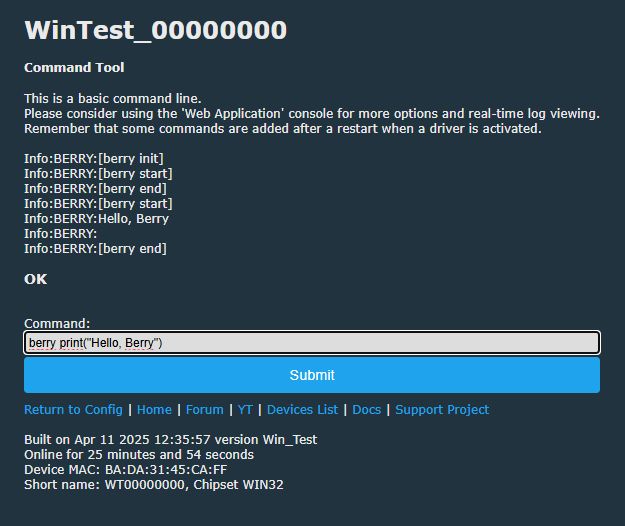
The same could be done in the Web App console:
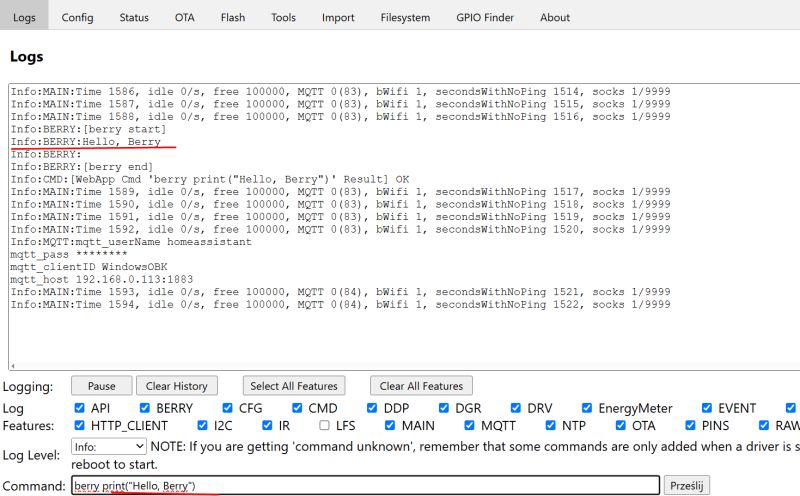
This way you can test various berry commands, for example, expressions:
berry print("Hello " + str(5+2*2))
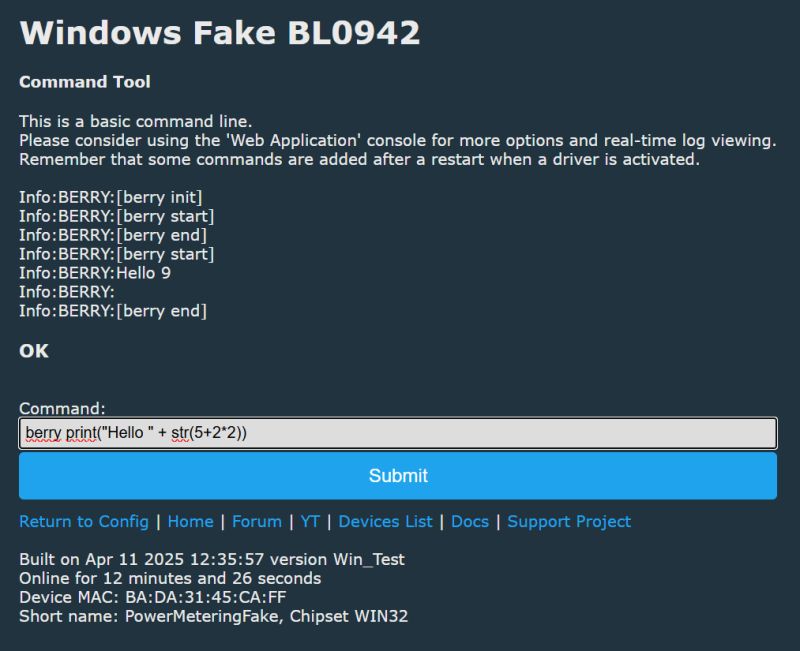
First Berry commands
The most simple way to call OBK commands from Berry is "runCmd" command.
Commands should be taken from here:
https://github.com/openshwprojects/OpenBK7231T_App/blob/main/docs/commands.md
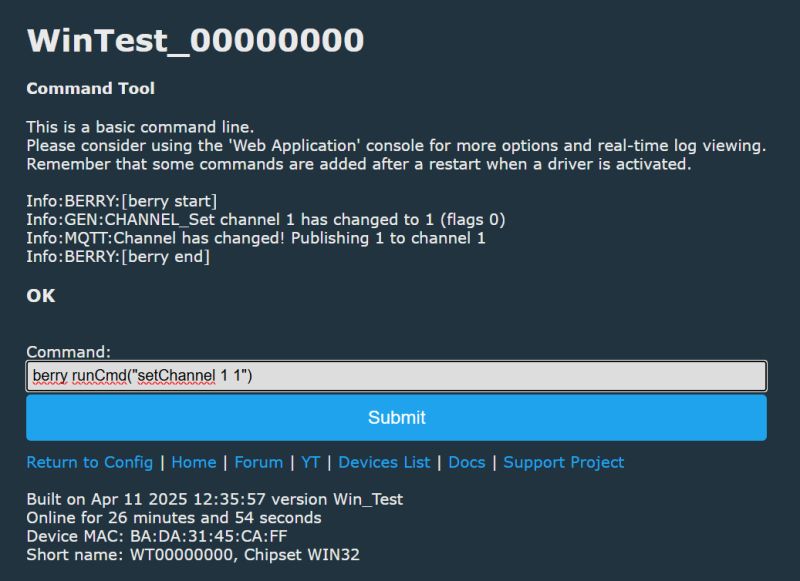
For example, you call setChannel from Berry to set new channel value. In OBK, this can for example set relay state, along with whole MQTT publish and state update:
berry runCmd("setChannel 1 1")
You can use the same approach to run text commands as well:
berry runCmd("MQTTHost 192.168.0.213")
Similary, you can use OBK publish commands to publish your data to Home Assistant:
Berry script files
Main Berry scripts should reside within Berry modules. Berry modules can be created in LittleFS file system:
Let's start by making simplest module. Call it autoexec.be. It will run on each device startup.
autoexec = module('autoexec')

# Add functions to the module
autoexec.myInit = def()
   setChannel(1, 42)
end

# Call function on first load
autoexec.myInit()

# Berry modules must return the module object
return autoexec
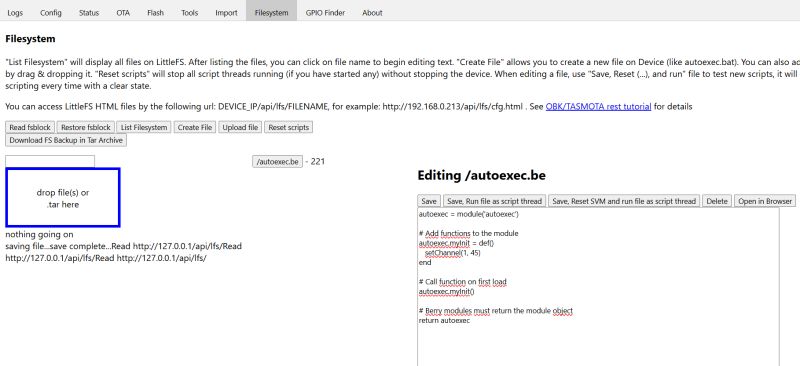
For faster prototyping, you can use "Save, Reset SVM and run file" button. This will also attempt to clear device state to simulate a reboot, but may not be always reliable.
Script execution over time
OBK features two commands that allows you to run scripts over time:
- setTimeout - runs commands once
- setInterval - runs command repeatedly
With setInterval, you can make a simple "blink LED" (or a relay, or anything) demo:
autoexec = module('autoexec')

autoexec.myToggle= def()
   runCmd("toggleChannel 1")
end

setInterval(autoexec.myToggle, 500)

return autoexec
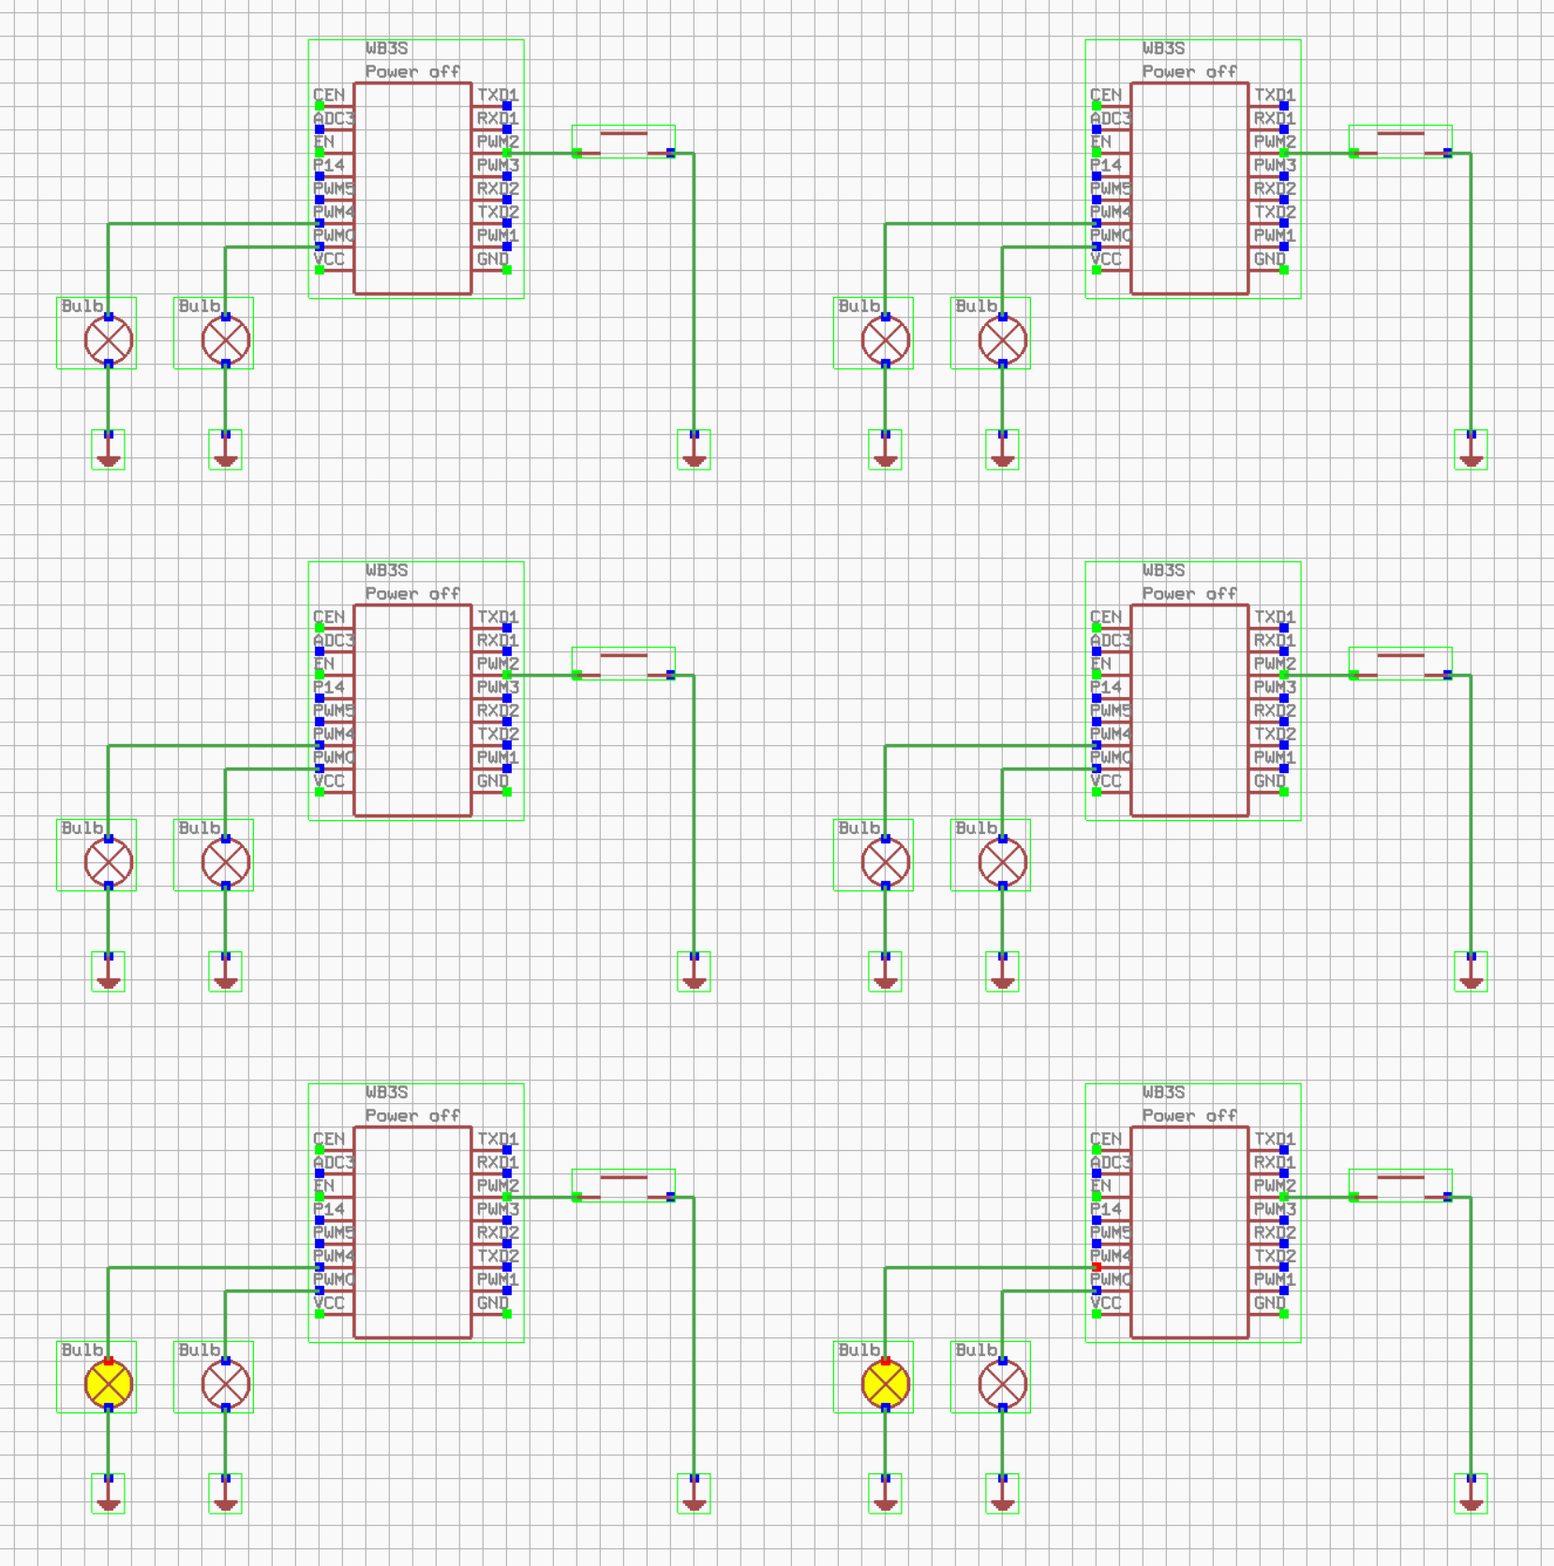
The same could be done with setTimeout, if needed:
autoexec = module('autoexec')

autoexec.myToggle= def()
   runCmd("toggleChannel 1")
   setTimeout(autoexec.myToggle, 500)
end

autoexec.myToggle()

return autoexec
Reacting to events - buttons
Berry can react to OpenBeken events. For example, you can use it with Btn_ScriptOnly button. Set a Btn_ScriptOnly role for given pin, let's say, 14, and try following code:
autoexec = module('autoexec')


autoexec.myToggle= def()
   runCmd("toggleChannel 1")
   runCmd("toggleChannel 2")
end

addEventHandler("OnClick", 8, autoexec.myToggle);

return autoexec
For the demonstration purposes, I've put two relays ("bulbs") on channel 1 and channel 2:
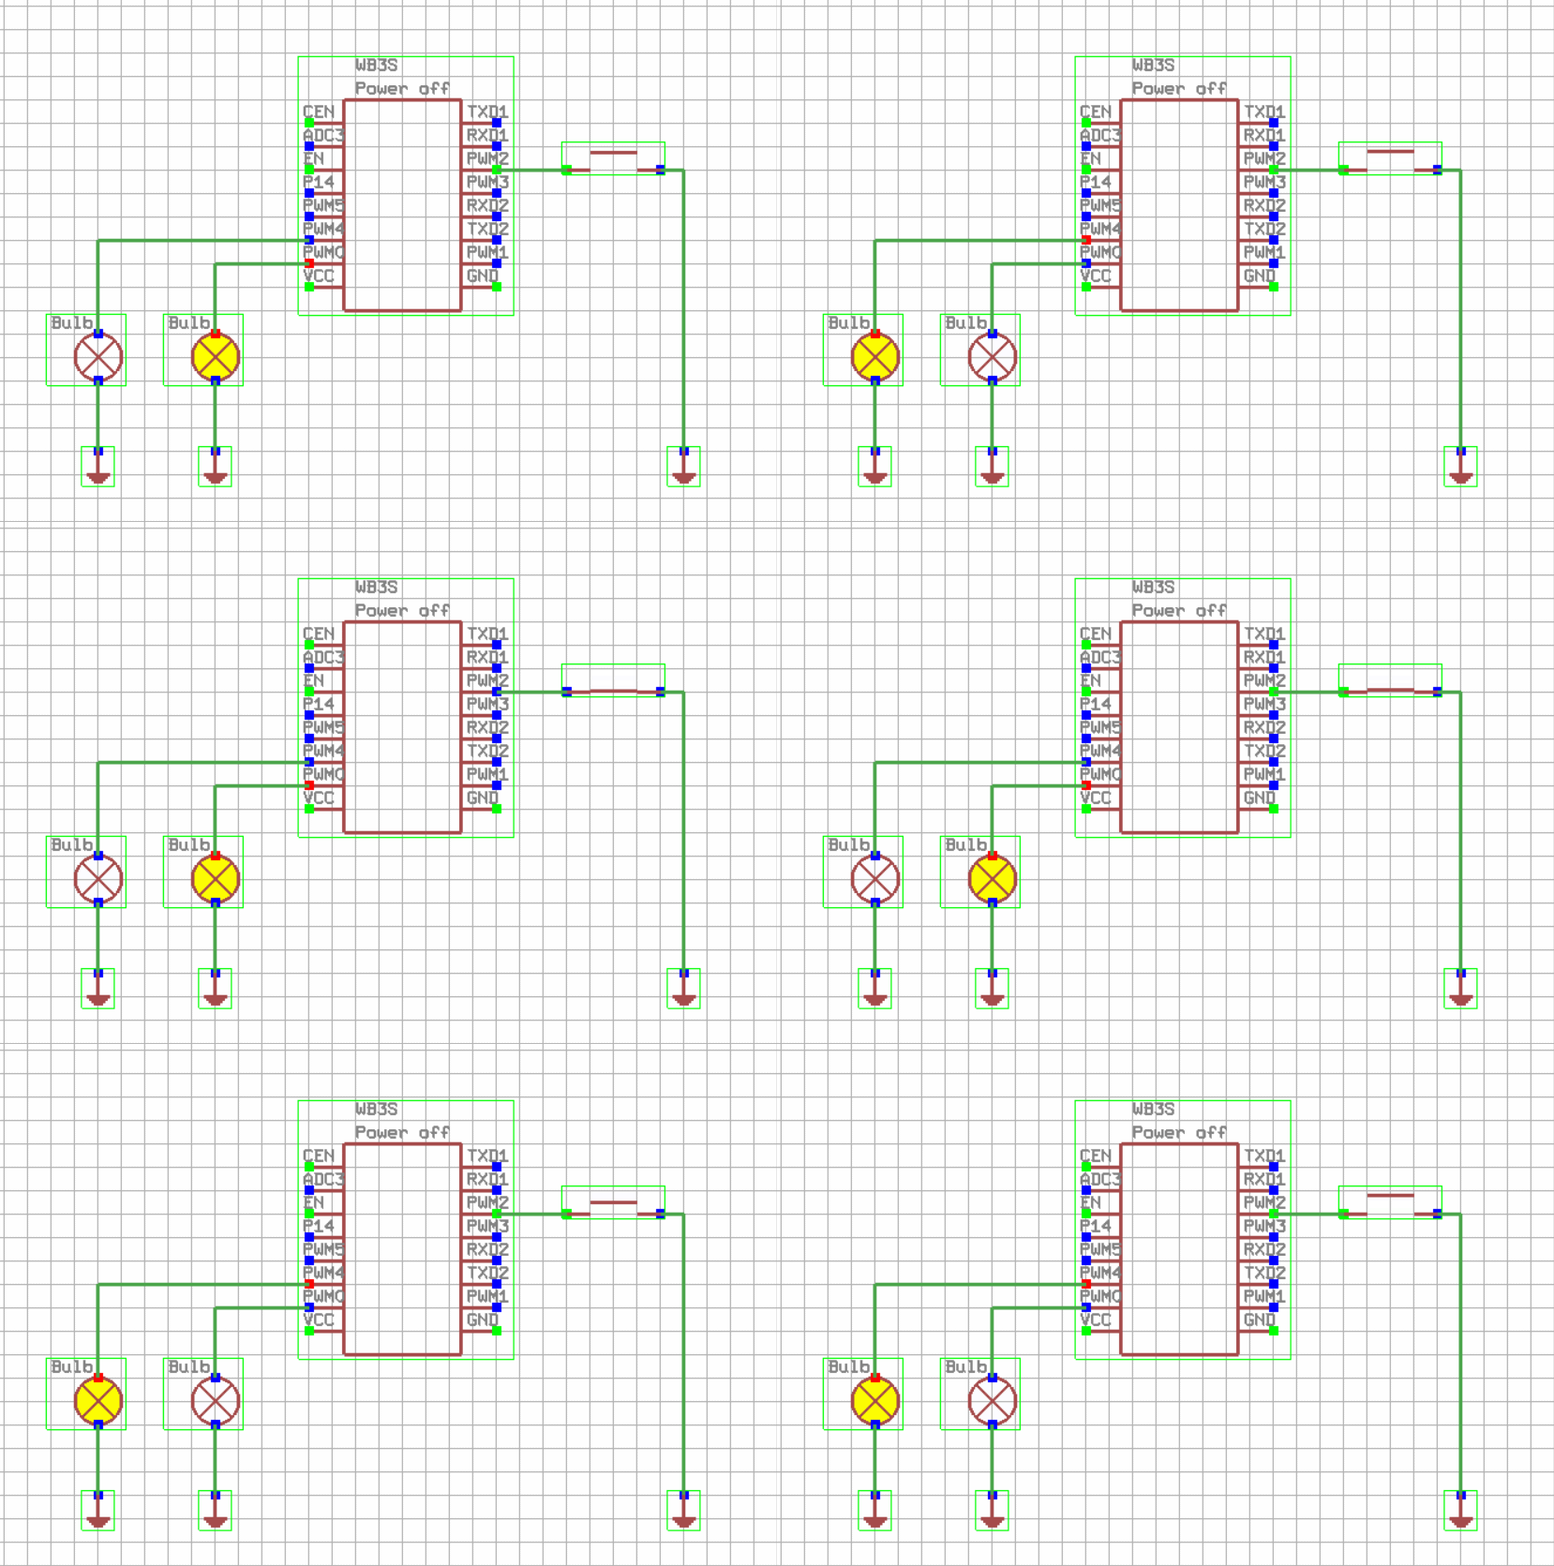
Reacting to events - channels
Similar approach can be taken to, for example, turn off relay after some time. In this case, we'll catch the situation when channel becomes 1 and set it back to 0 after some time. Keep in mind that for this demo I've set back the PWM2 pin button role to Btn, so it has automatic interaction with channel 1. So, channel 1 toggle is handled by OBK internally, as usual.
autoexec = module('autoexec')

autoexec.myToggle= def()
   runCmd("setChannel 1 0")
end

autoexec.myDelay= def()
   setTimeout(autoexec.myToggle, 1000)
end

addEventHandler("Channel1", 1, autoexec.myDelay);

return autoexec
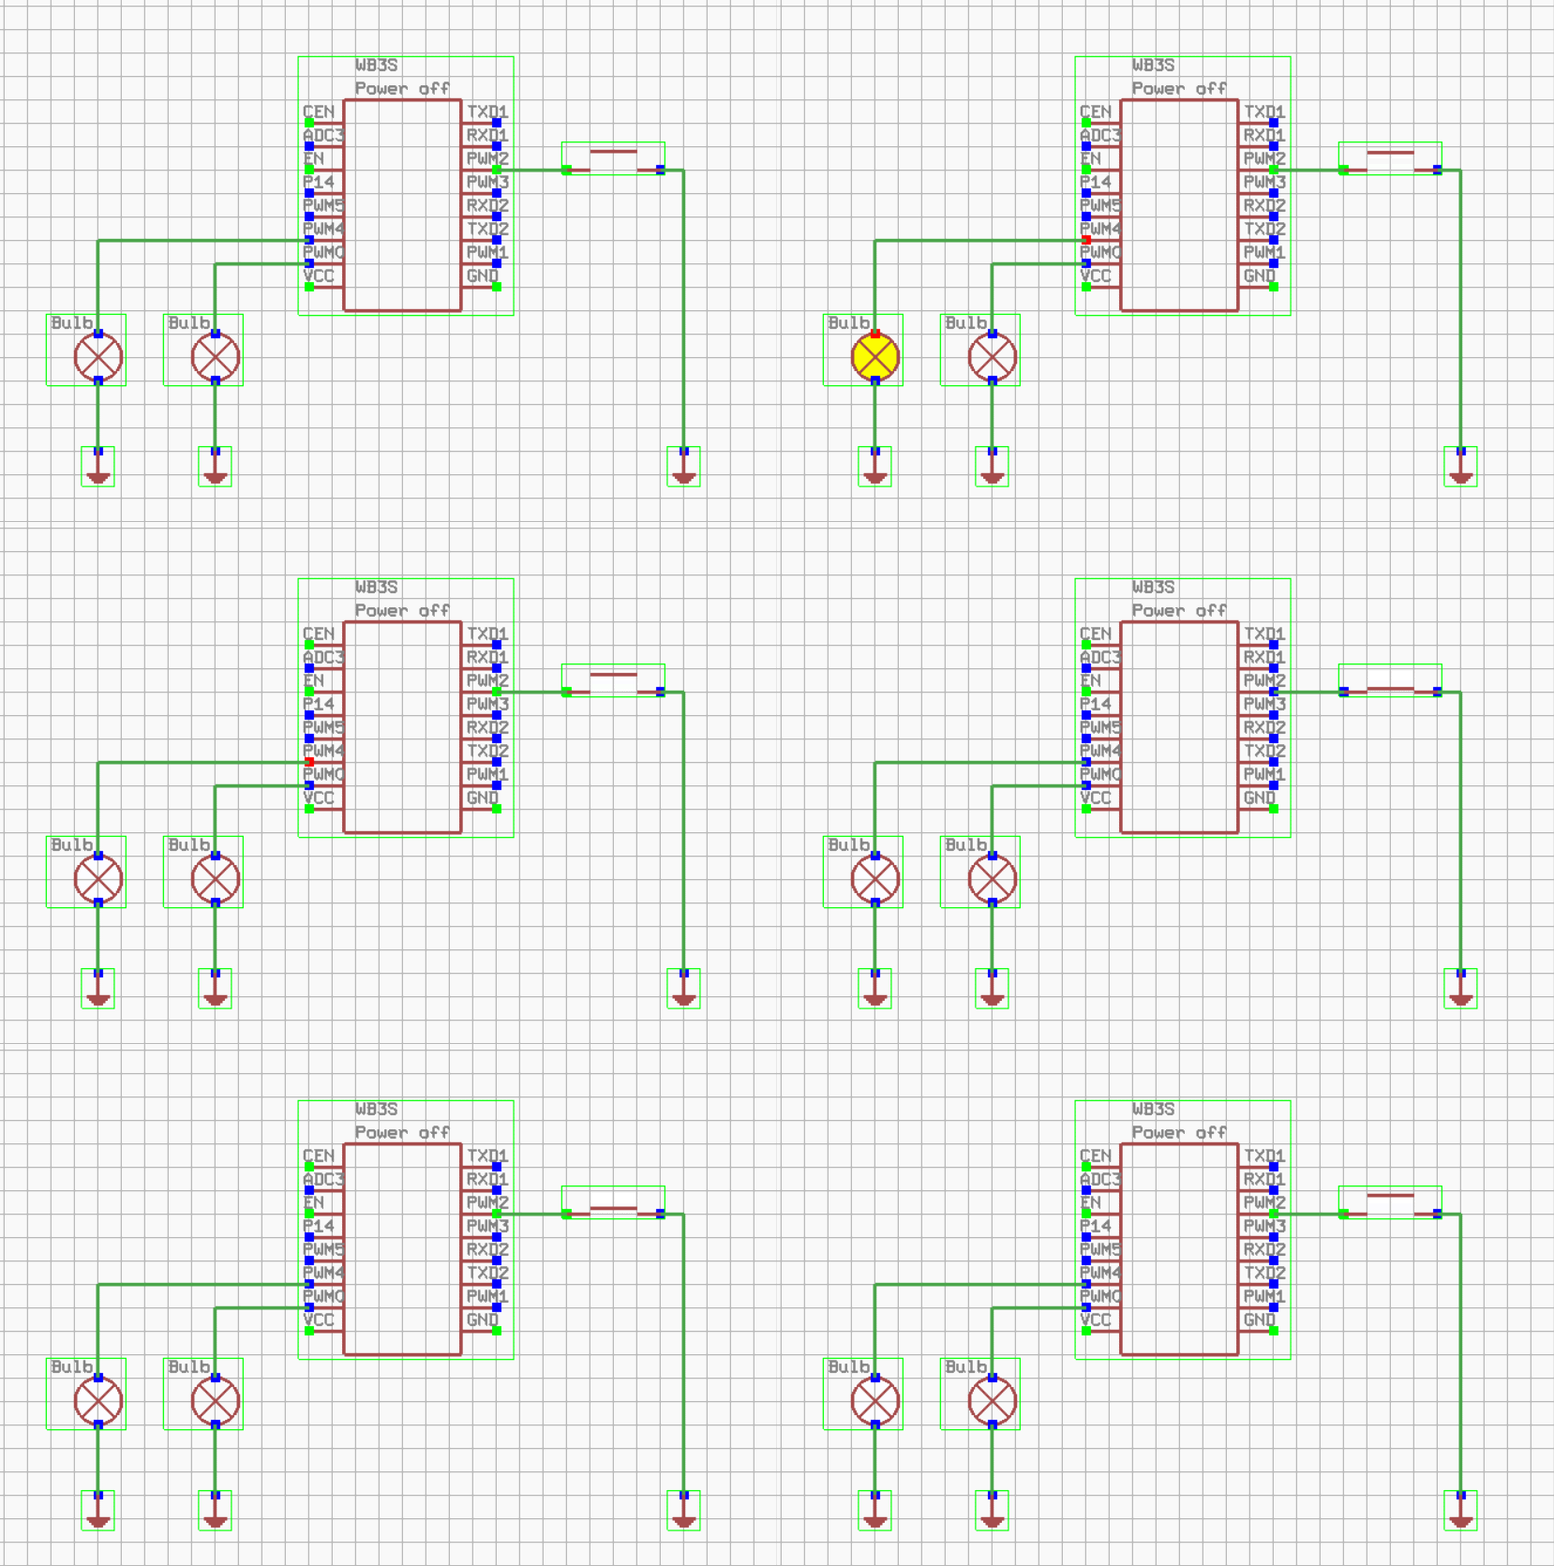
The code could be simplified by adding inline functions:
autoexec = module('autoexec')

autoexec.myToggle= def()
   runCmd("setChannel 1 0")
end

addEventHandler("Channel1", 1, def()
   setTimeout(autoexec.myToggle, 1000)
end);

return autoexec
and even futher:
autoexec = module('autoexec')

addEventHandler("Channel1", 1, def()
   setTimeout(def()
       runCmd("setChannel 1 0")
   end, 1000)
end);

return autoexec
Stopping and running intervals
setInterval returns a handle that can be later used to stop the interval. You can store it in a global variable and call "cancel" later. The following example demonstrates a stoppable setInterval demo where first button press starts then interval that blinks LEDs, and second button press stops it.
autoexec = module('autoexec')

g_handle = 0;

autoexec.myToggle= def()
   if g_handle == 0
        g_handle = setInterval(def()
             runCmd("toggleChannel 1")
             runCmd("toggleChannel 2")
        end, 200 )
     else
           cancel(g_handle)
           g_handle = 0
      end
end

addEventHandler("OnClick", 8, autoexec.myToggle);

return autoexec
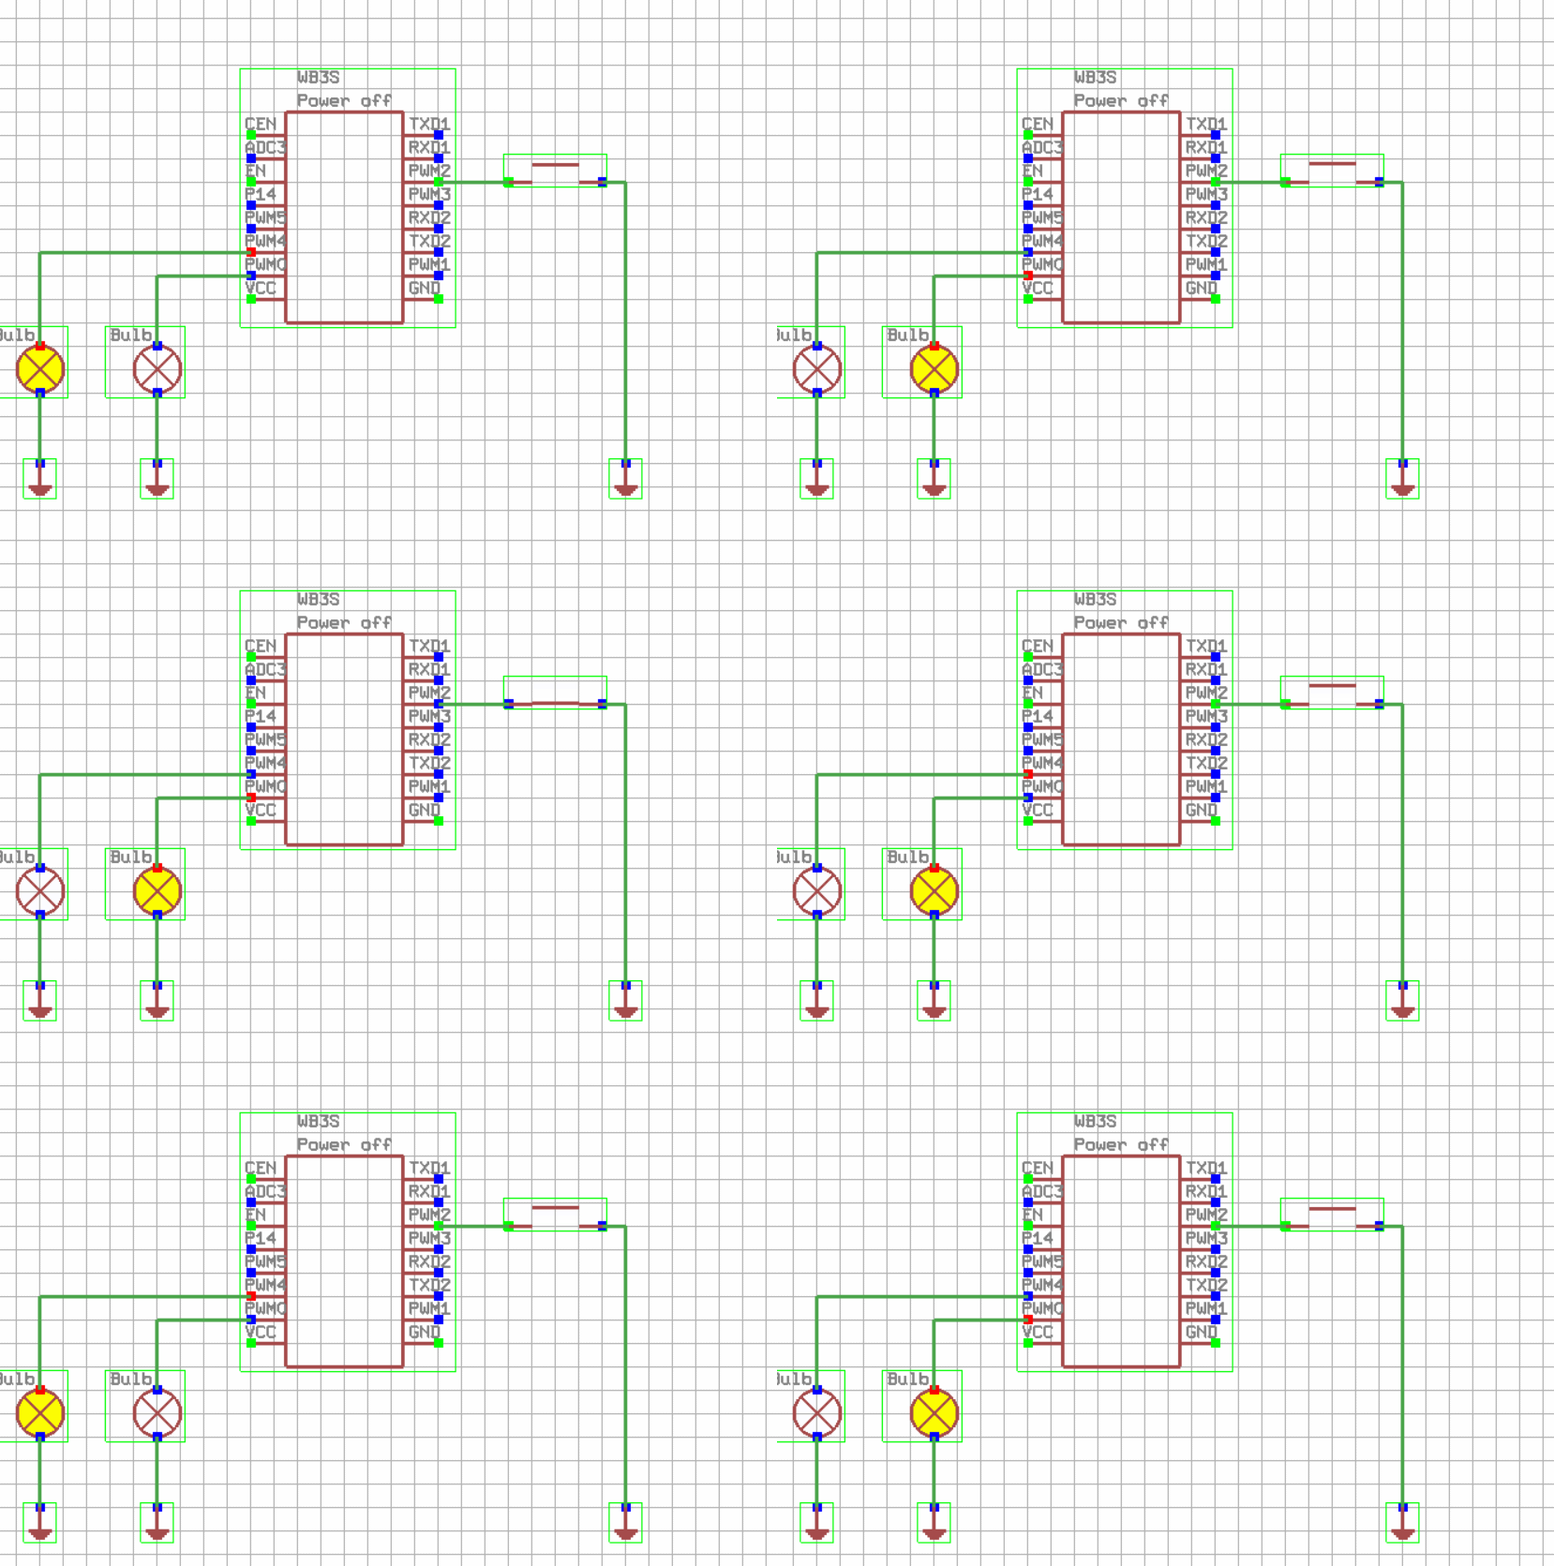
Calling module functions from outside
Keep in mind that you can simply use Berry modules anywhere inside OBK. Let's consider simplified version of mentioned module:
autoexec = module('autoexec')

g_handle = 0;

autoexec.myToggle= def()
   if g_handle == 0
        g_handle = setInterval(def()
             runCmd("toggleChannel 1")
             runCmd("toggleChannel 2")
        end, 200 )
     else
           cancel(g_handle)
           g_handle = 0
      end
end

return autoexec
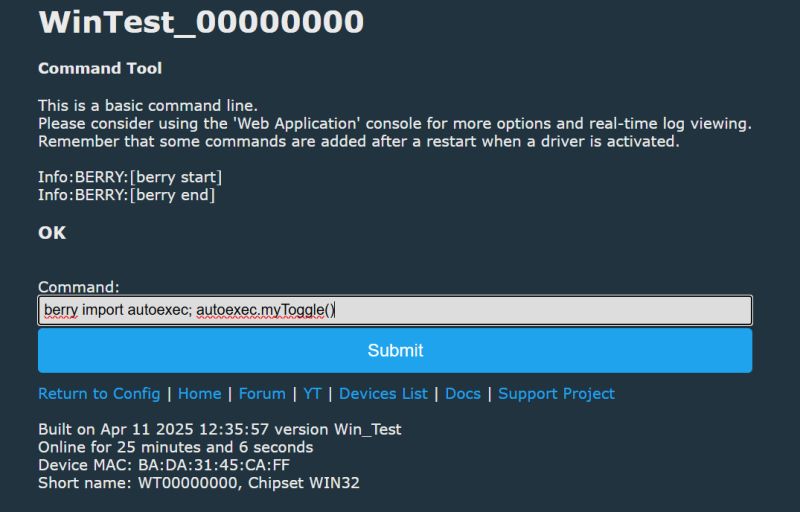
Once you have it in LFS, you can just run OBK command:
berry import autoexec; autoexec.myToggle()
and it will correctly toggle the blink interval.
Direct command handlers
There are more ways to call Berry functions from outside. For example, you can just create your own command handler in Berry:
autoexec = module('autoexec')

g_handle = 0;

autoexec.myToggle= def()
   if g_handle == 0
        g_handle = setInterval(def()
             runCmd("toggleChannel 0")
             runCmd("toggleChannel 1")
             runCmd("toggleChannel 2")
        end, 200 )
     else
           cancel(g_handle)
           g_handle = 0
      end
end

addEventHandler("OnCmd", "MyCmd", autoexec.myToggle)

return autoexec
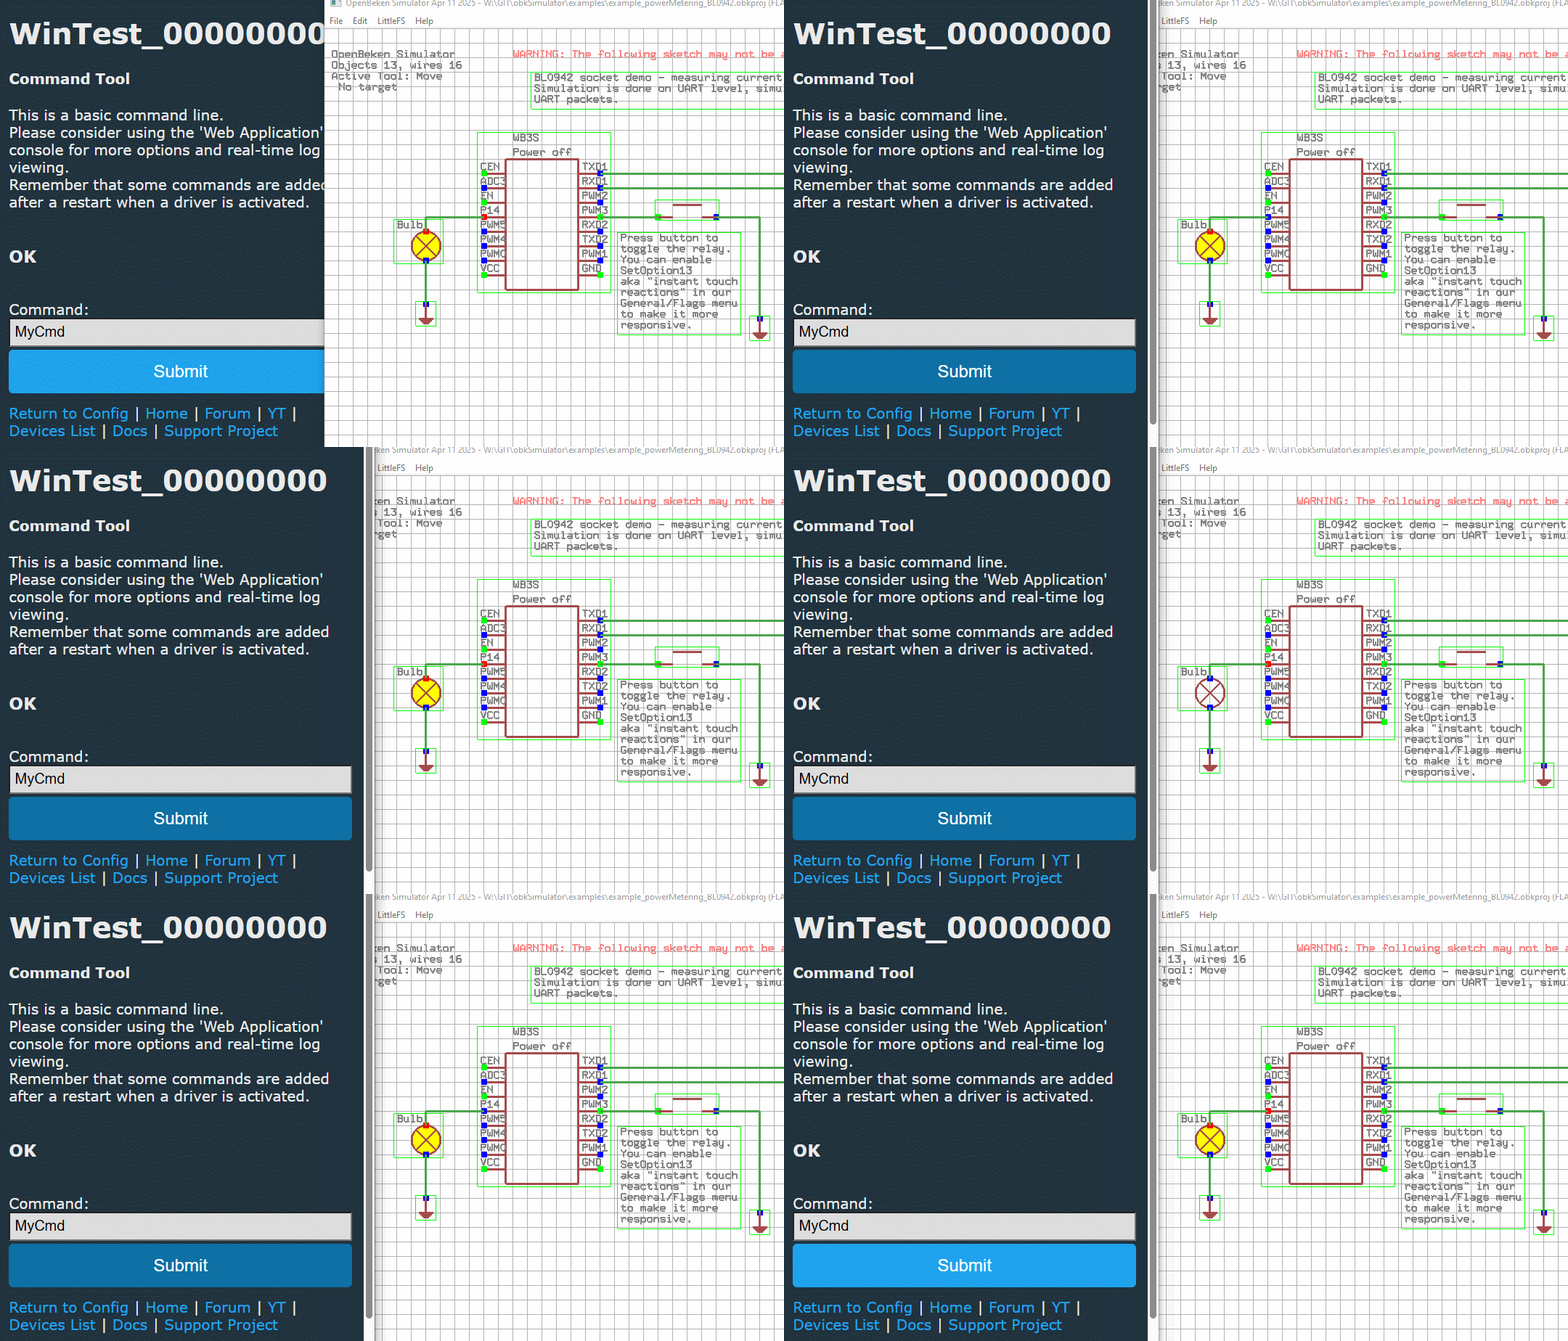
Keep in mind that now you can run this command from anywhere - even from MQTT!
Direct command arguments
Commands can have arguments that are also passed to Berry. Arguments are strings by default, so you need to cast them to int to use them as a number. In this example, we'll modify the blinking command to include single argument, which is a blink interval. In order to convert it to string, I've used int(del) function.
autoexec = module('autoexec')

g_handle = 0;

autoexec.myToggle= def(del)
   if g_handle == 0
        g_handle = setInterval(def()
             runCmd("toggleChannel 0")
             runCmd("toggleChannel 1")
             runCmd("toggleChannel 2")
        end, int(del))
     else
           cancel(g_handle)
           g_handle = 0
      end
end

addEventHandler("OnCmd", "MyCmd", autoexec.myToggle)

return autoexec
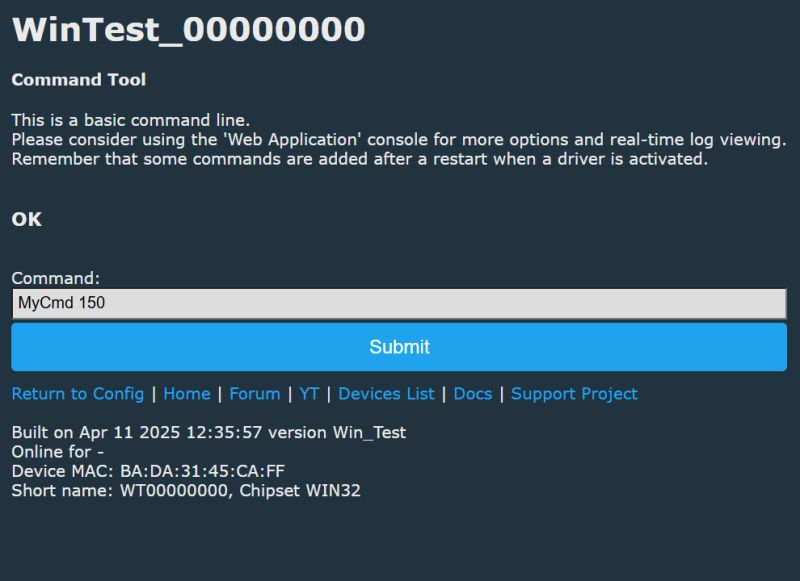
The usage is very simple:
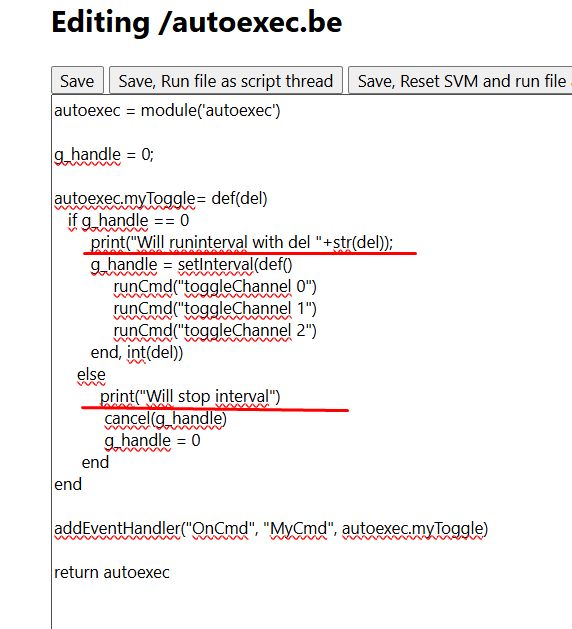
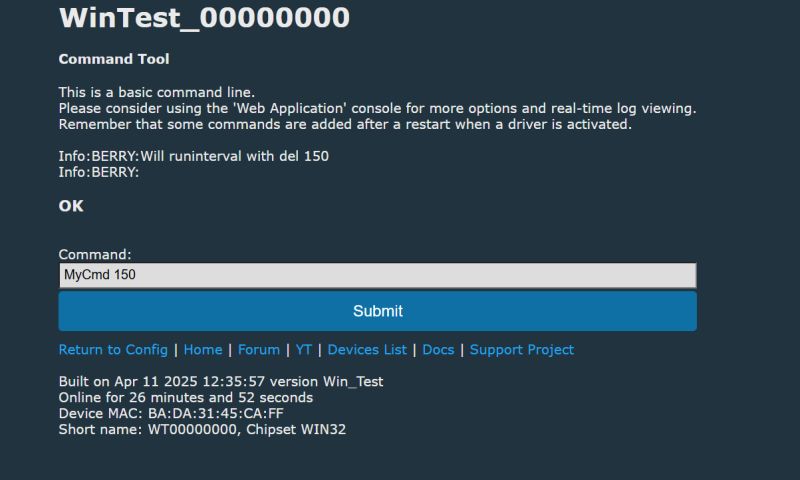
Of course, when in doubt, you can just print out some debug information:
Showing information on state section
OpenBeken features a main page with a state section that is automatically refreshed in background.
autoexec = module('autoexec')

g_handle = 0;

autoexec.myToggle= def(del)
   if g_handle == 0
        print("Will runinterval with del "+str(del));
        g_handle = setInterval(def()
             runCmd("toggleChannel 0")
             runCmd("toggleChannel 1")
             runCmd("toggleChannel 2")
        end, int(del))
     else
          print("Will stop interval")
           cancel(g_handle)
           g_handle = 0
      end
end

autoexec.myShow= def(request)
     poststr(request, "<h1>Hello Berry!</h1>")
     poststr(request, "<h5>Interval ID is " + str(g_handle)+"</h1>")
end

addEventHandler("OnHTTP", "state", autoexec.myShow)
addEventHandler("OnCmd", "MyCmd", autoexec.myToggle)

return autoexec
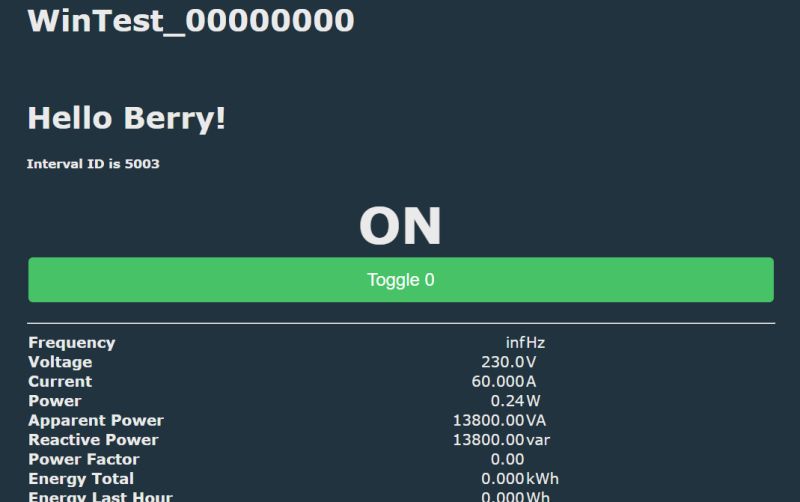
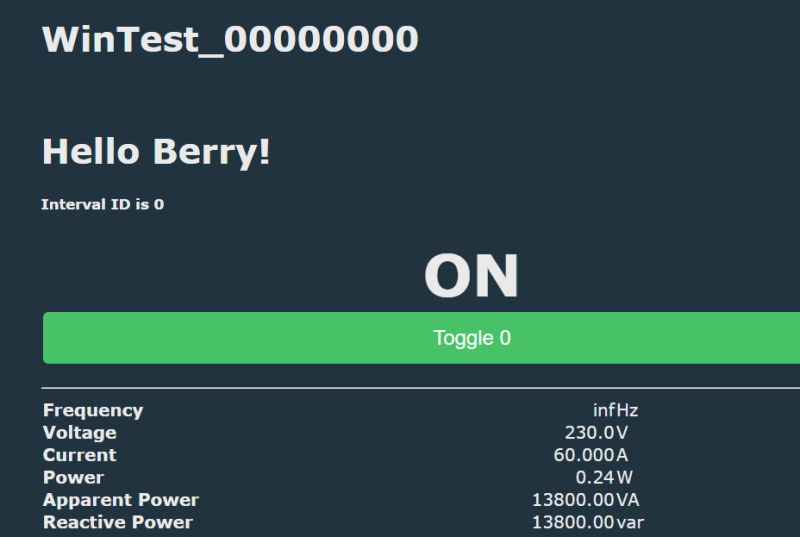
Interval ID will be 0 when it's inactive.
Access to OBK variables - power metering
OpenBeken has some legacy variables that were used before Berry introduction. They can be seen here:
https://github.com/openshwprojects/OpenBK7231T_App/blob/main/docs/constants.md
In Berry, you can access them with getVar function.
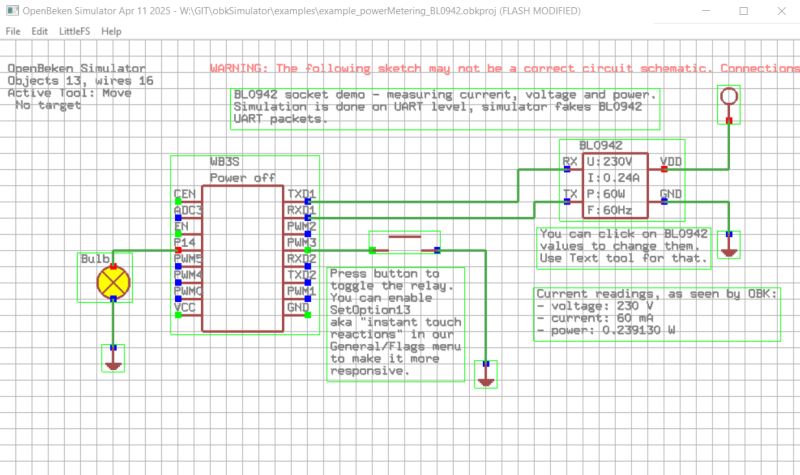
Here's a simple BL0942/BL0937 readout demo:
autoexec = module('autoexec')

autoexec.myShow= def(request)
     v = getVar("$voltage");
     poststr(request, "<h3>Berry voltage " + str(v)+"</h3>")
     c = getVar("$current");
     poststr(request, "<h3>Berry current " + str(c)+"</h3>")
     p = getVar("$power");
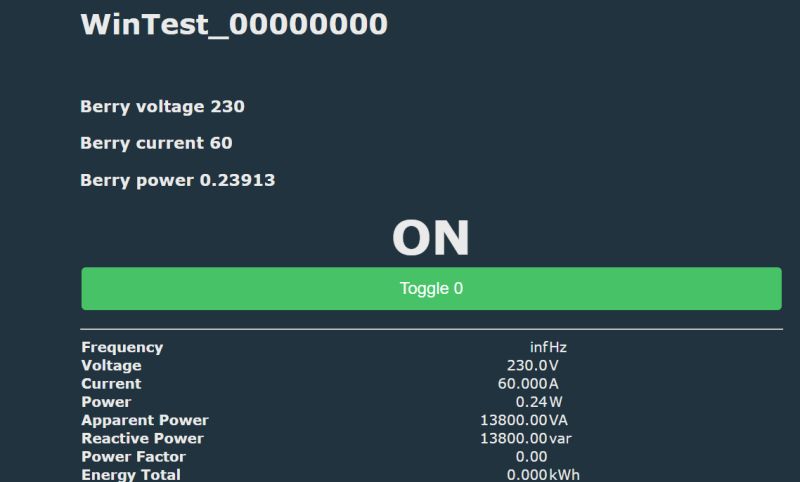
     poststr(request, "<h3>Berry power " + str(p)+"</h3>")
end

addEventHandler("OnHTTP", "state", autoexec.myShow)

return autoexec
Values are correctly displayed on the main page:
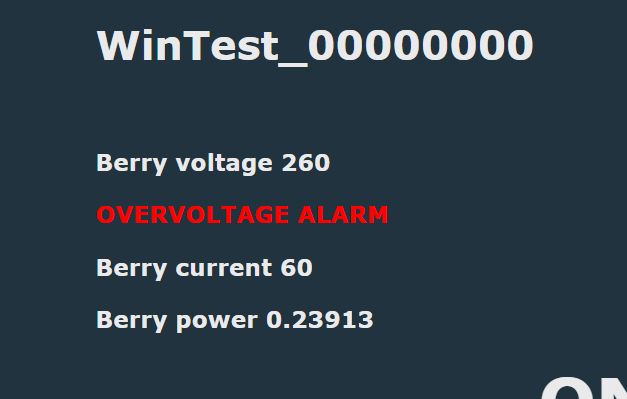
Following example can be expanded with conditionals. You can use if block to check voltage value.
autoexec = module('autoexec')

autoexec.myShow= def(request)
     v = getVar("$voltage");
     poststr(request, "<h3>Berry voltage " + str(v)+"</h3>")
     if v > 245
          poststr(request, "<h3 style='color:red'>OVERVOLTAGE ALARM</h3>")
    elif v < 210
          poststr(request, "<h3 style='color:red'>UNDERVOLTAGE ALARM</h3>");
     end
     c = getVar("$current");
     poststr(request, "<h3>Berry current " + str(c)+"</h3>")
     p = getVar("$power");
     poststr(request, "<h3>Berry power " + str(p)+"</h3>")
end

addEventHandler("OnHTTP", "state", autoexec.myShow)

return autoexec
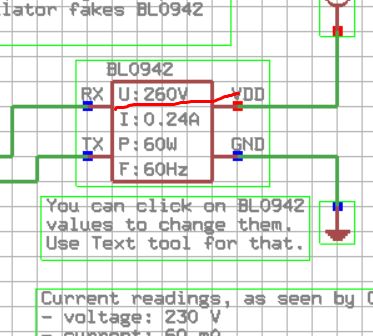
Now, let's set voltage to 260 and see what happens:
The error message is displayed correctly:
Extra sample - refresh counter
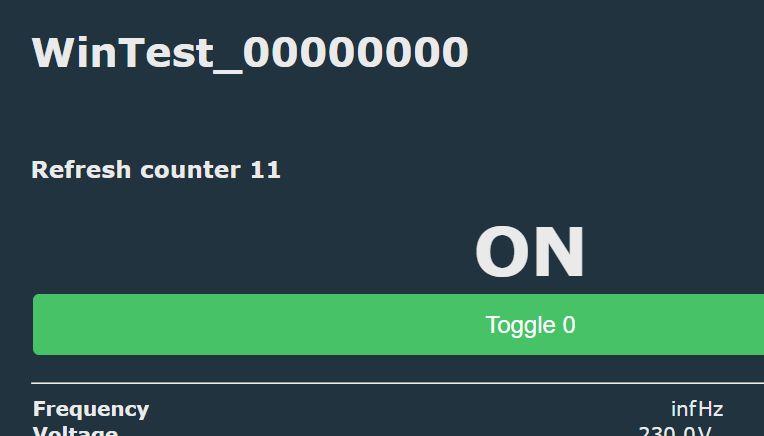
Following script will counter the number of automatic refreshes done by OBK state page segment:
autoexec = module("autoexec")

cnt = 0;

addEventHandler("OnHTTP", "state", def(request)
     poststr(request, "<h3>Refresh counter " + str(cnt) + "</h3>")
     cnt = cnt + 1
end)

return autoexec
Extra sample - loop logic and power check
The following sample was requested several times by users. This is a simple mechanism used to turn off relay when power consumption is below given threshold for given time. This can be used to detect when charging is finished.
In order to implement it, I've created a simple repeating interval called "my Logic", where I access current power value and compare it against predefined threshold, in this case, 1W. If it's below 1W, I count the number of loops, and if it reaches 5 (5 seconds, because one loop is one second here) I turn off the relay.
autoexec = module("autoexec")

loopsLowPower = 0;

def myLogic()
      p = getVar("$power");
      print("power is " +str(p));

      if p < 1
         loopsLowPower  += 1
         if loopsLowPower  > 5
           runCmd("POWER OFF");
         end
      else
          loopsLowPower  = 0;
      end
end

setInterval(myLogic, 1000);

return autoexec
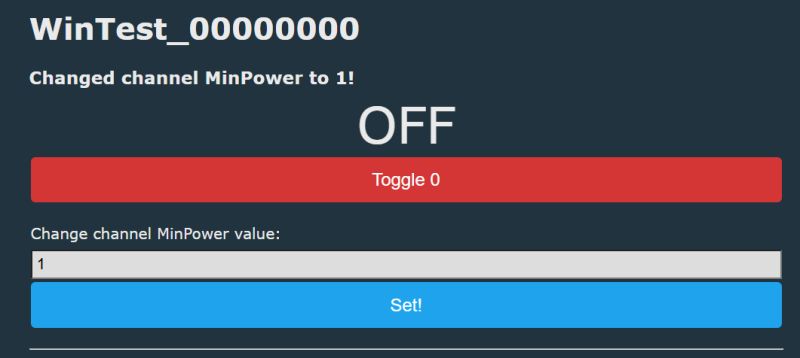
The following sample can be extended by, for example, moving constants to text fields:
autoexec = module("autoexec")

loopsLowPower = 0;

def myLogic()
      p = getVar("$power");
      print("power is " +str(p));

      minPower = getChannel(5);
      if p < 1
         loopsLowPower  += 1
         if loopsLowPower  > 5
           runCmd("POWER OFF");
         end
      else
          loopsLowPower  = 0;
      end
end

runCmd("setChannelType 5 TextField")
runCmd("setChannelLabel 5 MinPower");

setInterval(myLogic, 1000);

return autoexec
Result:
Access to OBK variables - time variables
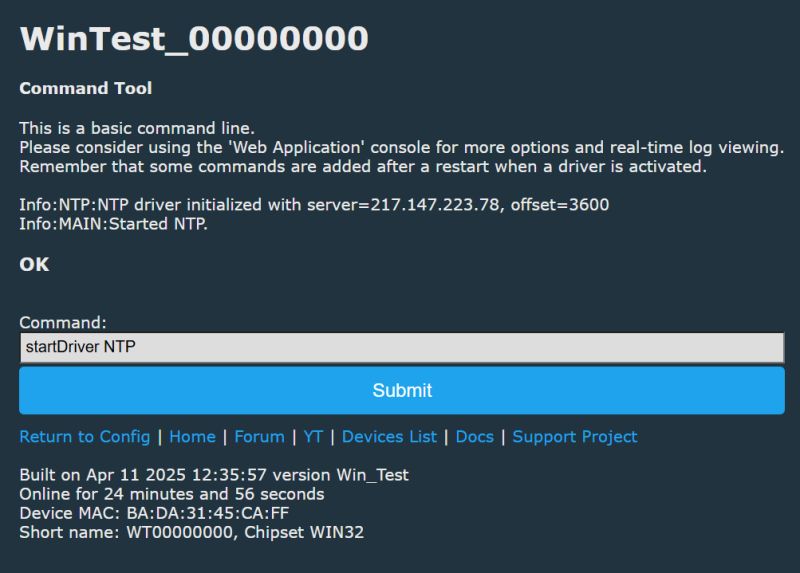
First start NTP driver. Once it's running, you will be able to access current time data:
Try following script:
autoexec = module('autoexec')

autoexec.myShow= def(request)
     h = getVar("$hour");
     m = getVar("$minute");
     poststr(request, "<h1>" + str(h)+":" + str(m)+"</h1>")
end

addEventHandler("OnHTTP", "state", autoexec.myShow)

return autoexec
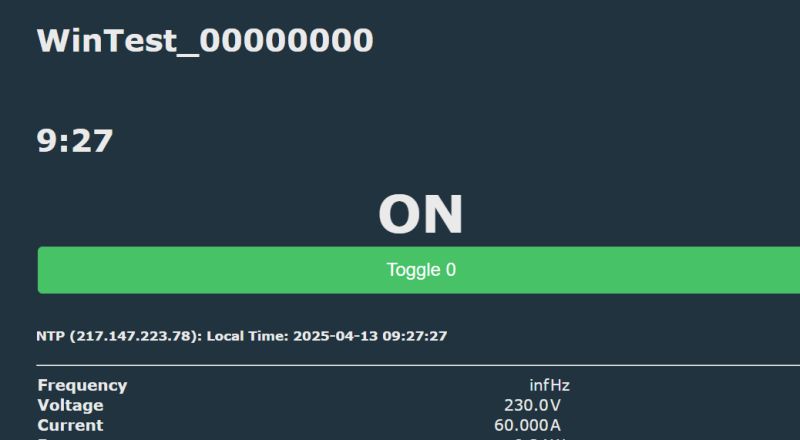
It will print NTP hour/minute on the main panel:
Custom HTML fields
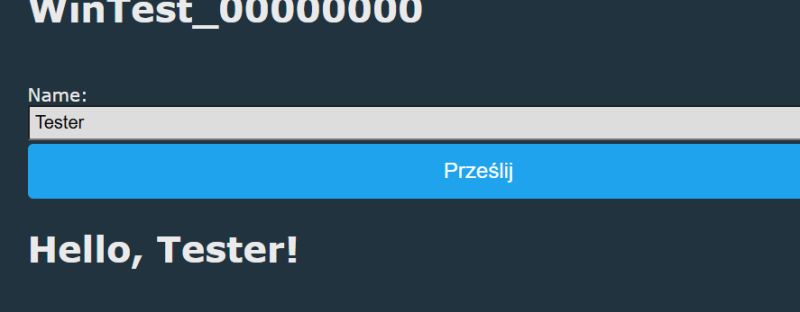
HTTP callback also allows you to create custom HTML fields. They can store any kind of data that is later processed by Berry. You can use getVar to access GET variables as well. The input field, however, can be tricky. This is becaue state section is refreshed automatically, so you'd lose the data you type. That's why there is another callback - called "prestate" that runs before state div. So field is created in prestate, and display in the state.
autoexec = module('autoexec')
name = "Unknown";

autoexec.myPre= def(request)
     other = getVar("name");
      if other != nil
        name = other;
     end
      poststr(request, "<form method='GET'>Name: <input name='name'><input type='submit'></form>")
end


autoexec.myState= def(request)
     poststr(request, "<h1> Hello, " + name+"!</h1>")
end

addEventHandler("OnHTTP", "prestate", autoexec.myPre)
addEventHandler("OnHTTP", "state", autoexec.myState)


return autoexec

Related reading
For more information on OBK events (button handling, etc), clock events (NTP, etc), see autoexec.bat samples. They are not in Berry, but they can still give some insights into OBK possibilities:
https://github.com/openshwprojects/OpenBK7231T_App/blob/main/docs/autoexecExamples.md
That's all for now
This is how you can create more advanced scripts in OBK. Let me know if you have any futher suggestions or ideas.
Soon I will post tutorial part 2, which will cover more advenced HTTP stuff, TuyaMCU integration and data processing.
Just please keep in mind that Berry integration has been so far mostly tested with self tests ( https://www.elektroda.com/rtvforum/topic4109775.html ) and in Simulator, so any testing is welcome. Let me know if you try to run some of my scripts on physical devices! Any testers available - @divadiow maybe? And special thanks for @niterian for initial Berry demo.


Comments
Fantastic stuff. I am not familiar with Berry though I have heard it mentioned in relation to Tasmota. I'll read this guide in earnest again and hopefully try some things on actual devices in due cour... [Read more]
Thank you. If you have some spare time, you can just try running berry "Hello world" or simplest Berry OBK http page addon for the time being. Just to see if it works on any physical devices. The integration... [Read more]
https://github.com/openshwprojects/OpenBK7231T_App/actions/runs/14448069041 😭 [Read more]
Probably makefile stuff. Files needs to be added by hand. BK7231 scans for files recursively, so it works for BK, but not for others. Added after 5 [minutes]: Ah, there was also a missing header,... [Read more]
ok. yes. was about to test W800 makefile. feel free to cancel my queued/stuck until you're at a point where I should update my branch with your latest changes [Read more]
I think BK7231 Easy UART flasher should be also able to download from Pull Requests... Added after 57 [minutes]: BK7238 test: https://obrazki.elektroda.pl/7075937700_1744645711_bigthumb.jpg... [Read more]
BK-T https://obrazki.elektroda.pl/1282162100_1744645996_thumb.jpg https://obrazki.elektroda.pl/9459347800_1744645931_thumb.jpg [Read more]
We need to dig into makefiles so it can build on more platforms, for example, on ESP32 [Read more]
is a divide by zero also a worthy test to be sure it errors gracefully without killing device or is that not a valid concern? berry print("Hello " + str(5+1/0)) https://obrazki.elektroda.pl/6547... [Read more]
Nice, it seems that Berry handles it well internally. [Read more]
. What are the motives behind the new language ? Practically comparable to Lua, and this one has a long-standing presence. Also prone to miniaturisation Somewhat partial "C-ness" in syntax and "Pascal-ness"... [Read more]
@jacekcz I had initially planned LUA myself, as I know it and have integrated it with C/C++ many times before, but then one contributor recommended Berry and pointed out that it is potentially lighter... [Read more]
I am integrating more functions with Berry. For example, here's an interesting sample that creates a list in Berry (probably not yet finished, but passes basic checks): int be_gmtime(bvm *vm) { struct... [Read more]