logo elektroda
logo elektroda
X
logo elektroda

Berry scripting for various IoT platforms - tutorial for OBK new script integration part 1

p.kaczmarek2 3510 12
ADVERTISEMENT
  • OpenBeken simulator with debugging console and BL0942 schematic
    Berry is a lightweight scripting language designed for embedded system. It features dynamically typed, one-pass compiler and interpreter with core’s code size is less than 40KiB which can run on less than 4KiB heap. Thanks to latest OBK integration, Berry can now run on most of new IoT modules, including BK7231, W800/W600, ESP32, BL602, LN882, Realtek. It can also run in OBK Windows simulator, so you can try out Berry easily, along with full MQTT and Home Assistant integration.

    For more information about Berry, please see Berry documentation:
    https://berry.readthedocs.io/en/latest/index.html

    Now let's focus on running Berry in OBK. Currently, there are two options:
    Option 1: you can just use OpenBeken Simulator to try Berry on Windows, just get binaries here: https://github.com/openshwprojects/OpenBK7231T_App/releases
    Screenshot with a download link for OBK Simulator for Windows
    Option 2: You can use only builds (no toolchain required) to enable Berry for the platform of your choice, follow this tutorial. Keep in mind that on some platforms you might need to disable some other features in order to keep binary size small enough to run. This is because OBK comes by default with most of the features enabled, so each binary has TuyaMCU driver, LED driver, WS2812 driver with animations, and even Tasmota JSON support, and you most likely will not this kind of thing. So, edit obk_config.h to suit your needs. Just remember - for Berry, you need to enable ENABLE_OBK_BERRY define.
    Futhermore, the stack sizes may not be adjusted for Berry currently, so you might need to increase them on your own. There is also still room for optimization in Berry code, for example, some event handlers could be more or less delayed to avoid large stack requirement. This is still subject to change in future.

    This tutorial will be based on OBK Windows Simulator, so anyone can run it, even with no IoT devices.
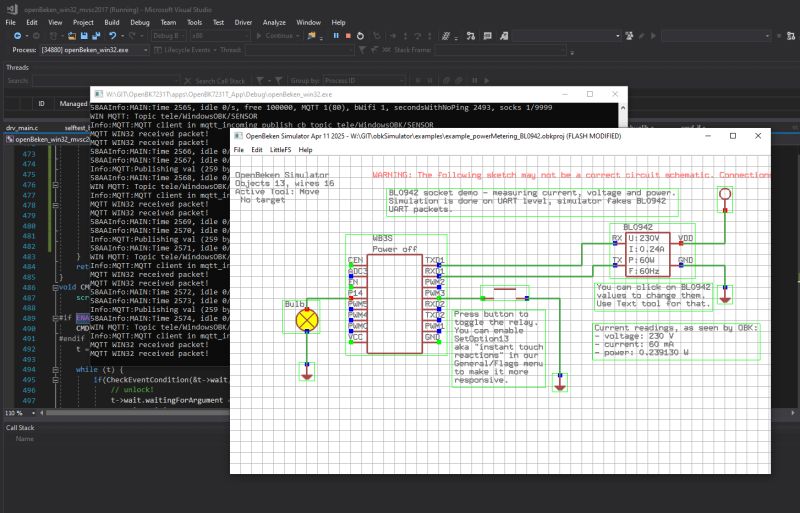
    Screenshot of OpenBeken simulator showing a circuit diagram with elements like a bulb and a BL0942 chip, and a terminal log window.
    Don't forget to get OBK simulator samples here:
    https://github.com/openshwprojects/obkSimulator
    They will be used here for demonstration purposes.

    I also assume that you know more or less how to run OBK Simulator - it creates a simulation window and virtual device page on your local IP, port 80. For more information, see related Simulator topic.

    First Berry steps
    Let's start by executing some simple Berry commands in OBK command line:
    
    berry print("Hello, Berry")
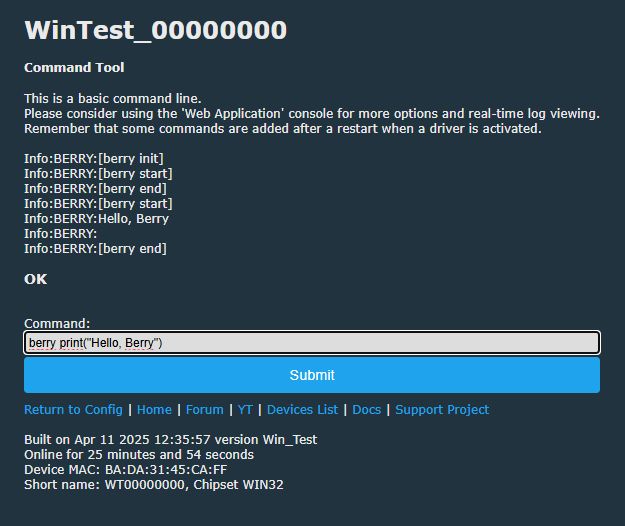
    

    Berry command tool interface displaying the result of the command berry print(Hello, Berry).
    The same could be done in the Web App console:
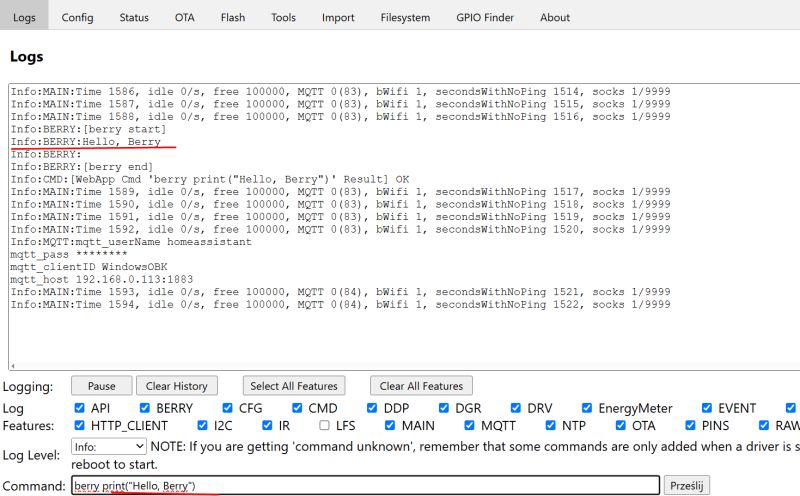
    Screenshot of logs showing execution of the command berry print('Hello, Berry') in the OpenBeken environment.
    This way you can test various berry commands, for example, expressions:
    
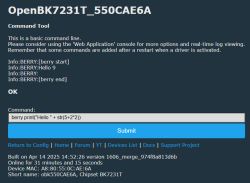
    berry print("Hello " + str(5+2*2))
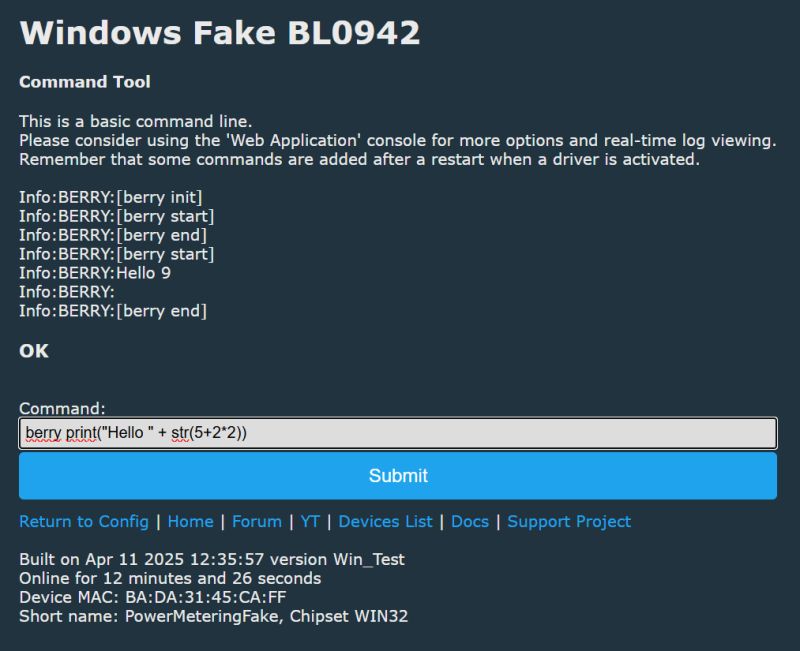
    

    Screenshot of the Windows Fake BL0942 interface with Berry commands.

    First Berry commands
    The most simple way to call OBK commands from Berry is "runCmd" command.
    Commands should be taken from here:
    https://github.com/openshwprojects/OpenBK7231T_App/blob/main/docs/commands.md
    For example, you call setChannel from Berry to set new channel value. In OBK, this can for example set relay state, along with whole MQTT publish and state update:
    
    berry runCmd("setChannel 1 1")
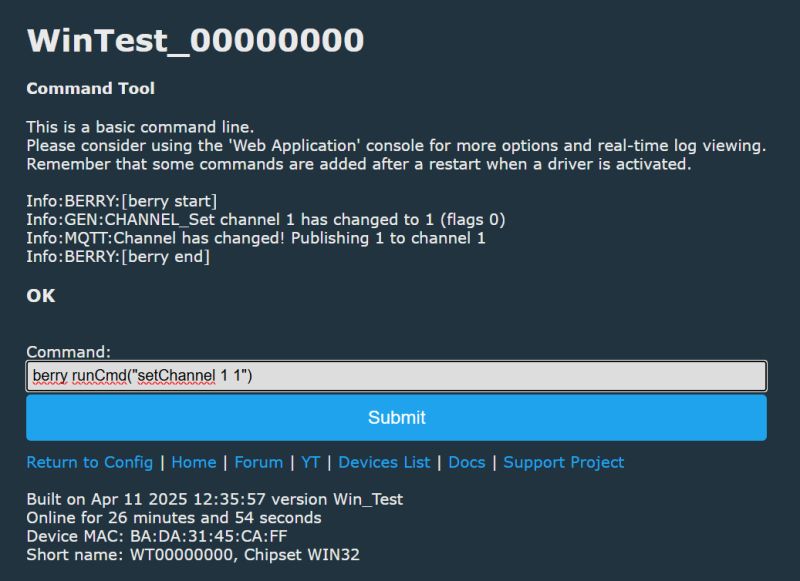
    

    Screenshot of the Berry command line tool interface with a command entered.
    You can use the same approach to run text commands as well:
    
    berry runCmd("MQTTHost 192.168.0.213")
    

    Similary, you can use OBK publish commands to publish your data to Home Assistant:


    Berry script files
    Main Berry scripts should reside within Berry modules. Berry modules can be created in LittleFS file system:


    Let's start by making simplest module. Call it autoexec.be. It will run on each device startup.
    
    autoexec = module('autoexec')
    
    # Add functions to the module
    autoexec.myInit = def()
       setChannel(1, 42)
    end
    
    # Call function on first load
    autoexec.myInit()
    
    # Berry modules must return the module object
    return autoexec
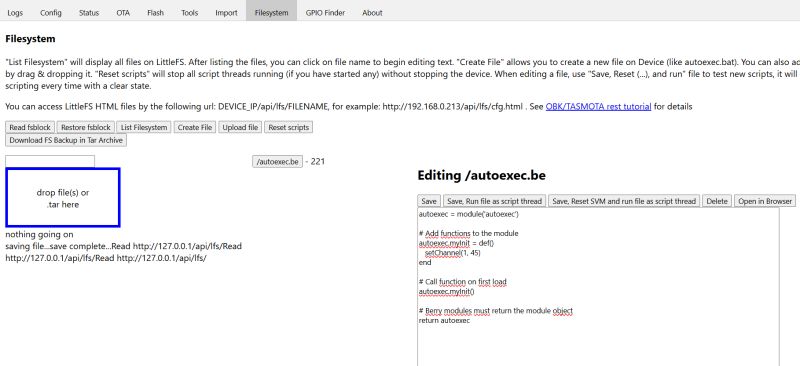
    

    File management interface with open script editor in OBK
    For faster prototyping, you can use "Save, Reset SVM and run file" button. This will also attempt to clear device state to simulate a reboot, but may not be always reliable.


    Script execution over time
    OBK features two commands that allows you to run scripts over time:
    - setTimeout - runs commands once
    - setInterval - runs command repeatedly
    With setInterval, you can make a simple "blink LED" (or a relay, or anything) demo:
    
    autoexec = module('autoexec')
    
    autoexec.myToggle= def()
       runCmd("toggleChannel 1")
    end
    
    setInterval(autoexec.myToggle, 500)
    
    return autoexec
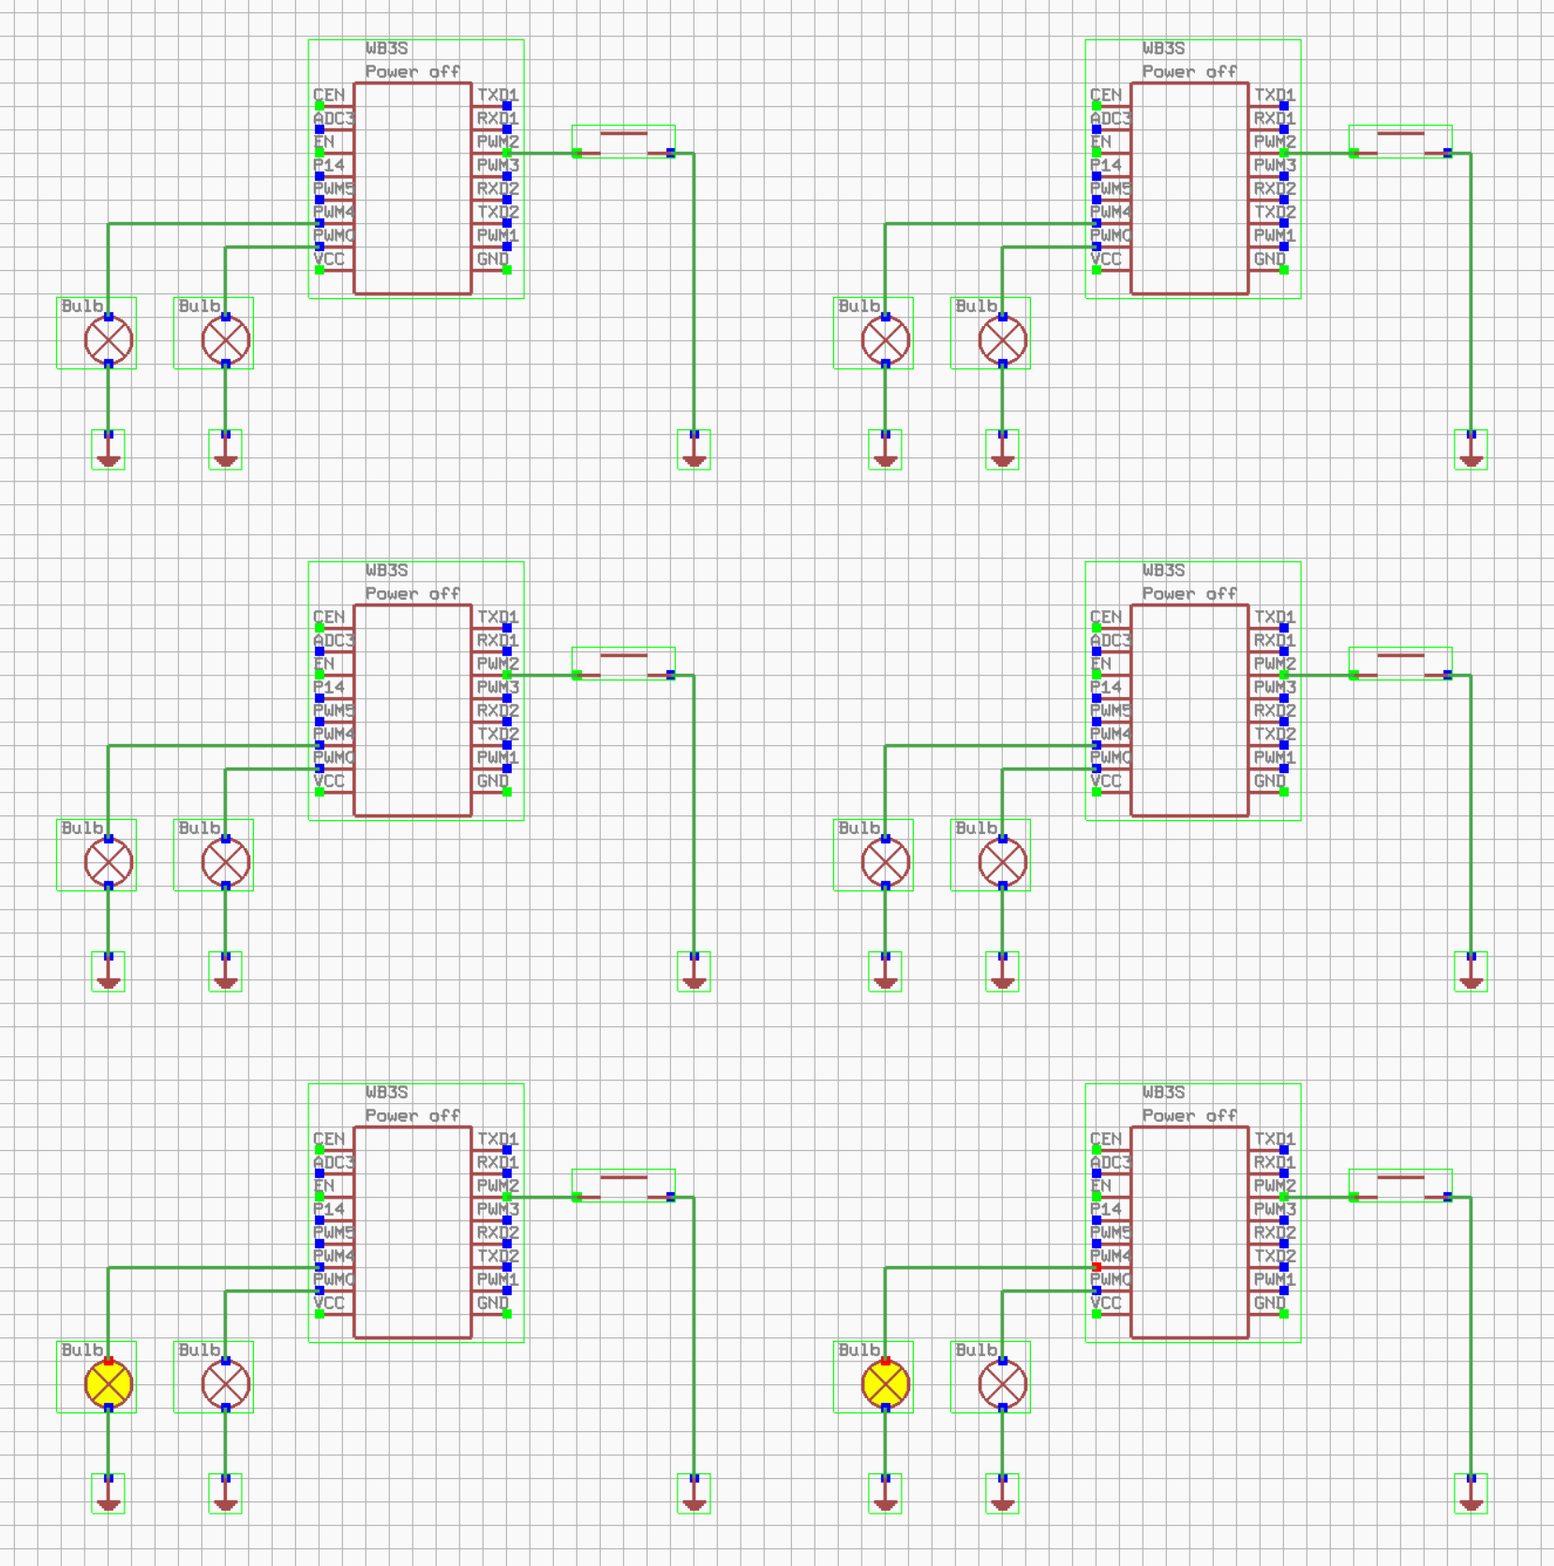
    

    Circuit diagram using a WB3S module connected to two bulbs.
    The same could be done with setTimeout, if needed:
    
    autoexec = module('autoexec')
    
    autoexec.myToggle= def()
       runCmd("toggleChannel 1")
       setTimeout(autoexec.myToggle, 500)
    end
    
    autoexec.myToggle()
    
    return autoexec


    Reacting to events - buttons
    Berry can react to OpenBeken events. For example, you can use it with Btn_ScriptOnly button. Set a Btn_ScriptOnly role for given pin, let's say, 14, and try following code:
    
    autoexec = module('autoexec')
    
    
    autoexec.myToggle= def()
       runCmd("toggleChannel 1")
       runCmd("toggleChannel 2")
    end
    
    addEventHandler("OnClick", 8, autoexec.myToggle);
    
    return autoexec
    

    For the demonstration purposes, I've put two relays ("bulbs") on channel 1 and channel 2:
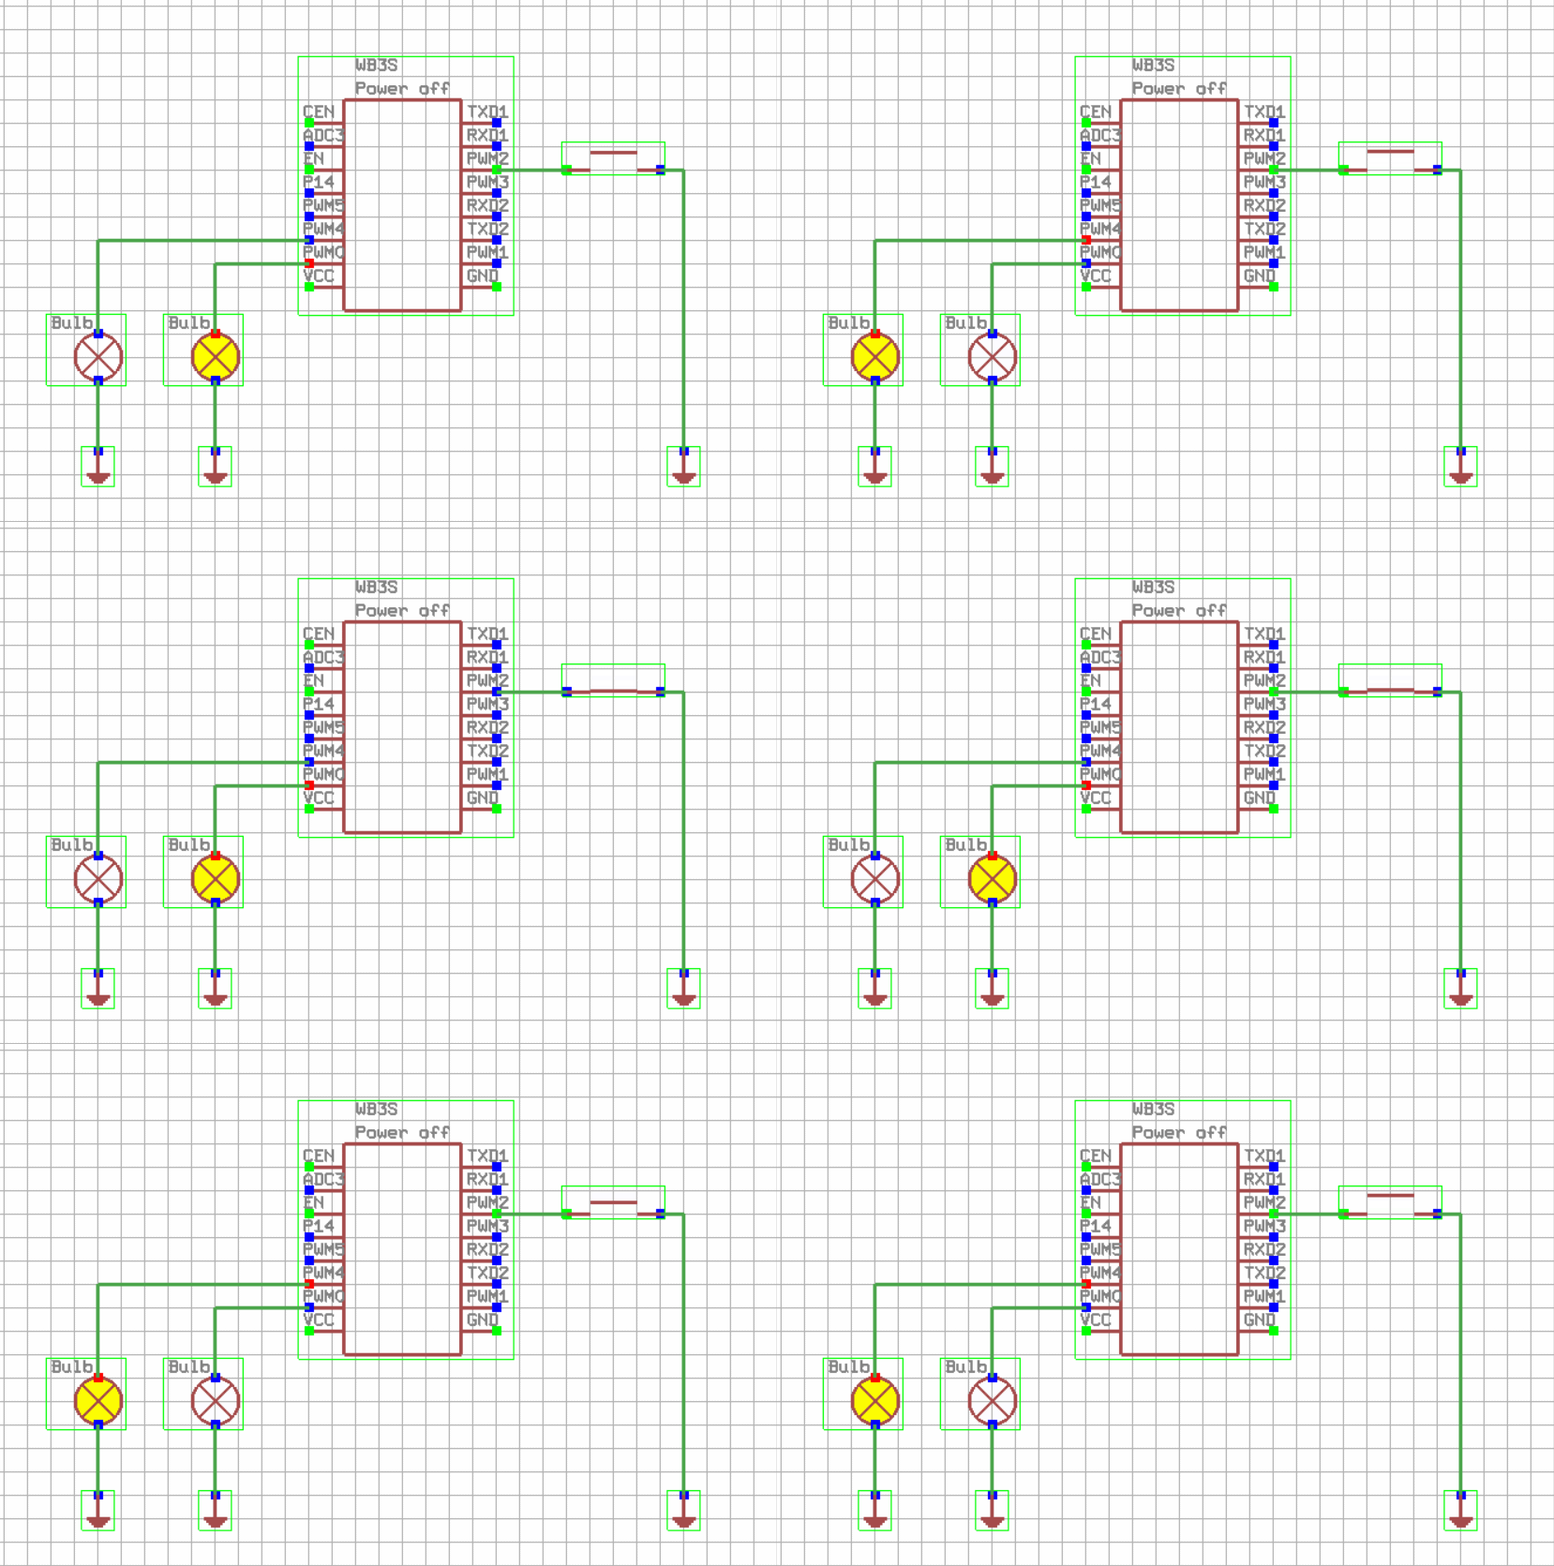
    Circuit diagram of a system with bulbs and WBS5 microcontroller

    Reacting to events - channels
    Similar approach can be taken to, for example, turn off relay after some time. In this case, we'll catch the situation when channel becomes 1 and set it back to 0 after some time. Keep in mind that for this demo I've set back the PWM2 pin button role to Btn, so it has automatic interaction with channel 1. So, channel 1 toggle is handled by OBK internally, as usual.
    
    autoexec = module('autoexec')
    
    autoexec.myToggle= def()
       runCmd("setChannel 1 0")
    end
    
    autoexec.myDelay= def()
       setTimeout(autoexec.myToggle, 1000)
    end
    
    addEventHandler("Channel1", 1, autoexec.myDelay);
    
    return autoexec
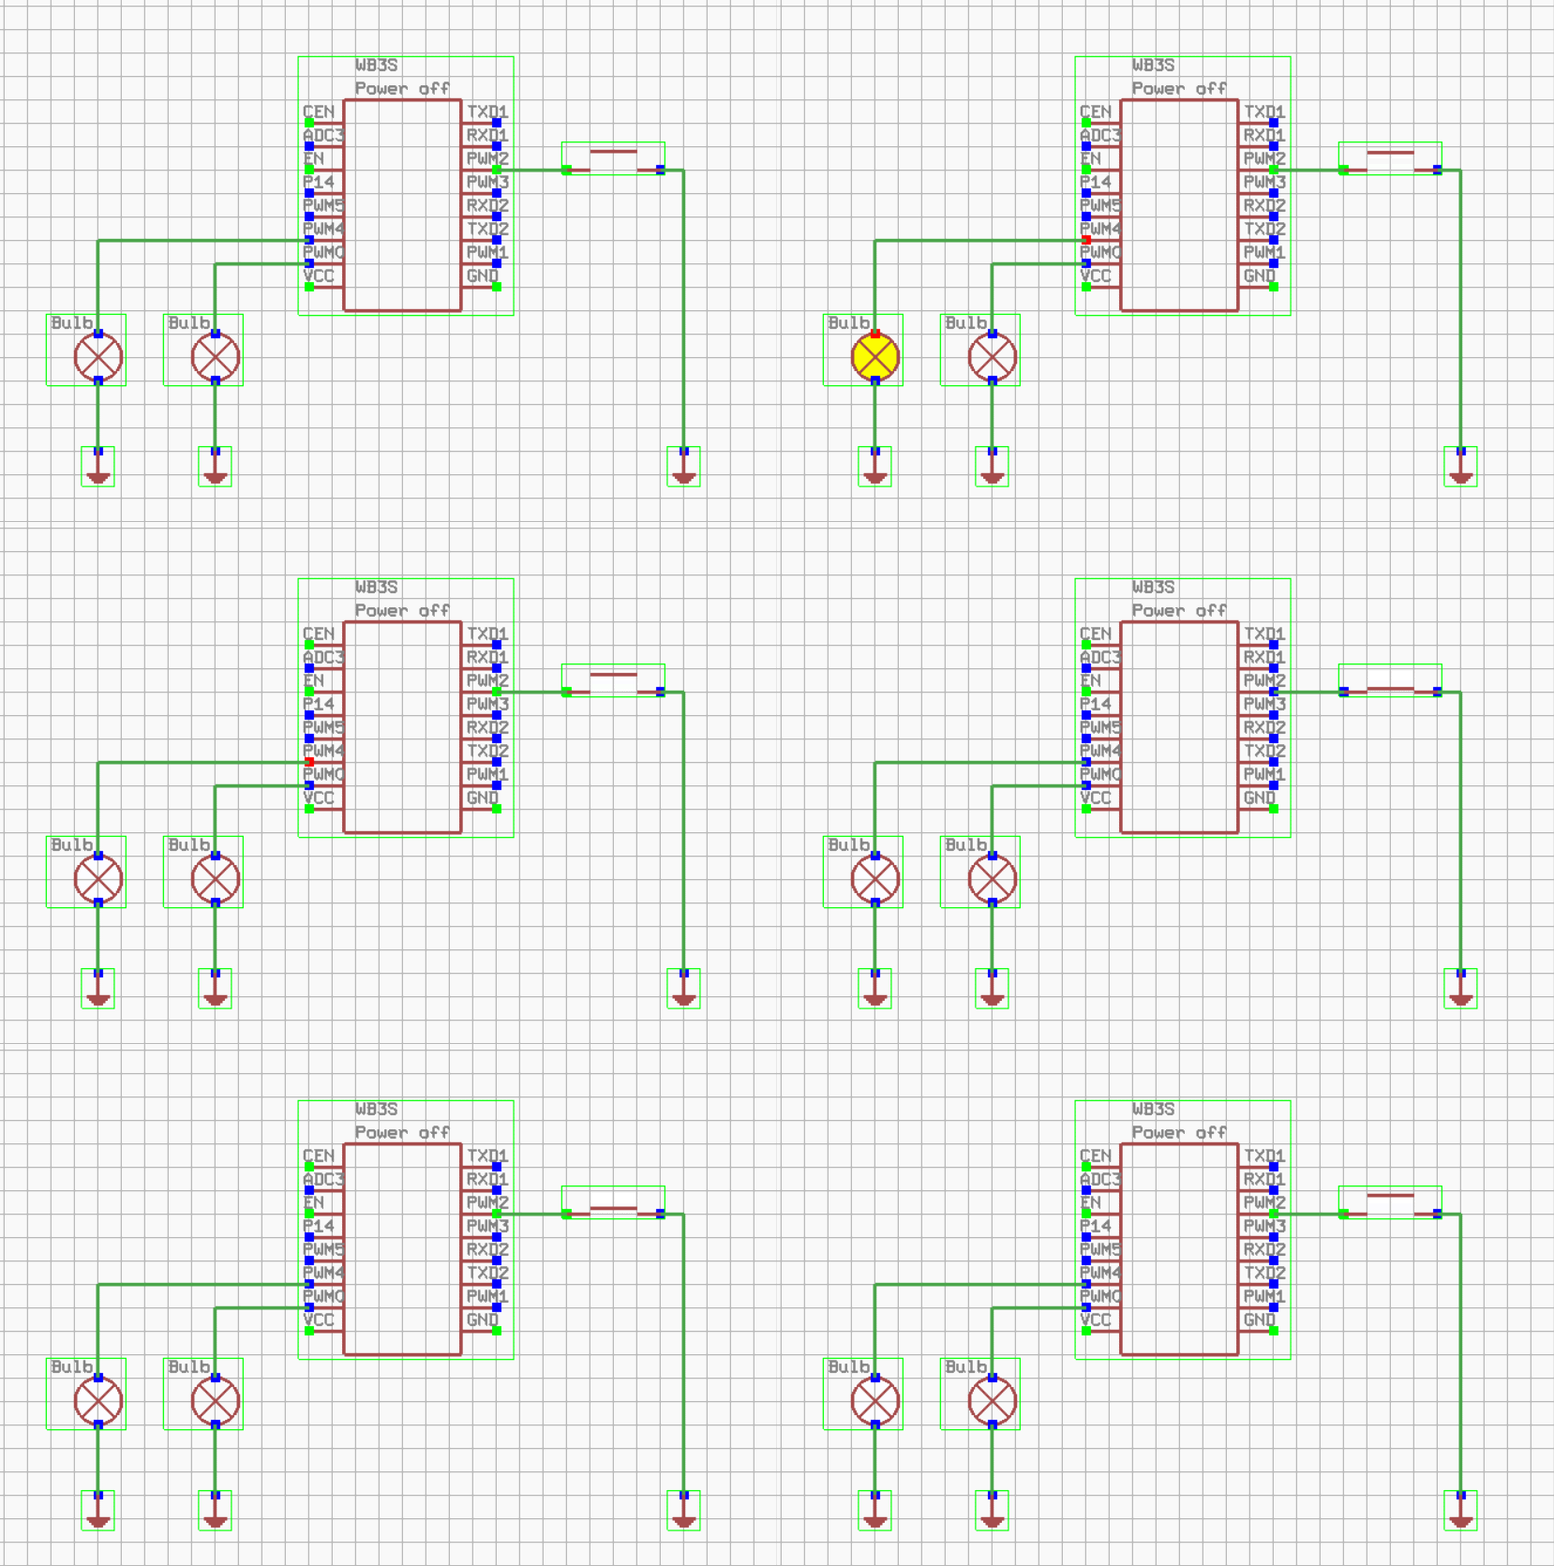
    

    Electrical circuit diagram with two bulbs connected to a WBS5 module.
    The code could be simplified by adding inline functions:
    
    autoexec = module('autoexec')
    
    autoexec.myToggle= def()
       runCmd("setChannel 1 0")
    end
    
    addEventHandler("Channel1", 1, def()
       setTimeout(autoexec.myToggle, 1000)
    end);
    
    return autoexec
    

    and even futher:
    
    autoexec = module('autoexec')
    
    addEventHandler("Channel1", 1, def()
       setTimeout(def()
           runCmd("setChannel 1 0")
       end, 1000)
    end);
    
    return autoexec


    Stopping and running intervals
    setInterval returns a handle that can be later used to stop the interval. You can store it in a global variable and call "cancel" later. The following example demonstrates a stoppable setInterval demo where first button press starts then interval that blinks LEDs, and second button press stops it.
    
    autoexec = module('autoexec')
    
    g_handle = 0;
    
    autoexec.myToggle= def()
       if g_handle == 0
            g_handle = setInterval(def() 
                 runCmd("toggleChannel 1")
                 runCmd("toggleChannel 2")
            end, 200 )
         else 
               cancel(g_handle)
               g_handle = 0
          end
    end
    
    addEventHandler("OnClick", 8, autoexec.myToggle);
    
    return autoexec
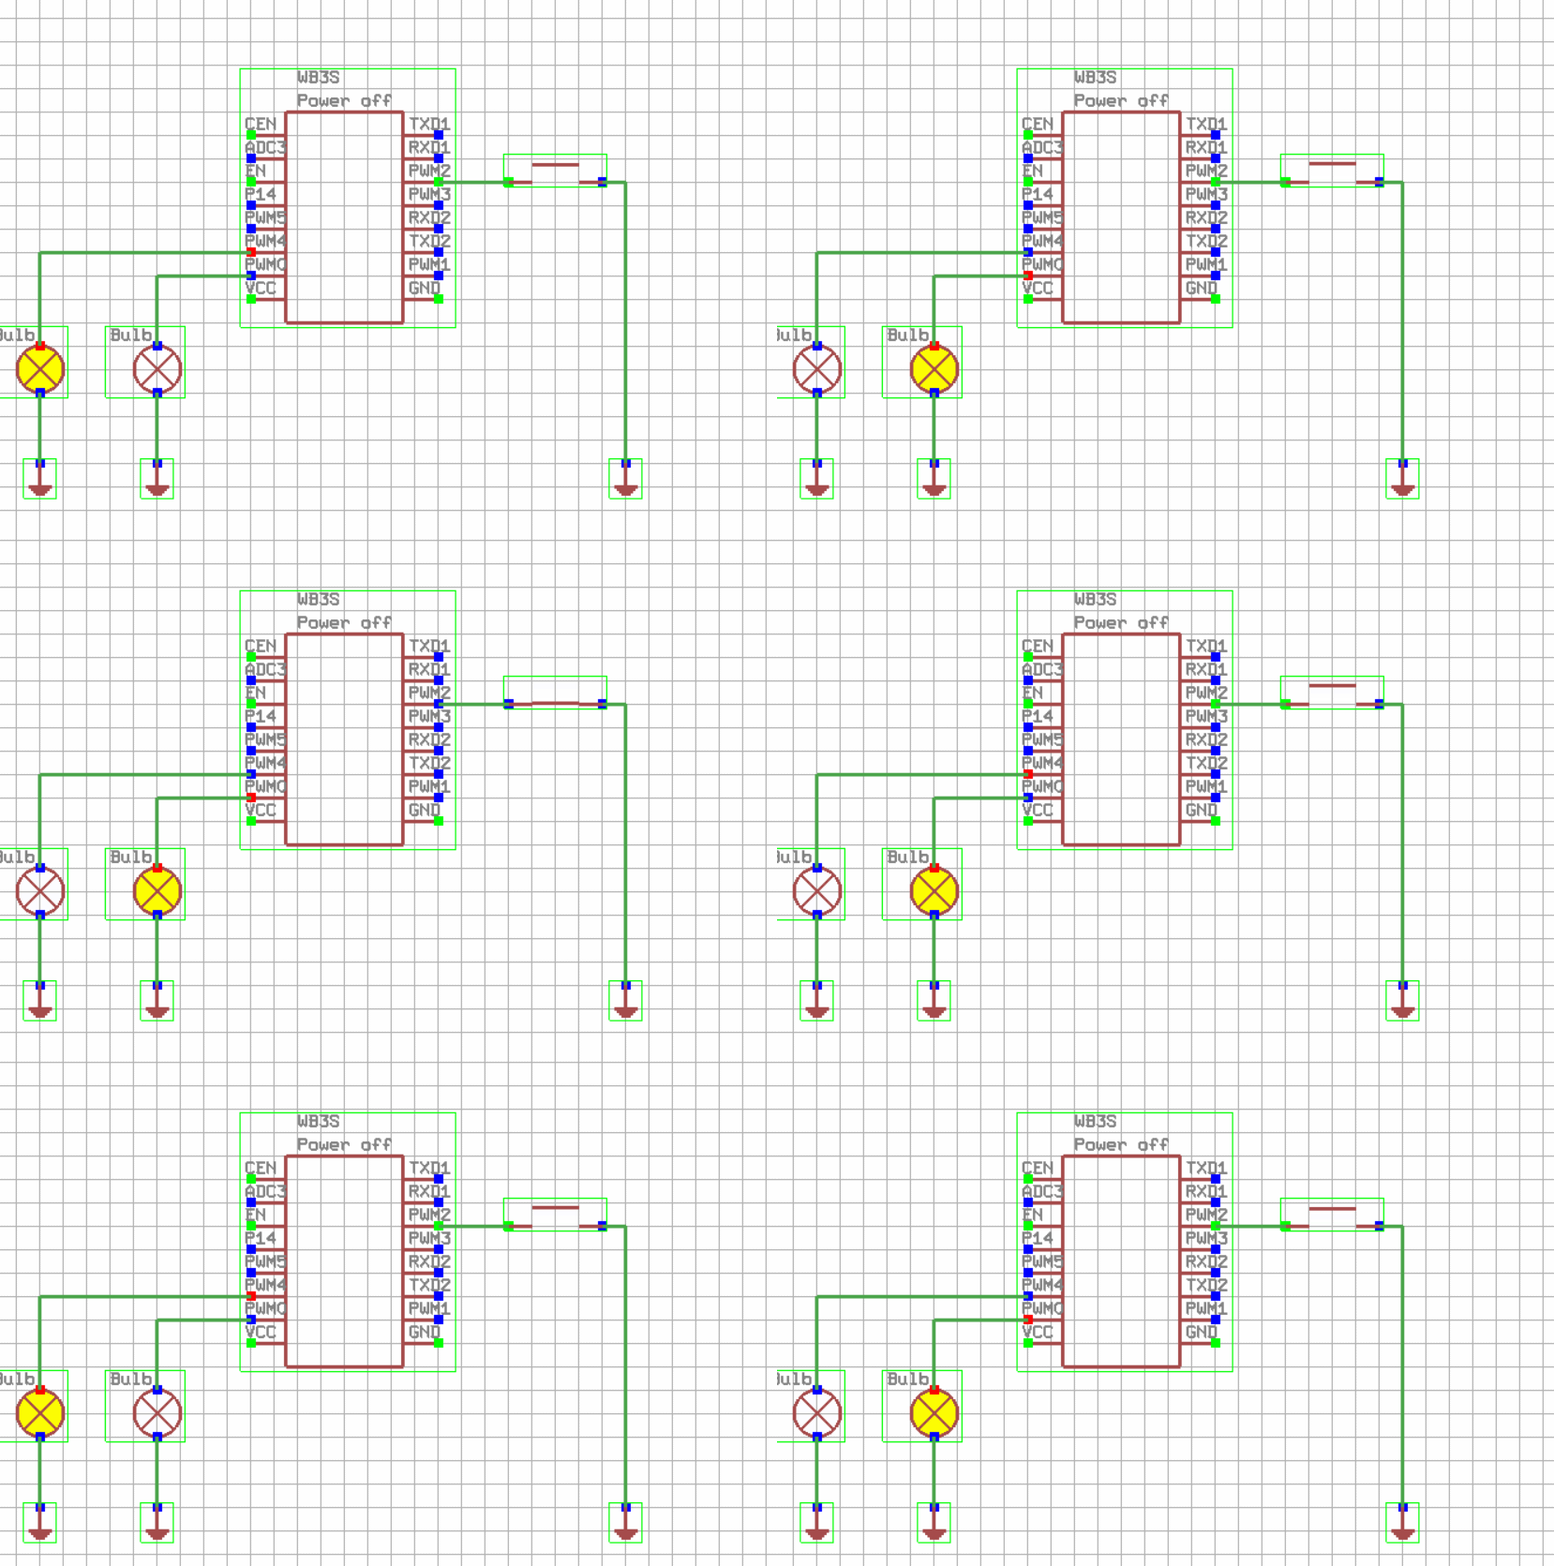
    

    Circuit diagram with WB3S module and bulbs


    Calling module functions from outside
    Keep in mind that you can simply use Berry modules anywhere inside OBK. Let's consider simplified version of mentioned module:
    
    autoexec = module('autoexec')
    
    g_handle = 0;
    
    autoexec.myToggle= def()
       if g_handle == 0
            g_handle = setInterval(def() 
                 runCmd("toggleChannel 1")
                 runCmd("toggleChannel 2")
            end, 200 )
         else 
               cancel(g_handle)
               g_handle = 0
          end
    end
    
    return autoexec
    

    Once you have it in LFS, you can just run OBK command:
    
    berry import autoexec; autoexec.myToggle()
    

    and it will correctly toggle the blink interval.
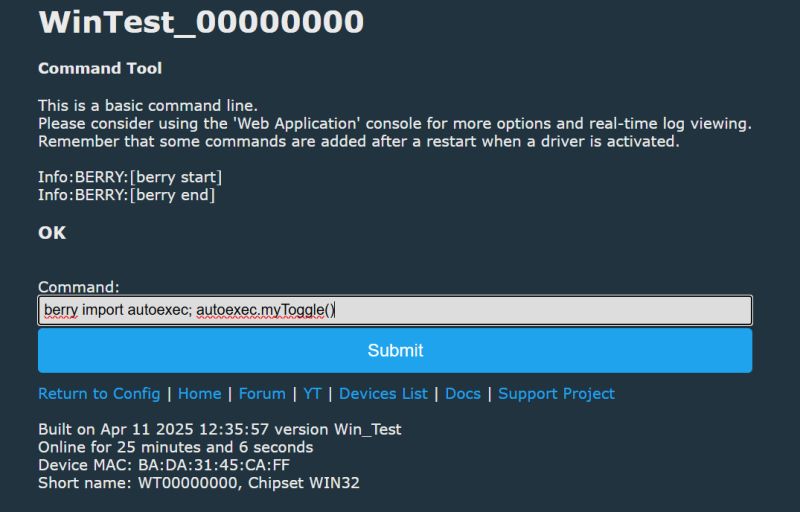
    Command Tool console interface with Berry command.


    Direct command handlers
    There are more ways to call Berry functions from outside. For example, you can just create your own command handler in Berry:
    
    autoexec = module('autoexec')
    
    g_handle = 0;
    
    autoexec.myToggle= def()
       if g_handle == 0
            g_handle = setInterval(def() 
                 runCmd("toggleChannel 0")
                 runCmd("toggleChannel 1")
                 runCmd("toggleChannel 2")
            end, 200 )
         else 
               cancel(g_handle)
               g_handle = 0
          end
    end
    
    addEventHandler("OnCmd", "MyCmd", autoexec.myToggle)
    
    return autoexec
    

    Keep in mind that now you can run this command from anywhere - even from MQTT!
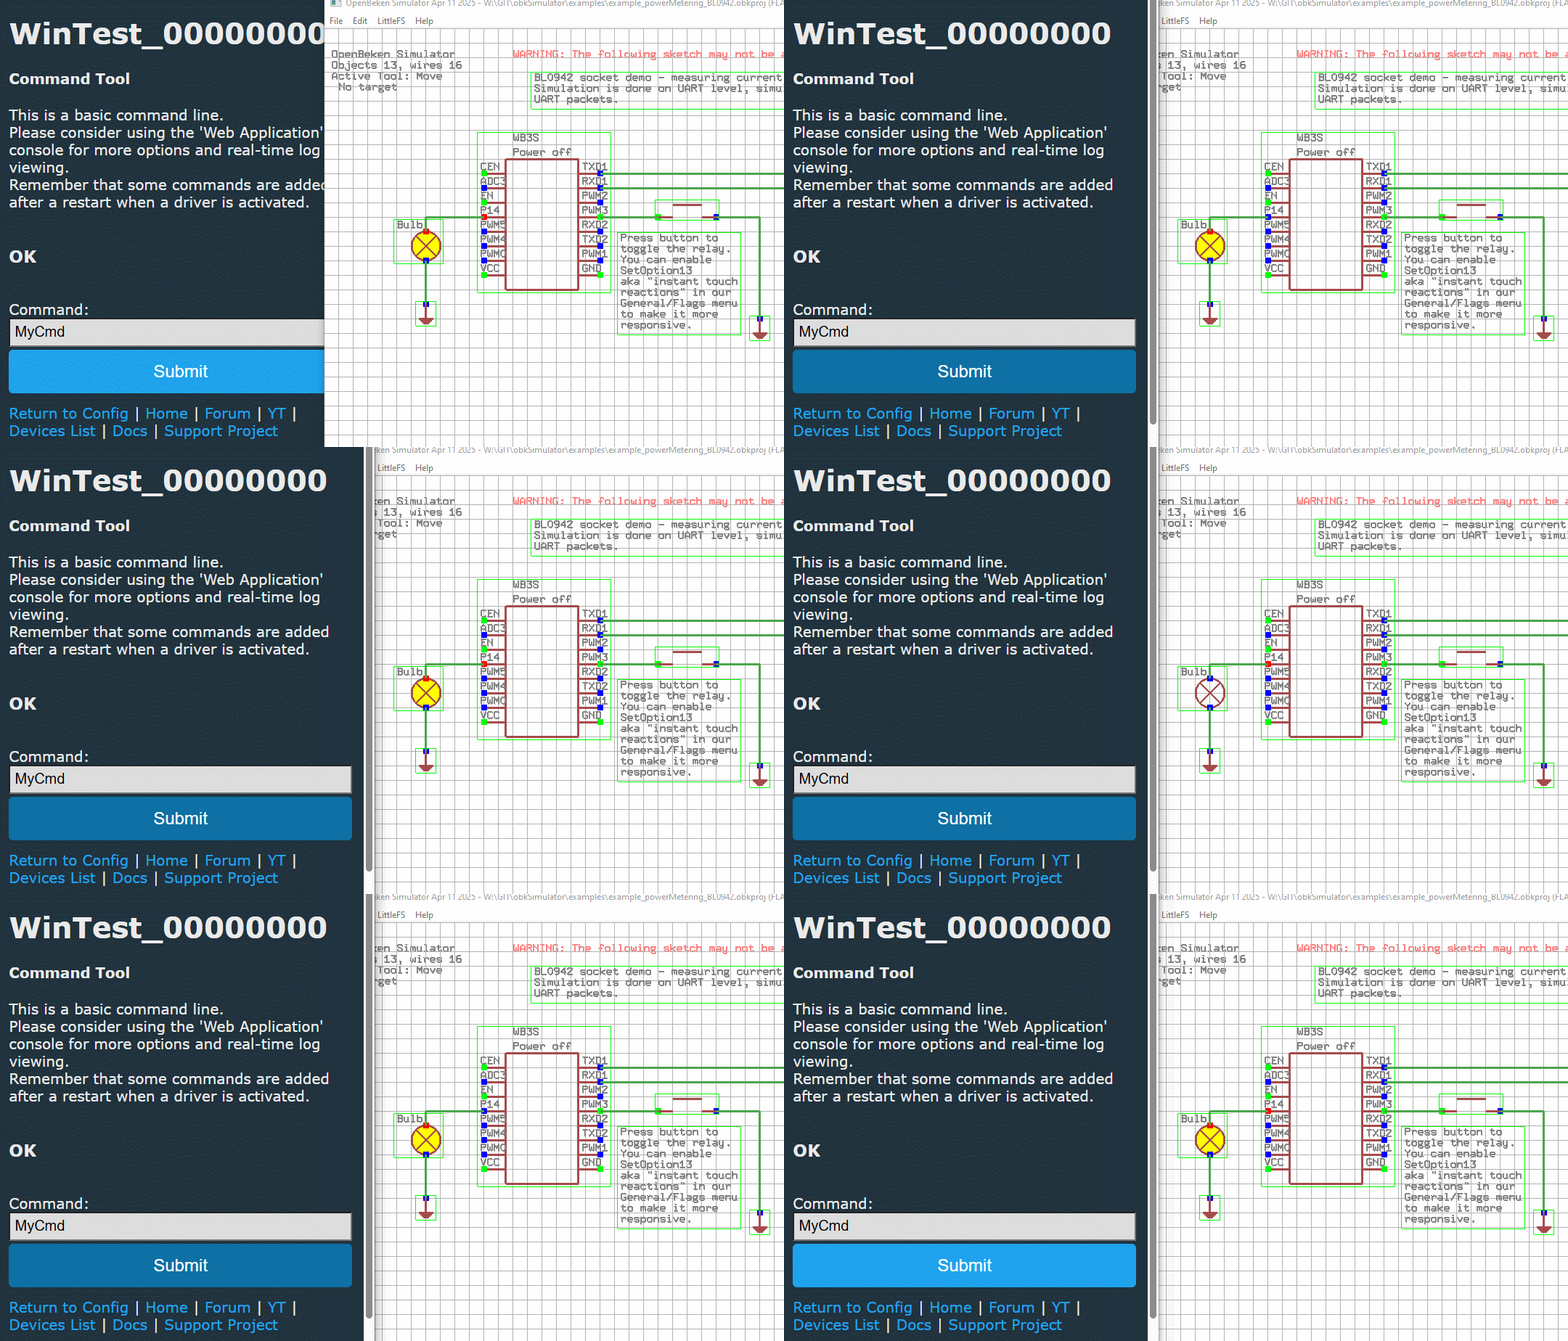
    OpenBeken simulator interface with a command input field and wiring diagram.


    Direct command arguments
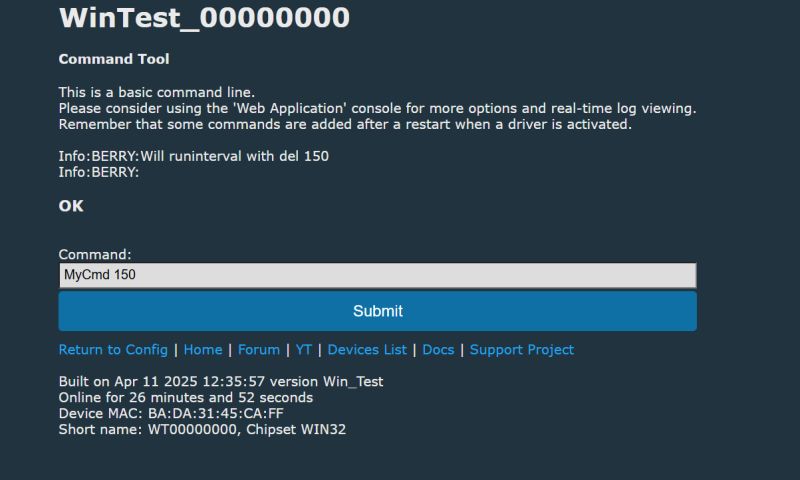
    Commands can have arguments that are also passed to Berry. Arguments are strings by default, so you need to cast them to int to use them as a number. In this example, we'll modify the blinking command to include single argument, which is a blink interval. In order to convert it to string, I've used int(del) function.
    
    autoexec = module('autoexec')
    
    g_handle = 0;
    
    autoexec.myToggle= def(del)
       if g_handle == 0
            g_handle = setInterval(def() 
                 runCmd("toggleChannel 0")
                 runCmd("toggleChannel 1")
                 runCmd("toggleChannel 2")
            end, int(del))
         else 
               cancel(g_handle)
               g_handle = 0
          end
    end
    
    addEventHandler("OnCmd", "MyCmd", autoexec.myToggle)
    
    return autoexec
    

    The usage is very simple:
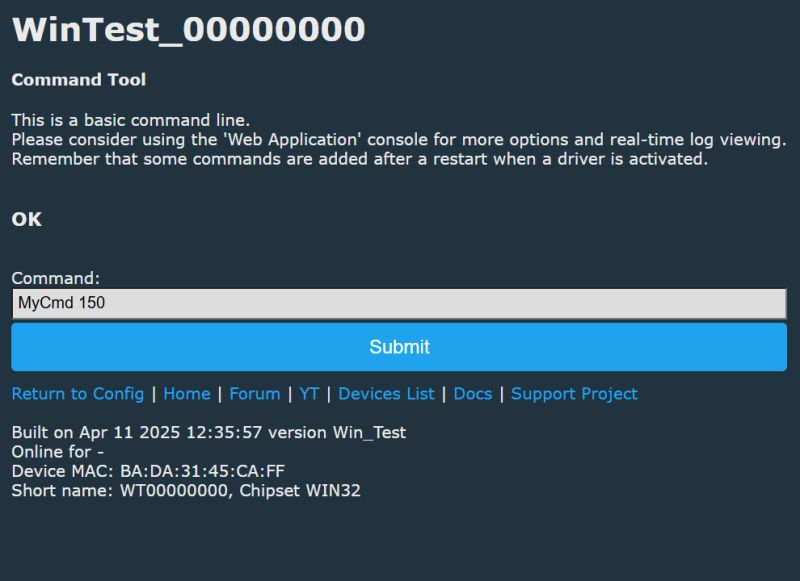
    Screenshot of the OBK Simulator command tool interface showing a text box with the command MyCmd 150 and a Submit button.
    Of course, when in doubt, you can just print out some debug information:
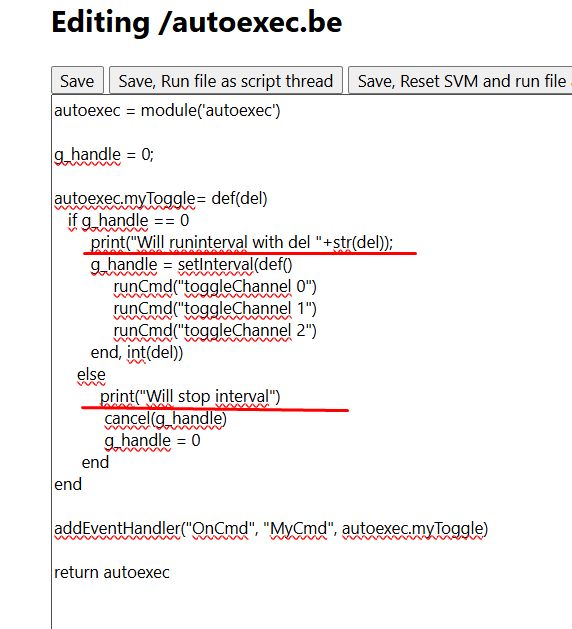
    Screenshot of editing an autoexec.be script with code in the user interface.
    Screenshot of command line tool console for Berry in OBK simulator.


    Showing information on state section
    OpenBeken features a main page with a state section that is automatically refreshed in background.

    
    autoexec = module('autoexec')
    
    g_handle = 0;
    
    autoexec.myToggle= def(del)
       if g_handle == 0
            print("Will runinterval with del "+str(del));
            g_handle = setInterval(def() 
                 runCmd("toggleChannel 0")
                 runCmd("toggleChannel 1")
                 runCmd("toggleChannel 2")
            end, int(del))
         else 
              print("Will stop interval")
               cancel(g_handle)
               g_handle = 0
          end
    end
    
    autoexec.myShow= def(request)
         poststr(request, "<h1>Hello Berry!</h1>") 
         poststr(request, "<h5>Interval ID is " + str(g_handle)+"</h1>") 
    end
    
    addEventHandler("OnHTTP", "state", autoexec.myShow)
    addEventHandler("OnCmd", "MyCmd", autoexec.myToggle)
    
    return autoexec
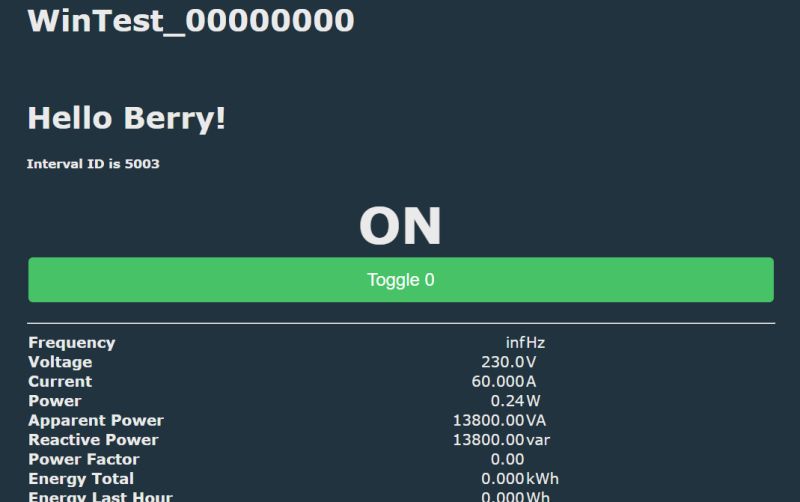
    

    Screenshot of a simulation application displaying power data and relay status.
    Interval ID will be 0 when it's inactive.
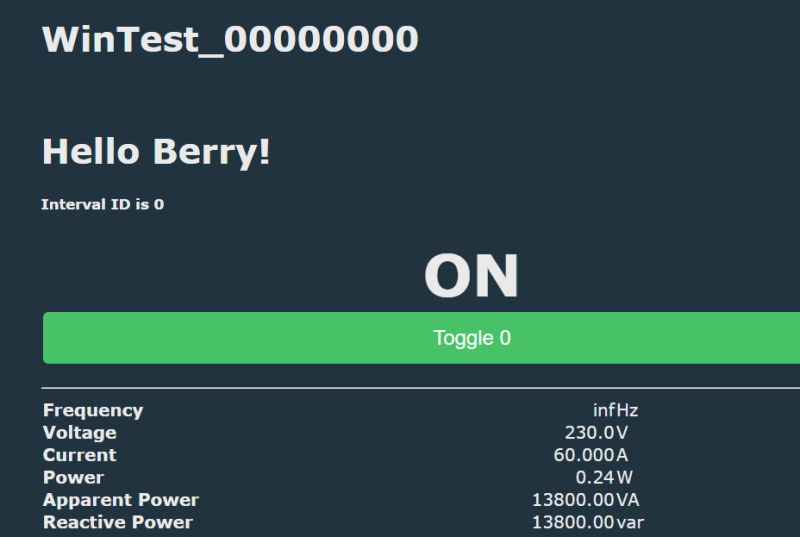
    Screenshot of a simulation application interface for the Berry scripting language.


    Access to OBK variables - power metering
    OpenBeken has some legacy variables that were used before Berry introduction. They can be seen here:
    https://github.com/openshwprojects/OpenBK7231T_App/blob/main/docs/constants.md
    In Berry, you can access them with getVar function.
    Here's a simple BL0942/BL0937 readout demo:
    
    autoexec = module('autoexec')
    
    autoexec.myShow= def(request)
         v = getVar("$voltage");
         poststr(request, "<h3>Berry voltage " + str(v)+"</h3>") 
         c = getVar("$current");
         poststr(request, "<h3>Berry current " + str(c)+"</h3>") 
         p = getVar("$power");
         poststr(request, "<h3>Berry power " + str(p)+"</h3>") 
    end
    
    addEventHandler("OnHTTP", "state", autoexec.myShow)
    
    return autoexec
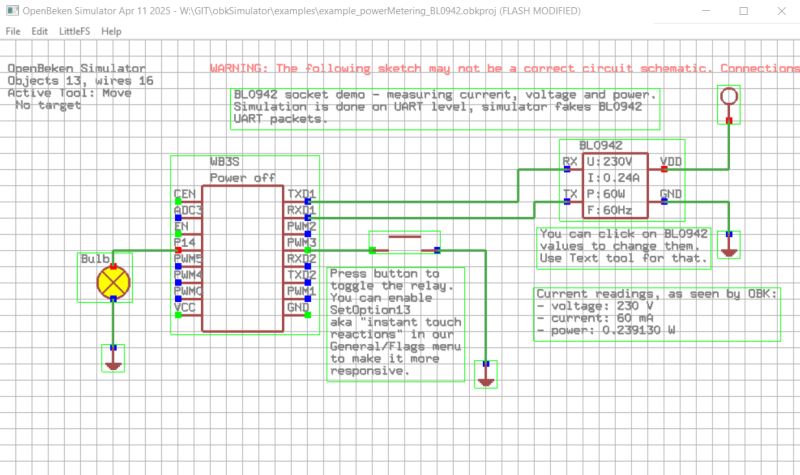
    

    Screenshot of OpenBeken Simulator showing a circuit schematic with voltage, current, and power measurements.
    Values are correctly displayed on the main page:
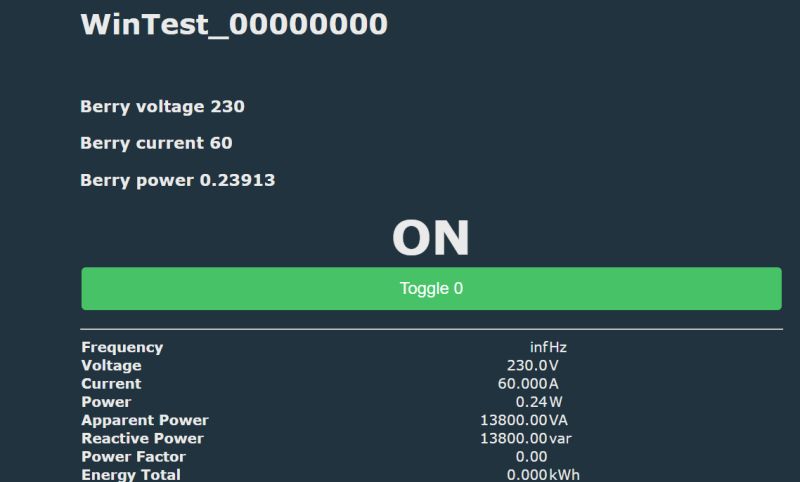
    User interface of a simulator with voltage, current, and power data.
    Following example can be expanded with conditionals. You can use if block to check voltage value.
    
    autoexec = module('autoexec')
    
    autoexec.myShow= def(request)
         v = getVar("$voltage");
         poststr(request, "<h3>Berry voltage " + str(v)+"</h3>") 
         if v > 245 
              poststr(request, "<h3 style='color:red'>OVERVOLTAGE ALARM</h3>") 
        elif v < 210 
              poststr(request, "<h3 style='color:red'>UNDERVOLTAGE ALARM</h3>");
         end
         c = getVar("$current");
         poststr(request, "<h3>Berry current " + str(c)+"</h3>") 
         p = getVar("$power");
         poststr(request, "<h3>Berry power " + str(p)+"</h3>") 
    end
    
    addEventHandler("OnHTTP", "state", autoexec.myShow)
    
    return autoexec
    

    Now, let's set voltage to 260 and see what happens:
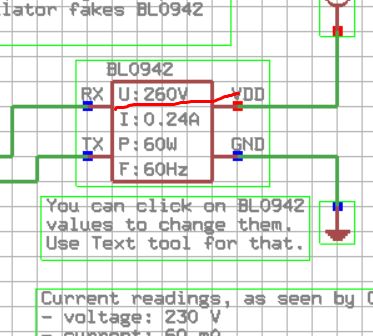
    Diagram of BL0942 simulator circuit showing voltage, current, power, and frequency values.
    The error message is displayed correctly:
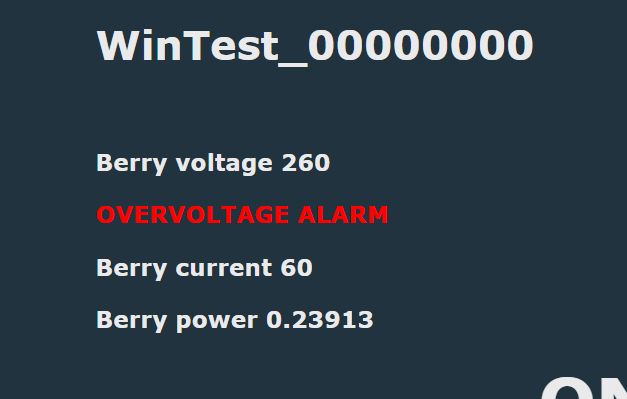
    Screenshot showing electrical parameters with an overvoltage alarm.

    Extra sample - refresh counter
    Following script will counter the number of automatic refreshes done by OBK state page segment:
    
    autoexec = module("autoexec")
    
    cnt = 0;
    
    addEventHandler("OnHTTP", "state", def(request)
         poststr(request, "<h3>Refresh counter " + str(cnt) + "</h3>") 
         cnt = cnt + 1
    end)
    
    return autoexec
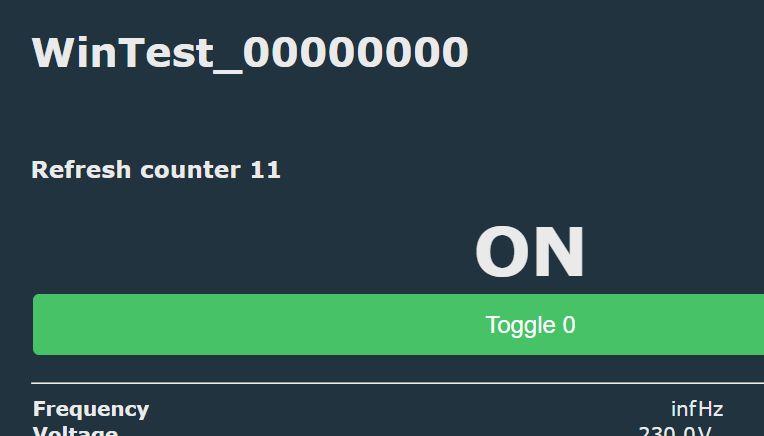
    

    Screenshot of an interface showing a refresh counter and a toggle switch.


    Extra sample - loop logic and power check
    The following sample was requested several times by users. This is a simple mechanism used to turn off relay when power consumption is below given threshold for given time. This can be used to detect when charging is finished.
    In order to implement it, I've created a simple repeating interval called "my Logic", where I access current power value and compare it against predefined threshold, in this case, 1W. If it's below 1W, I count the number of loops, and if it reaches 5 (5 seconds, because one loop is one second here) I turn off the relay.
    
    autoexec = module("autoexec")
    
    loopsLowPower = 0;
    
    def myLogic()
          p = getVar("$power");
          print("power is " +str(p));
    
          if p < 1
             loopsLowPower  += 1
             if loopsLowPower  > 5 
               runCmd("POWER OFF");
             end
          else
              loopsLowPower  = 0;
          end
    end
    
    setInterval(myLogic, 1000);
    
    return autoexec
    

    The following sample can be extended by, for example, moving constants to text fields:
    
    autoexec = module("autoexec")
    
    loopsLowPower = 0;
    
    def myLogic()
          p = getVar("$power");
          print("power is " +str(p));
          
          minPower = getChannel(5);
          if p < 1
             loopsLowPower  += 1
             if loopsLowPower  > 5 
               runCmd("POWER OFF");
             end
          else
              loopsLowPower  = 0;
          end
    end
    
    runCmd("setChannelType 5 TextField")
    runCmd("setChannelLabel 5 MinPower");
    
    setInterval(myLogic, 1000);
    
    return autoexec
    

    Result:
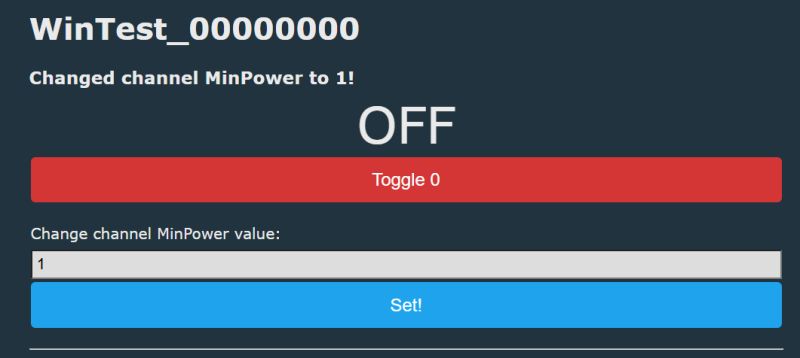
    Screenshot of an interface simulating a channel test with an option to change MinPower value.

    Access to OBK variables - time variables
    First start NTP driver. Once it's running, you will be able to access current time data:
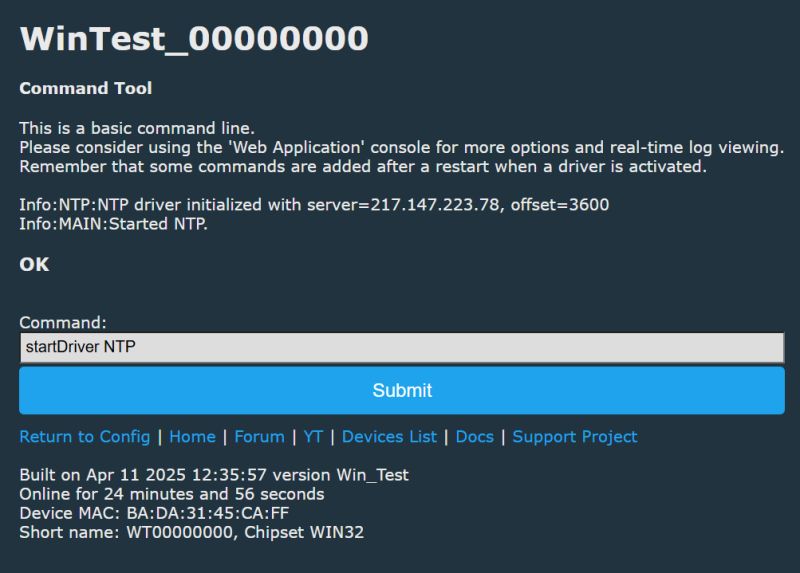
    Screenshot showing the command input tool in the WinTest application.
    Try following script:
    
    
    autoexec = module('autoexec')
    
    autoexec.myShow= def(request)
         h = getVar("$hour");
         m = getVar("$minute");
         poststr(request, "<h1>" + str(h)+":" + str(m)+"</h1>") 
    end
    
    addEventHandler("OnHTTP", "state", autoexec.myShow)
    
    return autoexec
    

    It will print NTP hour/minute on the main panel:
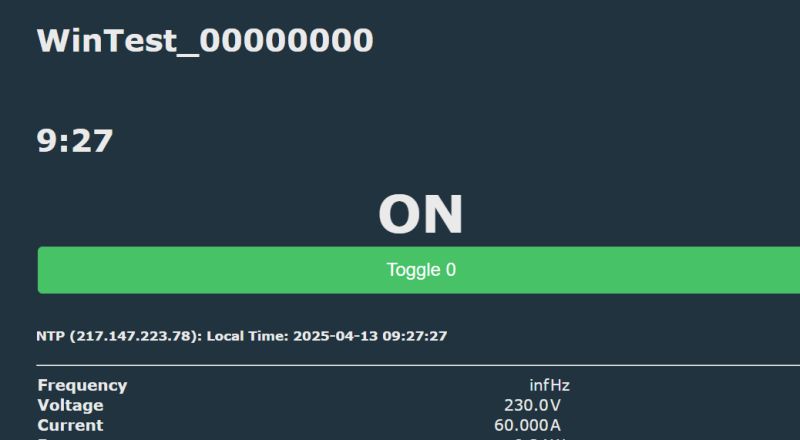
    OBK simulator interface showing device status and electrical parameters.


    Custom HTML fields
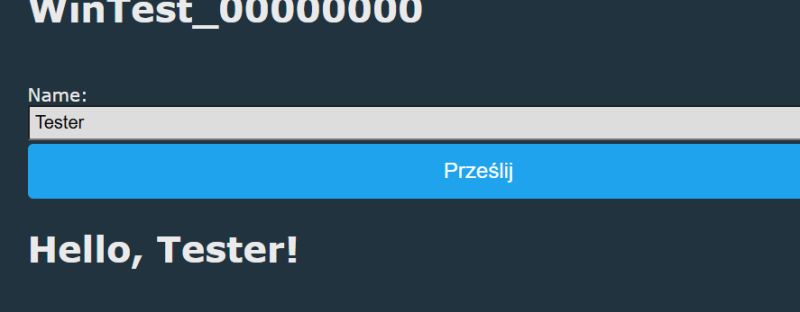
    HTTP callback also allows you to create custom HTML fields. They can store any kind of data that is later processed by Berry. You can use getVar to access GET variables as well. The input field, however, can be tricky. This is becaue state section is refreshed automatically, so you'd lose the data you type. That's why there is another callback - called "prestate" that runs before state div. So field is created in prestate, and display in the state.
    
    
    autoexec = module('autoexec')
    name = "Unknown";
    
    autoexec.myPre= def(request)
         other = getVar("name");
          if other != nil
            name = other;       
         end
          poststr(request, "<form method='GET'>Name: <input name='name'><input type='submit'></form>")
    end
    
    
    autoexec.myState= def(request)
         poststr(request, "<h1> Hello, " + name+"!</h1>") 
    end
    
    addEventHandler("OnHTTP", "prestate", autoexec.myPre)
    addEventHandler("OnHTTP", "state", autoexec.myState)
    
    
    return autoexec
    

    Screenshot of a form with a field to enter a name and a Submit button, below is the text Hello, Unknown!
    OBK Simulator user interface with a text field and Submit button

    Related reading
    For more information on OBK events (button handling, etc), clock events (NTP, etc), see autoexec.bat samples. They are not in Berry, but they can still give some insights into OBK possibilities:
    https://github.com/openshwprojects/OpenBK7231T_App/blob/main/docs/autoexecExamples.md

    That's all for now
    This is how you can create more advanced scripts in OBK. Let me know if you have any futher suggestions or ideas.
    Soon I will post tutorial part 2, which will cover more advenced HTTP stuff, TuyaMCU integration and data processing.
    Just please keep in mind that Berry integration has been so far mostly tested with self tests ( https://www.elektroda.com/rtvforum/topic4109775.html ) and in Simulator, so any testing is welcome. Let me know if you try to run some of my scripts on physical devices! Any testers available - @divadiow maybe? And special thanks for @niterian for initial Berry demo.

    Cool? Ranking DIY
    Helpful post? Buy me a coffee.
    About Author
    p.kaczmarek2
    Moderator Smart Home
    Offline 
    p.kaczmarek2 wrote 11794 posts with rating 9913, helped 563 times. Been with us since 2014 year.
  • ADVERTISEMENT
  • #2 21518587
    divadiow
    Level 34  
    Fantastic stuff. I am not familiar with Berry though I have heard it mentioned in relation to Tasmota. I'll read this guide in earnest again and hopefully try some things on actual devices in due course.
  • ADVERTISEMENT
  • #3 21518817
    p.kaczmarek2
    Moderator Smart Home
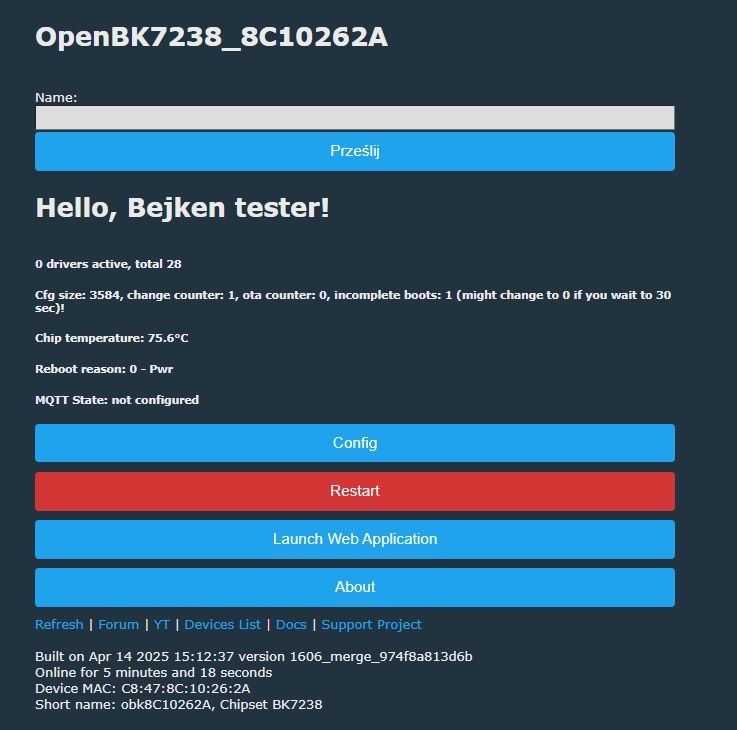
    Thank you. If you have some spare time, you can just try running berry "Hello world" or simplest Berry OBK http page addon for the time being. Just to see if it works on any physical devices. The integration is still being improved, and I still expect some stack size issues.

    By the way, to anyone reading - if you want to check out the current Berry capabilities in OBK, just look at our OBK Berry self test:
    https://github.com/openshwprojects/OpenBK7231T_App/blob/main/src/selftest/selftest_berry.c
    The following file is a set of automatic tests that are run with each OBK compilation. They are run so we can check if OBK is still working as expected after adding new changes and features. Everything that is in selftest_berry.c is expected to be always working, so you can just look there to get some syntax details, etc.
    Helpful post? Buy me a coffee.
  • #5 21518954
    p.kaczmarek2
    Moderator Smart Home
    Probably makefile stuff. Files needs to be added by hand. BK7231 scans for files recursively, so it works for BK, but not for others.

    Added after 5 [minutes]:

    Ah, there was also a missing header, and ESP32 complained about it due to the warning settings:
    
    /home/runner/work/OpenBK7231T_App/OpenBK7231T_App/src/cmnds/cmd_main.c:1124:45: error: implicit declaration of function 'CMD_Berry_RunEventHandlers_Str'; did you mean 'CMD_Berry_RunEventHandlers_IntInt'? [-Werror=implicit-function-declaration]
     1124 |                                 int c_run = CMD_Berry_RunEventHandlers_Str(CMD_EVENT_ON_CMD, cmd, args);
    

    It's fixed now in main, so we need to add files to Makefile

    Added after 4 [minutes]:

    This needs to be in Makefile:
    https://github.com/openshwprojects/OpenBK7231T_App/tree/main/src/berry
    And this (only berry subdirectory):
    https://github.com/openshwprojects/OpenBK7231T_App/tree/main/libraries
    However... I also need to keep an eye on the workflow:
    https://github.com/openshwprojects/OpenBK7231T_App/blob/main/.github/workflows/workflow.yaml
    Helpful post? Buy me a coffee.
  • ADVERTISEMENT
  • #6 21518966
    divadiow
    Level 34  
    ok. yes. was about to test W800 makefile. feel free to cancel my queued/stuck until you're at a point where I should update my branch with your latest changes
  • #7 21518968
    p.kaczmarek2
    Moderator Smart Home
    I think BK7231 Easy UART flasher should be also able to download from Pull Requests...

    Added after 57 [minutes]:

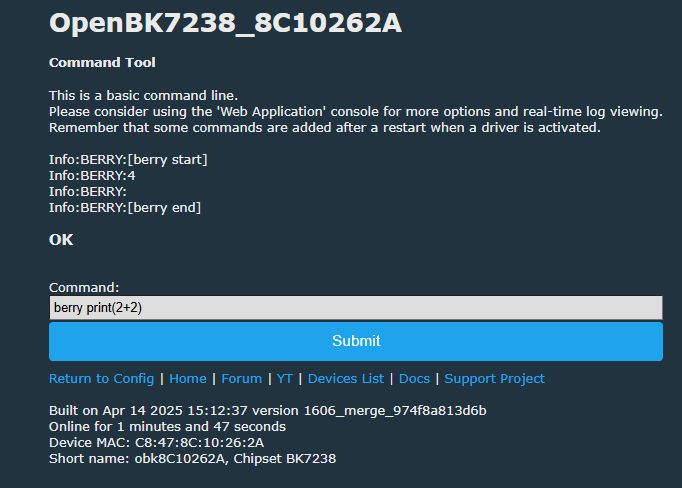
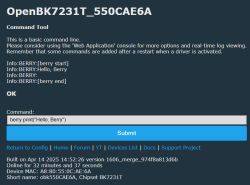
    BK7238 test:
    Command line tool window of OpenBK7238 with executed command.

    Added after 3 [minutes]:

    Works:
    User interface for OpenBK7238 with technical information.
    Helpful post? Buy me a coffee.
  • ADVERTISEMENT
  • #9 21519046
    p.kaczmarek2
    Moderator Smart Home
    We need to dig into makefiles so it can build on more platforms, for example, on ESP32
    Helpful post? Buy me a coffee.
  • #10 21519048
    divadiow
    Level 34  
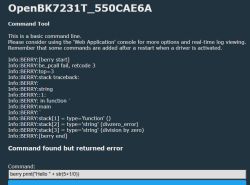
    is a divide by zero also a worthy test to be sure it errors gracefully without killing device or is that not a valid concern?
    Code: Text
    Log in, to see the code

    Screenshot of the OpenBK7231T command line tool with a division by zero error.
  • #11 21519067
    p.kaczmarek2
    Moderator Smart Home
    Nice, it seems that Berry handles it well internally.
    Helpful post? Buy me a coffee.
  • #12 21519803
    JacekCz
    Level 42  
    >>21517768 .

    What are the motives behind the new language ?
    Practically comparable to Lua, and this one has a long-standing presence. Also prone to miniaturisation
    Somewhat partial "C-ness" in syntax and "Pascal-ness" is not enough
  • #13 21519828
    p.kaczmarek2
    Moderator Smart Home
    @JacekCz I had initially planned LUA myself, as I know it and have integrated it with C/C++ many times before, but then one contributor recommended Berry and pointed out that it is potentially lighter than LUA, although I have not tested it myself in this particular case. The author of Berry himself, on the other hand, writes:
    Quote:
    .
    A few years ago, I tried to port the Lua scripting language to STM32F4 microcontroller, and then I experienced a Lua-based firmware on ESP8266: NodeMCU. These experiences made me experience the convenience of script development. Later, I came into contact with some scripting languages, such as Python, JavaScript, Basic, and MATLAB. At present, only a few languages are suitable for transplanting to the microcontroller platform. I used to pay more attention to Lua because it is a very compact embedded scripting language, and its design goal is to be embedded in the host program. However, for the microcontroller, the Lua interpreter may not be small enough, and I cannot run it on a 32-bit microcontroller with a relatively small memory. To this end, I started to read Lua code and developed my own scripting language-Berry on this basis.

    This is an ultra-lightweight embedded scripting language, it is also a multi-paradigm dynamic language. It supports object-oriented, process-oriented and functional (less support) styles. Many aspects of this language refer to Lua, but its syntax also borrows from the design of other languages. If the reader already knows a high-level language, Berry's grammar should be very easy to grasp: the language has only some simple rules and a very natural scope design.

    The main application scenario I consider is embedded systems with low performance. The memory of these systems may be very small, so it is very difficult to run a full-featured scripting language. This means that we may have to make a choice. Berry may only provide the most commonly used and basic core functions, while other unnecessary features are only used as optional modules. This will inevitably lead to the language's standard library being too small, even the language There will also be uncertain designs (such as the implementation of floating-point numbers and integers, etc.). The benefits of these trade-offs are more room for optimisation, while the disadvantage is obviously the inconsistency of language standards. Berry's interpreter refers to the implementation of Lua interpreter, which is mainly divided into two parts: compiler and virtual machine. Berry's compiler is a one-pass compiler to generate bytecode. This solution does not generate an abstract syntax tree, so it saves memory. The virtual machine is a register type. Generally speaking, the register type virtual machine is more efficient than the stack type virtual machine. In addition to implementing language features, we also hope to optimise the memory usage and operating efficiency of the interpreter. At present, the performance indicators of Berry interpreter are not comparable to those of mainstream languages, but the memory footprint is very small.

    It wasn't until later that I learned about the MicroPython project: a simplified Python interpreter designed for microcontrollers. Nowadays, Python is very hot, and this Python interpreter designed for microcontrollers is also very popular. Compared with the current mature technology, Berry is a new language without a sufficient user base. Its advantage is that it is easy to master the grammar and may have advantages in terms of resource consumption and performance.

    If you need to port the Berry interpreter, you need to ensure that the compiler you use provides support for the C99 standard (I previously fully complied with C89, and some optimisation work later made me give up this decision). At present, most compilers provide support for C99, and the common compilers such as ARMCC (KEIL MDK), ICC (IAR) and GCC in the development of ARM processors also support C99. This document introduces Berry's grammar rules, standard library and other facilities, and finally guides readers to transplant and extend Berry. This document does not explain the implementation mechanism of the interpreter, and may be explained in other documents if we have time.

    The author's level is limited, and the writing is in a hurry. If there are any omissions or errors in the article, I hope the readers will not hesitate.

    Guan Wenliang

    April 2019

    Source: berry/docs/source/en/Reference.rst

    Additionally, Berry is heavily inspired by LUA:
    Quote:
    .
    License
    Berry is free software distributed under the MIT license.

    The Berry interpreter partly referred to Lua's design. View Lua's license here: http://www.lua.org/license.html.
    .

    Berry is also used by Tasmota, among others. For this reason, we have decided on Berry for the moment, although I would not rule out an approach with LUA, especially as I am familiar with LUA, and integrating LUA and being able to switch between integrations would certainly be an interesting experiment, one could test in practice what is lighter, what performs better, etc.
    Helpful post? Buy me a coffee.

Topic summary

Berry is a lightweight, dynamically typed scripting language optimized for embedded systems with a core code size under 40KiB and minimal heap requirements. Recent integration with OpenBeken (OBK) firmware enables Berry to run on multiple IoT platforms including BK7231, W800/W600, ESP32, BL602, LN882, and Realtek modules, as well as in the OBK Windows simulator with full MQTT and Home Assistant support. Two main usage options exist: running Berry via the OpenBeken Simulator on Windows or deploying it on physical devices. Current development focuses on improving integration, addressing stack size issues, and expanding Makefile support for cross-platform builds, particularly for ESP32 and W800. The OBK Berry self-test suite provides automated syntax and functionality verification. Berry handles runtime errors gracefully, such as divide-by-zero exceptions. The choice of Berry over Lua is motivated by Berry’s lighter footprint and inspiration from Lua, with potential future experiments to compare performance and integration ease between the two languages. The discussion includes troubleshooting build errors related to missing headers and Makefile configurations, and demonstrates successful deployment on BK7231 and BK7238 hardware.
Summary generated by the language model.
ADVERTISEMENT