logo elektroda
logo elektroda
X
logo elektroda

HARVIA 20 Pro Wood Stove in 400x320cm Garden Sauna Build – Layout and Progress Updates

manitu 72316 31
ADVERTISEMENT
Treść została przetłumaczona polish » english Zobacz oryginalną wersję tematu
  • #1 8427101
    manitu
    Level 11  
    Last week, I started building a garden sauna. The whole thing will consist of a sauna and a rest room. The external dimensions of the structure: 400x320cm. Dimensions inside the sauna: 300x200, which will allow for the location of 4 lying places. The rest of the structure will be used for a shower, a small table and sun loungers.
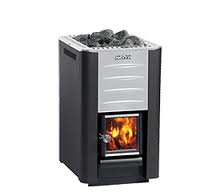
    Today I was able to buy a HARVIA 20 pro stove at a great price of PLN 1,500. On the Allegro, such a stove costs PLN 2600. I forgot to write, the sauna will be fired with a wood stove. Until yesterday, I was able to cover the roof and partially make the exterior walls. I cannot devote time to construction until the evening, so construction may take some time. Unfortunately, mosquitoes also do not let you work any longer.
    If I have some time, I will post photos from the implementation.
    I present the construction design projection.
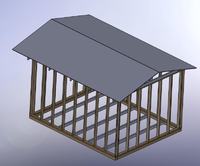
    HARVIA 20 Pro Wood Stove in 400x320cm Garden Sauna Build – Layout and Progress Updates

    Added after 1 [minutes]:

    If you are interested in building a sauna, please share your experiences.
  • ADVERTISEMENT
  • #2 8428698
    por_zybert
    Level 2  
    Hello!
    I have already built a 7x3 gazebo, part of which will ultimately be used as a sauna. I'm in the process of looking for really :) the occasional stove. I have already seen some super cheap ideas but if I find nothing, I will be forced to follow your path. greetings

    PS The best bats for mosquitoes. Buy or make yourself a BATBOX, you may get stuck. (Eats 2000 pcs a day :D )
  • #3 8429229
    phanick
    Level 28  
    I recently heard on TV, while breaking the record for being in hot sauna temperature, one man died and the other suffered severe burns (good luck with the project my friend :( ).
  • #4 8432290
    Starkes
    Level 19  
    I am not a sauna specialist - I also tried on, and I think I will install infrared heaters in the bathroom.

    So that you do not eat up costs - insulation, insulation, insulation.
    Also, don't forget about fire safety.
  • #5 8432326
    terminux
    Level 23  
    What elements did you use for the structure? Wooden squares, is the structure steel?
  • ADVERTISEMENT
  • #6 8442747
    manitu
    Level 11  
    Construction is slow, mainly due to a lack of time. But I plan to finish the exterior walls on Saturday. I will also throw in some photos from the construction site.
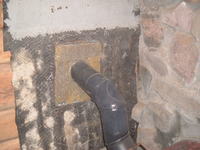
    As for the materials, the structure and external walls - pine, internal walls - spruce, benches - aspen. I plan to put an osb board and tiles on the floor. I have no concept of extracting the fumes from the stove. Maybe a pipe with insulation like for gas stoves?
  • #7 8457936
    manitu
    Level 11  
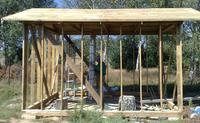
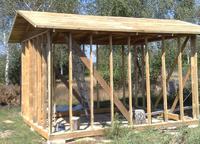
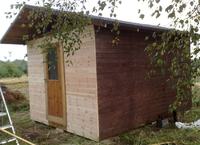
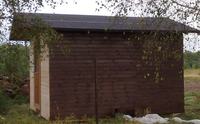
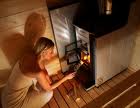
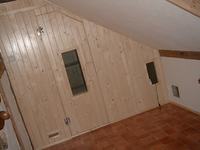
    We managed to catch up with work a bit. I am posting some photos from the construction site, a bit of poor quality, because they were made with a phone.
    HARVIA 20 Pro Wood Stove in 400x320cm Garden Sauna Build – Layout and Progress Updates
    HARVIA 20 Pro Wood Stove in 400x320cm Garden Sauna Build – Layout and Progress Updates
    HARVIA 20 Pro Wood Stove in 400x320cm Garden Sauna Build – Layout and Progress Updates
    HARVIA 20 Pro Wood Stove in 400x320cm Garden Sauna Build – Layout and Progress Updates
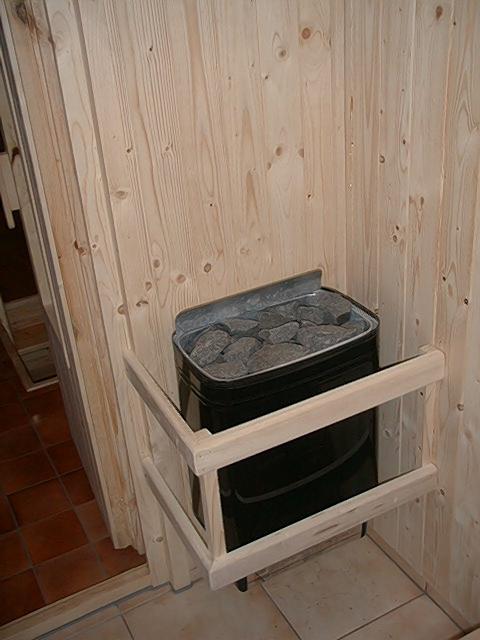
    and bake HARVIA 20 Pro Wood Stove in 400x320cm Garden Sauna Build – Layout and Progress Updates

    Added after 1 [minutes]:

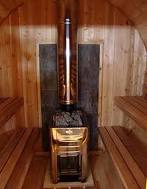
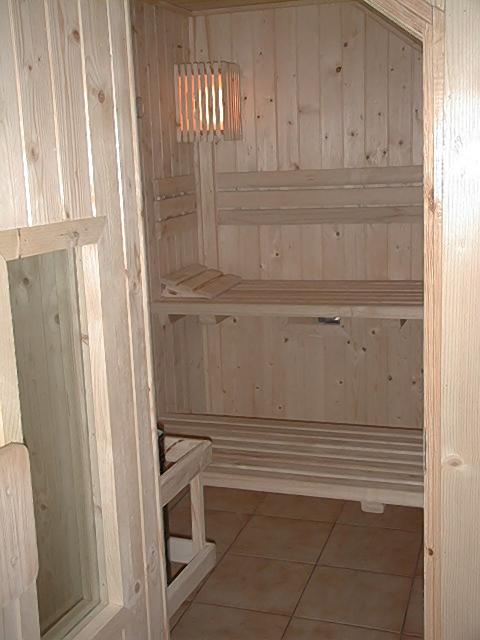
    and this is what it will look like in a sauna HARVIA 20 Pro Wood Stove in 400x320cm Garden Sauna Build – Layout and Progress Updates HARVIA 20 Pro Wood Stove in 400x320cm Garden Sauna Build – Layout and Progress Updates

    Added after 3 [minutes]:

    The next step is to make the floor of osb boards and internal walls of spruce slats.
  • #8 8458129
    Miles!
    Level 21  
    Under no circumstances should you put tiles on the floor (because I understand that you mean glaze). They will heat up to such a temperature that no one will be able to walk on it. The floor must be wooden. There should be no metal elements inside (except the stove, of course). Some time ago I finished building my own sauna (it is located in a residential building). I made the stove myself (just like everything else). For now, the only problem that has arisen is poor draft in the chimney, but it is easy to fix. The only thing left for me to do is to make seats of different heights (the higher you sit, the more steam and more degrees Celsius we have at our disposal).

    Greetings.

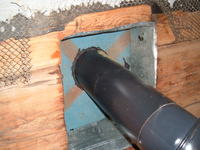
    Ps. I realized the exhaust gas very simply. A thick steel pipe, a hole in the wall and appropriate wood expansion joints are filled with fireproof cotton wool and black silicone.
    Photos:
    HARVIA 20 Pro Wood Stove in 400x320cm Garden Sauna Build – Layout and Progress Updates HARVIA 20 Pro Wood Stove in 400x320cm Garden Sauna Build – Layout and Progress Updates
  • #9 8563974
    por_zybert
    Level 2  
    There is one more idea to consider. The stove can be built of brick and clad inside with fireclay plates. My brother-in-law brought me a set from the old stove (door, grate and hammer). If it goes well, I will make smokehouses. I wonder how it turns out.

    Stay awake.
  • ADVERTISEMENT
  • #10 8576618
    manitu
    Level 11  
    It takes a little bit of time to build, but I managed to partially make the interior walls and connect the stove. When I finish it, I will upload photos.
  • #11 8634321
    kazekkk
    Level 2  
    Hello
    I will be impatiently watching your progress as I plan to start the construction of a free-standing sauna in the garden in the spring. Initially, it was supposed to be a sauna heated with an electric stove, but due to difficulties with connecting to electricity, I decided to have a sauna heated with a wood stove. I have some experience in construction site because a few years ago I built a sauna in the attic house (heated with an electric stove). I use it regularly and I recommend it to everyone with a clear conscience :) Although the sauna is considered a luxury, with the right choice of materials and hand-made, it does not have to be so expensive, I would like to share my experience in building a sauna and, of course, I would like to use the advice of people who have experience in building a sauna outdoors.
    HARVIA 20 Pro Wood Stove in 400x320cm Garden Sauna Build – Layout and Progress Updates HARVIA 20 Pro Wood Stove in 400x320cm Garden Sauna Build – Layout and Progress Updates HARVIA 20 Pro Wood Stove in 400x320cm Garden Sauna Build – Layout and Progress Updates
  • #12 8635804
    retrofood
    VIP Meritorious for electroda.pl
    Miles! wrote:
    Under no circumstances should you put tiles on the floor (because I understand that you mean glaze). They will heat up to such a temperature that no one will be able to walk on it. The floor must be wooden. There should be no metal elements inside (except the stove, of course).


    I spent a good few years in the east, where "bania" (their version of the sauna) is almost religion and sanctity. I have stayed in many of them. From, I would say, primitive objects, through ones where the house on the plot looked like a poor relative, to such as the sauna complex in Odincowo, where there was a 25-meter full-size swimming pool on the first floor.
    They all shared common features:
    1. If there were wood-fired stoves, there were power to the furnace and air intake outside the cabin . Inside the cabin there was only heat transfer and storage, mostly stones.
    2. All - sparse and necessary metal elements are separated by a wooden truss. No kidding here. The temperature in the cabin often exceeds one hundred degrees Celsius! Even the water scoops (with aromas) were wooden.
    3. Nobody uses softwood for the cabin !!! Only deciduous, with the exception of birch, of course. The best are poplar and aspen slats.
    4. Wooden floor, of course, only and exclusively. No tiles! Well, unless we use slatted pallets for the tiles, which is quite convenient because it allows the wood to be dried and aired. A solid floor will show signs of wear fairly quickly and will need to be chipped.
    5. Neither walls nor benches (shelves) may have visible nail heads. This should be assembled so that it is absolutely impossible to touch the metal.

    I asked my friends who had their own sauna, like a garden sauna, but it was a building that was about 10 x 5 meters, how they used to do it. Well, like any wooden building, except that the cabin was lined with a metal foil, similar to the one used for backwater screens, and covered with poplar paneling inside. And it had 3 traditional benches at different heights. All inside the cabin, it was poplar. In addition, the building had a rest room with a table, benches, cupboards for dishes, towels and sheets, a changing cabin with hangers and shelves (for the sauna you need to remove all metal (rings, earrings, etc.) and artificial ones, only cotton remains. ).
    A lot of beer is being drunk in the sump at the table to make it easier to sweat in the cabin.
    I endured 15-20 minutes in temperatures up to 95 degrees, and then we ran naked in the snow. There are photos, but I will not publish them, because censorship would remove them. Because the sucks are like this:

    http://vimeo.com/1087221

    who knows Russian, here is a short guide:

    http://steaman.ru/arrang/35

    And here's all about sucks, including structure and aromatherapy:

    http://www.rupar.ru/

    PS. Electrical installation minimal, special wires and no circuit breakers inside! Also, do not allow locks on doors that could snap shut. It's best not to give at all.
    And abachi wood can be used for finishing.
  • #13 8765026
    krzysiekkom
    Level 2  
    Hello.
    I also started building a garden sauna. I'm interested in how you solve the cooling problem. I am planning (looking for cheaper logs or barrels) to use a hot water heater mounted on the smoke pipe.
    Be careful with the passage of the smoke pipe, an orifice and air are a good solution. I am going to build the wall directly next to the stove.
  • #14 8945738
    Grzesiakzuch
    Level 12  
    Hello sauna people
    Let me stick to the topic. I intend to build a sauna heated by a solid fuel stove (wood) at home. For now, I am at the design stage and figuring out technical problems. Right now, what I'm most interested in is how to regulate the temperature in a sauna heated with a wood stove. It is known that the furnace is selected 1kW per 1m3 of the room. It is also known that when it burns up in a furnace, it will heat up to a certain temperature, depending on what burned it up and how much of it you put into it. In traditional tiled stoves, the temperature control is equipped with a damper in the boilers, which is a flap on the flue or an air blower. What are the controls for sauna stoves ??? What to do when the temperature rises, e.g. to 140 ° C and I want to sauna at 90 ° C ??? Is the ventilation more evasive ??? Or maybe you do not need to control anything, just choose the right stove (1kW per 1m3) and fire it to the maximum and the temperature will be good, i.e. 90 ° C ??? My point is that the sauna should not be too cold or too hot.
    Share your experiences.
  • #15 8977656
    krzysiekkom
    Level 2  
    It seems to me that you shouldn't choose a stove that is too small, because if you burn with low-calorie wood, you may not reach the right temperature.
    I hope that in a few or a dozen days I will be able to write more on this subject because I am just about to finish the sauna. When testing my stove, I have the impression that it will only be a primitive regulation of ventilation and, unfortunately, the opening of the door.
    I guess it is not that important whether it will be 80 or 90 degrees. It is important how you will feel there.
    By the way, you may know some access to cheap wooden barrels.
    Greetings.
  • #16 9038424
    kazekkk
    Level 2  
    I would like to share some insights from the use of a wood-fired sauna. Maybe they will help someone build a sauna. In December, I completed the construction of the outdoor sauna. In the first version it was supposed to be a wooden house with a vestibule with a wood-burning stove, but I decided to build it in a utility room. It is a brick building with a wall thickness of 24 cm. Inside the room I put a sauna with 15 cm walls, insulated with mineral wool, plus a screen of aluminum foil and 19mm thick paneling. I left about 10cm of free space between the wall and the wall of the sauna, which is to ensure ventilation. I obtained a sauna with the following dimensions: length 2.1 x width 1.8 m x height 2.1. It is heated with a HARVIA M3 stove. This stove heats up the sauna very quickly. At a temperature of -5 ° C outside, I got the temperature of 110 ° C after about 45 minutes and it was difficult to reduce it, because the ventilation hole in the ceiling with a diameter of 110mm was too small. I enlarged it to 200x200mm and that helped. Of course, it is a hole with a latch for adjustment. For the last five years I have been using the sauna heated by an electric stove in my apartment and cooled down in the shower and now, after a few baths in the sauna outside, I must admit that it was only a substitute for sauna. Much more pleasure is coming out of the hot sauna straight into the snow, of course, if there is or pouring a bucket of cold water. The ideal solution would be to swim in the lake, but it will be difficult because I have 500m to it and running with your bare ass in the streets could be strange to you. neighbors :D
  • #17 9109662
    manitu
    Level 11  
    Welcome back. Unfortunately, the lack of free time did not allow me to visit the forum. Currently, the sauna is operational, but there are minor finishing touches to be made.
    First things first.
    I bought the original HARVIA 17KW stove and it is just right. The whole structure has been divided into two parts - the sauna room has the dimensions of 200 x 300 x 200 cm (L x W x H), and the rest of the room has a shower, a bench and a small table. If you are only sauna with your wife, you can even fold out small deckchairs.
    There are four benches in the sauna with dimensions of 200 x 65 cm in two levels
    The walls are 10 cm thick and insulated with mineral wool. With 18 degrees frost, one hand of wood is enough to warm up the sauna (I bought 10 MP - it would be enough for two years of intensive sauna).
    Sauna heating time from 30 to 50 minutes. At -18C 50 minutes.
    Temperature regulation - here is a small problem, but with a little practice (after about 2 months) I can almost flawlessly match the amount of wood to the desired temperature.

    Recently, my friends were asking what the cost of one sauna was, I told them that the equivalent of one beer (PLN 2 to PLN 3, depending on the outside temperature).
    After leaving the sauna, we cool down in the shower, but I plan on a cold water barrel and a heated barrel with bubbles. It's great to rest. I just need to add another sauna room to the side.
  • #18 17408985
    Bobasy
    Level 12  
    The red lettering insists on the possible addition of a tip. When I don't have one. I have a request for advice.
    I'm in the process of building a sauna. I have a floor and plan to build a glass steam sauna or use 220w m? underfloor heating foil. But I got a foil and I liked the idea. As far as steam is concerned, everything is rather simple. It is the foil that requires more involvement, because electromagnetic shielding and insulation against moisture. If the outside of the glass (rectangular shower screens) is insulation from moisture and weathering and shielding from the electromagnetic field. If under the floor there is additional insulation underneath. And how, if possible, the glass can bear it, because the (target) temperature is 60 ° C. Not enough for a sauna and for glass? I do not know. I am asking colleagues to share their advice. Greetings.
    Is the foil or wired floor heating technology appropriate for a sauna or a steam generator? Or .... both ;-)
  • #19 17415270
    retrofood
    VIP Meritorious for electroda.pl
    Bobasy wrote:
    I'm in the process of building a sauna. I have a floor and plan to build a glass steam sauna or use 220w m? underfloor heating foil

    Read the topic from the beginning. The invention you are considering will not be a sauna, it will be more of a greenhouse.
  • #20 17415281
    Bobasy
    Level 12  
    I usually start with reading. But for your time to advise me about reading, thank you.
    A sauna is a process that takes place in a specific place. The material the walls are made of ..... doesn't matter. It can be a foil or a tent or whatever you choose.
    I emphasize "you decide"!
    Greetings.
  • #21 17415290
    retrofood
    VIP Meritorious for electroda.pl
    Bobasy wrote:
    I usually start with reading.

    Perfect. So you should know why it is used in saunas wood .
  • #22 17415303
    Bobasy
    Level 12  
    retrofood wrote:
    Bobasy wrote:
    I usually start with reading.

    Perfect. So you should know why it is used in saunas wood .


    I noted your previous entry as substantive. Ie without puzzles or other emotional inserts.
    According to the footer, have you joined the group of advanced tasters? Because the spirit of your statements is different?

    The walls I can make.
    I have no conditions for wood.
    The theme is the exchange of experiences.
    Greetings.
  • ADVERTISEMENT
  • #23 17891594
    Macmacmat
    Level 2  
    Hello, maybe you have some experience with the construction of a garden sauna in a typical tin plate due to the lack of space at home. Do you think that the idea of buying a small tin plate insulated with mineral wool and enclosed from the inside with a sauna tree, heated by an electric stove, makes any sense? Will it be difficult to heat it in winter, will the exchange of temperatures and humidity be disturbed due to the structure of the room? Maybe some of you have applied such a solution. Regards Maciek
  • #24 17905203
    qr
    Level 12  
    Blaszak won't last long. What about venting something like that, joining, corrosion of elements .. how to fix it afterwards? what? It is a better traditional cattle made of wood with metal fittings, etc.
  • #25 17905243
    retrofood
    VIP Meritorious for electroda.pl
    Macmacmat wrote:
    or the idea of buying a small tin plate insulated with mineral wool
    Why such slaloms? If you want a tinplate, it's made of sandwich panels! Cheaper and easier. Just don't forget about ventilation.
  • #26 17905309
    Macmacmat
    Level 2  
    With a quick calculation, the total cost would be 3,000, I do not know how long to live in the place where I would like to do it, so the service life of 5 years is fully acceptable to me, but I am just wondering about the ventilation and thermal insulation solution. It is to be a small sauna in the allotment garden near the house. Maybe you have any ideas?
  • #27 18379124
    piramidon
    Level 12  
    I built a sauna with external dimensions of 220cm x 300cm. I put it in the garden. It has been serving me for 3 years. There are four seats in it, or three lying places (two male - higher and one female - lower, cooler). As a rule, it is a wet, low-temperature sauna - up to 70 ° C. For dry sauna, I go to the sauna "in the city" for 100 degrees. The limitation in the operating temperature of home saunas resulted from the broken capillaries on the faces of the ladies (laser removal costs over PLN 100 per one). The stove is for wood - a goat bought from a neighbor with a capacity of about 4.5 kW. The area of the cottage is divided into two rooms: a 120 x 220 cm vestibule and a 180 x 220 cm sauna. In the vestibule there are two chairs with armrests and (on the other side) a wooden bench 118 cm wide. The walls from the inside are made of unedged and edged larch timber - purchased directly from the sawmill - 25mm thick. After delivery, I debarked the boards with a sharpened spade, dried them for two months and treated them with a rustic brush. In this condition, I fastened them on the walls with phosphated (gray) wood screws. It was a mistake - they started to corrode with salt. But the sauna took a patina faster.

    I warn you about the size of this sauna and the cooling vestibule: we are sitting next to each other four peasants (including three about 90 kg, about 180 height) - a few hours each. Any guy can envy such an atmosphere of a man's evening with a beer and a half. Why a beer and a half? because you can go home with your own car. Checked with various alcohol meters.
    Once, after five hours of sitting, my wife started to worry - it was the time of tapping our tinctures.
    This is my third sauna - better: approach to the sauna. For example: At the cottage on the plot there were three wooden walls and a woolen rug instead of a door - on the fourth one. My wife and I have been married for 25 years and we still chuckle at the memories of the sauna.

    I removed the redundant part. [retrofood]
  • #28 19289610
    Rosomak67
    Level 2  
    Hello all.
    I plan to put a sauna on the plot. I was wondering if a concrete cellar could be used as a room. Prices range from 2,800 to 3,200. We have a ready room that is enough to insulate and finish inside. From the outside, I planned to cover it with earth to make it look like a mound of earth. From a concrete tank for a septic tank of about 4 m3, I plan to make a mini pool in front of the sauna with a depth of 1.10 or 1.2.
    I would like to hear your opinions if it makes sense. It's not about the price, because I think that building a wooden house is a comparable cost.
  • #29 19289829
    Grzegorz740
    Level 37  
    Bobasy wrote:
    retrofood wrote:
    Bobasy wrote:
    I usually start with reading.

    Perfect. So you should know why it is used in saunas wood .


    I noted your previous entry as substantive. Ie without puzzles or other emotional inserts.
    According to the footer, have you joined the group of advanced tasters? Because the spirit of your statements is different?

    The walls I can make.
    I have no conditions for wood.
    The theme is the exchange of experiences.
    Greetings.


    I would not enter your sauna for any money for fear of my health.
  • #30 19578108
    Mirt222
    Level 1  
    Well, neither do I. The sauna must be done with safety rules; otherwise, a tragedy may result.

Topic summary

The discussion centers on the construction of a garden sauna with external dimensions of 400x320 cm and an internal sauna space of 300x200 cm, designed to accommodate four lying places. The sauna is heated by a wood-fired stove, specifically the HARVIA 20 Pro initially purchased at a discounted price, later replaced or supplemented by a HARVIA 17 kW stove. The structure uses pine for external walls and frame, spruce for internal walls, and aspen for benches, with plans to install OSB board flooring. Key construction considerations include proper insulation with mineral wool, fire safety, and effective smoke extraction using insulated steel pipes with fireproof materials. The floor must be wooden rather than tiled to avoid excessive heat retention. Temperature regulation in wood-fired saunas is managed primarily through ventilation control and stove operation, with some users noting challenges in maintaining desired temperatures. Ventilation design includes air intake from outside and exhaust through a chimney, with attention to draft issues. Alternative heating methods such as infrared heaters and electric stoves were discussed but wood stoves remain preferred for outdoor saunas. Additional advice covers mosquito control (e.g., bat boxes), use of deciduous woods (poplar, aspen) for interior surfaces, and avoiding metal elements inside the sauna except for the stove. Some users shared experiences with sauna dimensions, insulation thickness (5-10 cm mineral wool), and structural materials like Scandinavian spruce. The discussion also touches on the feasibility of unconventional sauna structures such as concrete cellars or tin plate cabins, with concerns about ventilation, insulation, and durability. Photos and progress updates were shared, illustrating construction stages and interior layouts.
Summary generated by the language model.
ADVERTISEMENT