logo elektroda
logo elektroda
X
logo elektroda

Bleeding Radiators: Proper Venting Techniques, Screw Positions (A, B, C), & Ideal Temperature

scigal 65592 39
Best answers

How should I bleed these radiators, which screw should I use, and should I do it when the radiators are hot or cold?

Bleed the radiator with screw A only, and do it on a cold radiator with the radiator valve closed so the air is forced out by water entering from below; do not use B or C for venting [#10044326][#10044068] Keep unscrewing A until only air hisses out and then a steady stream of water appears; if water comes out immediately, that usually means there is little or no air left in that radiator [#10044326][#11914062] The top of a radiator is normally warmer than the bottom, so a cool lower section is not automatically a fault [#10044326][#11914062] If the radiator still heats slowly or only partly after bleeding, the more likely cause is poor flow through the radiator, such as a throttled or dirty valve/presetting or a blocked return, especially at point C [#48136][#11914062][#21261358] Aired radiators can definitely make heating slower, but the thread also notes that if the whole system has air at the boiler/outlet side, the installation may not start properly at all [#10044068]
Generated by the language model.
ADVERTISEMENT
This content has been translated flag-pl » flag-en View the original version here
  • #31 21261038
    kubackiandrzej
    Level 3  
    Posts: 4
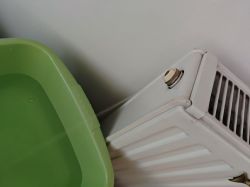
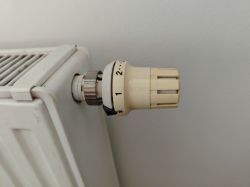
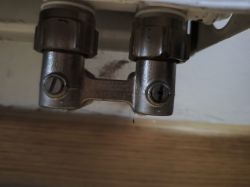
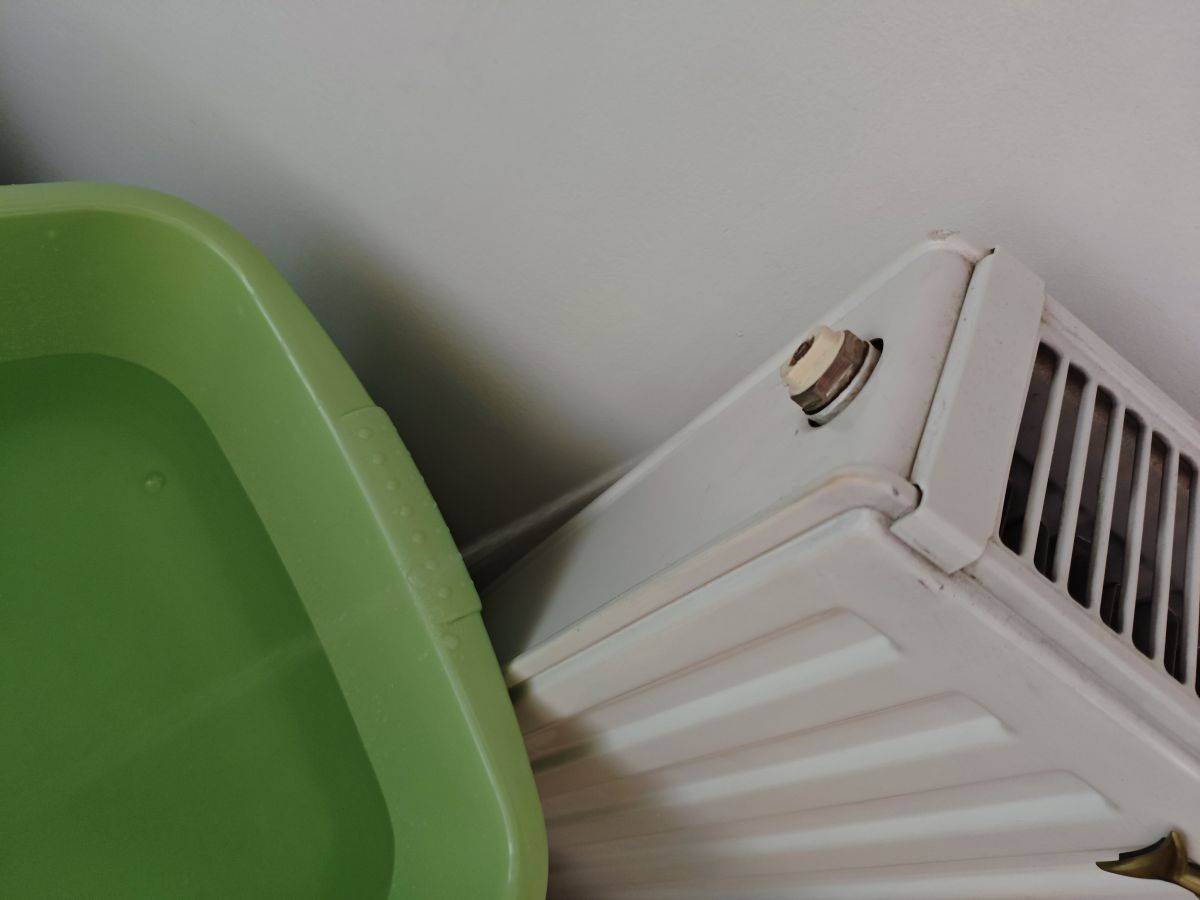
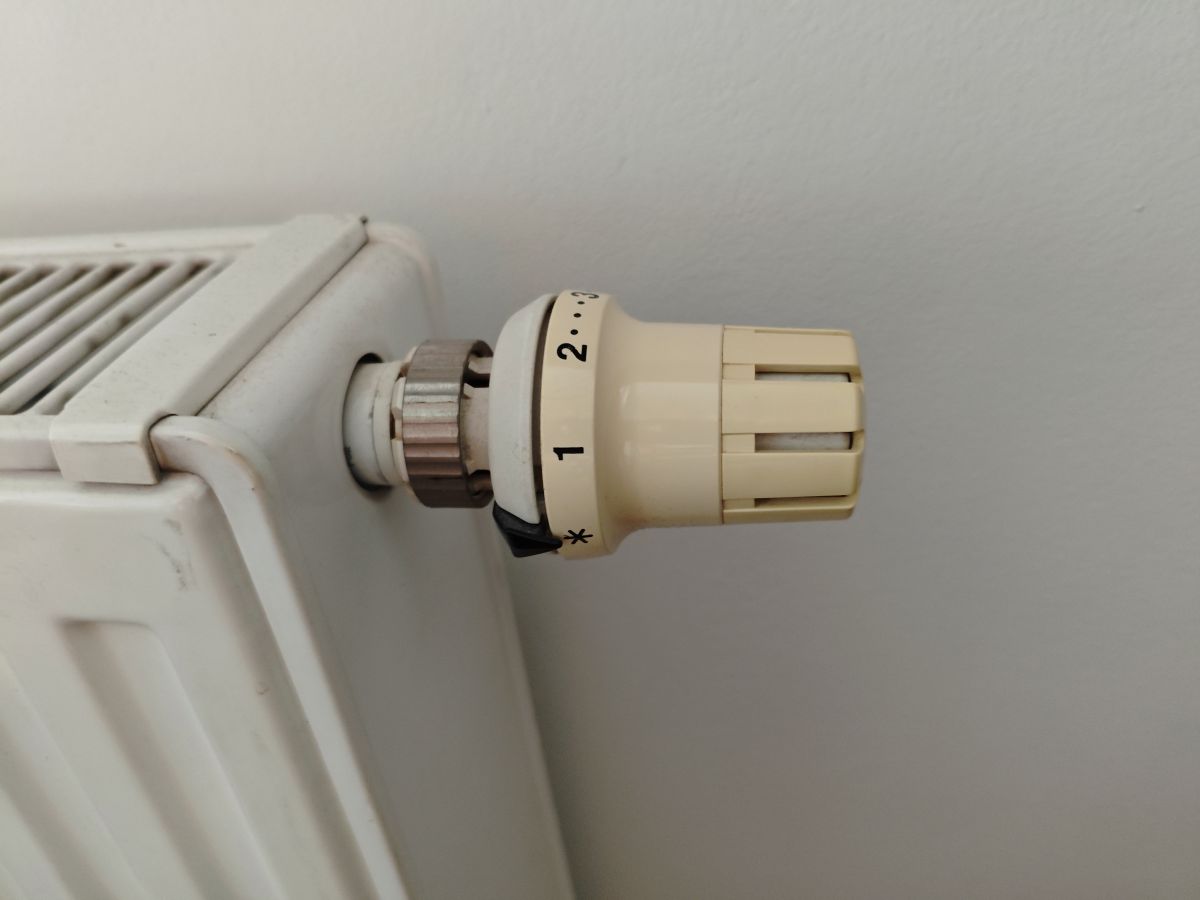
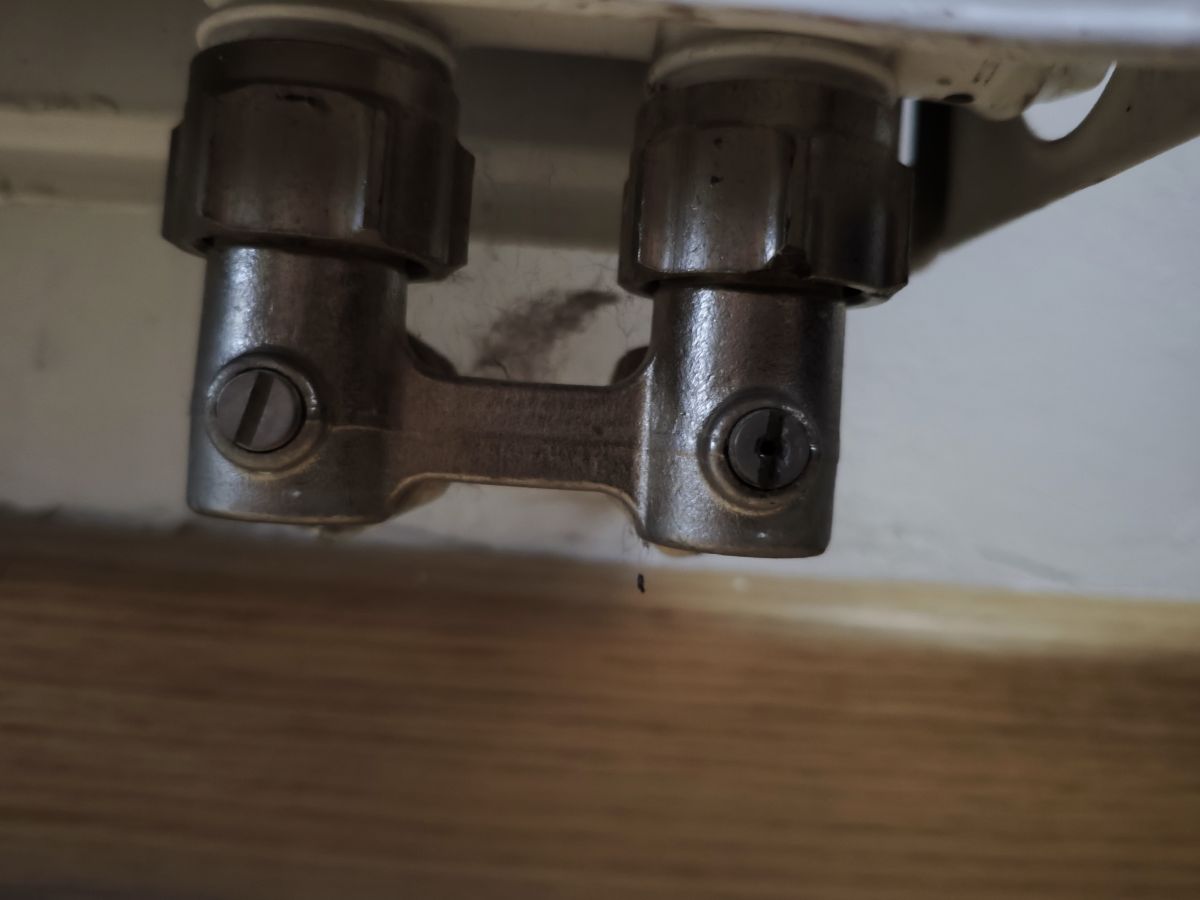
    Hi, I have a problem like this when venting - radiator cold (other radiators in the flat work without a problem) - I have turned off the head at the thermostat, unscrewed the valve and water is pouring like mad (more than half a bucket so far), the radiator remains cold. I've added pictures, can you advise anything? I didn't move those tubes at the bottom, I'm throwing in just in case, they just happen to be slightly warm, but nothing else.

    Radiator with a closed thermostat valve and a plastic bucket nearby. Thermostatic valve head on a radiator. Metal radiator valve against a wall and floor background. .
  • ADVERTISEMENT
  • #32 21261358
    Zbigniew Rusek
    Level 38  
    Posts: 3610
    Help: 394
    Rate: 1535
    After this venting, has the head been opened (at least to a temperature that is higher than the current temperature in the room where the radiator is located)? If so (the best way to check this is to open the heating head to maximum), then there is a problem with the flow through the radiator. It's worth checking how the so called presetting is set (it acts as an orifice) and this can be checked by removing the thermostatic head (it looks like a Danfoss to me on the photo, so it should be quite simple). If it's a Danfoss (which it looks like it is), when you remove the head there will be a metal ring with numbers from 0 to 7 and then an N on it. The higher the number, the higher the flow of the heating medium through the radiator (N is the maximum flow - as if without an orifice and this setting is generally only used to flush the valve). On the brass body (on the screw side) there is a dot - a reference point - whichever number is opposite the dot indicates the setting. To change the setting, you have to pull the metal ring a little towards you and turn it (if it is not stained, you can do it with your fingers, if it is dirty, you may need to use e.g. a pair of pliers). In any case, if venting does not help (all indications are that there is no air), the cause is a lack of heating medium flow or a very weak flow. If the setting was on a low value and, in addition, the head was in the closed position all the time, the valve may have become silted up. If this is in Krakow (especially near the Ugorek housing estate) - I could come.
  • ADVERTISEMENT
  • #33 21261487
    kubackiandrzej
    Level 3  
    Posts: 4
    Unfortunately, Warsaw. I changed the setting, but it doesn't do anything. I've left it on 'N' and nothing happens to the radiator temperature either. Another thing - shouldn't it be the case that when I turn the head down to zero, the water in the radiator is not topped up? I've done this, unscrewed the vent valve and a strong stream of water is pouring out of it. On the one hand, it's good that there is no air, but according to the diagrams in this thread above, I would have thought that with the head turned to zero, there would be no supply of new water to the radiator and the pressure would go down to zero (i.e. the water jet would get weaker and weaker until it stopped flowing).
  • #34 21261623
    ta_tar
    Level 41  
    Posts: 6442
    Help: 693
    Rate: 2029
    kubackiandrzej wrote:
    that when I turn the head to zero, the water in the radiator is not topped up?
    .
    The pressure is coming from the return side.
    There is still the stem coming out of the thermostatic insert screwed into the valve to check if it moves at all. Check after unscrewing the head to see if it pushes inwards.
  • #35 21261767
    kubackiandrzej
    Level 3  
    Posts: 4
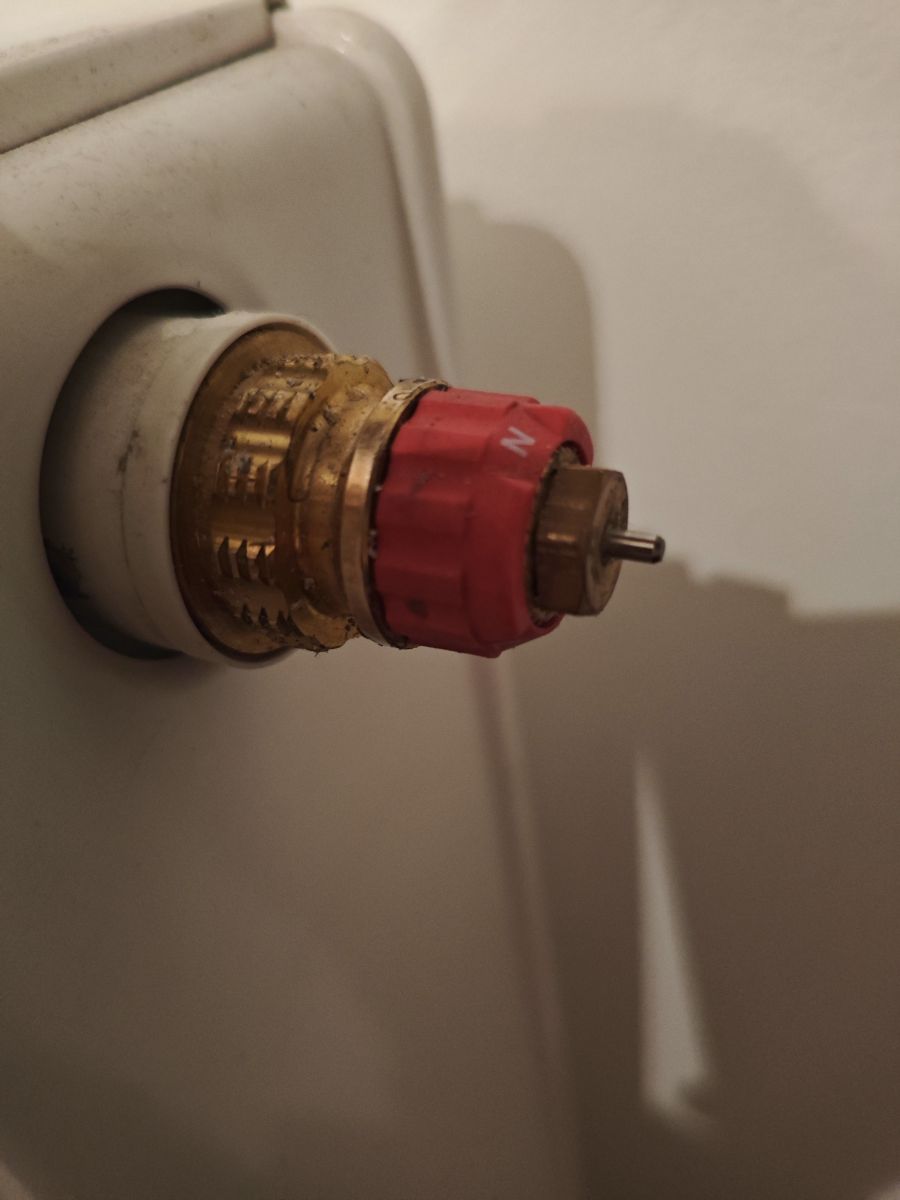
    Radiator valve with a visible red knob. .

    This is what it looks like when the head is removed. Apart from being able to adjust between 'N' and '7' (turn that red knob) nothing moves there (at least not without tools / a lot of force and I'm afraid to try so as not to deform anything).
  • ADVERTISEMENT
  • #36 21261793
    ta_tar
    Level 41  
    Posts: 6442
    Help: 693
    Rate: 2029
    This protruding pin should be able to be pushed in using a small amount of force.
  • #37 21261938
    Zbigniew Rusek
    Level 38  
    Posts: 3610
    Help: 394
    Rate: 1535
    >>21261767 Something is jammed. It should be able to be turned from 0 to N and all around. You may have to try turning it with a pair of pliers (first pulling the red part towards you), but make sure not to crush or deform it. You should also consider whether the valve at the bottom is choking the flow (photo on the right in the first post) - the left screw is not quite parallel to the inlet. You might also want to chamfer those other radiators a bit (maybe throttling them will induce flow through the faulty one). And is this a bungalow, townhouse or block of flats? Is it the top floor or, for example, the ground floor (if it's a larger building - several storeys high, then maybe the floor below should be slightly chimneyed with radiators).
  • ADVERTISEMENT
  • #38 21261960
    kubackiandrzej
    Level 3  
    Posts: 4
    It can be spun from zero to N (you don't have to pull it off), while this protruding pin doesn't move at all (doesn't go in). It's a block of flats, top floor.
  • #39 21261969
    ta_tar
    Level 41  
    Posts: 6442
    Help: 693
    Rate: 2029
    kubackiandrzej wrote:
    while this protruding pin does not move at all (does not go in).
    .
    It is the insert that is to be replaced. It is supposed to move.
  • #40 21262078
    Zbigniew Rusek
    Level 38  
    Posts: 3610
    Help: 394
    Rate: 1535
    The insert is not necessarily replaceable. You have to try to move this pin with pliers. First try pulling it out (you should be able to pull it out e.g. 2 mm if it is baked closed), then push it in (if it was baked open, you should be able to push it in about 2 mm). Probably the radiator has been many years in the baked-on position, which is why this pin (and the valve) got blocked. As it is possible to completely shut off the radiator from supply and return at the bottom, it would be theoretically possible to replace the insert.

Topic summary

✨ The discussion revolves around the proper techniques for venting radiators, particularly when only the upper half of the radiator is hot while the lower half remains cool. Users emphasize that bleeding should be performed on cold radiators and that the valve on the radiator must be closed to prevent water from flowing out while air is expelled. Various methods for venting are discussed, including the use of screws labeled A, B, and C, and the importance of ensuring that the return valves are fully open. Users also highlight potential issues such as clogged vents, low water levels in the system, and the need to check the flow through the radiator. The conversation includes troubleshooting tips for radiators that do not heat properly, including checking thermostatic valves and ensuring proper water flow. Additionally, concerns about the impact of air in the system on heating efficiency are raised, along with the risks associated with draining water from the system.
Generated by the language model.

FAQ

TL;DR: Up to 30 % of space-heating energy can be wasted by air-locked radiators [EST, 2023]; “bleed on a cold system for best results” ["stanislaw1954", #10044068].

Why it matters: Correct venting restores full output, lowers gas bills, and prevents pump wear.

Quick Facts

• Bleed radiators when water is ≤30 °C and the pump is OFF [Elektroda, stanislaw1954, post #10044068] • Typical system pressure in flats: 1.5 – 2.0 bar [Vaillant, 2022]. • Manual bleed screw sizes: 5 mm square or ¼-in. Allen key (check before buying a key) [PlumbNation, 2023]. • Automatic air-vent cost: approx. €8–15 each, install time ≈10 min/radiator [Ferroli, 2022]. • Jammed thermostatic pin travel should be 2–3 mm; zero travel signals replacement [Elektroda, ta_tar, post #21261793]

Which screw do I use to bleed?

Open the small bleed screw marked “A” with a radiator key; leave supply valve closed to force air out [Elektroda, Trabi, post #10044326]

Does trapped air really slow heat-up times?

Yes. Tests show a 15 - 25 % drop in heat output when the top channel contains air [BSRIA, 2021] and users reported long warm-up until bled [Elektroda, scigal, post #10044011]

I only get water, no hiss—what now?

Continuous water means no air; poor flow is likely. Check that return valve “C” is fully open and preset on the thermostatic valve is ≥4 [Elektroda, Polon27, post #10048136]

Bleed screw opened fully—no air, no water?

Orifice may be clogged or system pressure too low. Increase fill pressure to 1.5 bar and rod the bleed hole with a 1 mm wire [Elektroda, irus.m, post #11913173]

Why does water still pour when the head is set to ‘0’?

Pressure can enter via the return side; a stuck thermostatic insert lets water bypass. The pin should move 2–3 mm when pressed [Elektroda, ta_tar, post #21261623]

How do I free a jammed thermostatic pin?

  1. Remove head.
  2. Grip pin with pliers, pull outward, then push inward repeatedly.
  3. Spray WD-40, reinstall head and test. If immobile, replace the insert [Elektroda, Zbigniew Rusek, post #21262078]

What is the failure rate of automatic vents?

Field surveys show ~5 % leak within five years due to dirt in the float seal [CIBSE, 2020].
Generated by the language model.
ADVERTISEMENT