Time for a guide on how to update or reinstall the BIOS on the motherboard using a USB flash drive. I haven't seen it anywhere on the web, I just needed it and tested it myself. Here I will describe how to re-flash the BIOS of Ami (American Megatrends Inc.) using a USB flash drive on the example of the MSI (Micro-Star) 875P Neo-FISR (PCB 2.0) motherboard.
1. First we need to prepare such a boot USB flash drive as a floppy disk. How to do it is described in this tutorial .
2. Download the latest and current one on the CD manufacturer's website BIOS , unpack the downloaded BIOS archives and on such a created, bootable on the basis of the MS-DOS pendrive we copy the flasher files and the BIOS image, in my example these are the files ADSFI712 (flasher) and A6758IMS.360 (BIOS image) .
3. Connect the USB flash drive to the USB port of the computer, start the computer and enter (most often by pressing the DEL button on the keyboard right after starting the computer) first into the BIOS to set the flash drive to boot as the first boot device. If otherwise set, set USB Device Legacy Support to All Device otherwise the flash drive may not boot as floppy. For me, I also had to set my pendrive as the only boot device and turn off all other boot devices, because I have some problems with this disc. We save the changes in the BIOS and restart the computer.
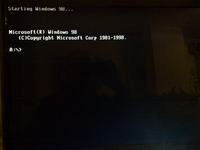
4. After restarting the computer, it starts from the pendrive, which it reads as a Windows 98 boot floppy disk and even the path to floppy A: \> is listed

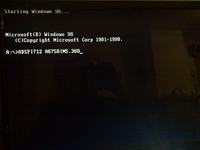
5. First enter the name of the flasher, space and the BIOS file:

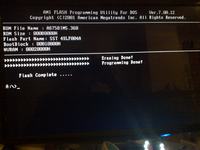
and press Enter. The BIOS flashing starts, which was successful for me:

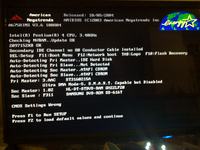
6. Turn off the computer, remove the flash drive from the USB port and restart it. After a short time, the POST screen appears, i.e. the first login after resetting or flashing the BIOS, where we can press the F1 button to edit the BIOS settings:

And that's it ...
Part of the inspiration and hint for this tutorial was this video:
Oh, if someone had problems with loading the BIOS in this way, in the case of the AMI BIOS, you can do it hard, i.e. change the name of the BIOS file to AMIBOT.ROM, let's not forget, the extension should be ROM and only this file we upload to a flash drive. Start the computer as described above and at the same time press the CTRL (Strg) and HOME buttons on the keyboard at the same time, after hearing a short signal, the BIOS should start flashing, the full completion of which will be signaled by repeated beep, beep ... so far it worked with a floppy disk.
1. First we need to prepare such a boot USB flash drive as a floppy disk. How to do it is described in this tutorial .
2. Download the latest and current one on the CD manufacturer's website BIOS , unpack the downloaded BIOS archives and on such a created, bootable on the basis of the MS-DOS pendrive we copy the flasher files and the BIOS image, in my example these are the files ADSFI712 (flasher) and A6758IMS.360 (BIOS image) .
3. Connect the USB flash drive to the USB port of the computer, start the computer and enter (most often by pressing the DEL button on the keyboard right after starting the computer) first into the BIOS to set the flash drive to boot as the first boot device. If otherwise set, set USB Device Legacy Support to All Device otherwise the flash drive may not boot as floppy. For me, I also had to set my pendrive as the only boot device and turn off all other boot devices, because I have some problems with this disc. We save the changes in the BIOS and restart the computer.
4. After restarting the computer, it starts from the pendrive, which it reads as a Windows 98 boot floppy disk and even the path to floppy A: \> is listed

5. First enter the name of the flasher, space and the BIOS file:
Quote:A: \> ADSFI712 A6758IMS.360

and press Enter. The BIOS flashing starts, which was successful for me:

6. Turn off the computer, remove the flash drive from the USB port and restart it. After a short time, the POST screen appears, i.e. the first login after resetting or flashing the BIOS, where we can press the F1 button to edit the BIOS settings:

And that's it ...
Part of the inspiration and hint for this tutorial was this video:
Oh, if someone had problems with loading the BIOS in this way, in the case of the AMI BIOS, you can do it hard, i.e. change the name of the BIOS file to AMIBOT.ROM, let's not forget, the extension should be ROM and only this file we upload to a flash drive. Start the computer as described above and at the same time press the CTRL (Strg) and HOME buttons on the keyboard at the same time, after hearing a short signal, the BIOS should start flashing, the full completion of which will be signaled by repeated beep, beep ... so far it worked with a floppy disk.


