logo elektroda
logo elektroda
X
logo elektroda

Electrolux EWS 126540 W - Drum Bearing Replacement: Confirming Tank Gluing & Alternative Methods

Szef22 36144 16
ADVERTISEMENT
Treść została przetłumaczona polish » english Zobacz oryginalną wersję tematu
  • #1 16189402
    Szef22
    Level 11  
    Hello
    Unfortunately, in my washing machine the drum bearing has probably fallen. The washing machine began to rumble quite heavily when spinning.
    After a few phone calls to the warehouse, I learned that it is impossible to replace the bearing itself (despite the fact that it is available for purchase) because the drum tank is glued and it is not possible to remove the drum and knock out bearings without cutting it.
    Is any of the forum members able to confirm this information ?? Perhaps there is a mania, how to undress the tank ??
    Is it possible to cut it on the weld line itself, and then glue with silicone to the glass?

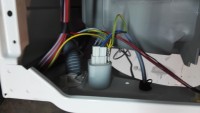
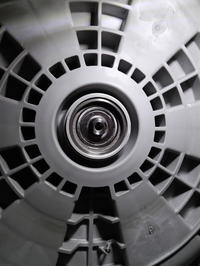
    Out of curiosity, I took the back of the washing machine, unscrewed the wheel and everything looks quite straight like any other washing machine. The bearing used is PPL Poland 6304Z. In the warehouse for one bearing (and from what I've learned there are two), they're screaming 40 zlotys. I do not want a PPL bearing anymore, so at Allegro I found the SKF 6304 2Z (ZZ) bearing for PLN 30 a piece. Is it the same?

    The model of the washing machine is Electrolux EWS 126540W NO 9145292207/01
    Attached photo of the back of the washing machine:
    Electrolux EWS 126540 W - Drum Bearing Replacement: Confirming Tank Gluing & Alternative Methods

    Thank you very much for your help.
  • ADVERTISEMENT
  • #2 16189595
    Chupacabra
    Level 33  
    Find out how to cut the bonded (welded) washing unit. The topic has been discussed here a million times and people do not want to answer this question anymore. For example, here: https://www.elektroda.pl/rtvforum/topic3279825.html#16106352 You have probably fired the inner bearing and sealer, therefore they roar. And the two bearings you write about are the same.
  • ADVERTISEMENT
  • #3 16189617
    Lodxx
    Home appliances specialist
    If the drum is welded it can be repaired as a rule, such repairs are going to happen. You have to remove the entire tank and remove the equipment. Then, in the place of the relief, the edge of the weld should be drilled every 10 cm holes for screws m5,6 depends what will approach you. Later, the tank cutter on the weld line is a blade (is more accurate than a flex), You break the drum and the bearings are preferably external then internal and sealer. Go to the store with old bearings and sealer and buy what you need. After breaking the drum, check the brass ring on which The inner bearing is certainly bigger than the external one, and the company that produced them does not matter because the bearing is usually damaged by the leaky sealant and begins to rust. The best seal is to buy two or three lips. folding you use glue for car windows, twist with screws and ready.
  • #4 16190345
    Szef22
    Level 11  
    Well, what to say, you have to do it :)

    Today I buy bearings, simering and glue, and on Friday after work, I am taking part in demolition :)
    At the most, you will need to buy a new tank with a drum or throw away the washing machine :)
  • ADVERTISEMENT
  • #5 16190554
    Lodxx
    Home appliances specialist
    And where do you get the dimensions of the bearings, I would have dismantled you first and checked the condition of the brass ring.
  • #6 16190567
    Szef22
    Level 11  
    In the service they choose them by the serial number of the washing machine, including the sealants.
    Besides, probably all 6304 2Z bearings have the same dimensions ??
    I will check the ring as I will undress. I suspect that it will be OK because roaring has just begun, but everything is possible so I can wait until Monday for the purchase and I will replace the parts
  • Helpful post
    #7 16190651
    Lodxx
    Home appliances specialist
    The tank is glued so you do not get the dimensions of the bearings, the service occurs as one part. And the inner bearing is certainly bigger than what you have outside.
  • #8 16192011
    Szef22
    Level 11  
    I called the warehouse today
    You're right :) Only when I choose it, they will choose something: /
  • #9 16228984
    Szef22
    Level 11  
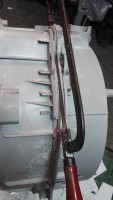
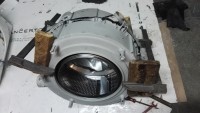
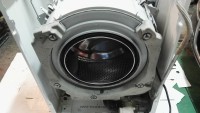
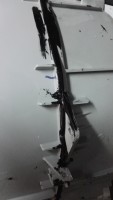
    The washing machine is pulled down, the washing group is cut with a saw blade (fleece or multitool is not suitable for this), holes for 5mm screw drills, bearings and sealant stamped
    External is 6304ZZ
    Internal 6206 ZZ
    Sealant 35x62x10 / 12.5
    The brass ring of the sealant on the cross was full, without scratches, rubbed it with only a paste to remove rubber and dirtiness

    Drum unit glued with adhesive for Boll glass. After 4 days of gluing the washing machine folded and unfortunately disappointed. The reale syndrome is leaking. The glue did not combine with the plastic even though it was ground with a paper and degreased.

    Currently, approach No. 2 with CX 80 Hybricx hybrid
    http://www.cx80.pl/nasze-produkty/kleje-hybrydowe-cx80/cx80-hybricx-premium-detail.html

    Today, the leak test


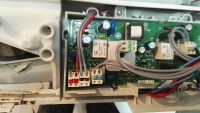
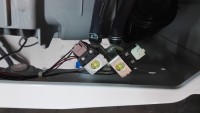
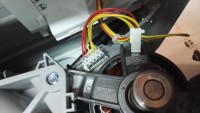
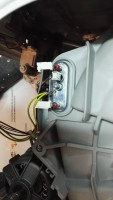
    Below the photos from the disassembly Maybe someone will be useful
  • ADVERTISEMENT
  • #10 16229568
    zhudomel
    Home appliances specialist
    If I see correctly, then there are too large gaps between the screws.
  • #11 16230054
    Szef22
    Level 11  
    The screws are every 20 cm. It was not possible to go deeper because of the tank's riffling. It simply was not like a drill or a tank rim was too small to be drilled safely
  • #12 16231305
    zhudomel
    Home appliances specialist
    Szef22 wrote:
    The screws are every 20 cm.
    It's still 1-2 in the middle.
  • #13 16231324
    Lodxx
    Home appliances specialist
    In my opinion, it leaks because, at the beginning, you have squeezed the two halves too much and the glue melted away from the sides. I did it the first time. Now I connect the two halves, leave for a few hours until the glue catches a little and then I screw it.
  • #14 16231357
    niewolno2
    Level 40  
    What was the colleague guided by using glass glue?
  • #15 16231412
    newDJ
    Level 18  
    It seems that the basic mistake is to twist the bathtub with too few screws. From the pictures shown it appears that you first cut the tank first and then you drilled the screw holes. These carpenters also made their deformation, which deformed from the bottom. Both the types of glue used for car windows and the ones used by you are good, the silicone is also good roofer which also has a grip for wet ground. Good luck.
    PS
    And by the way, old specialists, whether it's a shoemaker or a carpenter, they always told me, 'it's best kept when you have no glue.' Dear colleague so flew up with the sealing of the tank that even the screws sealed. And it had to be with the sealer sparingly, there was also a factory gasket for the bathtub, just a small amount of glue around the perimeter I always did and never corrected, nothing leaked.
  • #16 16231450
    Szef22
    Level 11  
    Lodxx wrote:
    In my opinion, it leaks because at the beginning you cut the two halves too much and the glue melted with your sides. Also the first time I did it. Now I leave the two halves for a few hours until the glue catches a little and I just screw off the screws.
    I think so too. The second time I did not use scoffs anymore, and the screws were brought up only after about 30 minutes as the CX80 began to figure. Yesterday I filled the tank with water and spits which does not leak. I will give my first washing today.
    niewolno2 wrote:
    What did your colleague use using window glue?
    Glass glue was recommended to me on the forum. I used it once and was convinced it would work.
    newDJ wrote:
    It seems that the basic mistake is to twist the bath too small amount of screws. From the pictures shows that most probably you first cut the tank, and then drilled holes for screws. These carpenters' clamps also did their thing, they deformed the tank, which went from underneath. Both types of glue used for car windows, and used by you are good, also good roofing silicone, which also has adhesion to wet ground. Good luck.
    PS
    And by the way, old professionals, whether it's a shoemaker or a carpenter, they always told me, "it's best kept when you have no glue." Dear friend, so he broke with the tank seal that even bolts sealed. And it was necessary with the sealant sparingly, there was also a factory bath gasket, just a small amount of adhesive around the perimeter. I've always done this and never corrected, nothing leaked.
    I did exactly the opposite. First, I was drilling and then cutting.

    The tank squeezes did not deform, they were not pressed as it is said for a cam. In addition, they were set up by large boards to distribute the pressure evenly over the larger surfaces. Unfortunately, I think they have squeezed out the adhesive that is not yet bound.

    I do not have a factory gasket. After the container was cut down, only a plastic rim (like a tongue groove) fell out over the majority of the circumference, creating a large cavity to connect the surface.

    As for the bolts, it seems to me that they are quite dense (about 15 items) and there should be no unsealing of the tank from vibrations. I know that the front part of the bathtub holds the whole counterweight, but there is also glue (3/4 tube), and this is not just a sealant.

    "Permanent sticking of heavy and heavily loaded elements exposed to difficult operating conditions (eg you can glue and seal natural stone - it does not discolour the structure"


    Anyway, today's the first wash I hope that when you spin the tank does not fall apart: /
  • #17 16284348
    Szef22
    Level 11  
    A few notes for posterity.

    After cutting the container from one of the halves I dropped a plastic pen (the halves are connected like a paneling with a tongue-and-groove). Before proper gluing, I suggest to first glue the resulting groove and leave it for one day to dry it dry. When gluing on the so-called once glue in the groove was not bound even after 4 days (I checked because I split the tank twice).
    Screws every 20 cm are enough. When screwing the engine to the tank, I advise you to take a close look at whether it extends the tank halves.

    For me, after cutting the tank, about 3 mm of the weld escaped, which caused that after tightening the engine, its handles stretched the glued halves of the tank (two times over the engine I had a leak). If this problem occurs to someone, I suggest using washers. It should be selected so that the body (mounting) of the engine squeezes the two halves of the tank.

    Thanks to the above repair I have two efficient washing machines. The new Amice TAWE6123LSLDS with a demountable tank and replaceable bearings and the old Electrolux EWS 126540 W

Topic summary

The discussion revolves around the challenges of replacing the drum bearings in the Electrolux EWS 126540 W washing machine, particularly due to the glued drum tank. Users confirm that while the bearings (PPL Poland 6304Z) can be purchased, the drum tank's design complicates the replacement process. Several methods are suggested for cutting the tank along the weld line, including drilling holes for screws and using specific adhesives for reassembly. Users share their experiences with different adhesives, such as CX 80 Hybricx and glass glue, and emphasize the importance of proper sealing techniques to prevent leaks. The conversation highlights the need for careful handling during disassembly and reassembly to ensure a successful repair.
Summary generated by the language model.
ADVERTISEMENT