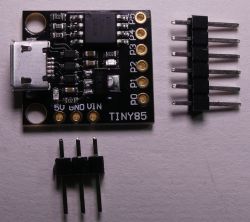
DigiSpark is a miniature Arduino compatible module, based on the ATtiny85 microcontroller. The board is not equipped with a USB UART converter typical for Arduino. The USB lines have been connected with the pins of the microcontroller, while the USB support has been embedded in the firmware. The module is equipped with a 5V stabilizer and the PCB terminals work with this voltage. 8kB flash memory available (2kB occupied by bootloader). We have the following outputs:
P0 (SDA, PWM, AREF)
P1 (PWM, LED)
P2 (D / A, SCK)
P3 (D / A, USB +)
P4 (D / A, PWM, USB-)
P5 (D / A)
Integration with Arduino:
We choose:
File-> Preferences-> field Additional URLs to the tile manager, add the line:
http://digistump.com/package_digistump_index.json
Tools-> Tile> Tile manager-> search for "digistump" and install Digistamp AVR Boards library.
We download and install the driver for the device:
https://github.com/digistump/DigistumpArduino/releases/download/1.6.7/Digistump.Drivers.zip
After installation, select Tools-> Board-> Digispark (16.5MHz)
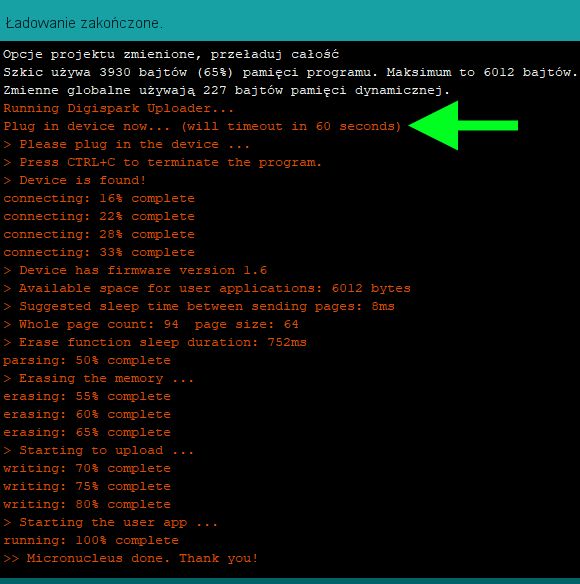
Loading the program is different than with standard Arduino boards:
-compile the program and start uploading
-when appropriate information appears in the console, connect the Digispark board
Let's open the example of DigiSparkUSB-> DigiScope
We compile the example and upload it to the board.
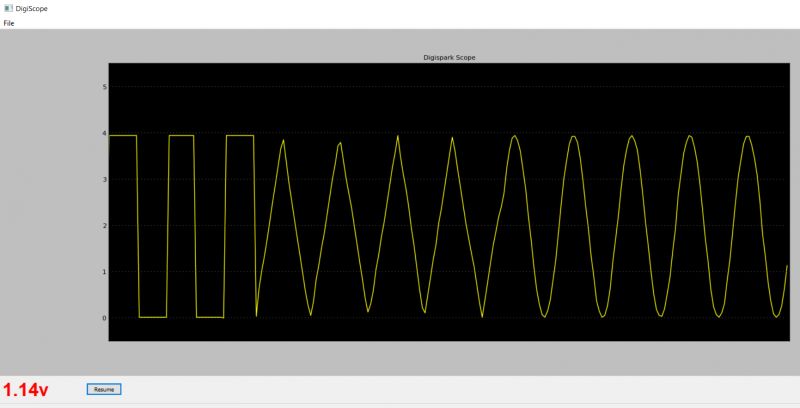
The analog signal is given on P2 (input voltage range 0-4.75v).
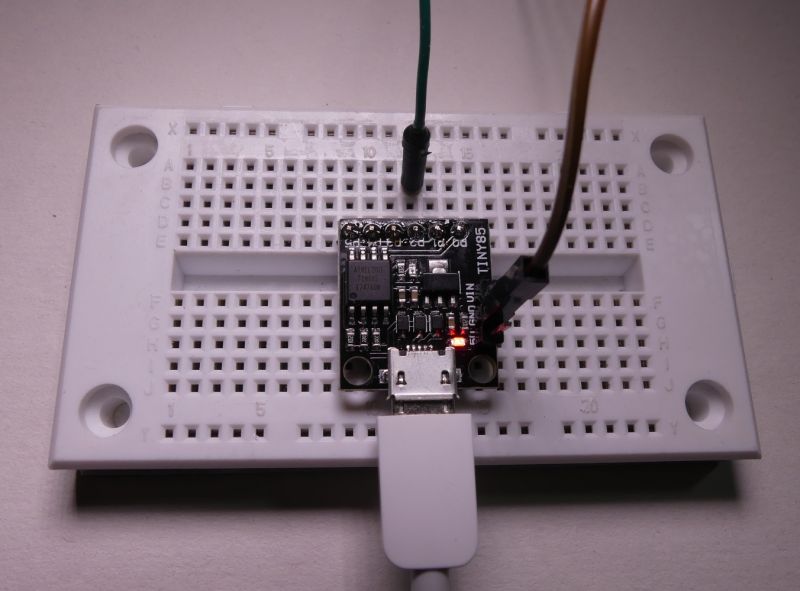
Using the tools https://github.com/digistump/DigisparkExamplePrograms (DigiUSB -> windows -> digiscope.exe) we can observe the analog signal given on pin P2. The 1Hz waveform is recorded below.
Depending on the program, digispark, when connected to USB, can emulate a keyboard (example with an I2C scanner), mouse, joystick, serial port. The advantage of the module are small dimensions, the disadvantage may be a small number of pins, and the layout of pins that makes it difficult to use the module on the contact plate. Earlier digispark versions were available on PCBs with a track pattern forming a USB plug, which allowed the PCB to be directly inserted into the USB socket.
What are your applications for digispark modules?
Source:
http://digistump.com/
P0 (SDA, PWM, AREF)
P1 (PWM, LED)
P2 (D / A, SCK)
P3 (D / A, USB +)
P4 (D / A, PWM, USB-)
P5 (D / A)
Integration with Arduino:
We choose:
File-> Preferences-> field Additional URLs to the tile manager, add the line:
http://digistump.com/package_digistump_index.json
Tools-> Tile> Tile manager-> search for "digistump" and install Digistamp AVR Boards library.
We download and install the driver for the device:
https://github.com/digistump/DigistumpArduino/releases/download/1.6.7/Digistump.Drivers.zip
After installation, select Tools-> Board-> Digispark (16.5MHz)
Loading the program is different than with standard Arduino boards:
-compile the program and start uploading
-when appropriate information appears in the console, connect the Digispark board

Let's open the example of DigiSparkUSB-> DigiScope
We compile the example and upload it to the board.
The analog signal is given on P2 (input voltage range 0-4.75v).

Using the tools https://github.com/digistump/DigisparkExamplePrograms (DigiUSB -> windows -> digiscope.exe) we can observe the analog signal given on pin P2. The 1Hz waveform is recorded below.

Depending on the program, digispark, when connected to USB, can emulate a keyboard (example with an I2C scanner), mouse, joystick, serial port. The advantage of the module are small dimensions, the disadvantage may be a small number of pins, and the layout of pins that makes it difficult to use the module on the contact plate. Earlier digispark versions were available on PCBs with a track pattern forming a USB plug, which allowed the PCB to be directly inserted into the USB socket.
What are your applications for digispark modules?
Source:
http://digistump.com/
Cool? Ranking DIY


