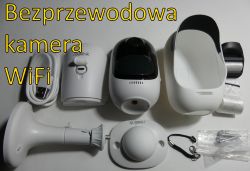
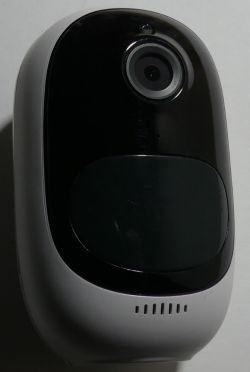
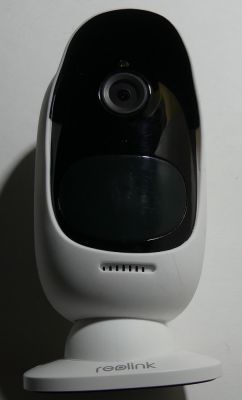
Piri made it available to us for testing 2.4GHz wireless WiFi camera reolink argus 2 . The term "wireless" is of key importance here, because the camera, apart from WiFi connectivity, is powered by a battery (5200mAh 3.6V) and can draw energy from a photovoltaic panel.
In the video below, we look inside the housing and test the capabilities of the device. The camera has seals that allow it to work outdoors, and a sensor that allows recording material in 1080p resolution. The PIR sensor detects movement and saves energy. Night vision is possible thanks to the IR illumination - the lens has a mechanically moved infrared filter. Video material can be saved on a microSD card (up to 64GB) placed in the camera slot.
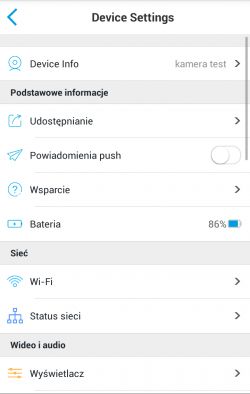
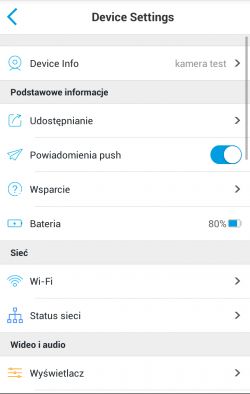
Easy installation and operation of the camera is possible in the smartphone application Piri StreamView , which allows you to preview live, as well as view the material stored on the SD card. The installation is accelerated by voice messages from the camera, scanning QR codes from the camera housing using the smartphone camera and the QR code displayed on the smartphone screen using the camera lens.
The built-in miniature speaker is surprisingly effective. As a curiosity - we can play an alarm sound from the camera's loudspeaker, and the default siren sound can be replaced with any recording. In addition, thanks to the built-in microphone and speaker, we can run two-way voice communication.
The voice information of the camera and the application interface are prepared in Polish. The interface of the application is easy to use, it requires minimal corrections in translation.
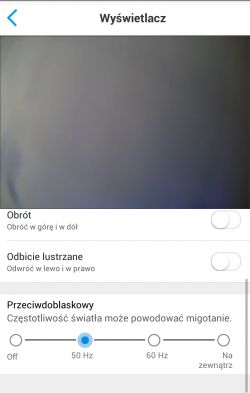

The device has a wide-angle lens, the transducer copes even with very strong sunlight . In the footage you will see a challenge to the compression used in the camera, where instead of a stationary frame, the camera was moved. Despite such a highly variable content of the image, the quality is sufficient. You can also see an improvement in video quality when stabilizing the frame. Video with a small amount of changes in the camera frame will be the standard mode of operation of the device mounted on the handle. However, even when, for example, leaves of a tree moving in the wind appear in the frame, video quality will not be a problem.

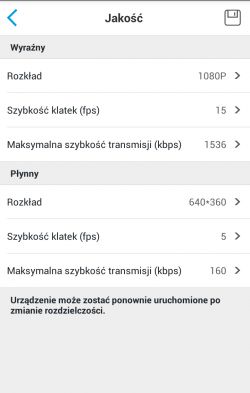
The default high quality setting is 1080p 15FPS, low resolution is 640x360 5FPS. When there is no WiFi connection, the camera still saves footage to the SD card. Recordings in low and high resolution are sent to the SD card in separate mp4 files. In the application, we can change the resolution settings. The maximum frame rate is 15FPS, low quality transmission takes ~150-200kb/s bandwidth, high quality ~1200-1500kb/s.
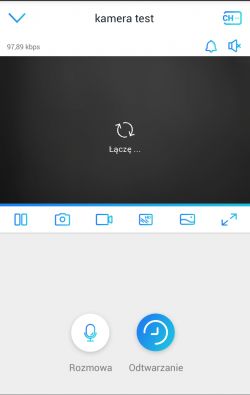
During the live view, the application allows you to take a photo or record video and audio. Camera mounting is facilitated by a magnetic holder or a version with a fixing screw. The magnetic holder allows you to quickly change the camera mounting location. The set also includes a strap for mounting on a tree or post.
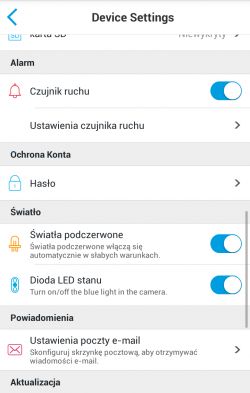
We can easily provide access to the camera to other users of the application using the QR code and access data. After 20 minutes of live view, the application informs about the camera going to sleep, which extends the battery life. We can resume the live view at any time, and the motion sensor watches over the activation of the camera when the PIR detects activity around the device. There is an option to send an e-mail alert when motion is detected.
CAMERA OPERATION AND CONSTRUCTION
The camera is powered by two Li-Ion batteries in the 18650 format, whose correct operation is supervised by the BMS. The manufacturer declares standby operation on the battery for up to 3 months or continuous viewing/recording for 16 hours.
Inside the battery housing, the I2C bus leads and the signal from the NTC temperature sensor are visible.
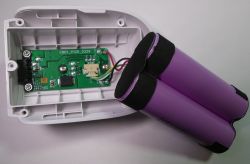
Opening the battery is a good time to check the current consumption in different camera modes. When making such measurements, remember not to cause a short-circuit on the battery, and use a current meter with minimal resistance, e.g. a current-voltage converter.
The measurement results are as follows:
- no WiFi card recording, IR off: current 345mA at 3.902V
- no WiFi card recording, IR on: current 625mA at 3.864V
- WiFi connection recording to the card, IR off: current 343mA at 3.900V
- WiFi connection recording to the card, IR on: current 623mA at 3.862V
As you can see, the state of the established connection does not have a large impact on power consumption,
it is important to turn on the IR backlight then the camera consumes ~625mA (power ~2.4W) in such conditions we can estimate the battery operation time for 7-8 hours.
In the absence of IR lighting, power consumption at the level of 345mA (~1.34W), estimated working time of continuous recording ~14-15 hours.
In standby mode (when the PIR sensor does not detect movement) and the WiFi connection is established, the camera consumes ~427uA (voltage 3.941V) which gives a power of 1-2mW. Observing the changes in current consumption over time, you can see cyclical current pins, this is probably WiFi communication in power saving mode.
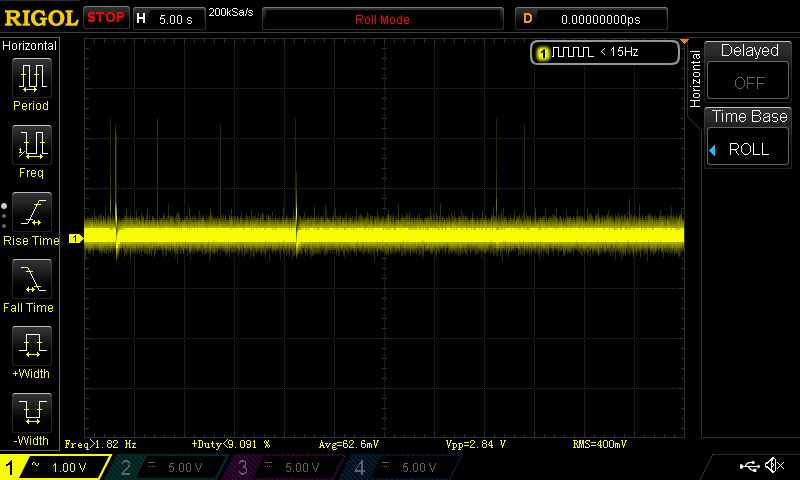
The low resolution in-app preview is:
-IR off: ~374mA at 3.880V -> ~1.45W
-IR on: ~662mA at 3.847V -> ~2.55W
The preview in the application high resolution is:
-IR off: ~375mA at 3.881V -> ~1.45W
-IR on: ~641mA at 3.848V -> ~2.47W
Live view slightly increases power consumption by ~100-150mW.
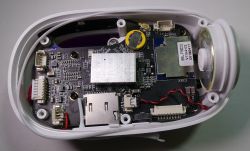
After opening the housing, you can see the seal, WiFi antenna glued to the housing, WiFi module, memory backup battery or RTC.
The housing shows the PIR motion sensor lens and the camera lens, as well as a miniature speaker.
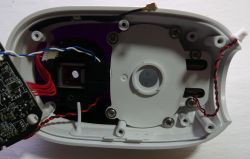
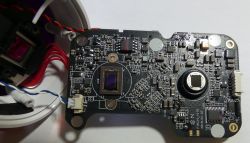
On the other side of the PCB, the PIR sensor and the matrix are visible. On the left side of the housing there is a mechanical infrared filter moved by an electromagnet.
It is definitely not a typical IP camera known from CCTV monitoring. The device focuses on energy efficiency, easy installation and operation. Plus, this compact camcorder is definitely multi-functional. The application allows you to view from several cameras at the same time. When the camera detects movement, we can receive a PUSH notification on the smartphone.

What applications do you see for this compact wireless WiFi camera?
Personally, I am not convinced by the use of a camera at the front door, especially when using a magnetic holder, such a camera could change its owner quite quickly. The solution may be to install the camera at the appropriate height, making it difficult to access the camera.
I like the quick and easy assembly that virtually anyone can do. A camera left at home can allow you to check the reason for the alarm, check the activity of pets, as well as verify information about a sudden storm, flooding, etc.
This functionality can be especially useful on vacation, giving you the opportunity to check what is happening in the apartment.
The camera can be left in the room when we make the apartment available to the renovation team, perhaps not everyone likes to work under the watchful eye of the camera, but after all it is our home. Another idea for using the device, and especially the two-way voice communication function, is the quick installation of the camera in technical rooms, server rooms, etc. We can supervise the work of the installation team, and, if necessary, quickly communicate with employees or colleagues staying in the technical room. The motion sensor will inform us about the start of work.
It's worth getting acquainted with the presentations on the channel YT Piri :
[ADVERTISING COLLABORATION]
In the video below, we look inside the housing and test the capabilities of the device. The camera has seals that allow it to work outdoors, and a sensor that allows recording material in 1080p resolution. The PIR sensor detects movement and saves energy. Night vision is possible thanks to the IR illumination - the lens has a mechanically moved infrared filter. Video material can be saved on a microSD card (up to 64GB) placed in the camera slot.
Easy installation and operation of the camera is possible in the smartphone application Piri StreamView , which allows you to preview live, as well as view the material stored on the SD card. The installation is accelerated by voice messages from the camera, scanning QR codes from the camera housing using the smartphone camera and the QR code displayed on the smartphone screen using the camera lens.
The built-in miniature speaker is surprisingly effective. As a curiosity - we can play an alarm sound from the camera's loudspeaker, and the default siren sound can be replaced with any recording. In addition, thanks to the built-in microphone and speaker, we can run two-way voice communication.
The voice information of the camera and the application interface are prepared in Polish. The interface of the application is easy to use, it requires minimal corrections in translation.


The device has a wide-angle lens, the transducer copes even with very strong sunlight . In the footage you will see a challenge to the compression used in the camera, where instead of a stationary frame, the camera was moved. Despite such a highly variable content of the image, the quality is sufficient. You can also see an improvement in video quality when stabilizing the frame. Video with a small amount of changes in the camera frame will be the standard mode of operation of the device mounted on the handle. However, even when, for example, leaves of a tree moving in the wind appear in the frame, video quality will not be a problem.

The default high quality setting is 1080p 15FPS, low resolution is 640x360 5FPS. When there is no WiFi connection, the camera still saves footage to the SD card. Recordings in low and high resolution are sent to the SD card in separate mp4 files. In the application, we can change the resolution settings. The maximum frame rate is 15FPS, low quality transmission takes ~150-200kb/s bandwidth, high quality ~1200-1500kb/s.


During the live view, the application allows you to take a photo or record video and audio. Camera mounting is facilitated by a magnetic holder or a version with a fixing screw. The magnetic holder allows you to quickly change the camera mounting location. The set also includes a strap for mounting on a tree or post.


We can easily provide access to the camera to other users of the application using the QR code and access data. After 20 minutes of live view, the application informs about the camera going to sleep, which extends the battery life. We can resume the live view at any time, and the motion sensor watches over the activation of the camera when the PIR detects activity around the device. There is an option to send an e-mail alert when motion is detected.
CAMERA OPERATION AND CONSTRUCTION
The camera is powered by two Li-Ion batteries in the 18650 format, whose correct operation is supervised by the BMS. The manufacturer declares standby operation on the battery for up to 3 months or continuous viewing/recording for 16 hours.
Inside the battery housing, the I2C bus leads and the signal from the NTC temperature sensor are visible.

Opening the battery is a good time to check the current consumption in different camera modes. When making such measurements, remember not to cause a short-circuit on the battery, and use a current meter with minimal resistance, e.g. a current-voltage converter.
The measurement results are as follows:
- no WiFi card recording, IR off: current 345mA at 3.902V
- no WiFi card recording, IR on: current 625mA at 3.864V
- WiFi connection recording to the card, IR off: current 343mA at 3.900V
- WiFi connection recording to the card, IR on: current 623mA at 3.862V
As you can see, the state of the established connection does not have a large impact on power consumption,
it is important to turn on the IR backlight then the camera consumes ~625mA (power ~2.4W) in such conditions we can estimate the battery operation time for 7-8 hours.
In the absence of IR lighting, power consumption at the level of 345mA (~1.34W), estimated working time of continuous recording ~14-15 hours.
In standby mode (when the PIR sensor does not detect movement) and the WiFi connection is established, the camera consumes ~427uA (voltage 3.941V) which gives a power of 1-2mW. Observing the changes in current consumption over time, you can see cyclical current pins, this is probably WiFi communication in power saving mode.

The low resolution in-app preview is:
-IR off: ~374mA at 3.880V -> ~1.45W
-IR on: ~662mA at 3.847V -> ~2.55W
The preview in the application high resolution is:
-IR off: ~375mA at 3.881V -> ~1.45W
-IR on: ~641mA at 3.848V -> ~2.47W
Live view slightly increases power consumption by ~100-150mW.
After opening the housing, you can see the seal, WiFi antenna glued to the housing, WiFi module, memory backup battery or RTC.

The housing shows the PIR motion sensor lens and the camera lens, as well as a miniature speaker.

On the other side of the PCB, the PIR sensor and the matrix are visible. On the left side of the housing there is a mechanical infrared filter moved by an electromagnet.

It is definitely not a typical IP camera known from CCTV monitoring. The device focuses on energy efficiency, easy installation and operation. Plus, this compact camcorder is definitely multi-functional. The application allows you to view from several cameras at the same time. When the camera detects movement, we can receive a PUSH notification on the smartphone.


What applications do you see for this compact wireless WiFi camera?
Personally, I am not convinced by the use of a camera at the front door, especially when using a magnetic holder, such a camera could change its owner quite quickly. The solution may be to install the camera at the appropriate height, making it difficult to access the camera.
I like the quick and easy assembly that virtually anyone can do. A camera left at home can allow you to check the reason for the alarm, check the activity of pets, as well as verify information about a sudden storm, flooding, etc.
This functionality can be especially useful on vacation, giving you the opportunity to check what is happening in the apartment.
The camera can be left in the room when we make the apartment available to the renovation team, perhaps not everyone likes to work under the watchful eye of the camera, but after all it is our home. Another idea for using the device, and especially the two-way voice communication function, is the quick installation of the camera in technical rooms, server rooms, etc. We can supervise the work of the installation team, and, if necessary, quickly communicate with employees or colleagues staying in the technical room. The motion sensor will inform us about the start of work.
It's worth getting acquainted with the presentations on the channel YT Piri :
[ADVERTISING COLLABORATION]
Cool? Ranking DIY


