Elektroda.com
Elektroda.com
X

How to repair a laptop power supply? What is the danger? Breaking wire

tomybb 8697 21
This content has been translated flag-pl » flag-en View the original version here.
  • How to repair a laptop power supply? What is the danger? Breaking wire

    In fact, I thought about publishing this material here on the forum for quite a long time. My concerns relate to the safety of such a repair. However, while browsing the internet, a dozen or so pages presenting a similar activity and the number of sold DC power cords for laptops, I decided that maybe it is worth including it, but at the same time sensitize to the danger of such an "operation". In my opinion, too few people paid attention to it in the materials I read. The danger I am writing about is the correct, later assembly of the plastic housing. It is worth mentioning at once that no manufacturer of a device equipped with such a power supply allows any interference, repair, etc. of this element. In the event of any damage, only complete replacement. No item, component or wire appears in the "part list" of the service manual. Of course, one can argue whether this is the right way, or is it not better to just use dismountable power supplies? It's just that the manufacturer does not have any interest in this, and we are left with what we have. :) Although a few times I have already encountered similar designs, where there were screws, but it's a rarity. If we do not find any screws under all stickers / feet, it only means that the housing of our power supply has been ultrasonically welded.

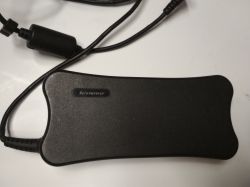
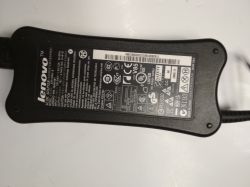
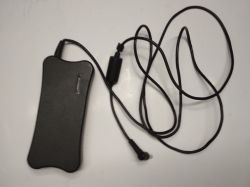
    The power supply presented here comes from the Lenovo laptop model, its exact designations are: ADP-90RH B. Damage is the periodic interruption of charging. We have a blue LED here that indicates the presence of voltage. So you can immediately suspect that the problem may be somewhere at the output of the power supply. Of course, to suspect, because the voltage signaling by means of a lit diode does not always mean 100% power efficiency.
    How to repair a laptop power supply? What is the danger? Breaking wire How to repair a laptop power supply? What is the danger? Breaking wire How to repair a laptop power supply? What is the danger? Breaking wire


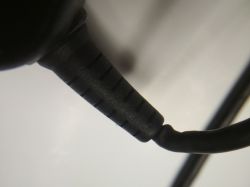
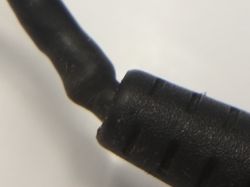
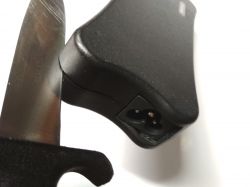
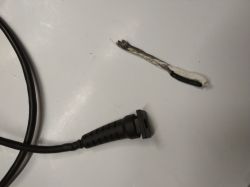
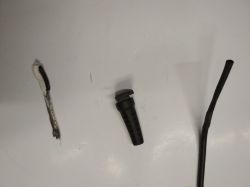
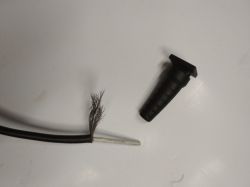
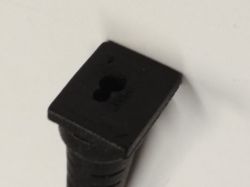
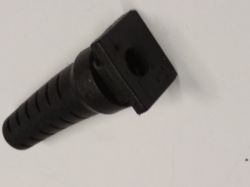
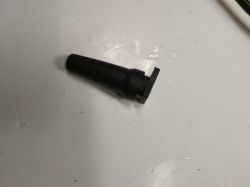
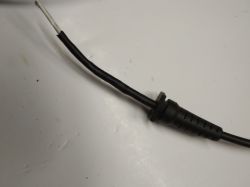
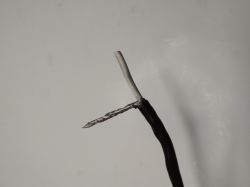
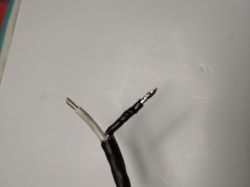
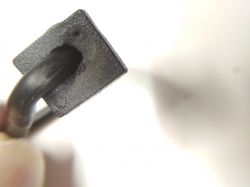
    An in-depth examination, which must always be done first, shows our problem. A interrupting cable, unfortunately in the worst, but at the same time the most common place - right next to the bend at the housing. Sometimes it can happen that a damaged wire will short-circuit the two wires inside. Therefore, it is not worth "bothering" such a "patient" for too long in the event of a defect.
    How to repair a laptop power supply? What is the danger? Breaking wire How to repair a laptop power supply? What is the danger? Breaking wire


    Another common place is at the plug itself - and in this case the repair is much simpler because we can replace the plug itself without having to take the whole thing apart.

    Unfortunately, we have to separate the casing, because it cannot be done in another way.

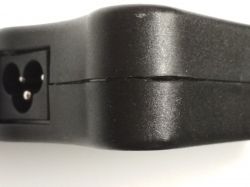
    We proceed to "disassembly". As mentioned earlier, let's first check if the manufacturer hasn't hidden any screws under the stickers or feet. If not, which is the vast majority, what you are about to see awaits us. :)

    Of course, we disconnect the power cord. It is worth noting that the high voltage inside the power supply will persist even for several seconds after disconnecting the 230V cable. Check how long the LED is still on.

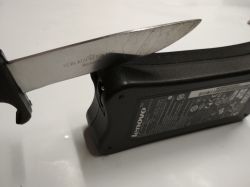
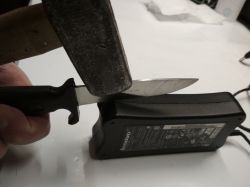
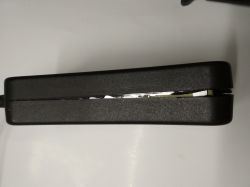
    One of the methods I know, for a reasonably "nice" and correct disassembly of such a housing, is to position the blade of a knife, preferably a decent one, in the gap between the halves and hitting the knife with a hammer. You do not need to use a lot of force, piece by piece, this way we can open the non-dismountable housing. It should be remembered that the entire operation should be carried out on a stable, hard surface that will not spring due to impacts. A good place is the top right above the table leg. If we overdo it, we will damage the casing or the components inside.

    How to repair a laptop power supply? What is the danger? Breaking wire How to repair a laptop power supply? What is the danger? Breaking wire How to repair a laptop power supply? What is the danger? Breaking wire

    How to repair a laptop power supply? What is the danger? Breaking wire How to repair a laptop power supply? What is the danger? Breaking wire How to repair a laptop power supply? What is the danger? Breaking wire


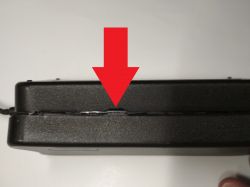
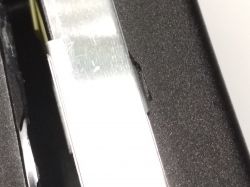
    As you can see, this method managed to open with virtually no damage. The only slight flaw visible in the marked place. After folding the two halves, everything will fold without a trace. We don't have any dents or broken pieces of plastic here.

    How to repair a laptop power supply? What is the danger? Breaking wire How to repair a laptop power supply? What is the danger? Breaking wire


    Another way of demolition is to saturate the connection points with a small amount of gasoline. A few drops. Wait a while, then the seal "lets go" and you can easily separate the two parts. With this method, however, you should follow safety rules, remember about the flammability of the product and ensure adequate ventilation. It's best to wait some time before doing anything until everything evaporates outside the room. I also read about cases where gasoline began to react also with the plastic casing.

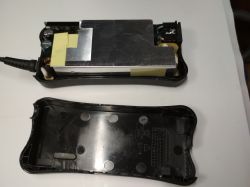
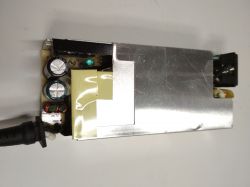
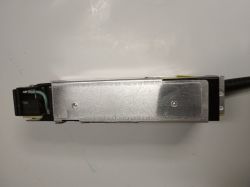
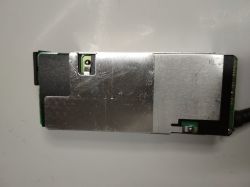
    The interior of our device is as follows.
    How to repair a laptop power supply? What is the danger? Breaking wire How to repair a laptop power supply? What is the danger? Breaking wire How to repair a laptop power supply? What is the danger? Breaking wire


    Important note here, depending on the design solution on the metal outer parts, heat sinks, dangerous voltage may occur. It depends on the manufacturer, but it is worth not checking it on your own body.

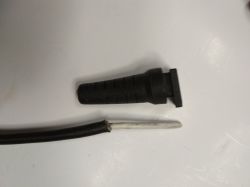
    At this point, we can buy a new DC cable and simply replace it in the world. However, I made my task difficult and used the old one. It should be mentioned right away that it is not worth doing this if you see that the cable is already quite "tired" along its entire length. Then we will add the work unnecessarily a second time. For me, however, 1/3 of the cable was fine, so I only left this one. And it was very long, and shortening it significantly did not stop, and maybe helped. :) But we don't cut this part off right away. It will also be useful for mechanically pulling the cable through the strain relief. We take the "gum", sometimes more force is required to do this. By the way, you can see how our "cable" is built. One pole is the screen.

    How to repair a laptop power supply? What is the danger? Breaking wire How to repair a laptop power supply? What is the danger? Breaking wire How to repair a laptop power supply? What is the danger? Breaking wire


    Some of the insulation may be left with bends inside, the factory holes in it will in most cases be too small to push the old wire back through. You can also try to drag it further, before you download it, but it will also be much more difficult.

    How to repair a laptop power supply? What is the danger? Breaking wire How to repair a laptop power supply? What is the danger? Breaking wire How to repair a laptop power supply? What is the danger? Breaking wire


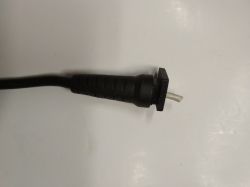
    Most often, you need to enlarge the hole in the "rubber" a bit so that the cable fits. However, it is worth making as small as possible, just to be able to pass the cable through. For convenience, you can cut a screen from a piece of the initial part, so that the beginning is thinner. Only after it is completely stretched, we cut off the unnecessary piece. That is why it is worth not to cut off "ready" at once, so as not to damage the mechanically proper part of the "cable". You also have to pay attention to how the strain relief was arranged in the housing - it is not always symmetrical.
    How to repair a laptop power supply? What is the danger? Breaking wire How to repair a laptop power supply? What is the danger? Breaking wire How to repair a laptop power supply? What is the danger? Breaking wire


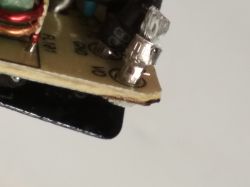
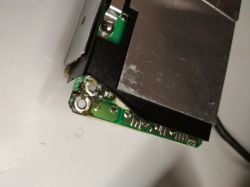
    We prepare the wires. I did as it was originally, the screen was twisted, additionally secured with a heat-shrinkable sleeve. In the original, the wires were crimped and soldered to the "connector". Here, after whitening the tips, I solder directly to the PCB. Of course, we remember about the appropriate polarity. Of course, we cut off the excess.
    How to repair a laptop power supply? What is the danger? Breaking wire How to repair a laptop power supply? What is the danger? Breaking wire

    How to repair a laptop power supply? What is the danger? Breaking wire How to repair a laptop power supply? What is the danger? Breaking wire


    You still need to secure the cable against pulling out. There are different methods, some use cable ties, others just make a knot in the cable. I am not going to suggest anything, but you have to do it right, in the right place. In addition to the mechanical anti-pullout feature, it must also be secured against rotation, which is also undesirable. The cable is now not permanently connected to the strain relief, so such situations may arise. Glue is probably the best here. You just need to pay attention to its temperature properties (the power supply will heat up) and prevent it from flowing out of the outside.
    How to repair a laptop power supply? What is the danger? Breaking wire


    Of course, all these activities are eliminated when we buy and replace only a dedicated cable for our equipment model.

    We only have to assemble the housing correctly ...

    Well, I left three dots to give you a chance to show off. What are your ways to correctly, reliably and, above all, safely connect these two plastic parts?

    The conditions in which the equipment works should be taken into account. We have a portable device here, which is definitely a notorious change of place, frequent falls, but also a higher temperature inside, etc. It must be done safely and securely. The ways I found on the web are: use of glue, wide heat shrink tubing, welding, wrapping with tape. I must admit that welding looks the most reliable, but we must have a suitable (the same as the housing material) binder. And do it reliably. A different welding machine than one based on hot air - ultrasonic - rather, the average electronics engineer, amateur or even service technician does not have. At least not everyone. But definitely the worst the way I think is to use only electrical tape. Whatever it is, even the best will degrade over time, it will start to peel off due to constant movement, shifting, etc. It is worth mentioning that nowadays laptops (although similar power adapters are not only in them) are used by several-year-old children. And the children know. Curiosity and they are already starting to "scrape" that tape. A moment of inattention and they will be interested in what is in this black forest. The tragedy is ready! But of course not only children are at risk. Therefore, I believe that too many people underestimate this problem in this type of repair. Sometimes it is not worth the risk and if we are not sure about the safety, for many people it will be a much better choice, however, to buy a new power supply.

    Let's remember:
    CAUTION!! INCORRECT CONNECTION OF THE PLASTIC PARTS OF THE HOUSING RISK OF SHOCK!


    I am counting on you and your ways here. Can it be connected solid, safely and securely, just like after leaving the factory?

    Cool? Ranking DIY
    About Author
    tomybb
    Level 26  
    Offline 
    tomybb wrote 1673 posts with rating 1530, helped 3 times. Been with us since 2006 year.
  • #2
    szeryf3
    Level 26  
    I move the cable through the strain relief, using a little cream.
  • #3
    tomybb
    Level 26  
    How do you secure the cable later so as not to tear it out?
  • #4
    Olkus
    Level 31  
    szeryf3 wrote:
    I slide the cord through the tip, using a little cream.

    Oil is better in my opinion. For me, the power supply (also Lenovo) had a blue diode inside, so that it was not visible outside whether it was lit or not :D The Chinese probably forgot to make a hole in the housing for the LED.

    tomybb wrote:
    How do you secure the cable later so as not to tear it out?

    Cable tie + hot glue.

    Greetings,
    AND.
  • #5
    pier
    Level 24  
    I only open such cases with a hammer. The housing is edged and lightly seamed. It comes off after a few hits and I stick such an open casing practically without a trace. After using a knife or screwdriver, the housing halves will never fit perfectly and it will be ugly.
  • #6
    viwaldi1
    Level 24  
    pier wrote:
    [...] After using a knife or screwdriver, the housing halves will never fit perfectly together and it will be ugly.

    I mask the traces of opening / gluing with a strip of black heat-shrinkable self-adhesive foil. I used to buy one from the automotive one for wrapping thresholds, but I use it basically only for power supplies ;)
  • #8
    Jacekser
    Level 23  
    I squashed, or rather swelled, the casing in a vice with feeling. The casing is grabbed by the sides at the corners and lightly squeezed so that the upset side is on top. You need a vise with a fairly long jaw opening for the long side. Of course, you have to use narrow screwdrivers and a knife to help "the side fall apart". Sometimes a strain relief had to be drilled with a drill to get rid of the section of the damaged wire welded by the external insulation. After a successful (sometimes) repair, I closed the casing by wrapping it with insulating tape (mostly glued ones, without latches).
  • #9
    siewcu
    Level 34  
    I took the replacement cables from other power supplies, also damaged ;) Visual inspection, checking the transition with a multimeter when bending in all possible directions and to the power supply. Although there was another problem more often - soldering points of the 230V power socket disconnected from the PCB. This is a bigger problem.
  • #10
    PPK
    Level 28  
    I would check if there is a breakdown of the primary voltage to the secondary one. In the customer's nice equipment, the neon lamp was on + 19V. Leakage current to PE, approx 8mA. Of course, the power supply itself only P and N.
  • #11
    ^ToM^
    Level 41  
    pier wrote:
    I only open such cases with a hammer. The housing is edged and lightly seamed. It comes off after a few hits and I stick such an open casing practically without a trace. After using a knife or screwdriver, the housing halves will never fit perfectly and it will be ugly.


    I open that too. When you hit the right place with a hammer, it opens itself without damage.
    At the beginning, I opened a few old power supplies for practice.
  • #12
    Droga Meczna
    Level 11  
    tomybb wrote:
    What are your ways to correctly, reliably and, above all, safely connect these two plastic parts?

    I used automotive epoxy for gluing. He's been holding on for six months now.
  • #13
    romarcin
    Level 17  
    PPK wrote:
    I would check if there is a breakdown of the primary voltage to the secondary one. In the customer's nice equipment, the neon lamp was on + 19V. Leakage current to PE, approx 8mA. Of course, the power supply itself only P and N.

    This is a normal phenomenon in ungrounded power supplies ("eight" socket) and it depends in what position you put the plug into the 230V socket. In switched mode power supplies, the ground of the secondary side is connected to the ground of the primary side by a capacitor 1 - 2.2 nF, the flow of microamperes through it causes the neon lamp to light up, and an unpleasant "tingling" in the hand, when, for example, you connect the satellite antenna cable to a switched receiver.
  • #14
    McMarycha
    Level 31  
    You can also use agents such as "label remover", which dissolve the glue, to open the cases. Apparently gasoline also works, but I have no experience with it.
  • #16
    wesmar
    Level 22  
    I professionally open power supplies, because I make modifications to the CC-CV with modifications to the voltage divider + hall, sometimes different and the best method for me is the appropriate proportions of transformer oil with toluene, xylene, trimethylbenzene, acetone. I have come to perfection in this and the reassembly and cleaning is IPA + glue toluene like PS case, CA like ABS. I water the mixture with a 5 cm? syringe and the thin one with a pharmacy needle. Super perfect, no spatter. You have to wait 2-4 minutes (repeat after 2) and suck with large suction cups with levers, purchased on ALI as a full set for removing glass. You can't do it better mechanically. The glue must swell. Those glued on CA - it would be ideal to stick with the debonder or create it yourself based on H2SO4, because it is quite expensive. However, suction cups with handles mechanically handle the penetration of the mixture in the place of the weld and it is very good.
  • #17
    ^ToM^
    Level 41  
    Droga Meczna wrote:
    tomybb wrote:
    What are your ways to correctly, reliably and, above all, safely connect these two plastic parts?

    I used automotive epoxy for gluing. He's been holding on for six months now.


    After repair, most of the housings are permanently sealed with a regular droplet. If you had to open it again then there is no problem.

    Added after 3 [minutes]:

    wesmar wrote:
    You can't do it better mechanically.


    You will. One shot with a hammer in the right place and the case opens in two equal parts. No damage and can be resealed on the glue.
    These chemicals you have administered are now recognized as highly carcinogenic and I do not recommend anyone to use and inhale them.
  • #18
    jedrzej10
    Level 14  
    Hello,

    My patent for opening the case is crushing in a vice. I place the power supply half in a vice and twist until the connection releases.
    Of course, I protect the edges from scratching.

    greetings
  • #19
    wesmar
    Level 22  
    ^ToM^ wrote:
    These chemicals you have administered are now recognized as highly carcinogenic and I do not recommend anyone to use and inhale them.

    True, they are minimally carcinogenic and genotoxic, but at such concentration and time of application, they are negligible with adequate awareness. Orlen oil is free of polychlorinated biphenyls (PCBs). With this "shot" it goes a lot to open, but the LLC's Dellow's converters are hard (those VI energy level), the splinters are on the seams, I have never managed to open the "elliptical" with two seams. Chemically, I just do it exactly.
  • #20
    William Bonawentura
    Level 33  
    wesmar wrote:
    The chemicals you have administered are currently considered highly carcinogenic and I do not recommend anyone else to use and inhale them.

    Rubber gloves + ventilation.
  • #21
    Anonymous
    Level 1  
  • #22
    YO8CDQ
    Level 1  
    Eu am desfacut zeci de carcase de surse de alimentare pentru laptop prin metoda taierii cu o panza subtire (pentru metale de inox). Dupa ce repar defectiunea inchid cutia la loc intr-o menghina portabila si totodata lipesc cu ciocanul de lipit tip " pistol de 100W " toate imbinarile. Nu trebuie nici un adaus de plastic, cutia se lipeste foarte bine. Pana la o alta interventie dureaza timp mult. Este o metoda practica rapida si eficienta pe care o recomand tuturor. Spor la treaba- Kuchta YO8CDQ