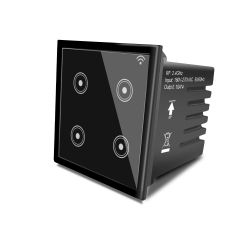
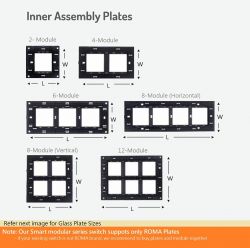
Protium 4 Gang ON/Off Modular Smart Switch, Fit on 2 Module of Roma Plate for Indian homes.
This device has WB3S (BK7231T) chip and TuyaMCU
Product Images
How to open
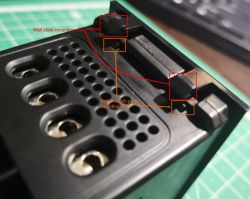
The switch touch plate is mounted to the housing with 4 clips, 2 on each sides. Gently press the clips inside and then push out towards the touch plate
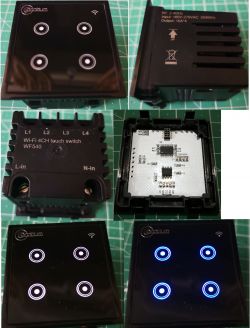
Teardown WB3S is sandwiched between the relay board and the TuyaMCU board
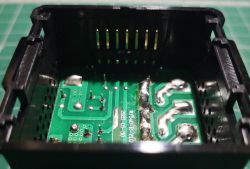
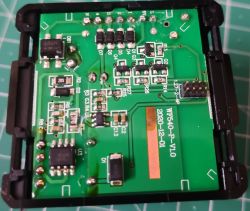
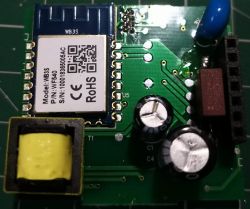
FTDI USB to TTL Serial
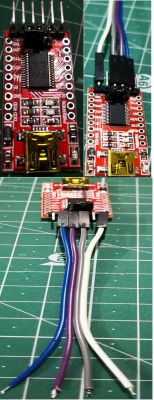
Board View
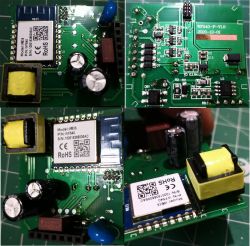
Pre-tin the pads
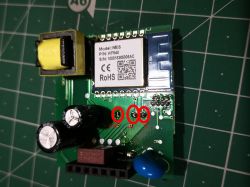
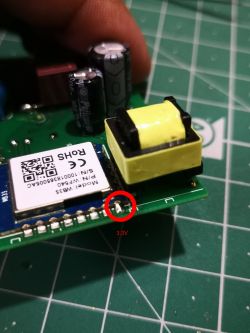
Solder the jumper cables
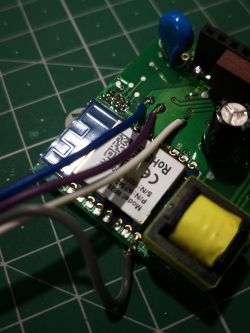
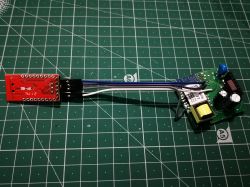
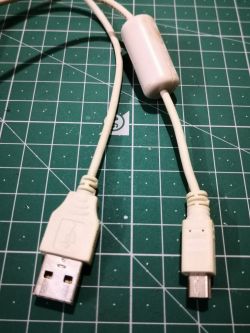
Preparing to upload the OpenBK7231T firmware
Download the last firmware from here https://github.com/openshwprojects/OpenBK7231T_App/releases
Connect the FTDI to the computer
Upload the firmware
I use ArchLinux, execute the below command, change the firmware and the serial port accordingly
When executing for the first time, it will fail as below.

Execute the command again, this time as soon as you execute the command, need to power cycle the device, do not RESET the device.
Power cycle the device by disconnecting the 3.3v power line and not GND, I use the jumper on the FTDI adapter.


Restart the device, connect to the access point and open the device page.
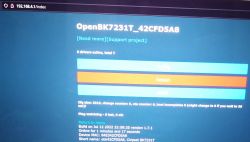
Configure the device
Create a file call autoexec.bat with below content
Click on Config and then click on Launch Web Application
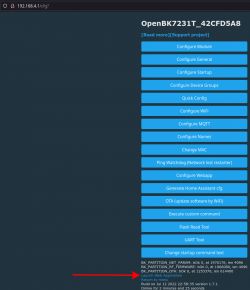
From the new tab, click on Filesystem
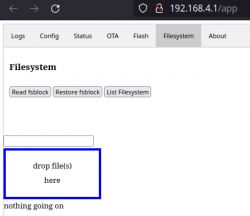
Drag and drop the autoexec.bat file as shown below.

Click on OTA and then click on Reboot
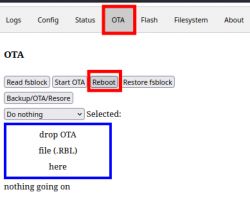
Configure WiFi and MQTT
My Home Assistant configuration
This device has WB3S (BK7231T) chip and TuyaMCU
Product Images


How to open

The switch touch plate is mounted to the housing with 4 clips, 2 on each sides. Gently press the clips inside and then push out towards the touch plate
Teardown WB3S is sandwiched between the relay board and the TuyaMCU board


FTDI USB to TTL Serial

Board View

Pre-tin the pads


Solder the jumper cables


Preparing to upload the OpenBK7231T firmware
Download the last firmware from here https://github.com/openshwprojects/OpenBK7231T_App/releases
Connect the FTDI to the computer
Upload the firmware
I use ArchLinux, execute the below command, change the firmware and the serial port accordingly
Code: Bash
When executing for the first time, it will fail as below.

Execute the command again, this time as soon as you execute the command, need to power cycle the device, do not RESET the device.
Power cycle the device by disconnecting the 3.3v power line and not GND, I use the jumper on the FTDI adapter.


Restart the device, connect to the access point and open the device page.

Configure the device
Create a file call autoexec.bat with below content
startDriver TuyaMCU

[inContentAd]

setChannelType 1 toggle
setChannelType 2 toggle
setChannelType 3 toggle
setChannelType 4 toggle


setChannelType 7 TextField
setChannelType 8 TextField
setChannelType 9 TextField
setChannelType 10 TextField

linkTuyaMCUOutputToChannel 1 1 1
linkTuyaMCUOutputToChannel 2 1 2
linkTuyaMCUOutputToChannel 3 1 3
linkTuyaMCUOutputToChannel 4 1 4
linkTuyaMCUOutputToChannel 7 2 7
linkTuyaMCUOutputToChannel 8 2 8
linkTuyaMCUOutputToChannel 9 2 9
linkTuyaMCUOutputToChannel 10 2 10
Click on Config and then click on Launch Web Application

From the new tab, click on Filesystem

Drag and drop the autoexec.bat file as shown below.

Click on OTA and then click on Reboot

Configure WiFi and MQTT
My Home Assistant configuration
switch:
  - platform: mqtt
    name: "obk-room-1 Wall Light"
    unique_id: "42CFE03F_1"
    icon: mdi:lightbulb
    availability:
      - topic: "obk-room-1/connected"
    state_topic: "obk-room-1/1/get"
    state_on: 1
    state_off: 0
    command_topic: "obk-room-1/1/set"
    payload_on: 1
    payload_off: 0
    qos: 1

  - platform: mqtt
    name: "obk-room-1 Ceiling Light"
    unique_id: "42CFE03F_2"
    icon: mdi:lightbulb
    availability:
      - topic: "obk-room-1/connected"
    state_topic: "obk-room-1/2/get"
    state_on: 1
    state_off: 0
    command_topic: "obk-room-1/2/set"
    payload_on: 1
    payload_off: 0
    qos: 1

  - platform: mqtt
    name: "obk-room-1 Ceiling Fan"
    unique_id: "42CFE03F_3"
    icon: mdi:fan
    availability:
      - topic: "obk-room-1/connected"
    state_topic: "obk-room-1/3/get"
    state_on: 1
    state_off: 0
    command_topic: "obk-room-1/3/set"
    payload_on: 1
    payload_off: 0
    qos: 1

  - platform: mqtt
    name: "obk-room-1 Socket"
    unique_id: "42CFE03F_4"
    icon: mdi:lightbulb
    availability:
      - topic: "obk-room-1/connected"
    state_topic: "obk-room-1/4/get"
    state_on: 1
    state_off: 0
    command_topic: "obk-room-1/4/set"
    payload_on: 1
    payload_off: 0
    qos: 1

number:
  - platform: mqtt
    name: "obk-room-1 Wall Light Countdown"
    unique_id: "42CFE03F_7"
    icon: mdi:cog-counterclockwise
    availability:
      - topic: "obk-room-1/connected"
    state_topic: "obk-room-1/7/get"
    command_topic: "obk-room-1/7/set"
    qos: 1

  - platform: mqtt
    name: "obk-room-1 Ceiling Light Countdown"
    unique_id: "42CFE03F_8"
    icon: mdi:cog-counterclockwise
    availability:
      - topic: "obk-room-1/connected"
    state_topic: "obk-room-1/8/get"
    command_topic: "obk-room-1/8/set"
    qos: 1

  - platform: mqtt
    name: "obk-room-1 Ceiling Fan Countdown"
    unique_id: "42CFE03F_9"
    icon: mdi:cog-counterclockwise
    availability:
      - topic: "obk-room-1/connected"
    state_topic: "obk-room-1/9/get"
    command_topic: "obk-room-1/9/set"
    qos: 1

  - platform: mqtt
    name: "obk-room-1 Socket Countdown"
    unique_id: "42CFE03F_10"
    icon: mdi:cog-counterclockwise
    availability:
      - topic: "obk-room-1/connected"
    state_topic: "obk-room-1/10/get"
    command_topic: "obk-room-1/10/set"
    qos: 1
Cool? Ranking DIY


