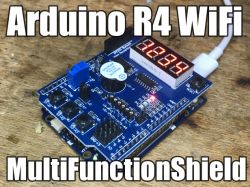
Today I will present the process of porting a library supporting MultiFunctionShield to Arduino R4 and briefly demonstrate its capabilities, i.e. displaying data on a 7-segment, 4-digit display and controlling the keyboard and buzzer. By the way, we will also see how you can implement a timer with an interrupt on R4 using fspTimer.h . This is enough to run this shield with the new Arduino.
MultiFunctionShield
The "multifunctional" shield is one of the cheapest Arduino accessories I know - you can buy it for less than PLN 10 on our Polish shipping portal:

The graphic comes from Github .
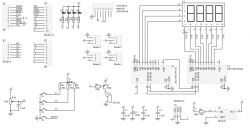
Diagram:
Actual look, some pics from me:
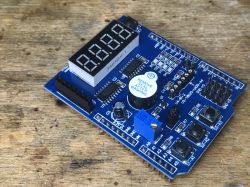
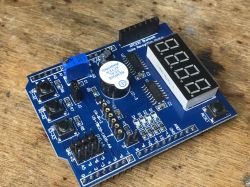
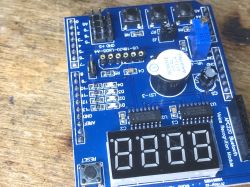
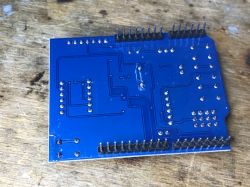
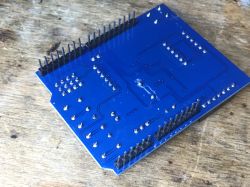
So you might wonder what it offers - basically not much:
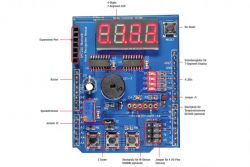
We have here:
- 7-segment display with 4 digits, controlled by two 74HC595D shift registers connected in cascade (so 3 GPIOs are needed for control)
- three buttons
- buzzer
- several LEDs
- potentiometer
- derived RESET button
- additional slots for various peripherals, IR receiver, DS18B20 temperature sensor, some other extensions
Some basic projects can be done on it. That's what we're going to try to do right now.
Attention! If you don't know how a shift register works or how a 7-segment display works, I recommend you to read other materials on this topic from our forum. Among other things, you can visit my old topic where I was running a similar display on an Arduino Uno R3:
Tuner 7 segment display, starting from Arduino, shift register
There I also discussed shiftOut, which is also used here.
Installing Multi Function Shield
On Arduino Uno R3, the one based on Atmeda, the whole process is very simple. Just install the library with the same name as shield, it is available in Library Manager:
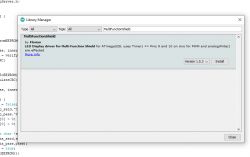
Unfortunately, it is not supported on R4. Even the Arduino IDE hides it specifically from us, because in the library settings (library.properties) is marked to work only on AVR:

Even if we force it open, it won't compile.
We'll need to port it to a new platform, but let's get to the code first.
This library is available on Github at:
https://github.com/coderfls/Arduino_MultiFunctionShield
In this topic, I will quote the code of this library, it is in accordance with its license - CC0
Overview of the MultiFunctionShield library
The downloaded libraries reside in the Arduino folder, for me it is:
C:\Users\Admin\Documents\Arduino\libraries\MultiFunctionShield\src
We have there e.g. library.properties file:

Let's see its contents:
name=MultiFunctionShield
version=1.5.3
author=Florian
maintainer=Florian
sentence=LED Display driver for Multi Function Shield
paragraph=for ATmega328, uses Timer1 => Pins 9 and 10 on Uno for PWM and analogWrite() are effected
category=Display
url=https://github.com/coderfls/Arduino_MultiFunctionShield
architectures=avr
includes=avr/interrupt.h
You will need to modify the architectures entry. Now let's go through the folders. There is only an example sketch in examples:
Code: C / C++
Pretty much everything in the code above should be self explanatory, but I'll cover it anyway:
Code: C / C++
In the above code, an object of the MultiFunctionShield class is created and its display multiplexing is started.
Code: C / C++
The above snippet just displays the given number on the shield's display.
It is worth remembering that the display multiplexing is constantly running in the background, because it has to refresh the display manually.
The rest of the demo of this shield should be clear, because these are ordinary operations on the Arduino GPIO, including the buzzer control.
Ok, back to the porting issue. Let's check the source code of this library first:

MultiFunctionShield class header:
Code: C / C++
The AVR interrupt header is already included here. It will need to be removed. There are also pins defined here (rigidly, because it is for this particular shield, so when we look for what is connected where, we have a cheat sheet here), and there is a class declaration ...
MultiFunctionShield class implementation:
Code: C / C++
Here you can see that the AVR timer was used for multiplexing. It is set in this snippet:
[syntax=c]
TCCR1A = 0; // Register loeschen
OCR1A = 1000; // Vergleichswert x = (CPU / (2 x Teiler x f)) - 1
TCCR1B |= (1
Cool? Ranking DIY Helpful post? Buy me a coffee.


