
logo elektroda
logo elektroda
X
logo elektroda

We're reviewing the Hot Air for 80 zł – STHOR 79371 – which heat gun is best for simple motherboard

p.kaczmarek2 900 1

TL;DR

  • The STHOR 79371 is a budget hot-air soldering station imported by TOYA, bought for just under 80 PLN and rated at 750 W with 100–500°C adjustment.
  • It was tested by removing PCB components with flux and a cold nozzle, then measuring real output with a thermocouple at 100°C, 350°C, and 450°C.
  • The display reads high: 350°C and 450°C were about 100°C below the probe, and 450°C on the STHOR matched roughly 350°C on a classic 858.
  • At 400°C it could remove SOIC8s in about 2 minutes, a large transistor with heatsink in 2.5 minutes, and a TQFP in under 3 minutes.
  • Inside, the station is very sparse, using a tiny SMPS, TM1650 display controller, Puya PY32F002B MCU, and triac-based heater control; it’s usable but not especially recommended.
Summary generated by AI based on the discussion content.
ADVERTISEMENT
This content has been translated flag-pl » flag-en View the original version here
📢 Listen (AI):
  • We're reviewing the Hot Air for 80 zł – STHOR 79371 – which heat gun is best for simple motherboard
    Today I’m putting the STHOR 79371 hot-air soldering station, a cheap model I bought for just under 80 PLN from a friend from university, through its paces. I’ll be testing how it performs in practice, taking measurements of the actual temperature recorded by a thermocouple at settings of 100°C, 350°C and 450°C, and finally I’ll take a look inside and show you its construction. Unfortunately, I don’t have any unboxing photos this time, as the owner had already unpacked the station and thrown the box away.
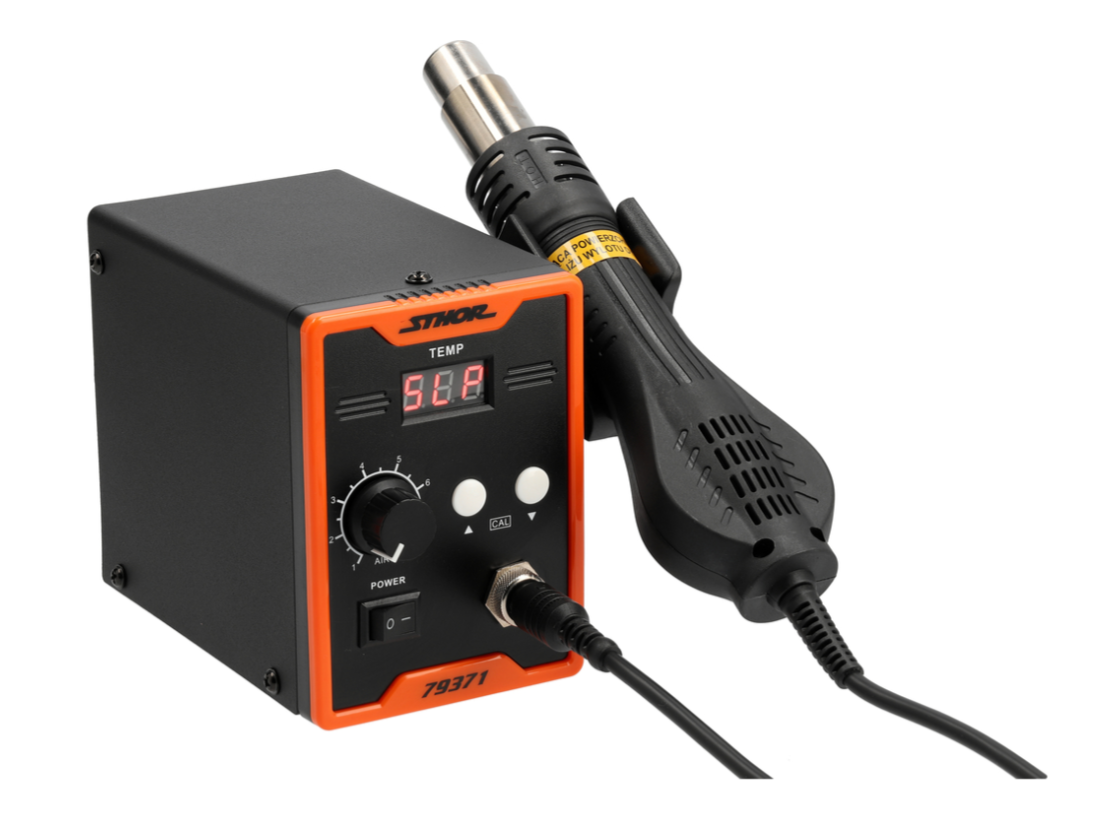
    So let’s start with the general information. The brand of this station is Sthor, manufacturer’s code 79371, although it is imported by TOYA. The rated power is 750 W, and the temperature can be adjusted from 100 to 500 degrees. Airflow up to 120 l/min. The handle features a brushless fan and a hibernation sensor.
    For around 70 zlotys, the set includes three nozzles, the station and a cable.
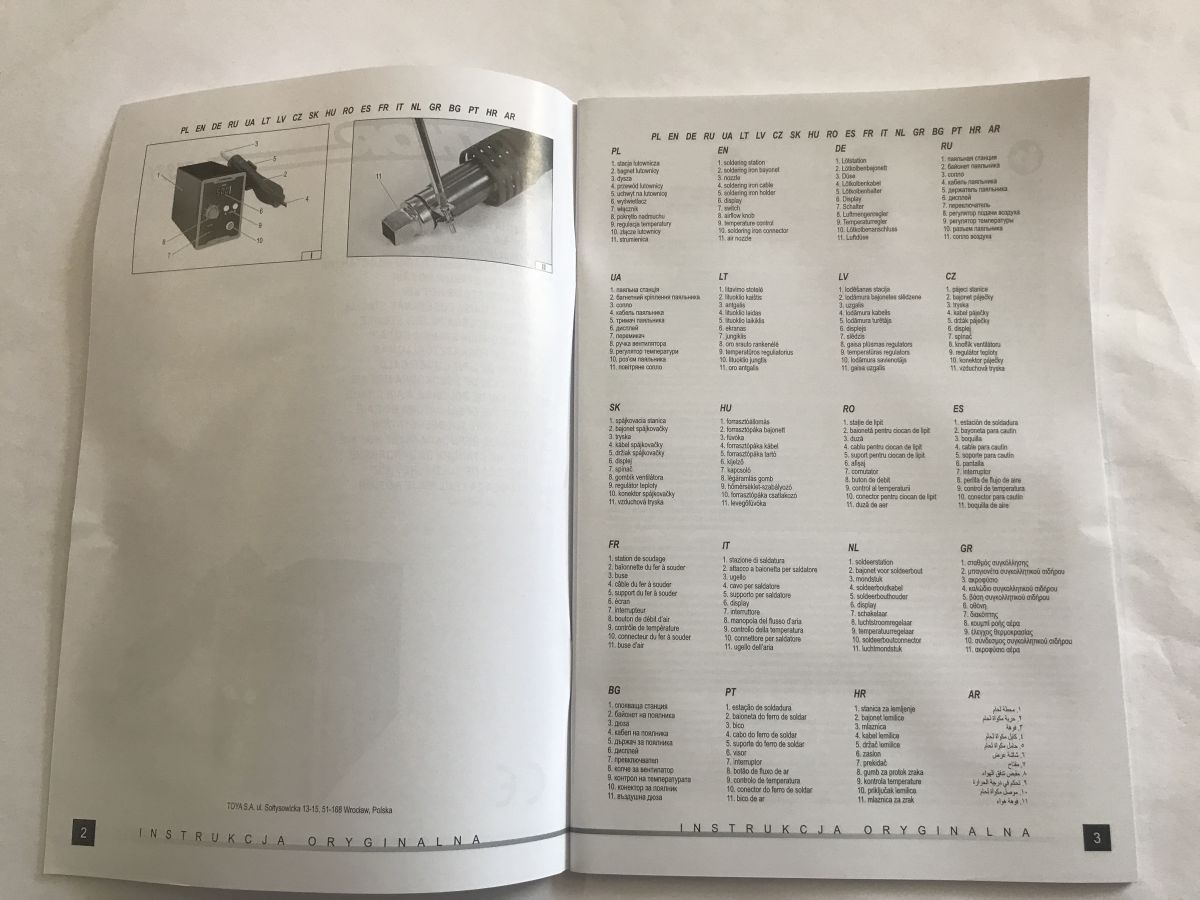
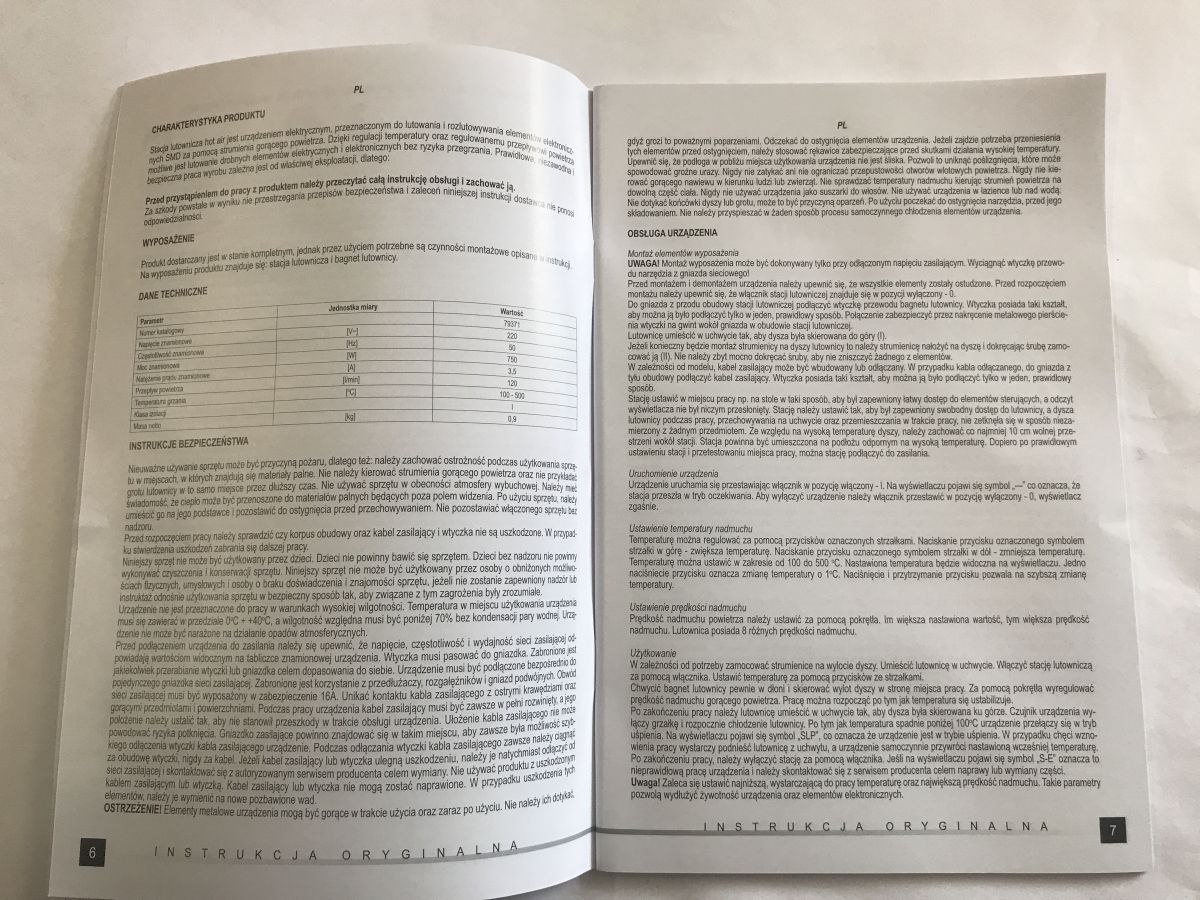
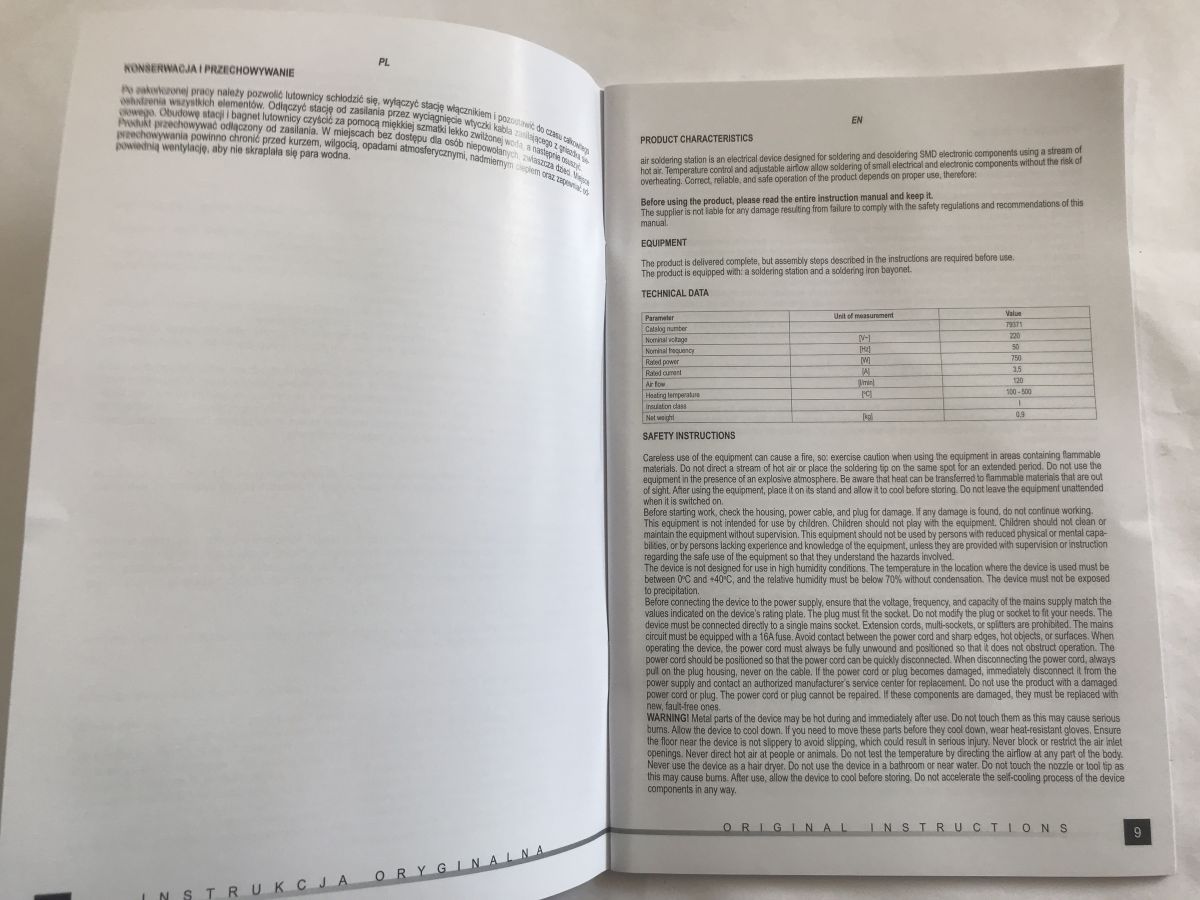
    We also have a manual, which I can show you:
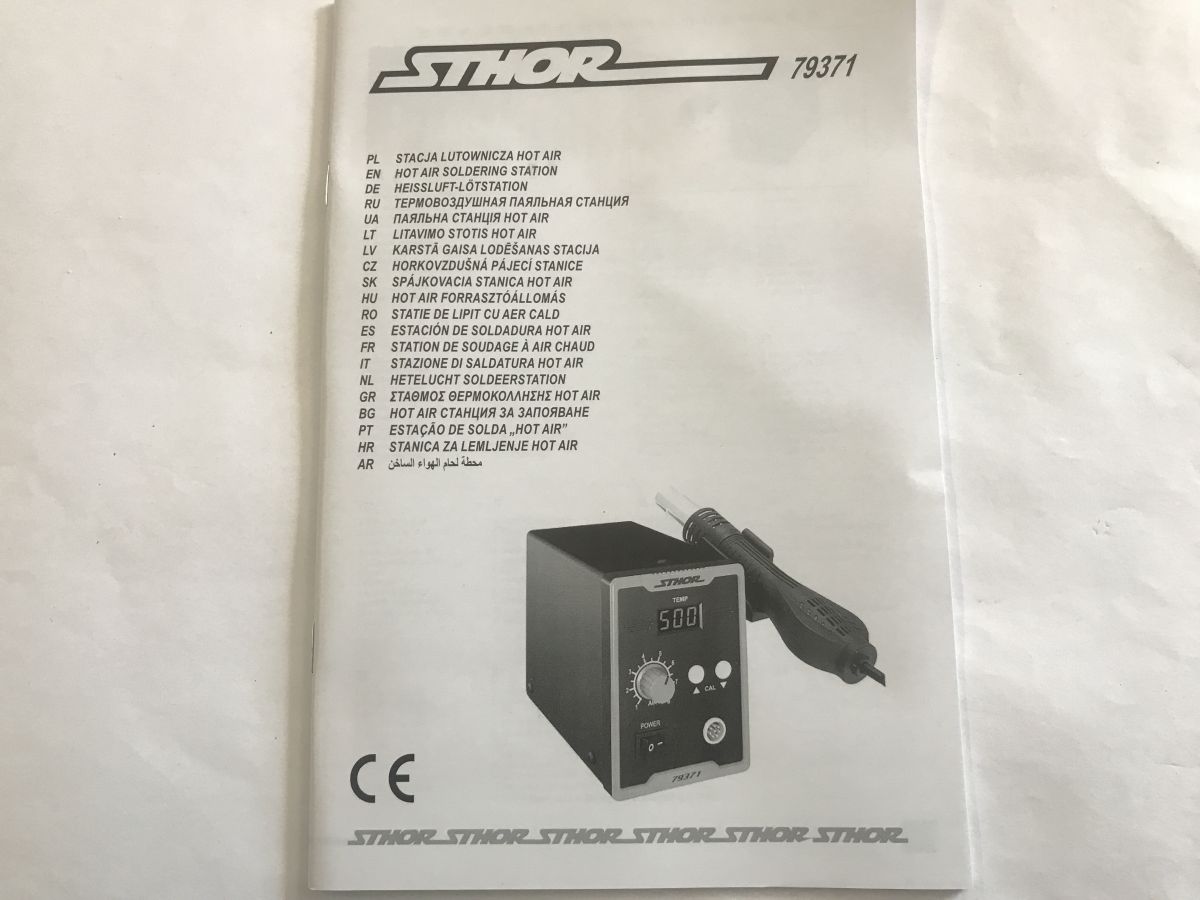
    We're reviewing the Hot Air for 80 zł – STHOR 79371 – which heat gun is best for simple motherboard We're reviewing the Hot Air for 80 zł – STHOR 79371 – which heat gun is best for simple motherboard We're reviewing the Hot Air for 80 zł – STHOR 79371 – which heat gun is best for simple motherboard We're reviewing the Hot Air for 80 zł – STHOR 79371 – which heat gun is best for simple motherboard
    Now we can move on to the actual tests.


    Practical tests
    To start with, the first test – we take a board and heat it up. Without any additional aids and always starting with a cold nozzle, so as not to cheat. We also time it, use flux and check how quickly the component can be removed.
    It’s not as silly a test as it might seem; I’ve tested quite a few of these hot air guns and I know that some simply don’t heat up – even on a low setting. An additional heater can be a good help here, but personally I successfully replace surface-mount components without one, so I do want to make sure that the solder does melt...

    I started with a test at 350 °C, an SOIC8 component, a narrow nozzle, and full airflow.


    Failure – it didn’t budge, even when I switched to low airflow for a minute at the end. On my Sugon, this component would have come off long ago, even with high airflow and at the same (or even lower) temperature setting.

    Second attempt – 400 °C – SOIC8 – full blast.


    It’s workable here. It took 2 minutes to remove the SOIC8. Acceptable, so to some extent this station is useful.

    Third attempt – 400 °C – large transistor with a massive ground pad


    2.5 minutes. This was a slightly more difficult task, as the component has better contact with the board and dissipates heat effectively, but it was still possible to remove it. That’s good.


    Fourth attempt – 400 °C – TQFP chip


    In just under 3 minutes, the chip was successfully removed.

    At this point, the impression is that the station is up to the task, although the temperature on the display is overestimated.


    Measurements
    I carried out the measurements using my kit described in a separate thread: OpenBeken configuration for hot air tests – MAX6675, temperature and power logging
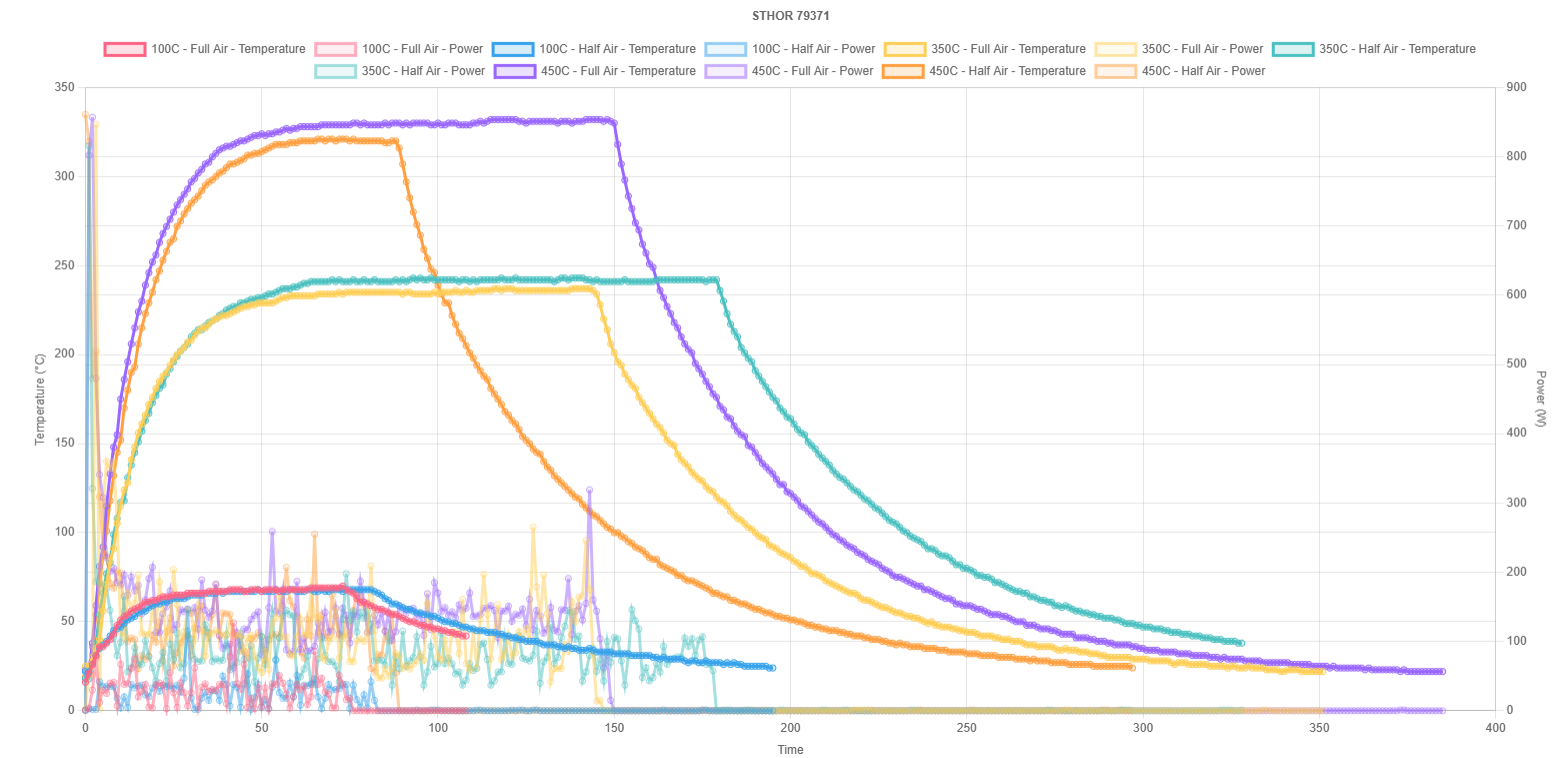
    I tested three temperatures – 100°C, 350°C and 450°C, each at full and half fan speed.
    We're reviewing the Hot Air for 80 zł – STHOR 79371 – which heat gun is best for simple motherboard
    Interactive version: https://openshwprojects.github.io/hotair/STHOR79371.html
    Well... my Sugon, set to 350 °, reached 320 ° on the probe; I checked this with the same fan setting as here, although I didn’t measure the actual fan speed. STHOR is around 100° lower. At 450°, the situation is similar, with a difference of over 100° as well. Interestingly, a similar drop occurs even at the 100° setting. Reducing the fan speed does not help at all here.
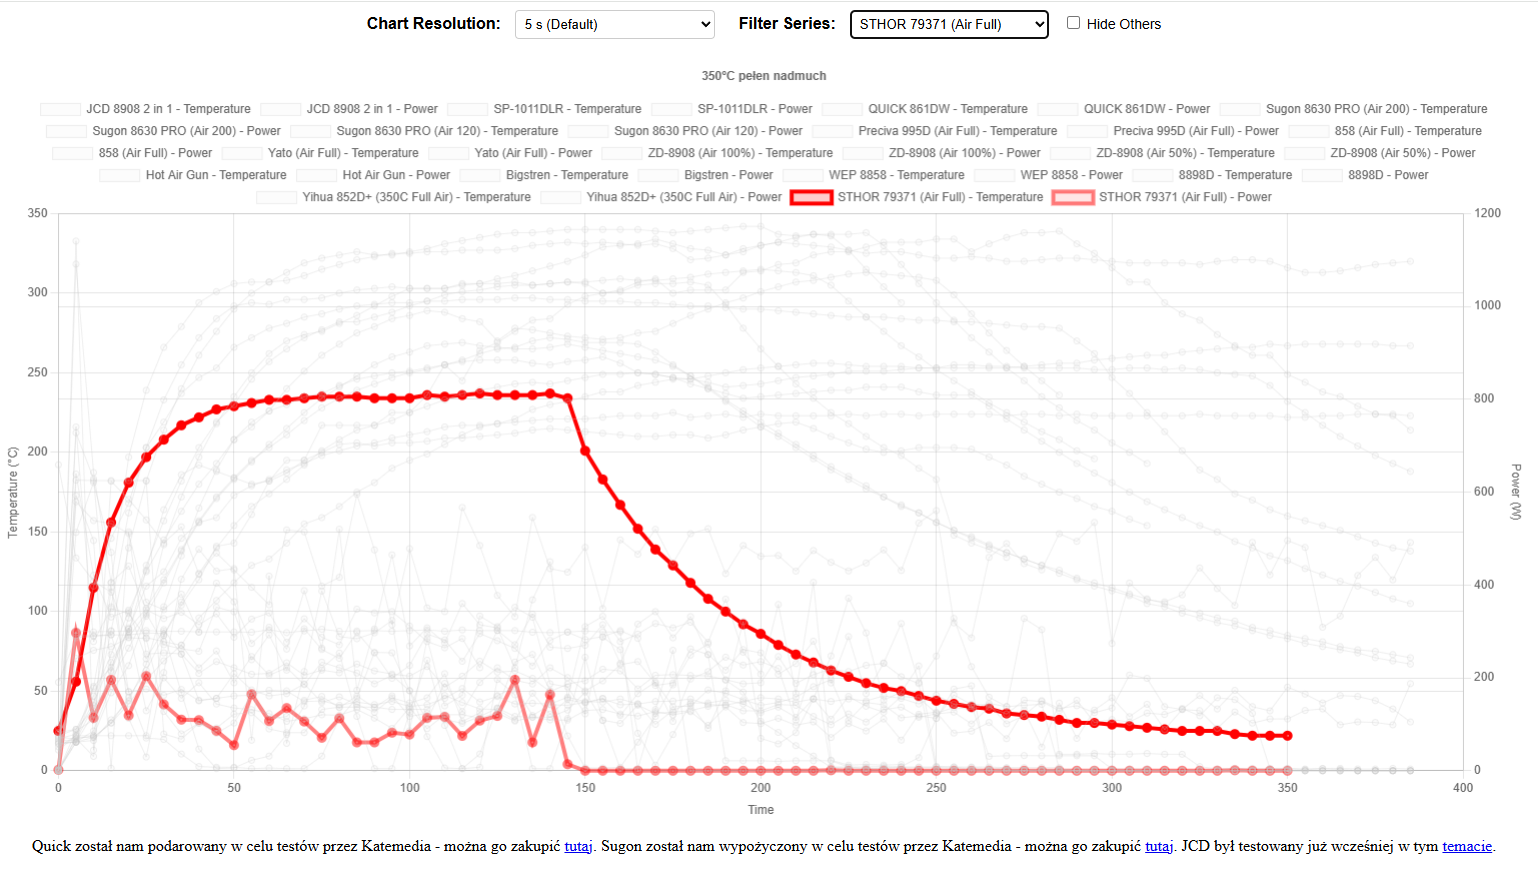
    Separately, I compared the unit to other tested models:
    We're reviewing the Hot Air for 80 zł – STHOR 79371 – which heat gun is best for simple motherboard
    The same problem occurs here; the readings on the display are significantly higher than those on the probe. What’s more, when compared to the classic 858, one could even say that 450 °C here is equivalent to 350 °C on the 858...
    Interactive versions:
    https://openshwprojects.github.io/hotair/version12/350c.html
    https://openshwprojects.github.io/hotair/version12/450c.html
    The power measurement also explains a lot – 700 W is only achieved right at the start, and then it is heated at a much lower power.


    Interior
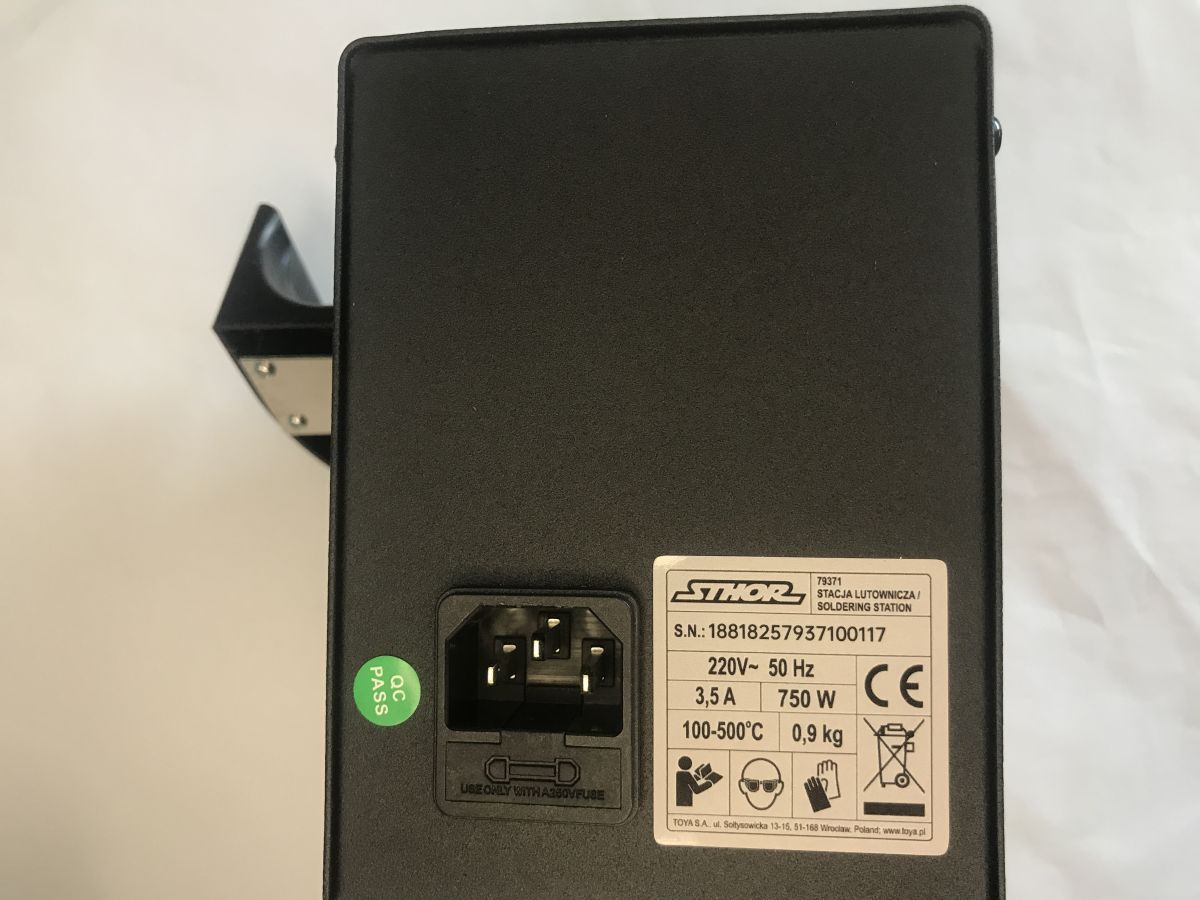
    We’ll also take a look at the sticker with the manufacturer’s information. On the back, there is a socket and a fuse slot.
    We're reviewing the Hot Air for 80 zł – STHOR 79371 – which heat gun is best for simple motherboard
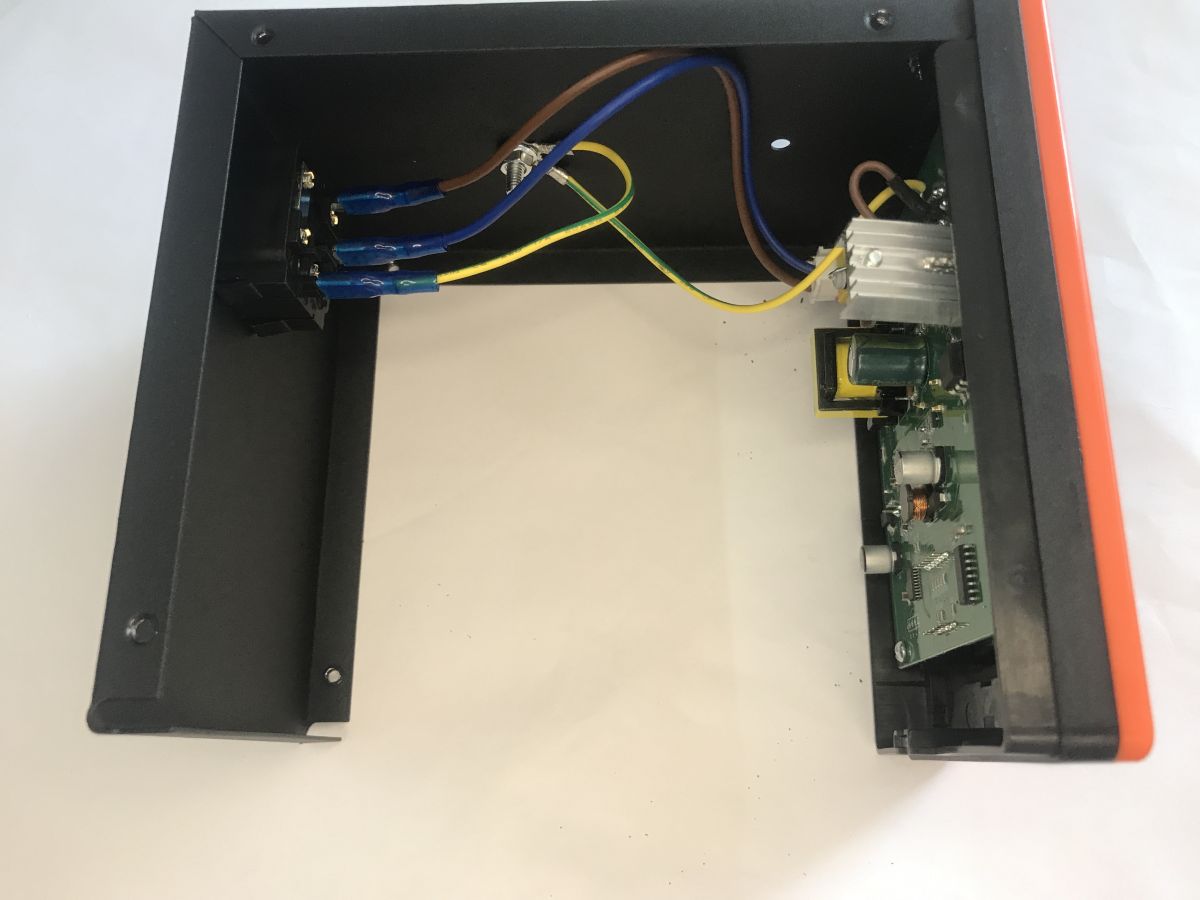
    We unscrew the screws and remove the casing. Inside, it’s basically… very empty, which comes as no surprise. The station is very light.
    We're reviewing the Hot Air for 80 zł – STHOR 79371 – which heat gun is best for simple motherboard
    So does it work fully on 230 V? Well, not quite – there is a tiny switching power supply inside. You can also see what is responsible for the digital control and the display.
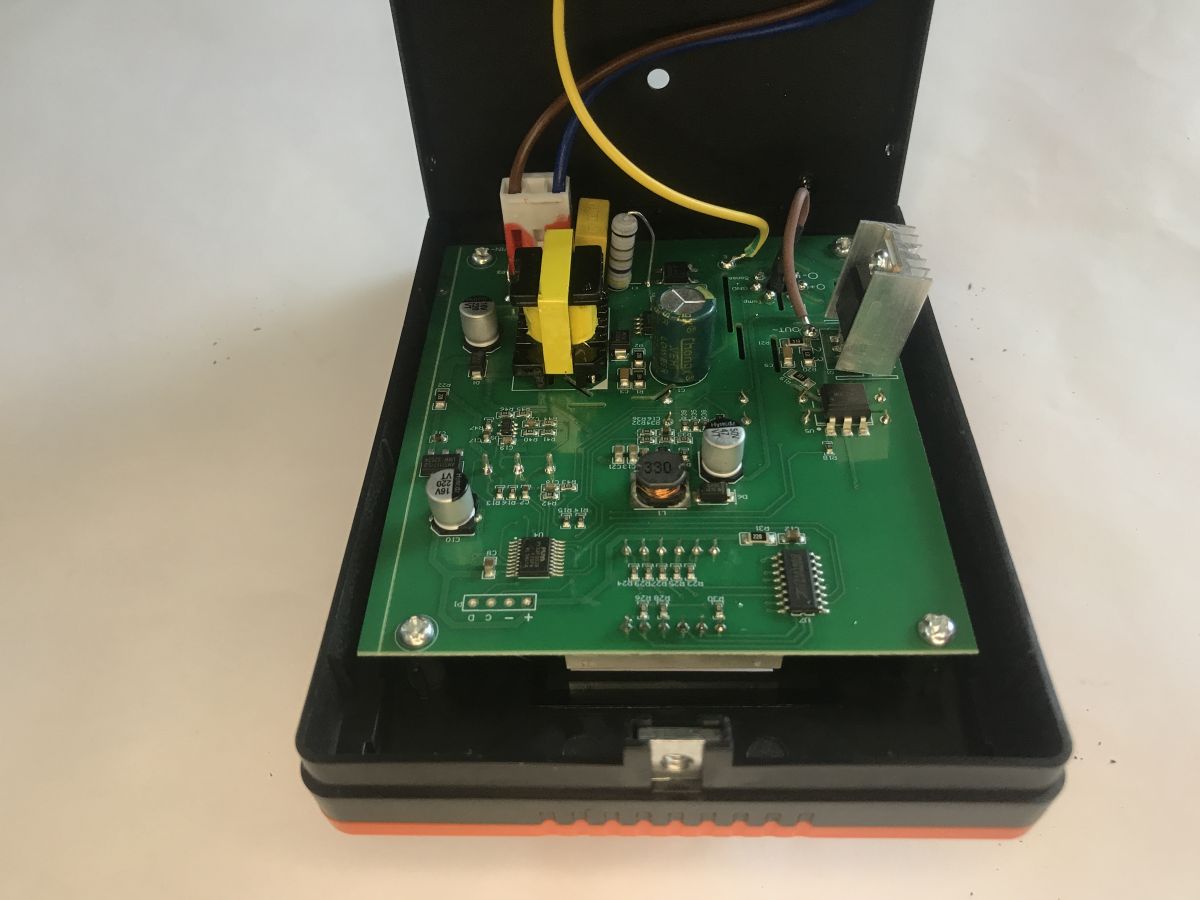
    We're reviewing the Hot Air for 80 zł – STHOR 79371 – which heat gun is best for simple motherboard
    The display is controlled by the TM1650, a controller with a protocol similar to I2C, but without addressing.
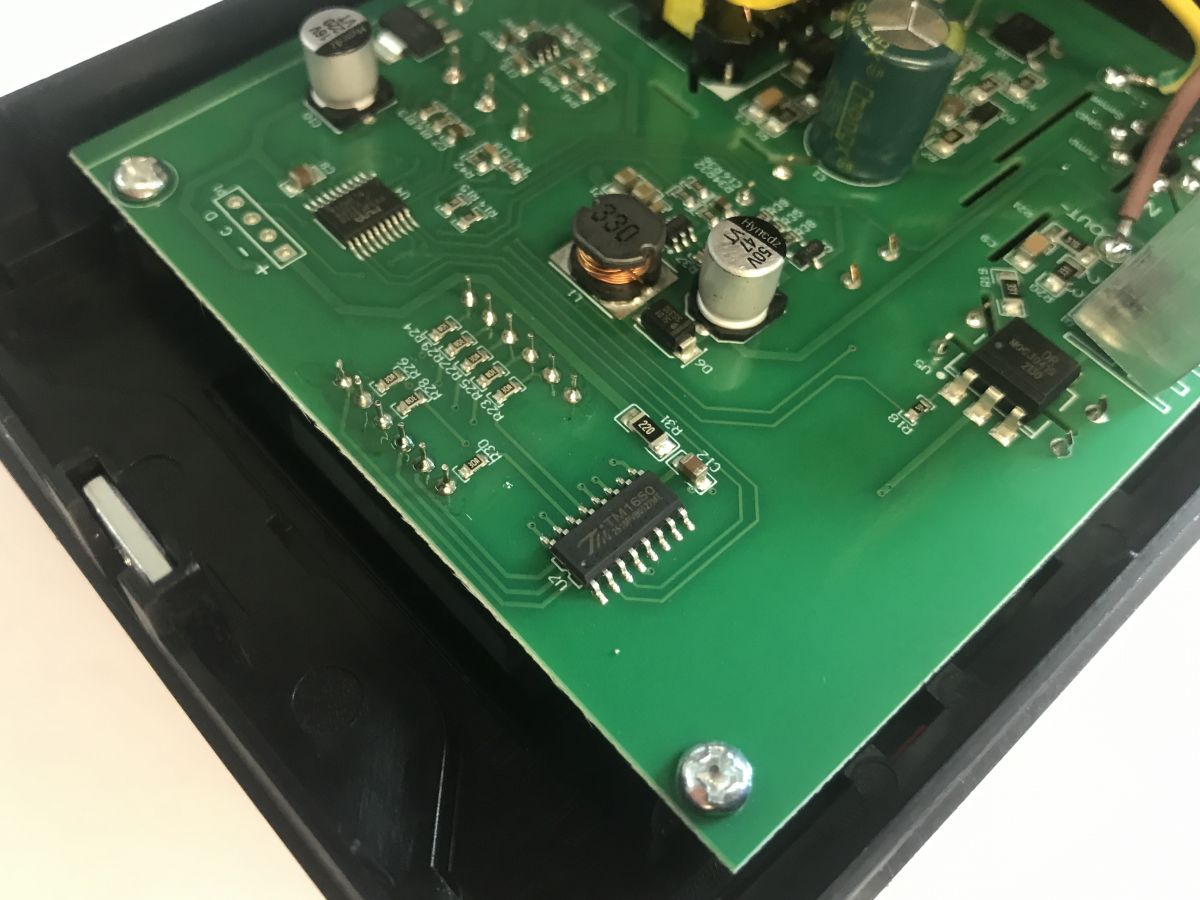
    We're reviewing the Hot Air for 80 zł – STHOR 79371 – which heat gun is best for simple motherboard
    The MCU is a Puya PY32F002B, a tiny but already 32-bit microcontroller based on the ARM® Cortex®-M0+ core with 24 KB of Flash memory and 3 KB of RAM. These days, even 8-bit chips are slowly becoming uneconomical, as their 32-bit equivalents are just as cheap...
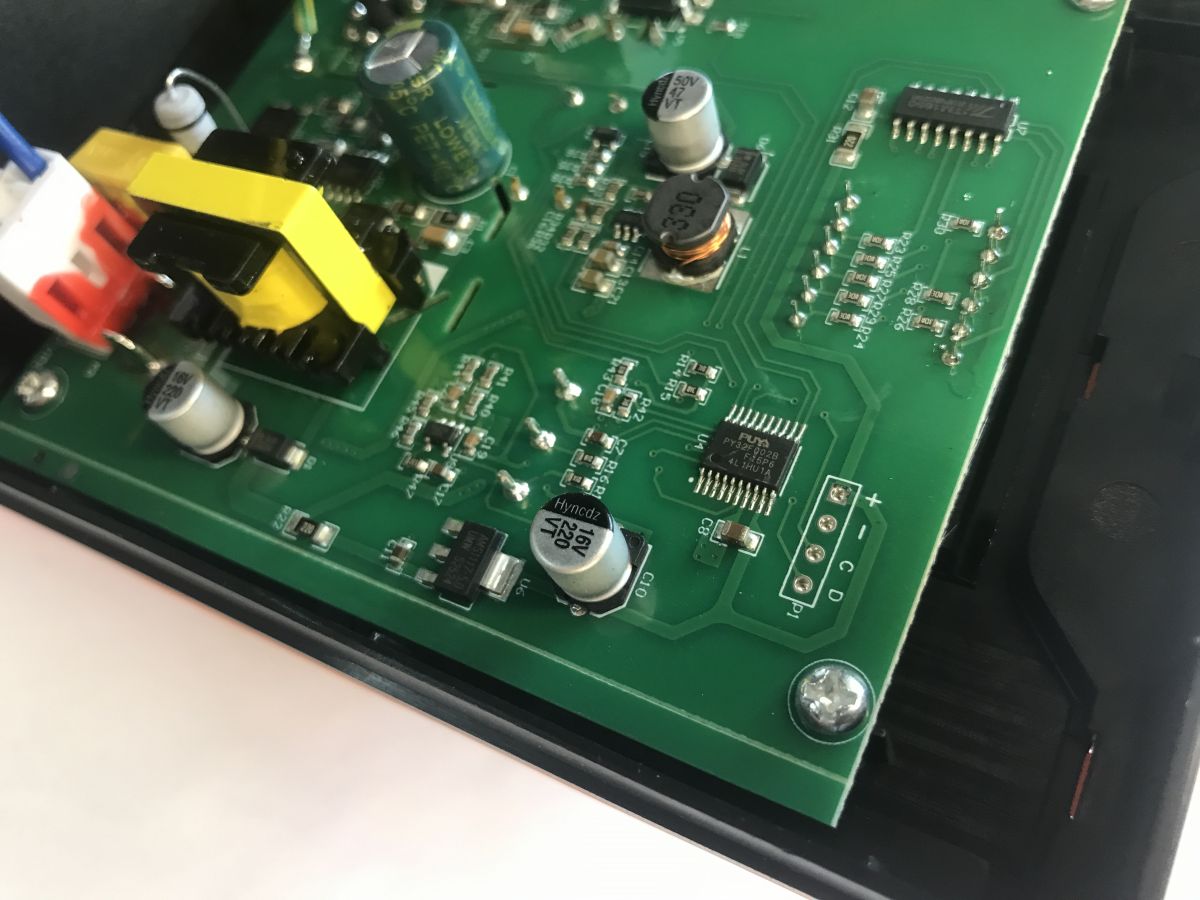
    We're reviewing the Hot Air for 80 zł – STHOR 79371 – which heat gun is best for simple motherboard
    In the high-voltage section, we have a BTA16-800BW triac with a driver; it is used to regulate the heater power directly from the mains and is controlled by the MOC3041.
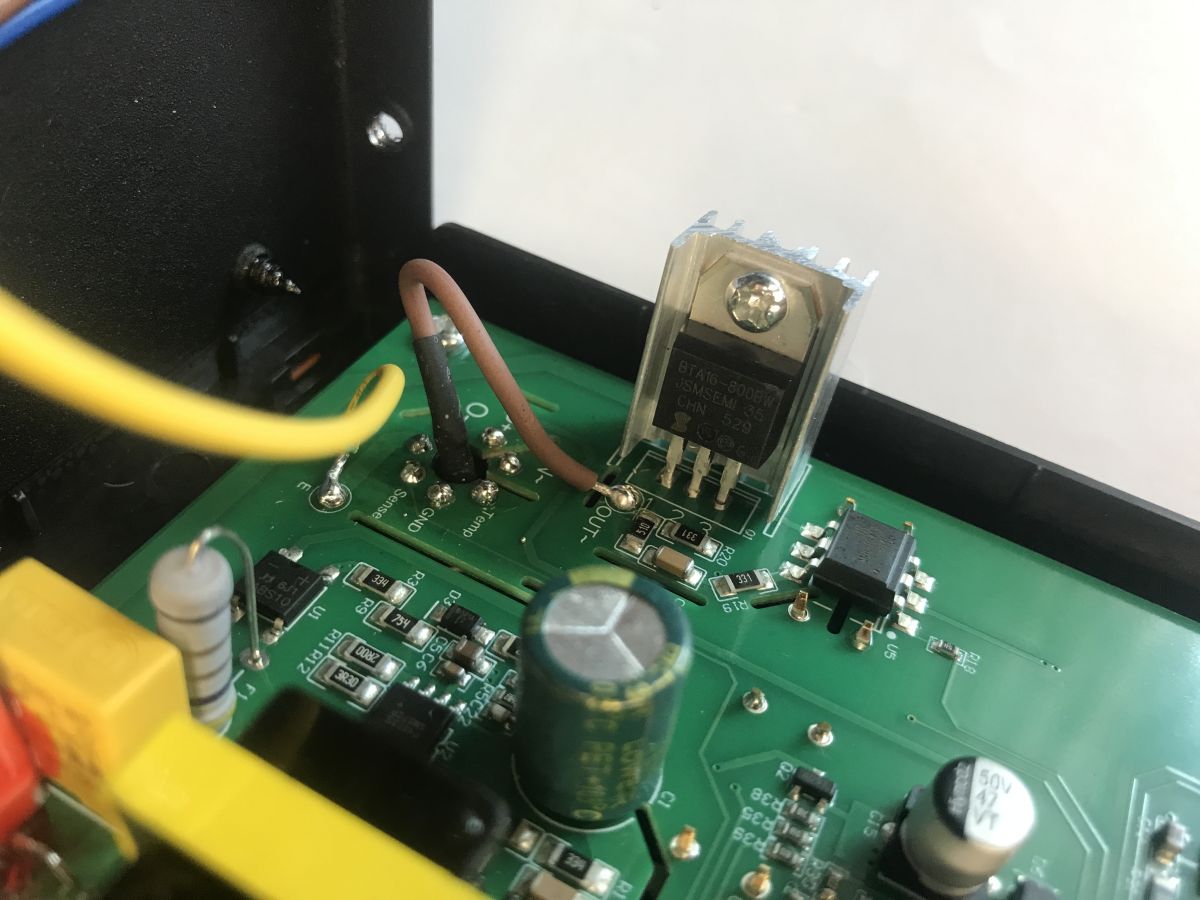
    We're reviewing the Hot Air for 80 zł – STHOR 79371 – which heat gun is best for simple motherboard
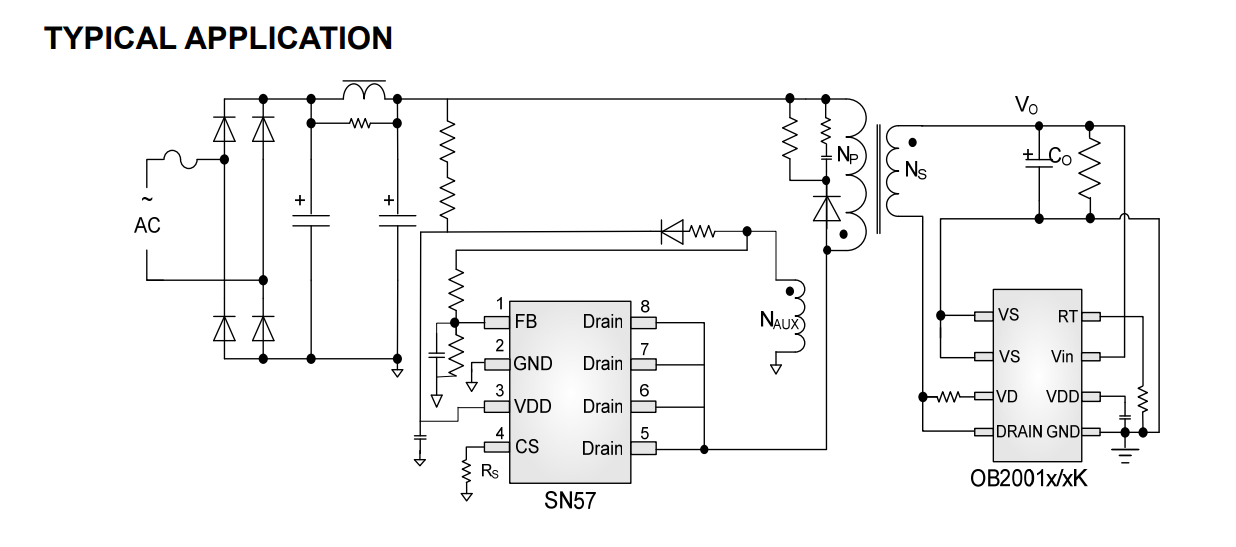
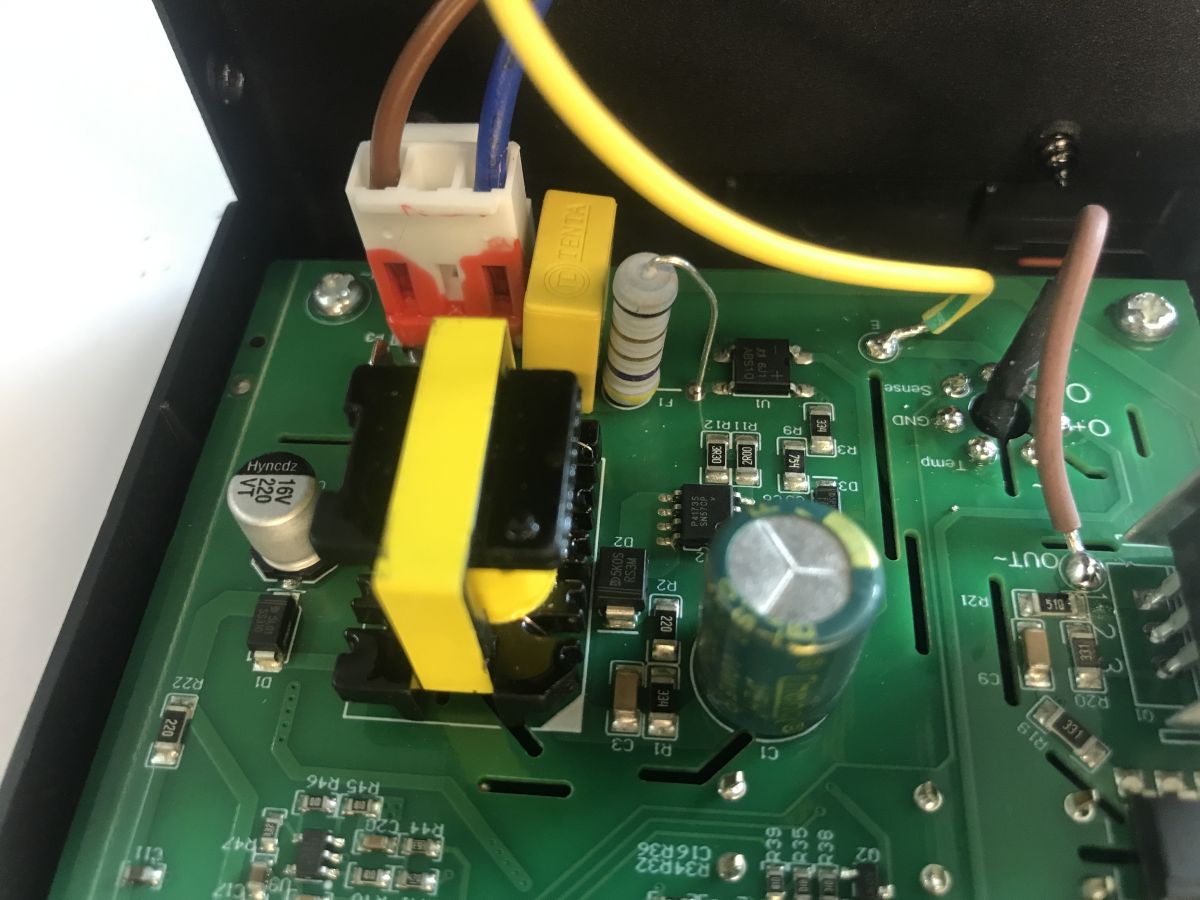
    You can also take a look at this power supply section. At the input, there is a capacitor acting as a filter and a fuse resistor. The converter is based on the SN57CP.
    We're reviewing the Hot Air for 80 zł – STHOR 79371 – which heat gun is best for simple motherboard
    “Typical application” AC-DC power supply schematic with SN57, OB2001x/xK ICs and transformer windings
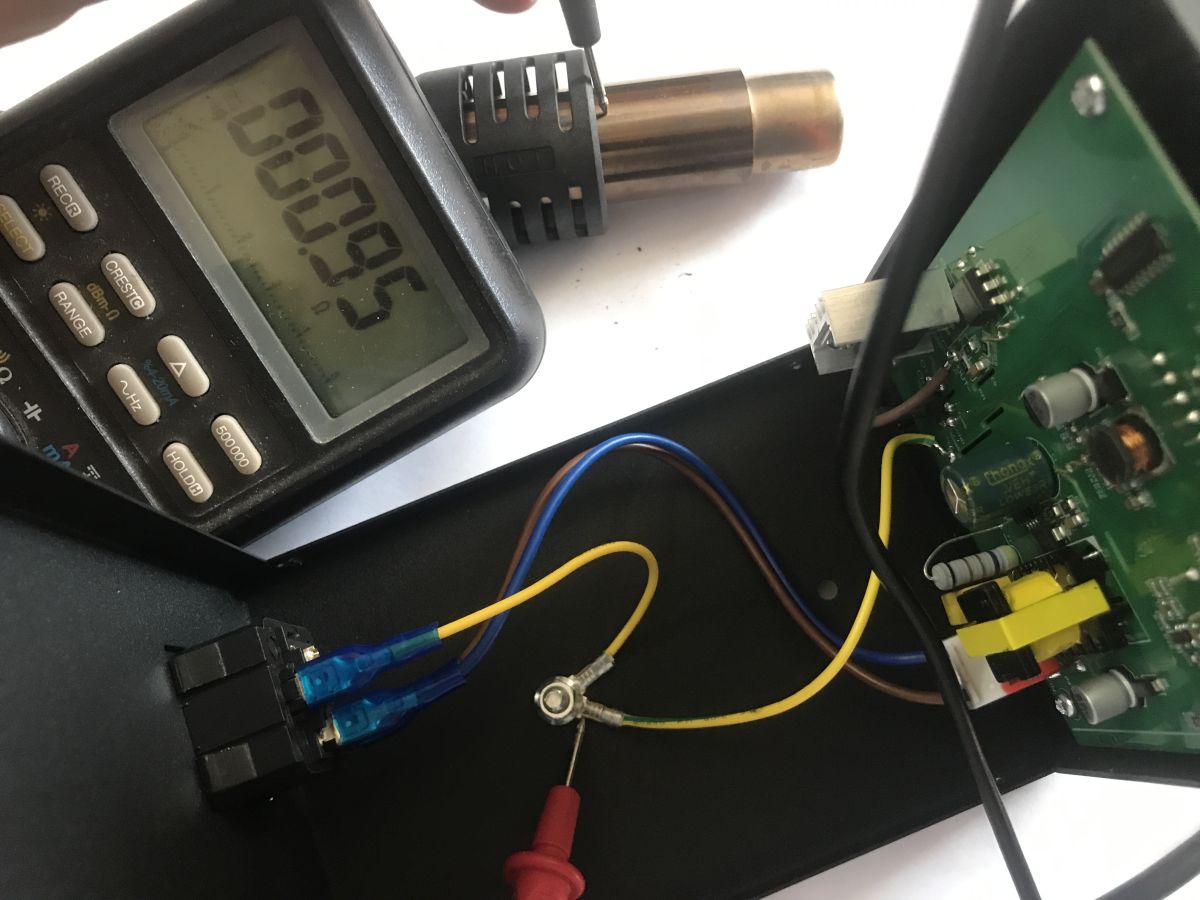
    The protective wire is connected to the hot air nozzle:
    Multimeter reading 200.9 next to an opened device showing a green PCB and wiring

    Summary
    It works, but it’s nothing to write home about. The very fact that 450 °C on this station at full fan speed is the same as 350 °C on other models (such as the classic 858) already goes some way towards explaining the frequent misunderstandings and surprise among beginners that, whilst components come off the PCB easily for others, they have to heat and heat with no end in sight. One might say that it’s fine, that you just need to use a heat gun – and there is some truth in that, but it doesn’t change the fact that there are differences between stations, and this is clearly evident from my measurements. It’s also interesting that even reducing the airflow at 350 °C didn’t help remove the SOIC 8 chips from the board; it only worked at 400 °C (on the display). You also need to be careful with the airflow itself, because even in the manual I’ve provided photos of, you can see that the manufacturer recommends the highest airflow setting to extend the heater’s lifespan. Otherwise, the heater overheats more quickly. Personally, I wouldn’t really recommend this station, especially as when I tested the classic 858, it heated slightly better. It would probably need to be calibrated before further use, assuming that’s even possible over such a wide range. I suppose the only advantage is that low lower temperature range; you can also work with heat-shrink tubing.
    Does such a simple hot air gun make sense for a beginner? Join the discussion

    Cool? Ranking DIY
    Helpful post? Buy me a coffee.

    About Author
    p.kaczmarek2
    Moderator Smart Home
    Offline 
    p.kaczmarek2 wrote 14699 posts with rating 12741, helped 656 times. Been with us since 2014 year.
  • ADVERTISEMENT
  • Quick station has better airflow and temperature control

    #2 21934003
    filipcichowskidev
    Level 12  
    Posts: 94
    Help: 4
    Rate: 192
    It’s suitable if:
    - you need to shrink-wrap components
    - remove paint from small metal parts
    - re-solder a TQFP32 chip every now and then

    Even when used with a preheater, it performs abysmally when removing BGAs, TQFP144 chips and similar components.

    These 858 stations have one annoying feature: if you switch the station on whilst holding the soldering iron, the airflow starts but the heating doesn’t. You have to put the handle back in the cradle and try again; then everything works like clockwork.

    We had one of these at work, and then I bought a Quick. The Quick has numerous advantages: sufficiently high power, a blower located in the central unit rather than in the nozzle, and a smaller discrepancy between the setpoint and actual temperature (though the question remains as to where we take the reading; I measure directly at the flask outlet, but if you move the thermocouple a few centimetres away, the temperature reading drifts.)
📢 Listen (AI):

FAQ

TL;DR: For beginners choosing a cheap hot-air station, the STHOR 79371 costs about 70–80 PLN but measured over 100°C low; as the reviewer put it, "it works, but it's nothing to write home about." It can remove SOIC8, TQFP, and larger parts, but simple motherboard and PCB rework takes noticeably longer than with a classic 858 or Sugon. [#21920885]

Why it matters: Beginners often blame their technique when the real problem is a station whose displayed 350–450°C is far above the actual nozzle temperature.

Station Displayed setting discussed Reported real-world heating result
STHOR 79371 350°C SOIC8 did not come off from a cold start
STHOR 79371 400°C SOIC8 removed in 2 min; TQFP in under 3 min
Classic 858 350°C Described as roughly comparable to STHOR at 450°C
Sugon 350°C Reached about 320°C on the probe and removed SOIC8 much faster

Key insight: The main issue is not raw usability, but calibration and control. On this unit, 450°C on the display behaves more like 350°C on better-known stations, so beginners may overheat boards while still feeling underpowered. [#21920885]

Quick Facts

  • Rated specs: STHOR 79371 is rated at 750 W, 100–500°C, and up to 120 l/min airflow; the set includes 3 nozzles, the station, and a cable for about 70–80 PLN. [#21920885]
  • Measured gap: At 100°C, 350°C, and 450°C settings, the thermocouple showed temperatures roughly 100°C or more below the display, and lowering airflow did not meaningfully close that gap. [#21920885]
  • Desoldering times: From a cold nozzle, 400°C removed SOIC8 in 2 min, a large transistor in 2.5 min, and a TQFP in just under 3 min. [#21920885]
  • Power behavior: The station reaches about 700 W only at startup, then continues heating at much lower power, which helps explain the weak sustained temperature performance. [#21920885]
  • Internal design highlights: Inside are a TM1650 display controller, Puya PY32F002B MCU, MOC3041 optotriac, BTA16-800BW triac, a small switching supply based on SN57CP, and a protective earth connection to the nozzle. [#21920885]

How well does the STHOR 79371 hot-air station actually perform for simple motherboard and PCB rework?

It works for simple PCB rework, but it is slow and clearly underheats relative to its display. At 400°C, it removed an SOIC8 in 2 minutes, a larger transistor in 2.5 minutes, and a TQFP in just under 3 minutes. At 350°C from a cold nozzle, the SOIC8 did not come off at all. That makes it usable for basic jobs, but weaker than better-performing beginner stations. [#21920885]

Why does the STHOR 79371 show 350–450°C on the display while the thermocouple measures more than 100°C less?

The display overstates the real nozzle temperature because the station does not sustain high heating power and appears poorly calibrated. The reviewer measured roughly 100°C less than the display at 100°C, 350°C, and 450°C settings. Power also peaked near 700 W only at startup, then dropped during heating. That combination explains why the shown temperature looks high while the probe and desoldering results stay much lower. [#21920885]

What settings and technique help remove an SOIC8 chip with the STHOR 79371 when 350°C is not enough?

Use 400°C, apply flux, and start with a cold nozzle. The reviewer failed at 350°C with a narrow nozzle and full airflow, then succeeded at 400°C with full airflow in 2 minutes. A practical method is: 1. apply flux to the SOIC8, 2. use a narrow nozzle and heat from a cold start, 3. keep heating at 400°C until solder fully releases. Lower airflow for one minute at 350°C still did not work here. [#21920885]

How long should it take to desolder SOIC8, TQFP, and larger transistor packages with a 750 W hot-air station like the STHOR 79371?

On this 750 W station, real times were about 2 minutes for SOIC8, 2.5 minutes for a larger transistor, and just under 3 minutes for a TQFP. Those results came at 400°C display setting, starting from a cold nozzle and using flux. At 350°C, the same station could not remove the SOIC8 in the first test. So the practical answer is 2–3 minutes here, not a few seconds. [#21920885]

STHOR 79371 vs classic 858 vs Sugon — which hot-air station heats more effectively for beginner electronics repair?

Sugon heats most effectively in this comparison, the classic 858 is next, and the STHOR 79371 is the weakest. The reviewer states that a Sugon set to 350°C reached about 320°C on the probe, while STHOR measured about 100°C lower than its own display. He also concludes that STHOR at 450°C behaves roughly like a classic 858 at 350°C. For beginners, the classic 858 therefore looks more effective than this STHOR. [#21920885]

What causes a cheap hot-air station to reach high power only at startup and then heat at much lower power?

The main cause here is the station's control behavior, which delivers strong initial warm-up power but weaker sustained heater drive. The reviewer measured about 700 W only at startup and then observed much lower heating power afterward. That limits stable nozzle temperature under airflow and makes the station feel weaker during real desoldering. The effect matches the large gap between displayed and measured temperatures. [#21920885]

How do you measure the real nozzle temperature of a hot-air station using a thermocouple, MAX6675, and OpenBeken logging?

You measure it by placing a thermocouple in the hot-air stream and logging readings at fixed setpoints and airflow levels. The reviewer used a setup from his separate OpenBeken thread with a MAX6675 and checked 100°C, 350°C, and 450°C at both full and half fan speed. 1. Put the probe at the nozzle output, 2. hold one temperature setting until it stabilizes, 3. record and compare probe temperature versus display value. [#21920885]

What is a sleep sensor in a hot-air handle, and how does it affect everyday use and heater life?

A sleep sensor is a handle sensor that switches the station into standby when the tool is set down, reducing unnecessary heating. This unit's handle includes a brushless fan and a sleep sensor. In everyday use, that means less idle heat and simpler pause-and-resume work during SMD tasks. The thread does not quantify the temperature drop, but the feature is explicitly listed as part of the handle design. [#21920885]

What is the TM1650 chip, and what role does it play in the STHOR 79371 display control circuit?

"TM1650 is a display controller that drives segmented LED displays, using a protocol similar to I2C but without addressing." In the STHOR 79371, it handles the digital display control inside the station. That means it is responsible for presenting the selected temperature and related front-panel information, while other parts manage sensing and heater control. [#21920885]

What is the MOC3041 and BTA16-800BW triac used for inside a hot-air soldering station?

"MOC3041 is an optotriac driver that switches a mains triac safely from low-voltage control, while BTA16-800BW is the power triac that regulates the heater from the AC line." In this station, that pair directly controls heater power from 230 V mains. The reviewer identifies both parts in the high-voltage section and links them to heater regulation. [#21920885]

Why does lowering airflow on the STHOR 79371 not noticeably improve the measured temperature at 100°C, 350°C, or 450°C?

Because the limiting factor appears to be heater control and calibration, not just air volume. The reviewer measured all three setpoints at full and half fan speed and found that reducing airflow did not meaningfully improve the probe temperature. Even in practical work, lowering airflow at 350°C for about a minute still failed to remove the SOIC8. That points to weak sustained heating rather than excessive airflow alone. [#21920885]

Which airflow setting is safest for the heater in the STHOR 79371, and how does airflow affect heating performance and heater lifespan?

The safest setting for heater life is the highest airflow. The reviewer notes that the manual recommends maximum airflow to extend heater lifespan, because lower airflow makes the heater overheat more quickly. The trade-off is performance: full airflow can cool the nozzle stream, yet this station still needed 400°C display setting for successful SOIC8 removal. So high airflow protects the heater, but it does not fix the station's weak real temperature. [#21920885]

How useful is the low 100°C range on the STHOR 79371 for heat-shrink tubing and other non-soldering tasks?

It is one of the station's more useful features for light heating jobs. The reviewer explicitly says the lower temperature range is an advantage and mentions heat-shrink tubing as a practical use. Because the station starts at 100°C, it can handle gentler tasks that do not need solder-melting temperatures. That makes it more versatile than a unit intended only for aggressive SMD rework. [#21920885]

What should you check inside a budget hot-air station for safety, including protective earth connection to the nozzle, fuse resistor, and power supply design?

Check that protective earth reaches the nozzle, then inspect the mains input parts and the low-voltage supply. In this unit, the reviewer confirms the protective wire is connected to the nozzle, shows a fuse resistor at the input, and identifies a small switching supply based on SN57CP. 1. Verify earth continuity to the metal nozzle, 2. inspect fuse and input filter parts, 3. check the power-supply section for sensible layout and intact insulation. [#21920885]

When does a simple hot-air gun like the STHOR 79371 make sense for a beginner learning SMD rework?

It makes sense only when price matters more than speed and accuracy. At about 70–80 PLN, the STHOR 79371 can remove common packages, but it needed 400°C display setting and 2–3 minutes for basic parts. The reviewer does not really recommend it because a classic 858 heated slightly better. For a beginner, it fits occasional practice and heat-shrink work, not efficient motherboard rework. [#21920885]
Summary generated by AI based on the discussion content.
ADVERTISEMENT