Anet A8 3D printer as laser plotter
TL;DR
- Anet A8 3D printer is converted into a laser plotter/engraver using a side-mounted laser module.
- A printed mount replaces the print cooling fan, the laser power lead goes to FAN2, and Inkscape with Lokster's plugin generates G-code.
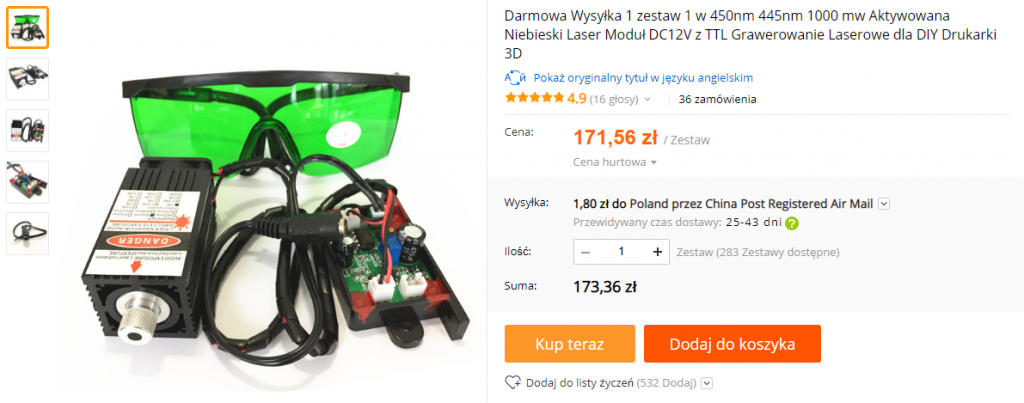
- The build uses a 1W, 450nm laser kit that cost around PLN175 and includes protective goggles plus control electronics.
- After editing SkyNet firmware to enable G2 and G3 arc commands, the printer can run the laser-generated G-code from a memory card.
Generated by the language model.
Hello everyone.
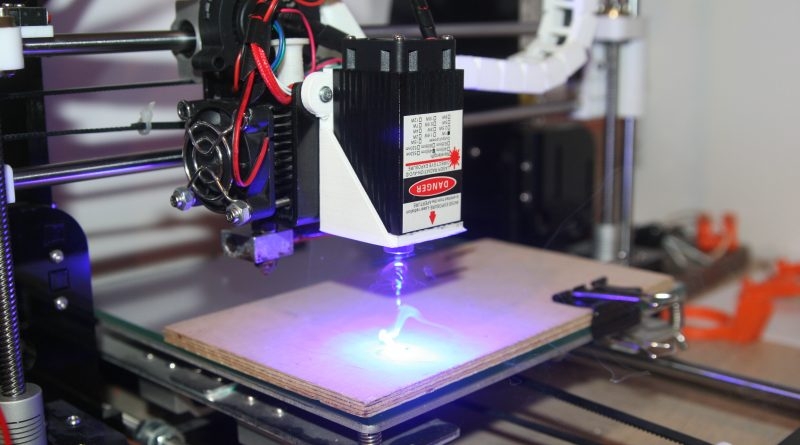
Today I wanted to demonstrate how to give the Anet A8 3D printer a new function in the form of a laser plotter.
I have described the whole project at http://resistor.pl/anet-a8-ploter-laserowy/
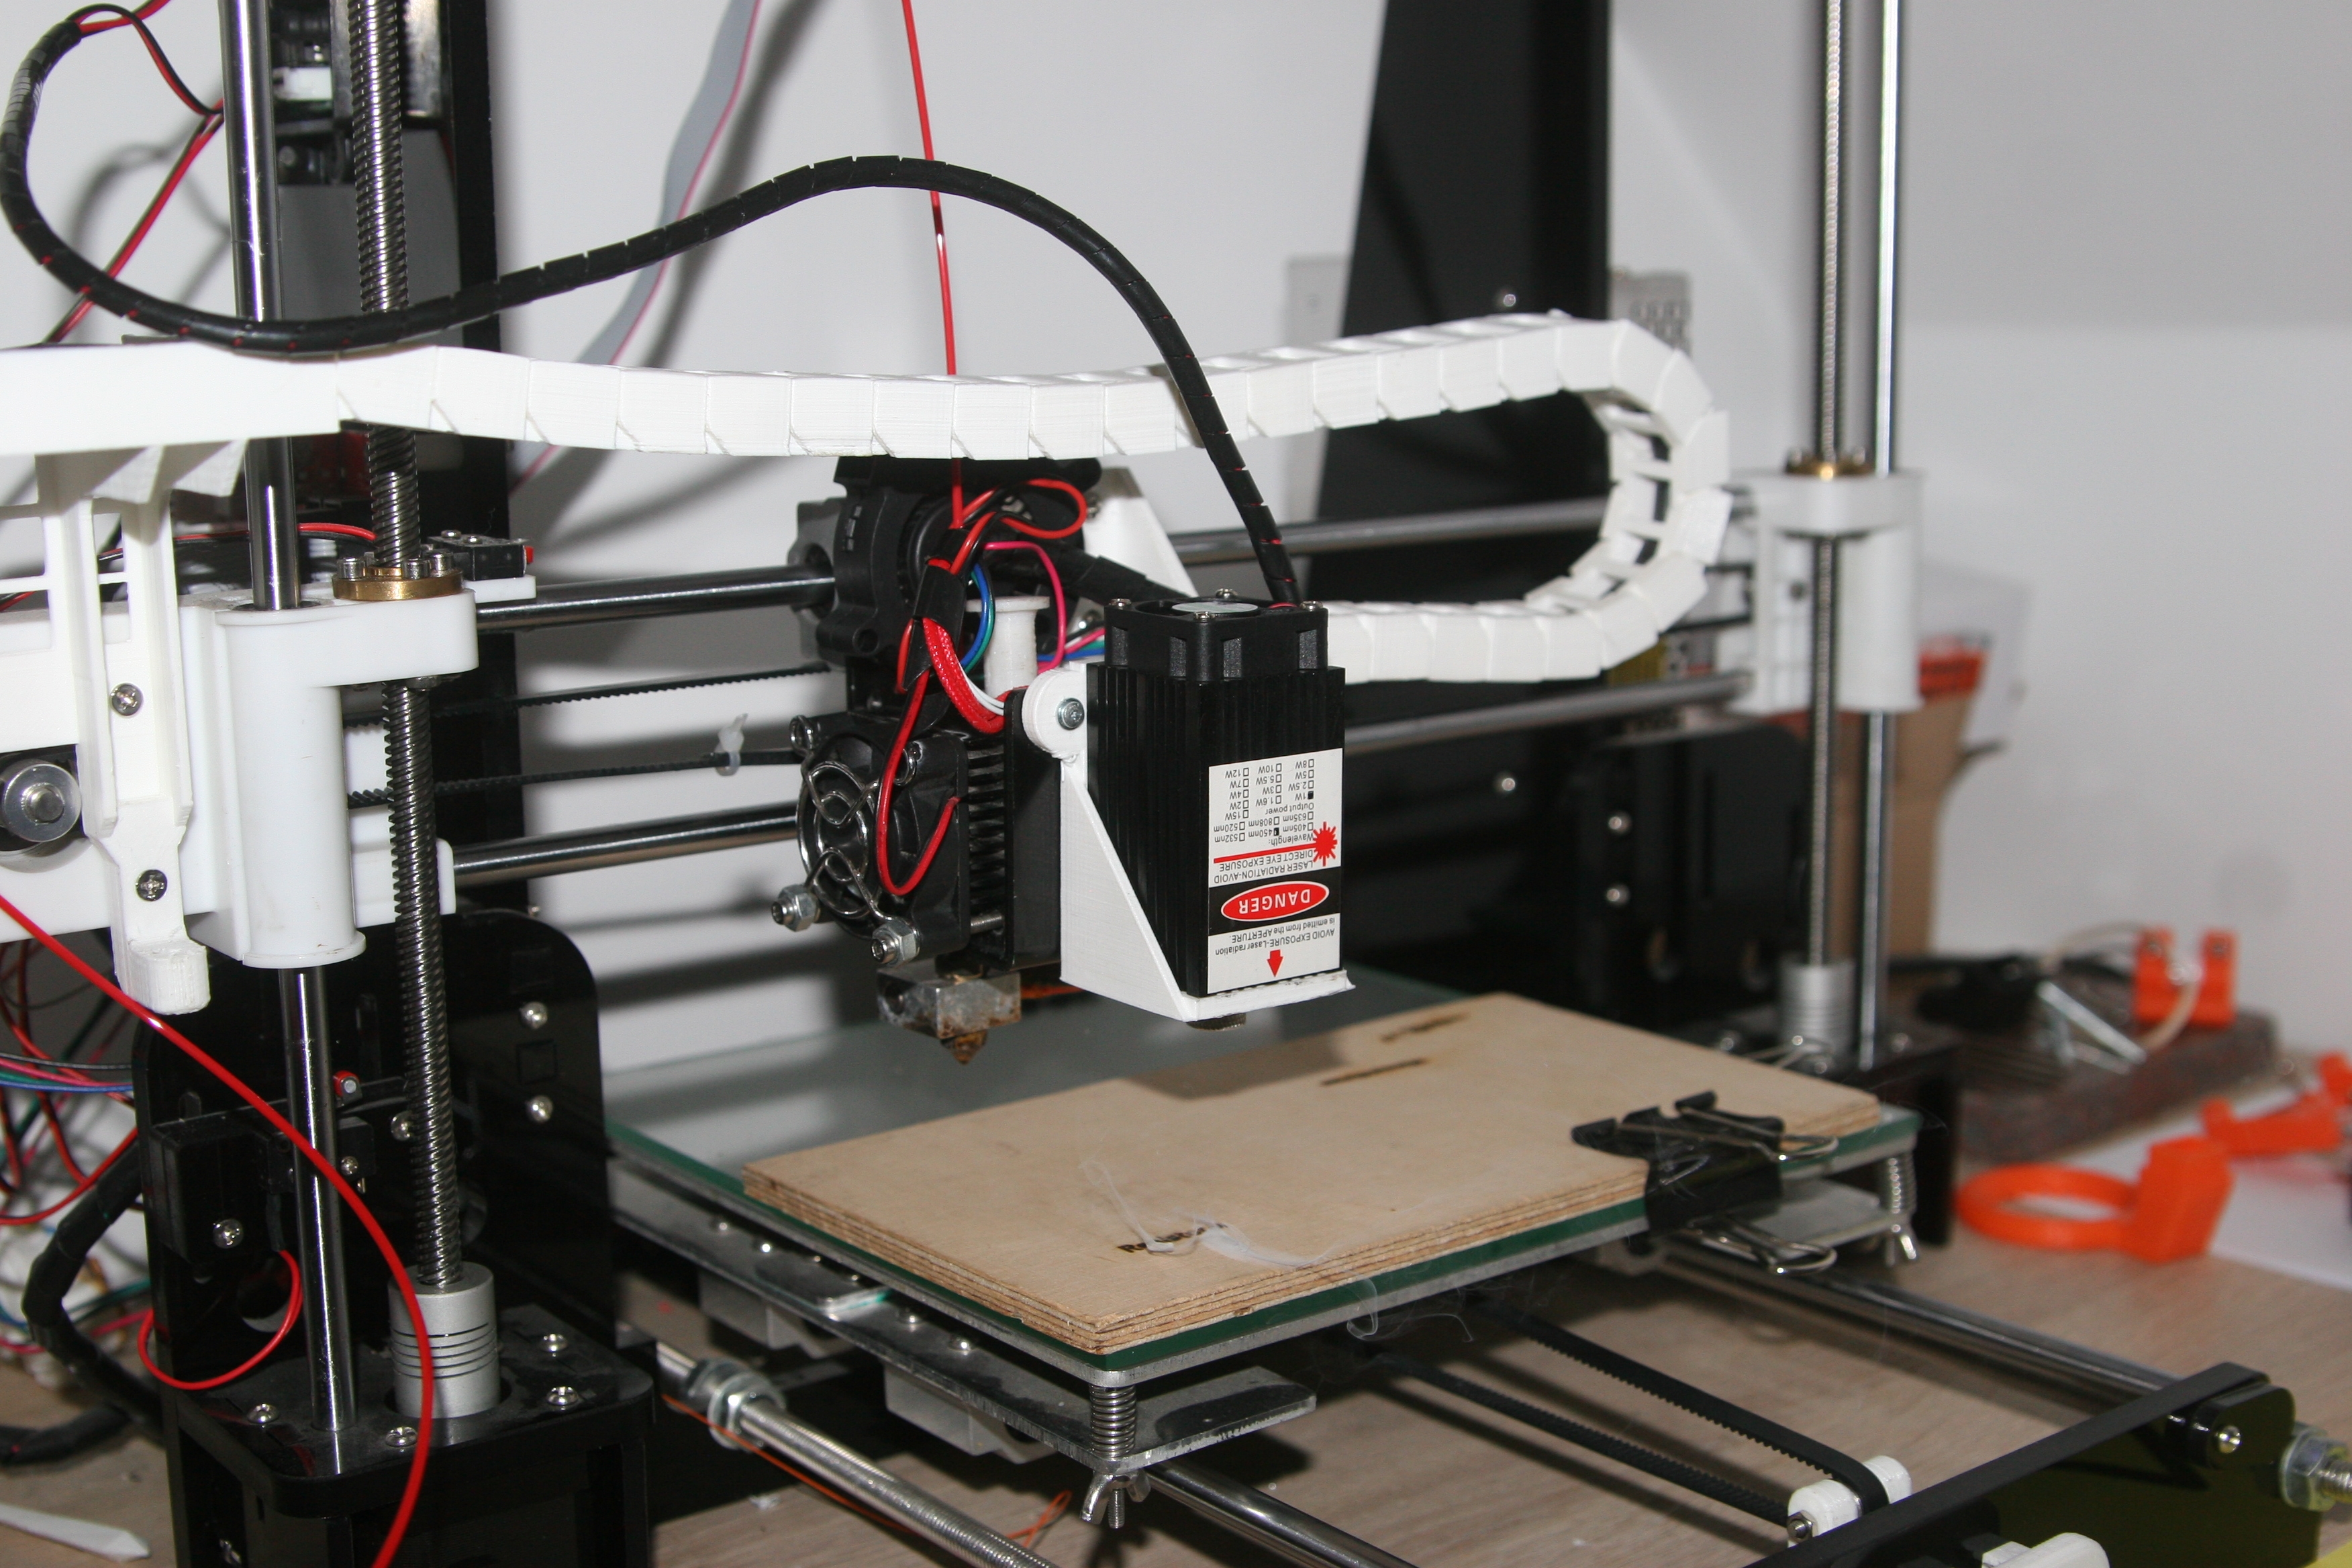
For this project you will need a laser that we can buy in China. It is important to pay attention to its power – lasers from 500mw to 15w are available, but the price of the latter oscillates around 800PLN.
I chose a laser with a power of 1W and a wavelength of 450nm, for which I paid around PLN175. The kit also included protective goggles and electronics responsible for the laser's correct operation.
Mounting
We mount the laser next to the printer head. The best way to do this is to use a printed mount. I have included several versions of the mount that can be found on the Thingiverse:
https://www.thingiverse.com/thing:2571185
https://www.thingiverse.com/thing:2117275
With three screws, we screw the laser to the printed piece, which then needs to be fixed in place of the print cooling fan (if you choose piece 1). Once the laser module is mounted, we connect the remaining electronics.
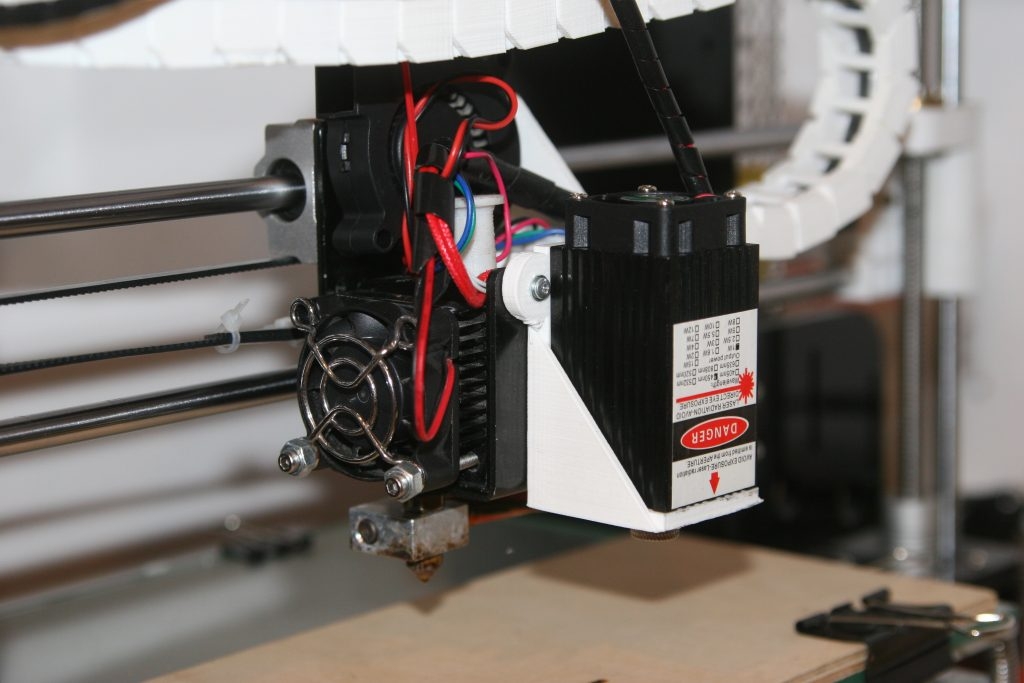
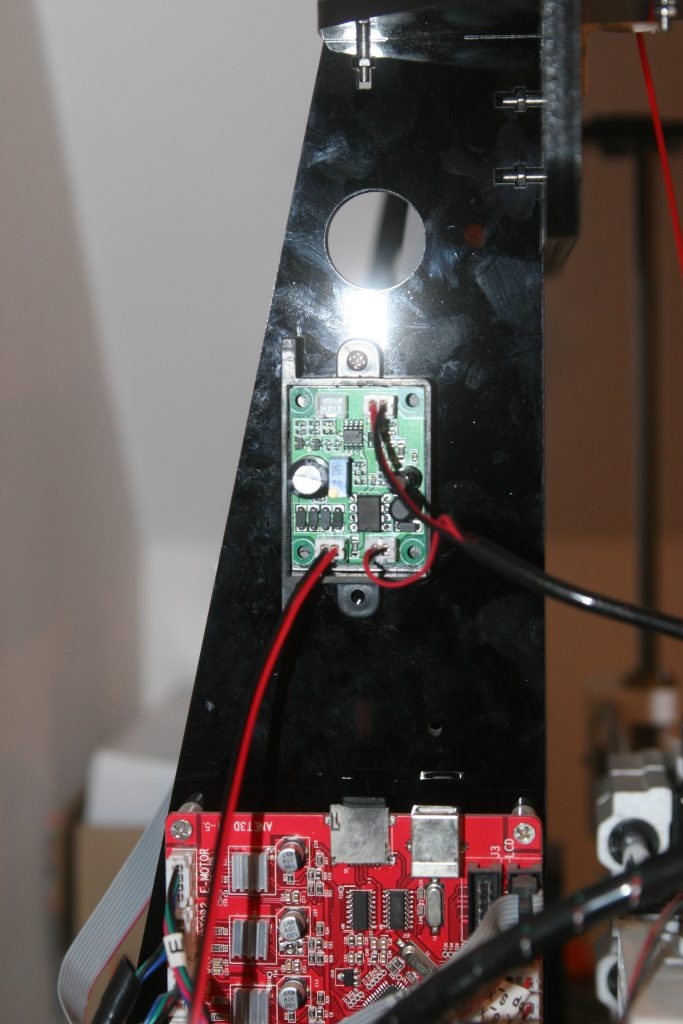
On the board responsible for the control we find four leads. Two of these are connected in turn to the laser diode itself and to the module's cooling fan. The other two sockets are TTL and 12V AC/DC. The 12V AC/DC lead is connected to the power supply cable, which will be used to supply the appropriate voltage to control the laser. We leave the TTL socket free, as we will not use it.
We connect a wire from 12V AC/DC to the main board of the 3D printer in place of the print cooling fan FAN2.
Calibrate the laser
We switch on and raise the Z axis to the level we have set.
We put on the protective goggles, go to the settings and turn on the print cooling to 1% or more in case the laser spot is not yet. visible.
Using the lens knob, we set the spot size to be as small as possible. This is best done on a white sheet of paper.
We zero the X and Y axes and then set them at point 0 of the printer table. We read the position of these axes, which will be our offset.
Operation and software
To operate the laser, we will use the free program Inkscape, which can be downloaded from: inkscape.org
We also download the plug-in for this program » Lokster’s Laser Engraving Inkscape Plugins
In the installed program, go to the Inkscape folder and extract the downloaded plug-in there.
Once this is done, we can create a graphic in Inkscape.
If we are using a pre-made image, we need to convert it into a vector graphic. To do this, we select Path in the menu and then the vectorise bimap option.
Select the finished graphic and choose Path/Object into Path
Now go to Effects/Lokster’s Tools and click on Laser Engraving. In the window that opens we adjust the settings for our plotter.
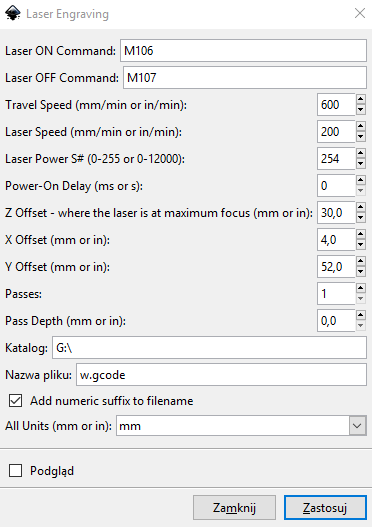
After indicating the save directory, name the file and click Apply. The gcode file saved in this way is uploaded to the memory card and run on the printer.
If you want your graphic to be hatched in the middle, you can use the Hatch fill option, which can be found by going to Effects/Lockster’s Tools.
With these settings we can adjust the hatching parameters of the interior of a given graphic.
After applying the hatching options, we go to Laser Engraving and create a gcode file.
Change in printer software settings
The Anet A8 printer does not interpret the G2 and G3 commands corresponding to arcs. In order for the plotter to work correctly, it is necessary to edit the configuration_adv.h file in the SkyNet software. Enable the option as below (line approx.800).
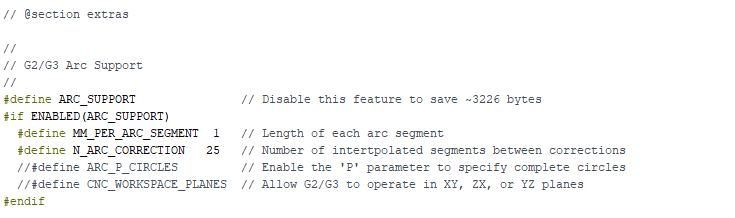
After this correction we upload the software and can enjoy the new function of our printer.
Project description: http://resistor.pl/anet-a8-ploter-laserowy/
Laser control: http://lokspace.eu/anet-a8-3d-printer-laser-engraver-mod/
Comments
Great stuff, I've been thinking about something like this for a long time. I often need to make precise cuts and there is no company in my area that can do this for me. I do have a question, what kind... [Read more]
I haven't yet tested any programs that the printer might work with, and I'm firing everything from a micro SD card. I have engraved in wood, leather, plastic and the laser in all of these materials works... [Read more]
How do the two devices communicate with each other. The printer has its own software and the laser has its own. Is there an interface that makes them communicate with each other? [Read more]
The laser is switched on by the voltage supplied from the printer board output FAN2, to which the print cooling fan is connected by default. The power is controlled in the same way as the fan speed, i.e.... [Read more]
Check out LaserGRBL. It might work for you. I have a typical laser plotter and it works great with it. For my own creations I use Inkscape with laser add-ons. I don't want to test anything else because... [Read more]
I'd be very careful with those crappy non-certified glasses, and I'd even look at a laser through them in my life, really be careful with your eyesight. Best regards [Read more]
In addition to engraving, have you tried cutting anything? E.g.: in plywood, plexiglass. [Read more]
I'm waiting for the 15W laser :) I wonder if the plexiglass can be cut nicely. [Read more]
Veneer and cardboard are no problem, thin plywood (approx.2mm) gave up after a few laser passes. [Read more]
The Anet A8 is powered by a 12V power supply? What is the issue with smoke and stench? Do you drain it off somehow? I also bought a laser for my Endera3, probably even the same kit as you, but no time... [Read more]
There is so little smoke during engraving that there is no need to evacuate it, and the smell itself disappears quickly. When engraving more items I move the printer to the garage. [Read more]
Are there other programmes than inkscape? [Read more]
Hello, I am also a user of Anet A8 with laser but with me it is a little bit different, I had a laser NEJE DK 8KZ, and I used its Laser Driver by connecting Uc Neje to Anet A8 under output T36 - PWM Fan... [Read more]
Does anyone know how powerful a laser I need to cut 3mm plexiglass? [Read more]
To cut plexiglass without tiring it with several passes the minimum would be 15w. with 1 watt you can at most engrave and not very efficiently, without gaining depth. And better not to do it in a room... [Read more]
I don't even print with PLA in the room so rest assured ;) [Read more]
@maestro16s those 15 watts did you test? [Read more]
Tested. At the same time I don't claim it was a smooth job, rather so called tiring .... In any case, for plexiglass work it would be reasonable at least at 30w to also cut something thicker, because... [Read more]
Mounting in a laser printer a cool topic, I also committed such a thing 1,5 years ago. Burned in plywood. However, I had problems to get PWM at the output of the 3D printer fan, with a frequency higher... [Read more]