Custom organiser/drawers for small components, parts - design and 3D printing
TL;DR
- A custom 3D-printed organiser with modular drawers for small parts was designed in Blender and printed on a Creality Ender Pro 3 using PLA.
- The design targets no-support printing, minimal gluing, interchangeable drawer layouts, label-card pockets, and compatibility with commercial Patrol drawer modules.
- The first prototype measured 92x40x72, used 1 mm walls, printed in just under 3.5 hours, and consumed 25 grams of filament.
- The final segments accept Patrol drawers, and Patrol drawers fit the custom segment, making it easy to reorganize existing workshop storage without remounting everything.
- 1 mm walls gave rigid drawers, while 0.5 mm walls printed faster but were less robust and sometimes needed glue; drawer clearance had to stay generous.
Summary generated by AI based on the discussion content.

Hello my dears
Today I will describe here my own segment with drawers for storing small parts.
I designed the whole thing first in the 3D modelling program Blender and then printed it on a 3D Creality Ender Pro 3 using PLA printer .
Design considerations
I made the following assumptions when designing the drawers:
- the whole thing should be easily manufactured on a cheap 3D printer (without using supports )
- gluing should be kept to a minimum
- different types of drawers should be available (i.e. different numbers of compartments)
- drawers should be compatible with the modular drawer segment still available in the shops Patrol , which I use to date
- the drawers should be able to easily insert a card/cardboard box with a description of the contents
- for printing will be used filament PLA and printer Creality Ender Pro 3
Design and first tests
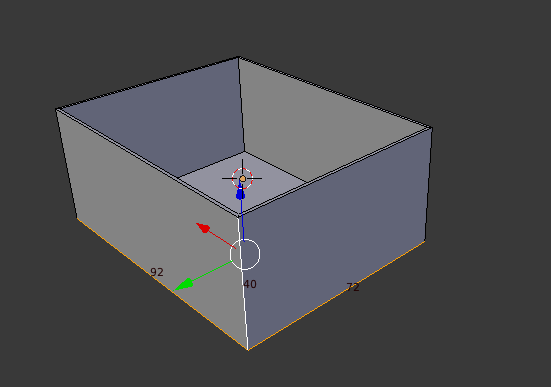
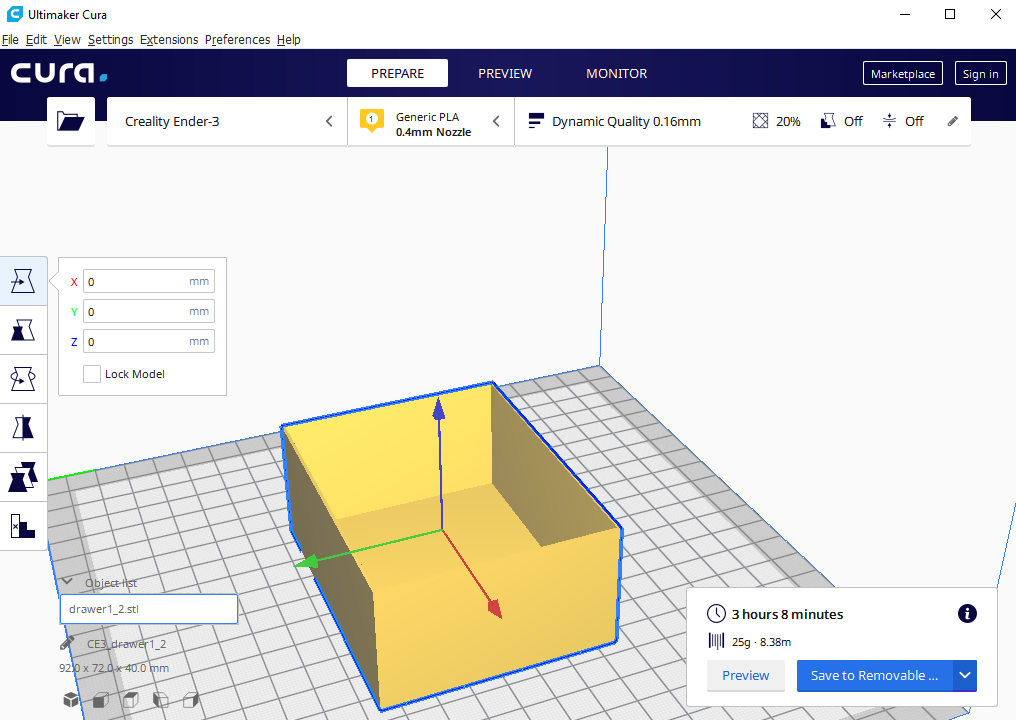
One of my primary considerations was compatibility with the Patrol segments, so I started by measuring the 'Patrol' drawers.
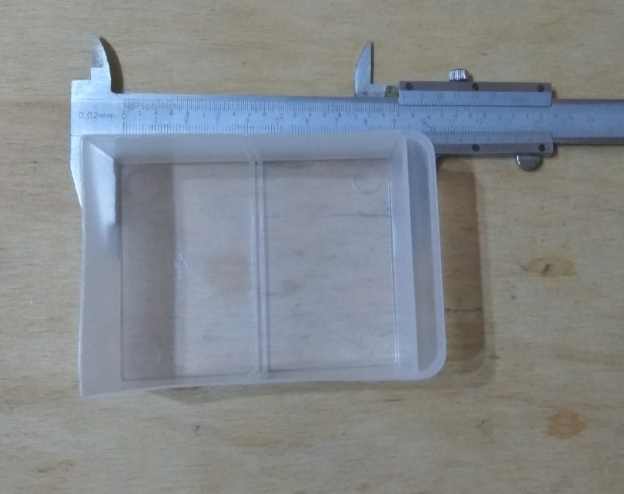
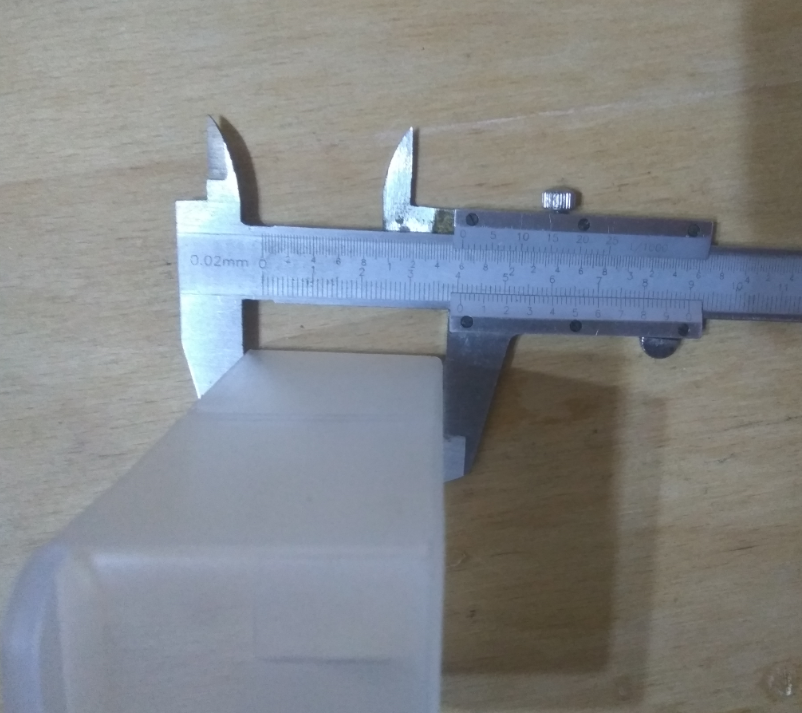
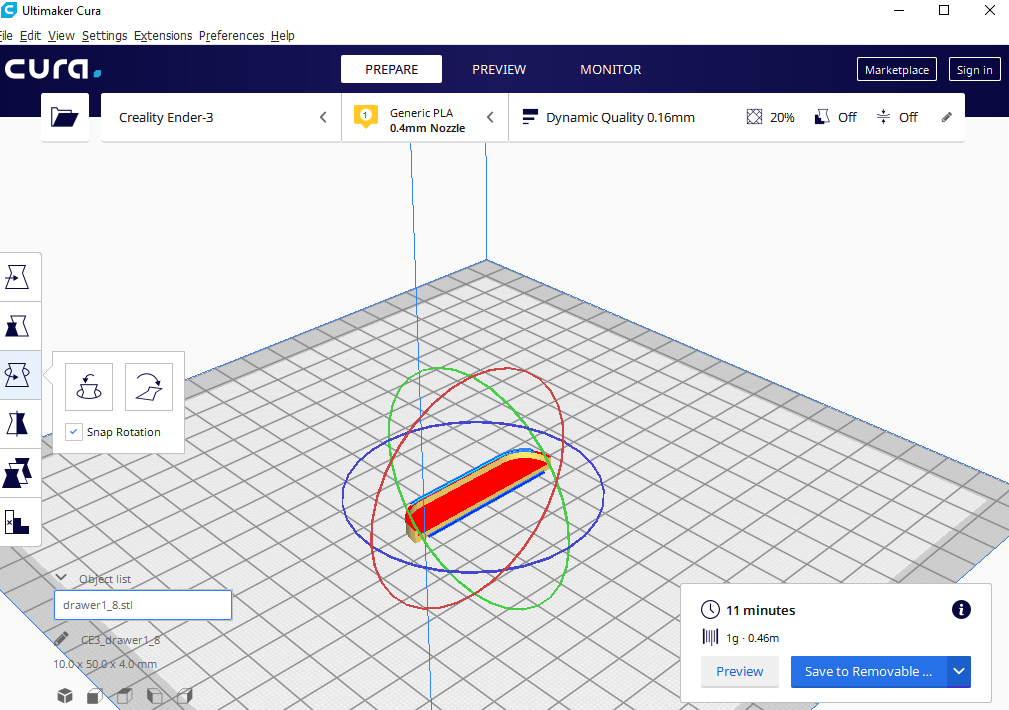
I came up with 92x40x72, so I designed a prototype like this:
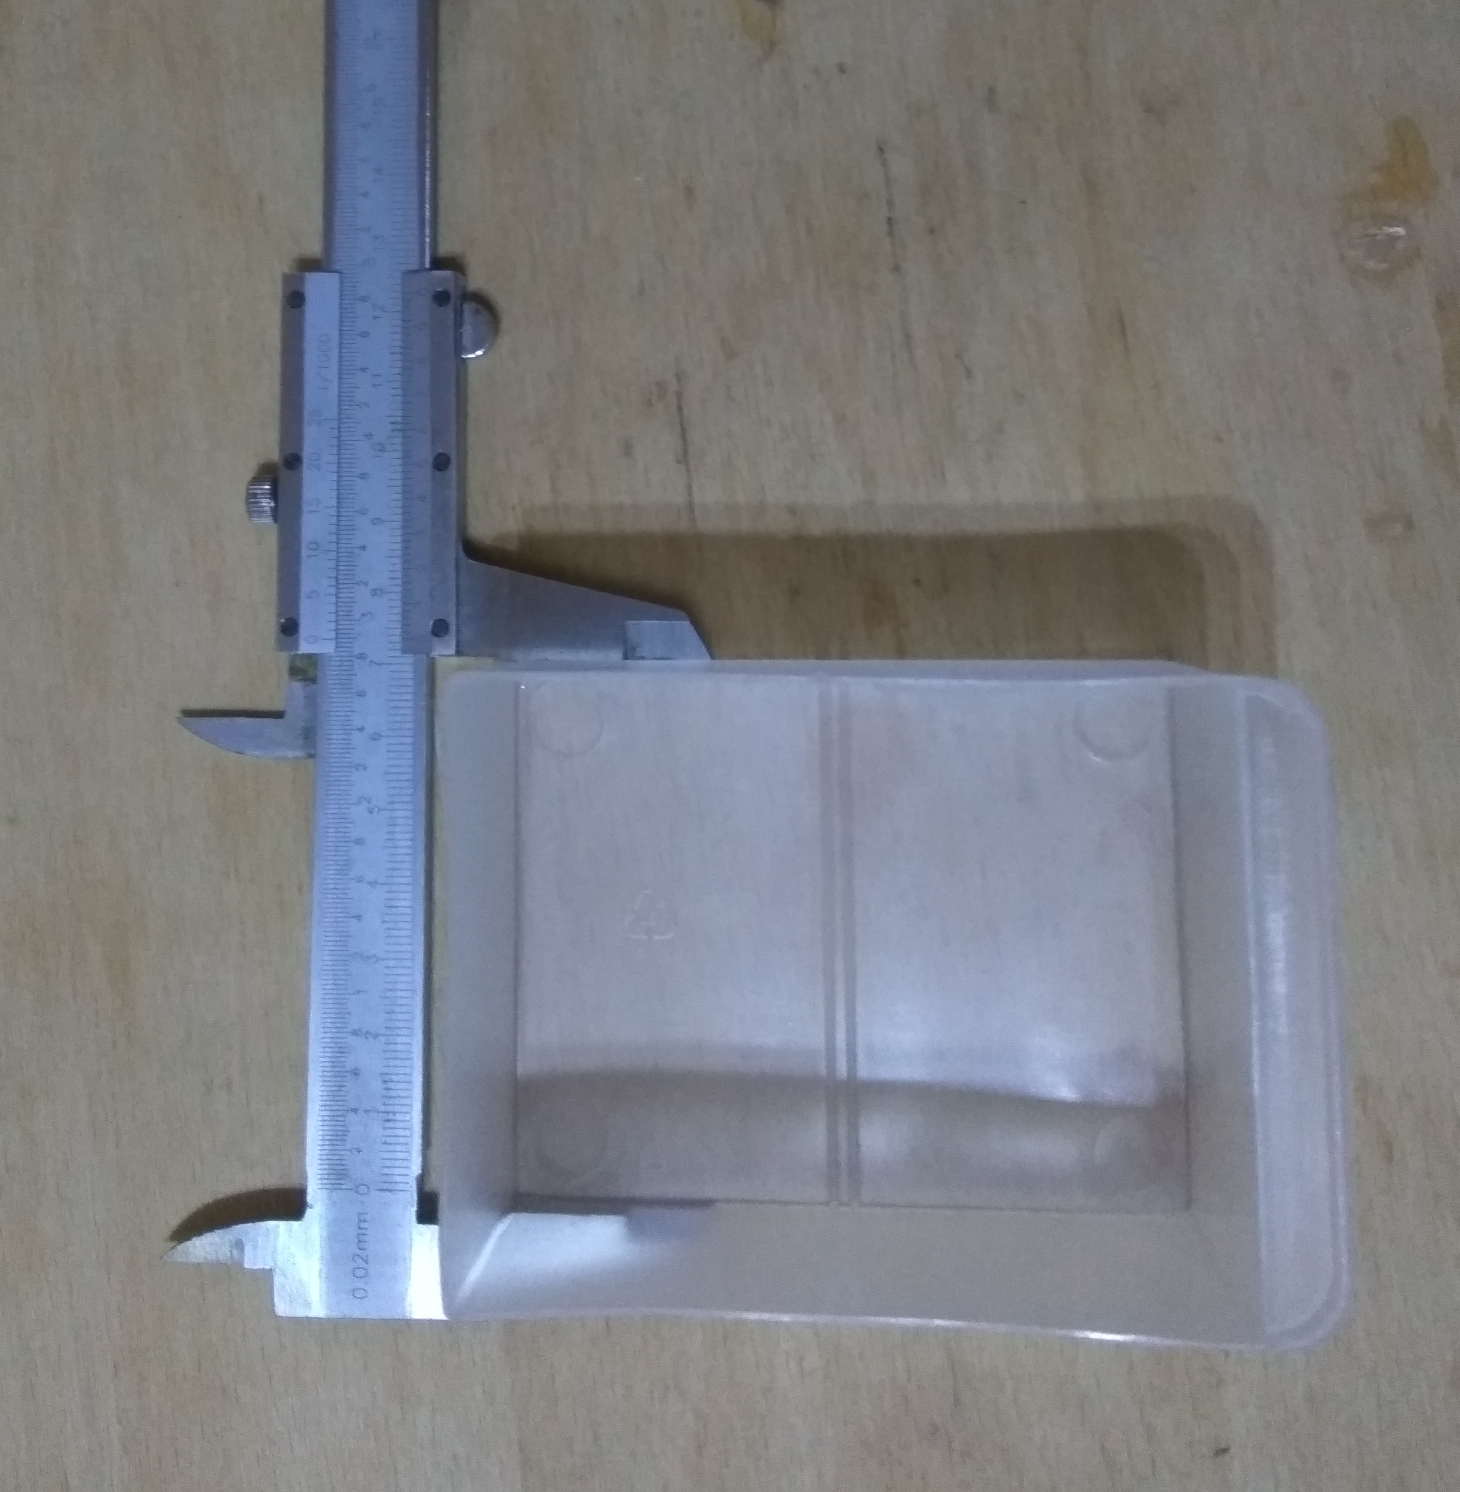
Then, as a first test, I printed it out:
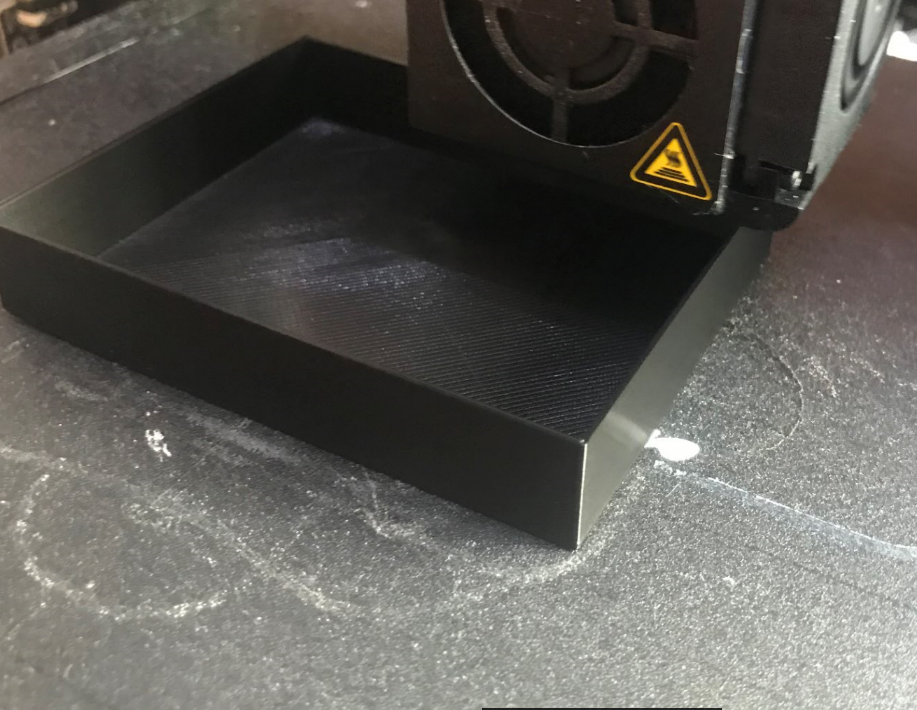
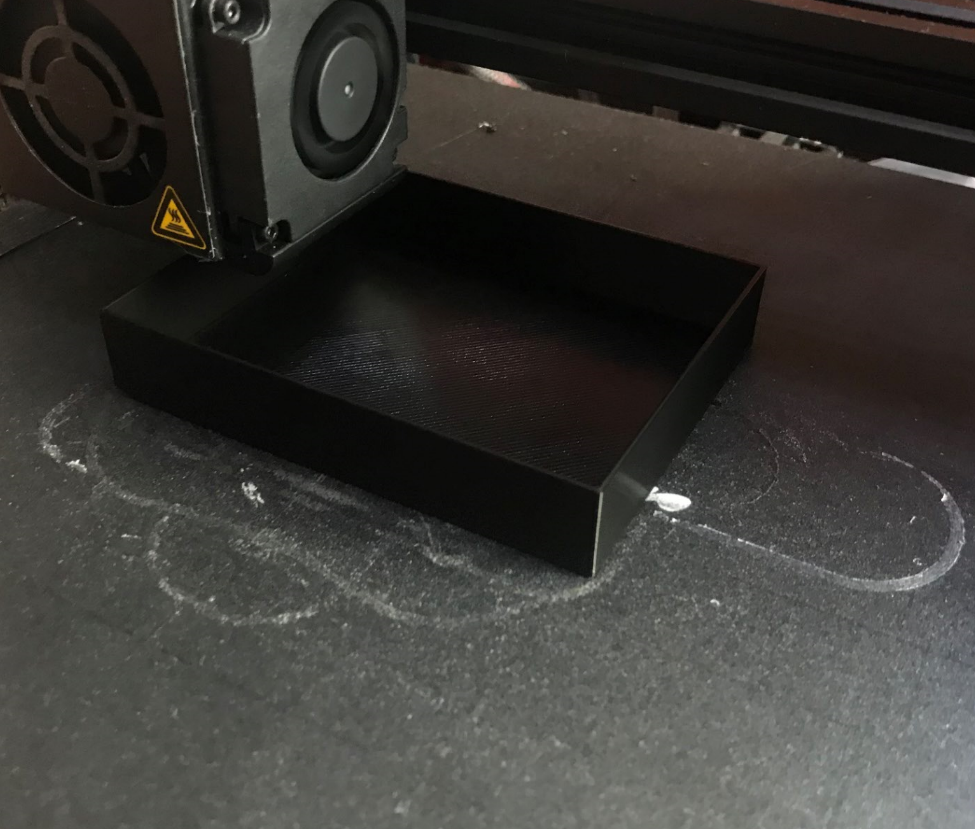
The wall thickness here was 1mm, the print time was just under 3.5h and the weight of the filament used was 25 grams.
The print came out good and solid. I then decided that I would try to print more of these, and to improve the existing model. I also then started to consider versions with 0.5mm thick walls (but such are less robust).
Handles
I then designed a handle. I decided that I would try to make it as a separate print, although I now know that I could supposedly use the so-called supports and print it together with the drawer.
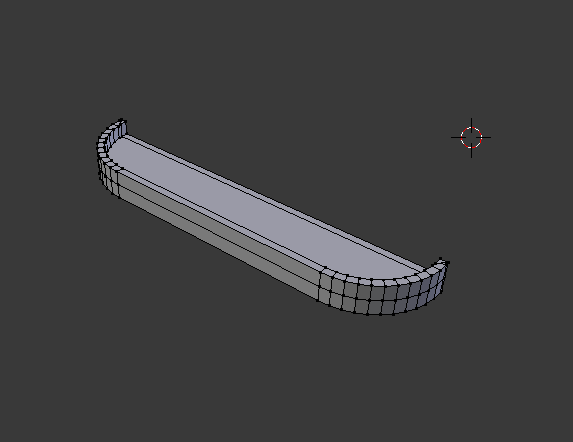
The handle itself turned out to be a quick and light print:
Less than a quarter of an hour and done. The printed handles came out like this:
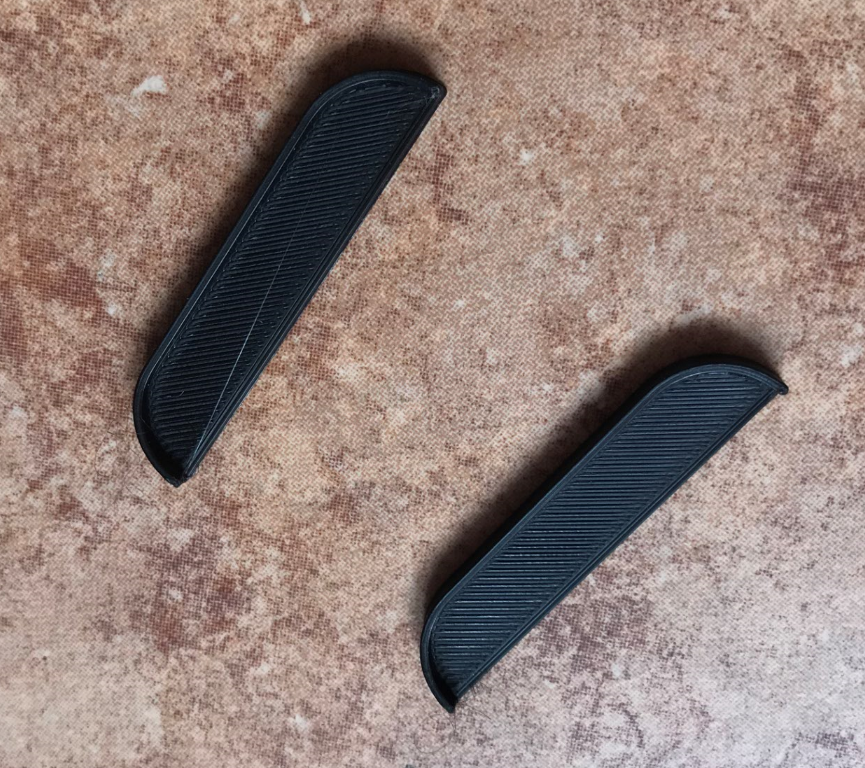
Initially I thought that this was just the first version and that I might modify these handles to somehow go on the drawers (something like a catch), but in the end I left their original concept to the end.
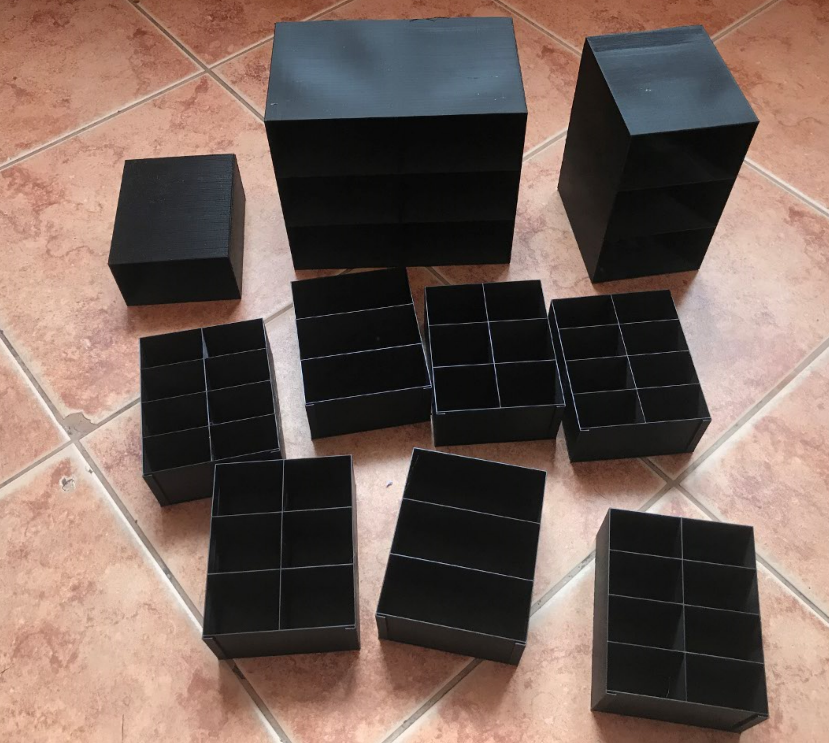
Different versions of the drawers
The next step was to prepare different versions of the drawers. In the end I stopped at:
- 3x1 version - 3 compartments
- version 3x2 - 6 compartments
- version 4x2 - 8 compartments
I decided to print these newer versions with 0.5 mm thick walls for a test, not 1 mm as in the first version.

Counter-intuitively, so many compartments can be useful, especially if someone really likes to keep things tidy and sorted. Even the nuts or bolts themselves are much more convenient to keep separated and not (as some do) mixed up.
"Pocket" for a card
Satisfied with the results, I decided to add something I was unlikely to find in the commercially available drawers, namely a pocket for a card/label with contents.
To start with I made it like this:
The whole idea was to be able to change the signature of each drawer without gluing.

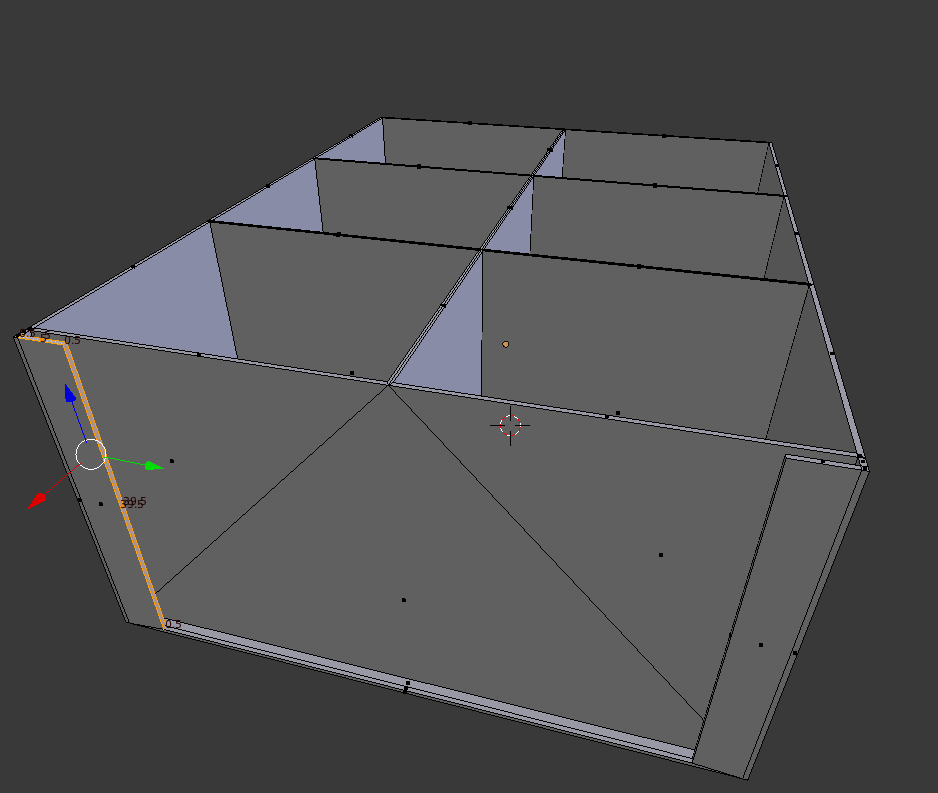
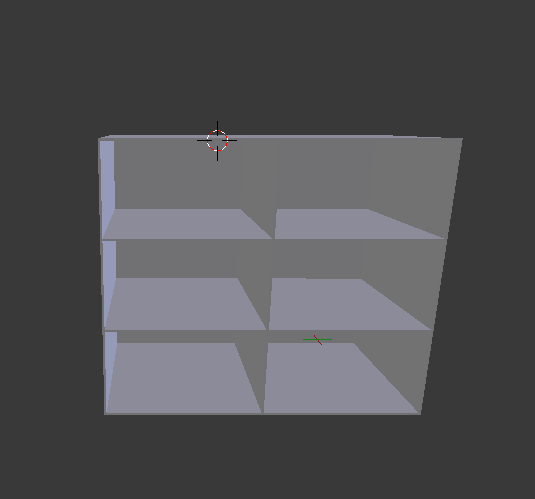
Segment for drawers
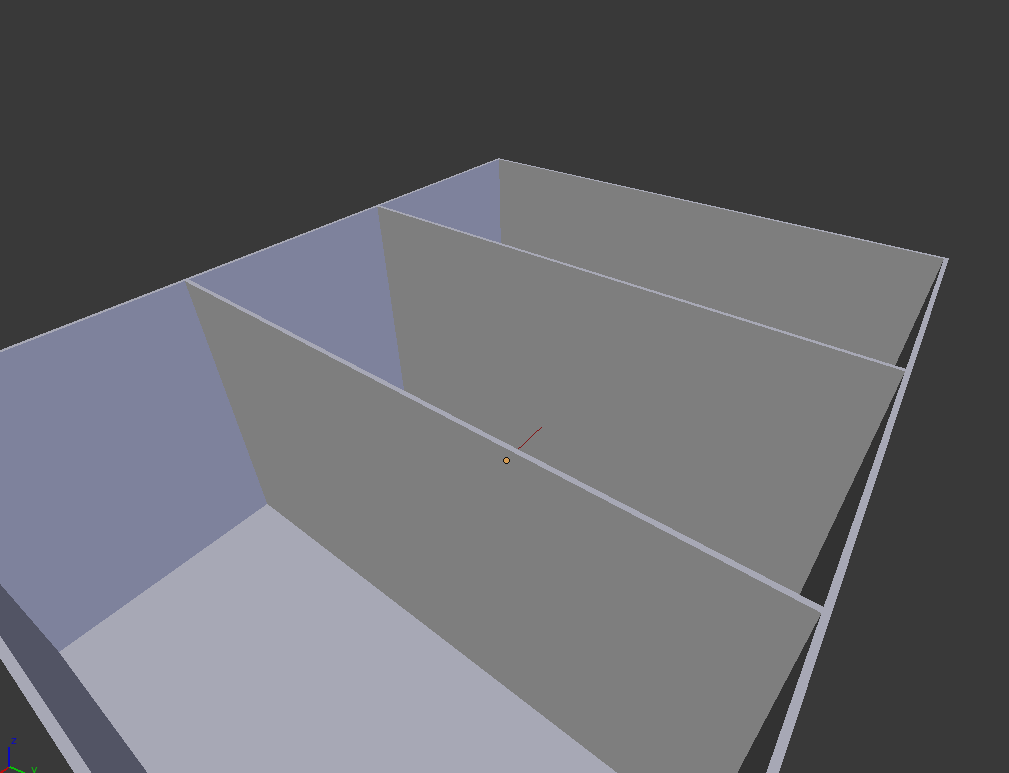
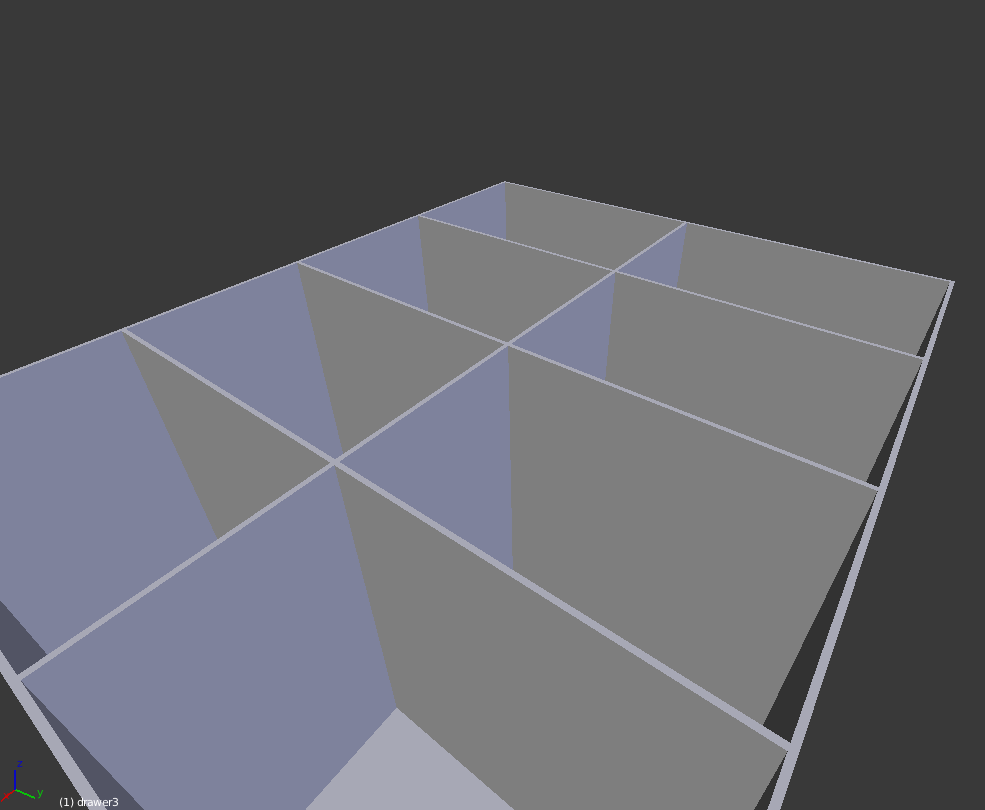
The next obvious step was to already design an entire segment into which the drawers could be inserted. I started with a 3x1 block:
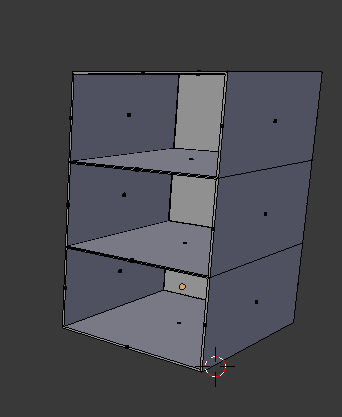
And after testing it (printing it, checking the dimensions) I also designed a 3x2 block:
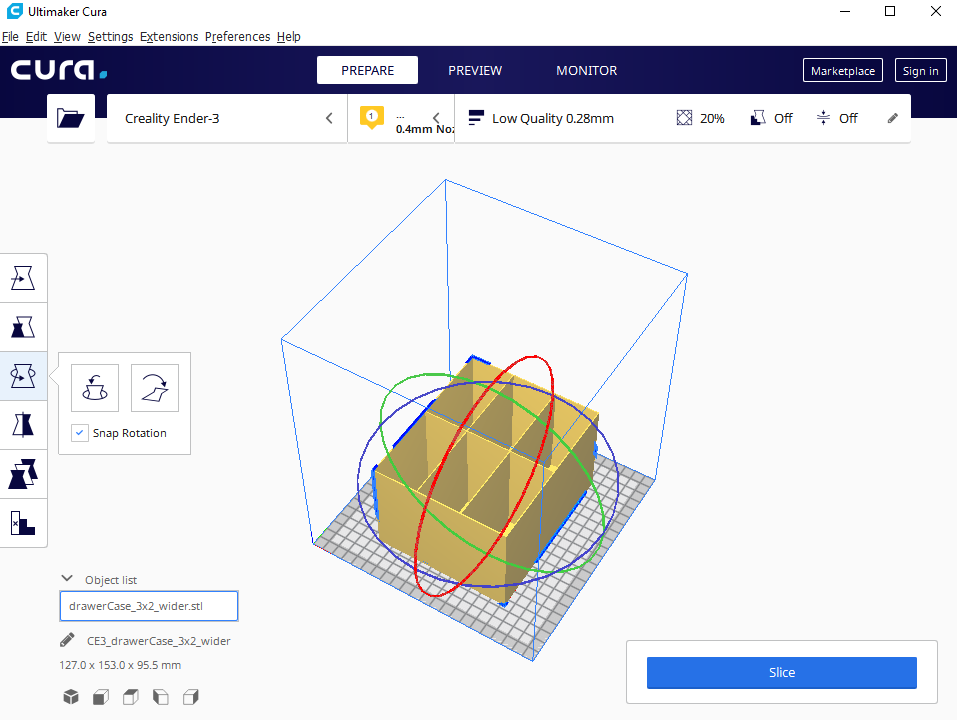
By the way, these were some of the longest pieces I've printed to date. A whole 15 hours! But it was worth it, as the element came out correctly on the first try.
I couldn't design any larger blocks anymore due to the limitations of my 3D printer, but there's nothing stopping you from printing two blocks and gluing them together. In my experience, 'Droplet' type adhesives hold PLA filament very well.
Addition - print times and weights
As a matter of interest, I will include here the print times and weights of the individual items. The values here are those estimated by the program Cura but I know from experience that they are quite close to reality (with longer times the discrepancy in print duration is several minutes). All the items here have been printed using a ready-made set of settings Cura called " Low Quality 0.28 mm ", which is this fastest configuration. Accuracy with these drawers is not critical, although I have changed some of the models several times to make sure they open and close comfortably.
Element: handle

Time: 8 minutes
Weight: 1 g
Element: Element:1x3 compartment drawer 1 g
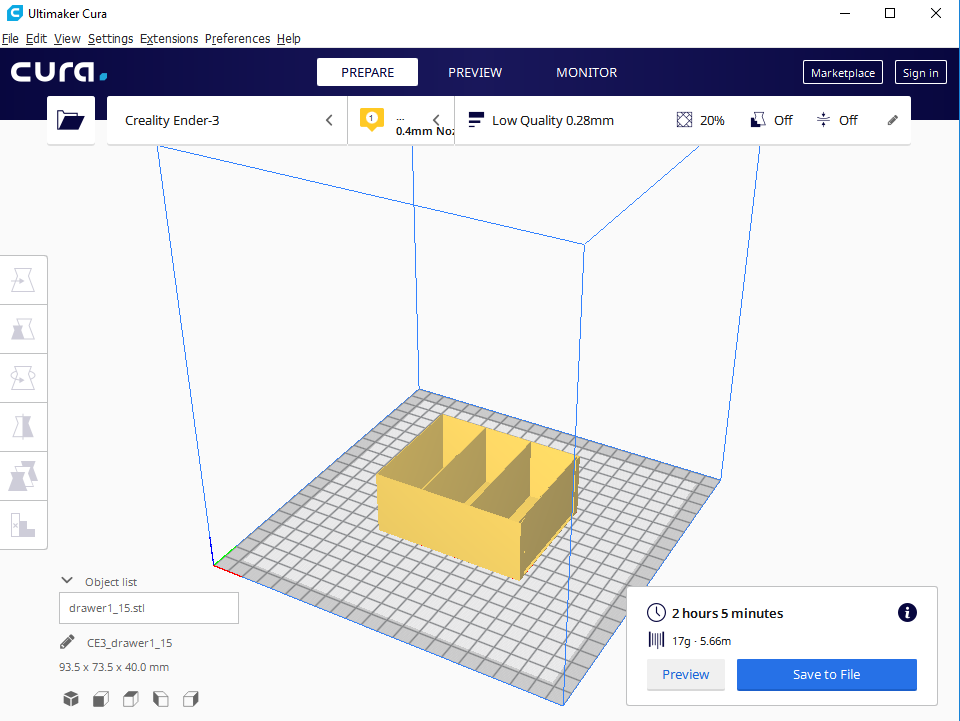
Time: 2 hours 5 minutes
Weight: 17 g
Element: Element:
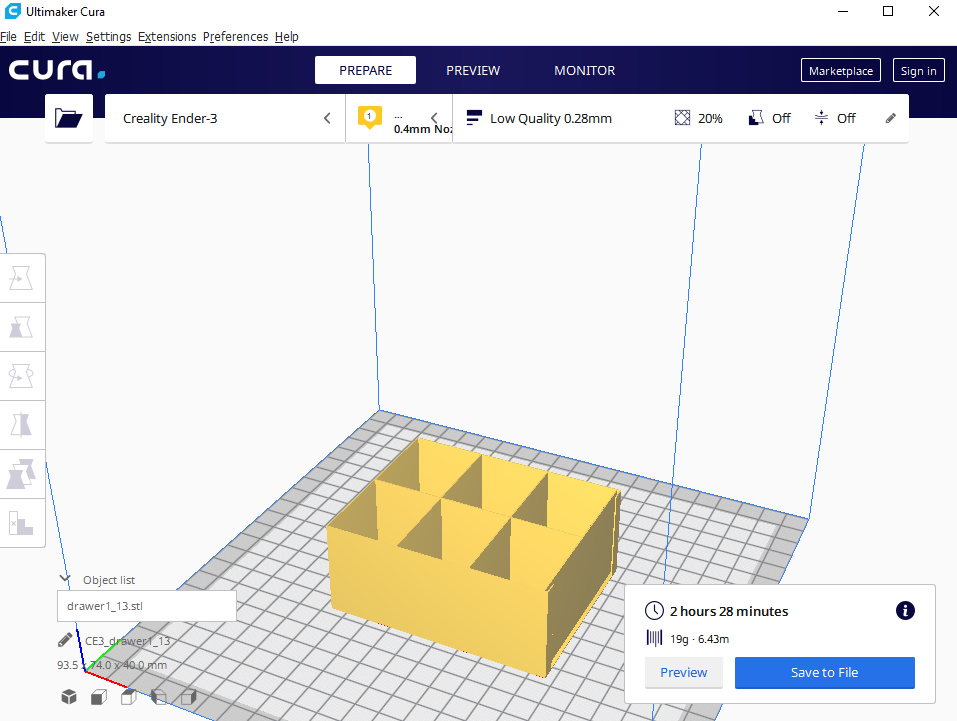
Time: 2 hours 28 minutes
Weight: 19 g
Element: Element:
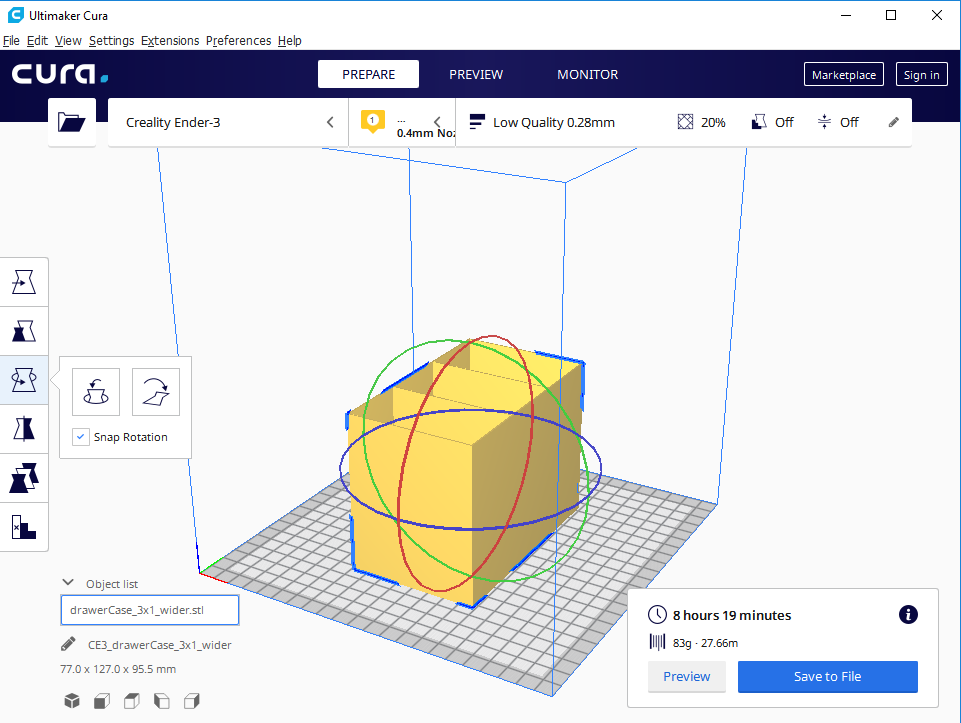
Time: 8 hours 19 minutes
Weight: 83 g
Element: Element:
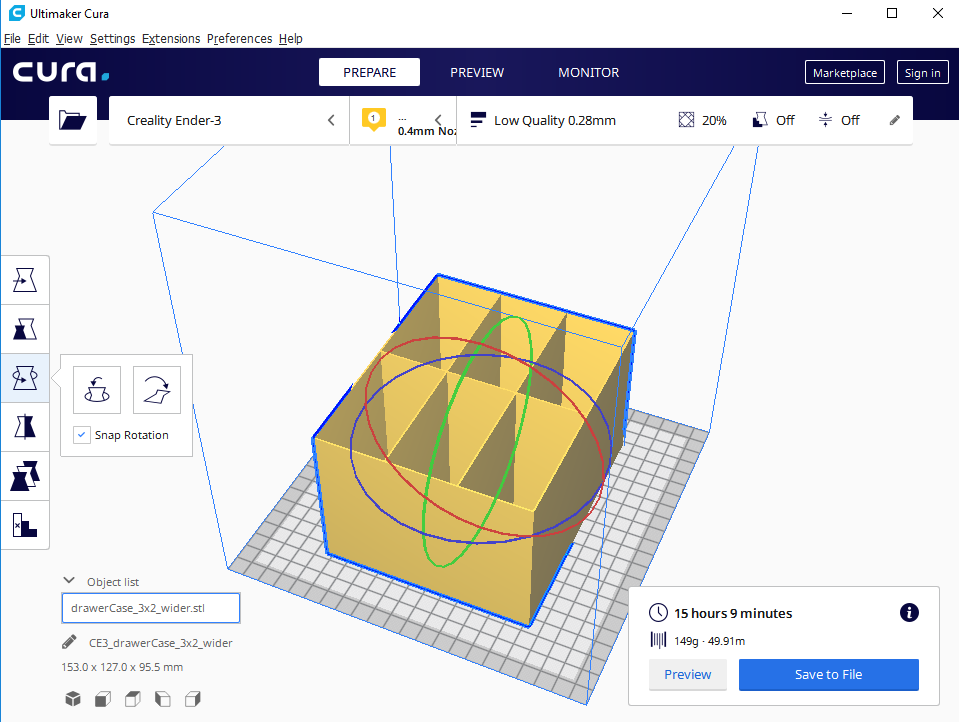
Time: 15 hours 9 minutes
Weight: 149 g
Final results - Custom drawer series
The photo below shows the printed first series of drawers before the handles were glued to them. Some of these have a wall thickness of 0.5mm and some have a wall thickness of 1mm, but I will comment on these thicknesses in the paragraph Conclusions .
The screenshot above shows a model of the drawer, the walls of which are already 0.5 mm thick (this is a bit thin, however) and the thickness of the insertion signature cardboard 1 mm (here 0.5 mm could be given).
This is how the drawers looked after the handles had been glued on (I used Kropelka glue for this):
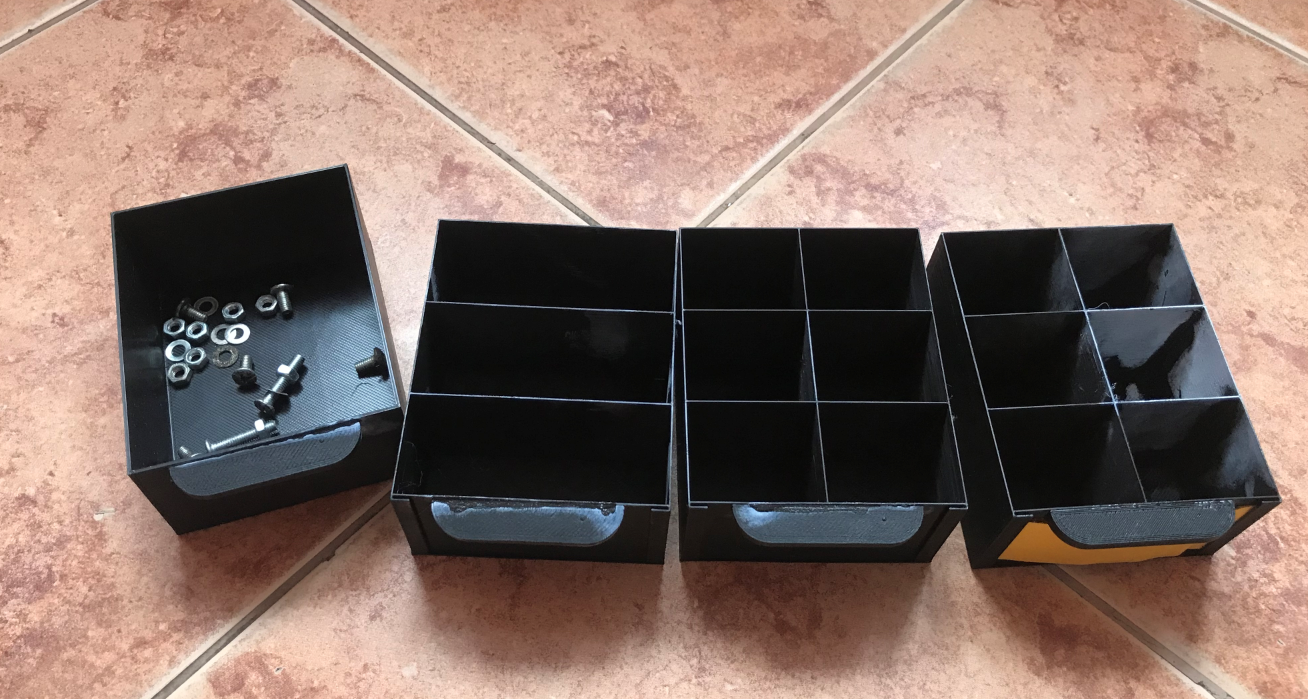
They came out quite solid. In addition, the baffles also reinforced them. I will write more about the solidity of the print in the conclusions.
Final results - Patrol module compatibility
As I wrote earlier - my design is compatible with the Patrol module, i.e. the drawer from the Patrol module can be inserted into my segment, and the drawer from my design can also be inserted into the Patrol segment. The dimensions have been specially chosen so that the drawers do not go quite loose, but also go in comfortably and conveniently.
This is what one of the Patrol drawers in my segment looks like:
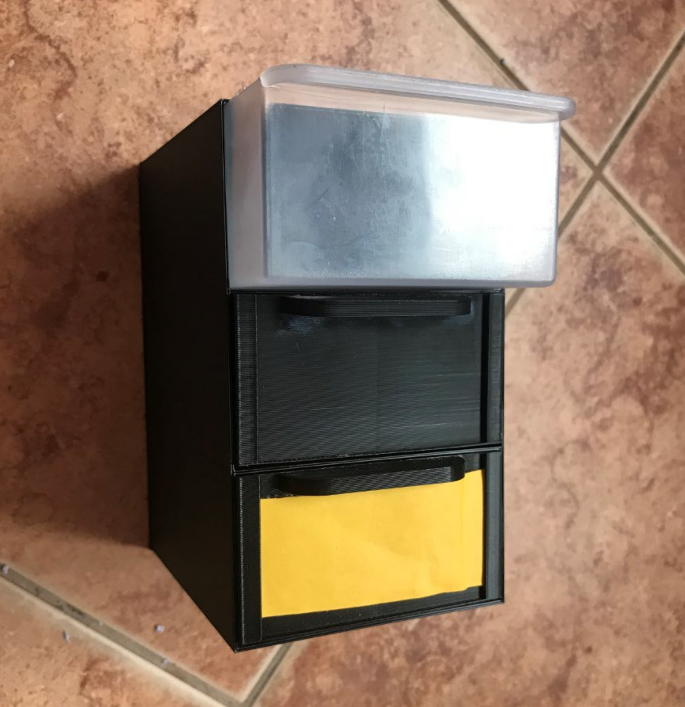
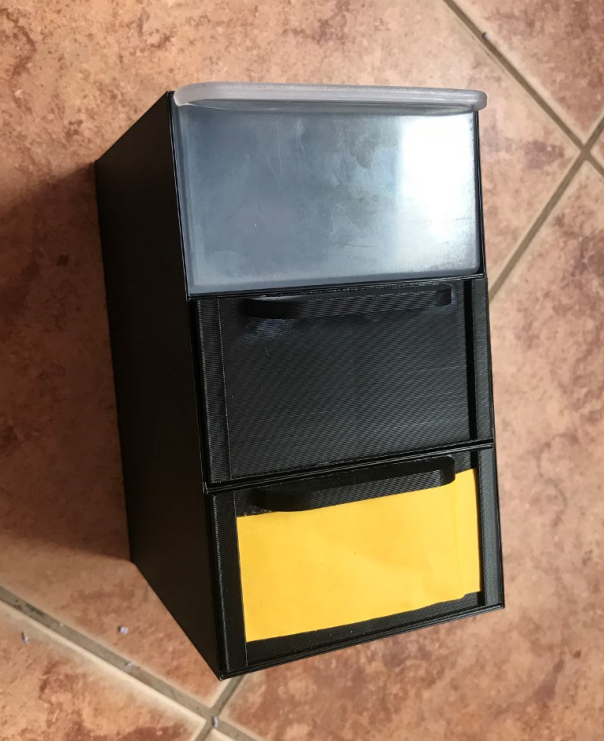
This is very convenient and useful. I already have quite a few "Patrol" drawers installed in the workshop and with this I can manage them better without moving them, which would require unmounting the entire segment from the wall.
Conclusions, observations
I drew the following conclusions from the first series of drawers I made with the help of 3D printing:
- 3D printing allows many types of drawer/piece organiser to be made
- the printed parts can be successfully glued with a drop and the handles stick in this way, although I think that gluing could be avoided by using a so-called "glue gun". supports
- wall thickness 1 mm results in a very rigid and robust drawer, however then the whole thing prints for a long time
- a wall thickness of 0.5 mm results in a more flexible drawer (but within the acceptable limit of suitability, unless one would not handle them well and/or hold heavy parts in them). Then the print is much faster.
- when printing with 0.5 mm thick walls, strange problems occur in places where successive layers of filament do not want to adhere to each other and "go loose", but I encounter this occasionally and it can be fixed with a few drops of glue
- it is much better to leave more slack between drawer and its segment than to give too little slack; if we give too little slack, drawers quickly wear and tear, especially if they have walls 0.5 mm thick
- the additional compartments in the drawers strengthen them considerably, which makes it possible to relax a little bit about the thickness of the walls
- the whole idea of printing out the necessary segments and drawers is very, very convenient in my opinion, everything can be customised in CAD and printed on the spot
- the thickness of the card 'pocket' could be reduced, as at this point you have to put a piece of cardboard in there to make it stick well (possibly thicker paper)
- the drawer segment uses quite a lot of filament, you could try to print it not 100% filled but with holes to reduce its weight
- there is still the issue of fixing the segments, both to each other and to the wall, to be improved. for the moment this is not urgent, because at my place they simply stand on the countertop
The question at the moment is how my drawers will fare after, say, a year of use. Then I will be able to judge more reliably whether a wall thickness of 0.5 mm is at all acceptable and whether gluing the handles with a droplet is really an acceptable idea. So far, they all work out pretty well.
In the worst case scenario I will just print them again, but all with wall thicknesses of 1 mm and maybe even more.
And what do you guys think about designing and printing your own drawers and organisers for the workshop? Feel free to discuss.
PS: I am attaching the source file where the models shown in the topic are. I make no guarantee that their dimensions are correct. I have widened some of them to work better with the Patrol drawers. The models may also actually come out slightly different due to printer settings. Before printing things from a file from me, I recommend double checking the dimensions. I myself corrected the dimensions once because the first version of the drawer was going clumsy and locking up.
The above attachment is in the format blend . Before printing, the individual models must first be exported from it to STL, and only then can the STL be converted to gcode for the 3D printer in question.

p.kaczmarek2 wrote 14683 posts with
rating 12711 , helped 656 times.
Been with us since 2014 year.
Comments
You'll probably hate me, but I'm going to be monothematic with your latest projects. As with the screwdriver holder the economics lie.... While it is justifiable to print a damaged drawer it is simply... [Read more]
At the Chinese, there are such drawers to choose from, to colour, for 1/100th of this price. [Read more]
The largest segment, the 3x2 weighed 150 grams (without the optimisation that can be added). With the price of the filament now available online, which is PLN40, this comes out to PLN6. A drawer of 20... [Read more]
But what guarantee that, two or more years down the line, when you want to expand your "cabinets", you will buy the same ones from him. And even when they are similar, will they match the previous one... [Read more]
There is another issue with the drawers that I forgot to mention - I can't imagine drawers for electronics that are not transparent. Somehow the inscriptions are not enough for me, but if others don't... [Read more]
You know, I don't know how your printer would take it, but I would be tempted to buy a 1mm nozzle, I have an Aneta 8 and with this nozzle it can handle this type of printing in vase mode in no time at... [Read more]
@Kobra, point out where my criticism is not constructive. I NEVER write just to write something. I always justify my criticism with reasons why I do and don't, and suggest other solutions. I also wrote... [Read more]
(Printing everything from scratch is just pointless - time, cost, questionable durability of a flaccid component As for me, you don't know what you are talking about PLA is very hard and resistant (I... [Read more]
I don't understand why you continue to go private and attack me. Your statements continue to lack substance, and about the flaccidity the author himself even wrote :) . Following your line now... You... [Read more]
I don't understand why you continue to go private and attack me. Your statements continue to lack meoriticity, and about flaccidity the author himself even wrote :) . Following your line now... You criticise... [Read more]
Thank you for your kind words and for your criticism. I, nevertheless, continue to believe that the cost incurred in making customised drawers (i.e. ones that are not on sale, i.e. those of my 6-chambered... [Read more]
Plus for the fixed partitions. The movable ones are only in theory about convenience and configurability. In practice, after time the elements chase all over the box. [Read more]
Exactly, I know this problem all too well. The worst thing is to give different compartments parts that look very similar and are small, such as screw washers. I have had this happen so many times... [Read more]
I am waiting for a project to 3D print a match or a stick.... The printed screwdriver holder and boxes are a complete misunderstanding and a dead end in the use of this technology. [Read more]
Fellow cracker you are strange, try to buy such a clutch. the white one is original (deliberate aging of the product) broke after a year and the blue one is a revised version made of PLA of questionable... [Read more]
I am not the odd one out, but you are attributing content to me that I have not addressed! I do not question the essence and technology of 3D printing! But where it is justified by time and economics! I... [Read more]
By the way, so as not to start a new topic: which 3D printer is now worth buying? [Read more]
The colleague's project - even if not entirely justified, in terms of effort and printing time - is quite interesting. With time calculated in hours, I wouldn't have so much patience and would buy twice... [Read more]
Rather in the price range up to about 1000PLN, with a view mainly to printing some not too large details, parts, etc. Which of these cheaper ones do you recommend? [Read more]