Simple screwdriver stand for wall mounting - design and 3D printing
TL;DR
- A wall-mounted screwdriver organizer with 10 slots was designed in Blender and printed in PLA on a Creality Ender Pro 3.
- The model is parametric, so the hole count and sizes can be changed quickly without editing each hole individually.
- The design uses 20 mm spacing, 5 mm holes, and a 10 mm by 180 mm body, with two fixing holes.
- A flat test print took 15 minutes, and the final part printed in less than two hours in Cura.
- The finished organizer mounted on a wooden workshop wall held the screwdrivers securely, though deeper hole bushings or two rows could improve retention.
Generated by the language model.

Hello my dears
Today I'm going to describe here my screwdriver organiser/stand/segregator that mounts on the wall.
I designed the whole thing first in the 3D modelling program Blender, and then printed it on a 3D Creality Ender Pro 3 using PLA filament.
Project ideas
The idea of such an organiser for screwdrivers is quite old and I myself have encountered it already in a wooden version, i.e. it was simply a board screwed to the wall and holes were made in it. But progress is moving forward, so I thought, why not print something like this for myself on a 3D printer? I decided to give it a try and gave myself the following assumptions:
- the model should be simple, without unnecessary additions
- model will be printed in ' Low Quality ' mode, that is the fastest one
- the model will have 10 screwdriver holes and two fixing holes
- the model will be made in Blender and will be made parametrically in Blender (i.e. I will be able to quickly change the number of holes and their size at any time, without having to edit each of the holes individually)
Element design
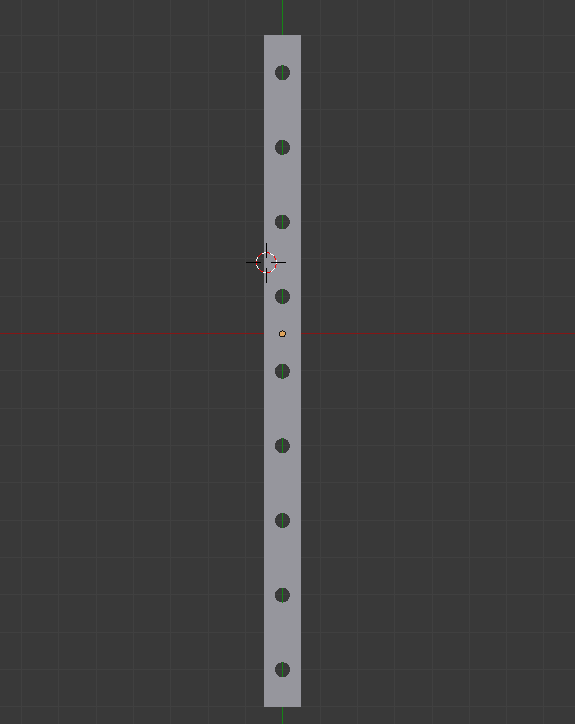
I started by designing the element in 2D. I assumed a hole spacing of 20 mm and a hole size of 5 mm .
The whole piece had dimensions 10 mm on 180 mm .
I also took the liberty of printing out a test piece, just for a live fitting. Specially one that is flat so as not to waste the filament. This sort of thing avoids any major/trivial errors getting into the final model.
After printing the above model (it only took 15 minutes to print!), I made the first fittings to my screwdrivers:
It came out pretty well, so I didn't actually make any big adjustments, just slightly resized the holes and started to develop the design. I added fixings, made it thicker, and extended the holes to make the screwdrivers hold solidly.
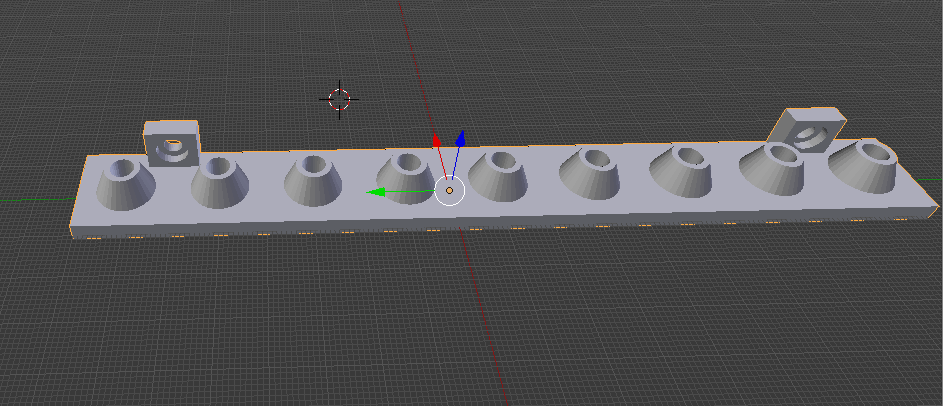
The final version of the piece looks as follows:
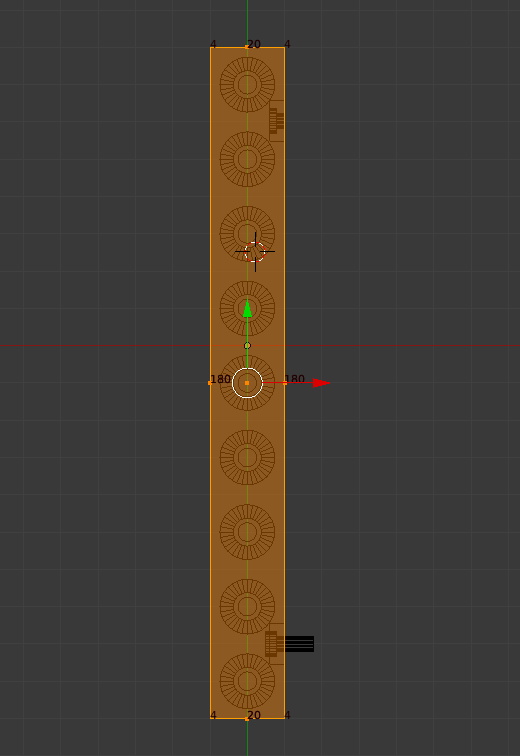
Additionally, I give a screenshot of the dimensions shown:
Print of the component
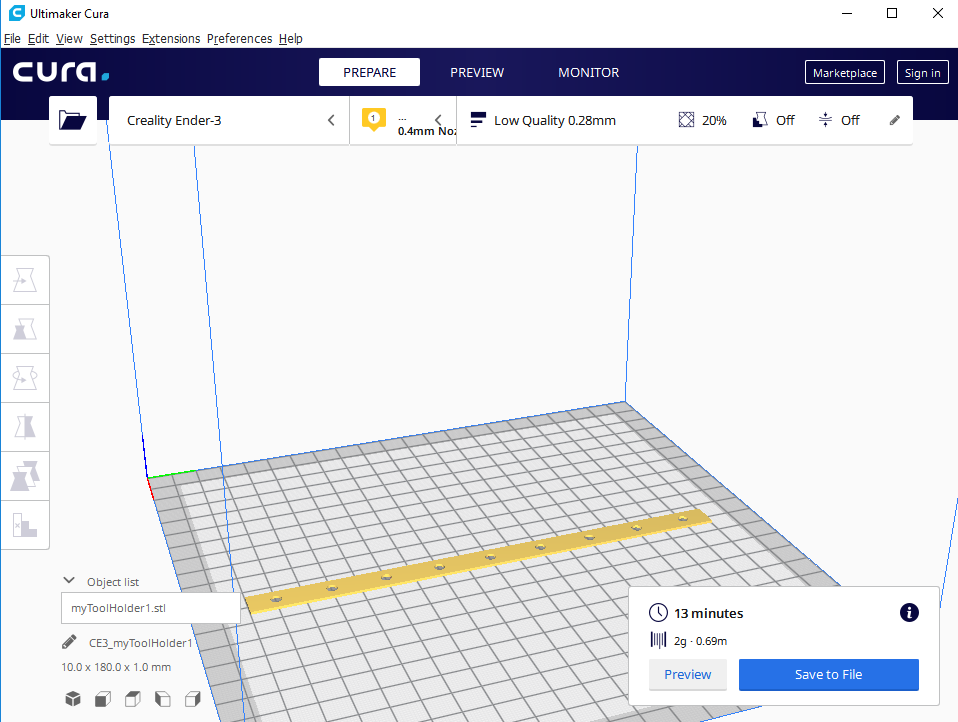
I imported the final model into Cura and started printing.

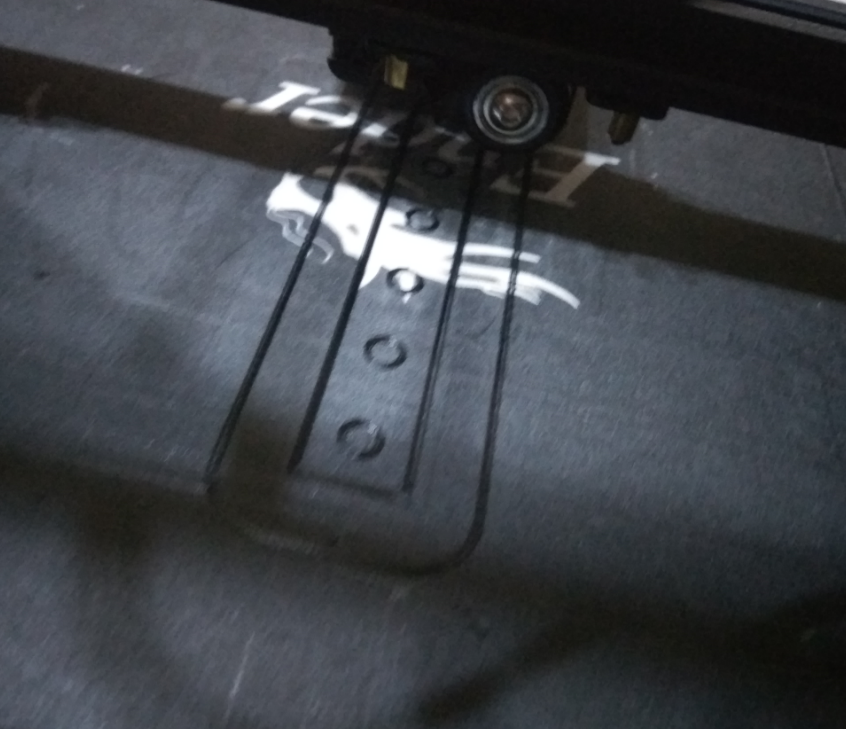
During the printing process, I observed that the 3D printer first applies a sort of border to the model (and the holes) and then only fills it in. Image is the photo below:

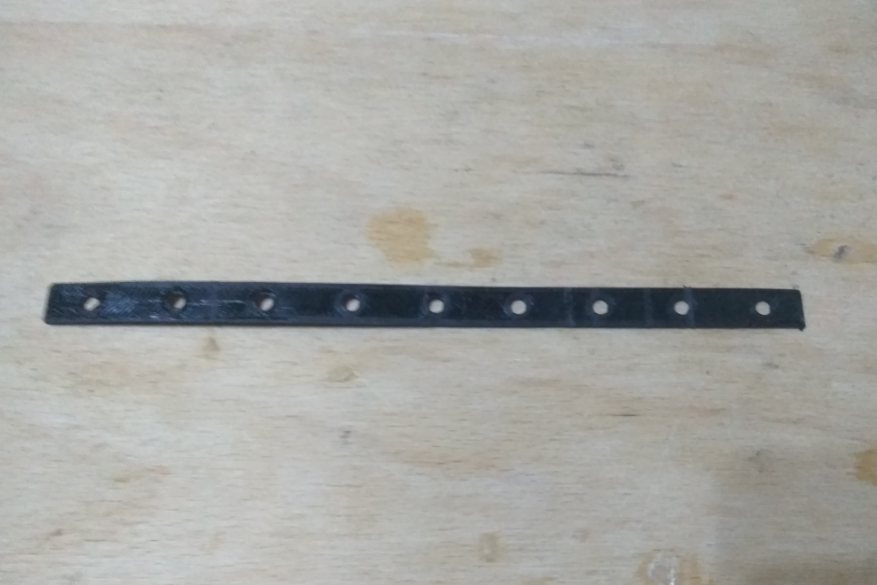
After less than two hours (according to the time estimate from Cura) the piece was ready. It came out like this:
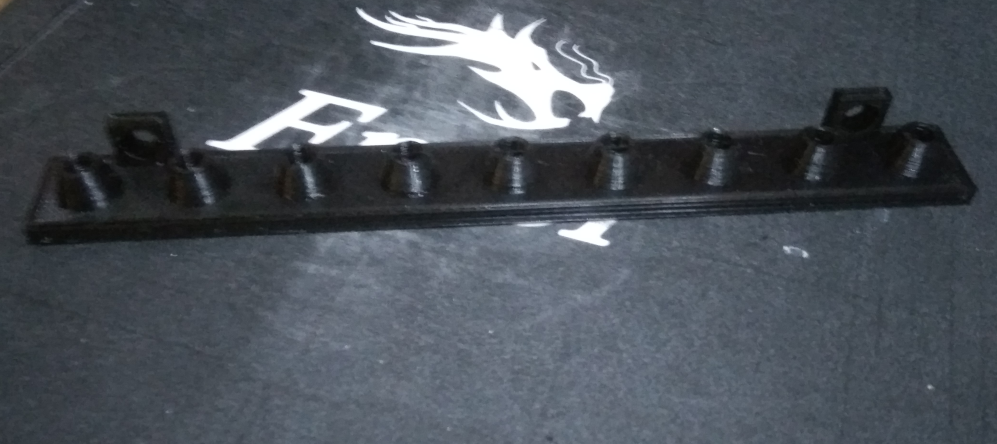
It looks promising, but will it work? We are about to find out.
Final result Final result
In the end, I prepared the following kit for myself to assemble (printed piece-organiser, two screws, and screwdrivers):
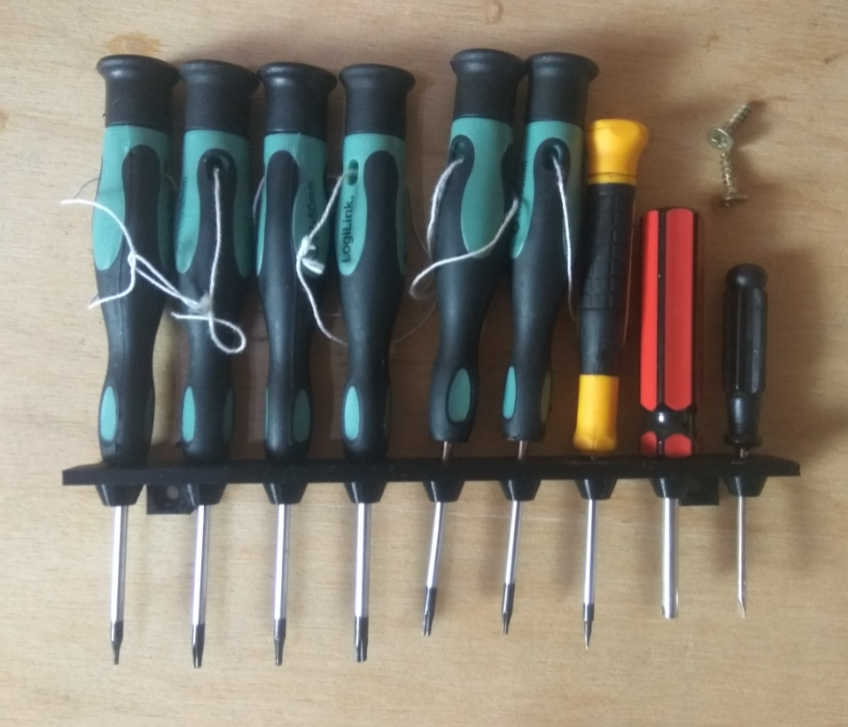
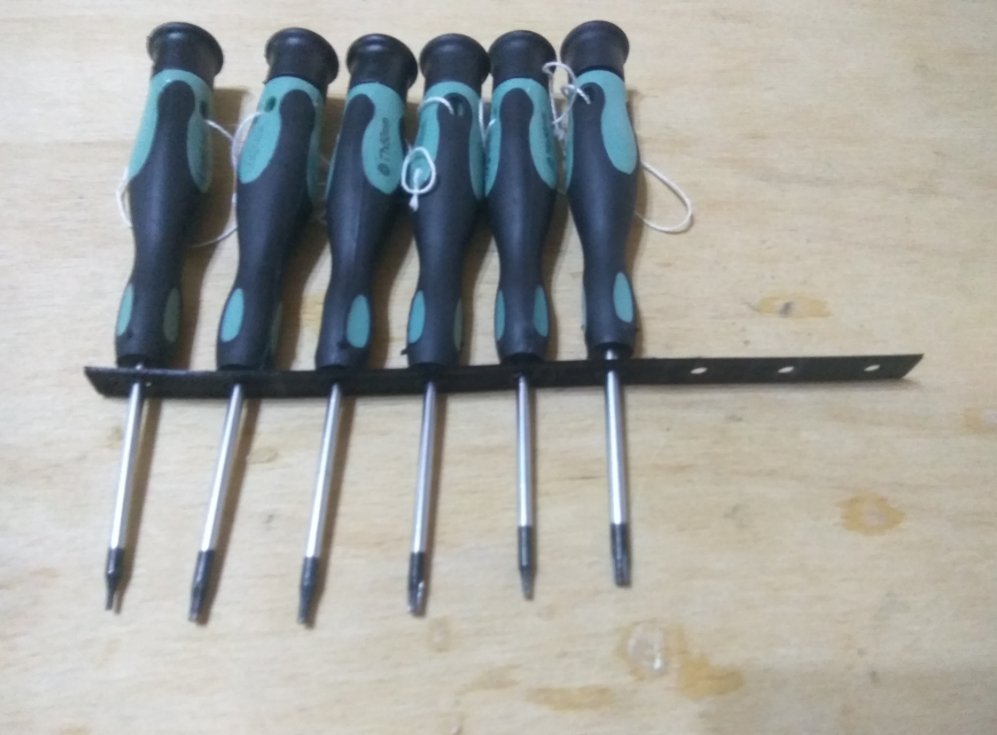
I mounted the whole thing on a wooden wall in the workshop:
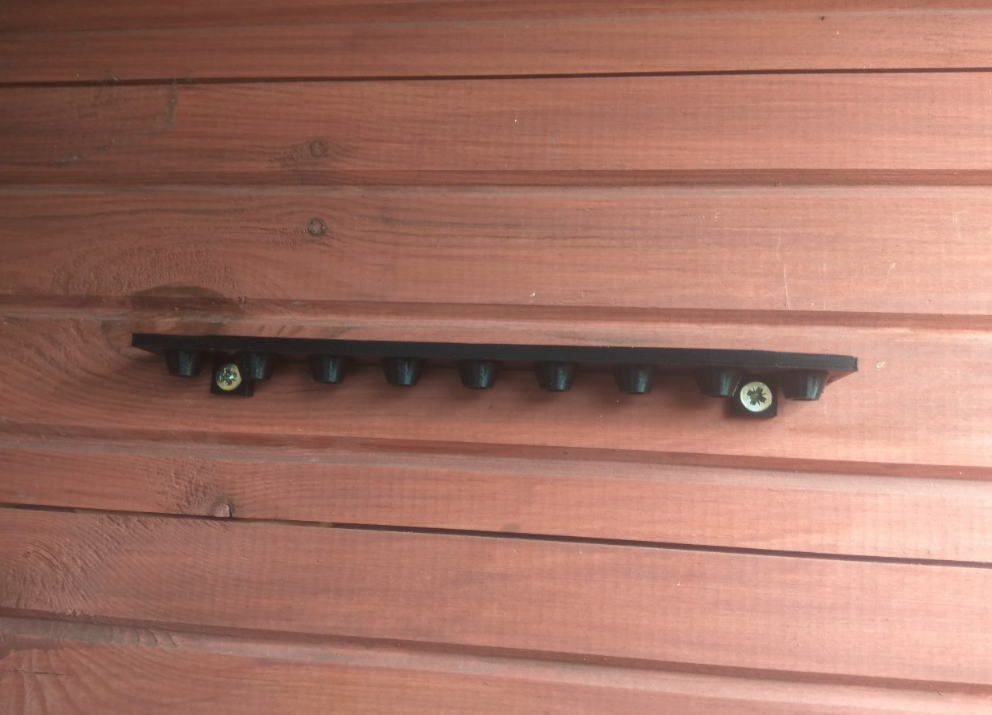
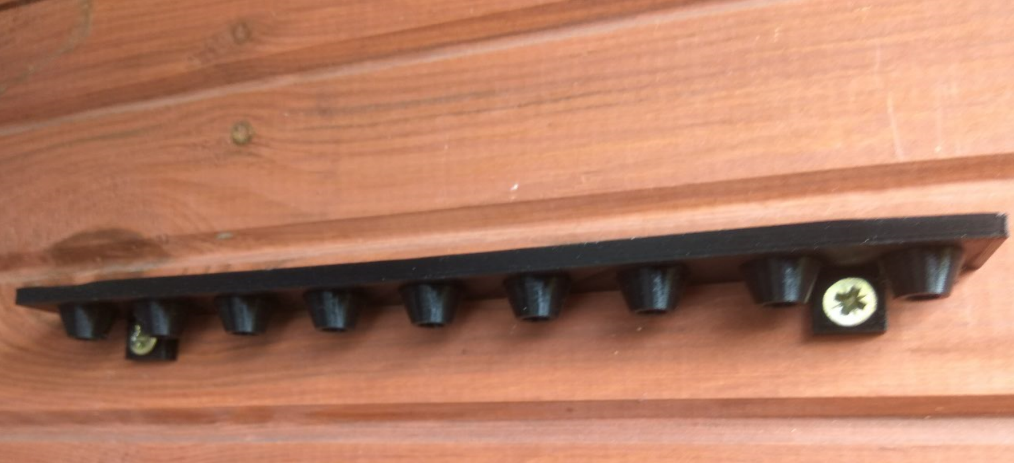
This is how the organiser already looks in use, along with a set of my torx screwdrivers (and a few others).
Summary, conclusions
I am very happy with the design. It is small, simple, and yet pleasing. As for improvements, I guess the only thing that could be done would be to extend those bushings of holes to make the screwdrivers hold more solidly in it, or make a version with two rows of holes.
The length of each piece is unlikely to be able to exceed 200mm in my case, as I am limited by the print area of my 3D printer ( Ender Creality Pro 3 ). Theoretically I could try after making the model to rotate it and align it diagonally, but I think the game is not worth the candle.
The organiser will certainly last me a long time, and even if by some miracle it gets damaged (which I doubt, the print is very solid and hard) I will just print it again.
For those interested, I am posting the source file with my model (in blend format):
Additionally I attach the same but already exported to STL format:

p.kaczmarek2 wrote 14612 posts with
rating 12630 , helped 655 times.
Been with us since 2014 year.
Comments
In my opinion, this is unfortunately a complete misunderstanding. How long does such a print take, what cost (including time spent on the project)? In order for the criticism to be substantive...Such things... [Read more]
Wait a minute, in the subject line you have all the information you need , you just have to read it all. The print time per piece is 1h 41 minutes and the weight per piece is 16 grams. Recently, a kilogram... [Read more]
Printing may be cool but in this case I would actually prefer to drill a piece of old board. The design can be drawn in tens of seconds and also duplicated indefinitely. A drill shouldn't use much electricity... [Read more]
As a project carried out to have fun with a 3D printer...cool. Better than printing dwarf figures. Unfortunately, however, I have to agree with the previous speakers that printing this type of "invention"... [Read more]
Easier and simpler to get out of the cable tray. But as an exercise it is ok. [Read more]
An interesting idea, of course more for the purpose of training the preparation of the design and the print itself. In addition, you get high aesthetics when comparing to a piece of wood or sheet met... [Read more]
The project doesn't kick ass, but that doesn't mean it didn't make sense. It's good that you've practiced and have more experience with the printer and projects. All I can do is wish you continued success!... [Read more]
As a training project I am of course in favour. However, I would think twice about continuing to equip the workshop with these types of prints. Well, unless under some distinctive tools that are hard to... [Read more]
Hello! On the mechanical side, I would also add supports between the two surfaces, the grommets for fixing on the wall and the slat itself. It will then not break even accidentally or due to material... [Read more]
And I understand the printer was given to a colleague as a gift for his birthday. [Read more]
And did you get a screwdriver and a drill or did you buy one ? Because those two things are the cost of a printer, unless you buy the cheapest sort. (Ba, I'm tempted to say something else, I'm assuming... [Read more]
The prices of printers are at such a level that many hobbyists can afford one to play with. So if something useful is created on it, rather than just toys, dumbwaiters and keyrings, that counts for a... [Read more]
SkechUp or ThinkerCad online [Read more]
SketchUp I recall - also used to come by default with Windows I think? Or maybe I installed some free version for myself.... I can't remember. About 8 - 10 years ago I was doing a visualisation of something... [Read more]
DesignSpark Mechanical, based on the Spaceclaim engine, only free. Pozr [Read more]
Fusion 360 [Read more]
It already depends... a well raked (no burrs, etc.) angle bar made of Al can look better = especially if you use an angle bar with oxidation in a colour (matching the shelf for example). Just go to OBI... [Read more]
And I'll just remind you some more, as this data is lost in the subject: Such a one 16-gram fart! Seriously? Very economical, very... Like nothing, only mass production to open :D [Read more]
Thanks for the hints. I'm a "layman" on the subject, so I approach all programs without prejudice. I'm using each one for the first time ever. As a test, I've thought of doing a winding staircase.... [Read more]