 Hello my dears
I will describe here in detail how to configure
Raspberry PI together with
OctoPi to operate the 3D printer over the network
WiFi . This is a very convenient solution because normally when we want to print something we have to manually put our model file (or more precisely: code
GCode for the printer) onto the microSD card and put it into the printer. And with the solution shown here, this can be done fully over the web (via a
web browser and a locally hosted
web site ) with a few clicks.
The method shown here also allows you to connect a webcam to view the printout, but I will skip connecting it and focus on the network printout itself.
The method described here will work on various
Raspberry and 3D printers, but I will do it using the example of
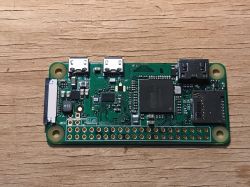
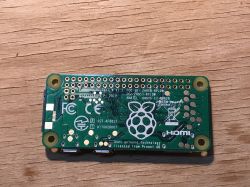
Raspberry Pi Zero W and printer
Ender 3 Pro .
What is OctoPi and OctoPrint?
To begin with, it would be useful to define exactly what is what. Admittedly, the two names can often even occur interchangeably, but each actually means something slightly different.
OctoPrint (current version is 1.4.0) is a web server/interface for 3D printers. It allows you to control the printer via a web browser, send it gcode files via a form, etc.
OctoPi (current version is 0.17.0) is a finished system image configured with
OctoPrint for
Raspberry PI .
Short table of contents of what I will describe here
Here I will describe:
- how to prepare a microSD card with
OctoPI for
Raspberry (along with uploading our network configuration so the Raspberry will connect to it by itself)
- how to connect
Raspberry to a 3D printer
- how to get the IP address of our
Raspberry (if the normal way of connecting to it via
http://octopi.local does not work)
- how to configure
OctoPrint to work with the printer (settings
Serial Port )
- how to use
OctoPi to print over the network
I won't describe here how to share our printer across the Internet, as I simply didn't have the need to do so (sharing on my home WiFi was enough). It is possible, but you will have to do it on your own.
What Raspberry to use?
OctoPi is compatible with many versions of
Raspberry PI , but the final choice of 'Tiny' depends on whether you only want to send
.gcode (print files) over the network or to watch the print progress via the webcam.
If we want to use a camcorder then we should definitely choose a more powerful microcomputer,
Raspberry 3 or 4. Sending the camcorder image requires bandwidth and with a weaker 'Tiny' could negatively affect the print quality.
If you only want to send GCode alone over the network and you don't need a webcam, then
Raspberry PI Zero W should also work fine (in my case it did).
I chose
Raspberry PI Zero W and I will describe all the steps here on its example, but for other
Raspberry they will probably be very similar.
What will we need?
First of all - printer
Ender 3 PRO or similar. A full list of printers compatible with
OctoPi is here:
https://github.com/OctoPrint/OctoPrint/wiki/Supported-Printers
As you can see very many printers are supported so chances are good that ours will be too.
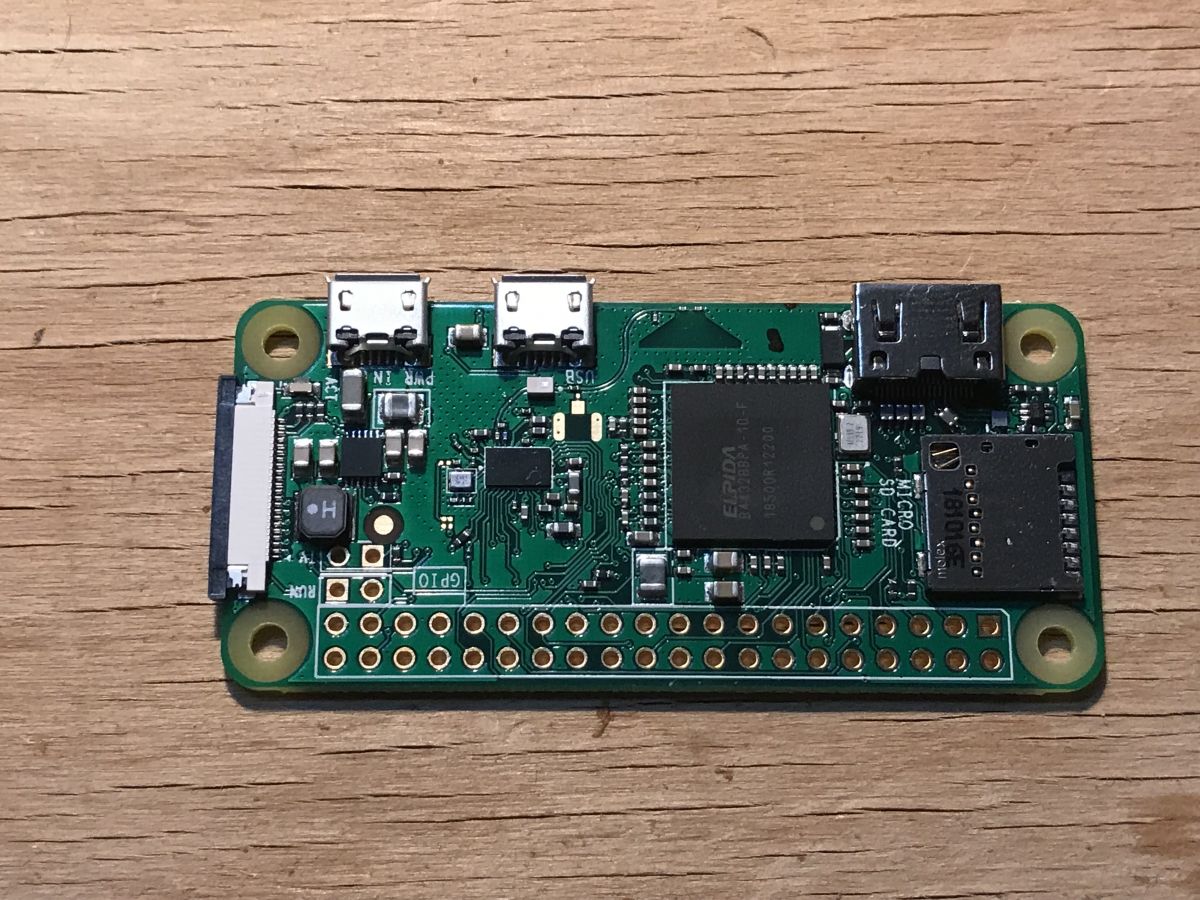
Raspberry Pi Zero W (this is for the version without camera, for the version with camera a more powerful version will be needed
Raspberry ):
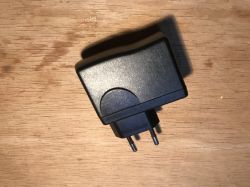
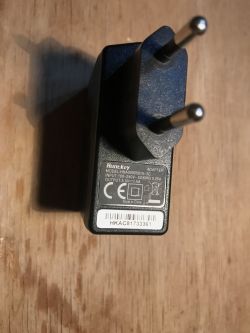
 5V power supply
 for Raspberry (required current capacity depends on which Raspberry you use, I recommend checking this on the web):
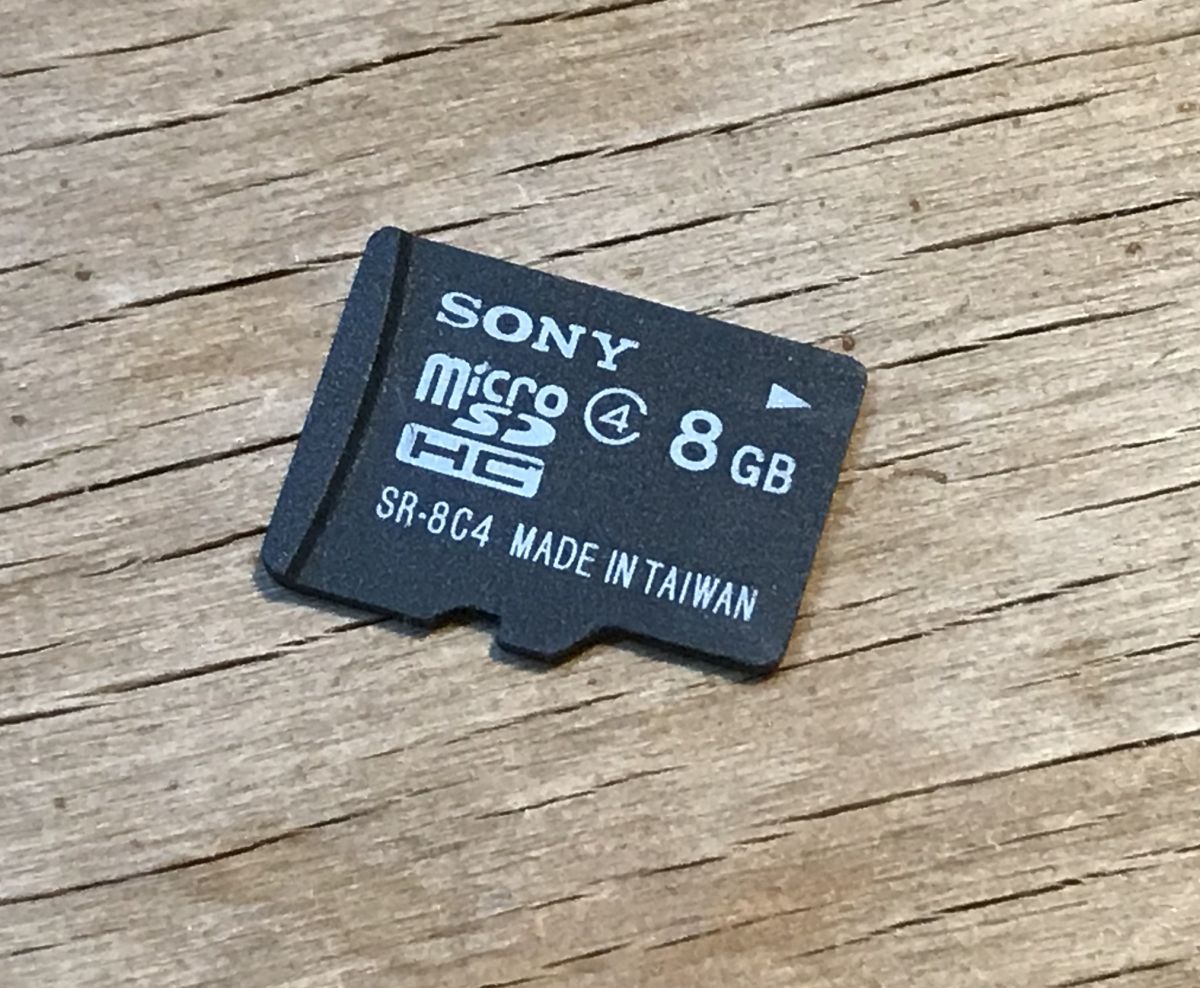
 MicroSD card
 (minimum 8GB) for
Raspberry (but if you insist, you can even use the one that comes with the Ender 3 in the kit):

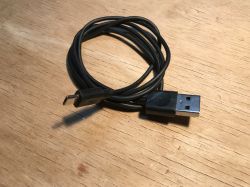
Cable for power supply
Raspberry , i.e.
micro-USB :

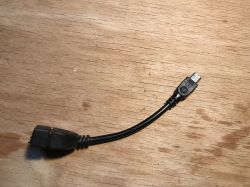
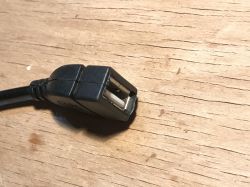
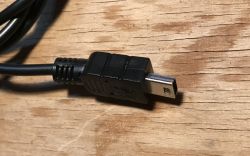
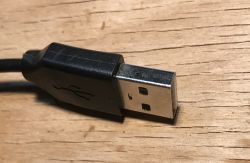
First part of connecting
Raspberry to the printer, i.e. micro-USB to USB female connector adapter (cable
USB OTG ):
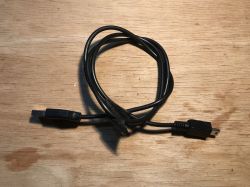
The second part of connecting
Raspberry to the printer, i.e. the usual
mini-USB cable :
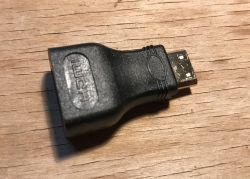
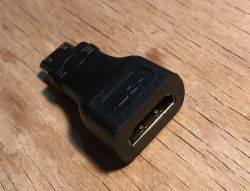
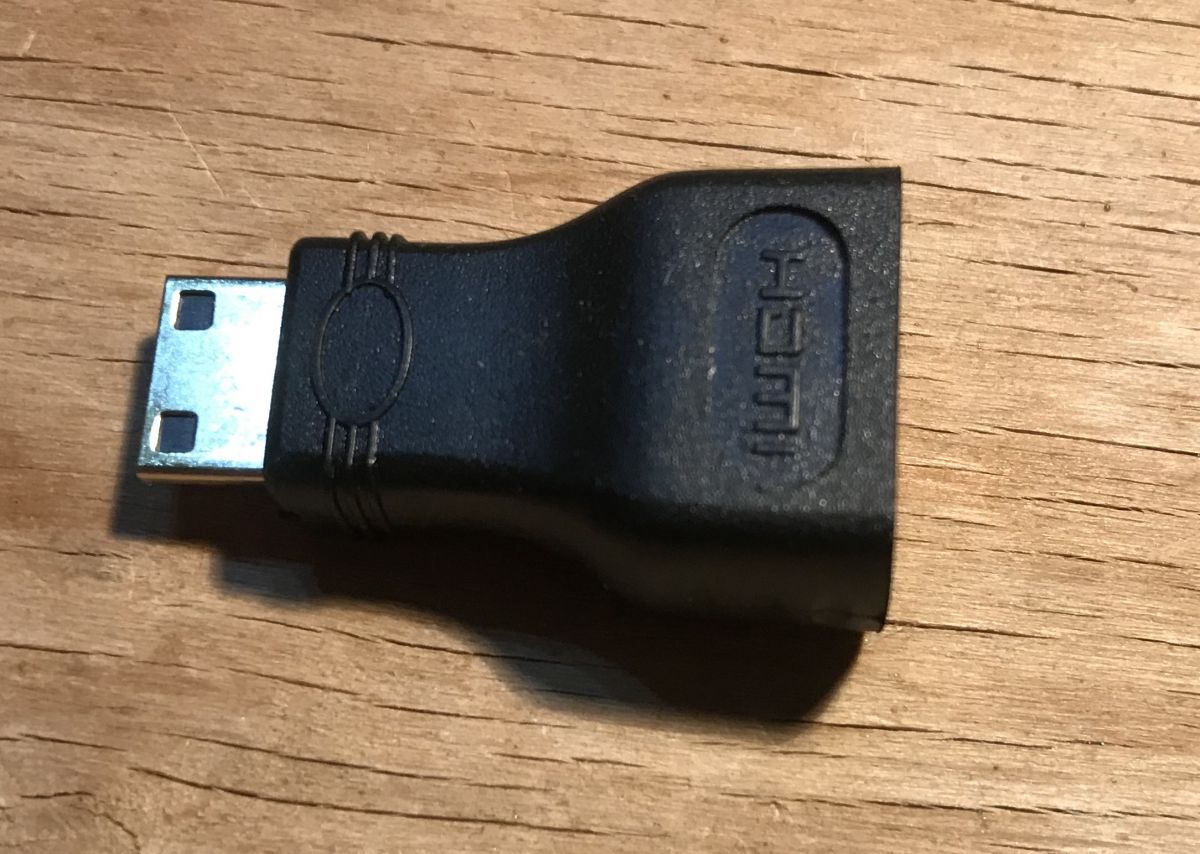
Optional - adapter
miniHDMI to
HDMI . It is only useful if we want to connect a monitor/TV to
Raspberry to view what is happening on it. This will not be necessary for us as we will complete the configuration first on the microSD card itself and then over the network:
 We are preparing a microSD card for the Raspberry
OctoPi
We are preparing a microSD card for the Raspberry
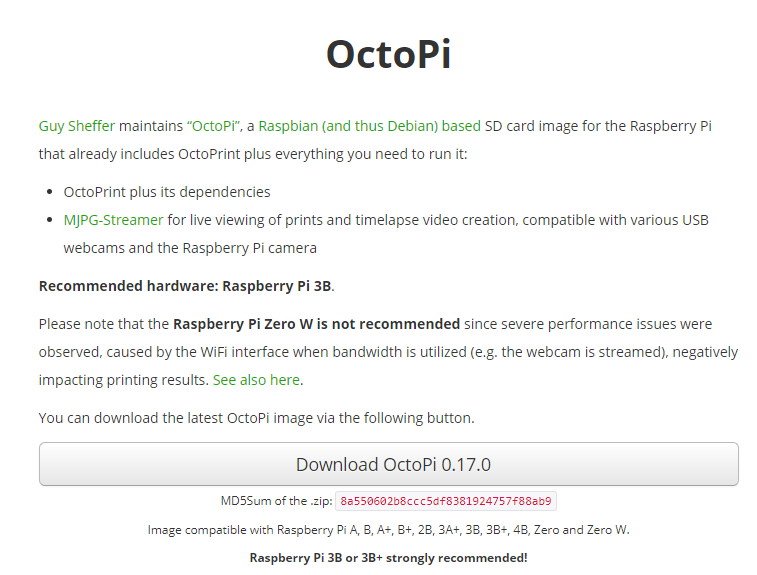
OctoPi download from here:
https://octoprint.org/download/
There is a warning on the page that
OctoPi can run slowly on the
Raspberry PI Zero W in combination with e.g. a print video stream, but I'm not going to add a video stream so no problem.
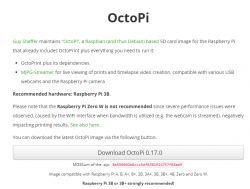
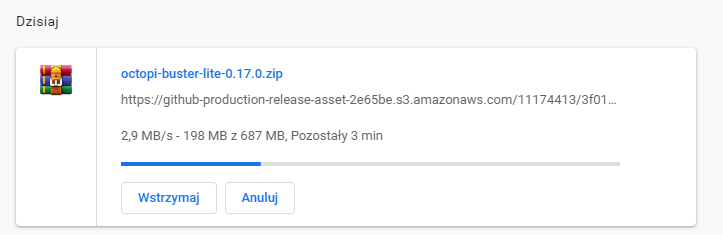
The version I used (and current at the time of writing this article) is
0.17.0 . It takes up
600MB and downloaded for me in a few minutes:
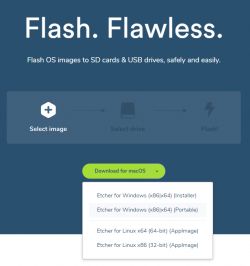
We also download the tool
Etcher , which will serve us to record the operating system
OctoPi onto a
microSD card :
https://www.balena.io/etcher/
I chose the
Portable version so as not to have to install anything:
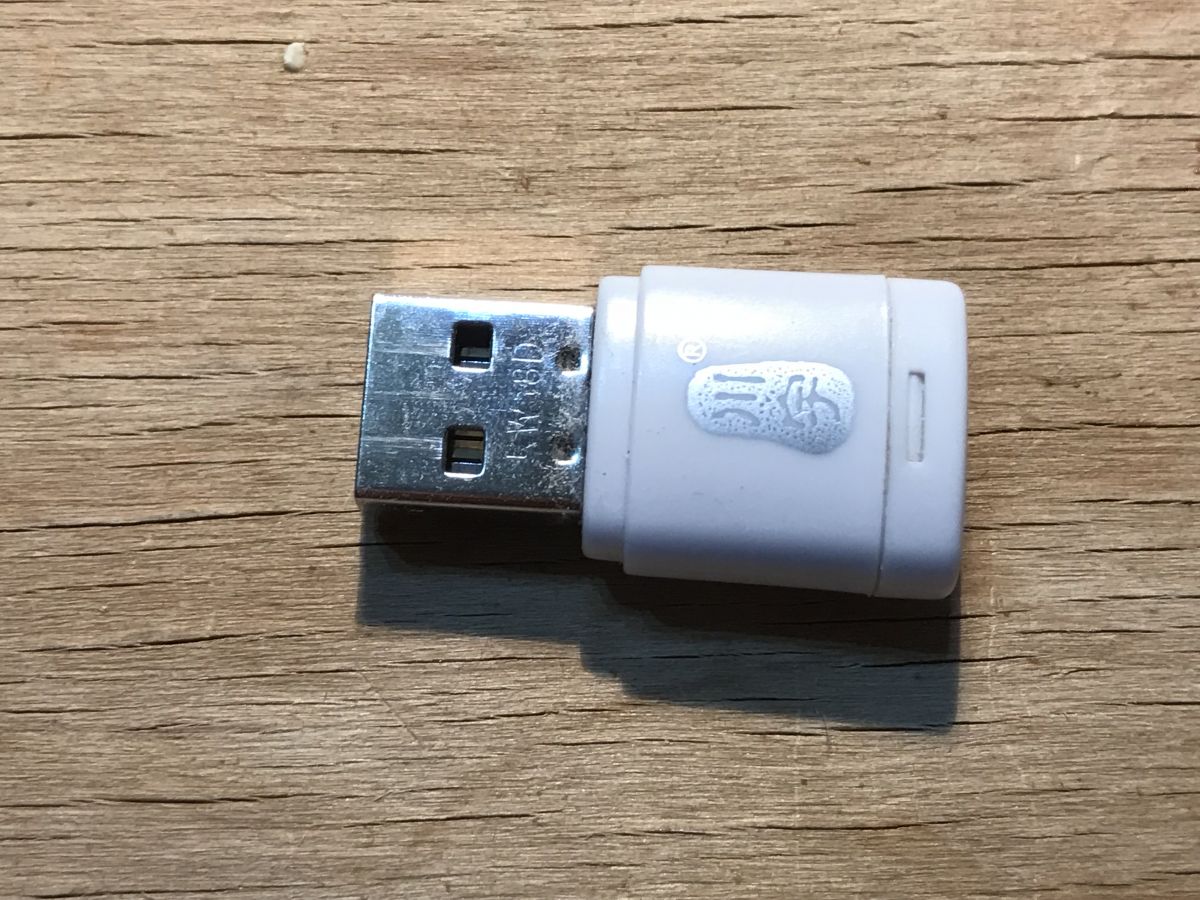
We get our microSD card ready and connect it to the computer via a suitable adapter (well, unless we have a slot for micro SD, then without). I used the adapter that came with my printer
Ender 3 Pro :

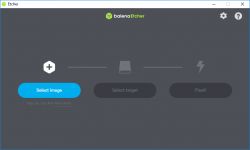
Our computer should detect that we have connected the microSD card. Now we can run the program
Etcher . Its interface is really minimalist and simple:
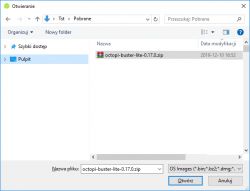
We click '
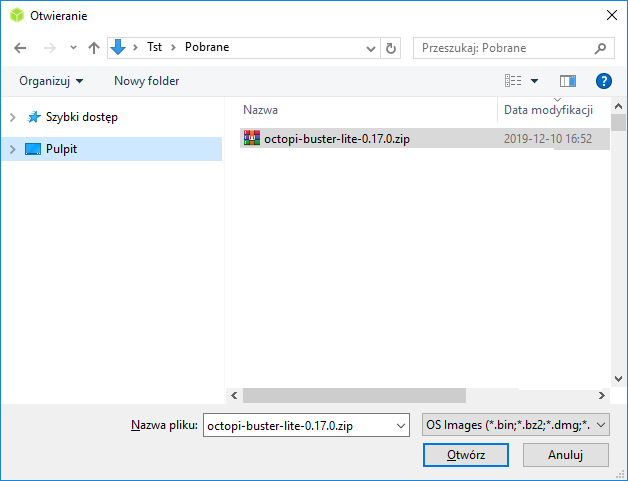
Select Image ' to select a previously downloaded operating system image:
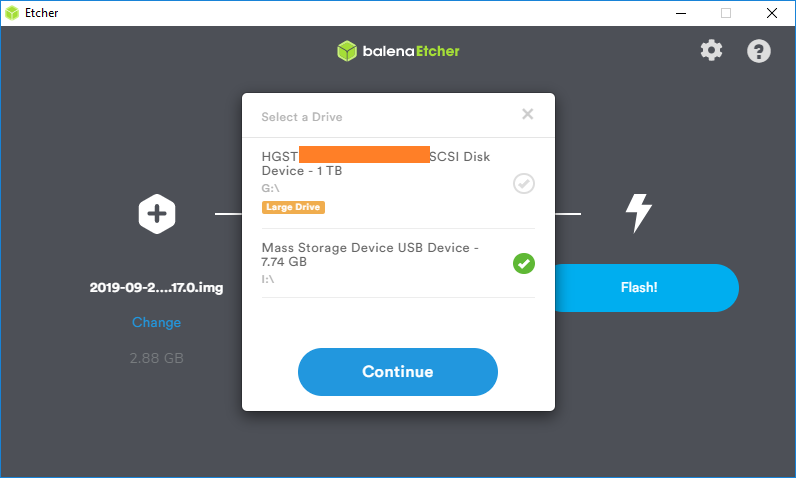
Then click '
Select drive ' to select our microSD card. The program
Etcher then also shows us hard drives connected to the computer via USB, so we have to be careful. Selecting the wrong media as needed can result in data loss!

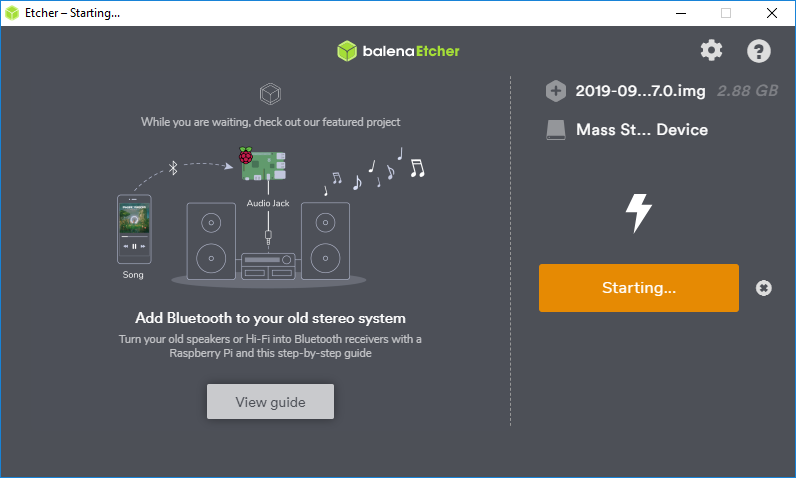
And finally - click
Flash .

It is possible that the system
Windows will then ask us for permissions or permission to operate. We grant it, of course.
We wait for the operation to complete:
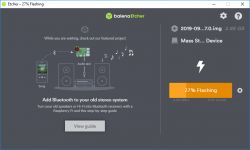
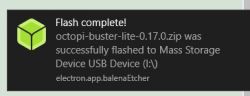
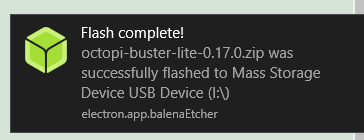
The whole thing took about 10 minutes in my case. After uploading I got a notification from
Windows :
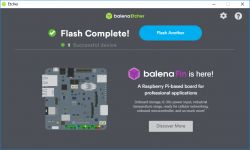
I alone
Etcher showed that he had finished the job:
But that's not all - we don't remove the card yet.
Once the system is uploaded, we open '
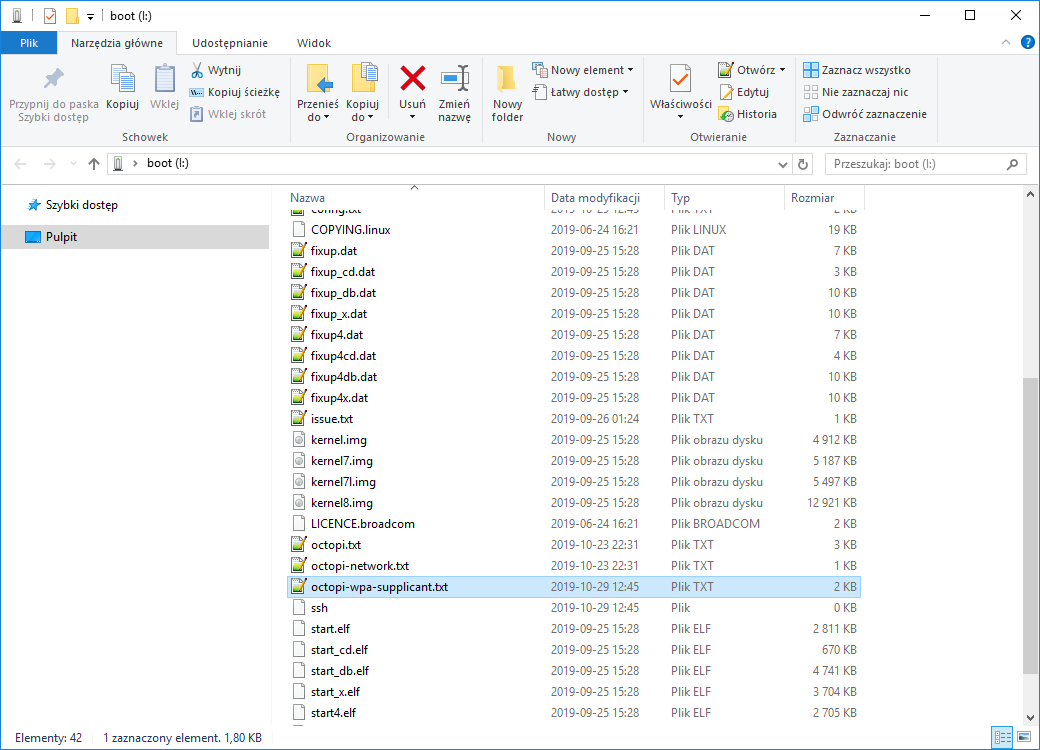
My Computer ' and then the microSD card to see the just-recorded system files:
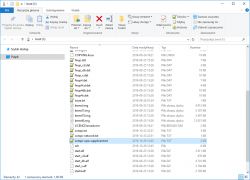
There we find the text file
octopi-wpa-supplicant.txt . In it is the WiFi configuration and there we need to enter our wireless network information. Without this
Raspberry will not know what to connect to.
Open it in some normal text editor (
Notepad++ , etc, not Wordpad or thereabouts):
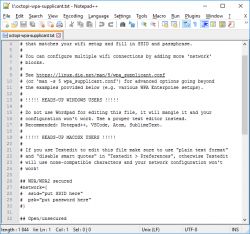
And in it we have to give
SSID (name) and password of our network. Below is the entire contents of the file, the relevant fields are completed. Yes,
WPA/WPA2 is supported.
Quote:
# Use this file to configure your wifi connection(s).
#
# Just uncomment the lines prefixed with a single # of the configuration
# that matches your wifi setup and fill in SSID and passphrase.
#
# You can configure multiple wifi connections by adding more 'network'
# blocks.
#
# See
https://linux.die.net/man/5/wpa_supplicant.conf
# (or 'man -s 5 wpa_supplicant.conf') for advanced options going beyond
# the examples provided below (e.g. various WPA Enterprise setups).
#
# !!!!! HEADS-UP WINDOWS USERS !!!!!
#
# Do not use Wordpad for editing this file, it will mangle it and your
# configuration won't work. Use a proper text editor instead.
# Recommended: Notepad++, VSCode, Atom, SublimeText.
#
# !!!!! HEADS-UP MACOSX USERS !!!!!
#
# If you use Textedit to edit this file make sure to use "plain text format"
# and "disable smart quotes" in "Textedit > Preferences", otherwise Textedit
# will use none-compatible characters and your network configuration won't
# work!
## WPA/WPA2 secured
network={
ssid="MY_SSID"
psk="MY_PASSWORD"
scan_ssid=1
}
## Open/unsecured
#network={
# ssid="put SSID here"
# key_mgmt=NONE
#}
## WEP "secured"
##
## WEP can be cracked within minutes. If your network is still relying on this
## encryption scheme you should seriously consider to update your network ASAP.
#network={
# ssid="put SSID here"
# key_mgmt=NONE
# wep_key0="put password here"
# wep_tx_keyidx=0
#}
# Uncomment the country your Pi is in to activate Wifi in RaspberryPi 3 B+ and above
# For full list see:
https://en.wikipedia.org/wiki/ISO_3166-1_alpha-2
country=EN
#country=GB # United Kingdom
#country=CA # Canada
#country=DE # Germany
#country=FR # France
#country=US # United States
### You should not have to change the lines below #####################
ctrl_interface=DIR=/var/run/wpa_supplicant GROUP=netdev
update_config=1
We save the changes to the file, close it and remove the microSD card.
Now it's time to put it into the
Raspberry , but about that in the next paragraph.
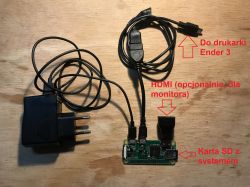
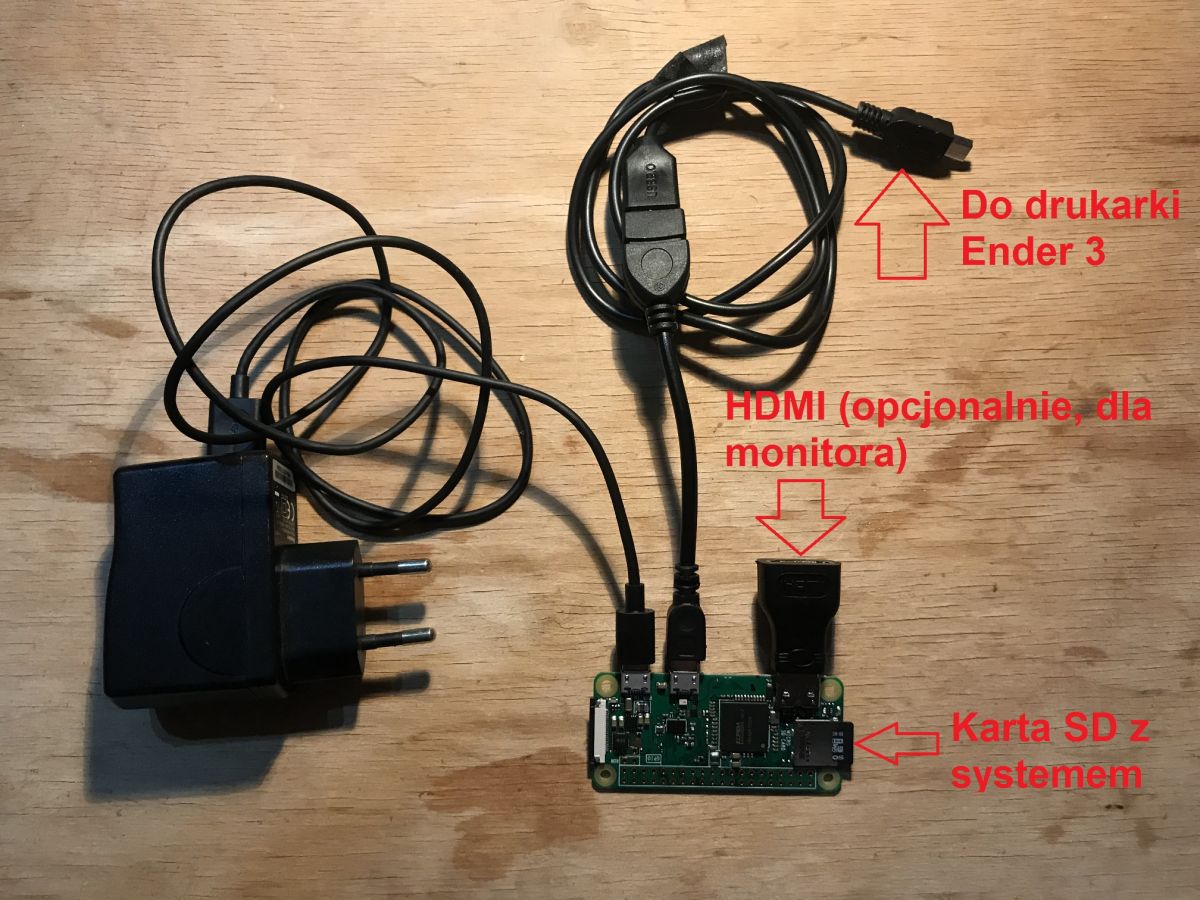
We connect the Raspberry to the Ender and boot
Now we can plug everything in. Insert the microSD card gently into the slot. Connect the 5V power supply to
PWR-IN from
Raspberry , while the adapter
USB OTG to the USB signature connector.
Optionally, we can connect a mini-HDMI to regular HDMI adapter (if we want to preview on a monitor how
Raspberry boots up).
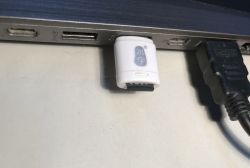
Below are all the connections in a clear photo:
All that's left is to connect this to the power supply and 3D printer and the hardware is ready. The
LED located on the
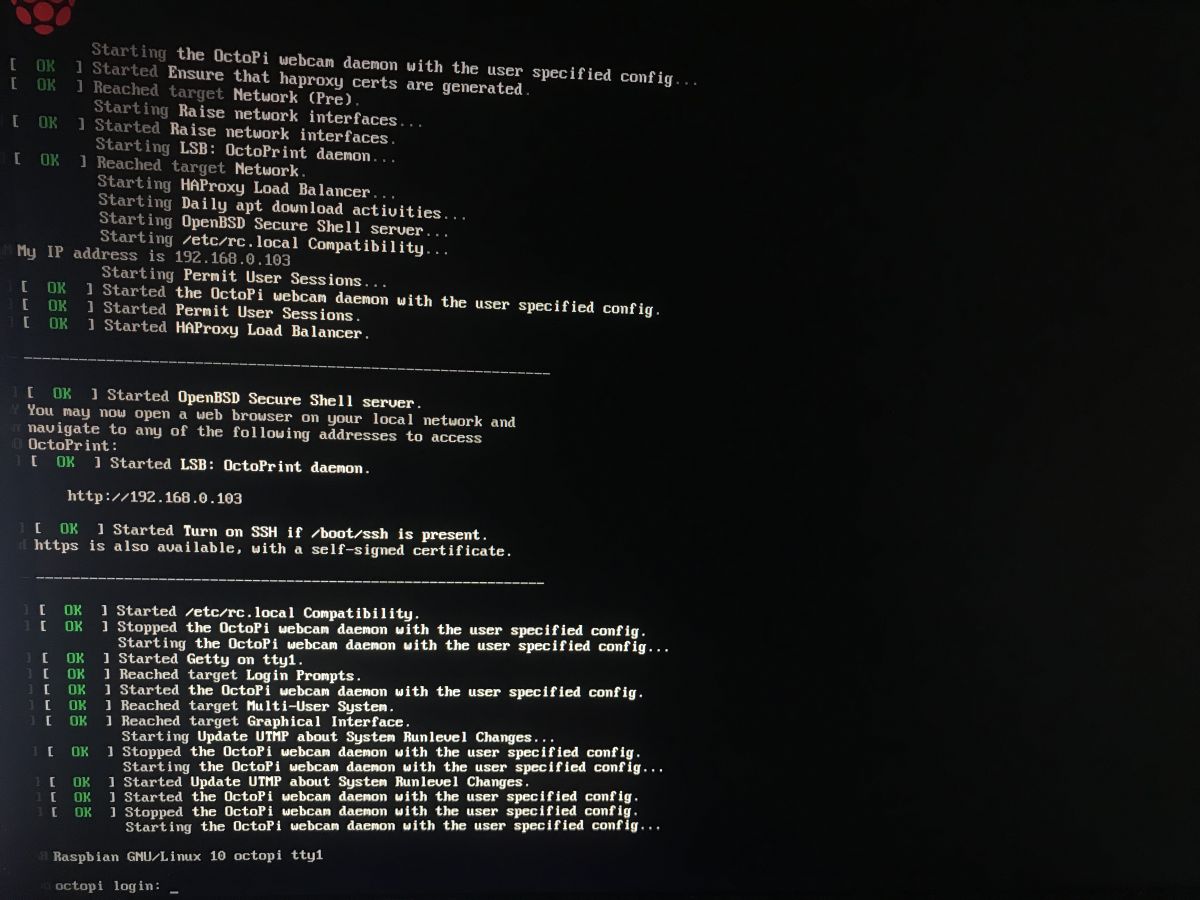
Raspberry should then light up. We still have to wait a bit (up to a few minutes) until the system boots up and automatically connects to the WiFi we indicated.
From this point on
OctoPi should be available on the local network at:
But if this address doesn't work, we need to get to it by the IP address itself - I'll describe how to get this IP below.
We check the OctoPrint IP - way 1
The first way to find out
the IP address of our server
OctoPrint is connecting the monitor to
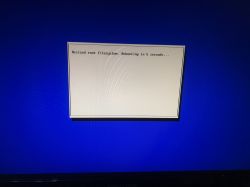
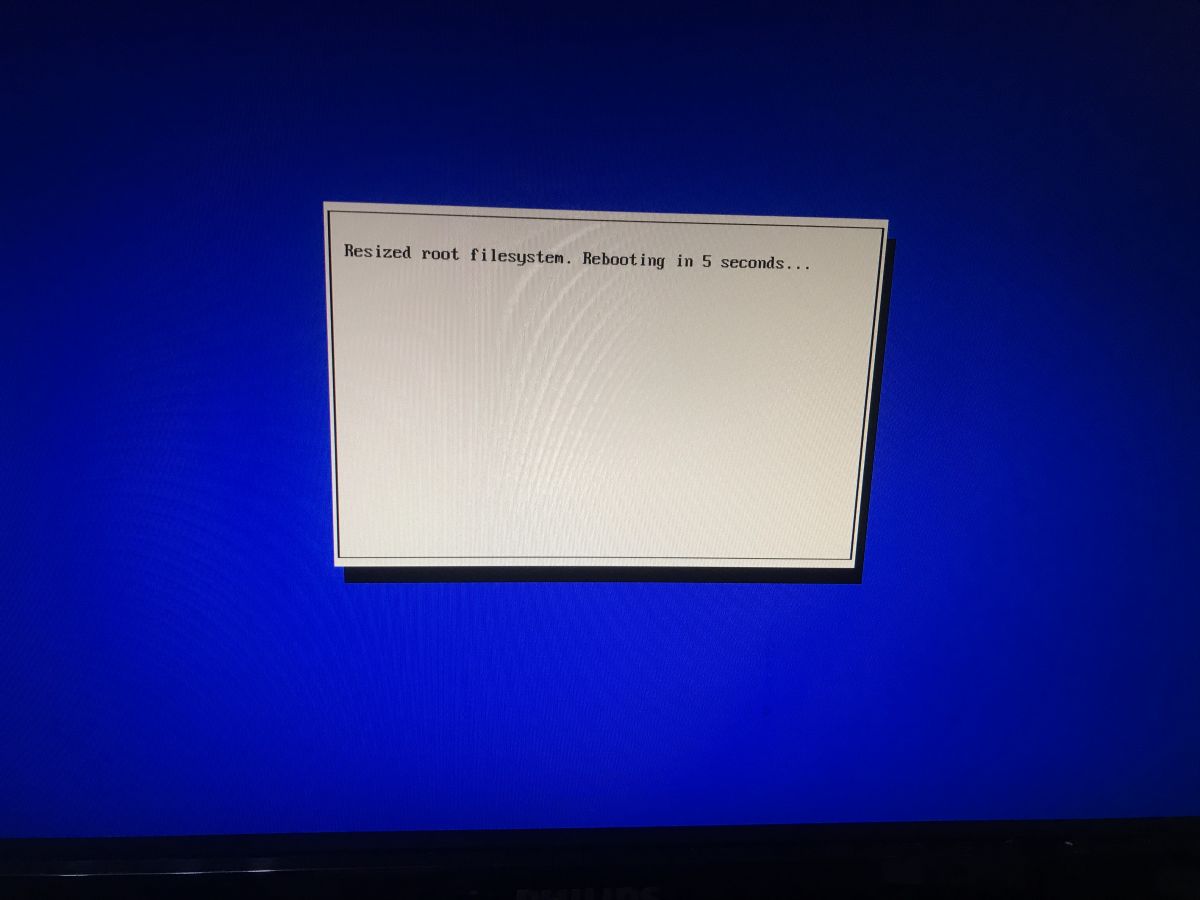
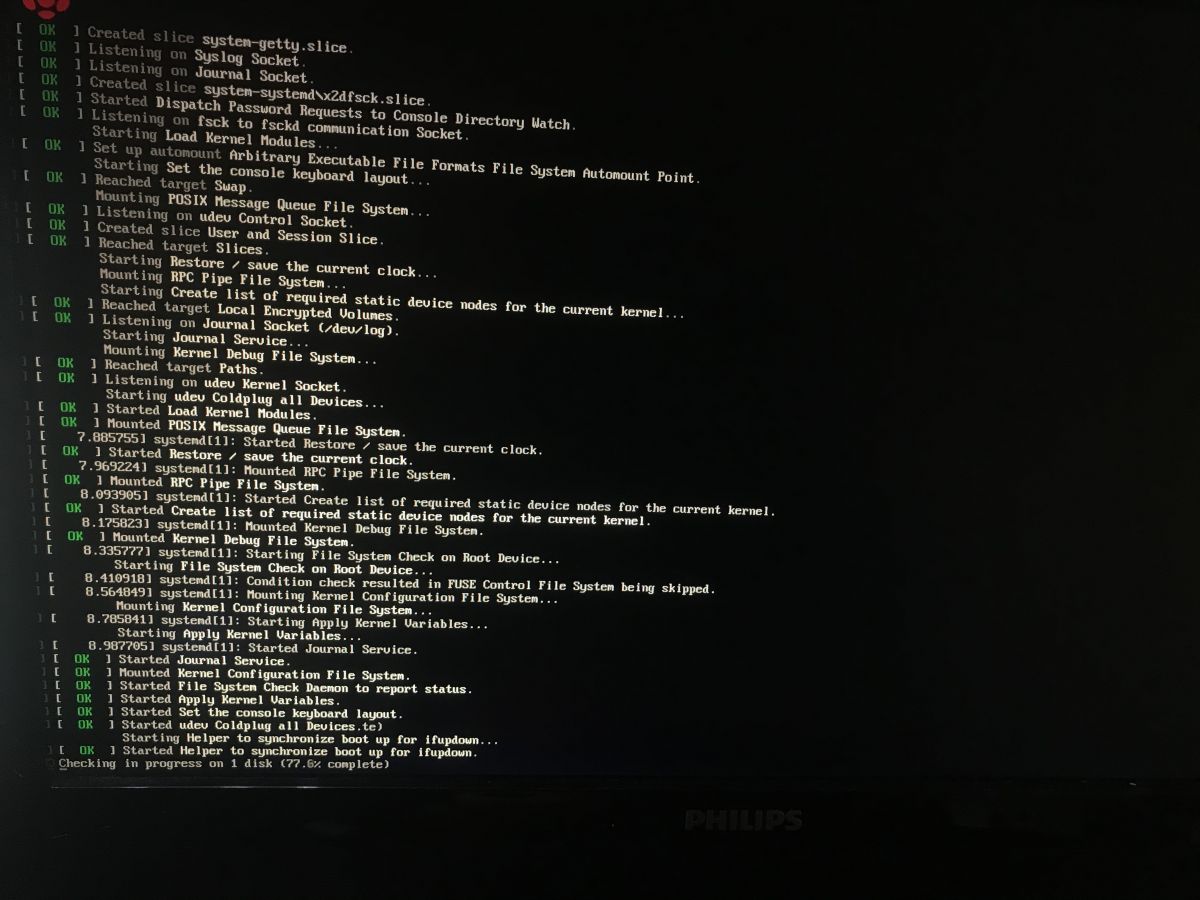
Raspberry PI . The monitor is connected via HDMI. When we boot up the 'Raspberry' with the monitor connected, we will see the boot information on the screen and then also the IP address assigned to it by the router.
First booting itself
Raspberry takes a little bit, system also then makes additional operations, some scanning, etc, see photos below for details:
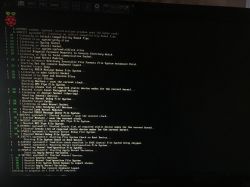
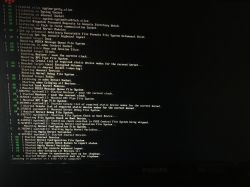
Only after some time does the IP appear on the screen (here:
192.168.0.103 ):
This address may be different after the next boot (it is assigned by the
DHCP router), so you do not need to remember it.
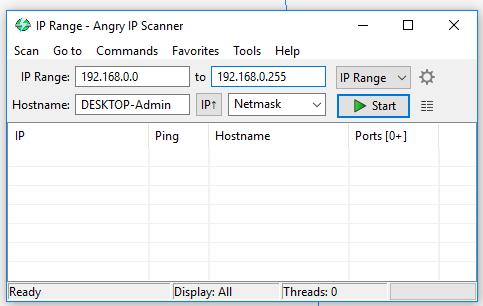
We check the OctoPrint IP - way 2
The second way to find out the IP address of our server
OctoPrint is to use the local network IP address scanner. The IP address
OctoPI will be conspicuous by its hostname
octopi.local .
We will need some kind of IP scanner - free to download of course. I chose
Angry IP Scanner from here:
https://angryip.org/download/
Using the IP scanner itself is very simple. Once installed and running, you enter the IP range you want to check:
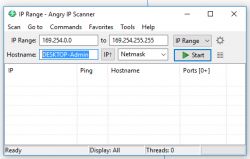
What range you enter depends on what IP your local network covers, I entered from
192.168.0.0 to
192.168.0.255 :

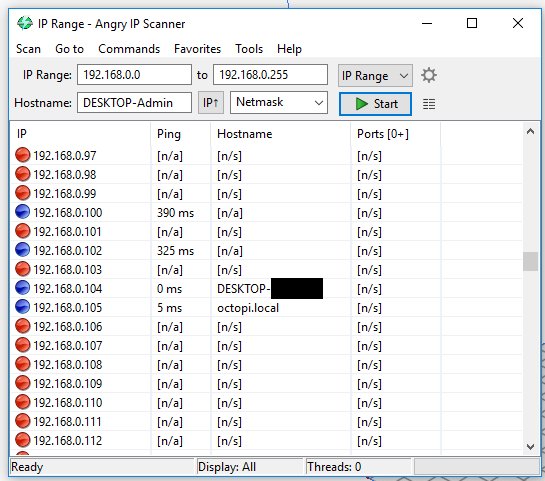
We click 'Start' and after a while we can already see the active IP on the network:
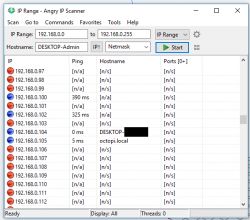
Done. This is how we found the IP of our
Raspberry - this is the IP which has the hostname
octopi.local . For a more convenient reading of the results from the
Angry IP Scanner we can also click the cog icon (settings) and under the tab '
Display ' select the option '
Alive hosts (responding to pings) only ' there
Finalizing the OctoPrint installation
Installations
OctoPrint are already finalised via a web browser from any device on this network where our
Raspberry is. We simply type
in the address bar and after a while the configuration page should load.
If that doesn't work, then we simply need to enter the IP address there (the two ways to find out the IP address of our
Raspberry I described in the previous paragraphs).
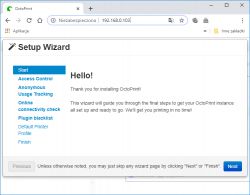
Follow the instructions from the screen and click '
Next '. We can further configure the password for
OctoPrint , I left it blank, because I don't intend to share
Raspberry on the Internet and my network
WiFi can only be accessed by household members.
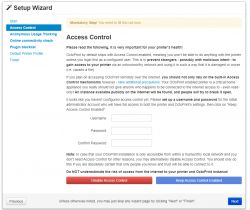
We confirm our decision:

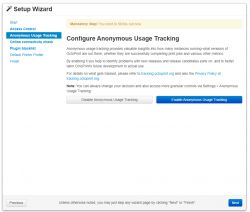
The installer then asks about the formalities for data collection - we can refuse them this pleasure.
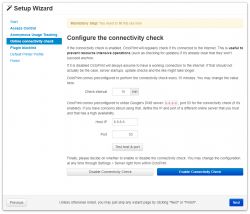
Next, the installer allows us to configure how to check if our server is connected to the internet. The settings from the screenshot are the default and also, in my opinion, suitable for us. The IP address 8.8.8.8 from the screenshot is one of Google's addresses, often used for such applications.
In the next step we can enable or disable the plugin blacklist, this is used to block plugins that may have undesirable effects, especially for novice users. I have not enabled it:

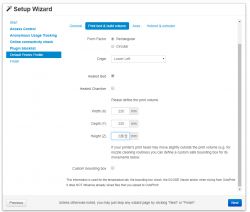
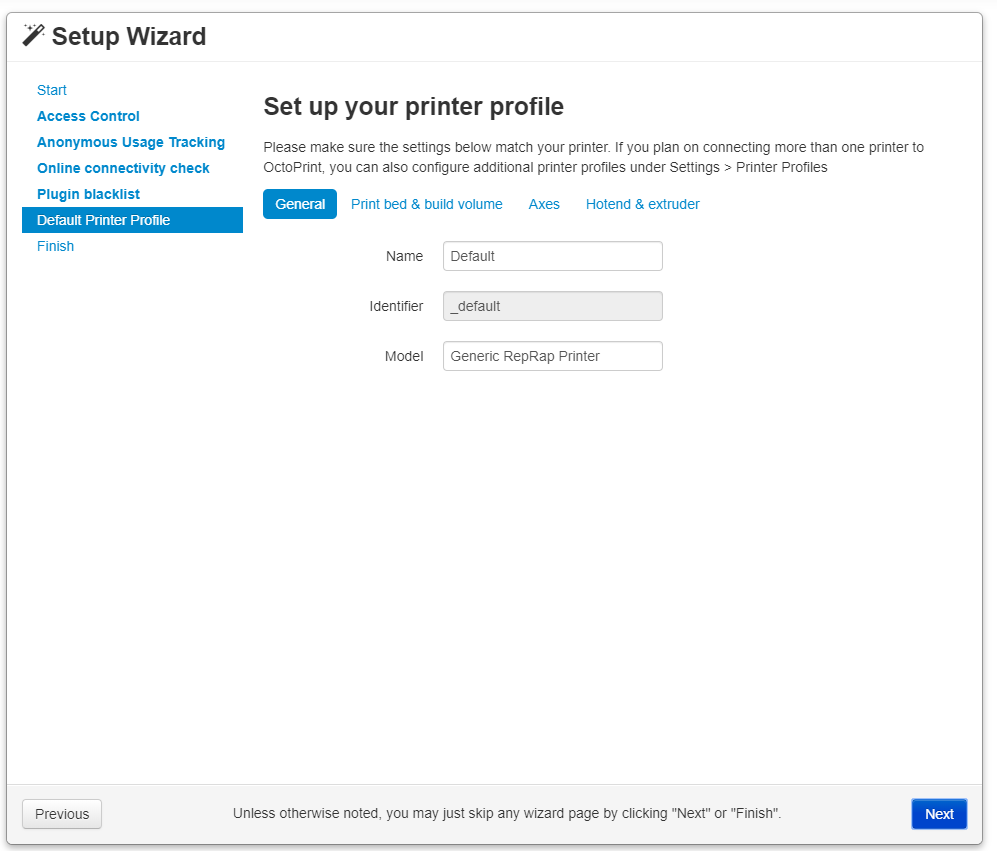
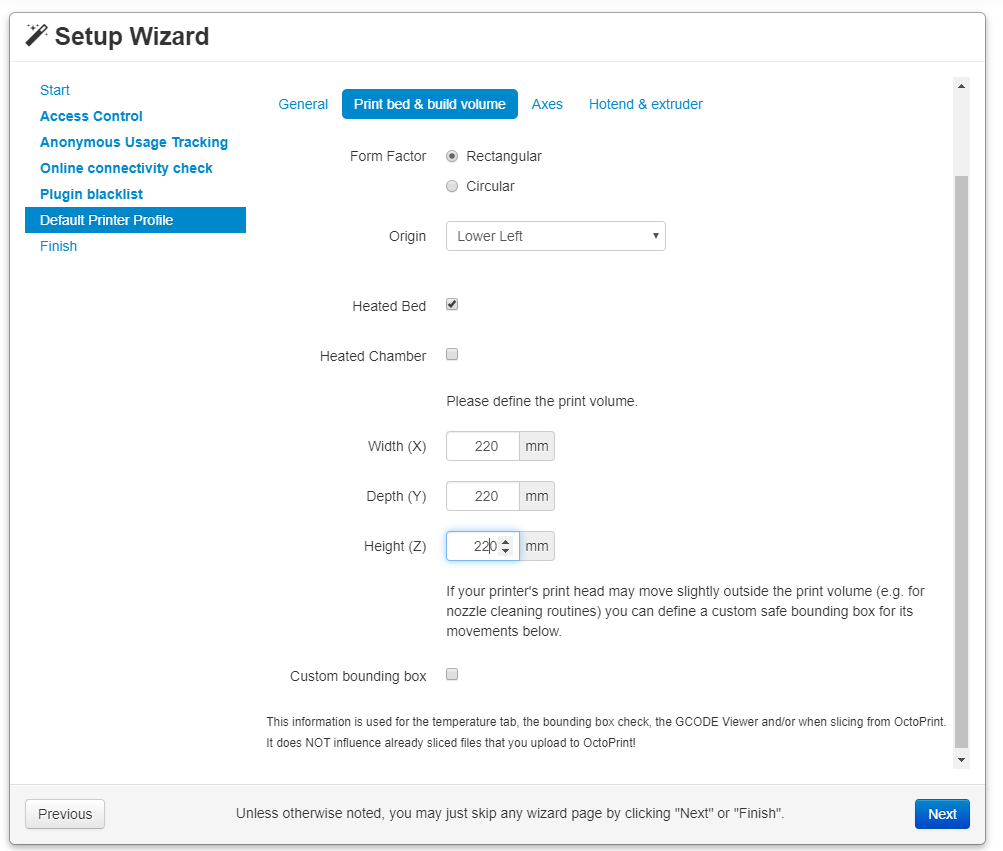
Now we can configure our printer. First we set its name.
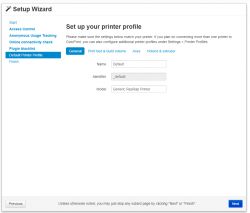
Here we set the parameters about our 3D printer. It is worth checking these on the internet. For my Ender 3 I entered the size of the working area as 220mm by 220mm by 220mm.
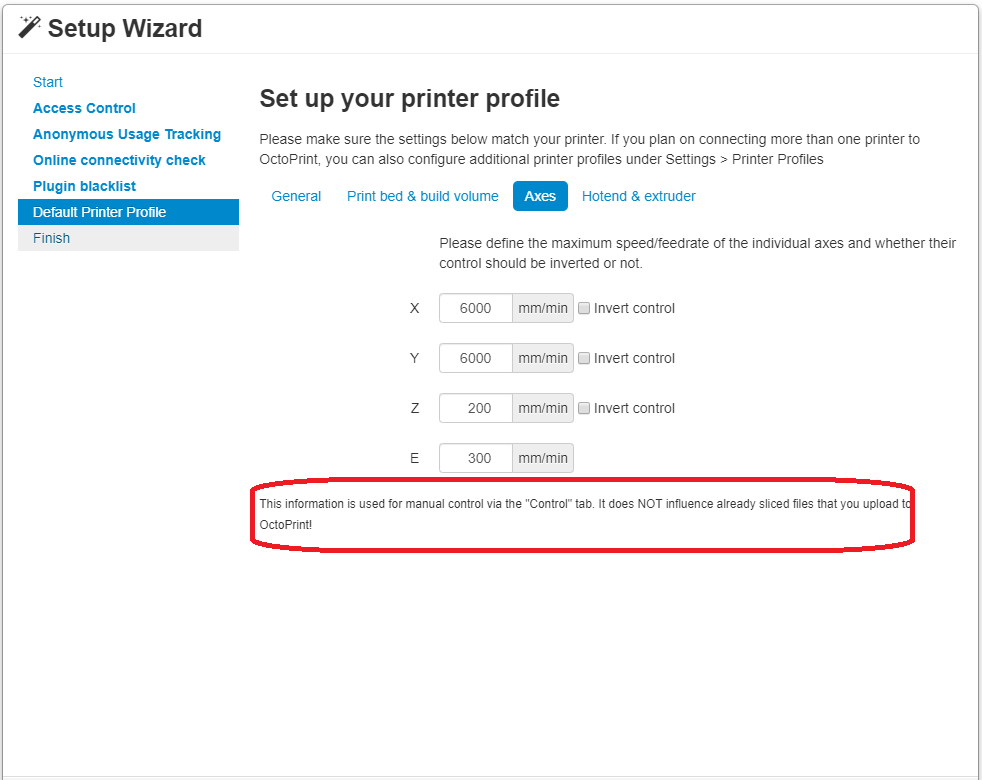
Further on, we can also set the speed of movement of each axis, but this is not that important because anyway these settings will eventually be taken by OctoPi not from here, but from GCode files.

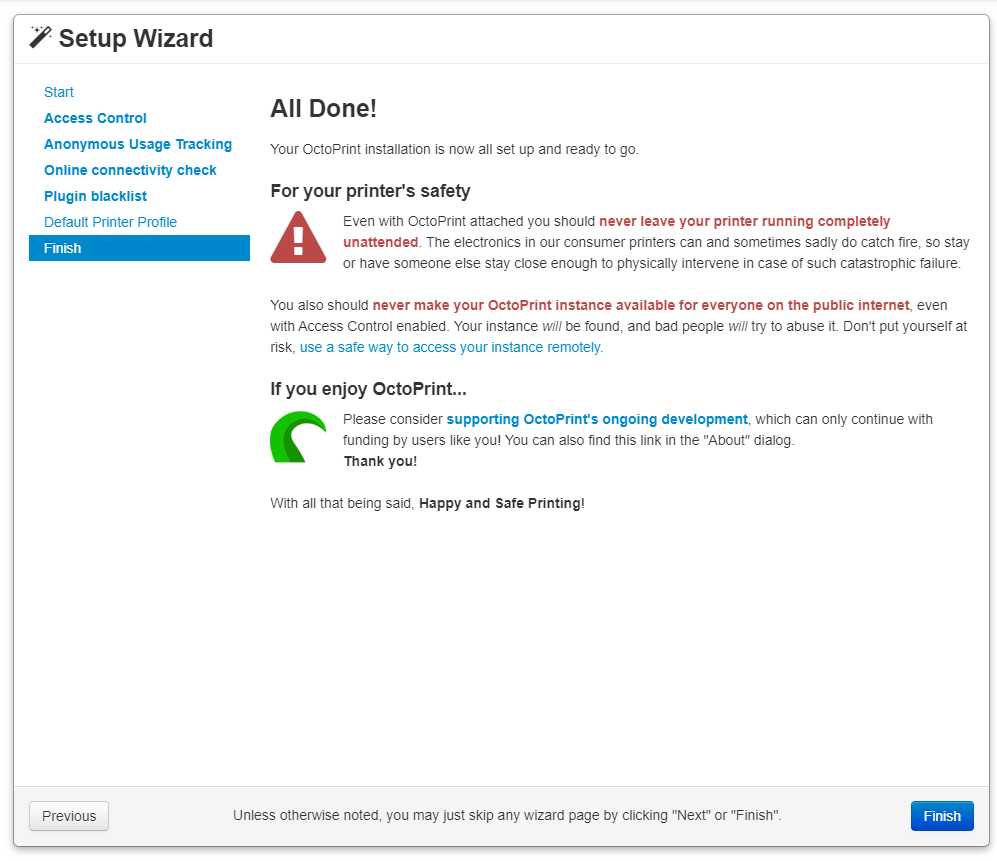
Finally, we get an informative screen where we can click 'Finish' to finalise the configuration:
But that's not all - we still need to check the connection
UART to our printer, about that in the next paragraph.
We connect to the printer via OctoPrint
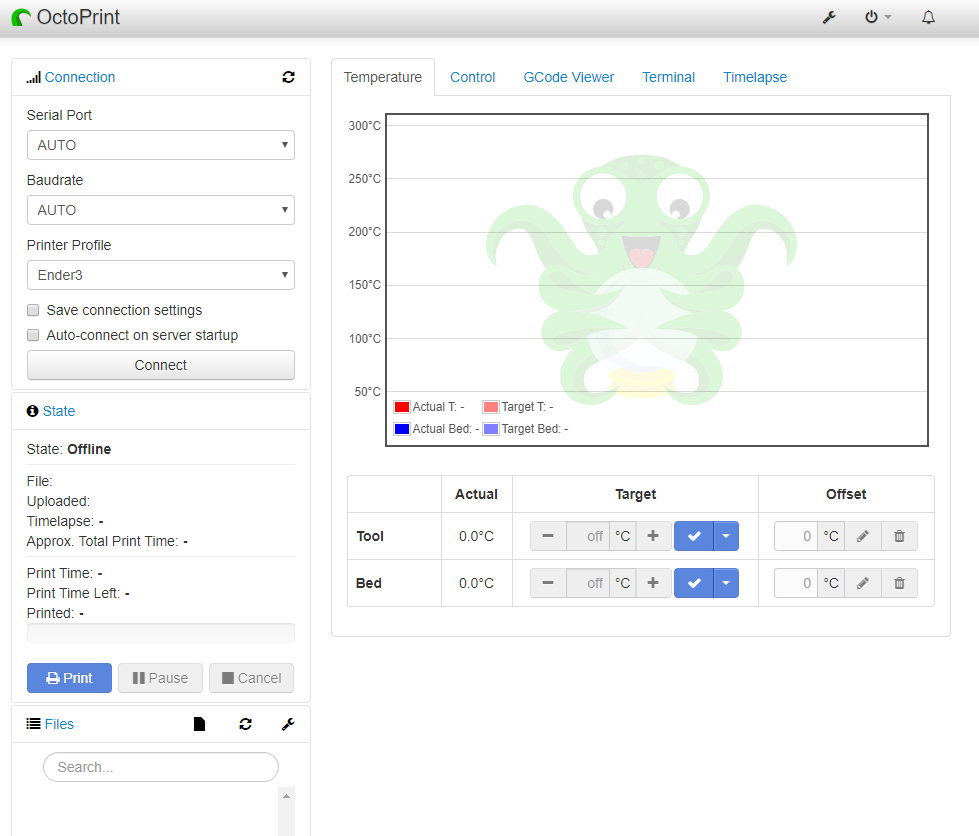
It's almost all done. Refresh the page and a standard screen should appear to our eyes
OctoPi :
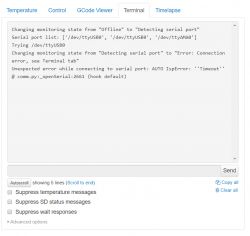
Here one would like to click the big '
Connect ' button to automatically connect to our printer. Unfortunately this doesn't work in my case. When I click '
Connect ', it
Raspberry scans the ports for a while but finds nothing. Although strangely the Ender fan then speaks up, as if it is picking up something.
The screenshot below shows what happens when I click '
Connect ':

As you can see, a scan is in progress, but after a while the printer search fails ('
Error connecting to printer '):
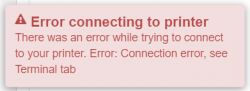
In line with the above message, more information is under
Terminal :
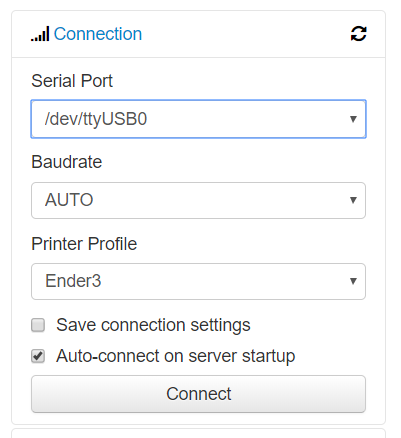
The solution to this problem for me turned out to be to select directly the appropriate port on which we have the printer:

In my case, on the
Raspberry PI Zero W , this port is called
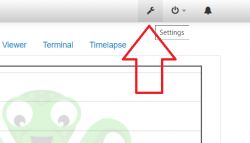
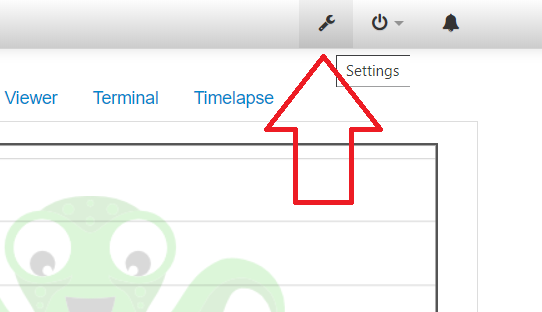
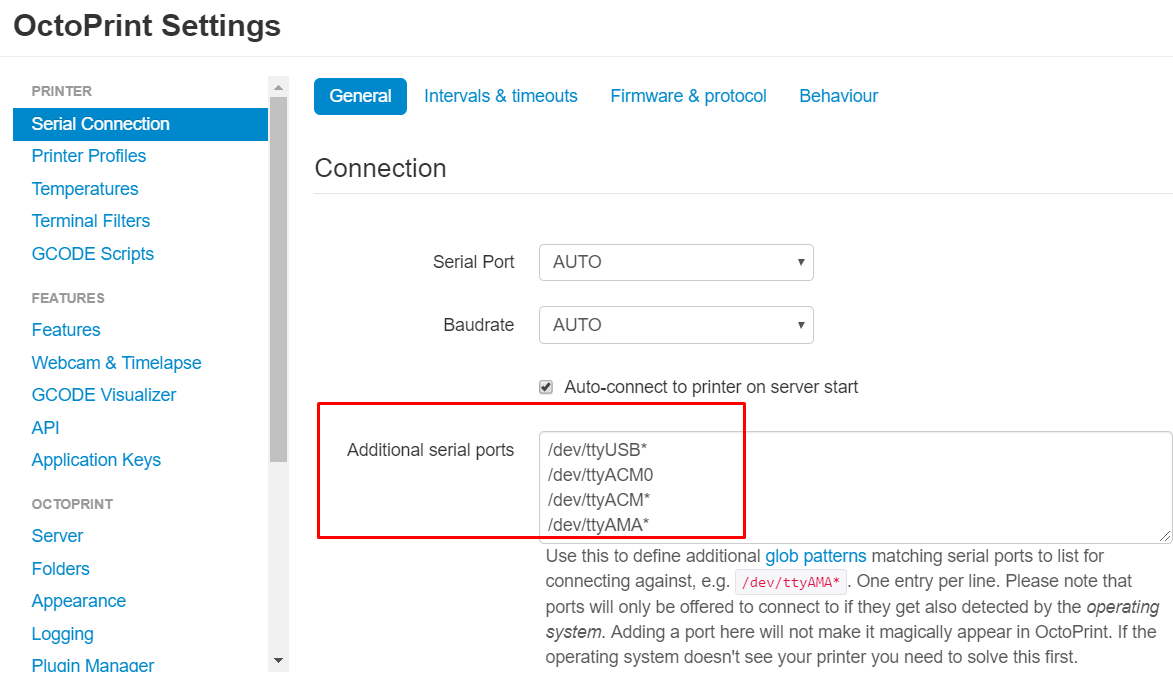
/dev/ttyUSB0 . If we don't have this port, then you need to go to settings (Settings), here:
And add the following port names there in 'Additional serial ports':
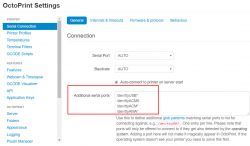
Port names:
/dev/ttyUSB*
/dev/ttyACM0
/dev/ttyACM*
/dev/ttyAMA*
Of course, then you have to click 'Save' to save and a restart of the Raspberry is advisable if this happens.
So on the main page you select the port '
/dev/ttyUSB0 ' (but in your case
it may be a different one - depends on the Raspberry used and the connection) and then after clicking '
Connect ' we should get a valid connection:
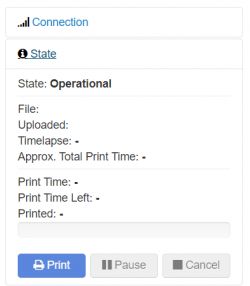
As you can see, the connection status has changed to '
Operational ', which means everything is fine.
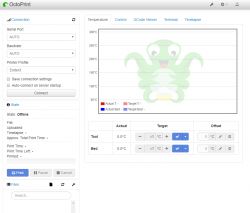
Once connected correctly, we can control the printer remotely via the 'Control' tab. This will allow us to check that everything is working:
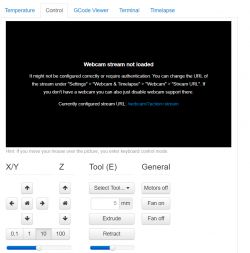
Pressing the buttons in this tab live
moves the axes on the 3D printer . If they don't work (the printer doesn't respond to them) it means that we have configured something wrong.
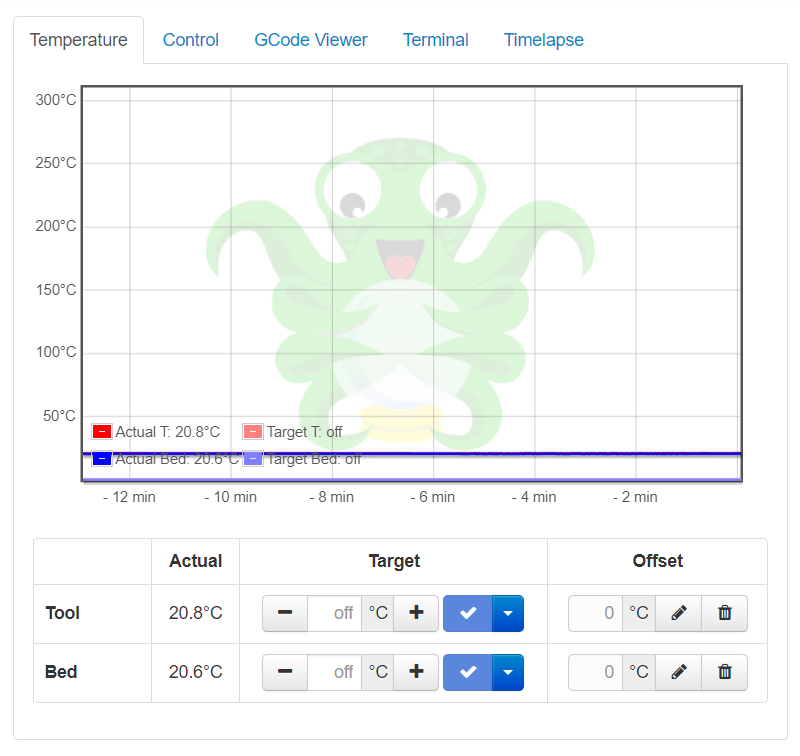
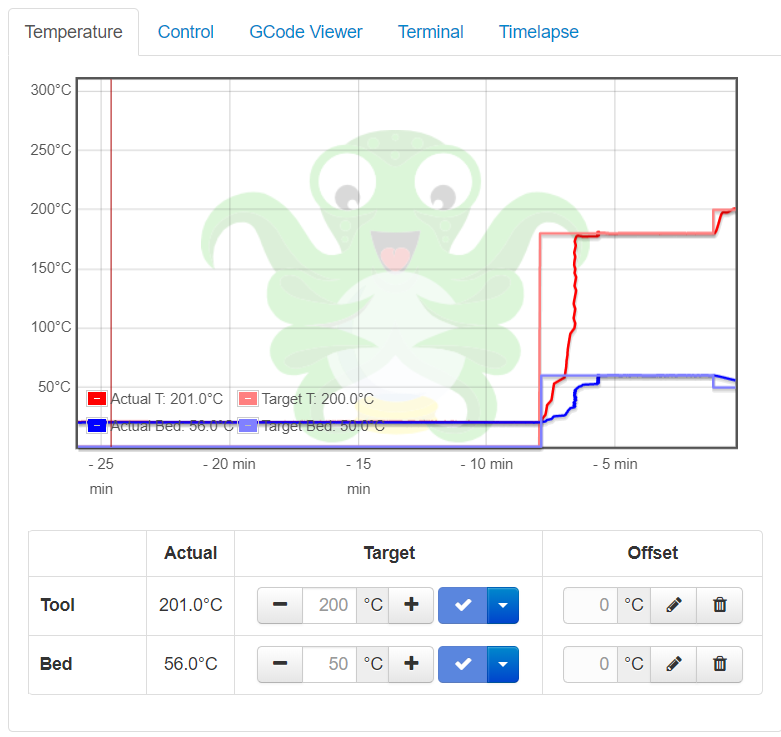
In the adjacent tab '
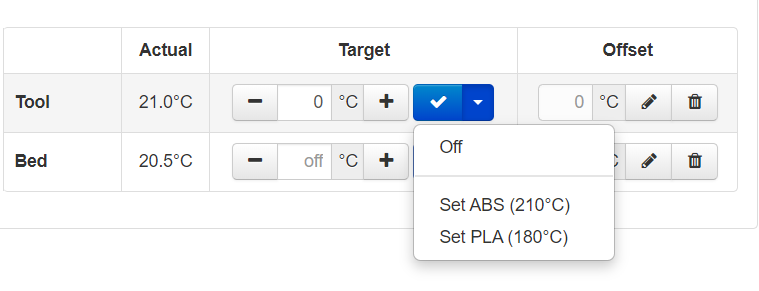
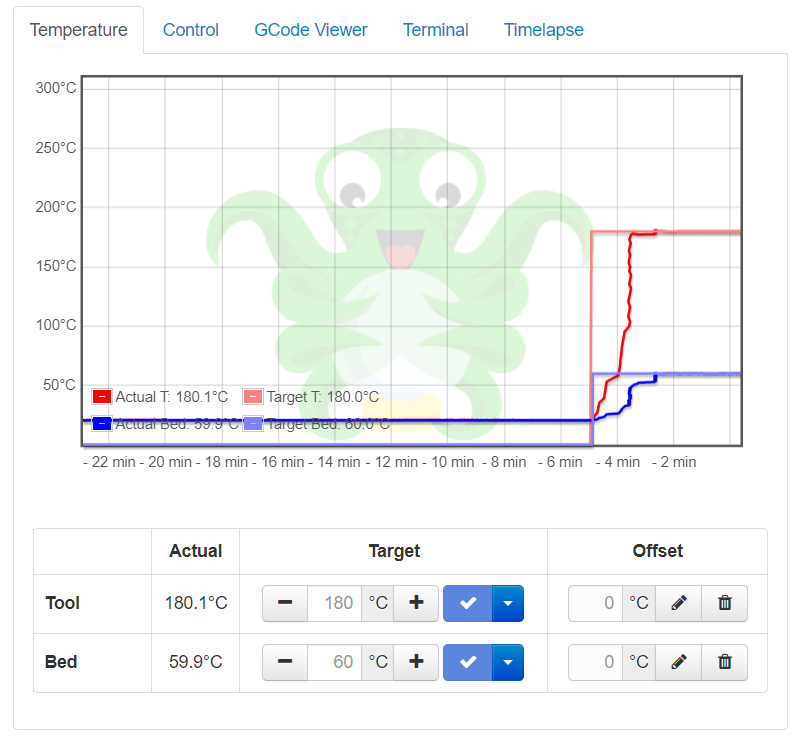
Temperature ' we can control the bed heating and hot end of the printer. This is convenient because we can warm up the printer even before we export the GCode of our object we want to print:
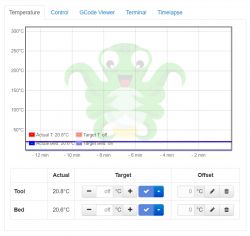
We can enter the temperature manually or select it from a drop-down list:

Here the temperatures are available:
- for filament
PLA - bed 60, tool 180
- for filament
ABS - bed 100, tool 210
Interestingly these temperatures are different to the ones I have by default in the slicer program I use (Cura). In it for PLA I have a temperature of bed 60 but tool 200.
The final choice of temperature, however, should be made by us depending on what specific filament we are using and how we like to print better - opinions vary. I recommend choosing experimentally.
Once you have chosen your temperature, the graph shows nicely how the printer heats up:
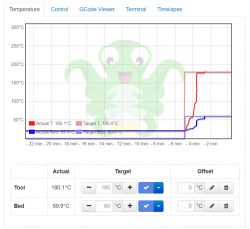
A moment later it is ready to print.
Preparing the GCode for printing
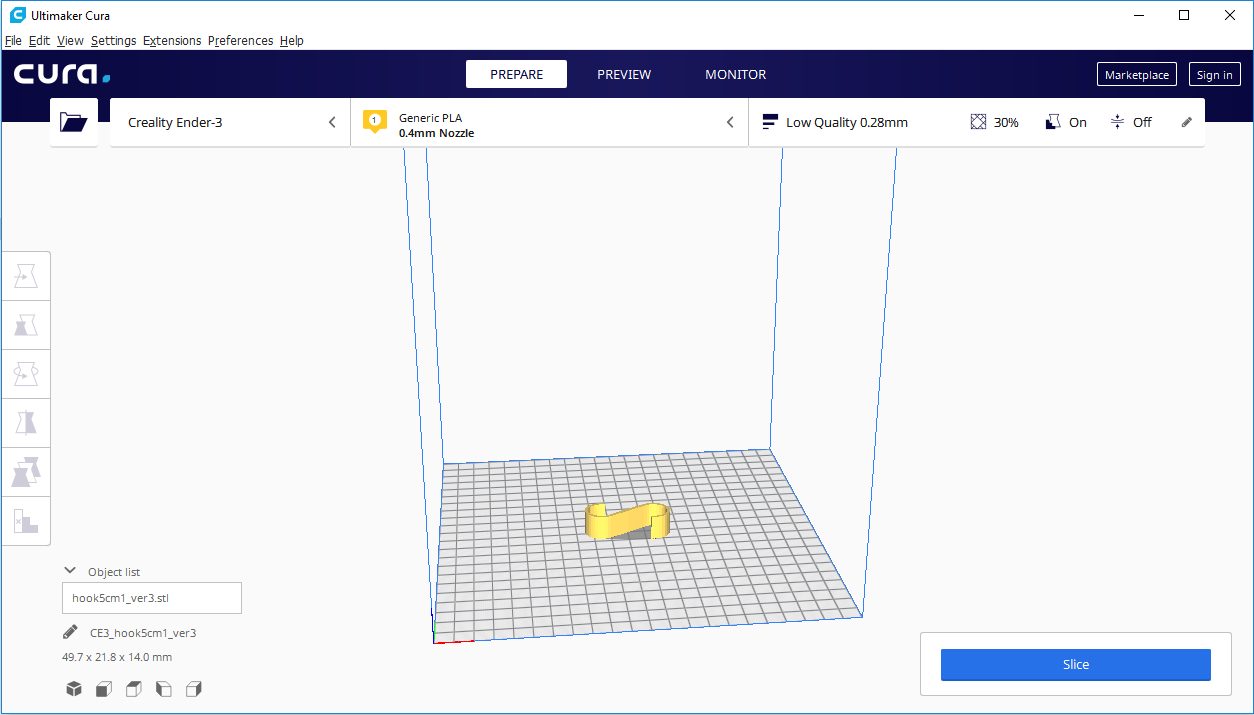
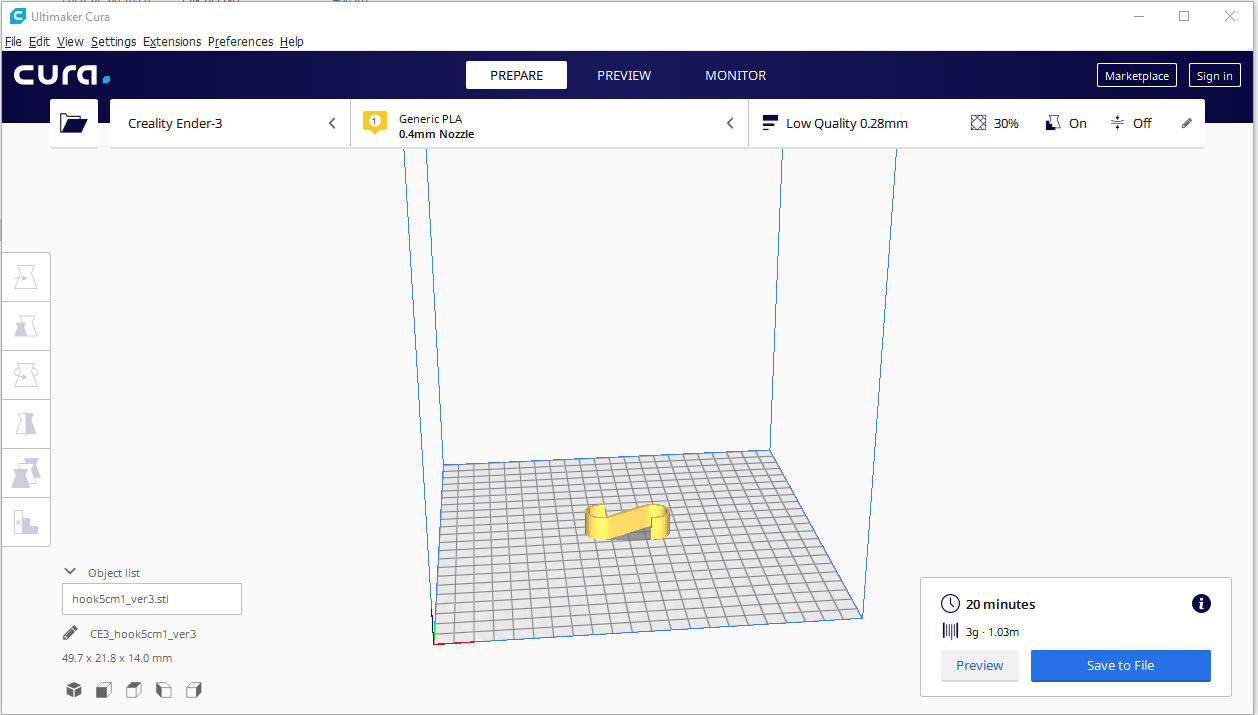
We prepare the .gcode file for the printer in the standard way, as we did before when we had to manually flip the whole thing to the microSD card. I use the Ultimaker Cura program for this.
I open the .STL in it and generate the .gcode for it by clicking the Slice button:
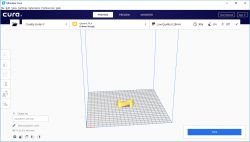
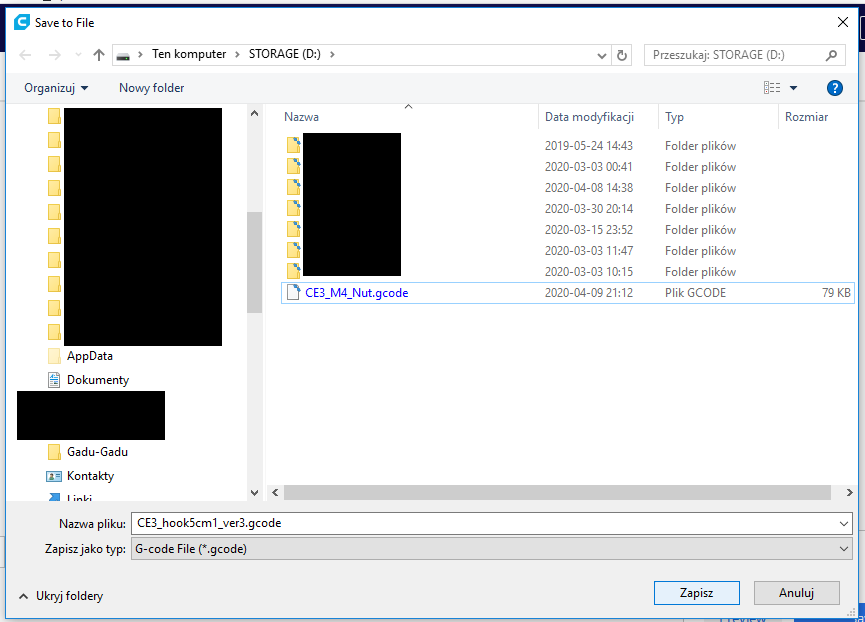
After generating the .gcode I save it to disk using the 'Save to File' button:

It's worth remembering where on the disk we saved the .gcode, as we'll be sending it via the browser to the Raspberry shortly.
 We are printing over WiFi
We already have everything correctly configured and we already have the model exported to the format
.gcode . Now we can send it to the printer, thanks to WiFi the whole thing can be done without getting up from the computer.
On the page
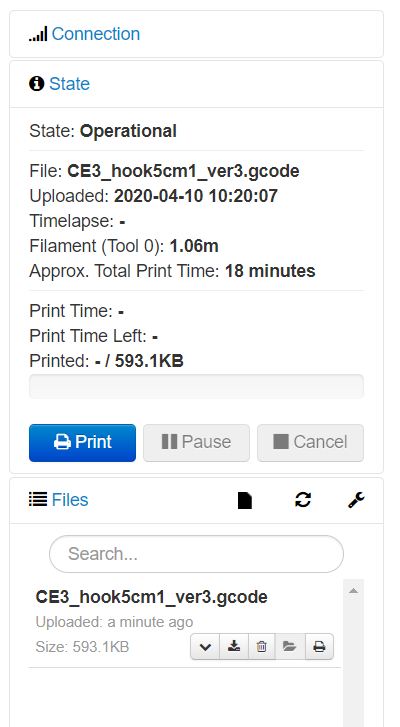
OctoPrint we have a list of uploaded files
.gcode :
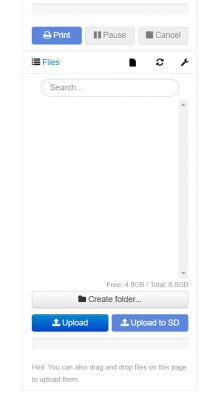
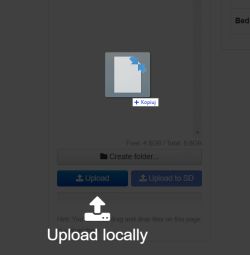
We can add another one there using the '
Upload ' button, or simply drag it to the web page from Windows Explorer (the
drag and drop method - also works):
After adding it there, click the '
Load ' button to load
gcode into memory:
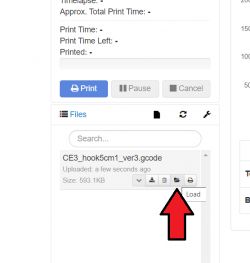
Then information about our gcode, expected print time, etc. should appear above:
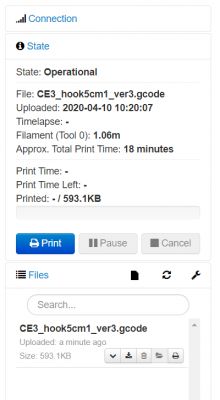
And you can basically start printing now - click '
Print '.
After clicking '
Print ', however, it is possible that even an already preheated printer will not start immediately. The image below explains why:

As you can see, the printer additionally heats up.
This is due to the fact that the final temperatures used are those set in the gcode file (settings from the slicer) and not those from OctoPrint. Keep this in mind.
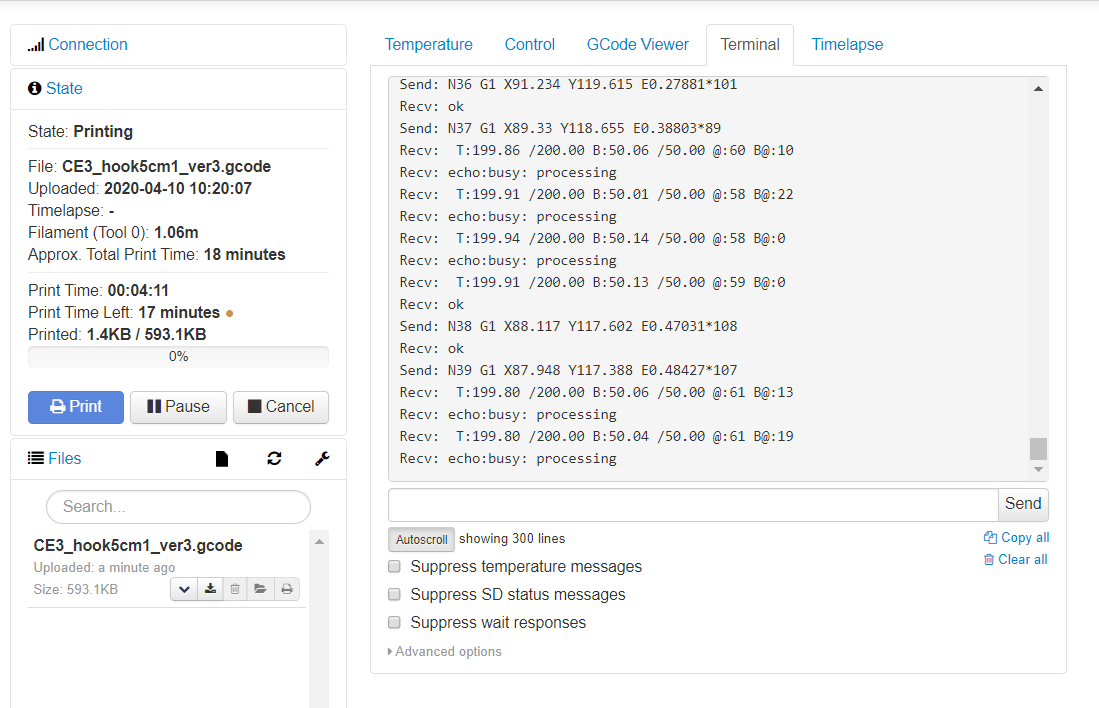
In
GCode Viewer we can preview the print plan and verify that everything is ok and that we are printing what we want:

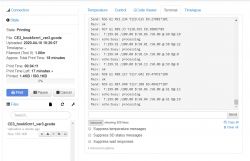
Once warmed up, our object should already be printing. Under
Terminal you can view the communication after
UART between the printer and
Raspberry , but in general I would advise against playing with the web panel while printing as any delay
Raspberry can result in a slight disruption of the print.
And that's it - after a reasonable amount of time we should have a finished print:

(
Yes, I know, in the above photo my magnetic pad from Ender 3 is in very bad shape, but I'm still waiting for a new one and the package is delayed still by this coronavirus... )
Final comments, tips
Here I will give in bulk some important notes on
Raspberry PI and
OctoPi . Some have occurred in the text but are worth repeating.
-
OctoPI can be used even with
Raspberry PI Zero W but preferably without a webcam, otherwise these weak
Raspberry does not cope and serial communication with the printer is too slow which creates print artifacts
-
OctoPI can run quite slow, even while standing up it can give messages that something is wrong (web page with error information), but with me always waiting a minute longer solved everything
-
OctoPI takes temperature settings from file
.gcode , setting the temperature via the web panel won't give us much, because then these values will be overwritten anyway by those in
.gcode
-
OctoPI itself did not want to detect my printer on the setting
Auto , I had to manually select the serial port
- in the current configuration it is possible that the LCD screen from Ender 3 will be powered by 5V from USB from
Raspberry PI (it will light up slightly even though the printer is switched off); this is rather undesirable but can be easily fixed by simply cutting off the 5V line from the connection, e.g. by taping the pin responsible for 5V with tape in the USB plug
Summary
I have shown here how to configure
OctoPi on
Raspberry Pi Zero W for use with printer
3D Ender Pro , but in principle similar steps can be applied to other
Raspberry and printers.
I've been using a 3D printer set up like this for a while now and haven't experienced any problems, artifacts or degradation in print quality, but I still stress that if you want to additionally hook up a webcam then you should use a more powerful
Raspberry than I have.
And just connecting the 3D printer to WiFi in this way I highly recommend , it greatly improves the workflow and convenience of flipping files. I wish I had done this sooner.


Comments
To add on my own, OctoPI is so badly optimised that you can't actually use it on anything below a RaspberryPI 3, one that it's slow, two that it increases print times (due to Octo muddling up the system... [Read more]
error105 100% right. I have Octopi on B+ with clipper and without overclock the printer cuts when printing. After Christmas I'll switch to the Pi 3. Because the gain from such a configuration outclasses... [Read more]
I use octoprint on a Pi 3B+, the increase in print time is negligible, with a 10h print it was a difference of about 10 minutes. With these adapters such a bit odd combinations, the ender board can't... [Read more]
I thought about this solution. Skip the FTDI altogether and plug straight into the UART - UART to raspberry. I'll catch up on the "back end" of printing then I'll check it out. If even that doesn't do... [Read more]
You are comparing a 4core 1.5GHz to a 1 core 700Mhz, rather pointless. Leaving aside the fact that if one application requires 4 cores and does exactly the same thing as another that runs smoothly on 1,... [Read more]
I won't argue, but the makers themselves suggest using the Pi 3B, and that it somehow goes on others can be seen as a nice gesture rather than a chance to save a few quid. I prefer to use the octoprint... [Read more]
I don't have such a need, I print from PETG so the print doesn't even peel off the cold table :) And via Repetier-server I can run the print remotely on RaspberryPi zero class hardware without worrying... [Read more]
Wait, then octoprint doesn't upload the entire gcode file to the printer's sd card, it just sends individual commands like when printing over the cable from a pc? After all, it's a backward step in de... [Read more]
Exactly, and on top of that when the Octo hangs the printout stops, and even if the printout does not stop, disconnecting the USB causes a problem because the printer board restarts so the printout is... [Read more]
After all, Repetier Server does the same thing. And as for the lack of uploading to SD card, misguided accusation, below is a screen shot from Otco showing that you can upload either to print or SD... [Read more]
Of course it does, it's just that it's better written so I'd trust it more not to crash than Octo :) It doesn't change anything, if you have a USB cable inserted and something happens to the Octo... [Read more]
So how is it different with Repetier Server ? no USB cable ? Greetings [Read more]
I wrote clearly that Repetier is better written so I would trust it more not to crash than Octo which requires 4 cores to send commands over UARC where such a thing is done by 8Mhz Attiny even :) ... [Read more]
Same with Repetier. I have used Repetier Server for a long time and indeed do not see any advantages over Octo. I've been using Octo for about four years now and have NEVER had a hang-up, nor have I noticed... [Read more]
Mi Octo sat on the Rpi A every now and then, Repetier crashed once. Generally I don't use it, I go to the loft fire up the printer and the emergency power supply, insert the card and wait 2 minutes until... [Read more]
Sorry but it's much cheaper and simpler to buy a proper control board, https://www.elektroda.pl/rtvforum/topic3526282.html [Read more]
Oy you must have become very discouraged with the octopi by putting it on anything and now you are making up silly things.... If you put it on the printer's SD card you can turn octopi off at any time. Secondly... [Read more]
Anything ? It works for me on the same RPi and Repetier-Server together with java and Blynk and it works smoothly, while OctoPI alone can no longer manage to work on the same hardware and does nothing... [Read more]