 Hello my dears
Here I will present a collection of 3D designed wall organisers/mounts for various power supplies and tools. All in one theme - and finally a library of 3D models in .blend format for download (from this you can produce STLe).
I printed the models shown here on my Creality3D Ender 3 Pro 3D printer, using black PLA filament.
Motivation for the project
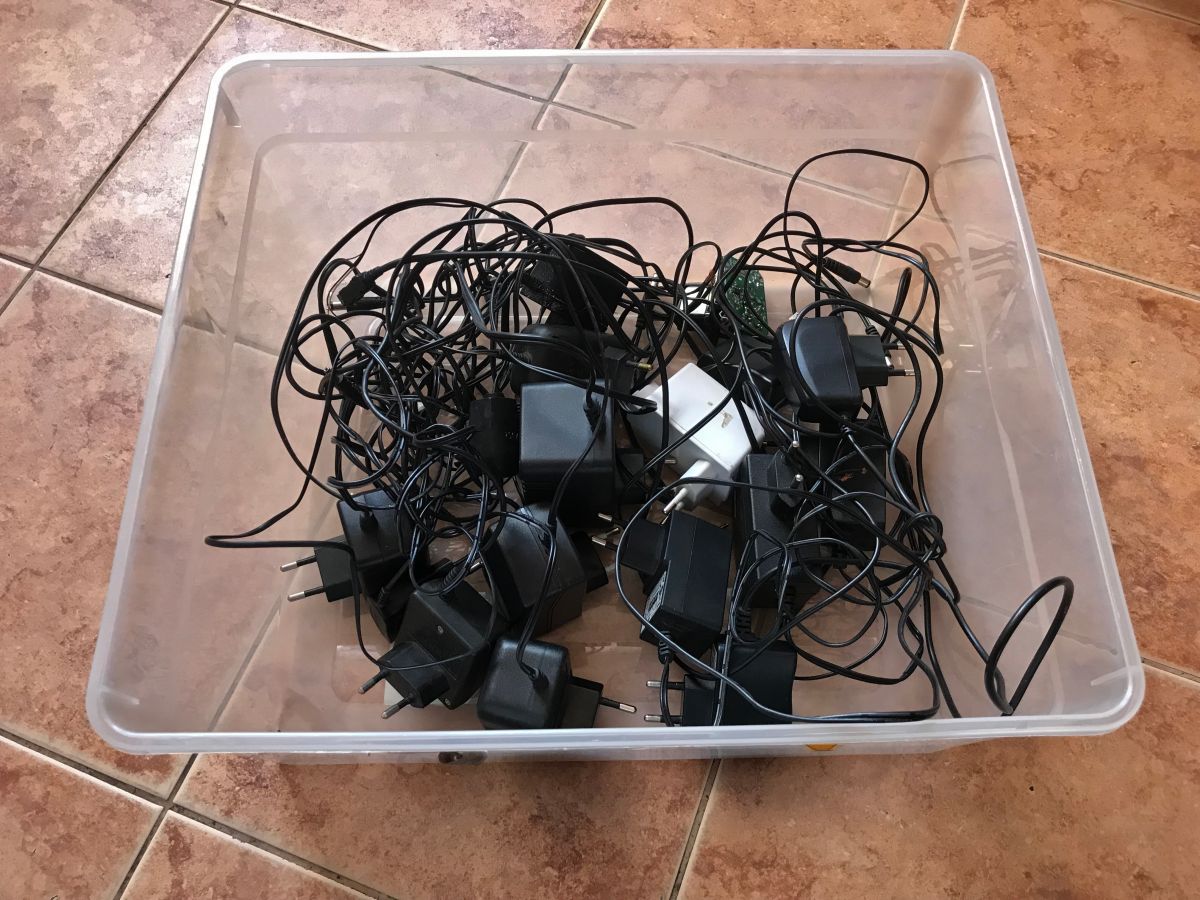
The prints were created because I was looking for a good and effective way to organise my collection of power supplies and tools, which has become quite substantial recently:

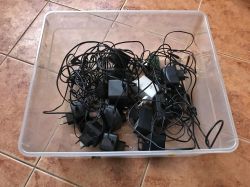

I needed something that would allow me convenient and quick access to any of the tools I needed. Preferably some sort of mount in plain sight, on the wall.
I decided on 3D printing because I know nothing about wood/metal working, plus printing has the advantage that I can easily make multiple identical copies of the same piece and modify the design at will on the computer.
I also used 3D printing because I wanted my mounts to fit the power supplies/tools well and go on them 'snugly'.
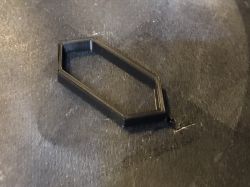
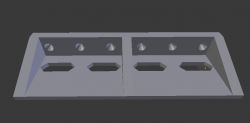
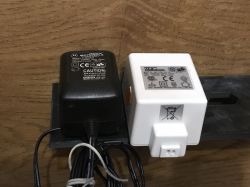
Power supply holder/organiser
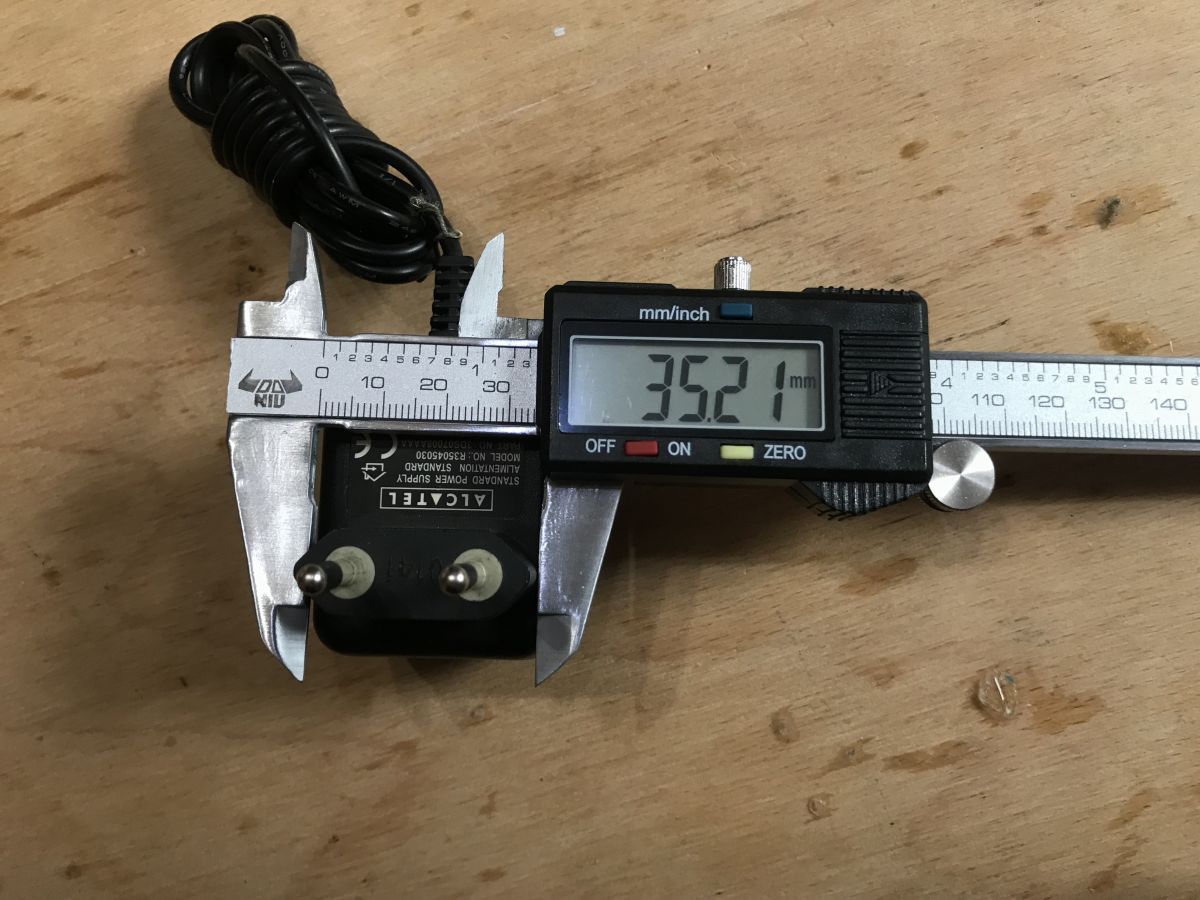
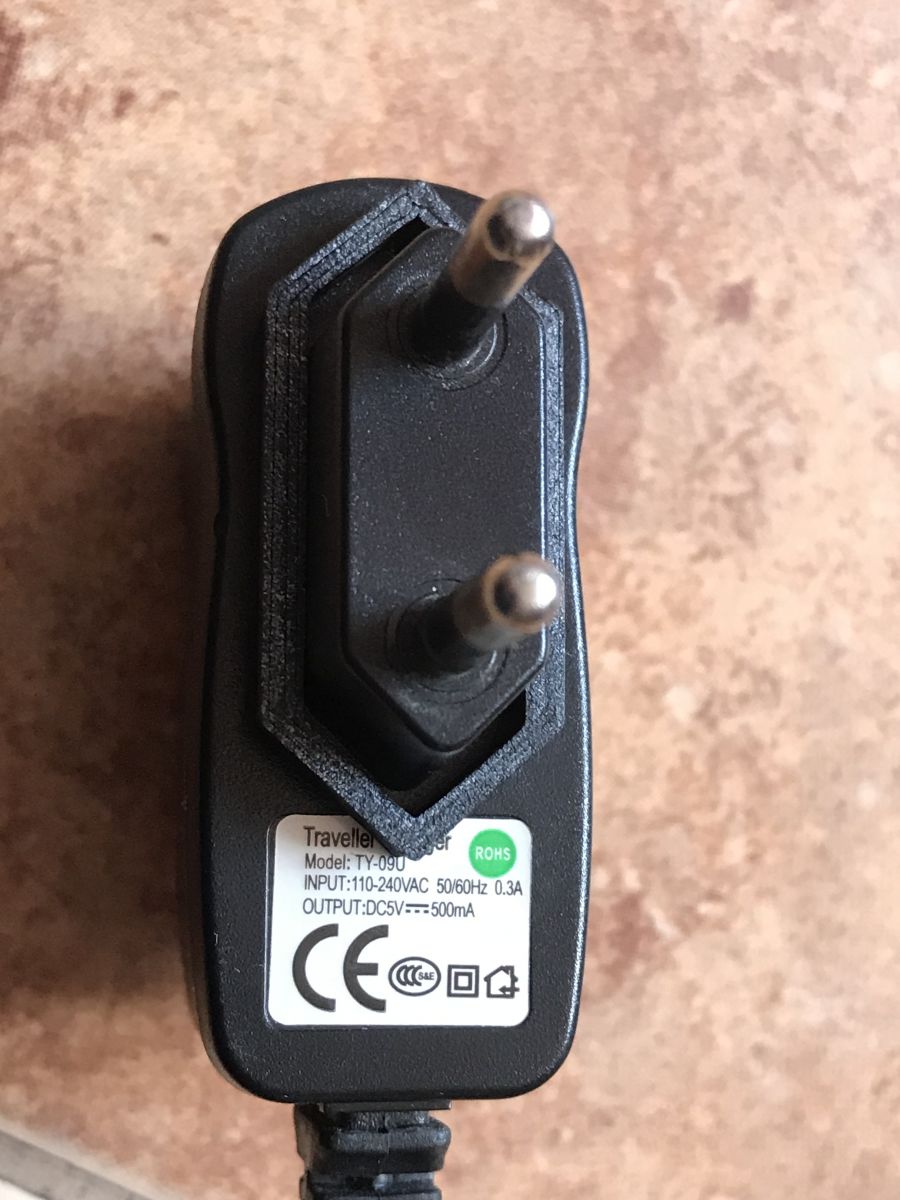
I started the design of the power supply organiser by sizing the power supply plugs and determining whether they were fairly standardised:

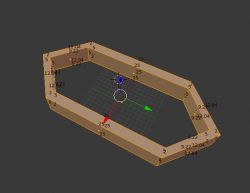
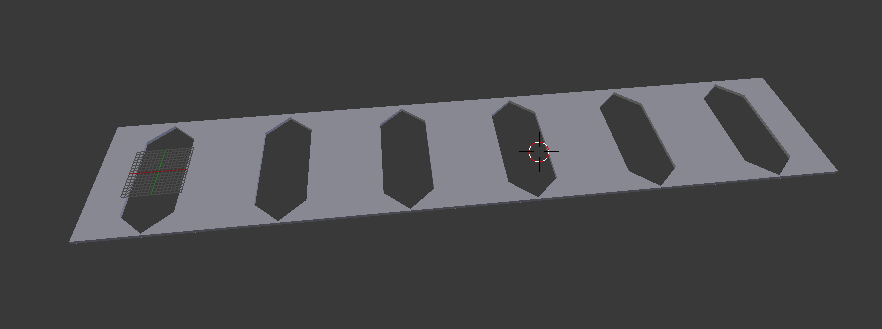
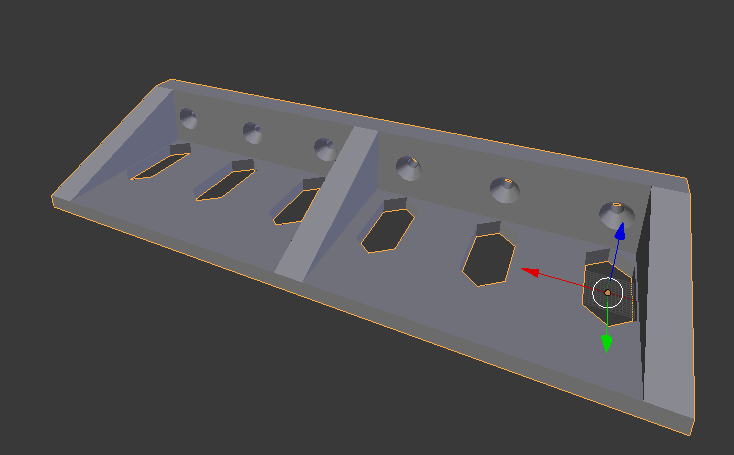
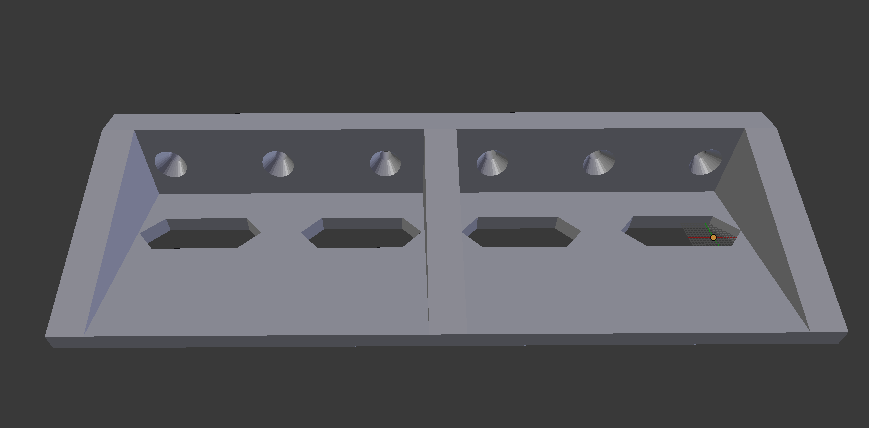
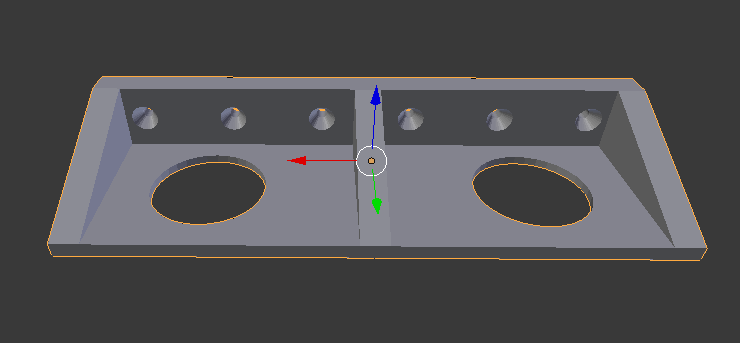
It turned out that they were all roughly the same size, but not to the millimetre. However, the differences were very small, so I made a 3D sketch of the mount framing:
I then printed it out for testing and preliminary fitting:

The first version was a bit too loose, but I quickly corrected that.
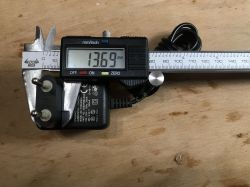
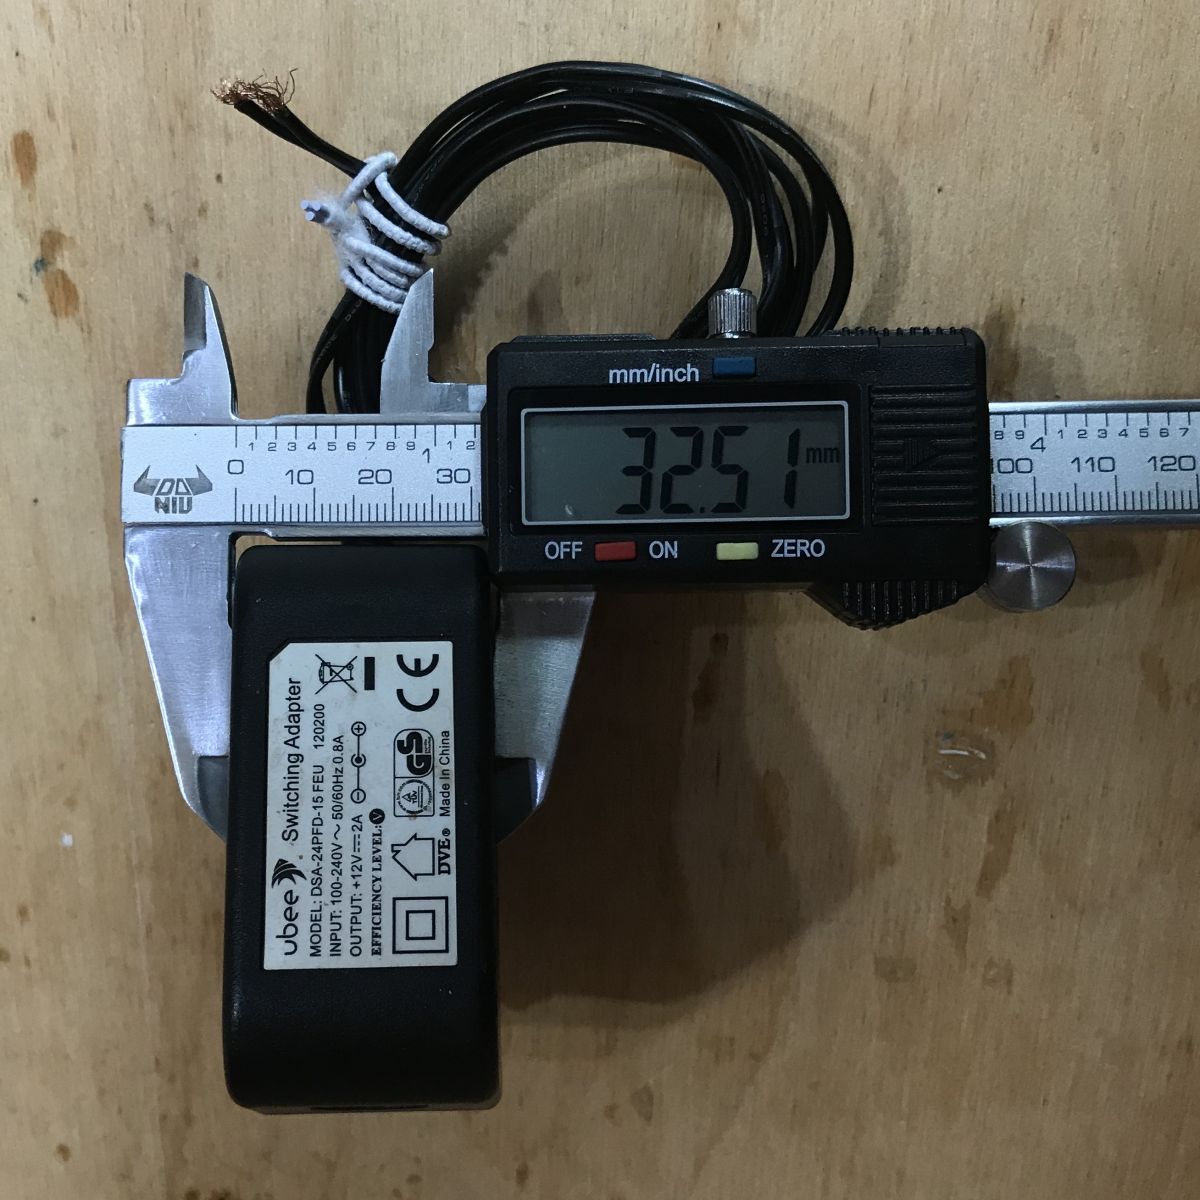
I then measured the thickness of the largest power supply I have:

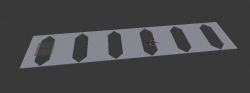
And based on its value I prepared a slightly larger prototype, already on
six power supplies:
After printing:
Fitting:
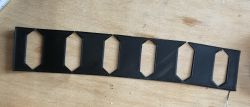
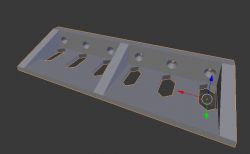
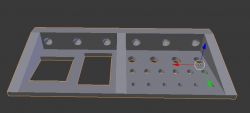
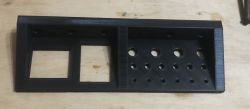
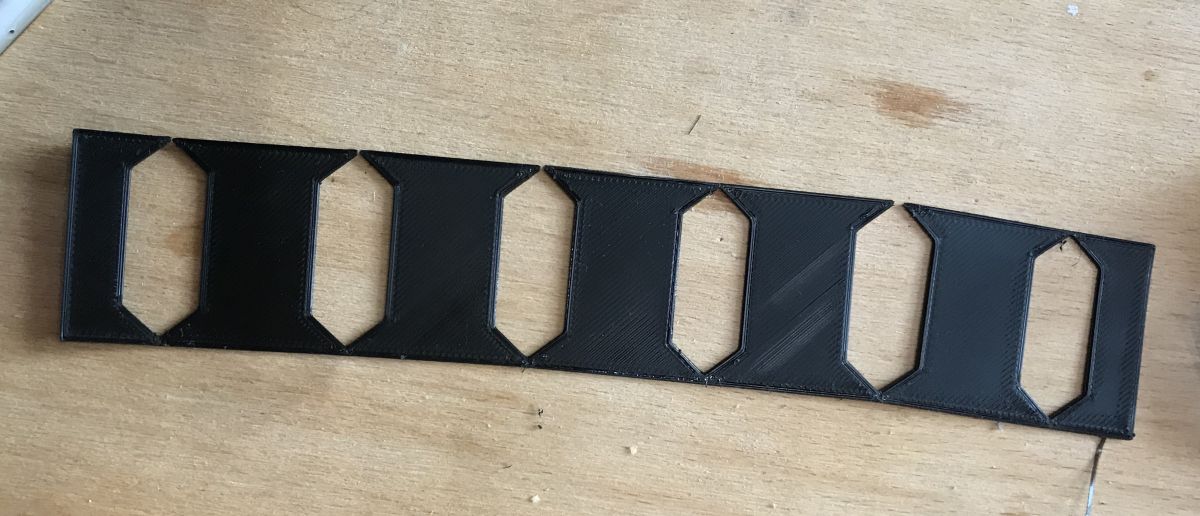
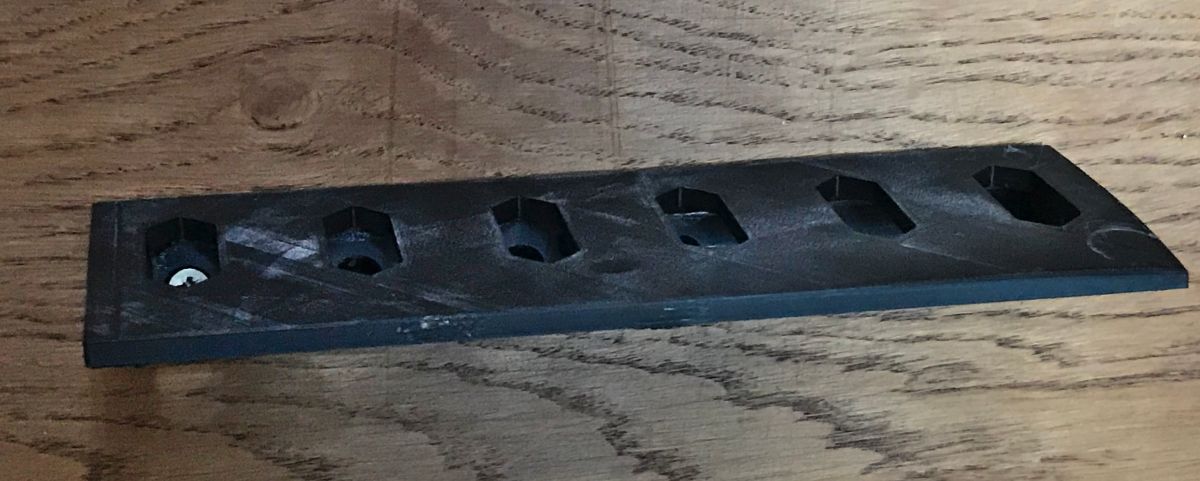
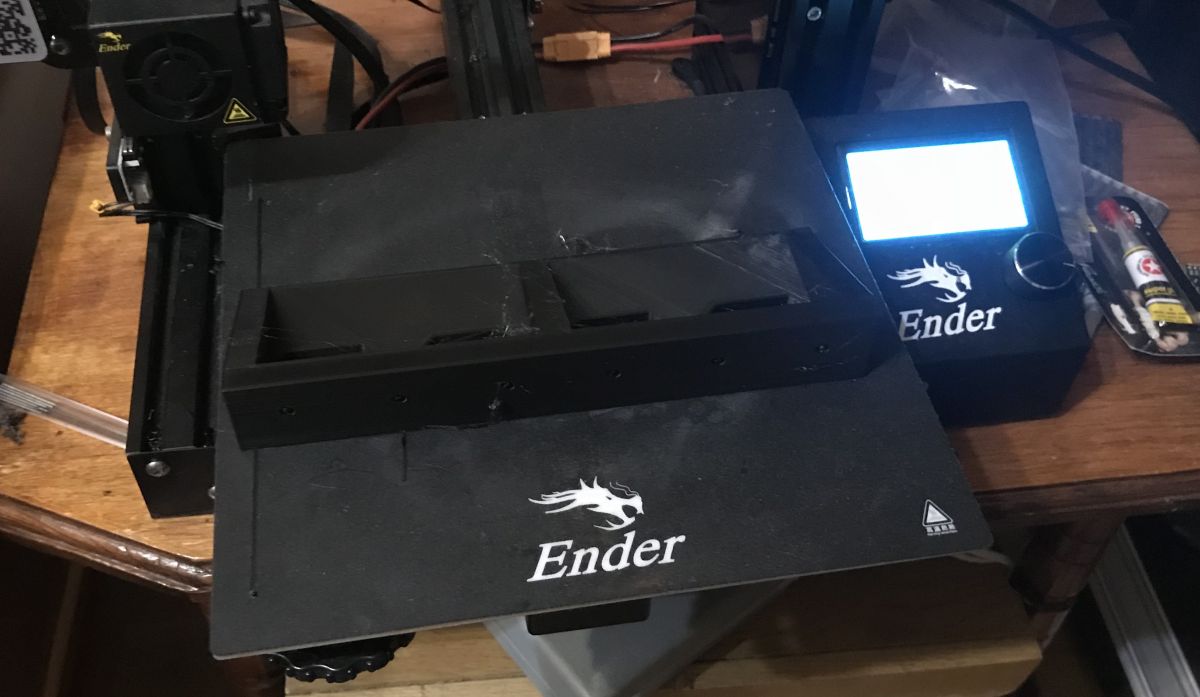
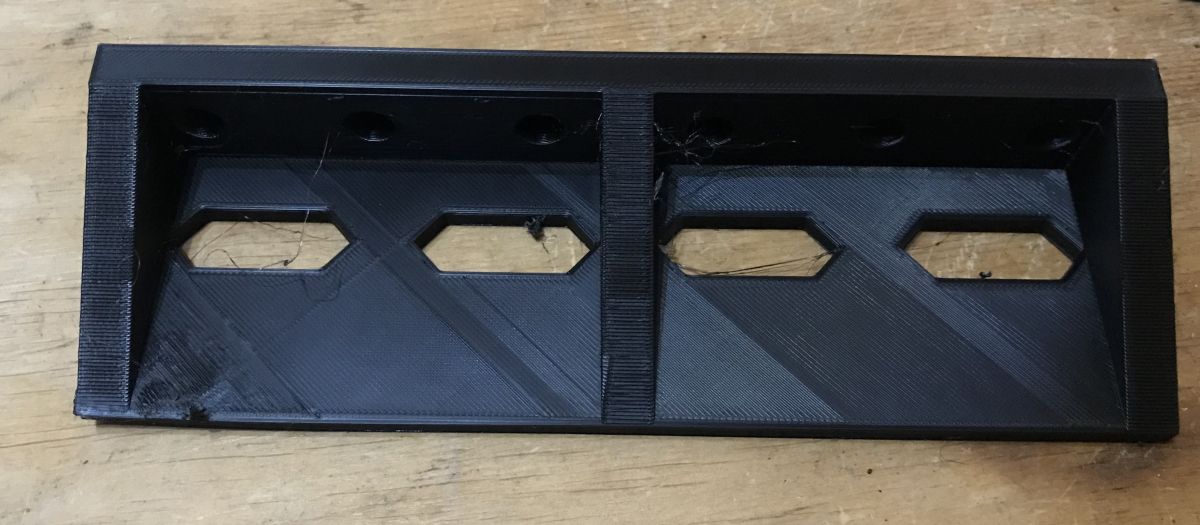
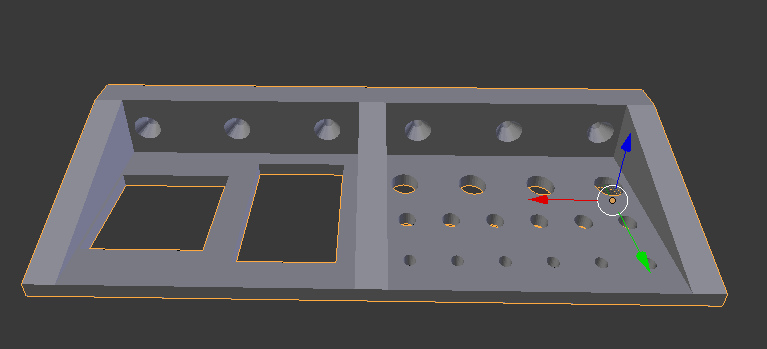
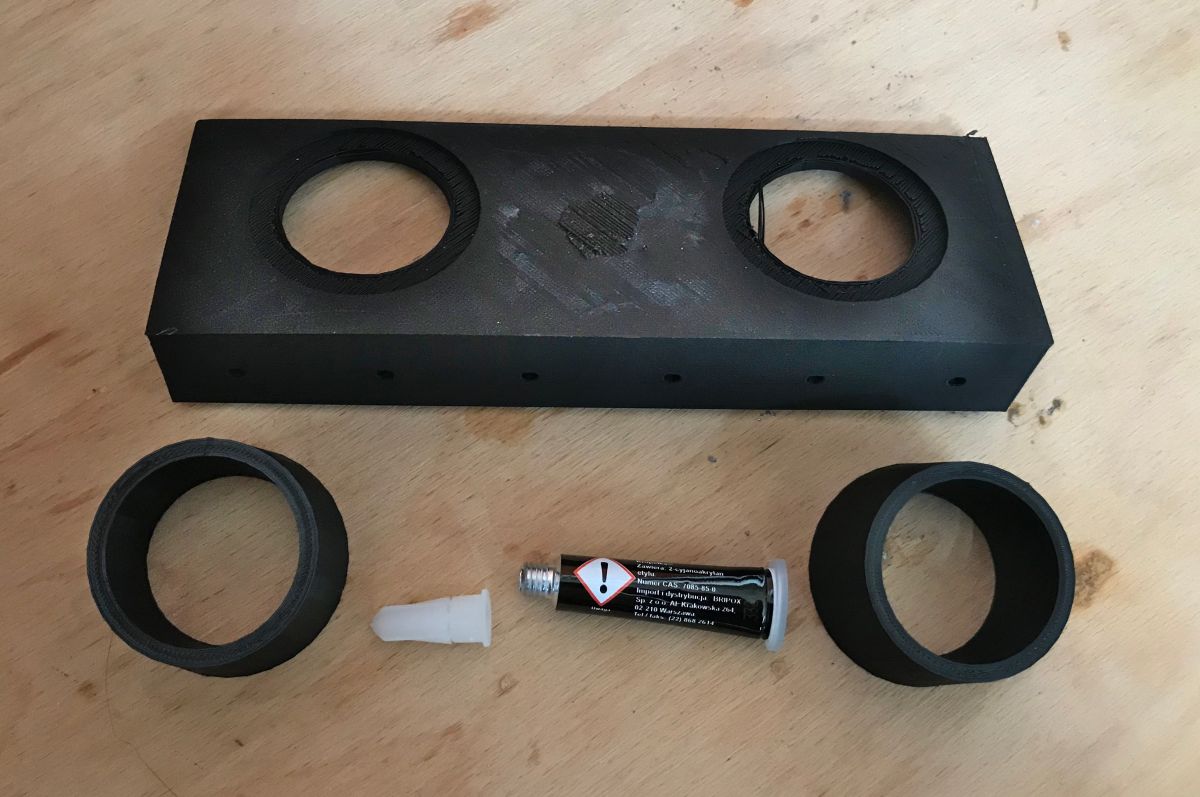
The fitting came out reasonably well, so I designed the final version. I tried to make the whole thing quite solid. I put as many as 6 screw holes for the attachment, but obviously not all are needed to make it stick.
The final version before printing:
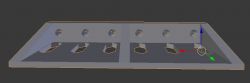
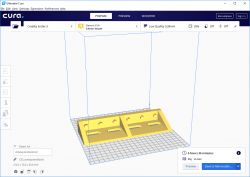
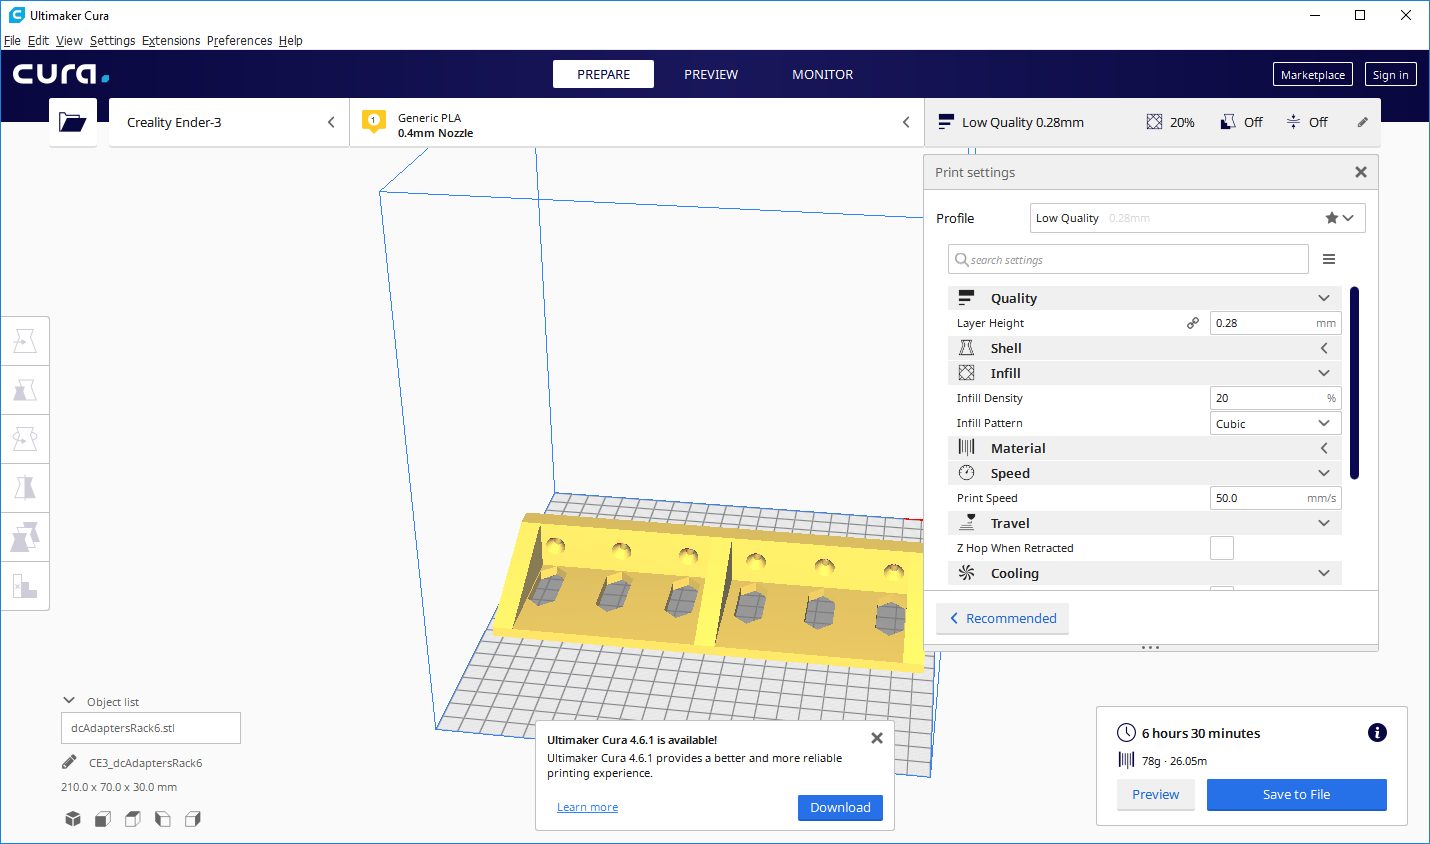
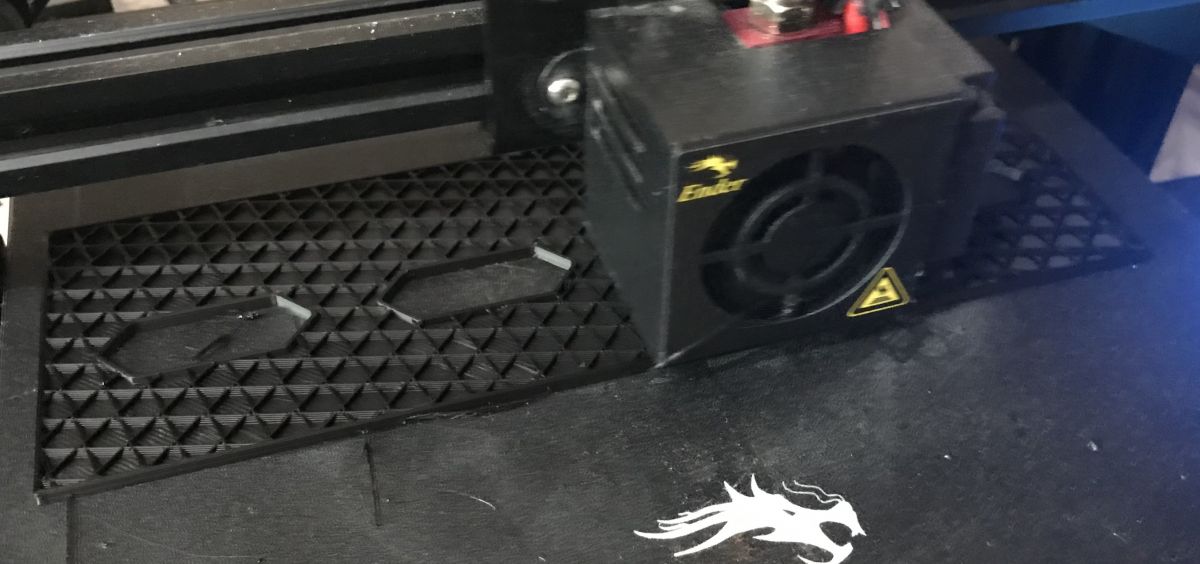
I printed the whole thing in 'Low Quality' mode, the print took just under 7 hours:

This part can be printed without turning on the supports, I turned them on at first because I thought they would be useful for the mounting holes. But the printer creates them fine even without supports.
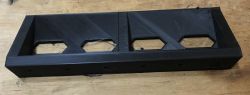
After printing:
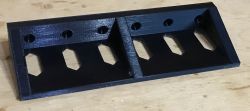
First fitting:
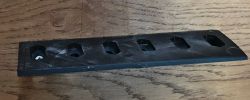
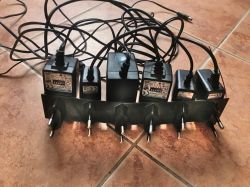
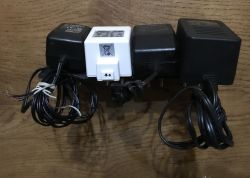
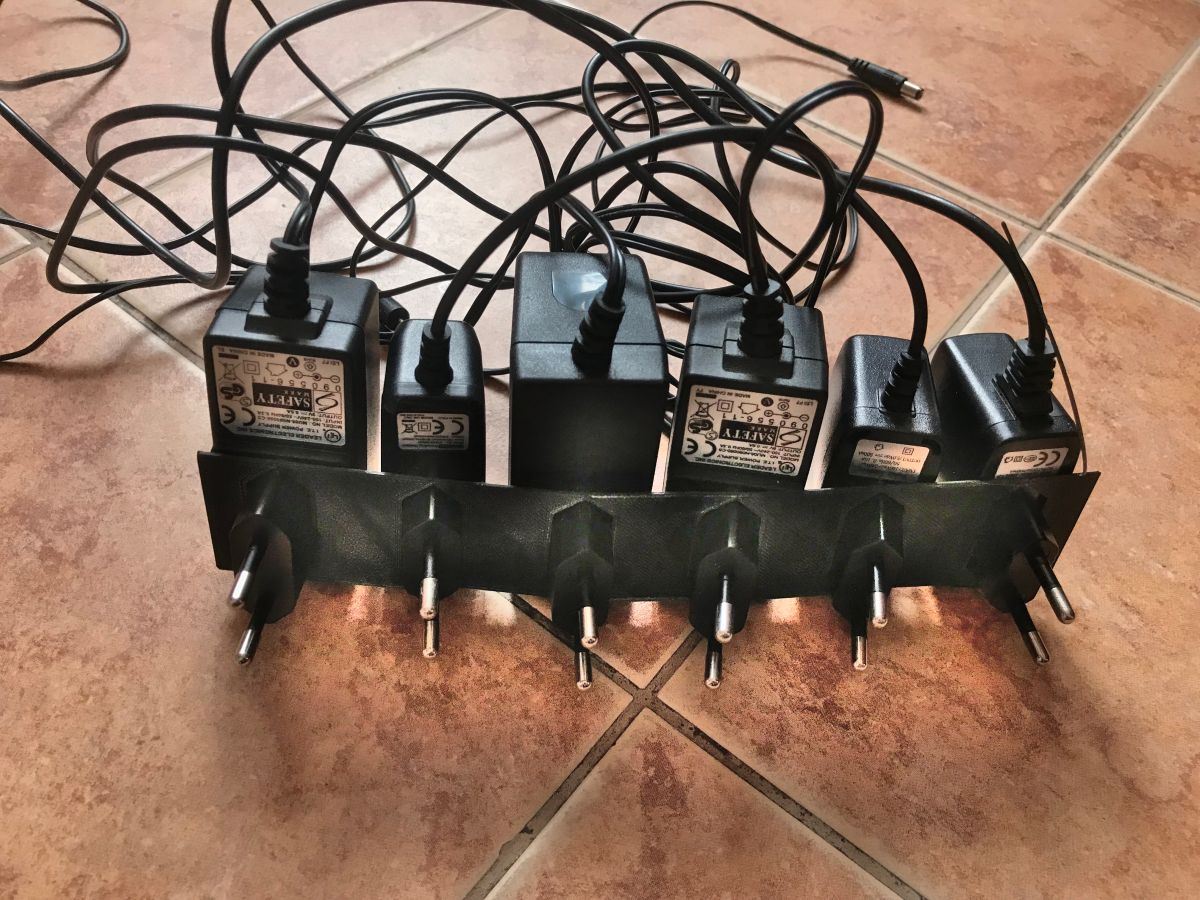
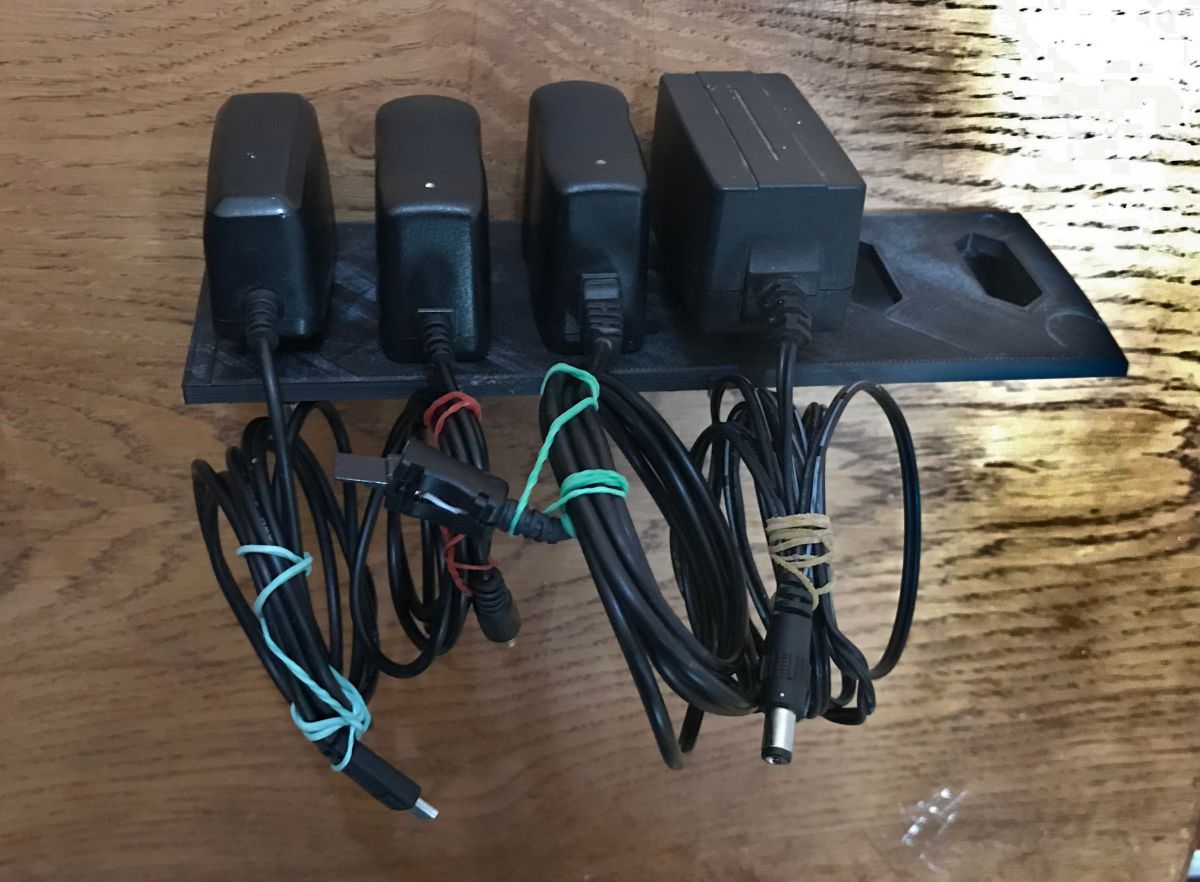
And the final result - with power supplies.

The organiser has come out very well - the power supplies hold solidly in it, it is convenient to put them in and take them out, and most importantly they are in view and from a distance you can see which is where.
Version two - plug turned 90 degrees
I then made a version for those 'thicker' power supplies, meaning I simply rotated the plug mount 90 degrees:
I didn't have to correct anything else, as the dimensions had already been checked beforehand.
In the process of printing:


Printed element:

Unfortunately, one corner of the piece lifted up slightly - it had become detached from the hot bed as a result of not perfectly levelling it; but I decided that since it was just a workshop mount, let it stay that way.
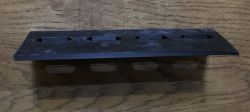
The final result (mounted on plywood for a test):
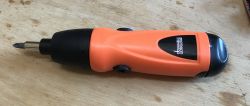
 Verse under Velleman mini drill with power supply
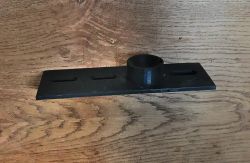
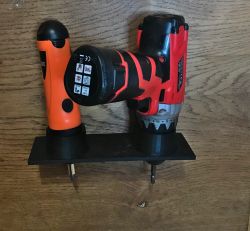
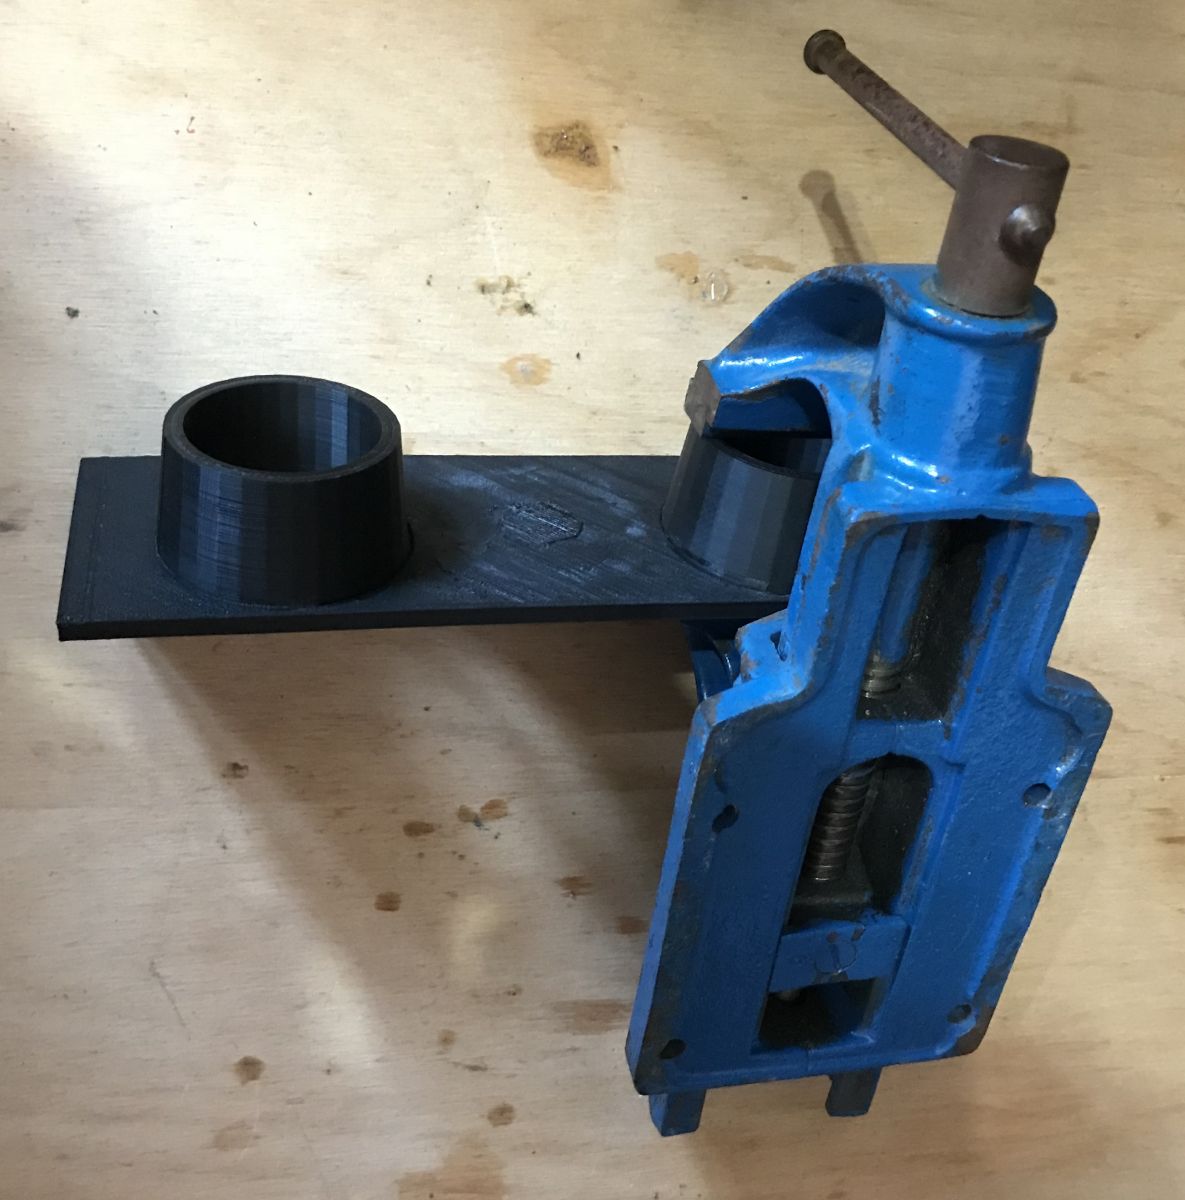
I then decided to make an organiser for this drill with a power pack:
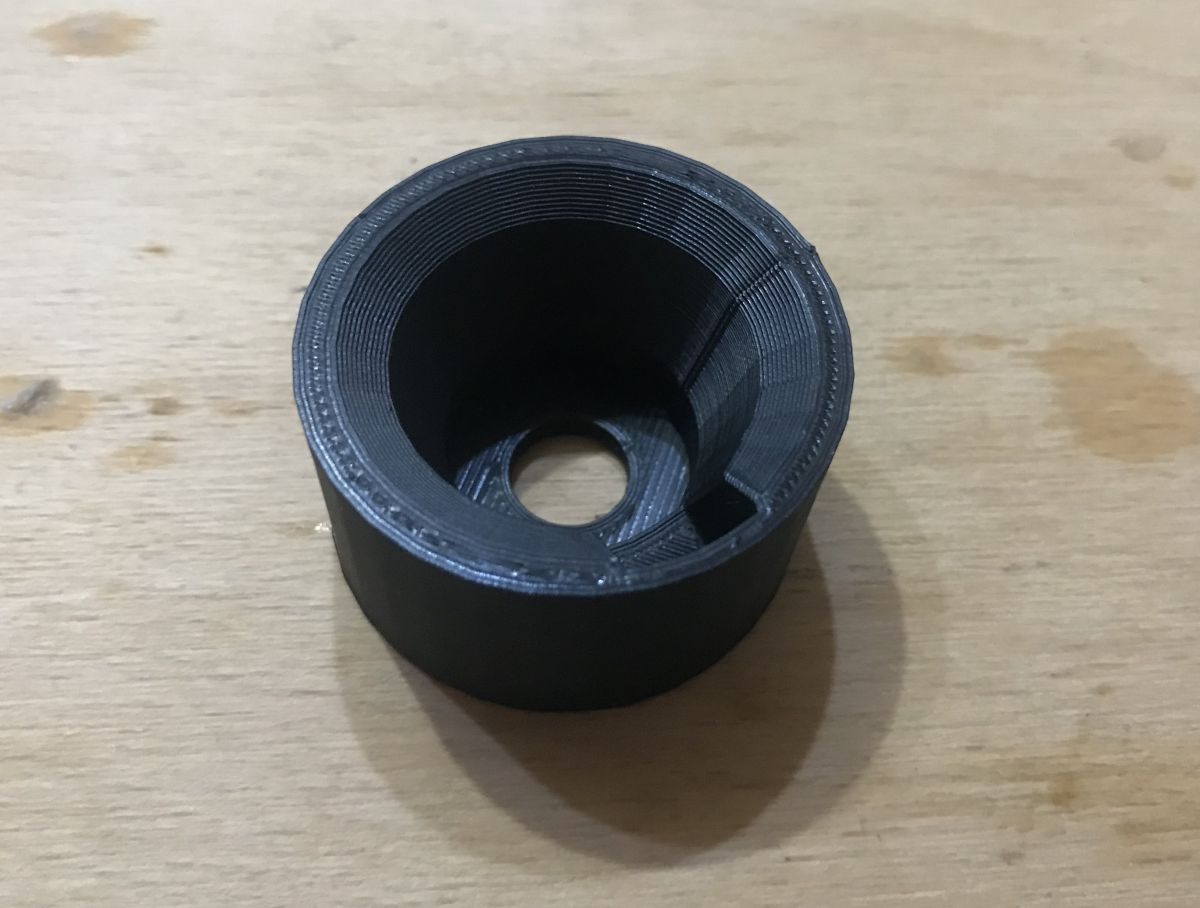
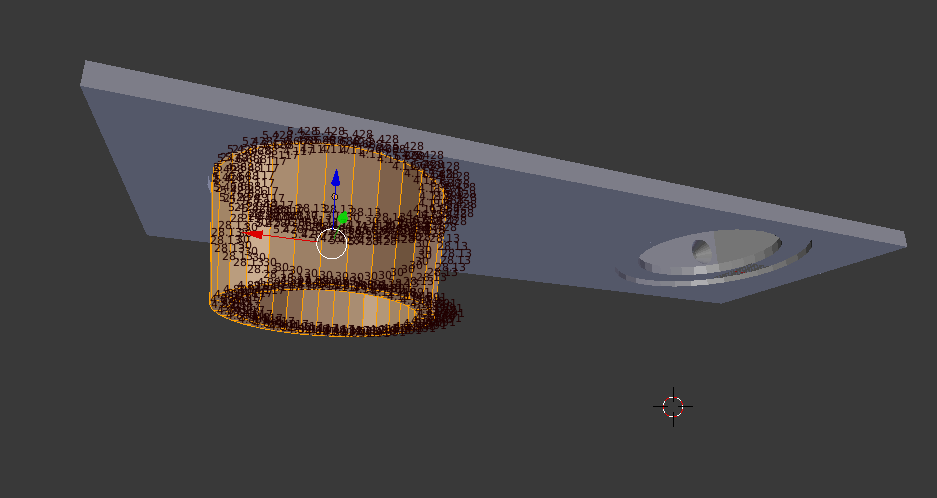
I did the design based on the organiser for four power supplies, but replaced one of the power supply slots with a round drill cap:
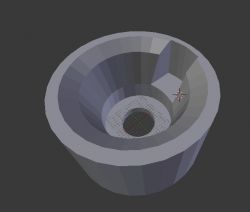
This cap is applied (glued) to the base of the organiser:

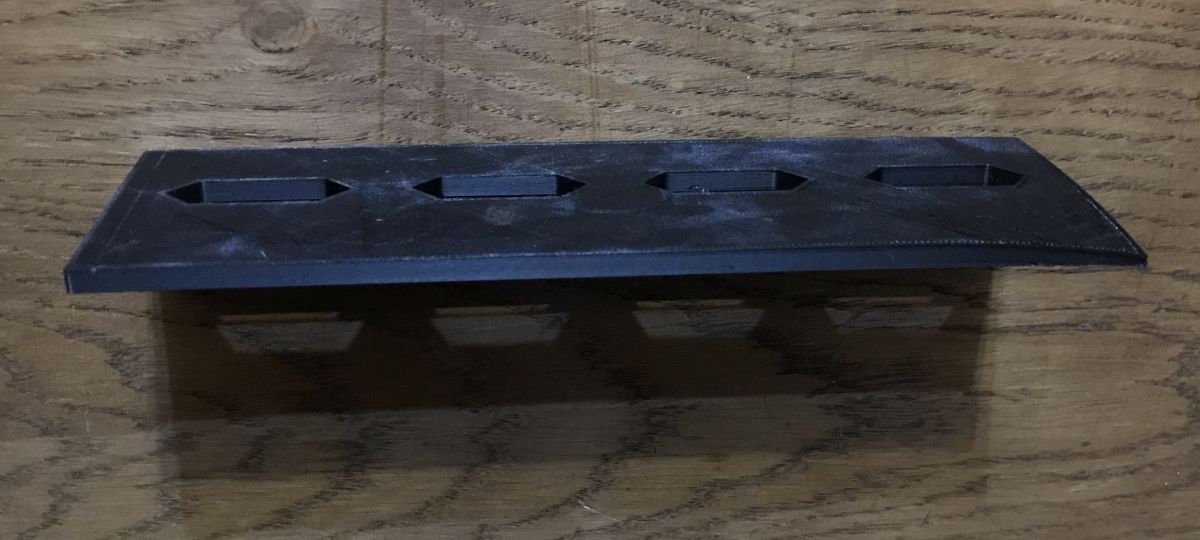
To start with, I printed the cap itself:

I checked that the Velleman was a good fit for it:
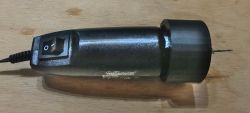
The tool holds very solidly and stably in it.
Then I already printed a normal base with slots for the power supplies:

It is worth remembering that the mini drill mounting location has a support structure so that the filament over it does not collapse. This structure needs to be removed after printing.
I glued both parts firmly together and left them compressed for some time:

Fitment:
Fitting already with mini drill:
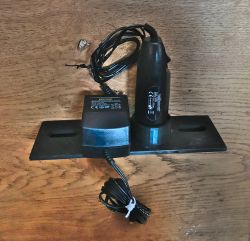
The drill sticks solidly and there is no possibility of it falling off, while at the same time the convenience of access is very high.
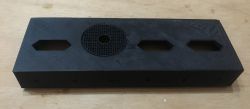
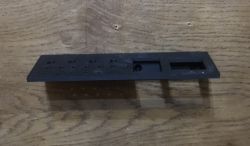
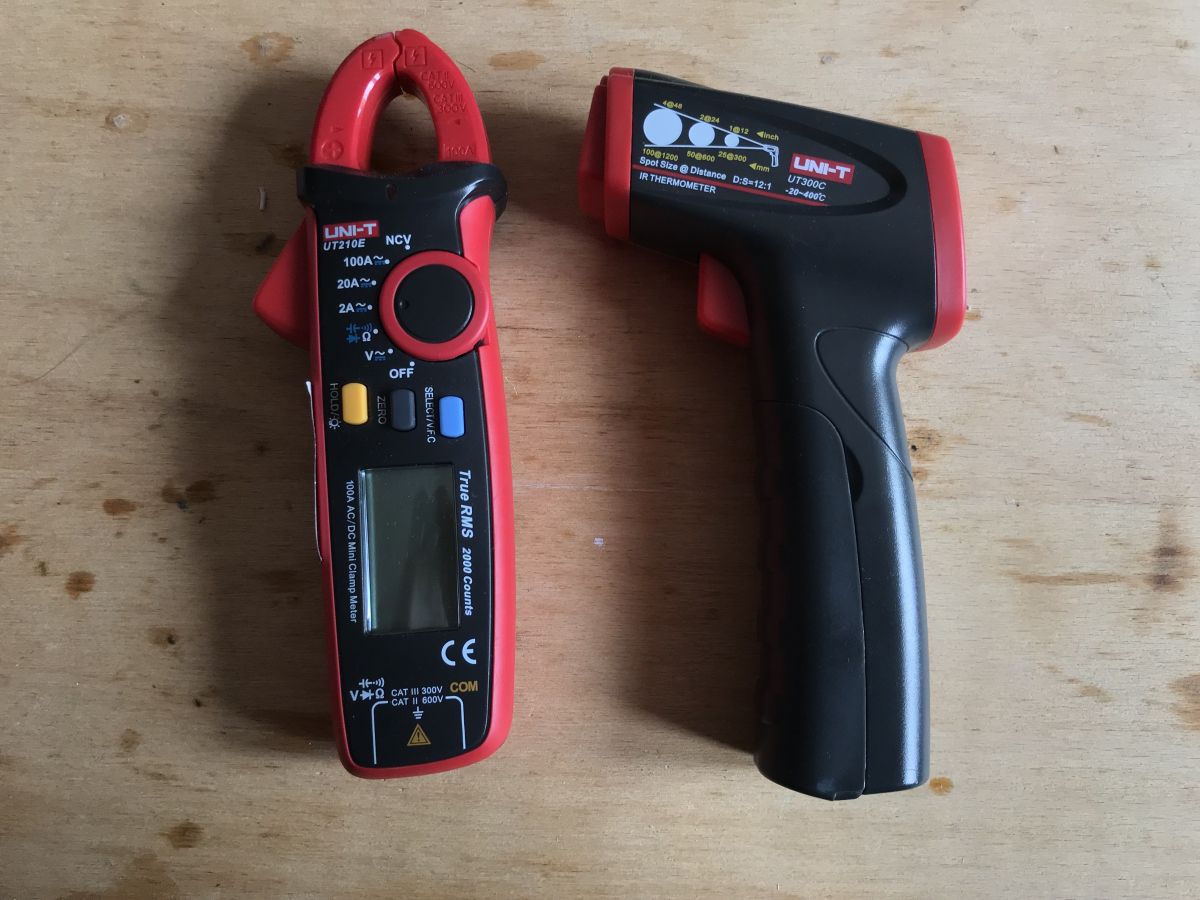
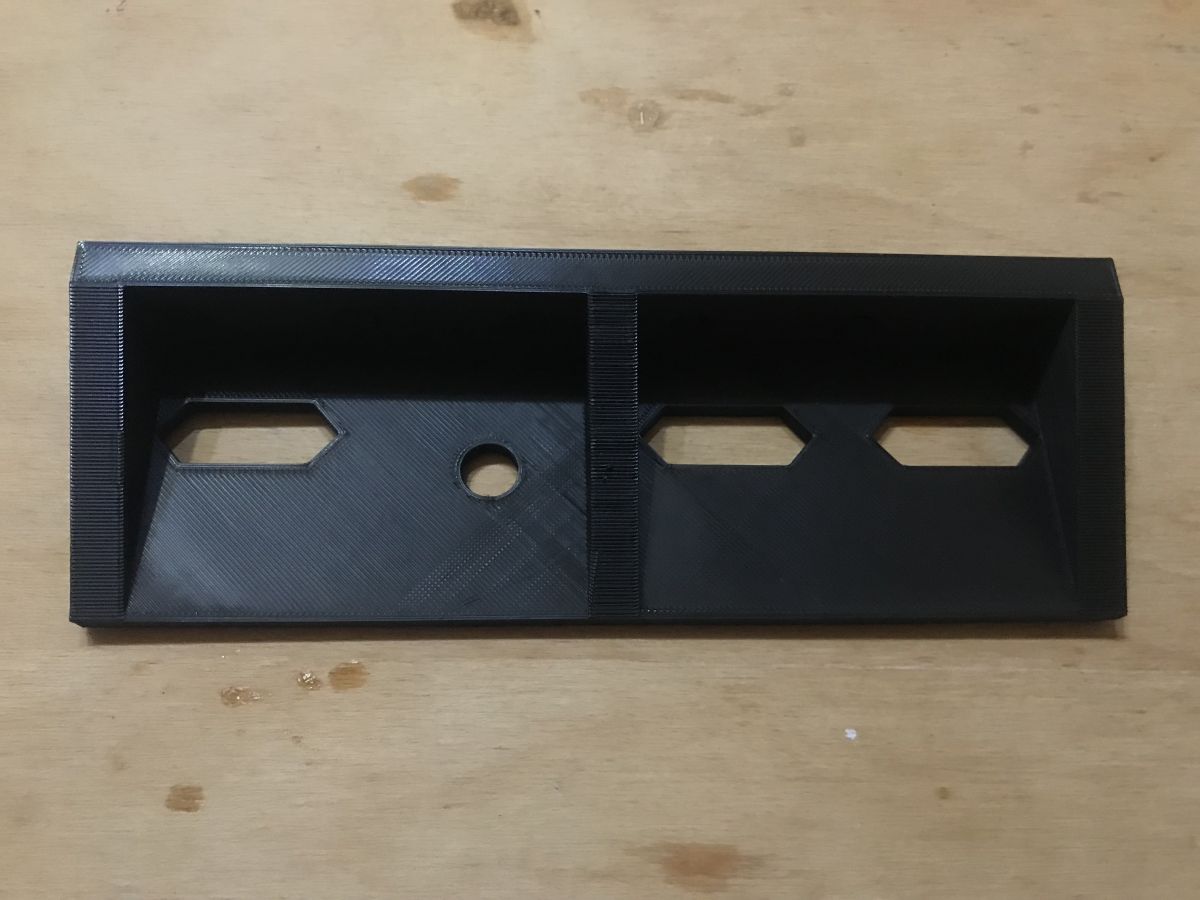
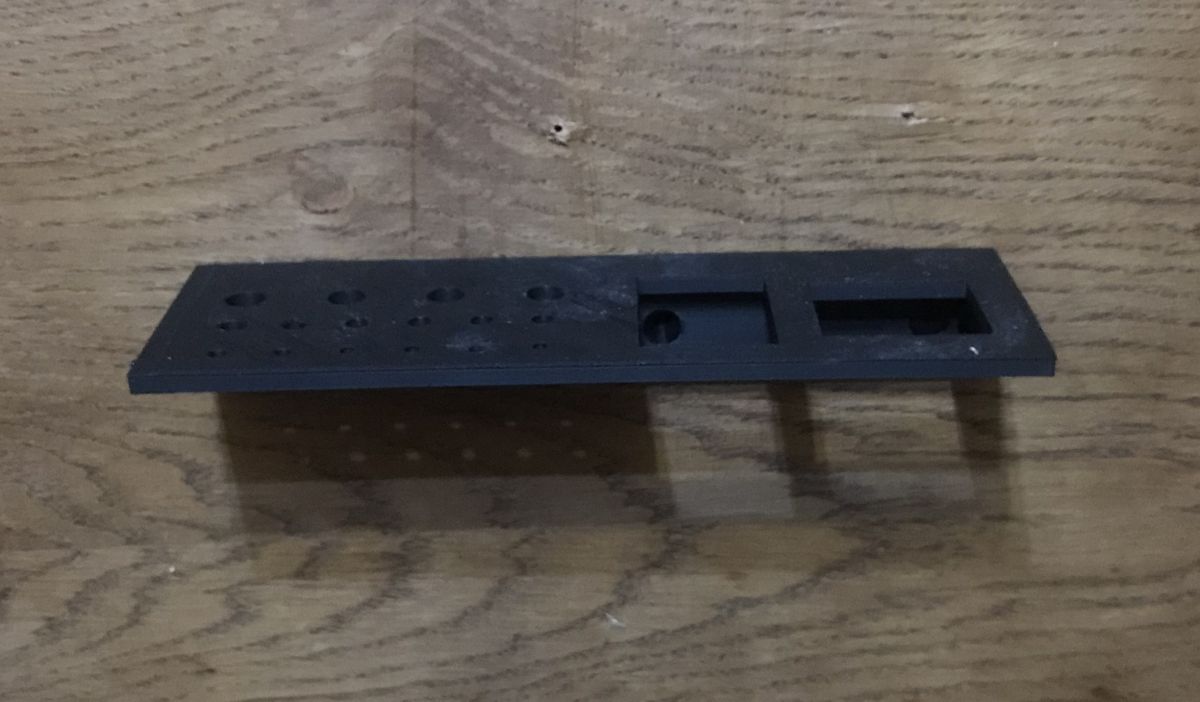
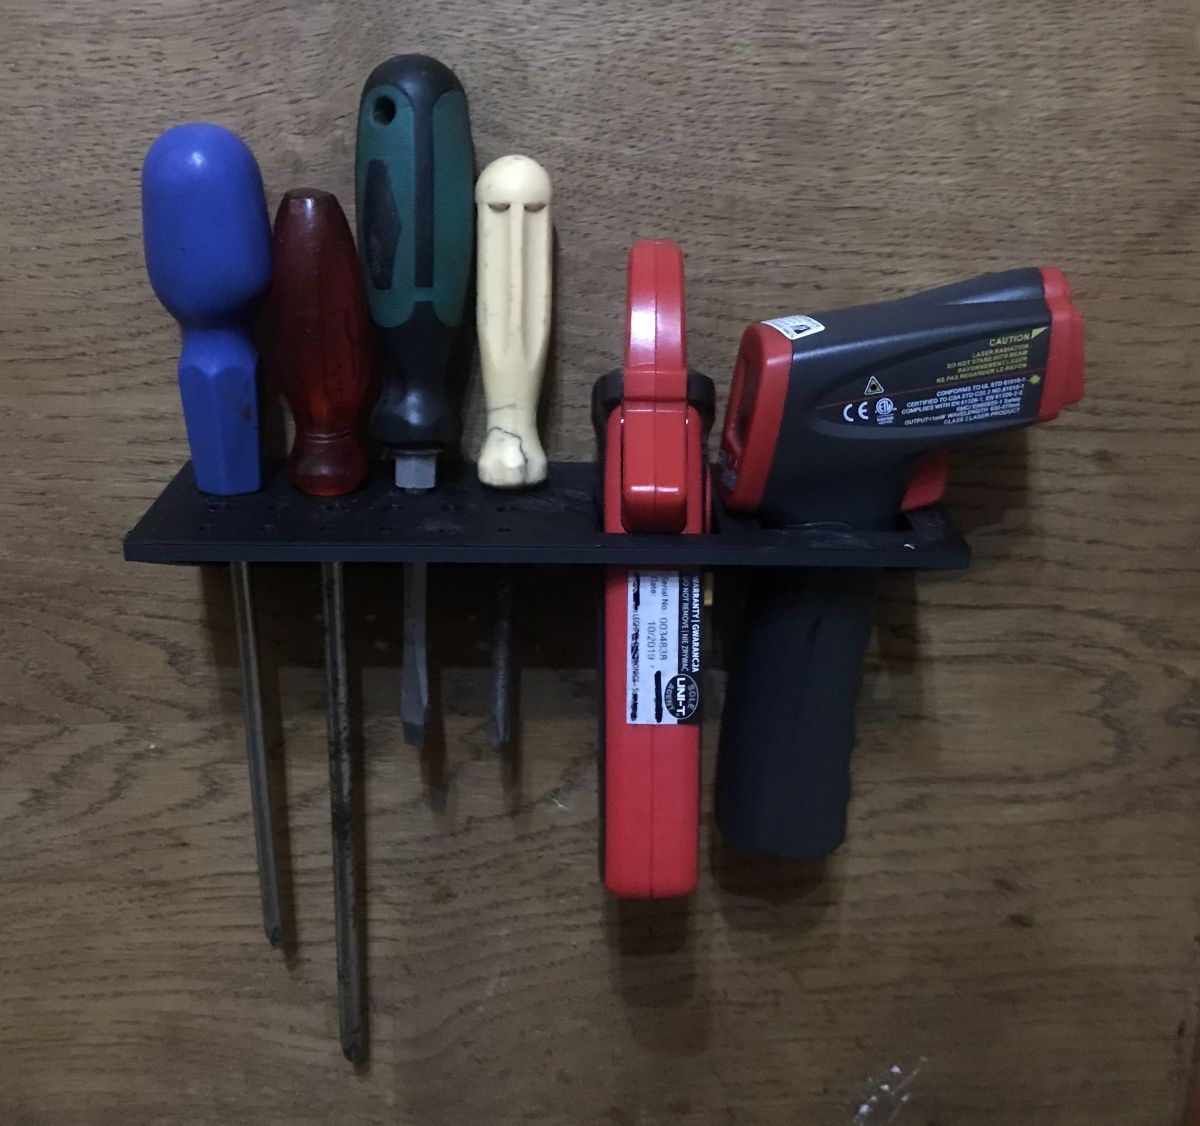
Version for pyrometer, clamp meter and screwdrivers
I also made a version of this organiser for my UT300C pyrometer and UT210E clamp meter:
I didn't need any more slots for power supplies, so I figured this version would have some screwdriver holes by the way.
After printing:
On the wall:

The pyrometer and clamp meter hold firmly, pull out and insert comfortably.
Version for screwdrivers
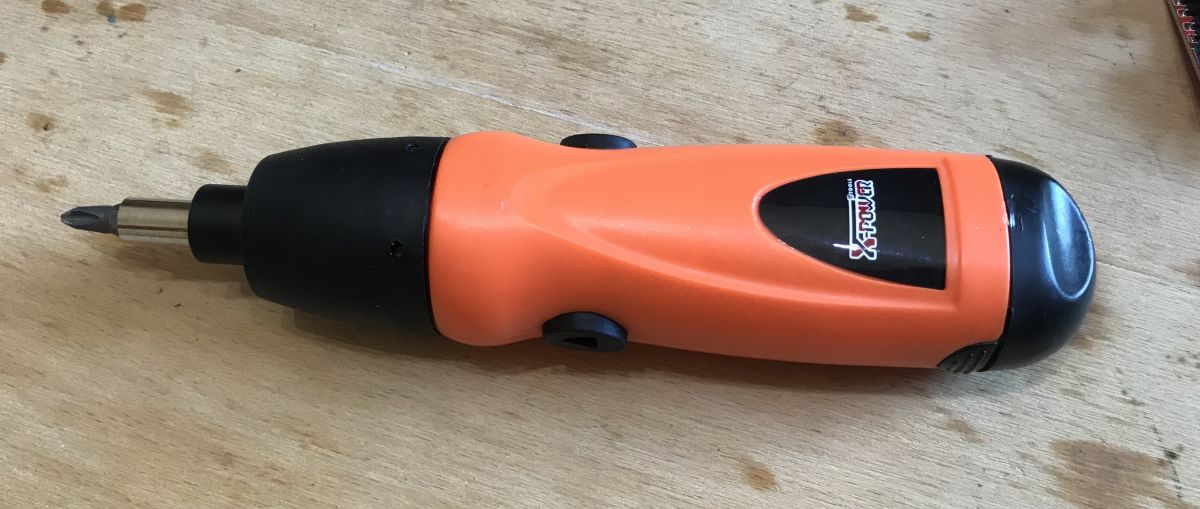
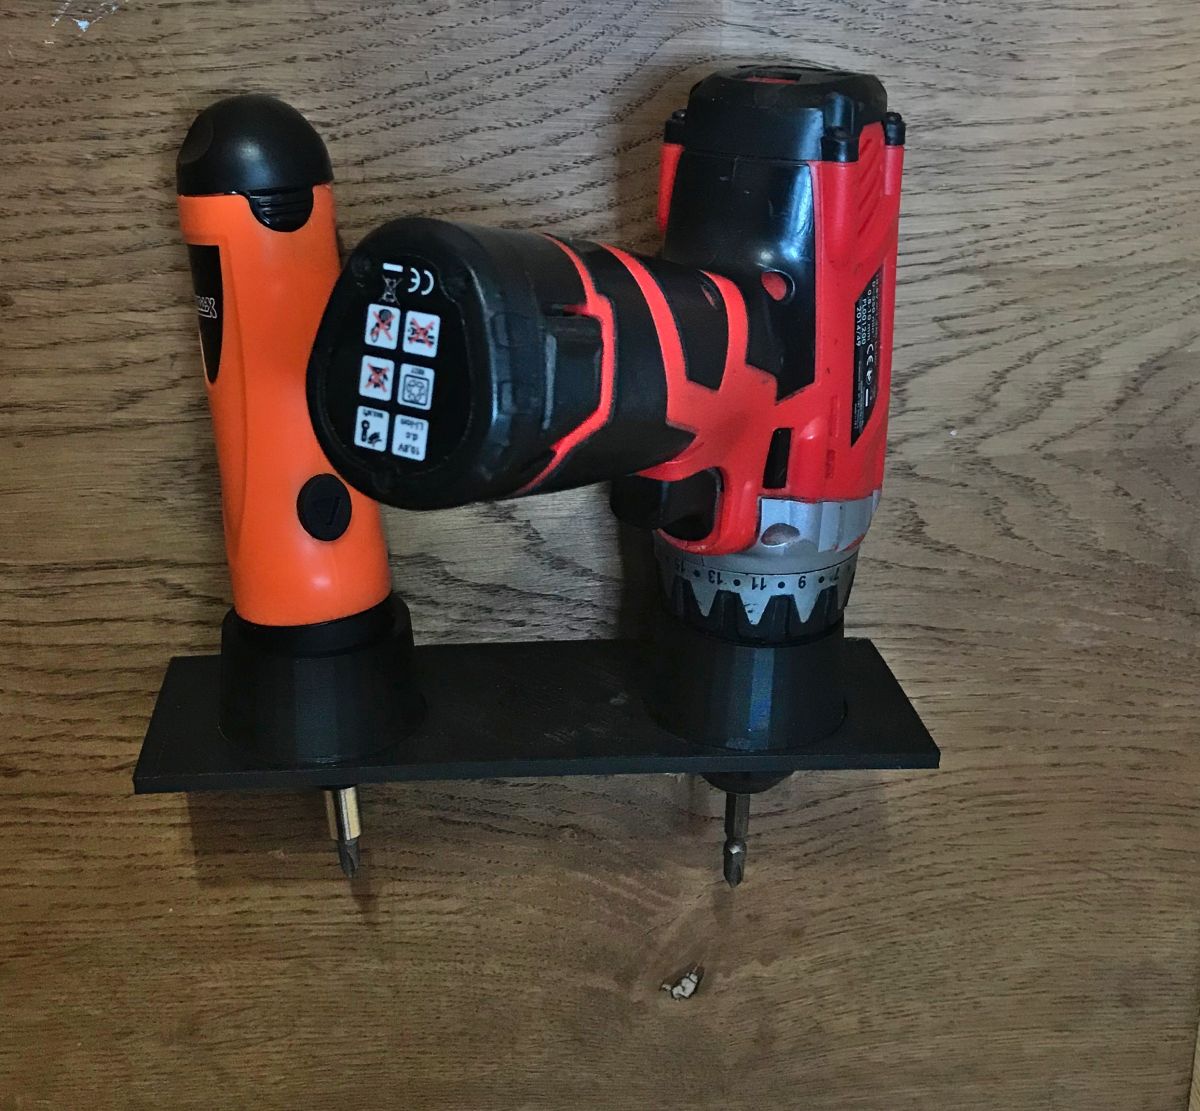
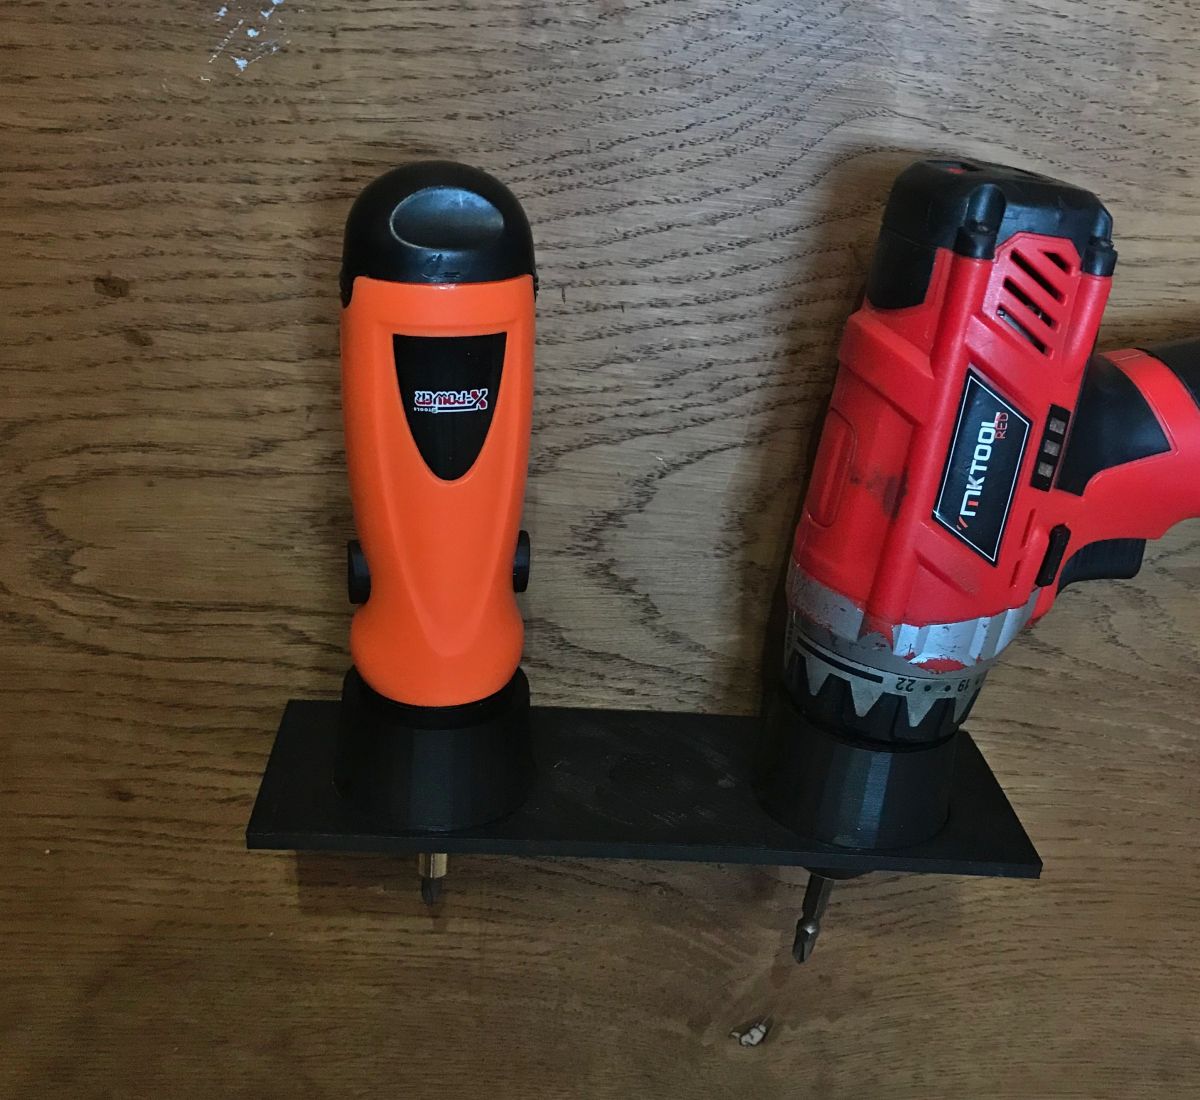
Another version of the organiser is designed for the two cordless screwdrivers I own; one Chinese, lighter, and the other the company's but slightly heavier.
This version too consists of a separate base and separate screwdriver caps:


The whole kit (including glue) after printing:

I used a squeeze to glue again, and left the parts like this for some time:

Result:
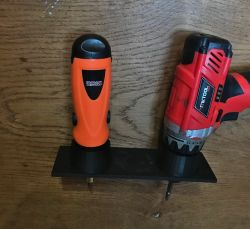
The tools stay firmly in their slots, they do not fall out, but there is also no problem removing them when needed.
I would advise attaching this item to the wall particularly solidly, as it takes on a little more weight than the organisers shown earlier.
Summary
I am very happy with my 3D printer printed tool organisers/holders. I have never had such convenient access to power supplies, screwdrivers, pyrometer and other tools.
I attach a source file with models of all the objects in the theme:
dcAdapters....blend.zip (123.25 kB)You must be logged in to download this attachment. 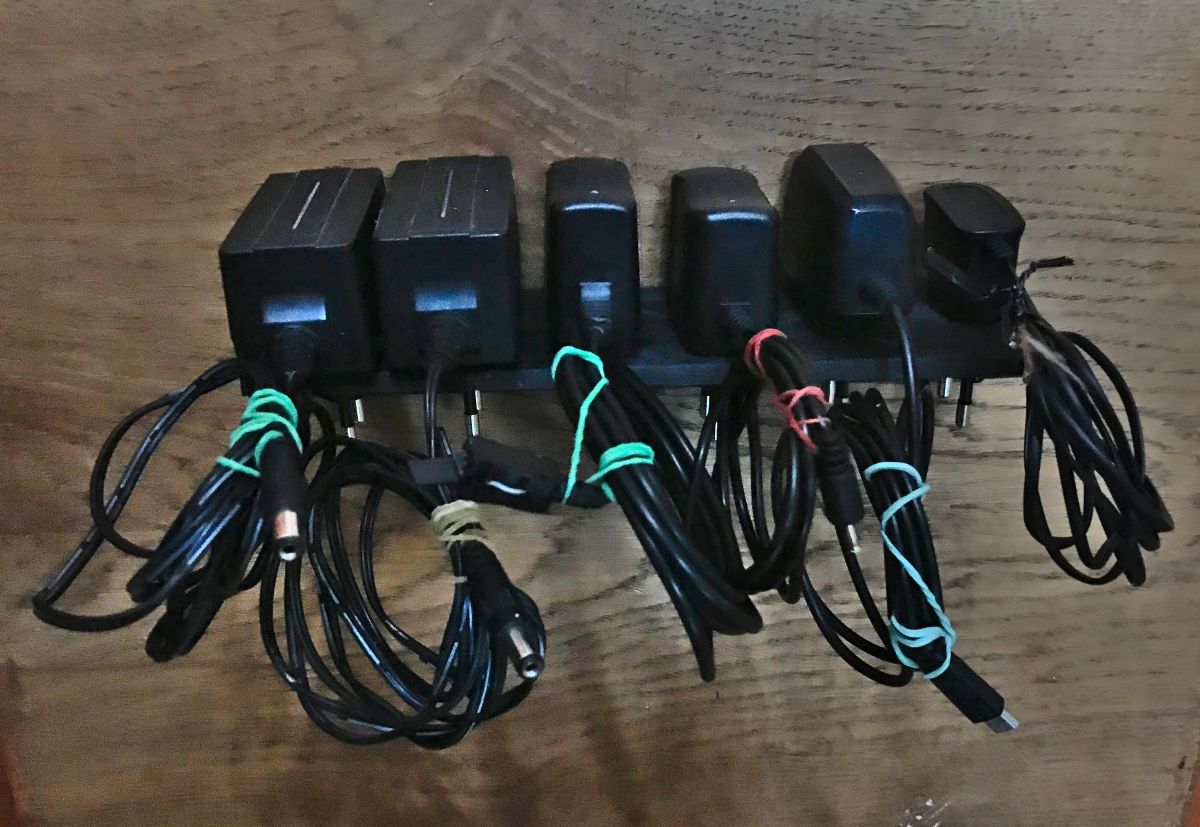


Comments
For me it's a great over-emphasis on form and content. The effect may be nice, but it's a waste of time for me [Read more]
Art for art's sake. [Read more]
Eeee there, don't listen to them, they're probably jealous :) If I had a 3D printer and a workshop in, say, some cool room, I'd make myself some nice ones like this. And, since I have a wooden workshop... [Read more]
Don't listen to them because for me it's a cool idea and execution. I have a lot of tools myself in my basement that are attached to a shelf on the wall. [Read more]
Thank you for your comments. I started printing the organisers from the theme somehow when the quarantine started, I think in March, and I've been using them ever since - almost 3 months now. I really... [Read more]
Some people here complain that it's a waste of time or an over-emphasis on form over content. Why should they? A very good idea. If I had a workshop, I would prefer to have everything nicely organised,... [Read more]
Unfortunately with power supplies there still seems to be a problem with the cables? Unless the cables are hanging loosely and you've only strung them up for work. I also make various racks for specific... [Read more]
I coil the cables from the power supplies as much as I can. Anyway, you can see from the photos. Basically, I have three ways of keeping them in place when coiled: - hooking them up with a simple rubber... [Read more]
I keep such power supplies - simply - in a labelled cardboard box. Works well! [Read more]
I do the same and so on top they will only collect dust. If they already have to be on top (they are often needed) it would have been better to buy a power strip with a switch for each socket and screw... [Read more]
https://obrazki.elektroda.pl/2700101300_1591115459_thumb.jpg How about making something like this instead of rubber bands? Such a bobbin with cutouts for the beginning and end of the cable. [Read more]
How much material/how much does one such holder weigh? That pretty much determines whether it makes sense to make such prints. [Read more]