Modular third hand, tripod, phone holder from Thingiverse - improvements
TL;DR
- Modular third-hand, tripod, and phone holder system based on HeyVye’s Thingiverse design, built from 3D-printed parts joined with M5 screws.
- The usable version adds winged knobs in Blender, moves some hinge mounts, rotates the small clamp 90 degrees, and fixes an oversized C-clamp cap.
- The parts were printed in PLA on an Ender Pro with Standard Quality and 20% infill, and one stand uses about 5 PLN of filament.
- The finished kit works as both a PCB soldering aid and a phone stand, and it can be reconfigured into different clamp layouts in minutes.
- The larger squeeze still has some play, while the smaller clamp works well and the long-term durability of the small clamp is still uncertain.
Generated by the language model.
Hello my dears
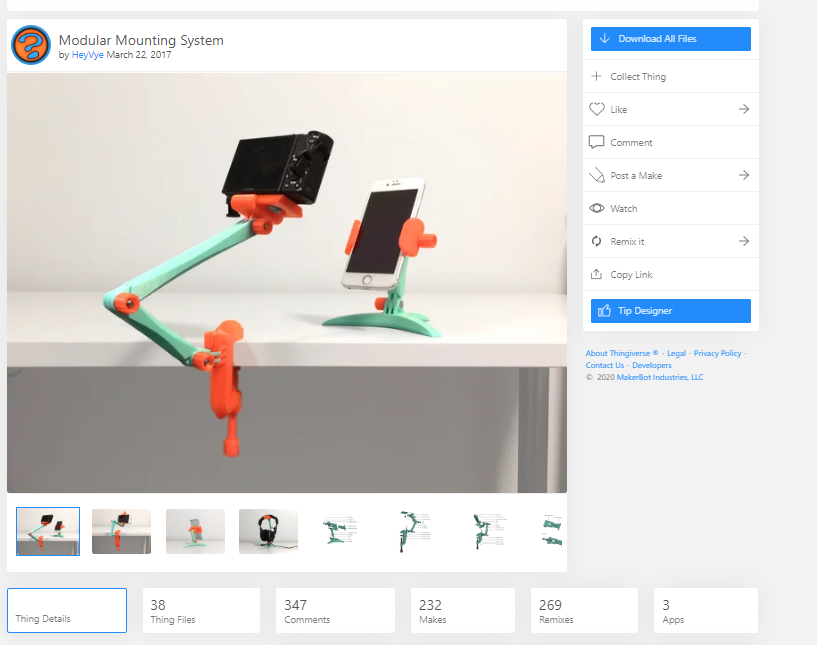
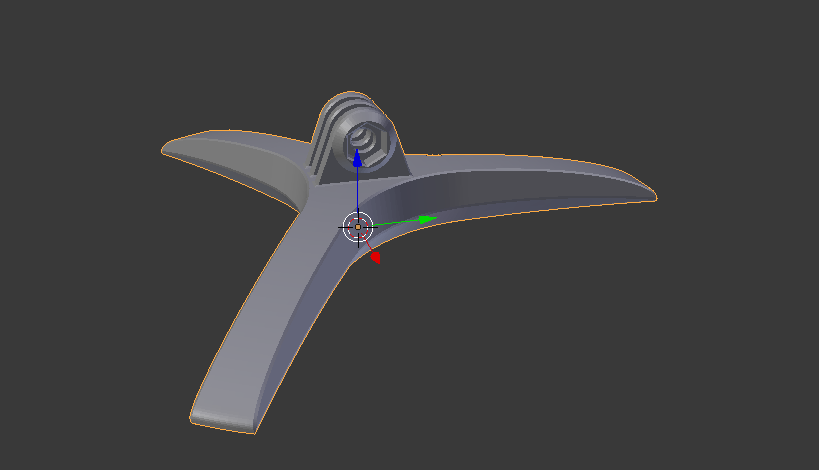
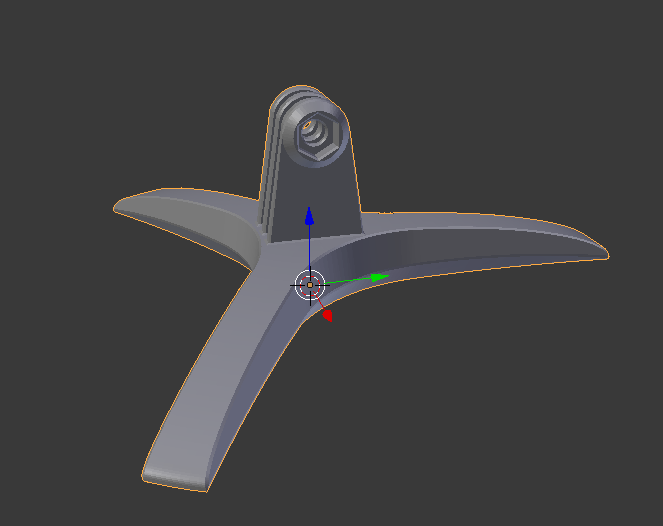
Here I would like to present a review and my own improvements to the modular third hand/stand/phone holder project from Thingiverse.
Modular Mounting System by HeyVye
The modular third hand/handle/phone stand system shown here is based on a design by HeyVye of Thingiverse, available here:
https://www.thingiverse.com/thing:2194278
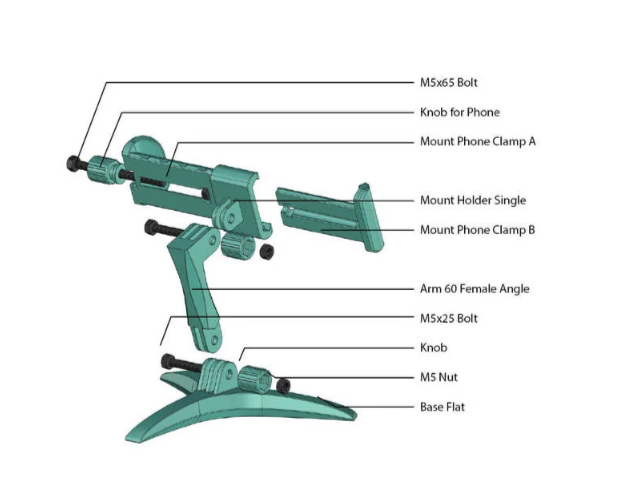
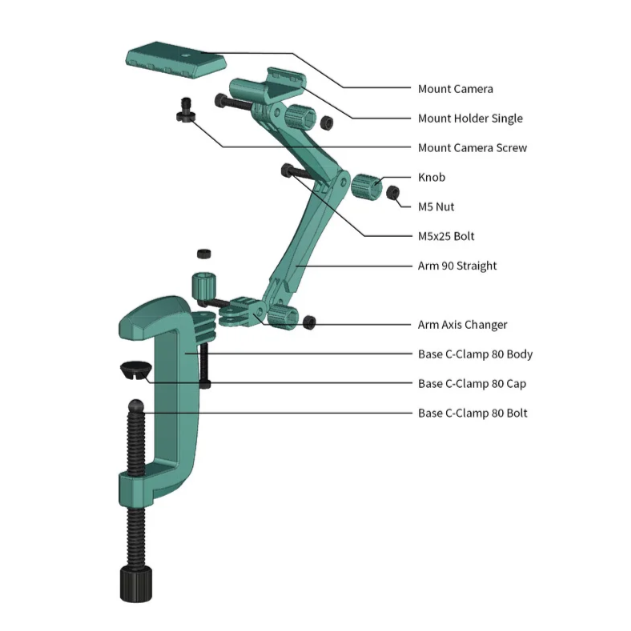
The third hand here is built from a set of components that we can print on a 3D printer and connect freely with additional M5 screws.
The author shows examples of tripod configurations on the project page:


This project is published under the license Creative Commons - Attribution .
The Thingiverse version of the project in my opinion needs a few tweaks, review and specifics below.
Initial printing, testing, first impression
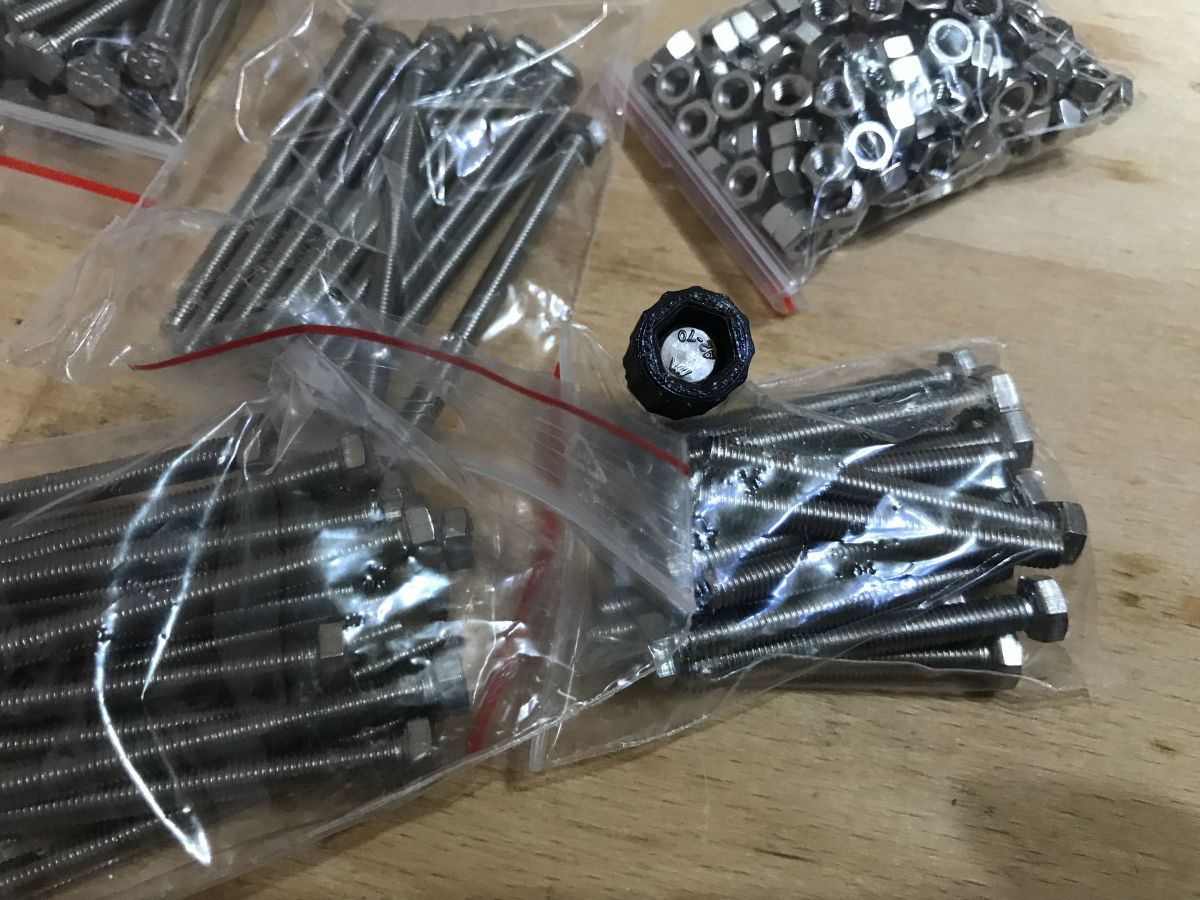
I printed the parts on my 3D Ender Pro printer from PLA filament. I used the default settings, which is 'Standard Quality' and 20% infill. Only some of the parts need support. I specifically bought a whole set of M5 hex head screws for the project:

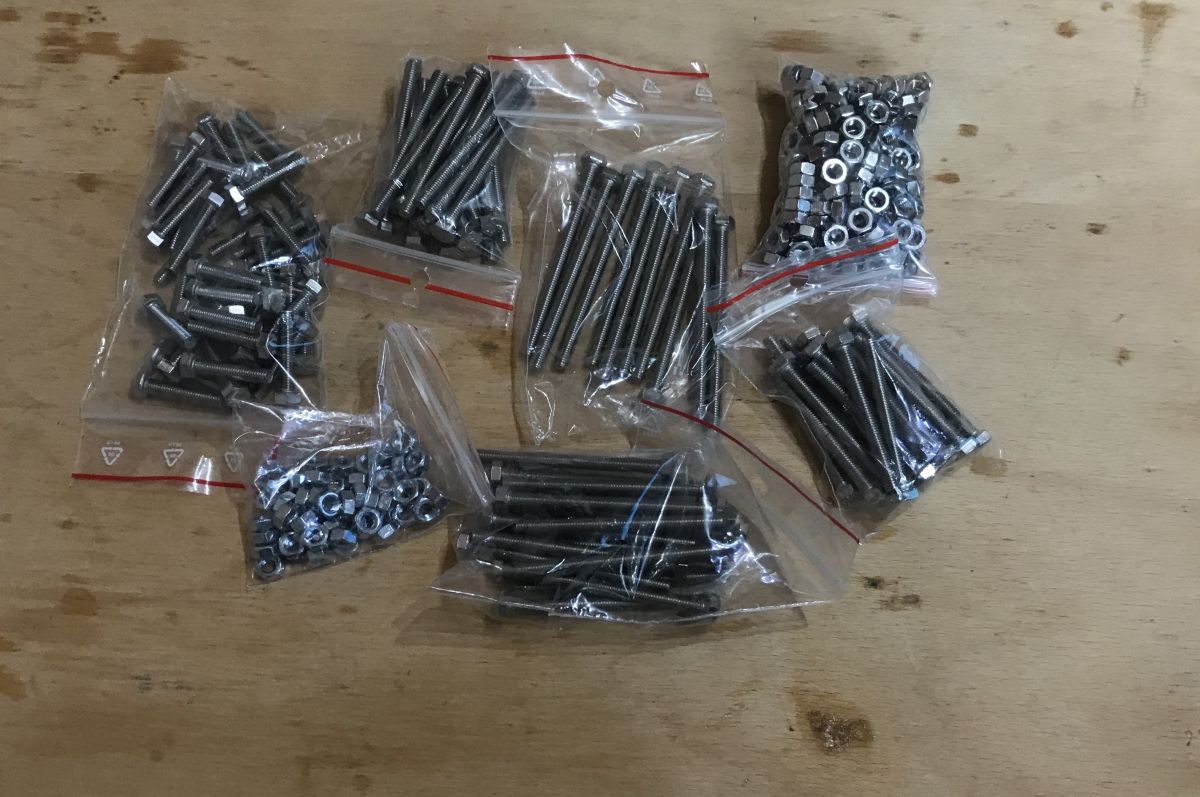
The screws fit the printed parts without any problems.

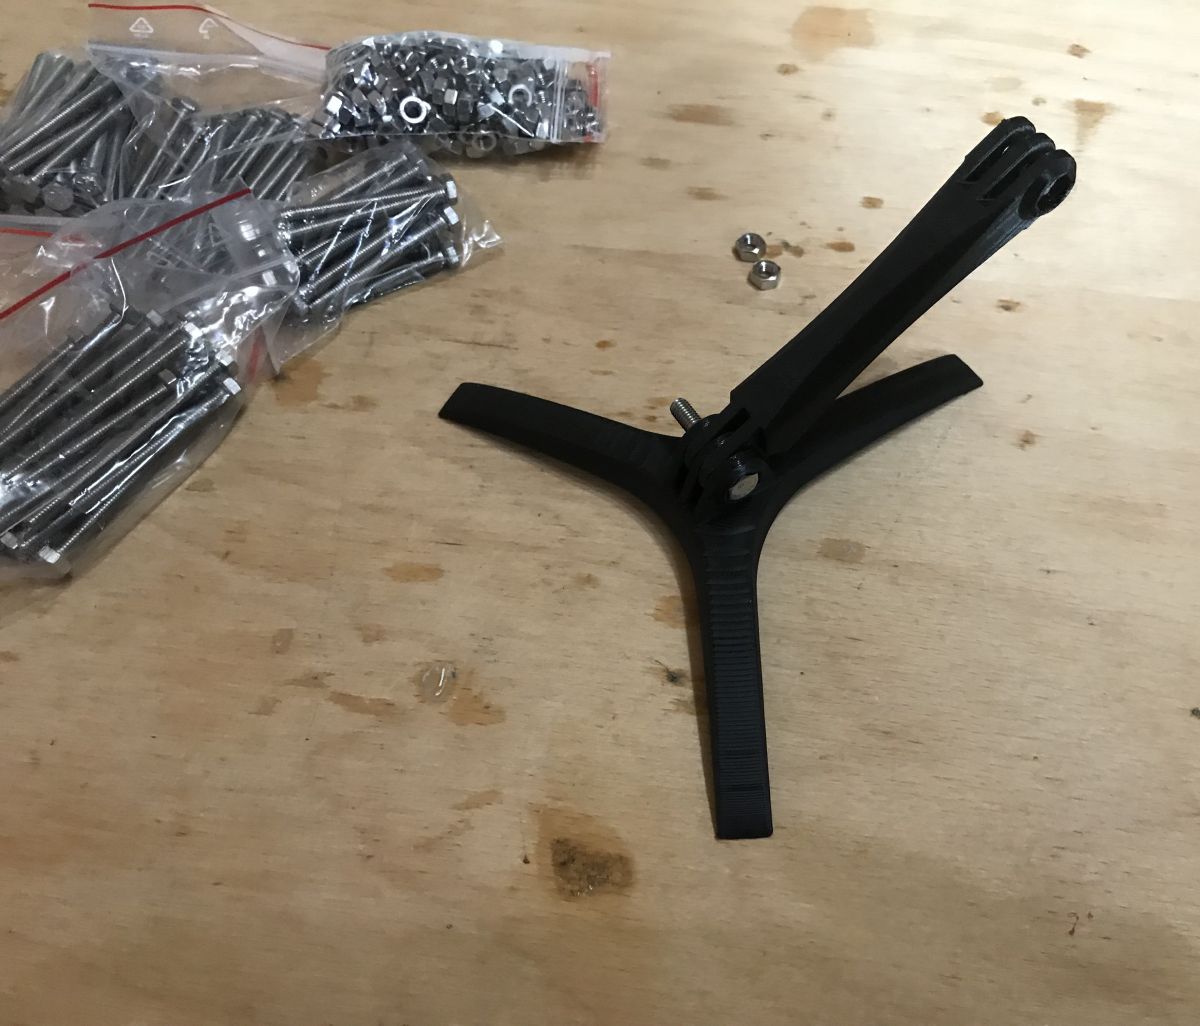

The hardest part is assembling the phone holder (the PCB will do too), although you can just press one part into the other, the PLA filament is malleable enough that it won't break.
My necessary fix to make it usable
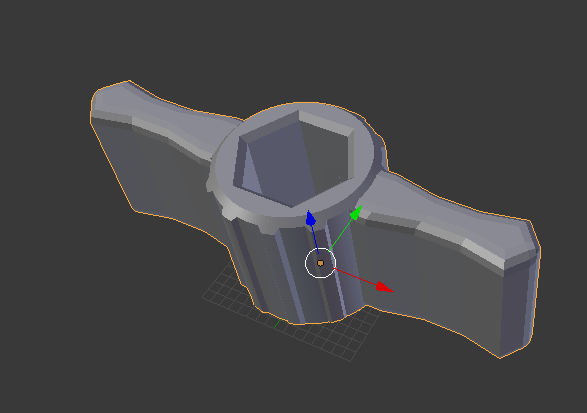
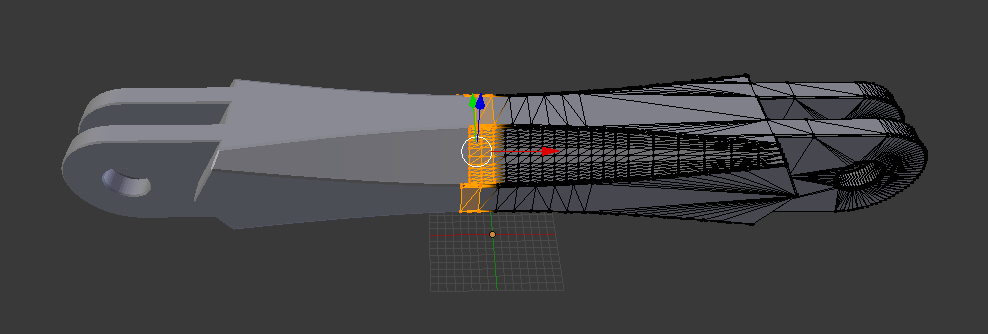
I quickly realised that the original knobs were awkward to use and hard to tighten at all so that the joints held their setting. The knobs were simply slipping under my fingers, so I modified them accordingly.
I made the correction in Blender.
The original version of the knob:

The knob after the correction (I added wings):
Second, improved version of my knob (wings raised so that they do not interfere with other knobs as they are close together):
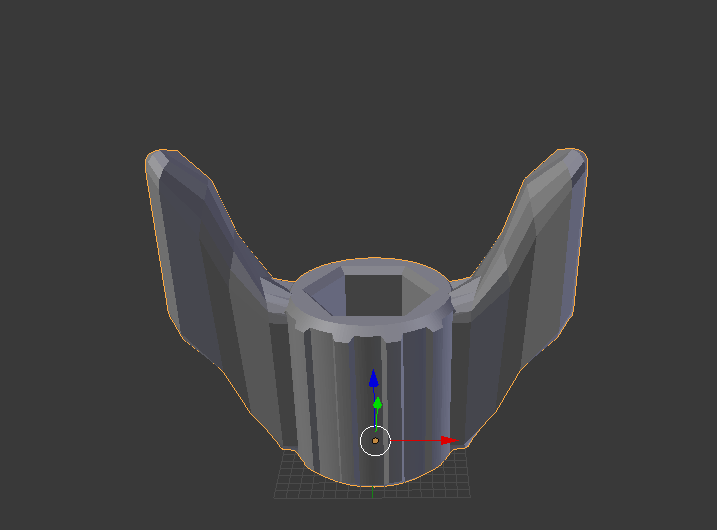
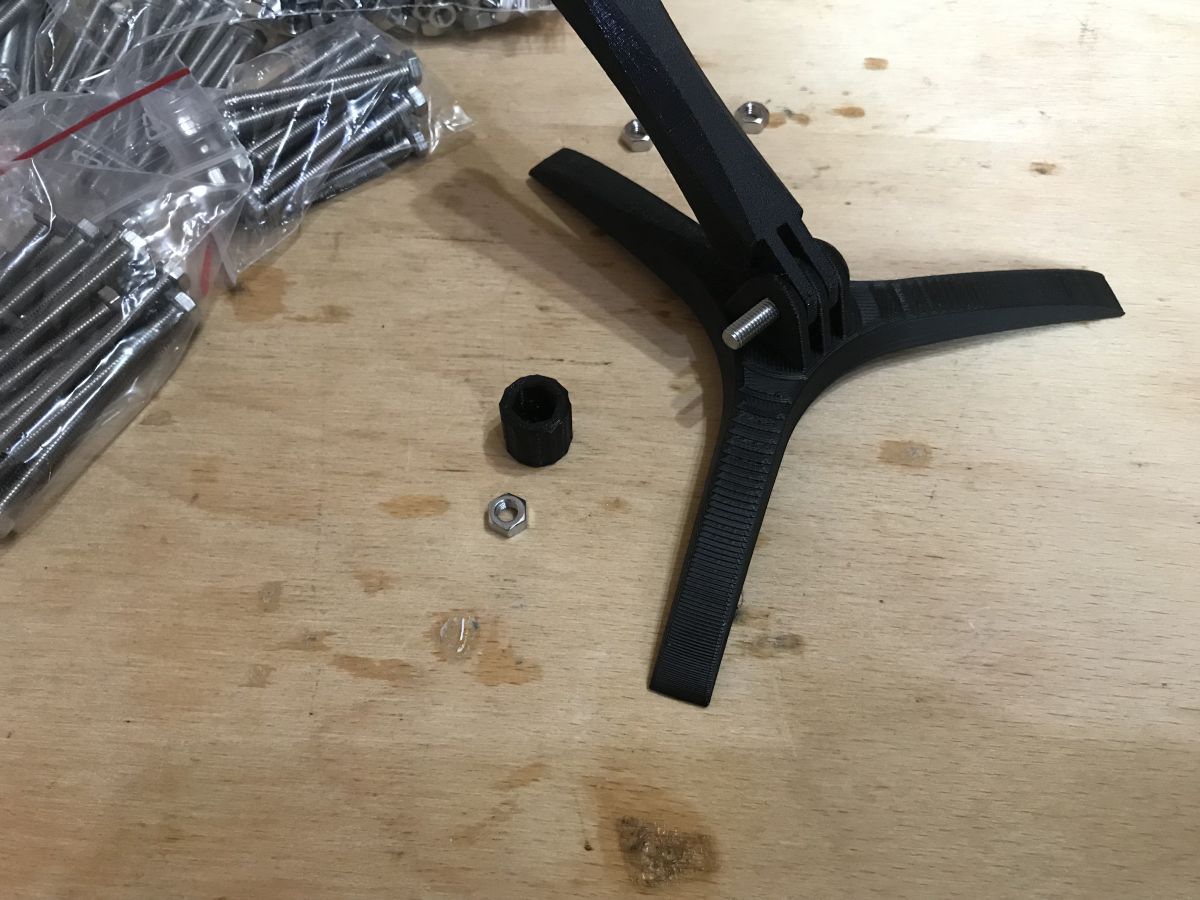
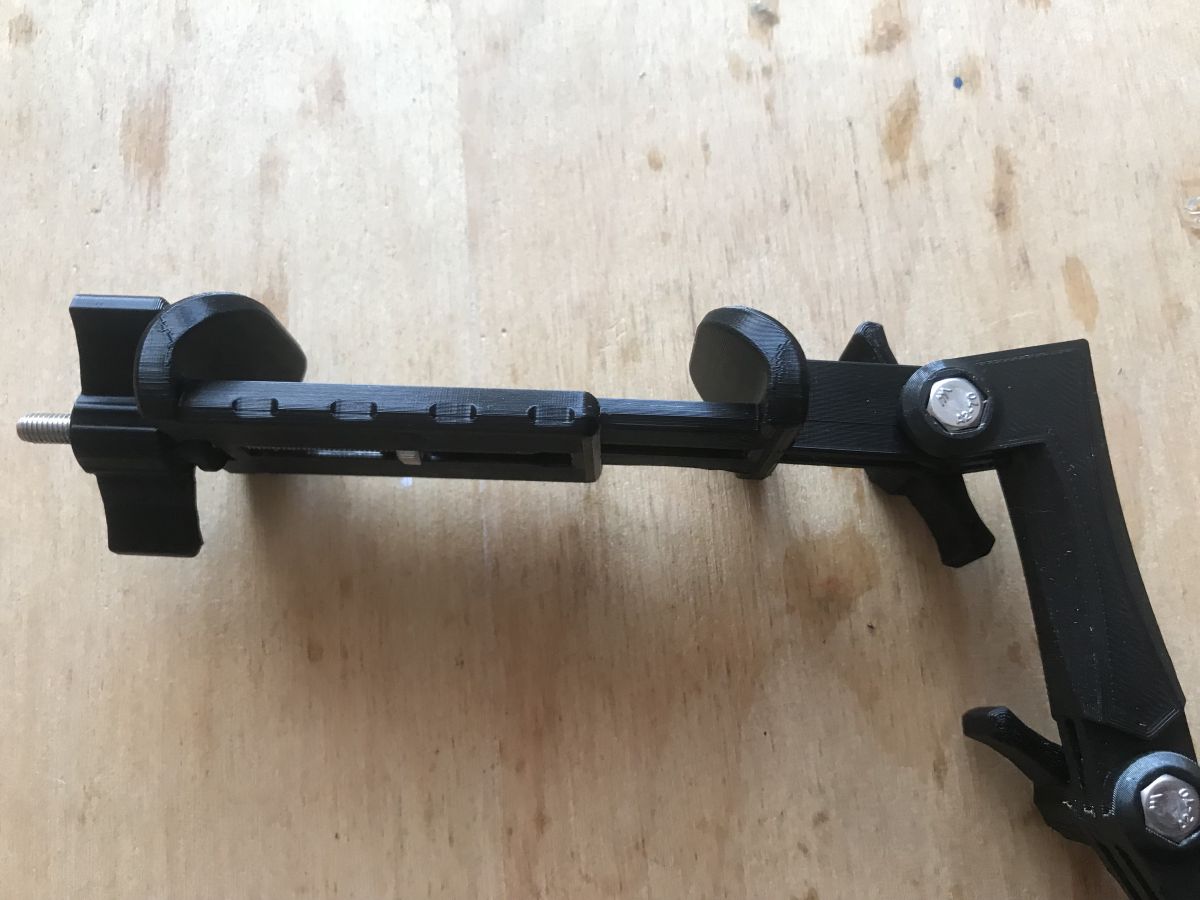
However, the addition of the wings entailed further changes. For some elements I had to move the hinge mounts further away so that the wings would fit, but I don't see this as a problem.
For example, this element, the base, before my modifications:
After modifications:
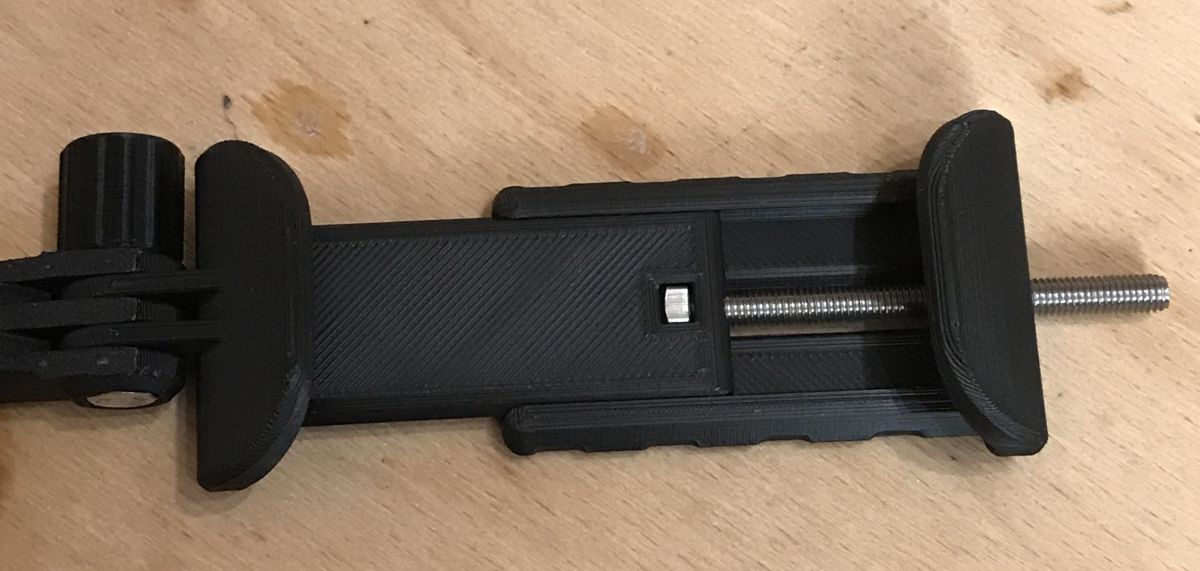
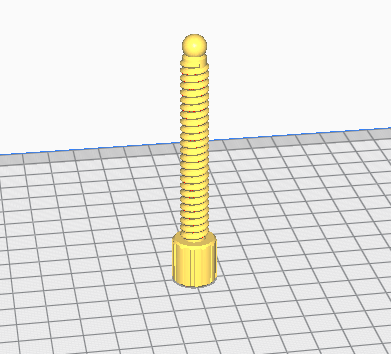
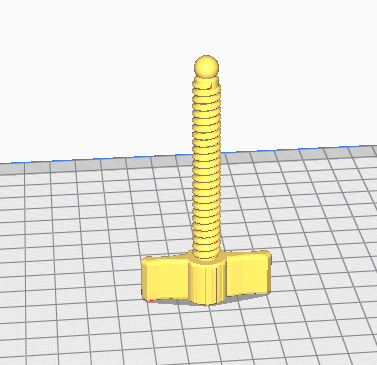
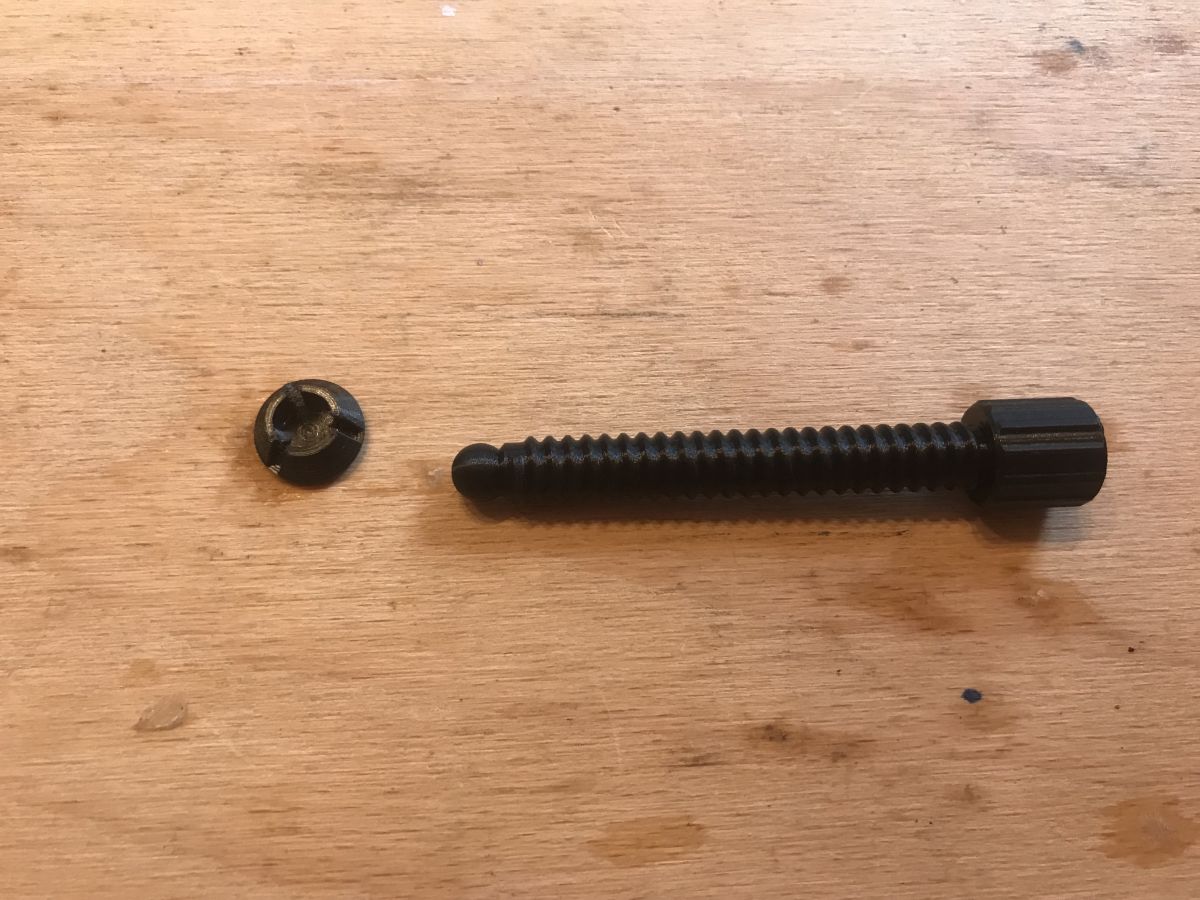
I made similar changes to the squeeze model. Original version of the squeeze screw:
After corrections:
Compression and scale correction
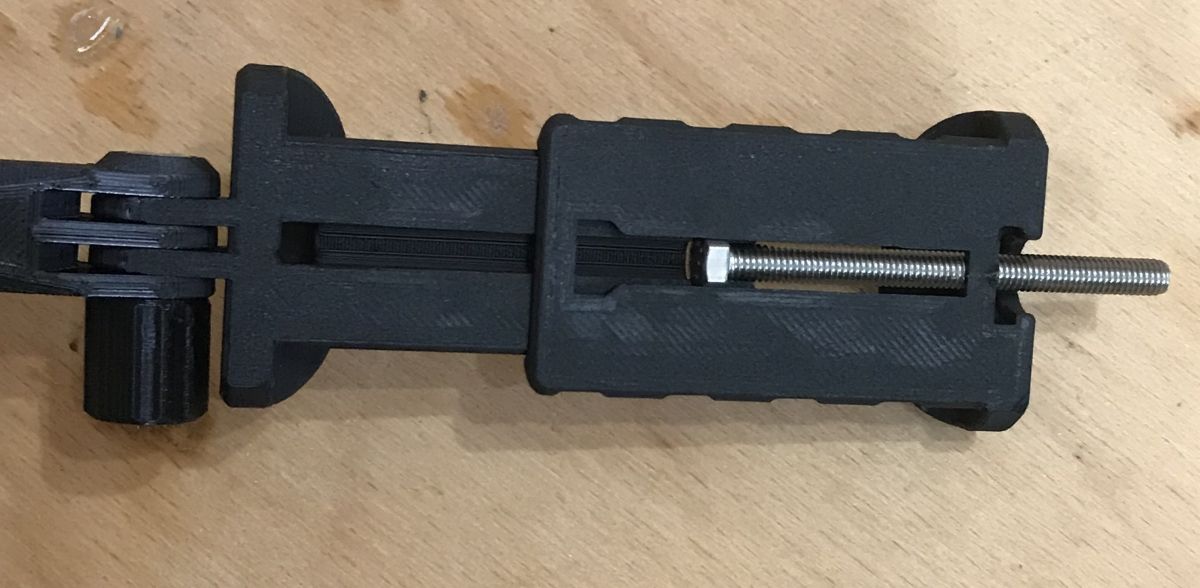
In addition, I have encountered another strange problem. The problem occurs with the model Base_C-Clamp_40_Cap_v5.stl . When opened in Cura it is huge, and this is just a 'cap' for compression:
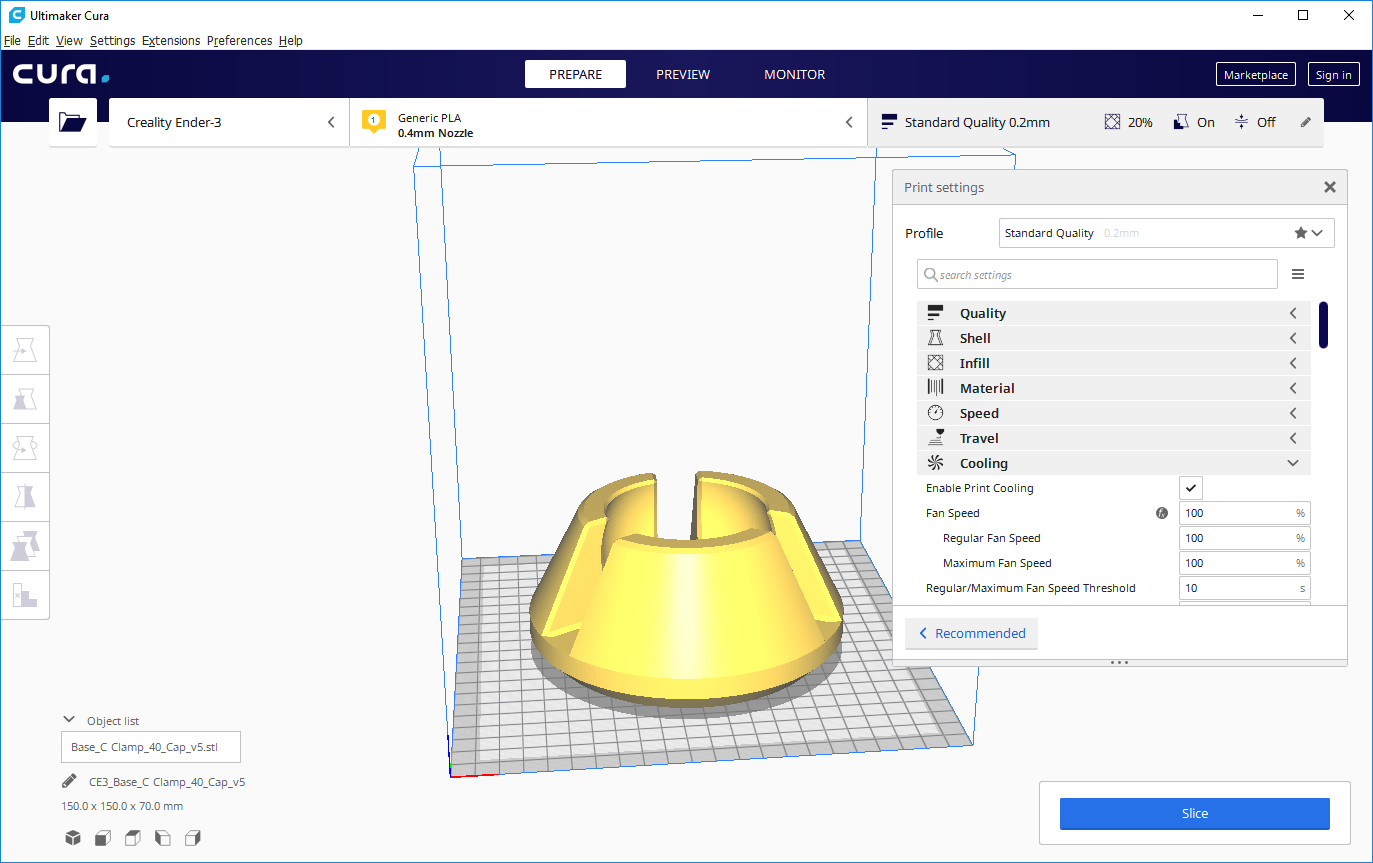
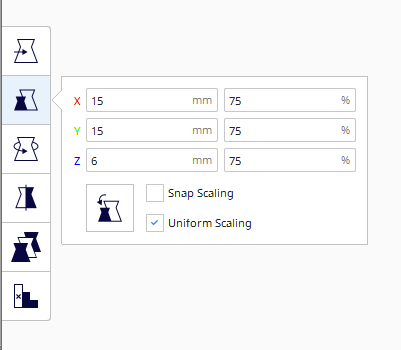
Probably the file is exported with the wrong units. That's why for the squeeze (version 40) I used the cap from the squeeze version 80 ( Base_C-Clamp_80_Cap_v5.stl ), I just scaled it appropriately - to 75% of the original size so it would go in well and sit in place:
Squeeze after printing:
Result:
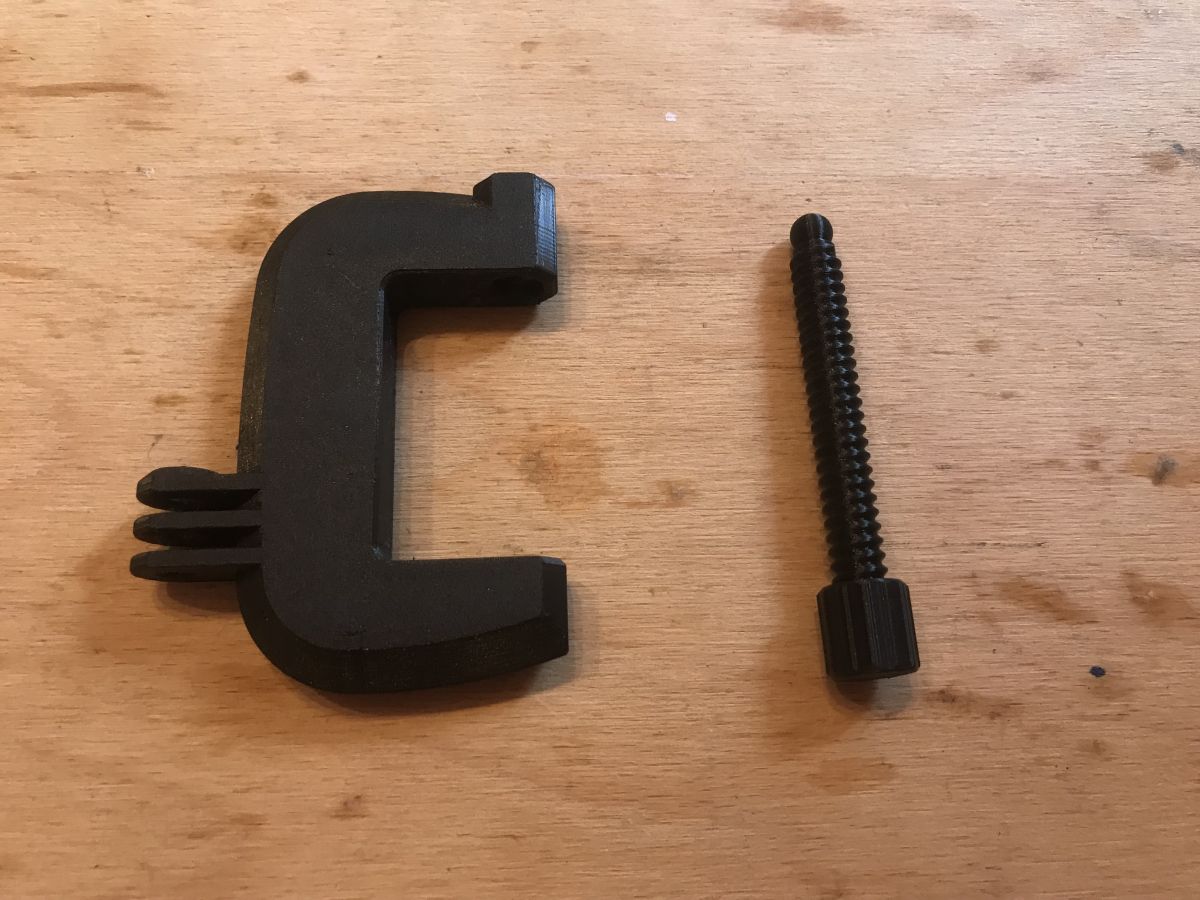
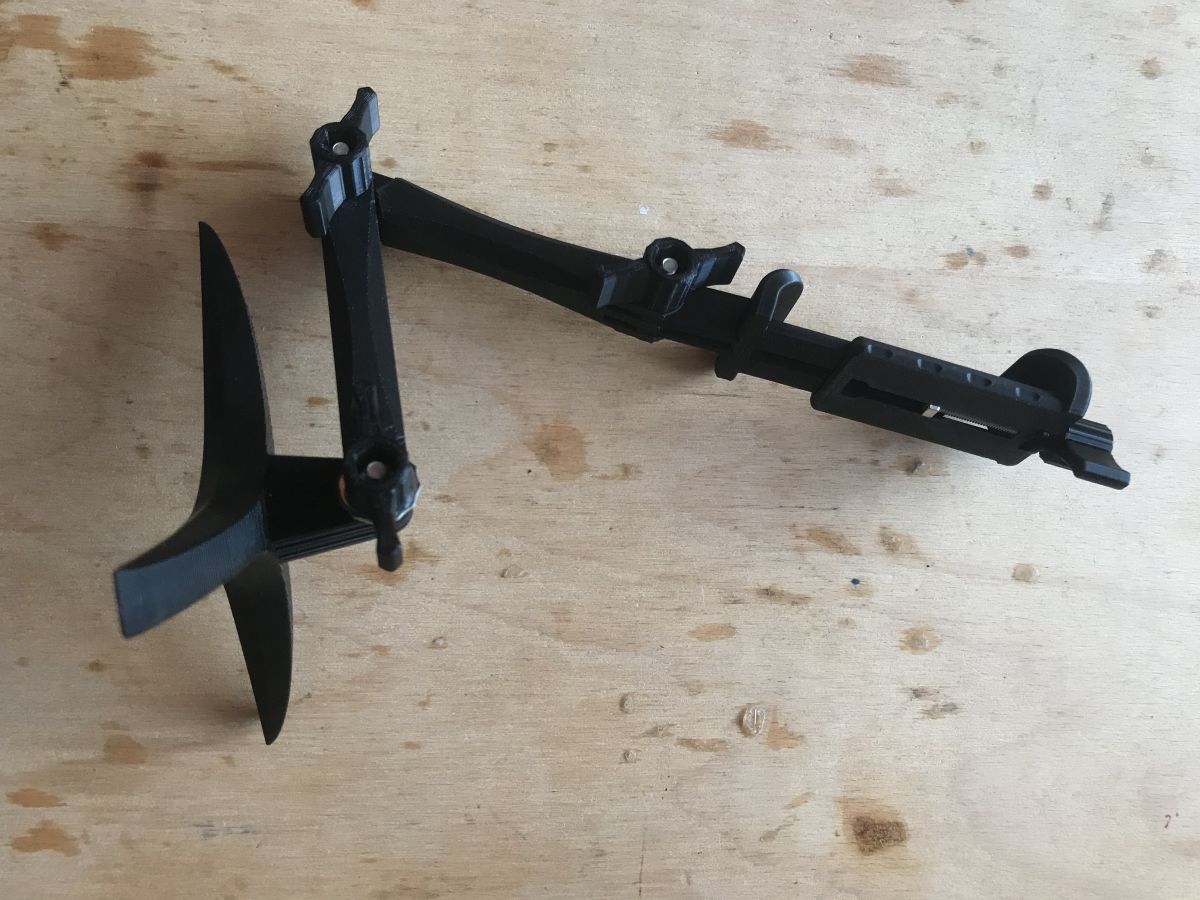
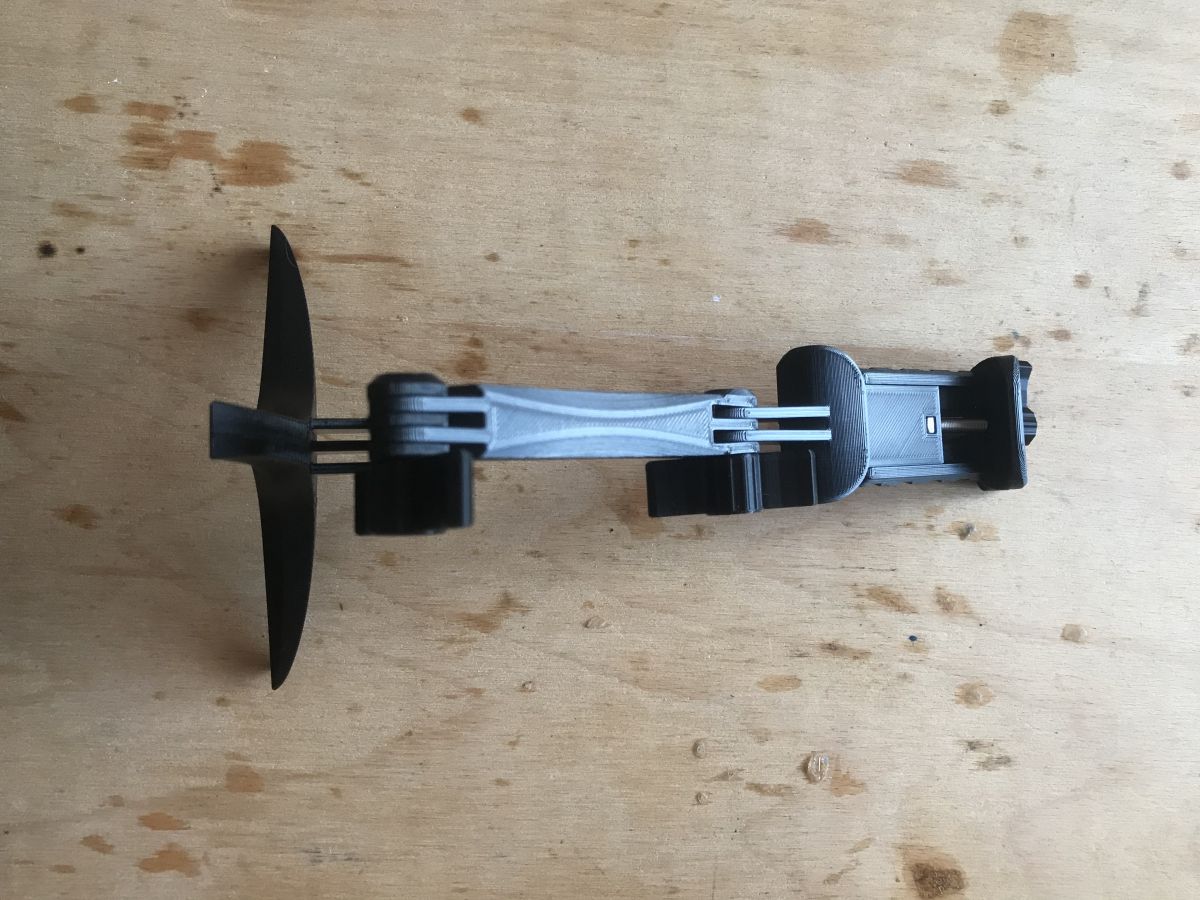
Squeeze small and large (version 40 and 80):
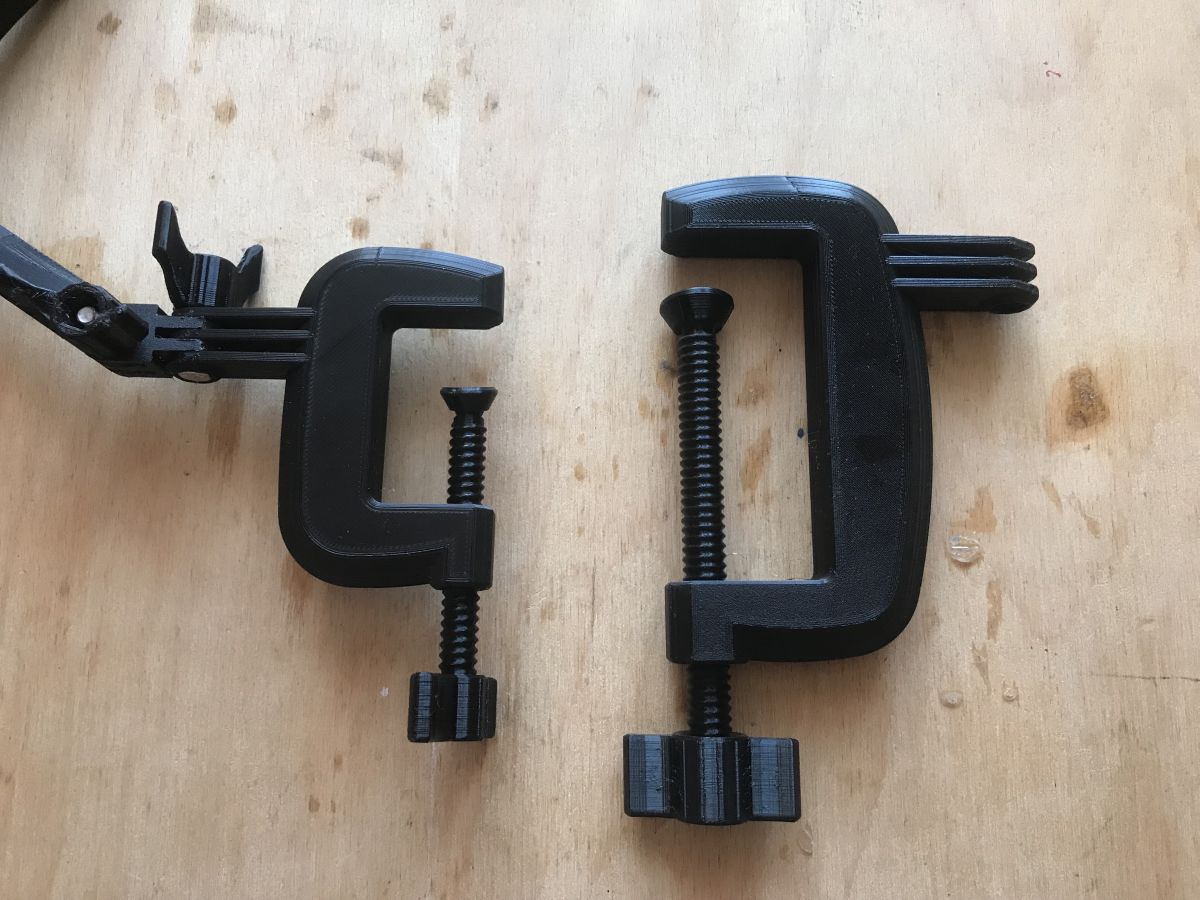
The large one has a bit of slack and is now the only weak link in the whole kit, but.... i don't use it at all anyway - I just printed it out to see how it would come out. The small squeeze is fully functional.
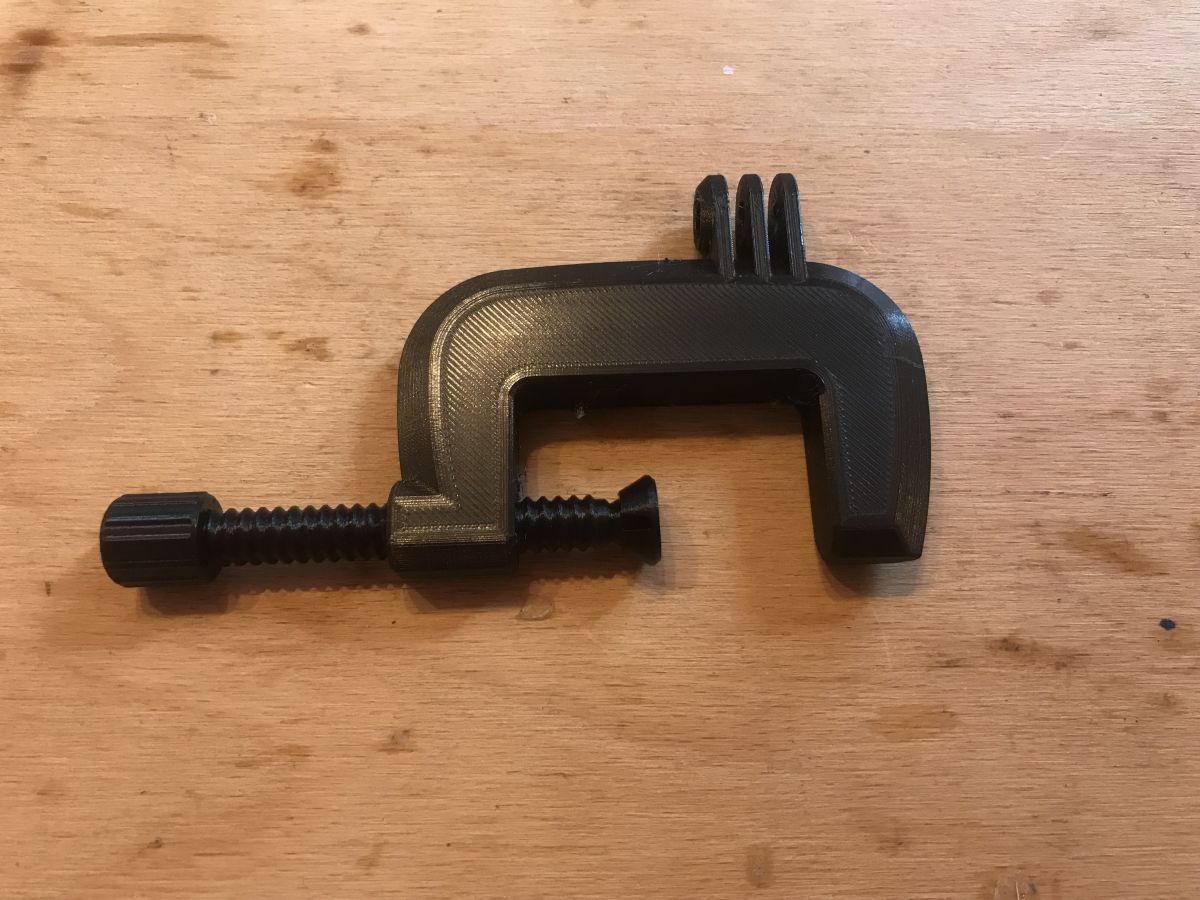
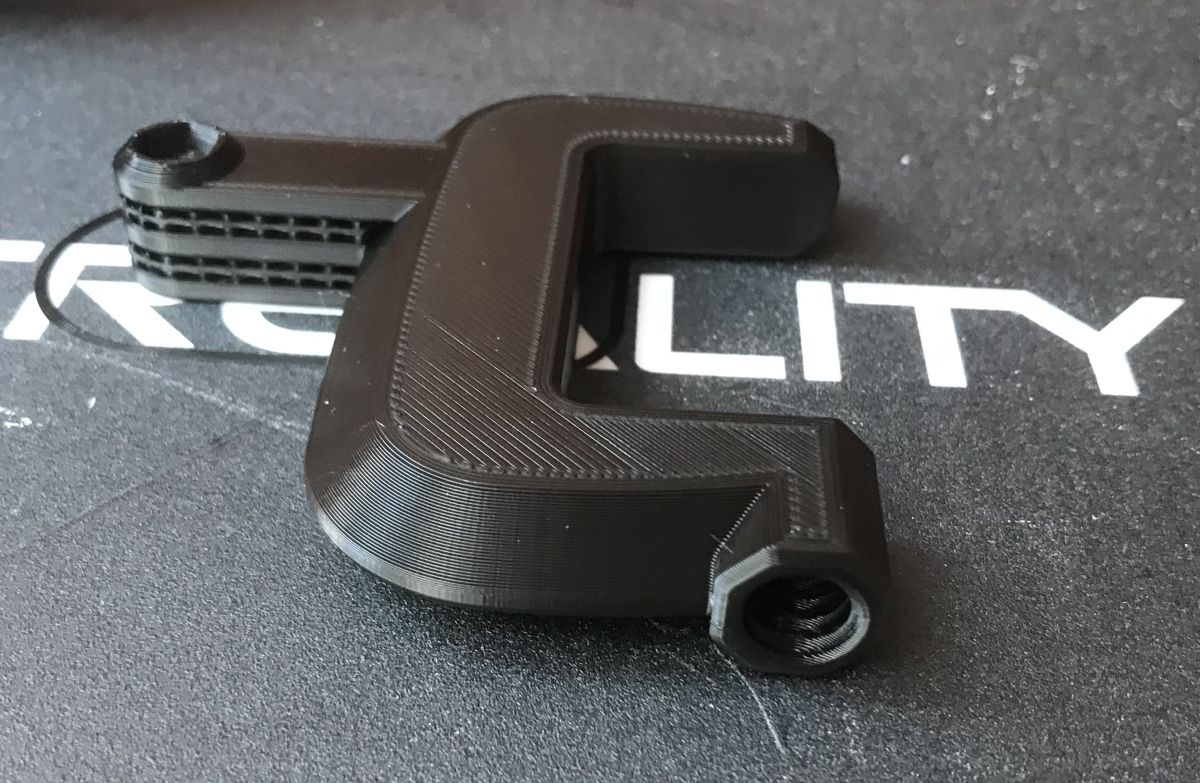
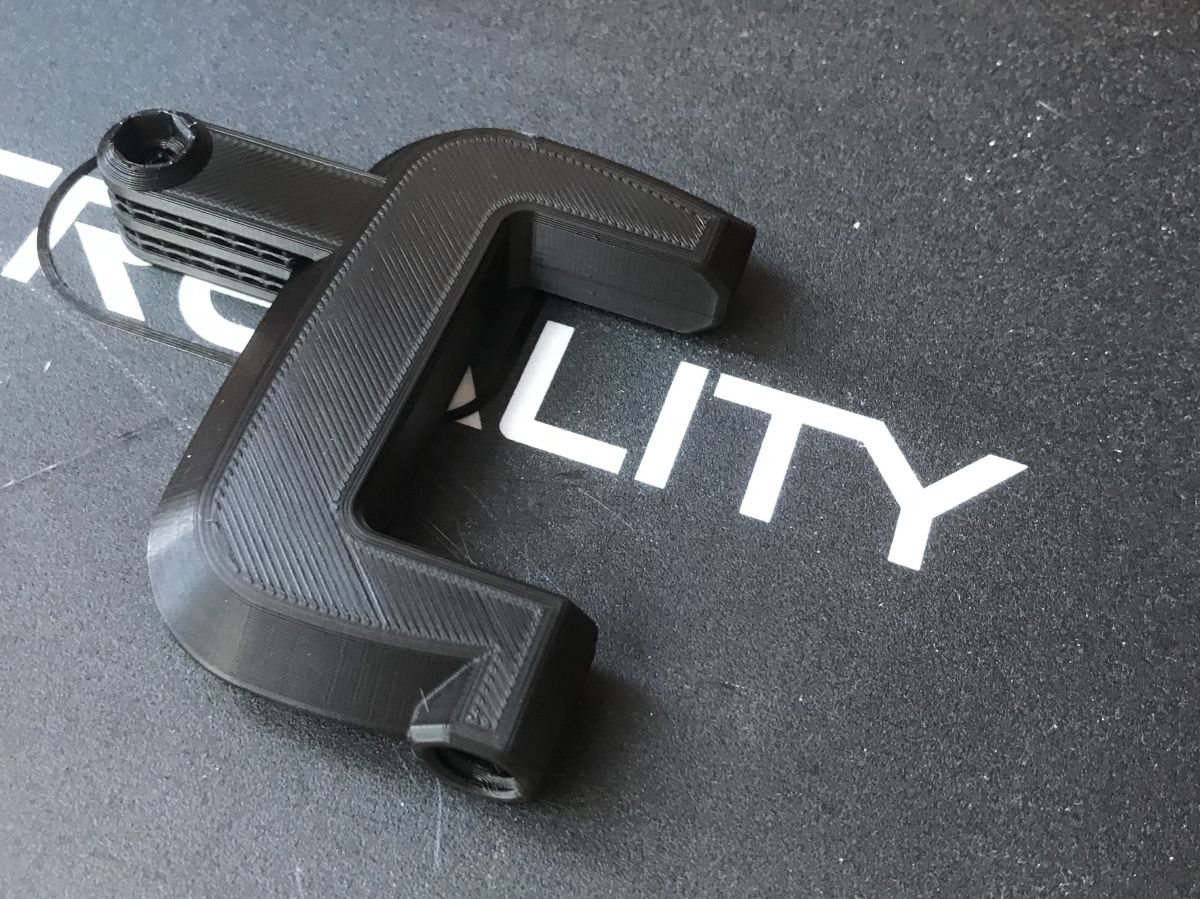
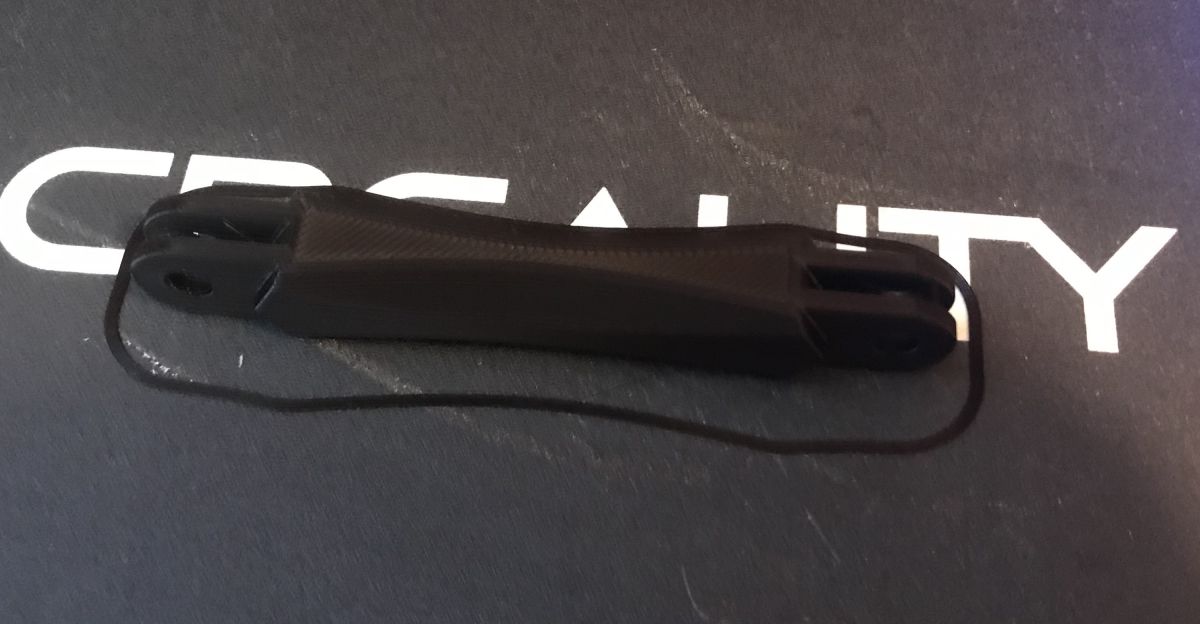
My version of the squeeze - the clip turned 90 degrees
I also wanted to be able to conveniently mount the board to which I would solder the components. To do this, I made another modified version of the smaller clamp from this kit. I simply rotated its mount by 90 degrees:

This piece needs to be printed with so-called supports (supports for the filament), but only in the necessary places. I have selected a 'support angle' of 85 for it in Cura:
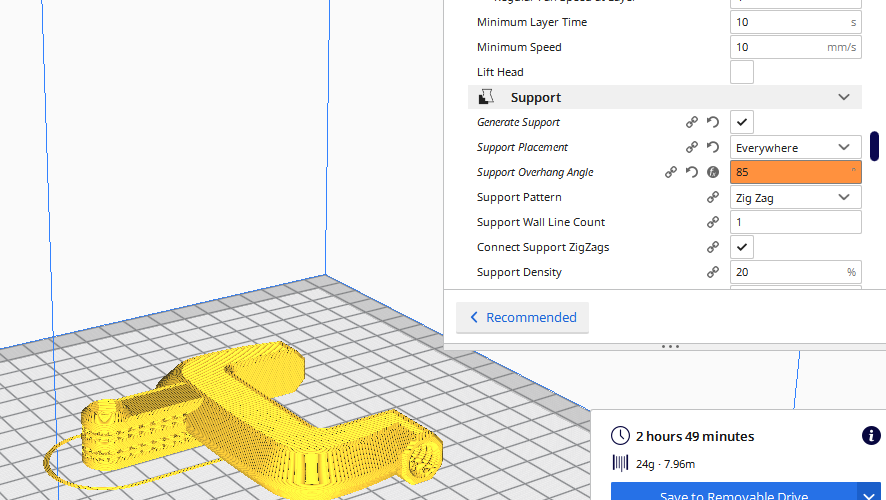
This puts the support where the compression is attached to the rest of the kit (you can see this in the screenshot), but there is no support where it has threads (you can also see in the picture that there is no support there).
After printing:
The model of my version of the squeeze is in the summary appendix at the end of the topic.
Male-to-male connector
In addition, I have prepared a modified version of the longer connector - the male-to-male connector. It comes in handy when you want to make a third hand that has clamps on both sides:
After printing:
The model of my version of the connector is in the summary appendix at the end of the topic.
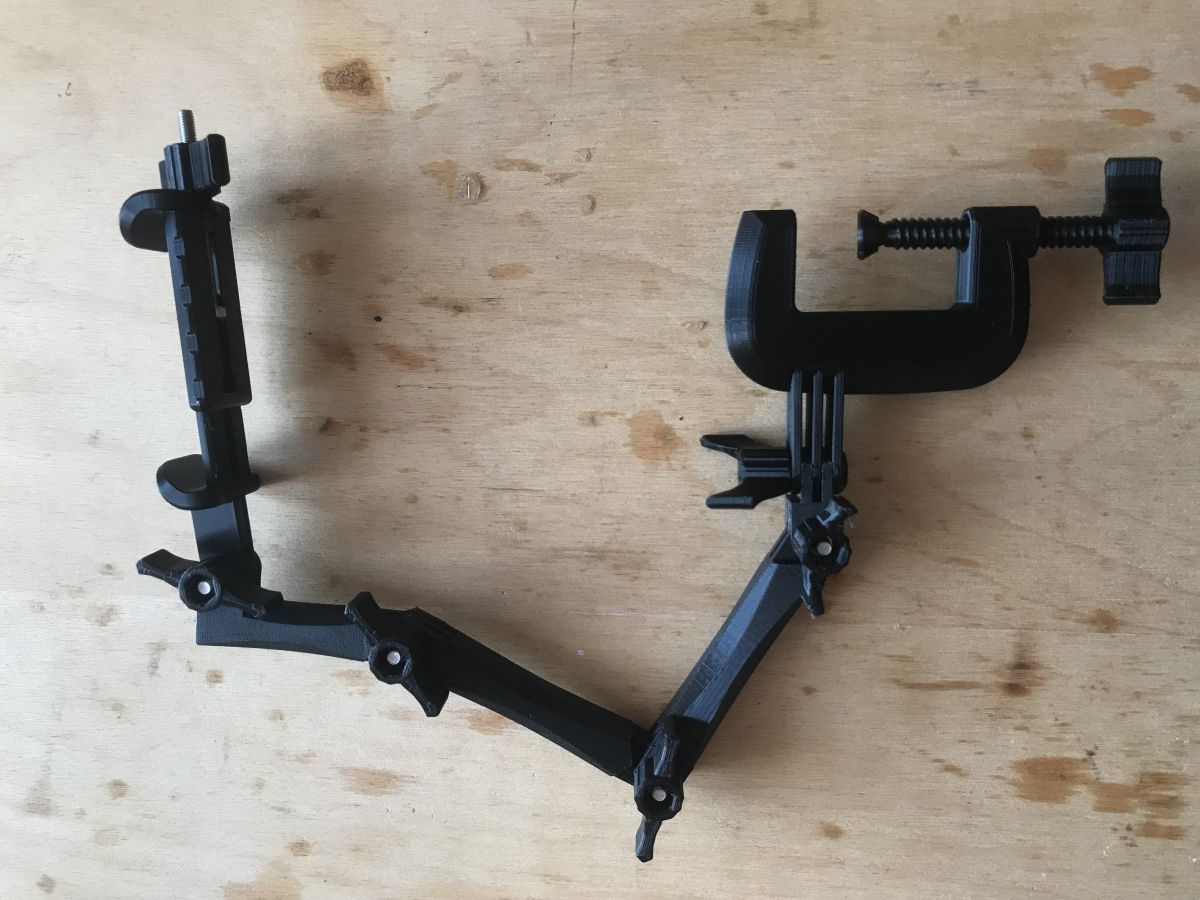
Final design - gallery Final design - gallery Final design - gallery
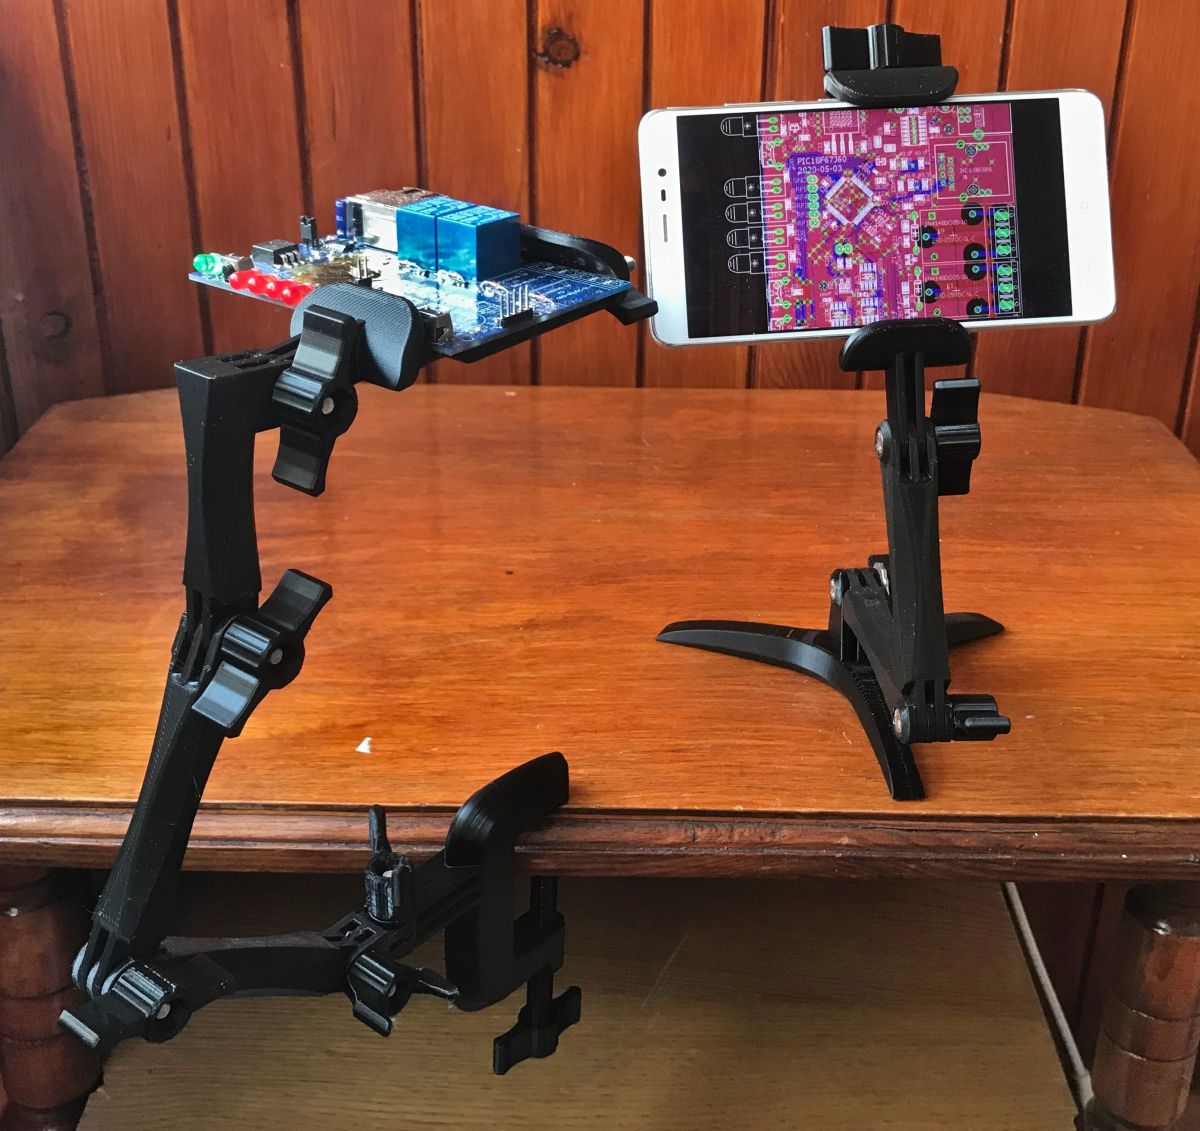
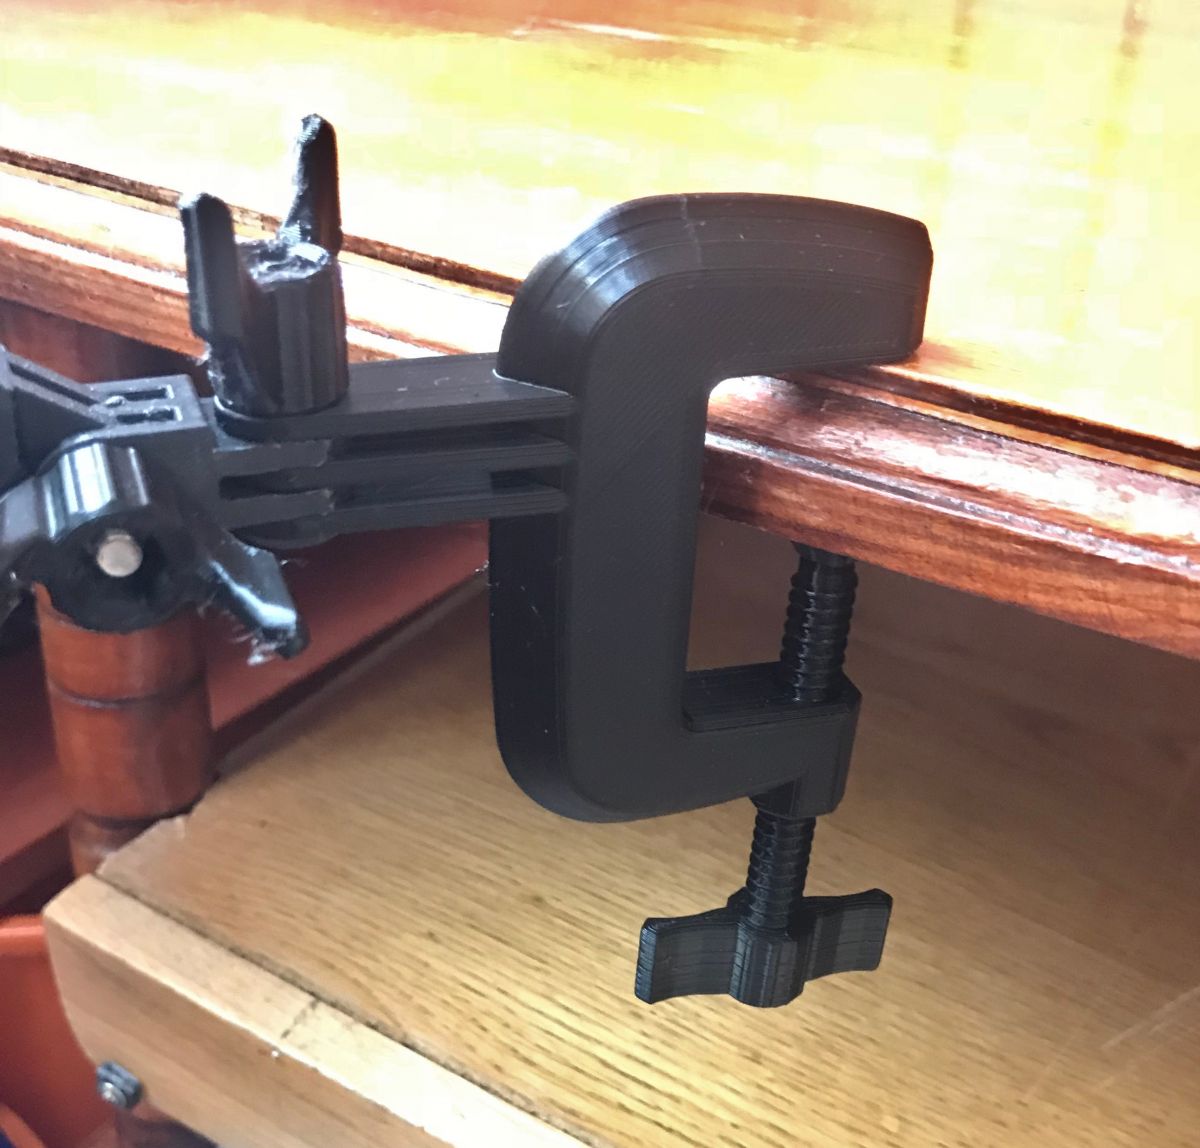
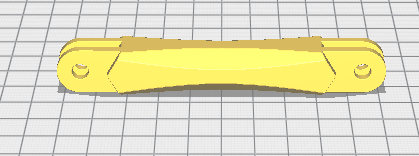
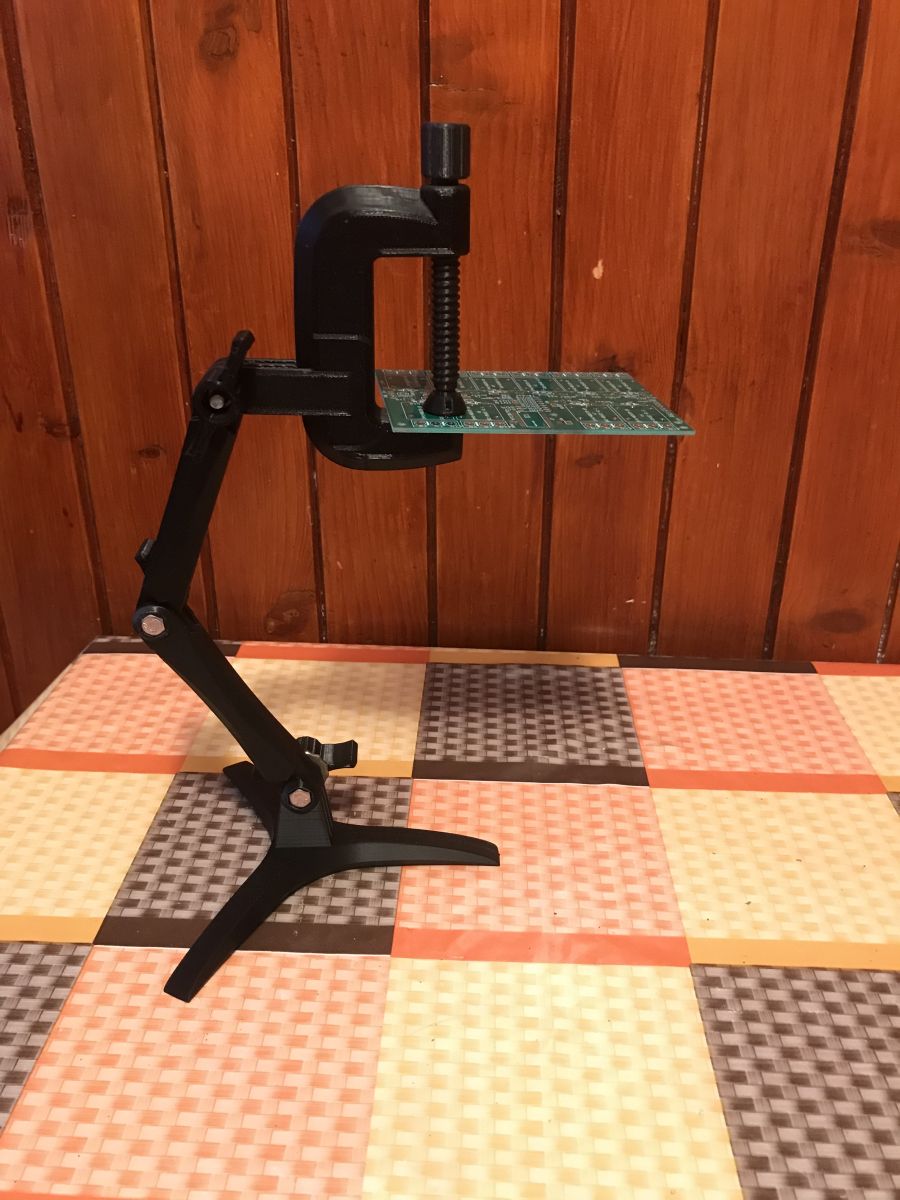
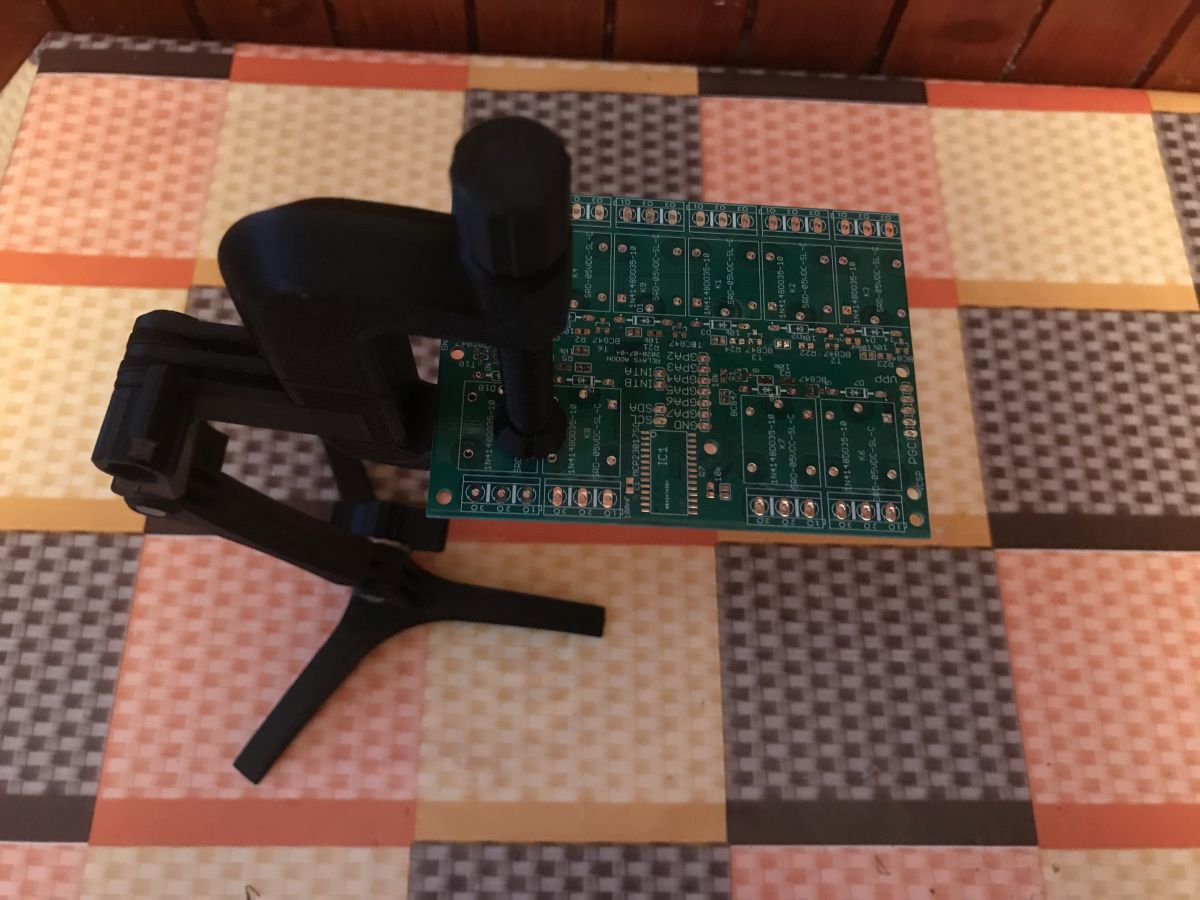
Finally, I made myself two 'third hands', one to hold the PCB while soldering and the other to hold the phone (e.g. with the schematic displayed):
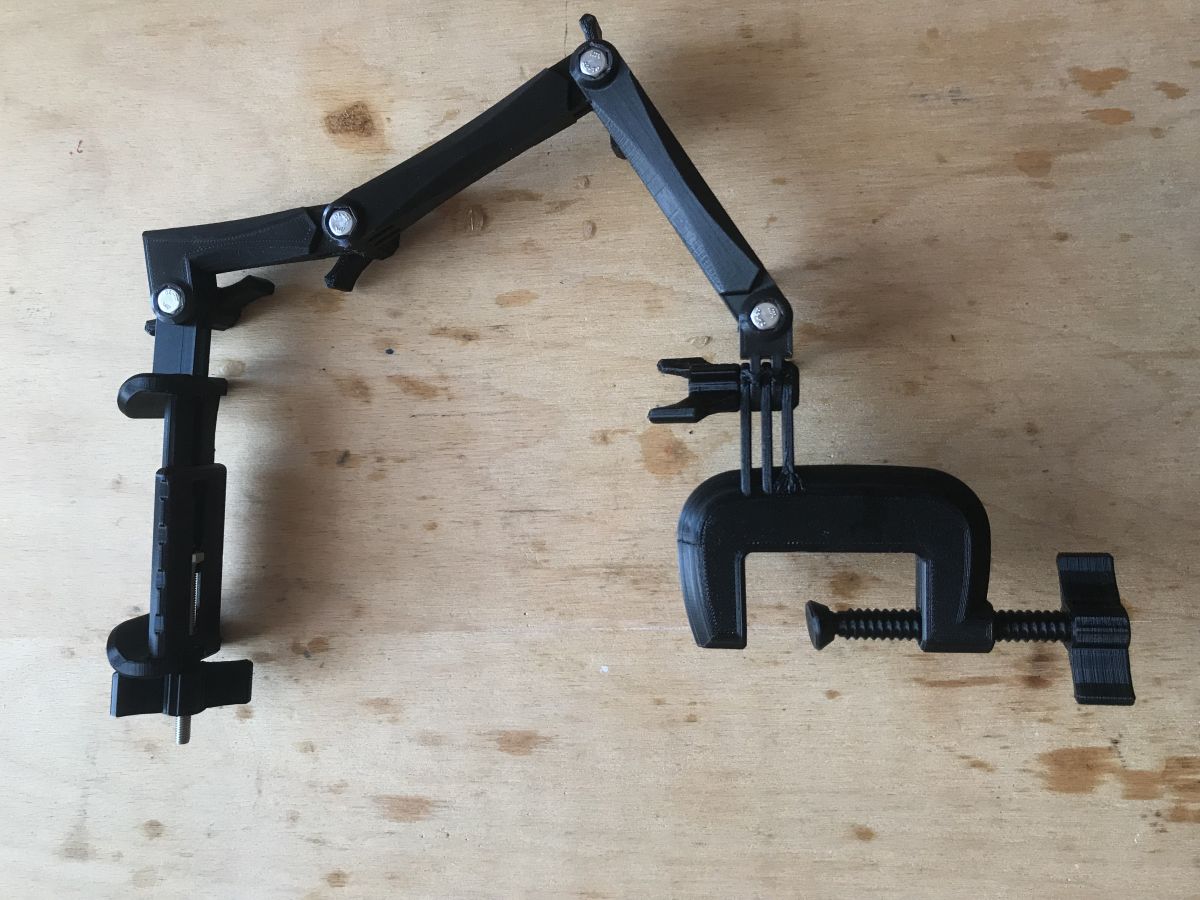


In use:
Alternative version (the one with the plate clamp; this is the one I used the male-to-male adapter for):
If we have the right number of elements it only takes a few minutes to convert our third hand into another version. You can even make a version that has clamps on both sides.
Weights of the elements and their conversion to the cost of the filament
Here I put a little download for those interested in the cost of printing such a set. I assume here the settings Standard Quality, infill 20% and the price of 50zł per kg PLA (at this price I buy this filament):
| Name | Screenshot screen shot | Weight | Cost | Weight|
| Knov_v5_improved | 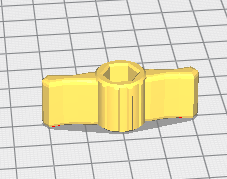 | 4g | 0.2PLN | |
| Arm_90_Straight_v5 | Arm_90_Straight_v5  | 11g | 0.55³ | |
| Base_Flat_v5_improved | 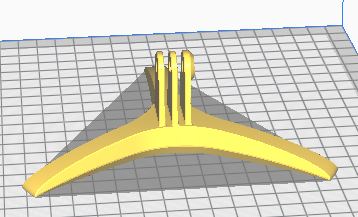 | 25g | 1.25PLN | |
| Base C-Clamp 40 Body v5-improved |  | 24g | 1.2PLN | |
| Base_C-Clamp_40_Bolt_v5 | 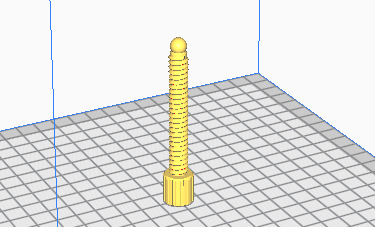 | 5g | 0.25PLN | |
| Mount_Phone_Clamp_B_with_Tab_v5-improved |  | 12g | 0.6zł | |
| Mount_Phone_Clamp_A_v5 |  | 10g | 0.5PLN |
(these are not all the items, just the most important ones, I give an overview)
My phone stand has one base (1.25zl), two arms (2 * 0.55zl), four nuts (4*0.2zl), one phone mount (0.6zl+0.5zl), so about 5zl filament cost.
I estimate that one such mount (taking into account also already screws and current) costs about 10 PLN . The final cost also depends very much on how you count, e.g. if someone prints larger objects in 3D on a printer then they even have leftover filament for free which is just fine for printing small parts like those shown here.
Attachment
I attach the full file package for this project. Inside:
- original STL from Thingiverse
- my modified STL files (with 'improved' in the name)
- temporary Blender (.blend) files with the objects I edited
Summary
Prior to my adjustments it was impossible to use the set. The dials were slipping under my fingers and made it impossible to tighten the joints, which then had play and the arm would twist under the weight of the phone.
After my corrections, the whole set is sensational and will definitely last me a long time.
Pros:
+ we can assemble such a third arm as we want from the elements
+ the phone mount is also suitable for PCB
+ the clamp allows you to fix the third hand on the table top very solidly
+ the clamp can also be used on the other side to hold the PCB
+ many different elements
+ by printing elements you can be sure that even if you want to extend something in the future, you will be able to add new parts to the set (the same way if you lose or damage something)
+ the parts are small and can be printed from leftover filament after larger prints (especially if someone is making large parts on a 3D printer)
Minuses:
- this larger squeeze has a bit of play (but this could probably be improved by slightly increasing the size of the printed screw; although the elasticity of PLA also does its job)
- i don't know what condition the small squeeze will be in, e.g. after a year of use, but it does its job well now
It is also quite impressive to me that these days you can print yourself a squeeze (complete with printed thread and screw) on a 3D printer which seems to be fully functional.
I use the kit shown here on an ongoing basis for soldering (and as a phone stand) and am satisfied.

p.kaczmarek2 wrote 14406 posts with
rating 12345 , helped 650 times.
Been with us since 2014 year.
Comments
Cool, useful ino one big minus - not suitable for electronics - zero ESD protection. Plastic, brrr.... Phew! [Read more]
A somewhat delicate design [Read more]