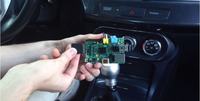
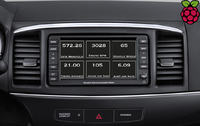
 This article will describe how to display and record car diagnostic information with a Raspberry Pi.
 Step 1: Required materials
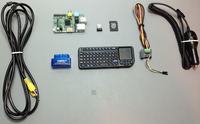
To complete this project you will need:
o Raspberry Pi Model B or B +
o Car stereo (must have an AUX socket)
o Bluetooth adapter
o Car charger
o USB or Bluetooth adapter based on ELM327.
o RCA cable
o Keyboard (optional)
Step 2: OBD II
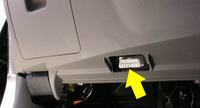
OBD (On-Board Diagnostics) is a standard system in cars sold after January 1, 2002 (in Poland). It provides access to data on the condition of individual vehicle systems (engine, gearbox, ABS, etc.). Vehicles compliant with the OBD-II standard should have a socket approximately 0.6 meters from the steering wheel. The connector itself has 16 pins and looks like the picture below.
Step 3: PyOBD
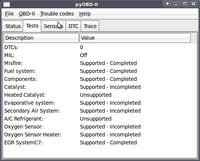
PyOBD (also known as pyOBD-II or pyOBD 2) is open source software designed to work with the ELM327 chip. For example, it allows information from the injection controller (ECU) to be displayed or to reveal fault codes. Various tests and readings of multiple statuses are also possible. The amount of information available depends on the car itself.
Step 4: Installing the software
Programming takes place here via the Raspian system with network access enabled. Communication with the computer is carried out using the USB TTL converter, however, it is allowed to use other methods of data exchange.
Before installing, you should enter the following commands:
This command pulls the latest package list:
sudo apt-get updateThey are updated here:
sudo apt-get upgradeNow we remove packages unused by any applications:
sudo apt-get autoremoveFinally, we restart the system:
sudo rebootWe continue by installing the programs necessary for the correct operation of the device.
 sudo apt-get install python-serial
 sudo apt-get install bluetooth bluez-utils blueman
 sudo apt-get install python-wxgtk2.8 python-wxtools wx2.8-i18n libwxgtk2.8-dev
 sudo apt-get install git-core#  sudo reboot
Then we download OBD-PI from this link or using the commands:
  cd ~
  git clone https://github.com/Pbartek/pyobd-pi.git
Step 5: Connecting the Equipment
1. First, insert the Bluetooth to USB adapter for the Raspberry Pi together with the SD card.
2. Connect the OBD-II adapter to the corresponding socket in the car.
3. We connect the Raspberry Pi with the car radio via the RCA cable.
4. We power the raspberry using a car charger.
5. Log in to Rpi and enter the command:
startx6. Run BlueZ (Bluetooth service), and then pair the ELM327.
7. We communicate with SPP - we should see this notification: "Serial port connected to dev / rfcomm0"
8. Open the terminal and enter the following commands:
  cd pyobd-pi
  sudo su
  python obd_gui.py
Step 6: Data Logging
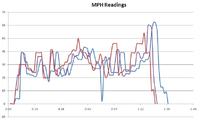
The actual reading of data in real time can sometimes be troublesome. So it is possible to collect and save various information and to read it later. To start downloading data, enter:
  cd pyobd-pi
  python obd_recorder.py
The saved data will be available at the path:
/ home / username / pyobd-pi / log /
source: http://www.instructables.com/id/OBD-Pi/?ALLSTEPS
Cool? Ranking DIY


