logo elektroda
logo elektroda
X
logo elektroda
ADVERTISEMENT
Treść została przetłumaczona polish » english Zobacz oryginalną wersję tematu
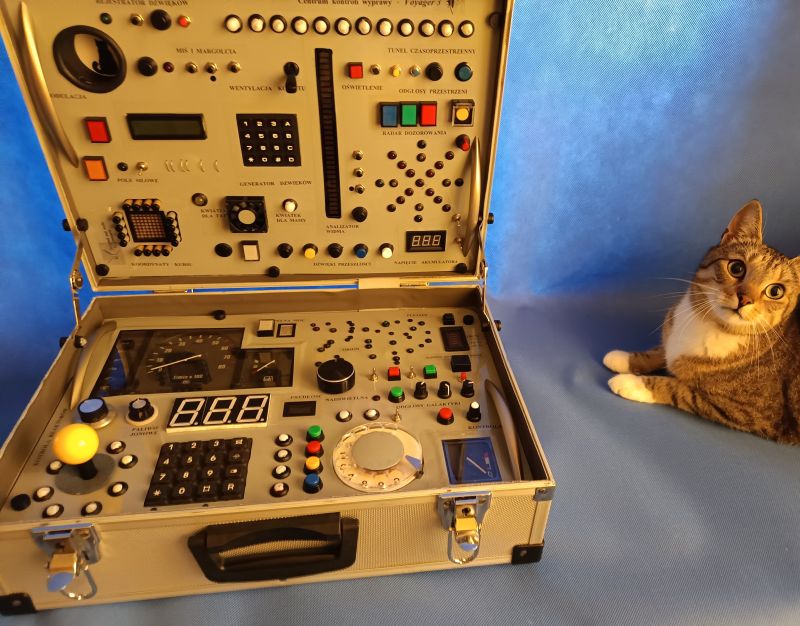
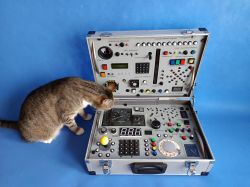
  • A cat sniffs an open silver case with a complex control panel full of buttons, switches, and displays on a blue background. .

    More than a decade ago on "Elektroda" I saw a cool toy project for a child:
    https://www.elektroda.pl/rtvforum/topic2515884.html
    I thought it was a pity that my children are already too big for such a toy.
    But time flies fast and in the meantime my grandson turned two.
    And I was reminded of that project.
    Most of the reasons for building and construction ideas
    are almost clones of the ideas of colleague reaven22 .
    I just used slightly different components for the build.

    The project got the name: "Voyager expedition control centre 3"
    and is generally in the spirit of an interstellar expedition,
    although for now it will be used for snapping, twirling, flashing,
    playing and making noise, but in time (as the child grows)
    perhaps it will become some small source of inspiration....

    Elements used .

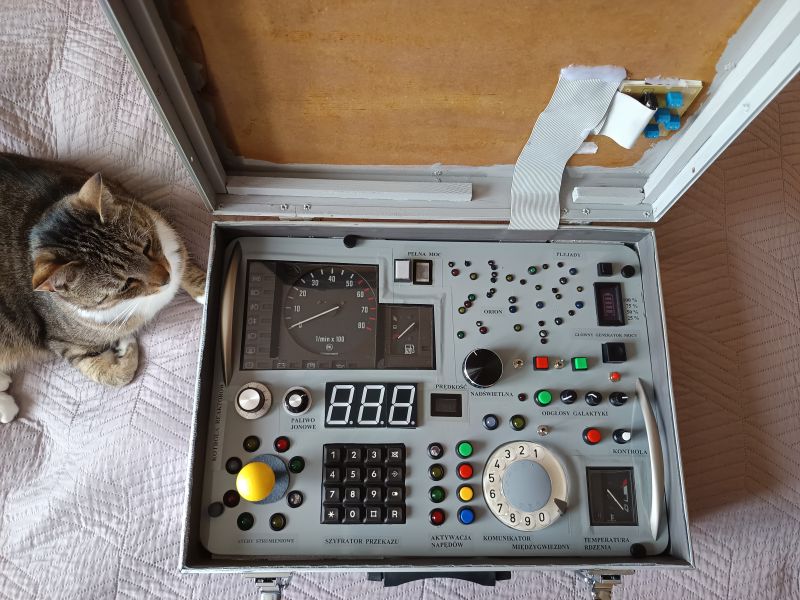
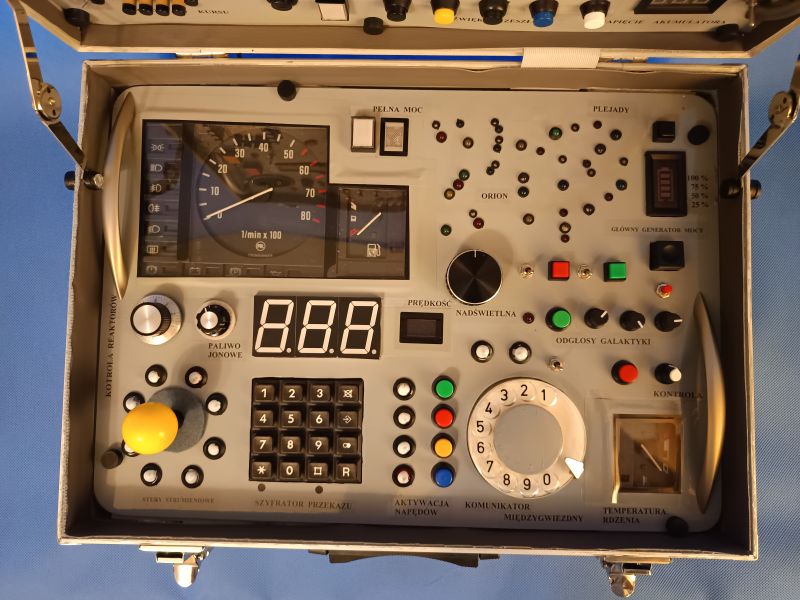
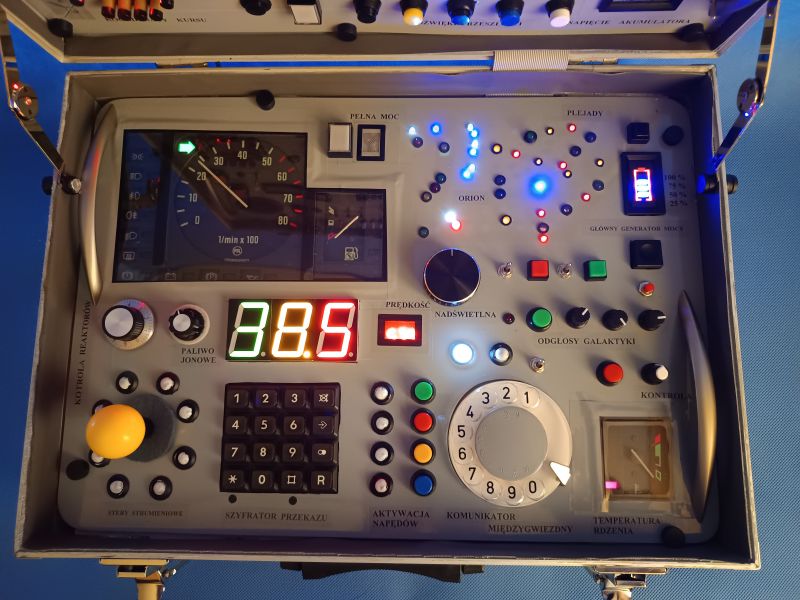
    Bottom of case:
    Main power generator - 6V battery from UPS, its charge indicator,
    main isostat to switch on and timer to de-energise after about 650 s.
    Reactor control, ion fuel, core temperature, superluminal speed
    - are clock elements from the Skoda Favorit.
    Thruster controls - an eight-position joystick.
    Message cipher - a keypad from an old phone that operates via a microcontroller
    3 seven segment displays in different colours.
    Interstellar communicator - this time it's a rotating telephone dial and connected LEDs.
    Galaxy sounds - in this role an AVT 3295 kit strange sound generator.
    Orion - AVT 795 running light.
    Pleiades - AVT 729 crazy spinning light.
    Full power, drive activation - coloured LEDs and button-activated buzzers.

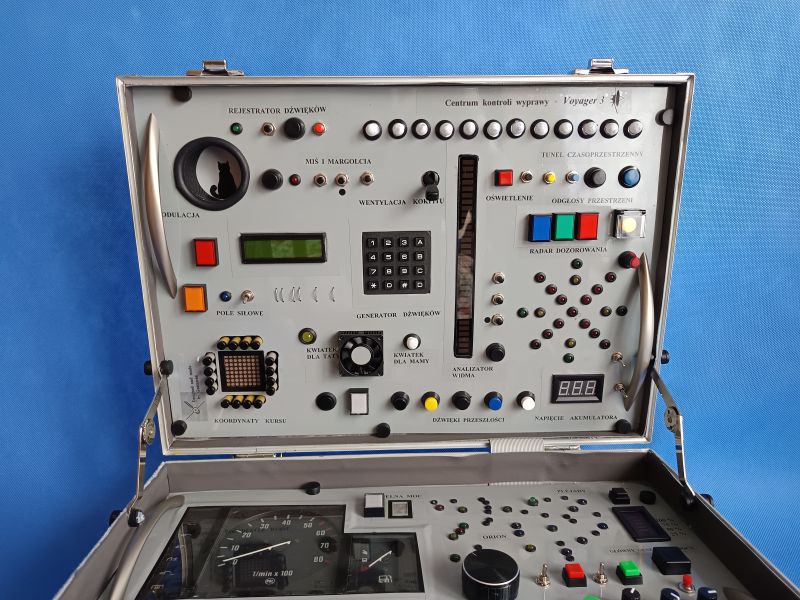
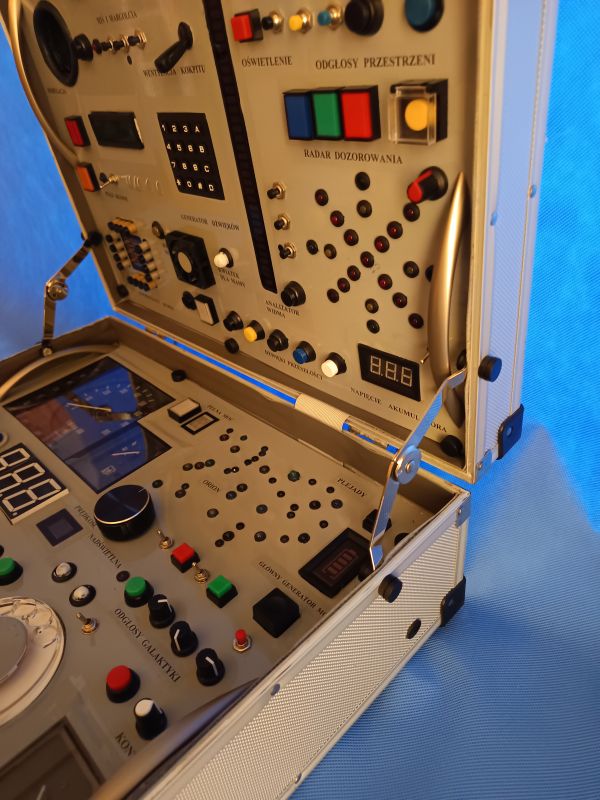
    On top of the case: .
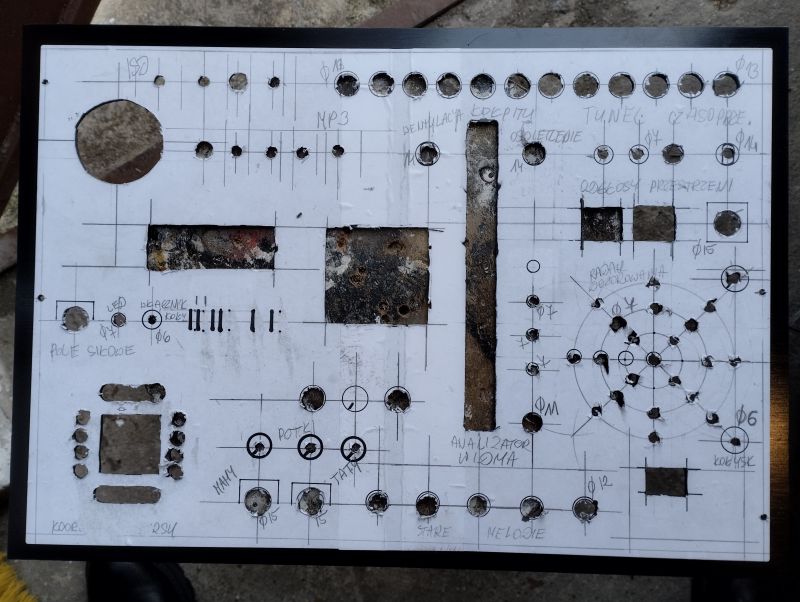
    Sound recorder - digital recorder module with ISD 1820 chip.
    Teddy bear and margolcia - song player module (mp3 from micro SD card).
    Space-time tunnel - AVT 3186 Knight Rider.
    Space noises - AVT 789 siren.
    Surveillance radar - AVT 1653 LED star.
    Spectrum analyser - off-the-shelf Chinese module that responds to music and sounds.
    Battery voltage - led battery voltage indicator.
    Sounds of the past - J068N music box bell.
    Flowers for Mum and Dad - AVT 749 random RGB LEDs.
    Sound generator - 4x4 keyboard with 16x2 display and microcontroller
    generating Morse code and music with Bascom SOUND instruction.
    Force field - AVT 740 touchscreen siren generator.
    Course co-ordinates - 8x8 matrix, LED combination manually lit by individual buttons.
    Cockpit ventilation - computer fan activated by a lever from an Old 266.
    Also various buzzers, lights and chimes lit by various buttons.

    The whole thing was supposed to fit into a Zepter cutlery case, but it did not.
    The only thing I used from this case was the hinges that prevented the top cover from falling onto the child's hands.
    And I fitted all the components into a larger 'kejsika' purchased from a well-known portal.
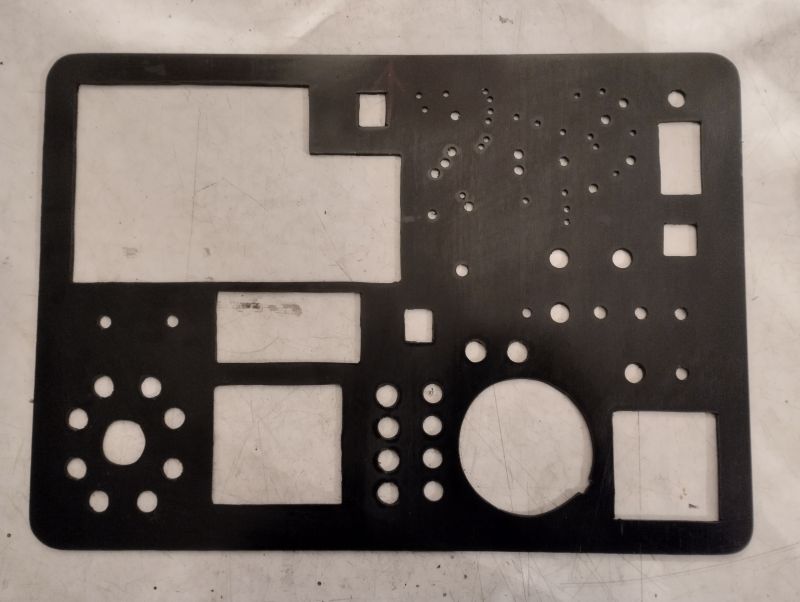
    I placed all the components on 4mm thick ABS plates.
    Painted in a lighter colour, as the black was a bit too gloomy.
    "A kilo" of trivets and "a kilo and a half" of glue also came in handy.
    From paper design to realisation took a while,
    the project itself also changed in the course of implementation, but in the end, on Children's Day, the "box"
    :) :) :)

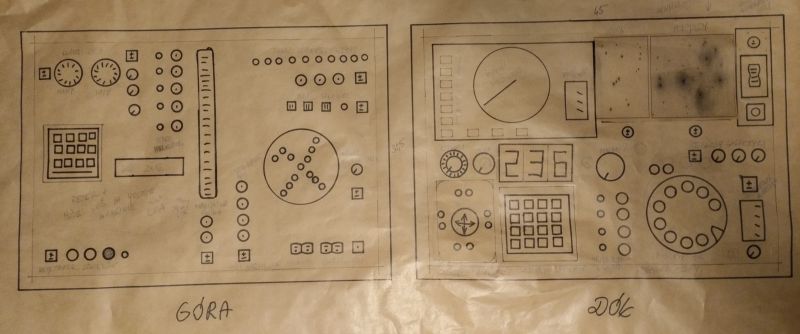
    Sketch of two control panels for a toy control center, featuring various buttons, indicators, displays, and dials arranged on two rectangular boards labeled GÓRA (top) and DÓŁ (bottom).
    A black mounting plate with various cut-out holes and rectangular slots, prepared for installing electronic components. .
    Control panel for a toy, with cut-out holes and handwritten labels for various electronic elements. .
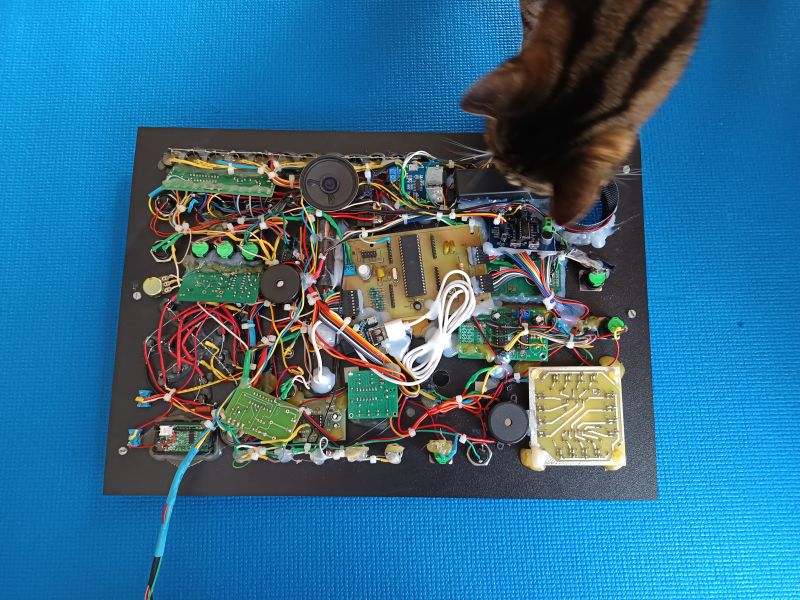
    An electronics panel with numerous wires, PCBs, and components; a cat's head is visible in the upper right corner. .
    A suitcase with a homemade electronic control panel inspired by a space station toy, standing on a bed, with a cat lying next to it. .
    Handmade educational toy: a control panel with many buttons, LEDs, displays, and indicators, mounted in a suitcase. .
    Control panel of the Voyager 3 Expedition Control Center toy in a suitcase, featuring various buttons, indicators, a joystick, rotary dial, and displays. .
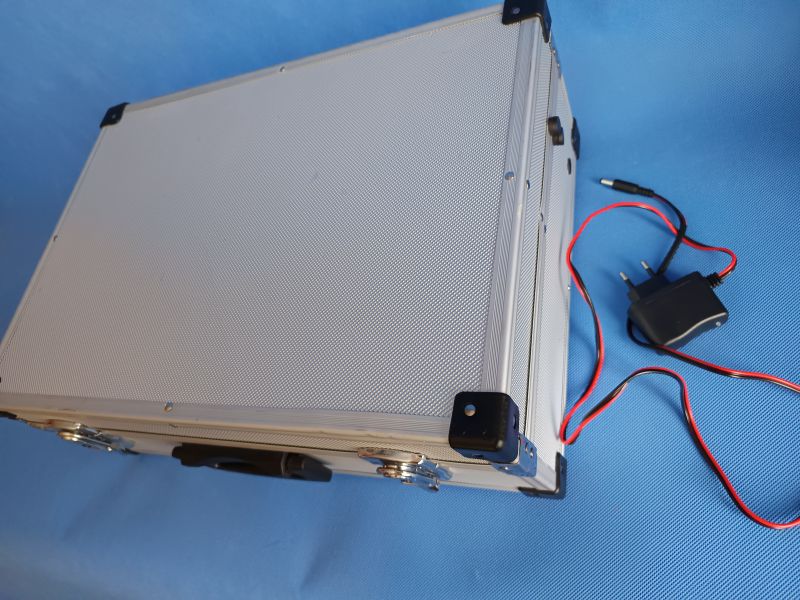
    Closed silver aluminum case with black corners, next to it a power adapter with wires on a blue background. .
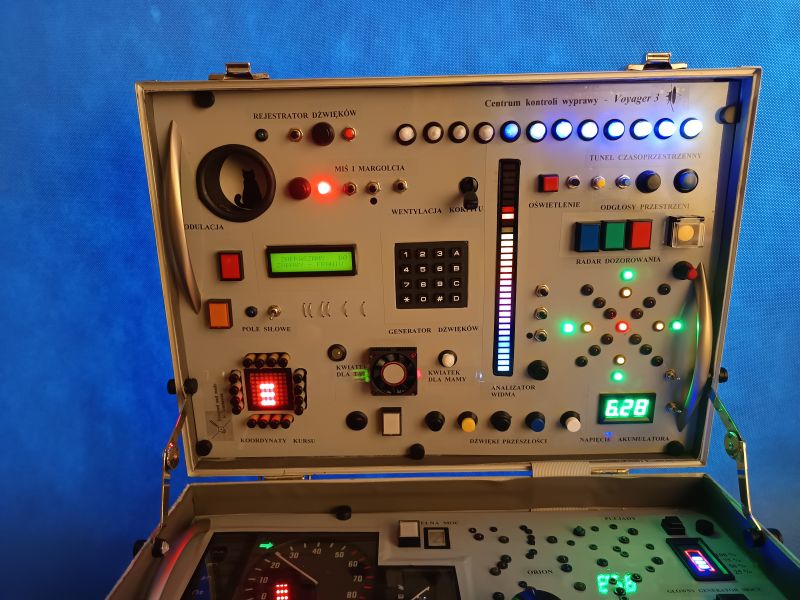
    Control panel of a space-themed toy console with many buttons, LEDs, and electronic displays. .
    A control panel of a toy Voyager 3 expedition control center with many buttons, indicators, and LED lights, installed in a suitcase. .
    Suitcase Voyager 3 Expedition Control Center with a panel full of buttons, switches, indicators and LEDs. .
    A suitcase with a complex child’s control panel toy styled as a mission command center, with a cat sitting next to it. .

    Cool? Ranking DIY
    About Author
    JulianChrupek
    Level 3  
    Offline 
    JulianChrupek wrote 10 posts with rating 55. Live in city Mrągowo. Been with us since 2025 year.
  • ADVERTISEMENT
  • #2 21573713
    gadek80
    Level 31  
    Well you've dug in, because now I'm going to ask you the very hard questions and ask you to spend even more time :P .
    - Do you have instructions for this on how to put it together?
    - Can you normally buy the components from a shop or somewhere and which ones?
    - I can DIY, drill, solder I have some tools. Will I be able to do this, without strictly electronic knowledge?
    - How long did it take you? (more or less)
    - Can you upload a youtube video of it working?
    Or if you don't want to, give me an address where I can come at night in a chimney sweep :)
  • #3 21573730
    JulianChrupek
    Level 3  
    @gadek80
    The manual and schematic are not available.
    You can buy all the components on a well known auction site.
    You have all the components listed and you can buy them as you wish.
    I think you can easily assemble something like this.
    All you need to do is choose the right supply voltages for the individual modules.
    I additionally etched some boards. The power supply converting the battery voltage to the voltages I needed (+3V, +5V, +12V) and the microcontroller boards.
    It took me about six months, a few evenings a week, because time is always fragile.
    The video I don't have, because I only use YT passively :) .
    But I can always give you more details on priv.
  • ADVERTISEMENT
  • #4 21573743
    andrzej lukaszewicz
    Level 41  
    This is of most interest to the cat...
  • #5 21573860
    JulianChrupek
    Level 3  
    Yes, he was the chief consulting engineer.
    No stage of construction was without his vibrissae :) .
  • #6 21573914
    TechEkspert
    Editor
    Very impressive! You can add the video directly in the post. Better not turn up at the airport with that suitcase 😉 .
  • ADVERTISEMENT
  • #7 21573922
    Zenereczek
    Level 13  
    Congratulations, lots of time and dedication.
    I didn't manage to do my own kids - I regret it, it lies on my conscience. But it's hard, there's no time for anything, you have to get along sometimes.
    Lots of ideas and projects in my head.
    On one car I made traffic lights and flashing lights - "roosters". A simple thing, but it took a lot of time.
  • #8 21573992
    gulson
    System Administrator
    Congratulations! Great construction! I knew cats ruled the world! Text me Parcelmate on Private Message and I'll send a little gift.
  • #9 21574177
    JulianChrupek
    Level 3  
    Thank you for your kind words.
    Well I just haven't made any meaningful video showing the modules.
    I only have how it passes the tests by the little recipient,
    but the family rodo does not allow to publish the image of a child :) .
    The case has gone to the 'capital'.
    On my next visit to my grandson I may register something :P .
  • #10 21574216
    koyodza
    Level 11  
    Please tell us what this is and how it works?
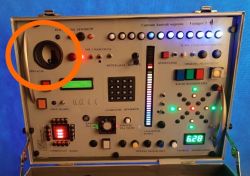
    Control panel with numerous buttons, knobs, displays, and lights in a suitcase; large knob labeled “DOLACJA” in the top left, highlighted with an orange circle. .
  • #11 21574251
    JulianChrupek
    Level 3  
    And this is a very important element :) .
    And seriously, this is the hole required to close the case,
    in which the joystick knob is concealed.
    It is enclosed by a metal mesh masking from the speakers,
    so that small fingers cannot be inserted there.
    By the way, sounds can be heard through the openings in the mesh.
    from the speakers and buzzers. And also the sounds reach
    to the microphones of the recorder and spectrum analyser.
    When the light button is pressed - the cat's silhouette is additionally illuminated :D .
  • #12 21574257
    SylwekK
    Level 32  
    Excellent construction. How much work it takes to make something like this knows only the one who makes such or similar :) .
    I think I like yours and the original even better than my design 😆.
    Make some video of the operation of this engine room :) .
  • #13 21574259
    JulianChrupek
    Level 3  
    SylwekK thank you.
    I will upload something after Sunday :) .
  • #14 21574389
    pan_buka
    Level 11  
    Further proof that our grandchildren are better off than our children :-) A capital toy, congratulations.
  • #15 21574394
    Ryszard49
    Level 38  
    pan_buka wrote:
    Further proof that our grandchildren are better off than our children
    .
    Mate I don't think you know what our children and grandchildren are playing with now.
  • #16 21574407
    pan_buka
    Level 11  
    >>21574394 I know, they play the way we organise play for them. If we give them time, they will play with us with toys like this, for example. If we give them a tablet or a mobile phone and take care of themselves, they will never take their eyes off the screen again.
  • #17 21575057
    398216 Usunięty
    Level 43  
    JulianChrupek wrote:
    And this is a very important element .
    And seriously this is the hole necessary to close the case ,
    in which the joystick knob is hidden.
    It is enclosed by a metal mesh masking from the speakers,
    so that you can't put your little fingers in there.
    .
    So I would suggest that you mount a speaker from the inside in this tunnel. It will certainly be better and louder than at present (you asked if these modules play so quietly). It is only important that the outer side of the diaphragm is fenced off (preferably tightly) from the outside. There will be a bit more bass and a much better sound.
  • #18 21575068
    skywalker2
    Level 15  
    >>21574394 .
    'Interstellar communicator' was widely used in my childhood days in the 20th century ;-)
  • #19 21575105
    reaven22
    Level 31  
    Great project :) nice to see more CDZ unveilings :) .

    It's still running at our place, Junior has taken over. :)
  • #20 21575594
    JulianChrupek
    Level 3  
    398216 Removed I tried with various speakers (from TV and from laptops) also with the factory sealed enclosure. The effect was miserable. I think this was simply the parameters of these modules (although I could be wrong). Anyway, the project is now closed and will remain as such :) .
    reaven22 you had a good idea and hence the imitators. I think the snapping, 'keyboarding' and curiosity in children will never change and such toys will be enjoyed - to the delight of home electronics and appliances :) .
  • ADVERTISEMENT
  • #21 21576461
    398216 Usunięty
    Level 43  
    JulianChrupek wrote:
    398216 Removed I tried with various speakers (from TV and from laptops) also with factory sealed housing. The effect was miserable.
    .
    You mean to say that a speaker mounted as I wrote makes little difference in sound (and volume) to being located inside as in your pictures? Sorry, but this is physically (acoustically rather) impossible.
    Yes - a small speaker will never give you bass like Altus or even ZGc 10, this is also due to the physics of sound, the principle is simple (at least in the case of speakers with such a small diameter) : Either a wider bandwidth from the bottom at the expense of efficiency (large amplitude of oscillation already predicted by the manufacturer), or higher efficiency (loudness) at the expense of poor bandwidth. As for TV speakers - I am not surprised that the effect is poor, as their efficiency is practically nonexistent. A loudspeaker from an older TV - still a CRT one, when there were no such drastic limitations in the size (depth) of the enclosure - by definition has a much larger diaphragm surface (which contributes to much better radiated bass) and higher (because the magnet itself is much larger) efficiency; if you had room for such a speaker and used it, you would probably wonder how to silence it.... ;) In the current situation the solution I gave is the maximum you can get.... maybe if you replace the current speaker with some 5W Chinese one (5 cm diameter should fit in this tunnel?) you would get more bottom, but would it be louder - I rather doubt. In any case, a loudspeaker - whatever it may be - needs to work in an enclosure where the front surface of the diaphragm has no DIRECT connection with the rear side.
    This is basic acoustics and physics - search for "acoustic enclosure" and this should clear up any doubts.

    Regards.
  • #22 21576581
    JulianChrupek
    Level 3  
    398216 Removed (DjMatyAs) it is always a pleasure to read your posts (and with even more pleasure to look at the projects) because one can learn a lot from them, but in the case of this case the hole was created just to fit the manipulator head in there. The sound flow is by the way. If the head would fit with the case closed - this hole would not be there at all, and the sound would come out through the construction plate. As is the case at the bottom. I insist that this is the fault of the ISD module. The other AVT kits, where different transducers (piezo and dynamic) have been used, "buzz" sufficiently.
    I write buzzing because the hi-fi quality is not what this project is about.
    In contrast, the Chinese mp3 player module with its visually meagre loudspeaker also plays very well, does not tire the ear, and it is a pleasure to listen to Teddy Bear and Margarita's songs.
    And since the toy is a bit in the spirit of a space expedition, I also smuggled a few Tangerine Dream songs from the era of Kurek and Kaminski's probe onto the SD card :) .
  • #24 21577383
    398216 Usunięty
    Level 43  
    JulianChrupek wrote:
    398216 Removed (DjMatyAs) it is always a pleasure to read your posts (and with even more pleasure to look at the projects) because one can learn a lot from them, but in the case of this case the hole was created just to fit the manipulator head in there. The sound flows are by the way.
    .
    Two issues.
    The first is the comparison of myself to djMatyas - I have no intention of explaining myself once again, although I was pleasantly flattered by the comparison to such an eminent figure (I came to the forum in part thanks to him).
    The second issue is already (fortunately, because I would not like to litter the topic) more technical;
    Nowhere did I write that the hole as it is was created to radiate sound, I wrote that since it is already there it can ALSO be used as part of an enclosure/acoustic enclosure. And (if that's what you meant) I didn't mean to suggest packing the speaker "from the front", but precisely from the inside - at the end of that tunnel. As long as the inner diameter of the tunnel matched the diameter of the loudspeaker - I'm sure the difference would be noticeable in plus. Of course, while maintaining a tight connection - as I wrote before - so that the sound waves from the front side of the diaphragm do not have a direct connection with those radiating from the rear side (the so-called "acoustic short circuit"), because then it would not make any sense. And the fact that the basic function (the place for the joystick) would remain unchanged is probably only a good thing?
    You mentioned the meagre volume and sound quality from this speaker - I wanted to help and that's it. The only downside is getting rid of the cat.... Or rather the drawing of it posted there.
  • #25 21577624
    JulianChrupek
    Level 3  
    Excluded :) cat must stay !
ADVERTISEMENT