logo elektroda
logo elektroda
X
logo elektroda

How to disassemble and repair the Zelmer Jupiter vacuum cleaner

adadzio2 36813 12
ADVERTISEMENT
Treść zostaÅ‚a przetÅ‚umaczona polish » english Zobacz oryginalnÄ… wersjÄ™ tematu
  • Helpful post
    #1 18483712
    adadzio2
    Level 9  
    Hello, I would like to share how to disassemble the Jupiter vacuum cleaner without damaging it and fix one of the reasons why the vacuum cleaner does not work. I have the following vacuum cleaner:
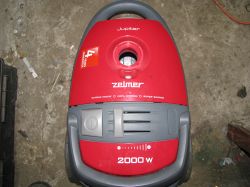
    How to disassemble and repair the Zelmer Jupiter vacuum cleaner How to disassemble and repair the Zelmer Jupiter vacuum cleaner
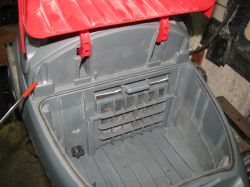
    First, unscrew 2 screws at the front, then 4 at the back
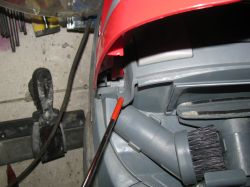
    How to disassemble and repair the Zelmer Jupiter vacuum cleaner How to disassemble and repair the Zelmer Jupiter vacuum cleaner How to disassemble and repair the Zelmer Jupiter vacuum cleaner
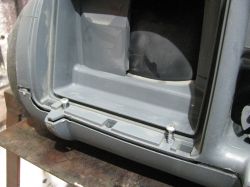
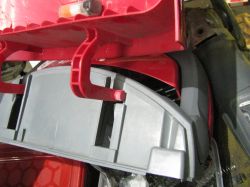
    Next, we need to pull out the front flap by prying the hinges and pull the flap out and now we can remove the top.
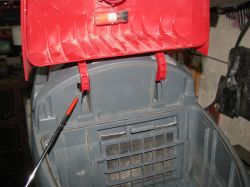
    How to disassemble and repair the Zelmer Jupiter vacuum cleaner How to disassemble and repair the Zelmer Jupiter vacuum cleaner
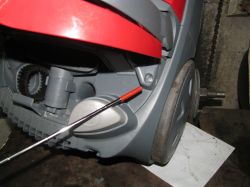
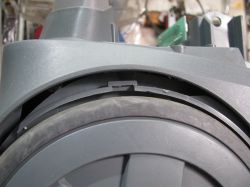
    Now it`s time to unlock the hooks above the wheels, insert a thin screwdriver on both sides and pry:
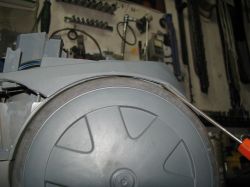
    How to disassemble and repair the Zelmer Jupiter vacuum cleaner How to disassemble and repair the Zelmer Jupiter vacuum cleaner
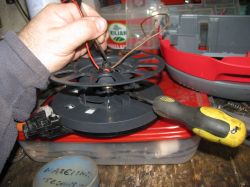
    Now let`s get inside, after checking the switch and wiring, I found that there is no voltage coming from the cable reel, so we pull the reel outside:
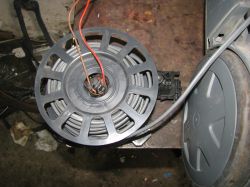
    How to disassemble and repair the Zelmer Jupiter vacuum cleaner How to disassemble and repair the Zelmer Jupiter vacuum cleaner
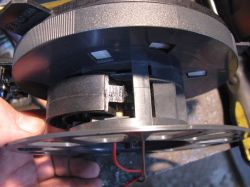
    We unwind the cable, taking care not to release the spring lock that locks the ring with the spring, otherwise we have to adjust the spring tension so that it winds up the cable completely. Once the cable is unrolled, we remove the black insert by prying the catch with a thin screwdriver:

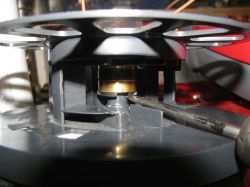
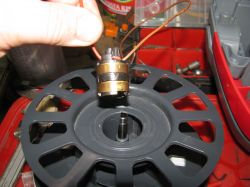
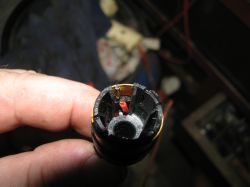
    Now I am disassembling the center where the entire contact slider is located, I inserted a thin knife, prying the extreme catch, and at the same time inserted a screwdriver and pryed the bottom to push it up.
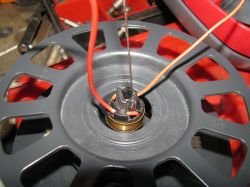
    How to disassemble and repair the Zelmer Jupiter vacuum cleaner How to disassemble and repair the Zelmer Jupiter vacuum cleaner How to disassemble and repair the Zelmer Jupiter vacuum cleaner How to disassemble and repair the Zelmer Jupiter vacuum cleaner How to disassemble and repair the Zelmer Jupiter vacuum cleaner
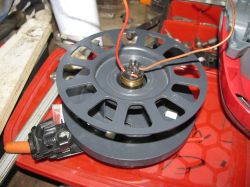
    After careful inspection, it turned out that the cable above was torn off. We solder the cable and wind the cable on the reel, put everything back together, put the reel in its place and close the engine, check the button to see if it rewinds the cable:
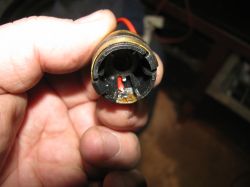
    How to disassemble and repair the Zelmer Jupiter vacuum cleaner How to disassemble and repair the Zelmer Jupiter vacuum cleaner
    Connect the switch board and check if it works:
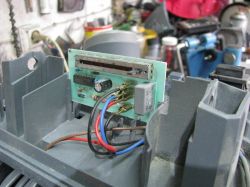
    How to disassemble and repair the Zelmer Jupiter vacuum cleaner
    We assemble the rest of the housing by screwing the remaining elements together in the reverse order. That`s it, I think maybe someone will find my tips useful.
  • ADVERTISEMENT
  • #2 18483905
    tomtim123
    Level 36  
    You described it nicely, which is a plus, I also repaired several such cases in my career. This is a typical fault in vacuum cleaners. Regards
  • #3 18484011
    abuhamza
    Home appliances specialist
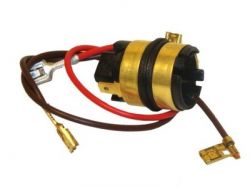
    And I assume this is the case
    How to disassemble and repair the Zelmer Jupiter vacuum cleaner

    And peace of mind.
    If you were at Zelmer`s training, you would know that it is a disposable part that breaks when taken off and a new one is put on 😀
  • ADVERTISEMENT
  • #4 18484086
    tomtim123
    Level 36  
    And we didn`t attend training and we fix it :-) Seriously, is there a new model of this slider in which the wires don`t break? Or just another new slider. Regards
  • #5 18484107
    jurand87sca
    Level 31  
    This slide from #3 looks like it could be the new stripper. Because the wires are on connectors, not soldered.. ;) Maybe they also gave better cables in this new disposable one...
  • ADVERTISEMENT
  • #6 18779886
    DaWiHs
    Level 2  
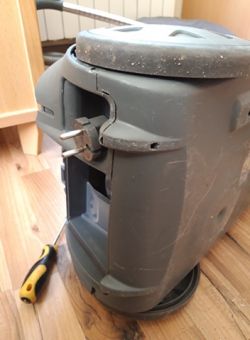
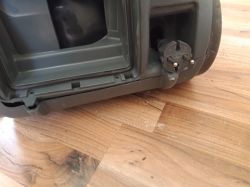
    Hello, I have a problem with disassembling this bush remover. I unscrewed everything, but it looks like something is still stuck there (as in the picture). Does anyone know how to arrange it here?

    How to disassemble and repair the Zelmer Jupiter vacuum cleaner How to disassemble and repair the Zelmer Jupiter vacuum cleaner
  • ADVERTISEMENT
  • #7 19189184
    puchan
    Level 14  
    Helpful topic. Just today my Jupiter died and the red wire in this slider is broken in exactly the same way. I`m wondering whether to replace these thin wires with thicker ones. After all, it`s 2000W. The old cables are a bit stiff, as if they were already severely overheated.
  • #9 19643362
    ryzior
    Level 1  
    Thanks to this post, I managed to remove the flap at the front - there was some problem.
    I once had a problem with this retractor in a Solaris and I simply managed to buy this part. It has been working since then (I think I broke it during disassembly, but I didn`t attend the training ;)

    Now I have a strange symptom - it`s probably electronic - the vacuum cleaner only works when the potentiometer is set to the maximum, unfortunately I don`t know... I suspect a transistor because it works, but not to the full extent. If I set it lower than max, it doesn`t turn at all, it just jerks. Can anyone help with this topic?
  • #10 19643948
    tomtim123
    Level 36  
    Moderated By TONI_2003:

    ✅ Quote selectively or not at all when replying after the person you are quoting!


    Remove the control board and carefully check for cold solder joints. I would put my bet on the potentiometer. I suggest washing this potentiometer with some isopropanol or white spirit and blowing it out with air, perhaps the resistance path is dirty. This resistance path may also be damaged (worn), in which case the only option left is to replace the potentiometer or the entire control board.
    Regards
  • #11 20029434
    Alberto_Eco
    Level 11  
    Thanks @adadzio2! My jupiter didn`t give up the ghost, but it sucked weakly and got hot. Of course - after replacing all the filters and the bag, there was no change, so I decided to disassemble it. That`s how I found your topic. Thanks to it, I got to the engine, which (at least in this model) is tightly wrapped with a sponge and then enclosed in a plastic casing with two outlets... Also clogged with a sponge.
    I took the dismantled sponges into a bath in dishwashing liquid and after 20 minutes of washing under running water - black water stopped coming out of them, and the sponges at the outlet of the housing became almost white!
    At this point, I don`t know yet whether his work has improved, because the sponges dry before I roll the old thing, but I am optimistic.
    At the same time, I also washed the housings, blew out the engine itself with compressed air and cleaned the potentiometer board with isopropyl alcohol.
    I will let you know what the final result will be.
  • #12 20031609
    Alberto_Eco
    Level 11  
    All right. I put it back together and there weren`t even any spare parts left ;)

    A few notes about the manual:
    1. First, remove the flap closing the bag chamber. Only then should you disassemble it.
    2. There is no information about the need to release the clip under the cable (due to ignorance and innate stupidity, I broke it)
    3. The cables from the reel are very short and one is permanently attached. After removing the top (with the slider), you must first dismantle the black cable from the connector on the board and remove the switch from the holder - this way you gain a few cm of cable and there is less chance of it breaking off.
    4. It is also a good idea to dismantle the motor cables (two black ones, coming from the same board with the potentiometer) before removing the casing.

    Generally - after cleaning all the internal sponges, washing the rotor and all plastics - the vacuum cleaner works a little quieter, and after working for about 5 minutes at full speed - the air blows slightly warm (instead of very hot, as it was before) and in the trunk to the small tips, it`s cold too.
    I won`t comment on the suction power, because in my opinion it sucks better than before (it may be a placebo effect), but my wife says she doesn`t notice any difference.

    Ps
    puchan wrote:
    After all, it`s 2000W.

    Mine is probably 860W on the nameplate ;) Nowadays, household vacuum cleaners with power > 1KW are no longer produced, because the EU prohibits...
  • #13 20174092
    miqrus
    Level 10  
    Thanks to @adadzio2 for the detailed description. The last two steps with the cable reel are the hardest. I took mine apart just to find out that I had a new generation glider and after assembling it to throw it away, the vacuum cleaner came back to life. ;)

Topic summary

The discussion focuses on the disassembly and repair of the Zelmer Jupiter vacuum cleaner. Users share step-by-step instructions for disassembly, including unscrewing screws, removing flaps, and unlocking hooks. Common issues include broken wires in the slider and problems with the potentiometer affecting performance. Some users suggest replacing thin wires with thicker ones and cleaning components with isopropanol. Others report successful repairs after cleaning internal sponges and the motor. The conversation highlights the importance of careful disassembly to avoid damaging parts and the potential for improved performance after maintenance.
Summary generated by the language model.
ADVERTISEMENT