[Media kit]
Do-it-yourself projects teach, entertain and stimulate the imagination. this time we show you how you can use the ARDUINO MKR WIFI 1010 kit to protect your cookie jar from gourmands you don't want to share your treats with. See how easy it is!
Components required for the project:
- Arduino MKR WiFi 1010 board,
- Arduino MKR IOT Carrier Board,
- micro USB cables,
- PIR sensor,
- PIR sensor connecting cables.
All components listed are available in this kit .
StEP 1: .
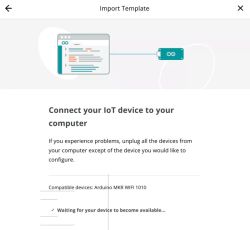
Connect the Arduino MKR WIFI 1010 board to the Arduino Cloud. Follow the instructions available on the Arduino website. Make sure you have the Arduino Crate Agent application installed.
 .
.
StEP 2: .
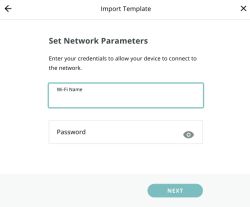
Enter your Wi-Fi access details.
 .
.
Step 3: .
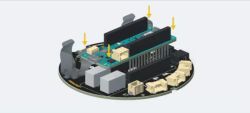
Connect the Arduino MKR WiFi 1010 board to the IoT Carrier Board. Note that the device must be connected to a computer before this step can be performed. Once the Arduino board is connected to the base board, you can reconnect the entire device to the computer.
 .
.
StEP 4: .
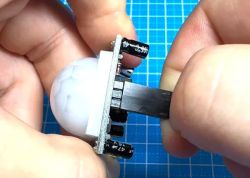
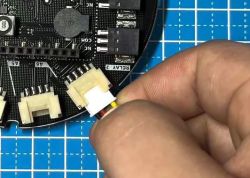
Connect the PIR sensor to the IoT Carrier Board. The sensor detects movement so you can catch the cookie thief in the act.
Step 5: .
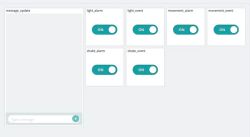
Configure the dashboard in Arduino Cloud as you wish:
 .
.
StEP 6: .
Create a trigger in Arduino Cloud.
 .
.
Step 7: .
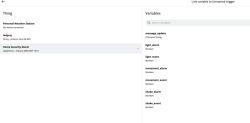
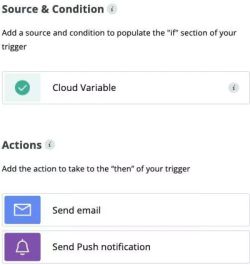
You can now configure the trigger and specify what action is to be taken when a certain event occurs. In our case, we can determine what should happen when someone fishes for our cookies and the sensor detects movement.
 .
.
As an action, it should be determined that a notification will be sent to our phone when movement is detected.
 .
.
Here you will find a detailed step-by-step instructional video. .
[ADVERTISING COOPERATION with Transfer Multisort Elektronik Sp. z o.o.]
Do-it-yourself projects teach, entertain and stimulate the imagination. this time we show you how you can use the ARDUINO MKR WIFI 1010 kit to protect your cookie jar from gourmands you don't want to share your treats with. See how easy it is!
Components required for the project:
- Arduino MKR WiFi 1010 board,
- Arduino MKR IOT Carrier Board,
- micro USB cables,
- PIR sensor,
- PIR sensor connecting cables.
All components listed are available in this kit .
StEP 1: .
Connect the Arduino MKR WIFI 1010 board to the Arduino Cloud. Follow the instructions available on the Arduino website. Make sure you have the Arduino Crate Agent application installed.
 .
.
StEP 2: .
Enter your Wi-Fi access details.
 .
.
Step 3: .
Connect the Arduino MKR WiFi 1010 board to the IoT Carrier Board. Note that the device must be connected to a computer before this step can be performed. Once the Arduino board is connected to the base board, you can reconnect the entire device to the computer.
 .
.
StEP 4: .
Connect the PIR sensor to the IoT Carrier Board. The sensor detects movement so you can catch the cookie thief in the act.


Step 5: .
Configure the dashboard in Arduino Cloud as you wish:
 .
.
StEP 6: .
Create a trigger in Arduino Cloud.
 .
.
Step 7: .
You can now configure the trigger and specify what action is to be taken when a certain event occurs. In our case, we can determine what should happen when someone fishes for our cookies and the sensor detects movement.

 .
.
As an action, it should be determined that a notification will be sent to our phone when movement is detected.
 .
.
Here you will find a detailed step-by-step instructional video. .
[ADVERTISING COOPERATION with Transfer Multisort Elektronik Sp. z o.o.]
Company Account:


