I. Unboxing
① I was thrilled when I received the notification that my trial application was approved.
② DP100 is the official launch of the atomic point. I have also seen. At the time of watching, the feeling is not great; I think it's just very general.
③When I saw the launch, I realized that this power supply was something I had no concept of in terms of size.
④New realization: only after use will one feel the performance of things, their imagination, and personal use of two different things.
⑤The following will be introduced in the experience.
Before unboxing: the black box in the lower left corner of the picture, with the Positive Point Atom logo on it
Note: To test the DP100, test tools have been prepared in advance
Note: I prepared my own 65W gallium nitride power supply, mhp30 soldering station (60W), and a zero ohm resistor
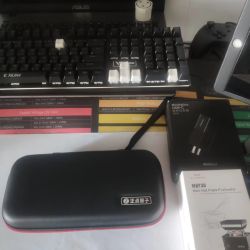
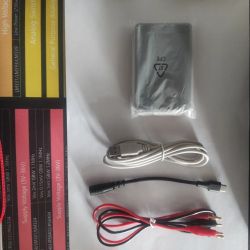
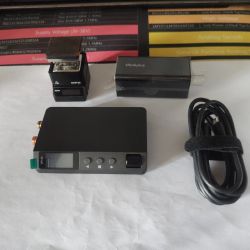
After opening the box, all things were as shown
Note: The main components are DP100 power supply workbench
Note: Accessories are alligator clips, power cord (red and black), USB cable - A port to A port, DC to TYPE-C cable
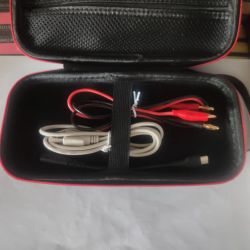
Second, experience
DP100: feel very small, but doubt that I can take 100W sense of skepticism
Note: not very heavy in the hand
Note: It is recommended to do weight, so as not to use on the desktop, which will be wired to drive the DP100 to move or turn over
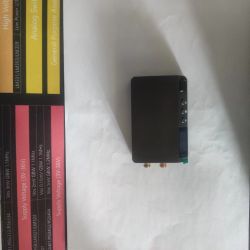
Note: Surprised only half the size of a cell phone
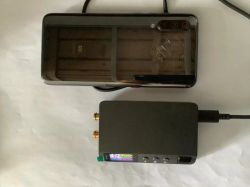
Note: the actual size of the picture
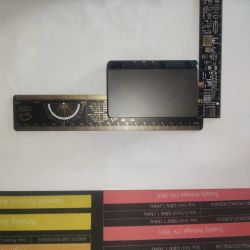
Note: A 65W gallium nitride charger is almost as big as. I have been surprised by this.
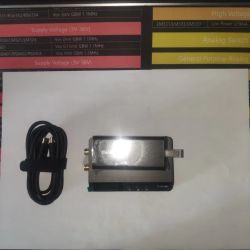
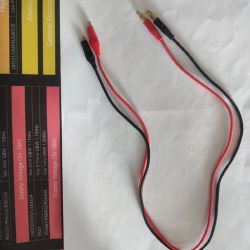
Note: The alligator clip power cord is very soft. More than 100 times more comfortable than my Fluke multimeter cable!
Third, use
Just their first use of the steps
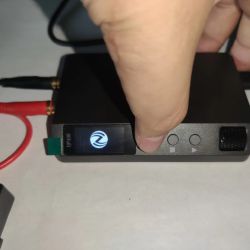
Note: The first power on the direct automatic boot
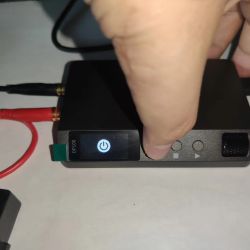
Note: After powering on, press Changan, the leftmost button, to display shutdown
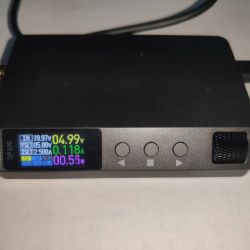
Note: DP100 front is straightforward, three buttons + a wheel key
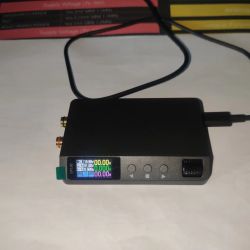
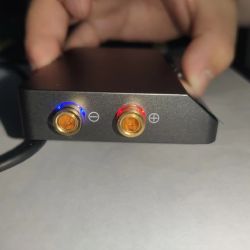
Note: DP100 left side view, as the power supply 0-30V adjustable output port
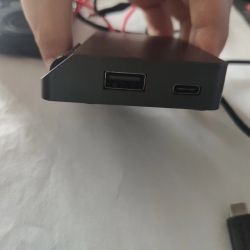
Note: DP100 right side view, TYP-C as the power input
Note: USB can double-click the center button with a square icon two times to enter the menu
① master mode: output 5V/1A; insert the mouse to control the DP100 interface settings
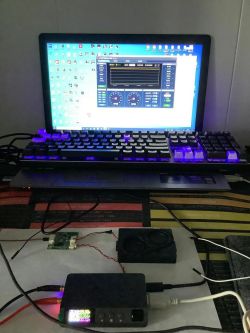
② from the mode: USB cable - A port to A port cable connected to the computer. The APP controls output parameters and can see any output power waveforms. Do not need to operate the physical buttons in the DP100
Note: After powering on, press the center key (among the three keys). You can set the output (voltage/current). This set of settings is saved in the first preset data
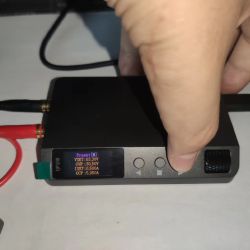
Note: You can preset 10 output values (voltage/current)
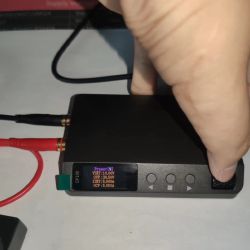
Note: After setting (voltage/current), you must press the start output button as shown in the picture; otherwise, it will not be output.
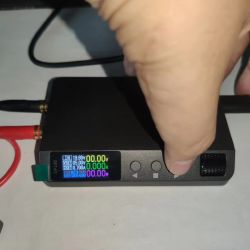
Note: No output is measured without pressing the output button.
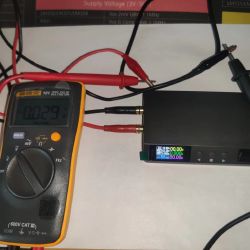
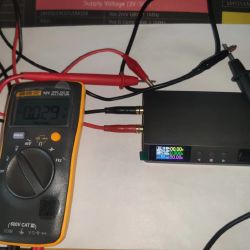
Note: Press the Start Output button. You will see the left side of the two connected to the crocodile clips, output LED lights on
Fourth, the summary
I prepared a lot of tests, as I had not taken into account the input interface, which resulted in the DP100 being unable to power up for testing. For example, I created a test trial video for the next direct recording.
① mhp30 because of the need for PD protocol power supply, I'll prepare a PCB adapter board next time. Measure the heating temperature rise with the power curve of the welding table
The Apollo STM32H4 board of Positive Point Atom. I will prepare a PCB adapter board next time and prepare to run the system with DP100 to detect the real-time power.
③ Qiyin Telen's voice control board, with DP100 test Bluetooth control cell phone playing music + a variety of voice control commands performed by the power jumps
④ I want to buy a DP protocol testing instrument, which is currently broken. Failed to negotiate the price in the second-hand market for a fish
Later, to make up, a variety of test equipment, a test video
DP100, this trial test, gives me a better sense of seismicity. It is to use the function of fast; it is easy to get started.
Looking forward to my test video; next time, I'll make up a post.
① I was thrilled when I received the notification that my trial application was approved.
② DP100 is the official launch of the atomic point. I have also seen. At the time of watching, the feeling is not great; I think it's just very general.
③When I saw the launch, I realized that this power supply was something I had no concept of in terms of size.
④New realization: only after use will one feel the performance of things, their imagination, and personal use of two different things.
⑤The following will be introduced in the experience.
Before unboxing: the black box in the lower left corner of the picture, with the Positive Point Atom logo on it
Note: To test the DP100, test tools have been prepared in advance
Note: I prepared my own 65W gallium nitride power supply, mhp30 soldering station (60W), and a zero ohm resistor

After opening the box, all things were as shown
Note: The main components are DP100 power supply workbench
Note: Accessories are alligator clips, power cord (red and black), USB cable - A port to A port, DC to TYPE-C cable


Second, experience
DP100: feel very small, but doubt that I can take 100W sense of skepticism
Note: not very heavy in the hand
Note: It is recommended to do weight, so as not to use on the desktop, which will be wired to drive the DP100 to move or turn over

Note: Surprised only half the size of a cell phone

Note: the actual size of the picture

Note: A 65W gallium nitride charger is almost as big as. I have been surprised by this.


Note: The alligator clip power cord is very soft. More than 100 times more comfortable than my Fluke multimeter cable!

Third, use
Just their first use of the steps
Note: The first power on the direct automatic boot

Note: After powering on, press Changan, the leftmost button, to display shutdown

Note: DP100 front is straightforward, three buttons + a wheel key

Note: DP100 left side view, as the power supply 0-30V adjustable output port

Note: DP100 right side view, TYP-C as the power input
Note: USB can double-click the center button with a square icon two times to enter the menu
① master mode: output 5V/1A; insert the mouse to control the DP100 interface settings

② from the mode: USB cable - A port to A port cable connected to the computer. The APP controls output parameters and can see any output power waveforms. Do not need to operate the physical buttons in the DP100

Note: After powering on, press the center key (among the three keys). You can set the output (voltage/current). This set of settings is saved in the first preset data

Note: You can preset 10 output values (voltage/current)

Note: After setting (voltage/current), you must press the start output button as shown in the picture; otherwise, it will not be output.

Note: No output is measured without pressing the output button.

Note: Press the Start Output button. You will see the left side of the two connected to the crocodile clips, output LED lights on


Fourth, the summary
I prepared a lot of tests, as I had not taken into account the input interface, which resulted in the DP100 being unable to power up for testing. For example, I created a test trial video for the next direct recording.
① mhp30 because of the need for PD protocol power supply, I'll prepare a PCB adapter board next time. Measure the heating temperature rise with the power curve of the welding table
The Apollo STM32H4 board of Positive Point Atom. I will prepare a PCB adapter board next time and prepare to run the system with DP100 to detect the real-time power.
③ Qiyin Telen's voice control board, with DP100 test Bluetooth control cell phone playing music + a variety of voice control commands performed by the power jumps
④ I want to buy a DP protocol testing instrument, which is currently broken. Failed to negotiate the price in the second-hand market for a fish
Later, to make up, a variety of test equipment, a test video
DP100, this trial test, gives me a better sense of seismicity. It is to use the function of fast; it is easy to get started.
Looking forward to my test video; next time, I'll make up a post.


