Hi,
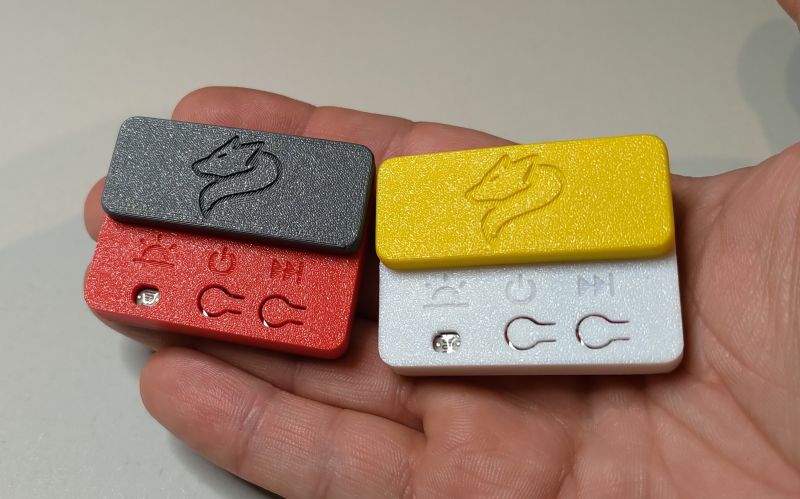
under this unusual topic name I present a project of a small automatic music player to make sitting on the toilet more pleasant. Of course this is one application, in other situations it could probably be useful too
The main considerations were low complexity, a trivial interface, maintenance-free after initial set-up, and room for hundreds or thousands of hours of music at low cost.
Features:
- MicroSD card support with Fat32 file system.
- Decoding of SBC Stereo files, with full bitpool, 44.1kHz 10bit.
- Very simple interface with 2 buttons and status LED.
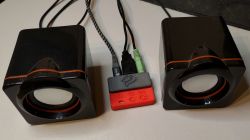
- Connectors: USB type C (power supply). USB A (power source for speakers), Mini-Jack (audio).
- Light sensor - automatically starts and stops playback according to brightness.
- Catalogue support: loop songs within a catalogue or skip to the next one.
- Non-repeat random playback function: each song in the catalogue will only be played once unless all others have already played.
- Skipping to the next/previous song, maintaining the drawn order (if you go back and skip forward, you will return to the same song).
- Fully configurable via SD card file.
- Saving the current state on the SD card in case of power failure, optional.
- Optional fade in / fade out effect with adjustable speed.
The project came about largely out of curiosity about how much you can squeeze out of a microcontroller for 8 cents.
The one used here is the Pyua PY32F002AF15P6TU. You can read about these Chinese penny chips at least here: https://www.elektroda.pl/rtvforum/topic3946116.html or more recently here: https://www.elektroda.pl/rtvforum/topic4144976.html
The microcontroller has 32kB of flash memory and only 4kB of SRAM.
MP3 decoding under such conditions is not possible. Here we have several times too little ram and probably not enough processing power.
On the other hand, playing uncompressed wav files would be a waste of space and the whole project would not contribute anything interesting. I didn't want to use an external decoder either, because it would have multiplied the price of the whole thing and again, there would have been nothing interesting in it.
A possibly lightweight, qualitatively sufficient and quite efficient codec turned out to be SBC, commonly used in bluetooth devices as the primary codec.
The data carrier was a MicroSD card. Currently, a 64GB card can be purchased for less than £8, which, with the SBC codec, can hold over 400 hours of music.
Such a stuffed card, combined with random playback, can really give the effect of perfect "radio" - with no commercials and no repeats.
The firmware is written a little in C, a little in C++. Hardware support is realised on bare registers (Puya's HAL is based on an STM32 hal and nasty), except for the clock configuration, which I didn't want to write from scratch.
I found the SBC decoder on github: http://github.com/google/libsbc/ . I did some light optimisations such as zlinning what I could and knocking out the checksum counting.
At first it was too slow, especially in stereo, but fortunately after these changes the decoder turned out to fit "just right" and eventually more steam went into the file system and optimal use of the SD card.
The Puya used has only 4kB of ram memory. It has to fit quite a large stack for the SBC decoder, buffers for the left and right channels, a buffer for the data and the SD card sector cache.
Because of the tiny buffers, there are no delays: once the file starts playing, the transmission from the card must be as fast and uninterrupted as possible.
The microcontroller is clocked at 48MHz using a PLL, which theoretically should not be
Initially, I set the PWM to generate the waveform at 176.4kHz, which was intended to pull the potential squeal far out of hearing range. A new sample was taken every four waveforms, giving a final sample rate of 44.1kHz. Unfortunately, such PWM conjugation limited playback to 8 bits - more could simply not be achieved at 48MHz clocking.
As an experiment, I dispensed with sampling every 4 passes and increased the range to 10 bits. A 44.1kHz squeal is not audible to the ears anyway, but 10bits definitely is.
At first I planned to add some basic dithering, but 10bit turned out to sound so much better that I abandoned the idea for now.
For the output samples, I created 2 cyclic buffers (for the left channel and the right channel) and I synchronise the decoding using DMA interrupts with half the transfer and its end.
The DMA 'plays' half of the buffer, where the next half is filled by the decoder. The transfer is cyclic, so once it is done, the next transfer starts immediately.
The card is handled by a hardware SPI with the fastest possible clocking. I've run tests on a dozen MicroSD cards and every one works, as long as it's a MicroSDHC or MicroSDXC.
I've also quickly added support for old cards, so pretty much anything should work. The third DMA channel is currently unused - I'm considering using it to speed up card transfers, but it's hard to embrace bidirectional SPI with a single transfer.
As a light sensor, I use a voltage divider with a photoresistor coupled to the ADC, using an interesting 'window watchdog' functionality. The ADC runs autonomously in the background and keeps an eye on whether the voltage value is within a set range. If not - it generates an interrupt.
In the interrupt, I change the playback state and set a new interval - a different one for light and dark. This way, during normal playback, I don't waste any CPU cycles on keeping an eye on the ADC.
The device was designed to work with cheap USB-powered computer speakers, so it has a built-in USB power output, which can be switched off together with playback (small power saving), or run all the time.
For file system support, I chose the Petit FAT library. It probably wasn't the smartest choice, as I ended up having to extend it a bit.
I added:
- Caching of sector ranges for the currently open file, which allows you to stream the contents of a file without glancing into FAT every now and then. Most optimistically, without fragmentation one CMD18 command can read the entire file.
- Counting elements in a directory
- Moving backwards in the directory
- Relatively fast jumping to the nth element in the directory.
- Saving and restoring the current internal state of the Petit FAT, to be able to save the state file if necessary without closing the file being played.
Initially, I didn't know how to go about implementing song shuffling. I really wanted to avoid repeating songs during playback, but naive implementations (e.g. keeping a bitmap of things already played) could not work well with such limited RAM.
In the end, after consulting with AI I arrived at the code, which can be seen in the file feistel.cpp . The algorithm does a permutation of the set of possible tracks 1...N into a set of shuffled tracks 1...N based on a key.
The key is either fixed - provided by the user in the configuration file (as a seed), or generated based on the value of a timer spinning all the time in the background + crc32. The randomness is influenced by the card's latency and the user's button press times.
As the playback order is predetermined by permutation, you can freely navigate through the tracks without repetition. Of course, the randomisation can be switched off and then the songs play in the order in which they were copied into the catalogue. For alphabetical sorting one would run out of ram.
In the final stages of playback, I added an effect of smoothly turning the sound up and down when switching the lights on and off - so that the music doesn't play back suddenly.
In the configuration, you can set how fast the music should be loudened and muted (and whether it should be muted at all), and whether this should also happen when changing the mode with a button.
During the project, I sat a lot on how to make the best possible use of the SD card. Initially, I expected that reading a single sector using CMD17 and cleverly 'asking' the card for the next sector ahead of time would be comparable to using CMD18 (reading multiple sectors).
In reality, yes, on some cards it worked, but surprisingly many "malicious" cards were periodically doing some sort of background operation, which increased the wait time for each sector enormously.
Well, and I had the effect of 2 minutes of trouble-free playback followed by 20 seconds of complete "chaff". I conclude that the cards get their performance class with the CMD18 command and no other.
It's also possible that SPI mode doesn't guarantee anything and I was just lucky that with CMD18 the cards turned out to be fast enough.
The interface is simple:
- Left button, press: change mode (Auto - Light Sensor/On/Off). Hold: next folder.
If the light sensor is off, there is no auto mode.
- Right button, press: Next song. Hold: previous song.
- LED lights up when a song should be playing.
Configuration is possible by creating a config.ini file on the memory card:
; LooTunes config file

; Enable random playback mode. 0: disabled, 1: enabled
; This affects playback order in subdirectories. Directory selection order is not randomized.
random_mode=1
; Randomization key (32-bit unsigned integer). Change this value to get a different order.
; Set to 0 to generate a random key based on time each time a new directory is being opened.
seed=0

; Light intensity auto power on / power off feature
; Light feature enabled, 0: disabled, 1: enabled, normal, 2: enabled, reversed
; In normal mode, light value higher than on_threshold will turn on the music
; and light value lower than off_threshold will turn off the music.
; In reversed mode, light value lower than on_threshold will turn on music
; and value higher than off_threshold will turn it off.
; Light sensor range is from 0 to 4095, where 0 is the darkest value and 4095 is the brightest.
; When light feature is disabled, player will only have two modes: forced on and forced off.
light_mode=1
on_threshold=2000
off_threshold=500

; USB port power. 0: port always powered off; 1: port always powered on; 2: port powered on during playback.
usb_mode=2

; Fade in / fade out effect
; When turning music on and off, the player can slowly fade in or fade out music in 8 steps.
; This value specifies how long (in ms) each step should take. Set to 0 to start/stop instantly.
fade_in=50
fade_out=100
; If instant_mode_change is set to 1, fade in / fade out will be skipped when changing mode (left button press).
instant_mode_change=0

; Current state saving (on SD). Requires state.bin file to be present in the root directory.
; Save current directory on directory change. Generate write cycle when changing directory.
save_directory=1
; Save current track. Can wear card a little more. Saving track will enable saving directory as well.
save_track=1
; Save current playback mode (light sensor / forced on / forced off). Generate write cycle when changing mode.
save_mode=1

; Jump to next directory after current one is finished
; 0: loop current directory, 1: jump to next directory
jump_next_dir=1
The current status is saved in the state.bin file. What is saved there can be set in the configuration. More stuff will put more load on the card, but with modern cards with wear leveling it should still be a trace amount of writes.
A state write is always an overwrite of one sector on the card. If the state.bin file is missing, state writing is disabled.
Schematic and PCB:
The schematic diagram and PCB were designed in KiCAD and the PCB was manufactured in a cheap PCB shop. The PCBs are double-sided, any normal PCB manufacturer should seamlessly produce them in the cheapest option.
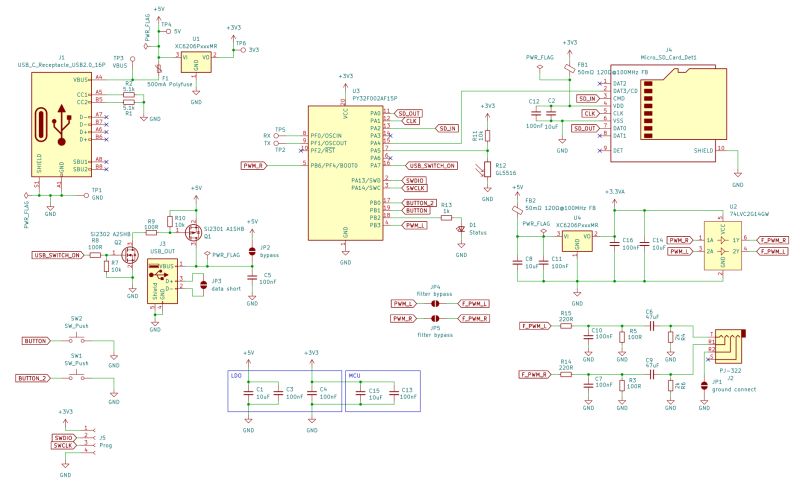
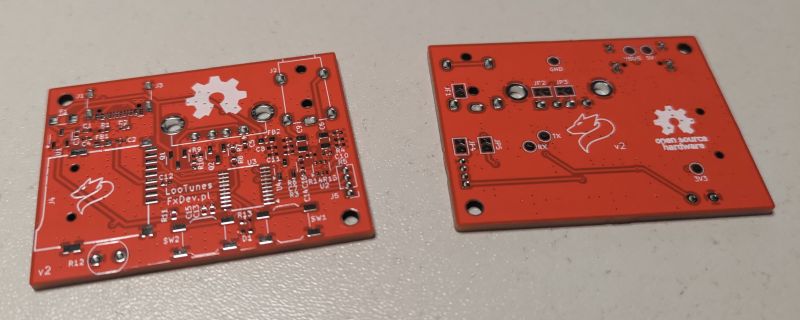
The main microcontroller is Puya PY32F002AF15P6TU, used as PY32F030. All the pieces I checked worked, but the manufacturer does not guarantee the existence of the peripherals I am using.
The whole thing is powered at 3.3V by two "662K" type stabilisers - very cheap and common clones of the XC6206P332MR. The second stabiliser is used to power the buffer to the sound on the 74LVC2G14GW.
Schematic the entire audio output is almost 100% copied from the Raspberry Pi, only there the more expensive NC7WZ16 is used, which can also be inserted here without any modifications. It's just a buffer, so it sounds the same.
In the first version there was no buffer but only a low-pass filter and unfortunately the operation of the memory operation card was very clearly audible. Adding a separate 3.3v stabiliser and buffer has SIGNIFICANTLY improved the sound quality.
I have made jumpers on the PCB that can be soldered to omit the second stabiliser and buffer - it will work, just worse.
There's also a jumper to cut the ground from the mini jack - I wanted to avoid a ground loop when feeding the speakers from the USB A socket of the device, but in practice you're unlikely to hear the difference.
I realise that the low-pass filter used will absolutely not help the PWM carrier: 44100Hz. In the attached samples it is clearly visible, but under normal conditions it is not audible.
As far as I know, it is not possible to construct a simple low-pass filter at 44100Hz that would not massacre the treble.
The USB A socket control is implemented on 2 standard Si2302 and Si2301 mosfets. I wouldn't overload this port, but for USB speakers it's enough.
There is a jumper, which allows you to omit this part of the circuit as well and not fill the transistors - then the port will always be on. You can, of course, leave the port unmanned if you don't need it.
The circuits used are cheap enough that the sockets may turn out to be the most expensive part of the whole.
Programming is done via the SWD socket, and for programming and all development I used probably the cheapest possible programmer: a debugprobe based on the Raspberry Pi Pico. You can buy a clone of the board from the Chinese for as little as a dollar, and the original one is also very cheap.
There is a chance that other programmers like J-Link or maybe even ST-Link will work. I programmed the whole thing with PyOCD, previously aided by my 'dirty' OpenOCD fork with Puy support added.
I thought it would be possible to program the board via a simple USB-TTL adapter, but the RX and TX leads on the pads were connected to pins other than those used by the built-in bootloader....
If anyone gets carried away with recreating the design I would be happy to help with programming.
Housing:
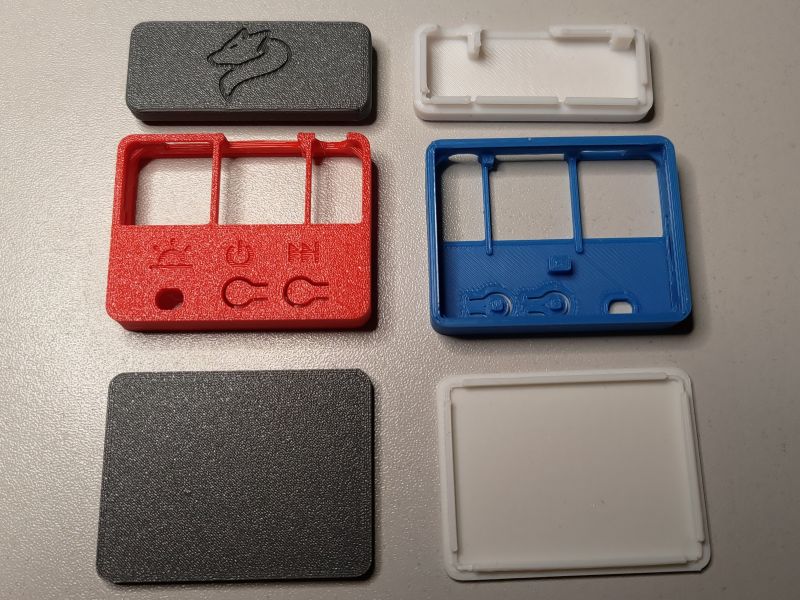
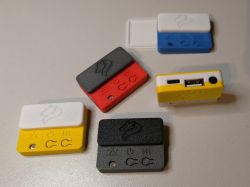
The enclosure was designed in Blender and made by 3D printing. It is divided into three relatively easy to print pieces, which tightly graft together using snaps.
I left 2 mounting holes on the PCB which were ultimately of no use - everything sits stably without screws.
The whole thing is simple to print, only working cooling is required to make a few curves. In addition, the adhesion of the layers must be good enough that the hooks do not break during assembly.
It is possible to print completely without supports, positioning the objects flat so that nothing - apart from the indentations for the ports - hangs in the air. By printing the three elements separately, a variety of colour variations can be achieved without a special printer
The whole thing weighs about 8.5g and prints in less than 30min on a faster printer.
Probably the best effect is when printed on a rough PEI base - this gives a slight texture that hides imperfections in the print.
Assembly:
I soldered the PCB myself, although for a fee you could ask the PCB manufacturer to cast the components.
I started the whole thing by greasing everything with flux and tinning the pads of the smaller components.
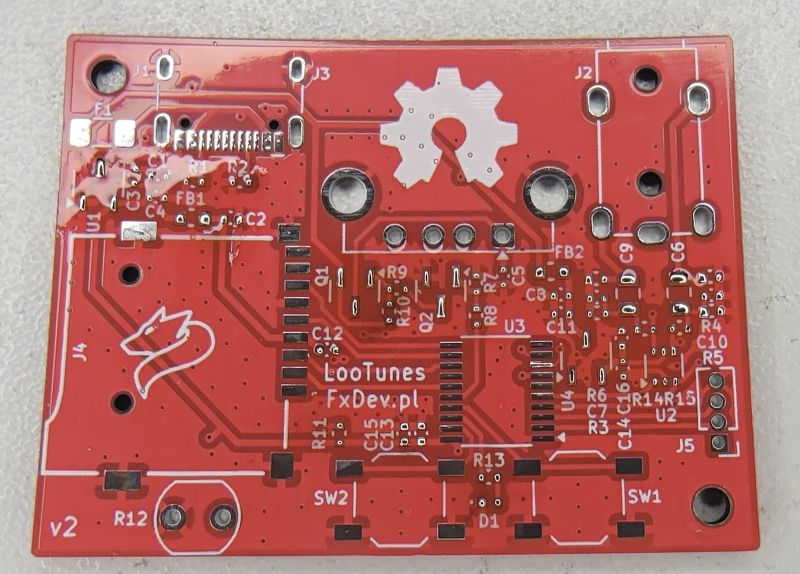
I then soldered the MCU, the positioning was not perfect but I found that I would improve it at the next stage.
I placed the PCB on a small hotplate and turned on the heating. The tin melted and with some adjustments with tweezers, the components settled into place.
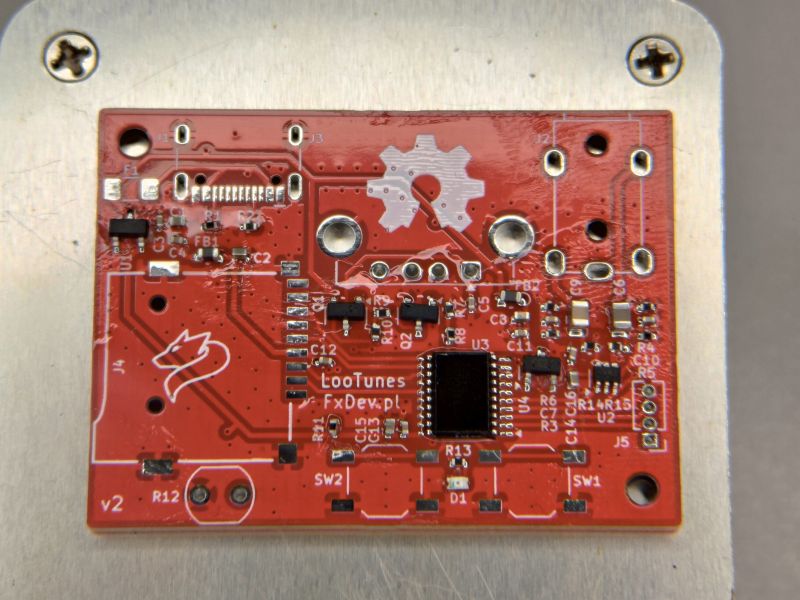
Finally, I soldered the through-hole components, USB port, buttons and memory card slot with a soldering iron.
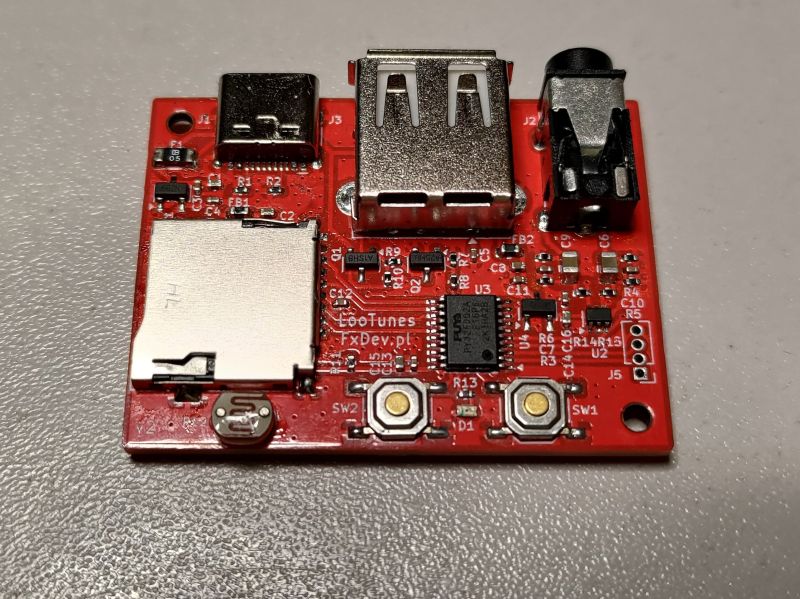
After assembling the components, it is worth checking that 3.3V is being generated correctly. If it is, you can connect a programmer/debugger and upload the software.
After inserting a properly prepared card (and enabling the appropriate mode), the music should start playing.
I start assembling the chassis by inserting the PCB into the centre piece (body). The PCB needs to pop satisfactorily into its slot and the buttons need to start clicking.
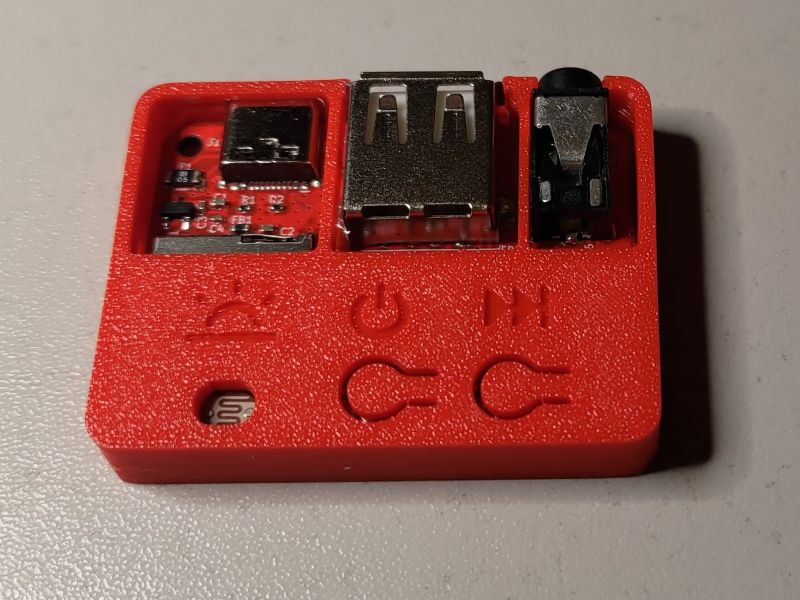
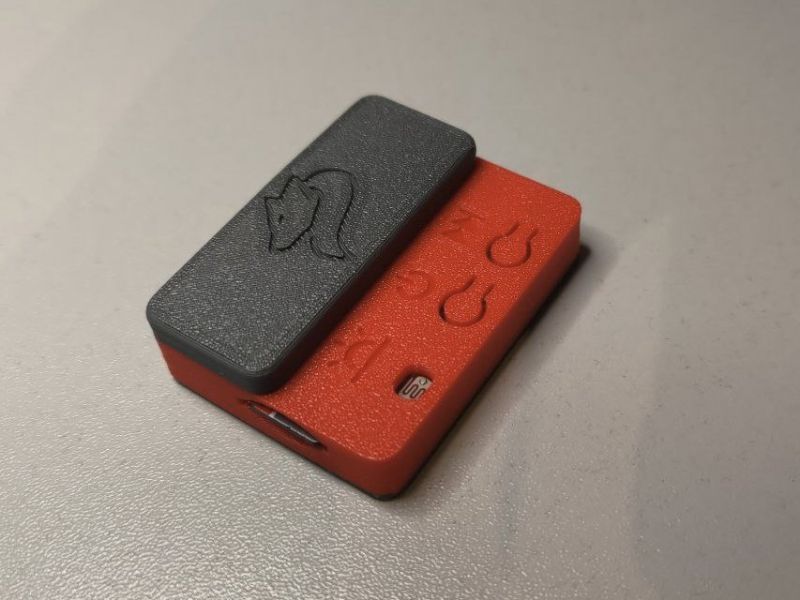
I then push in the 'cap' on top and the base carefully, which completes the assembly of the unit.
Costs:
The costs I incurred were less because I bought parts in larger quantities.
The finer things such as resistors and SMD capacitors I don't write down - it would come out to cents, and I bought them for many different projects.
The same goes for used filament - I already had filament and a kilo spool can be bought for as little as 20zl. The complete housing weighs 8.5g.
Converting, for 5 players:
- PCB $4.17 (JLCPCB: $2 PCB, shipping and taxes: $2.17) = ~£15
- MCU: PY32F002AF15P6TU (LCSC, I bought 300 pieces at one time): $0.08 * 5 = $0.40 = ~$1.46zł
- USB socket A (on aliexpress) $1 for 10 pieces = $0.50 = 1.82zł
- USB C socket (LCSC) $0.06*5 = $0.30 = 1.09 PLN
- Mini-jack socket $0.08*5 = $0.40 = ~$1.46zł
- Buffer 74LVC2G14GW $0.03 * 5 = $0.15 = 0.55 PLN
- Buttons (LCSC) $0.02 pcs *2 *5 = $0.20 = 0.73 PLN
- Time (otherwise I would have played the game anyway) $0 = 0zł
Total: 22.11zł for 5 pcs = 4.43zł for 1 pcs.
Of course, cheap USB-powered speakers for a computer is an additional cost: about 20zl, and an SD card, e.g. 64GB is 8zl.
Everything you need to create and develop the project: schematic, project in KiCAD, enclosure as well as the whole firmware is available on my github:
https://github.com/l0ud/LooTunes
The licence is MIT.
For those who just want to reproduce the project, I invite you to the assets directory, where there is already built FW and Gerbery for PCB production:
https://github.com/l0ud/LooTunes/tree/master/assets
In the attachments I provide the same, files latest at the time of writing the message.
In addition, I am adding 2 audio samples: a new sausage type track, and something with a higher dynamic range where the imperfections of the 10bit audio will be more audible.
I originally recorded them specifically lossless with a higher sampling rate to show the 'carrier' pwm at ~44100Hz. It is clearly visible on the spectrogram:

Unfortunately the forum will not accommodate such large files. So in the end I put the samples in a 44100Hz mp3 to evaluate the audible bandwidth
Files to SBC can be converted using FFmpeg, the command is:
ffmpeg -n -i "plik_wejsciowy.mp3" -ac 2 -c:a sbc -b:a 328k "plik_wyjsciowy.sbc"I have put a bash script on the repository that converts all mp3 and flac files from the "in" directory to the "out" directory:
https://github.com/l0ud/LooTunes/blob/master/assets/convert.sh
The main directory should contain the config.ini file and the state.bin file (if you want to store the current state). The .sbc files must be in the subdirectories. If you don't want to divide the music into folders, you should create at least one folder anyway and put the files there.
A short video demonstrating how it works:
Feel free to comment but don't eat me up as this is my first DIY here
Cool? Ranking DIY


