logo elektroda
logo elektroda
X
logo elektroda

The interior of an old Schneider Electric SR1 A201BD programmable logic controller

p.kaczmarek2 927 8

TL;DR

  • Inside an old Schneider Electric/Telemecanique Zelio Logic SR1 A201BD programmable logic controller, a 24V DC DIN-rail smart relay with 12 inputs and 8 relay outputs.
  • The teardown finds ULN2003A relay drivers, HEF4050BT buffers, TAKAMISAWA JS24M-K relays, and an HD64F3644H H8/300H microcontroller on a separate cross-slot board.
  • The front-panel menu exposes PROGRAM, PARAMET, VISU, and RUN/STOP, plus CLEAR PROG, TRANSFER, and PROG INFO, while deeper editing can be done with free Zelio Soft.
  • Despite scrap damage like cut wire ends, the controller still runs its program, shows messages on the LCD, and appears reusable for practice or education.
Summary generated by AI based on the discussion content.
ADVERTISEMENT
This content has been translated flag-pl » flag-en View the original version here
📢 Listen (AI):
  • The interior of an old Schneider Electric SR1 A201BD programmable logic controller
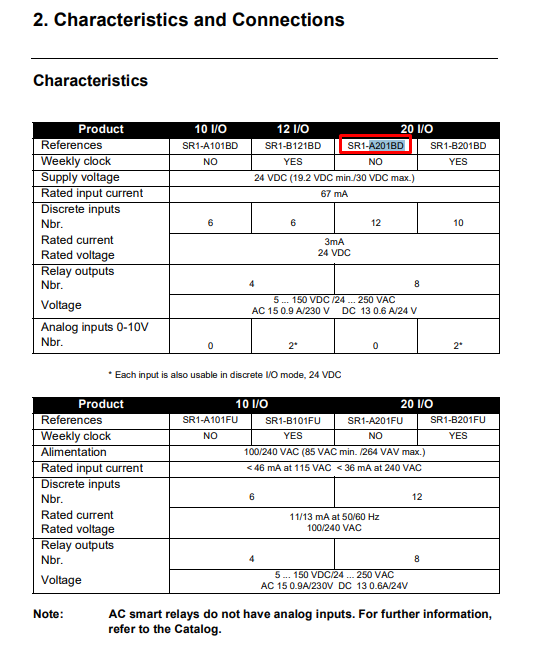
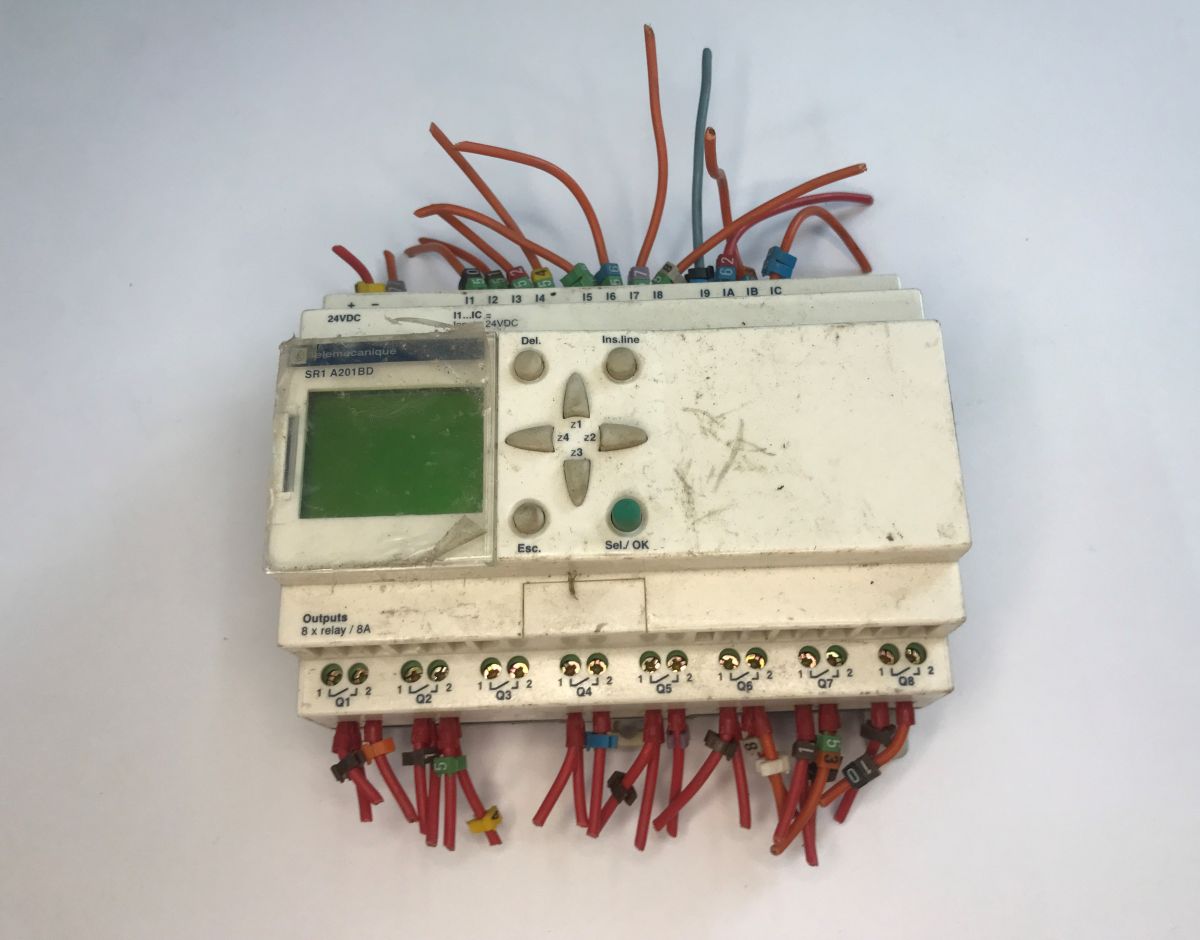
    Today we’re taking a look inside yet another piece of older industrial automation equipment. This time, we’re examining the Zelio Logic SR1 A201BD controller from Telemecanique, which was later acquired by Schneider Electric. It is a classic in the field of automation, powered by 24V DC, offering programmable I/O consisting of 12 inputs and 8 relay outputs. Interestingly, as early as the 2000 catalogue, the device was advertised as a ‘smart relay’, which nowadays might bring to mind the ubiquitous concept of the ‘smart home’.
    The interior of an old Schneider Electric SR1 A201BD programmable logic controller The interior of an old Schneider Electric SR1 A201BD programmable logic controller
    In its day, this device was an excellent alternative to building complex control cabinets using standard relays and timers, offering the ability to programme it easily “on the fly” using the built-in display and keypad.
    The interior of an old Schneider Electric SR1 A201BD programmable logic controller
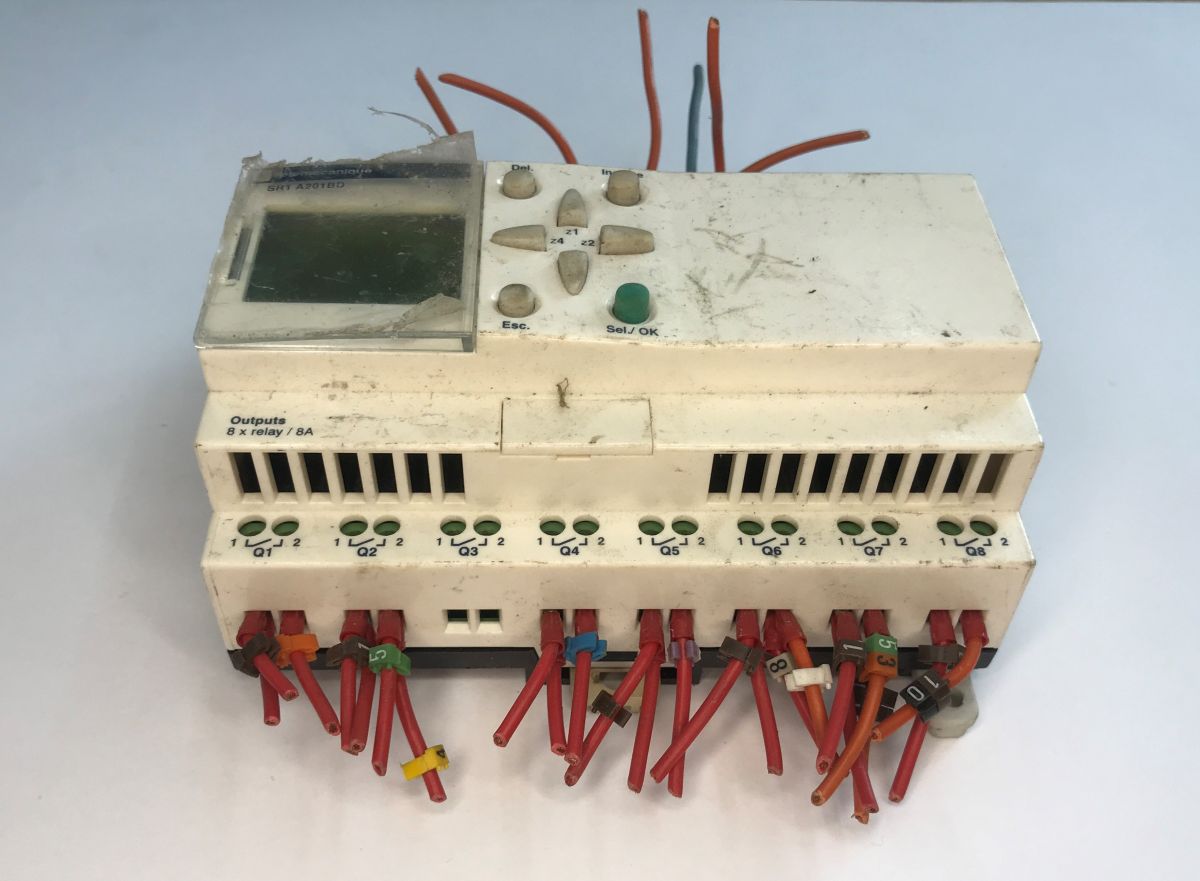
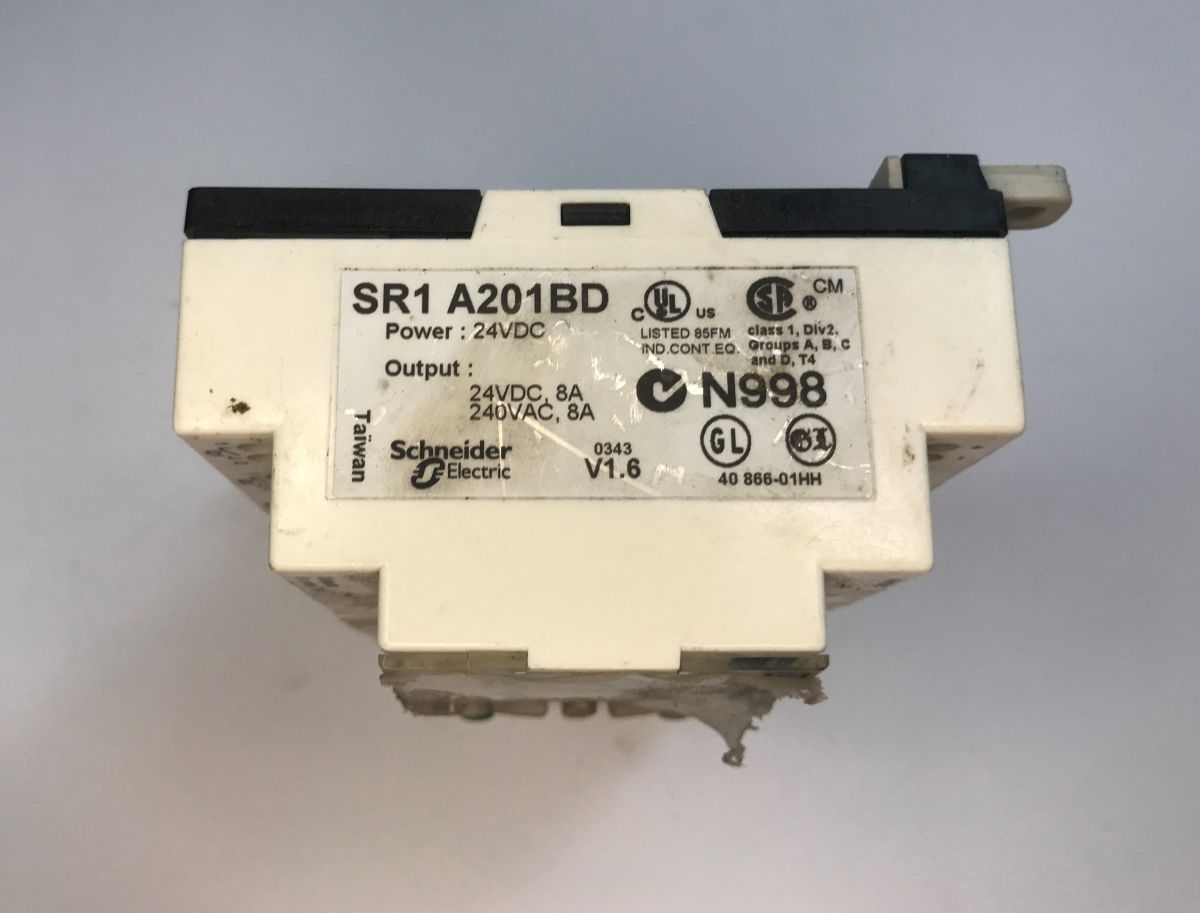
    The unit operates on 24 V DC, a voltage typical for industrial designs, and is mounted on a DIN rail. On the front panel, there is the aforementioned liquid crystal display and the buttons described above.
    The interior of an old Schneider Electric SR1 A201BD programmable logic controller The interior of an old Schneider Electric SR1 A201BD programmable logic controller The interior of an old Schneider Electric SR1 A201BD programmable logic controller
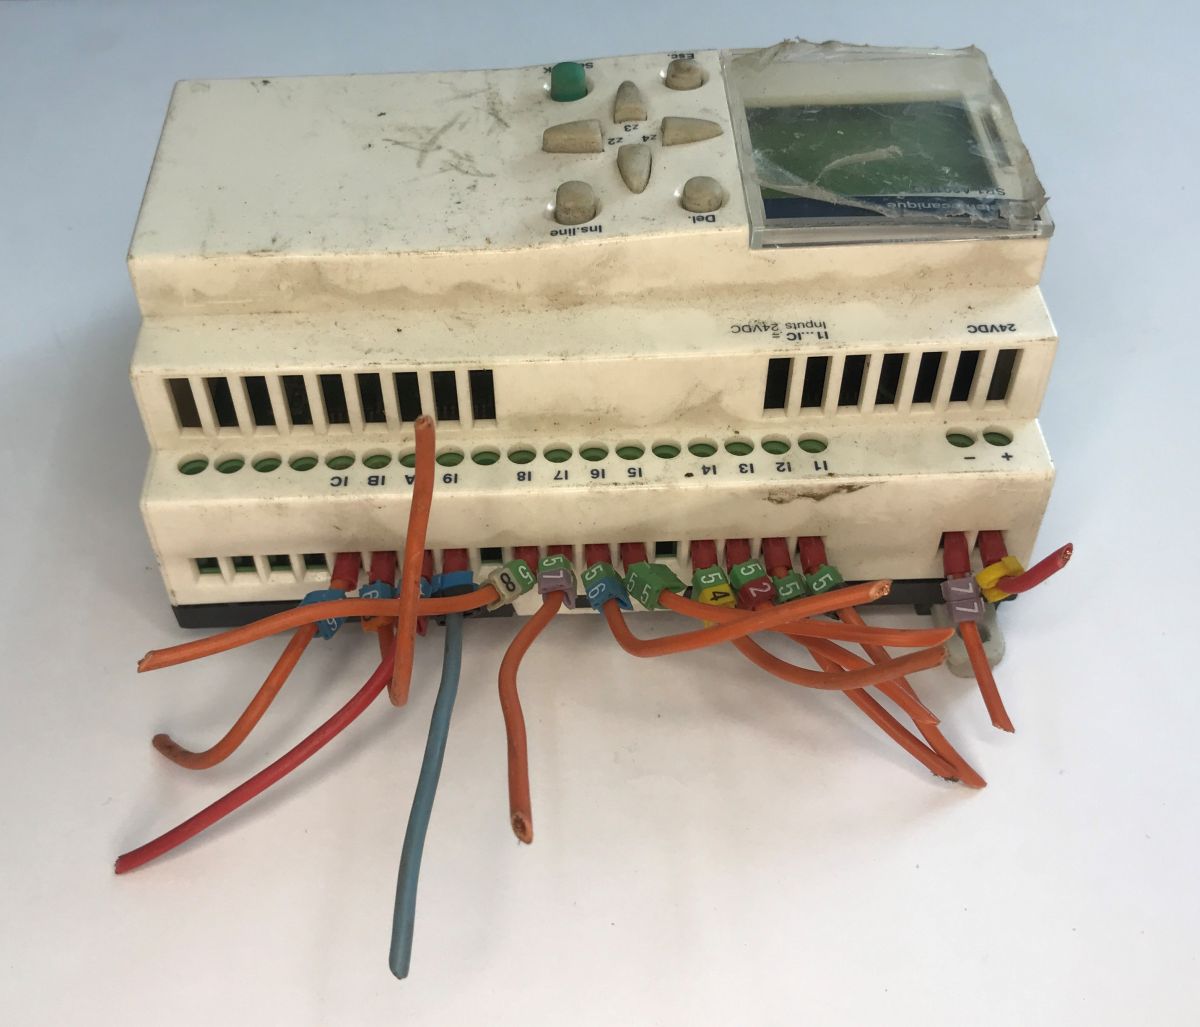
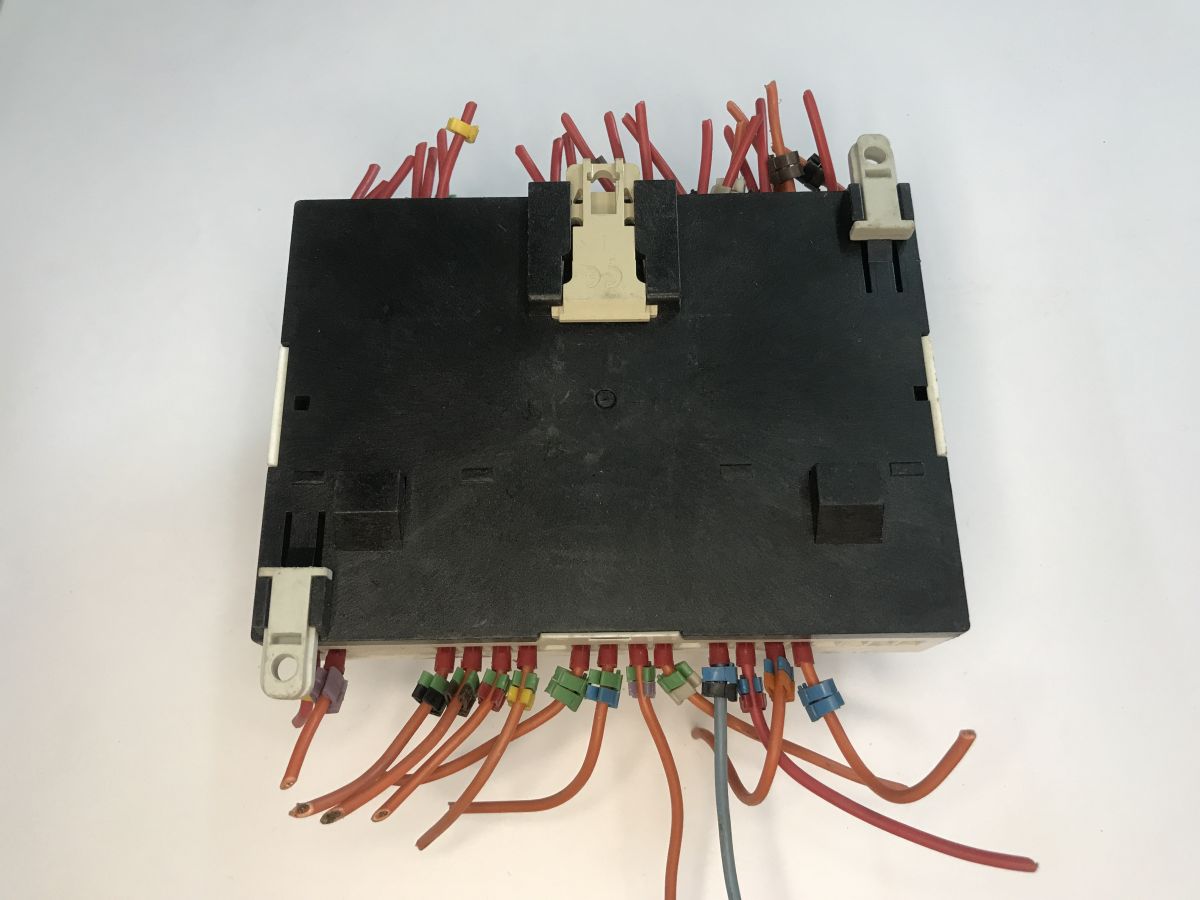
    My unit has a slight quirk: the wire ends have been cut off. I often come across this with devices salvaged from scrap. You might also notice the ‘beads’ with numbers on them, used to label the signals. Very handy and practical.
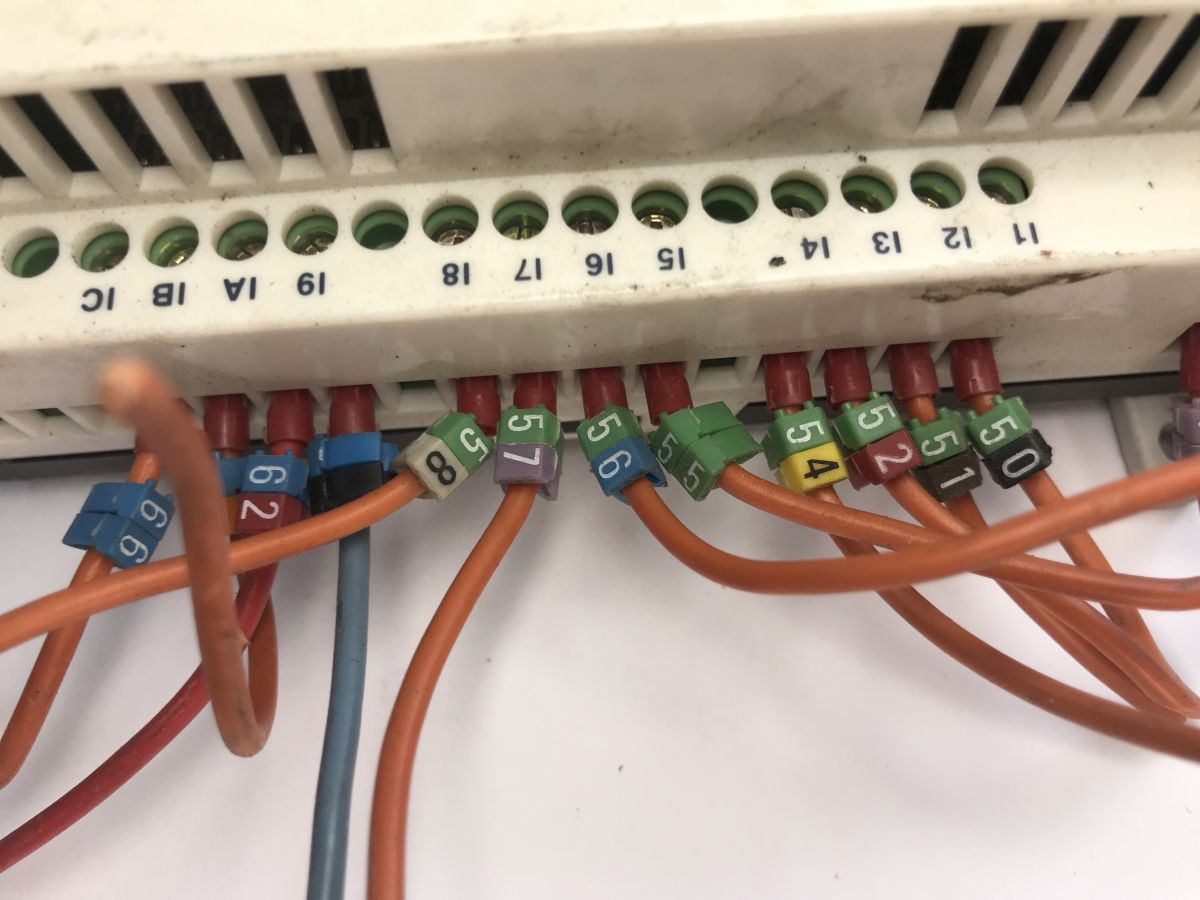
    The interior of an old Schneider Electric SR1 A201BD programmable logic controller
    Now you can take a look inside. Simply pry open the clips – preferably several at once – and gradually separate the casing.
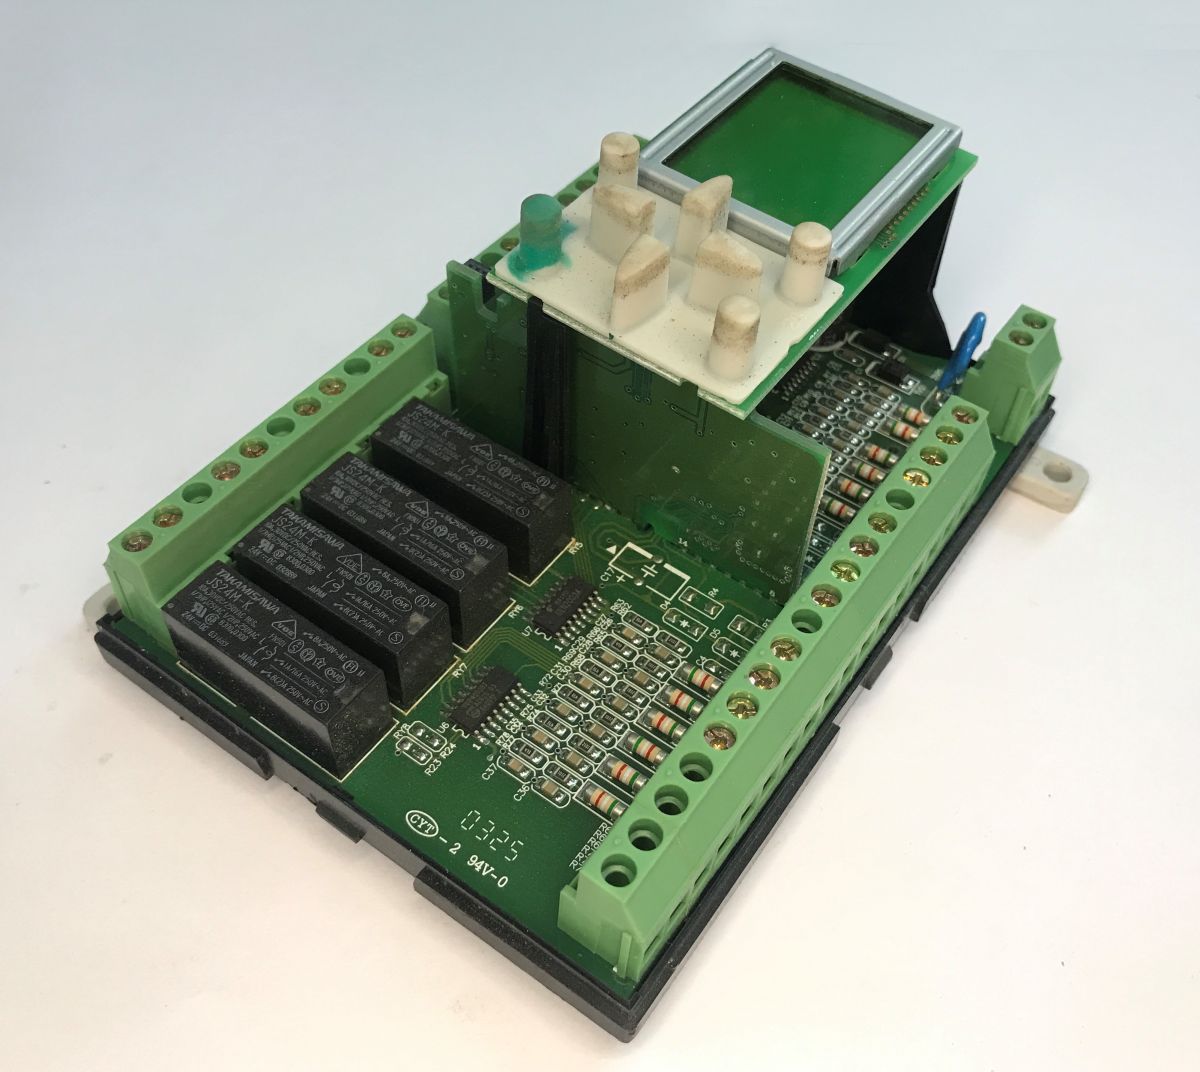
    The interior of an old Schneider Electric SR1 A201BD programmable logic controller The interior of an old Schneider Electric SR1 A201BD programmable logic controller
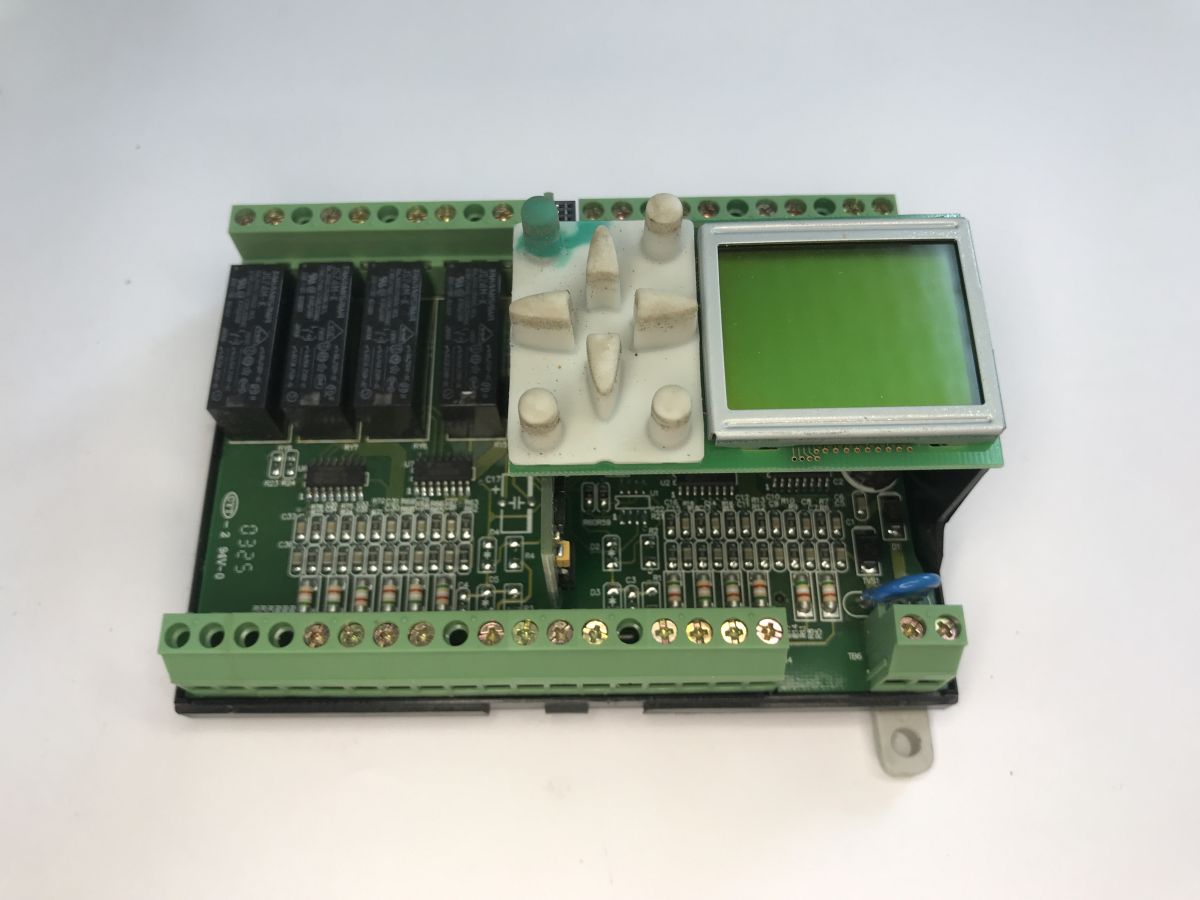
    At first, it looks as though there are two circuit boards inside – the base board and the display board. After a moment, however, we notice that there is also a cross-slot board, and it is on this that the main microcontroller is located, but more on that in a moment. First, the relays.
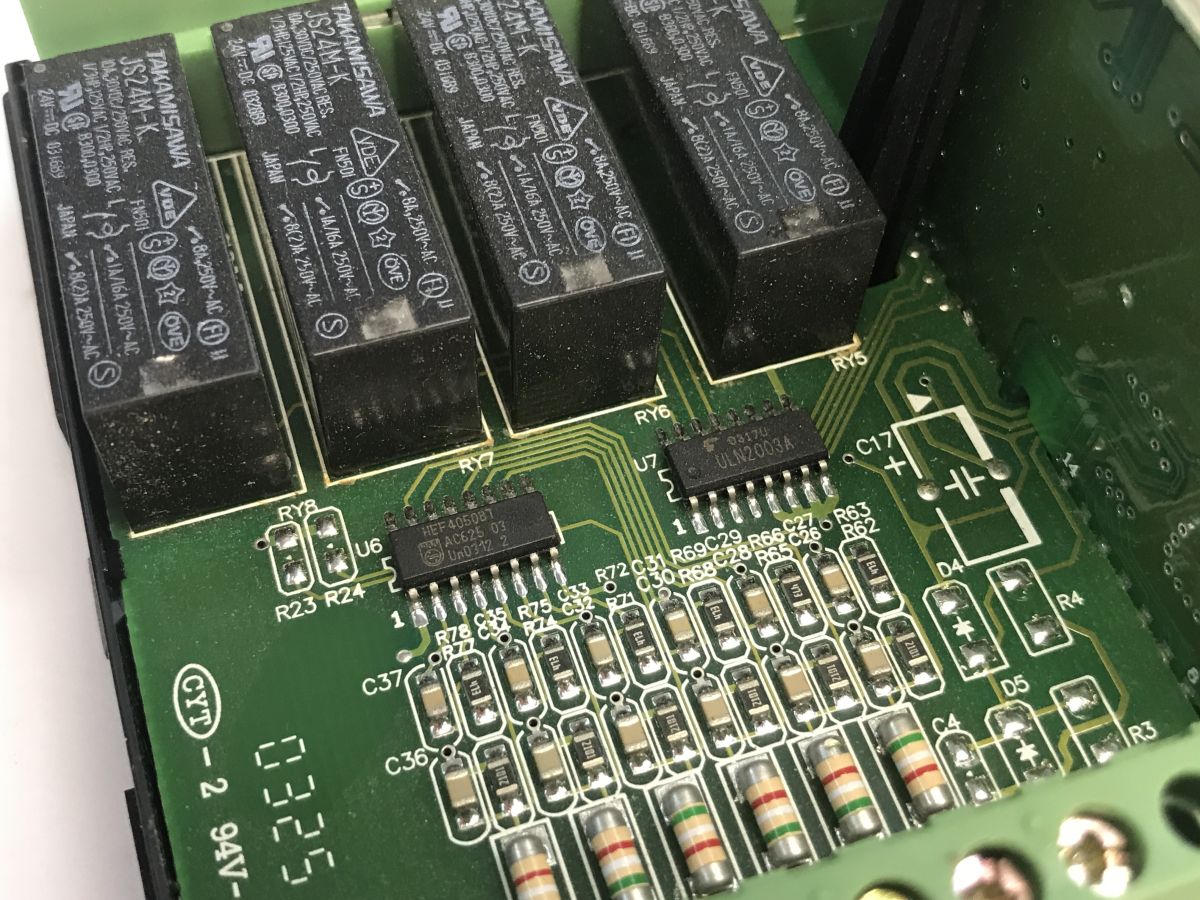
    The interior of an old Schneider Electric SR1 A201BD programmable logic controller
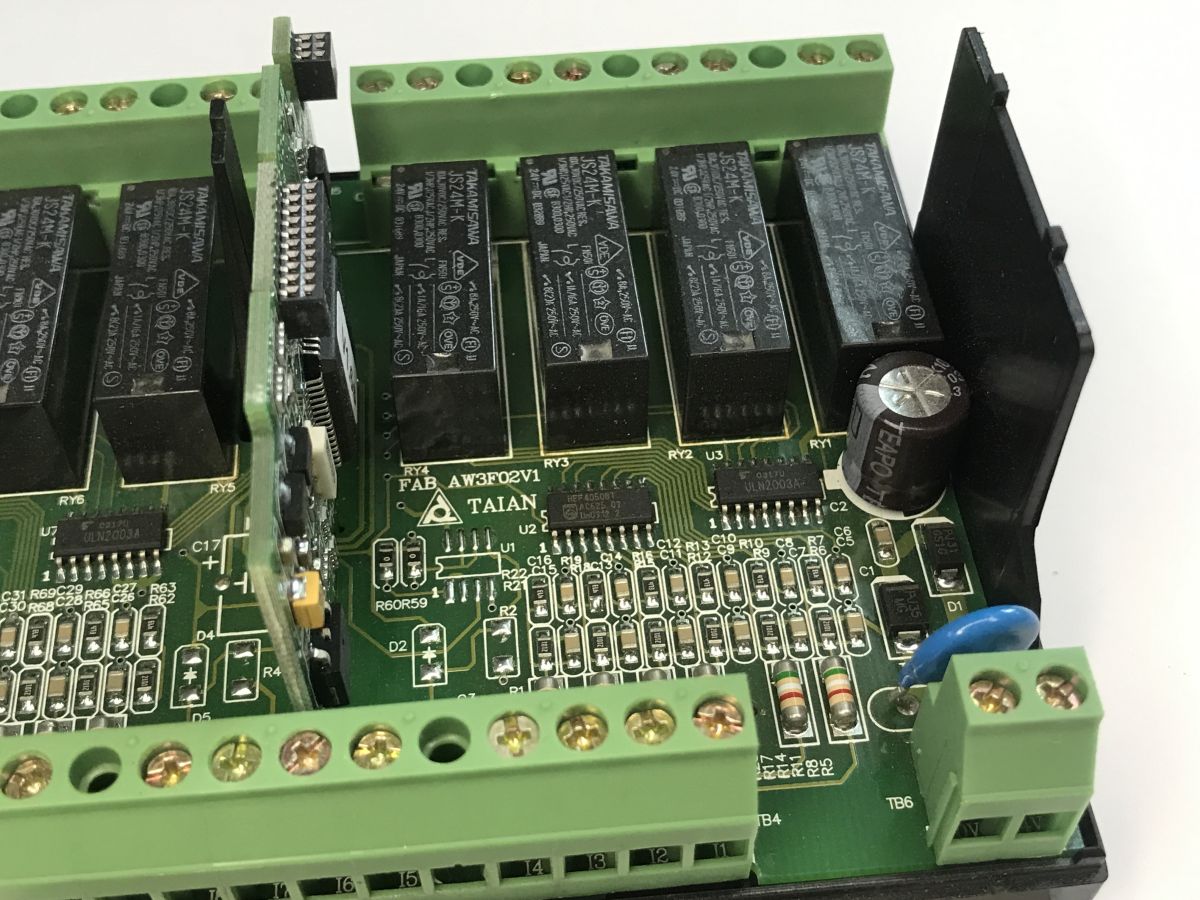
    The relay coils are driven by the ULN2003A, a common Darlington transistor ladder circuit, ideal for switching inductive loads. Next to it is the HEF4050BT chip, which acts as a buffer and logic level converter. The relays themselves are the reliable TAKAMISAWA JS24M-K, rated for 24V DC. Now you can remove the display:
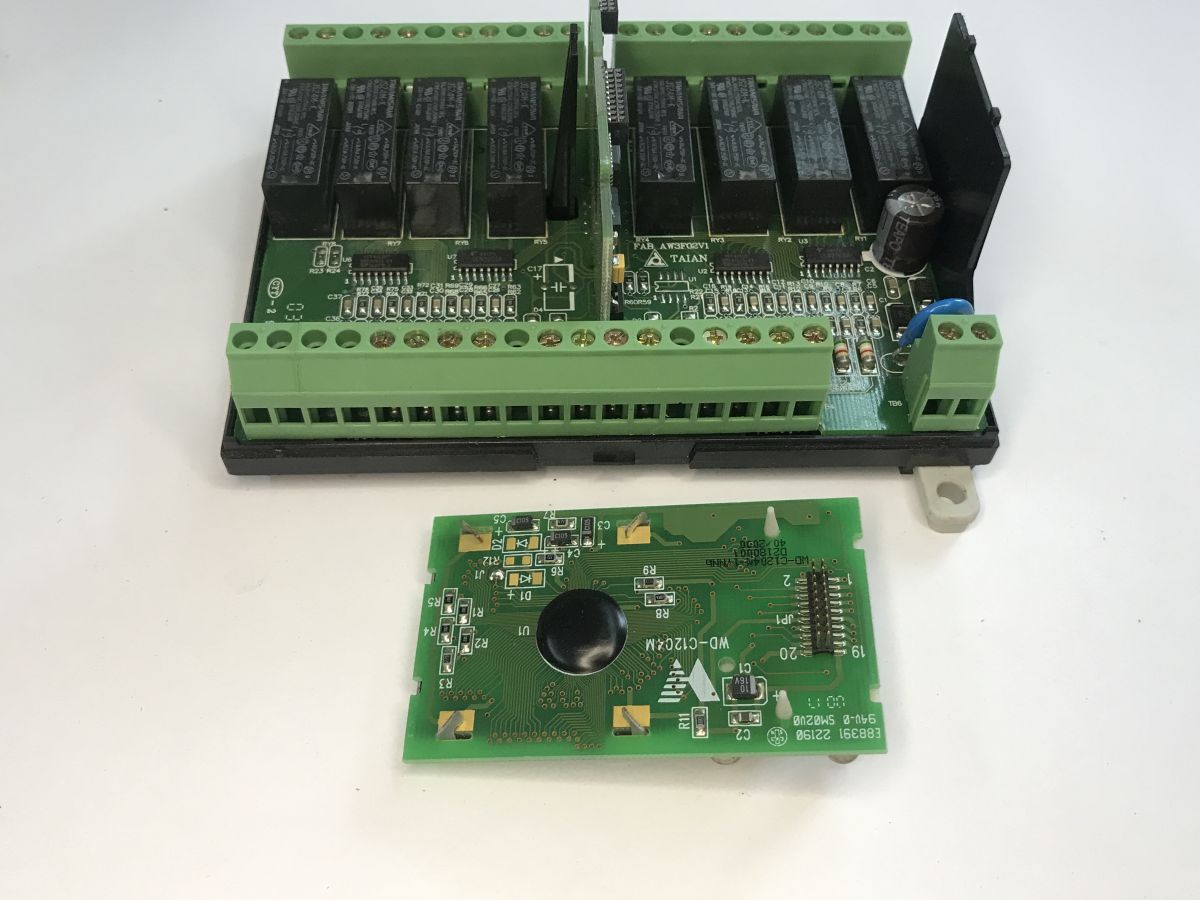
    The interior of an old Schneider Electric SR1 A201BD programmable logic controller
    On the other side, the ULN2003 + HEF4050 pair is repeated.
    The interior of an old Schneider Electric SR1 A201BD programmable logic controller
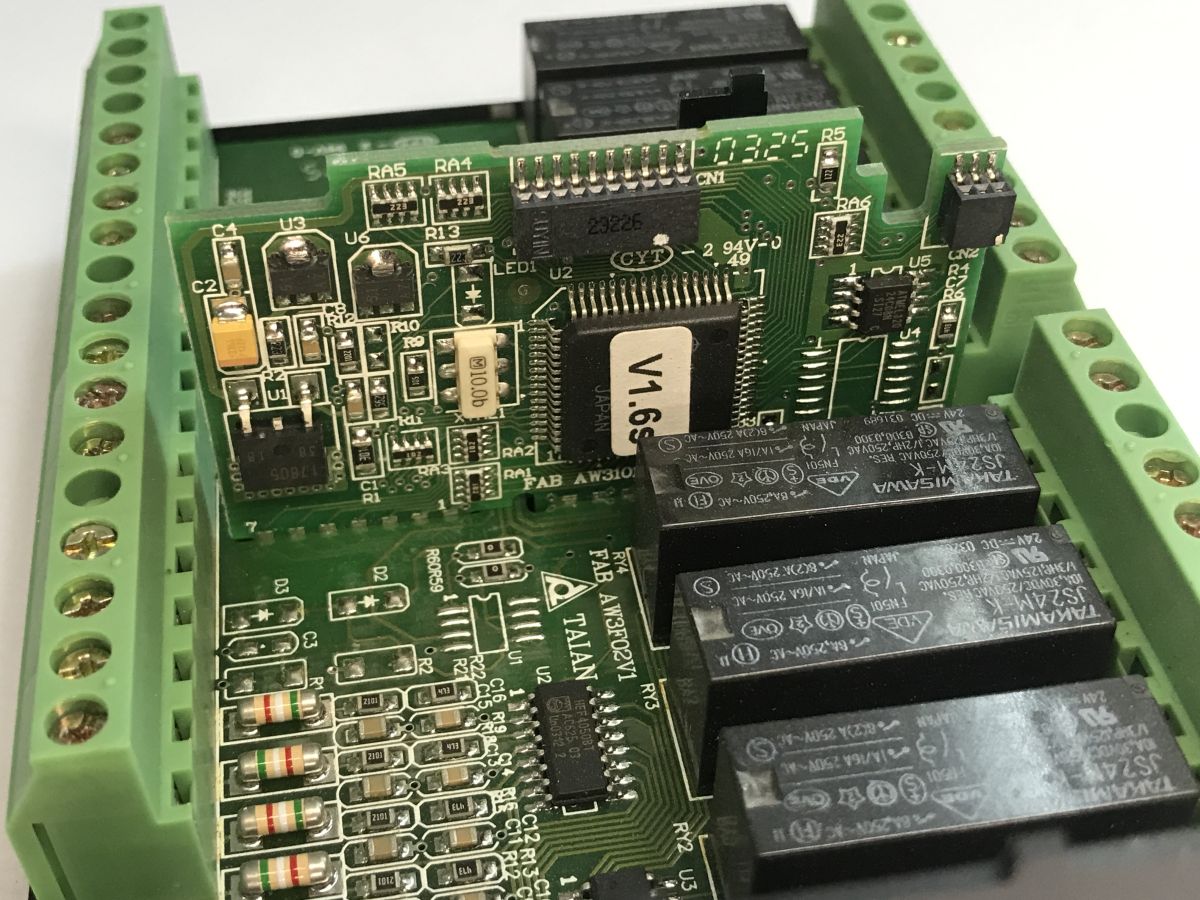
    Now for the most interesting part – the main CPU and the small EEPROM in a SOIC package:
    The interior of an old Schneider Electric SR1 A201BD programmable logic controller
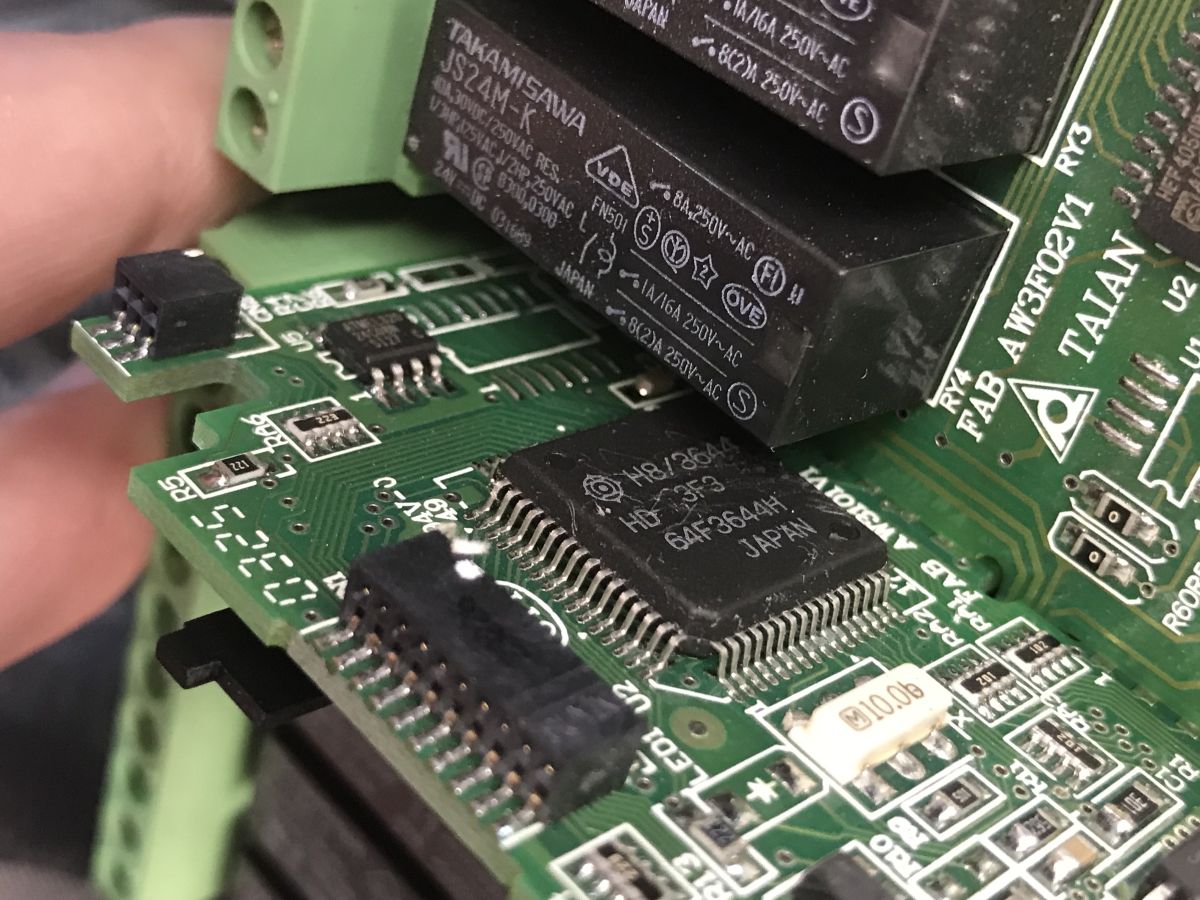
    You can also see a programming connector in the corner. I removed the label from the TQFP chip and identified it as an HD64F3644H microcontroller (part of the H8/300H family from Hitachi, now Renesas). It is a high-performance 16-bit chip that successfully handled the relay logic.
    The interior of an old Schneider Electric SR1 A201BD programmable logic controller

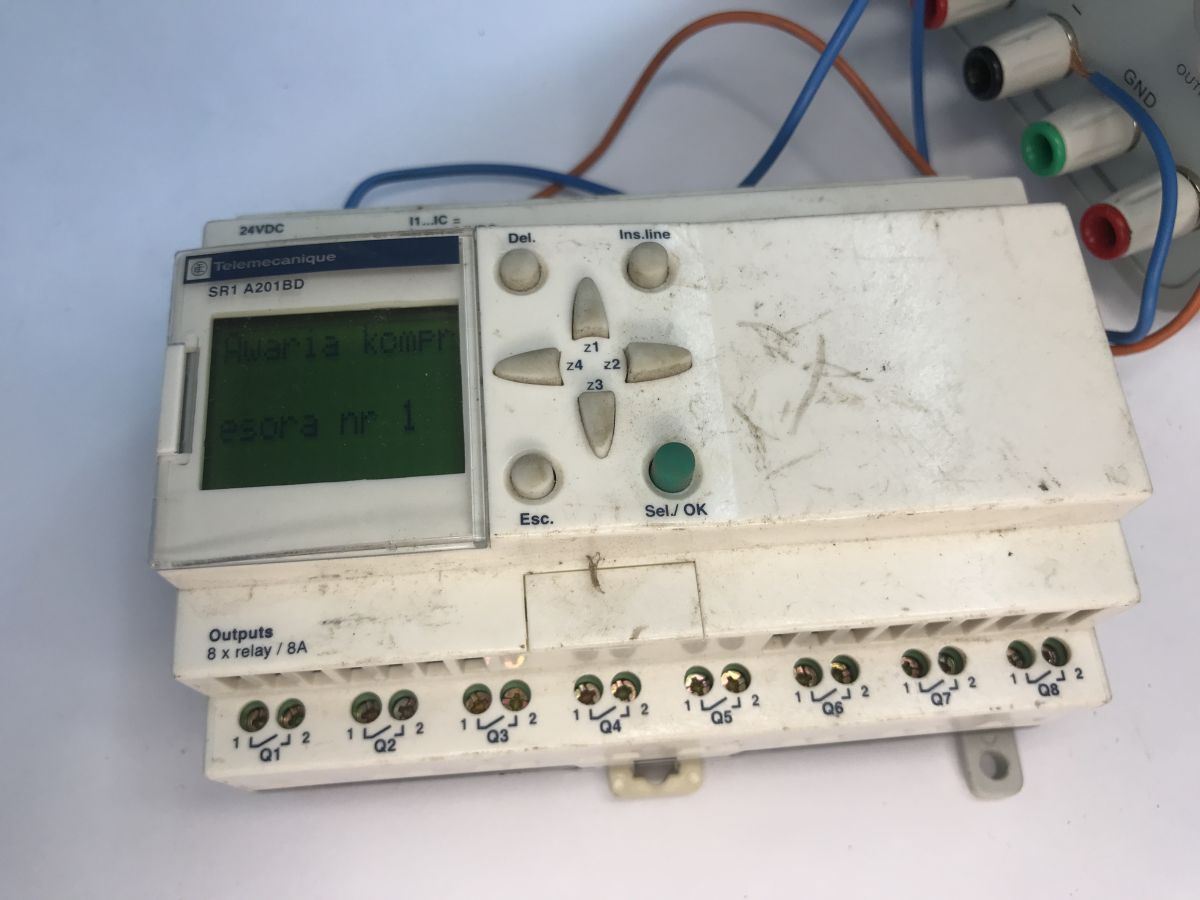
    So much for the construction. Does this scrap device actually work?


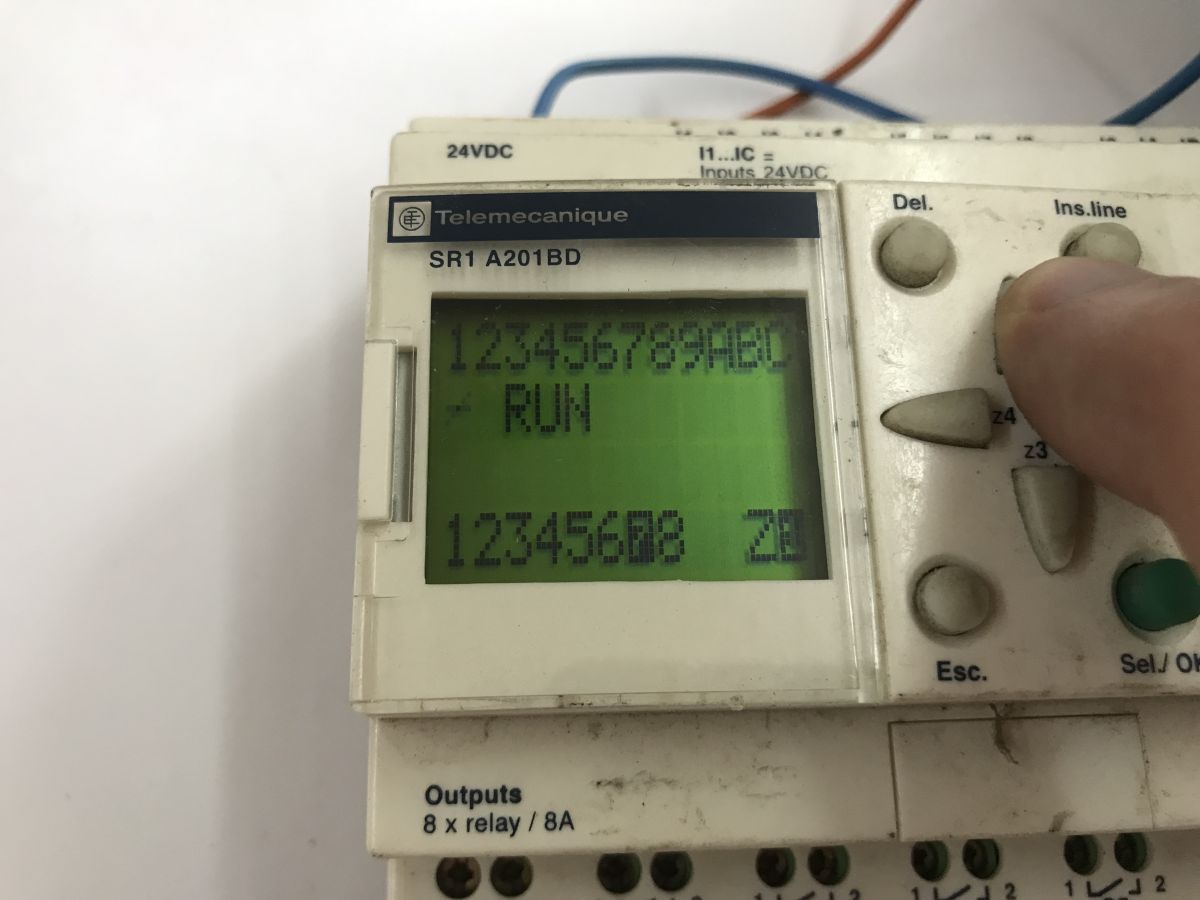
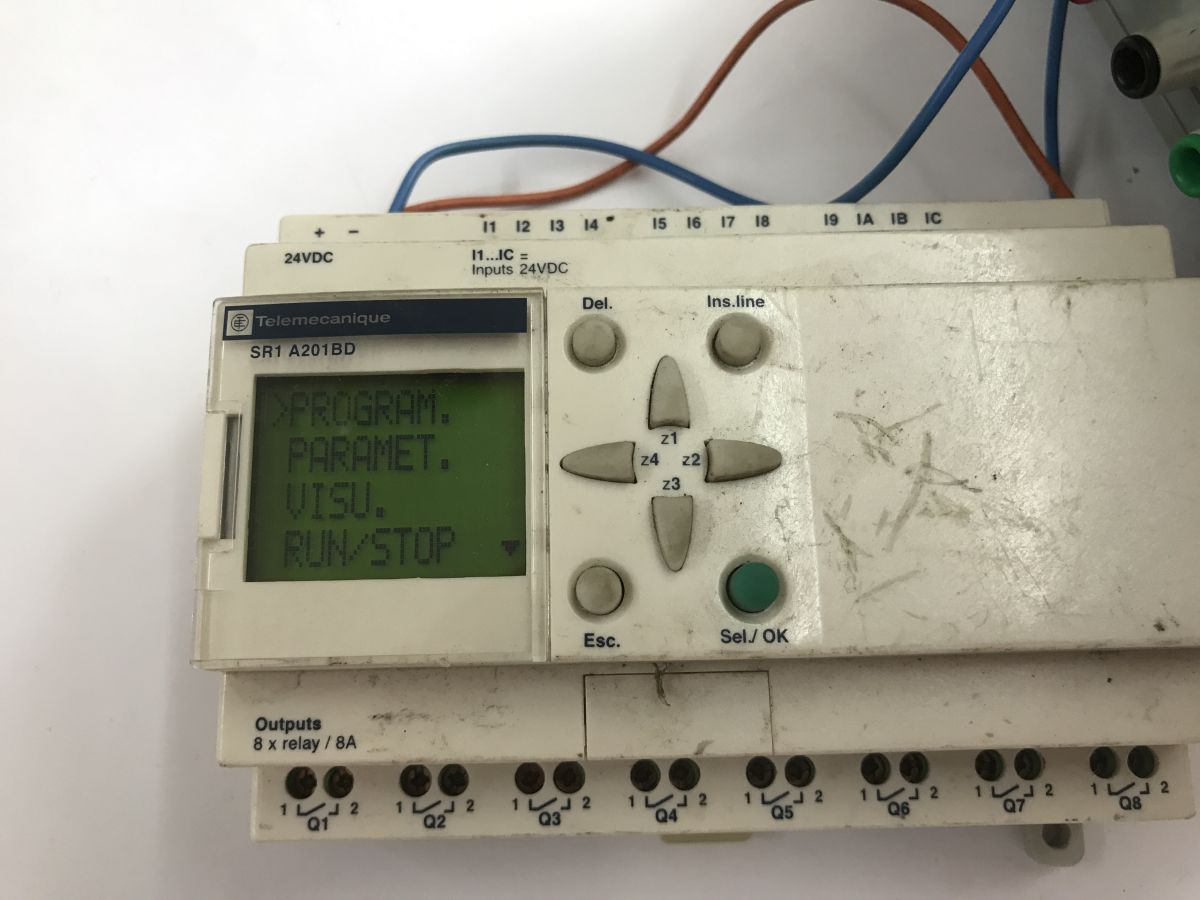
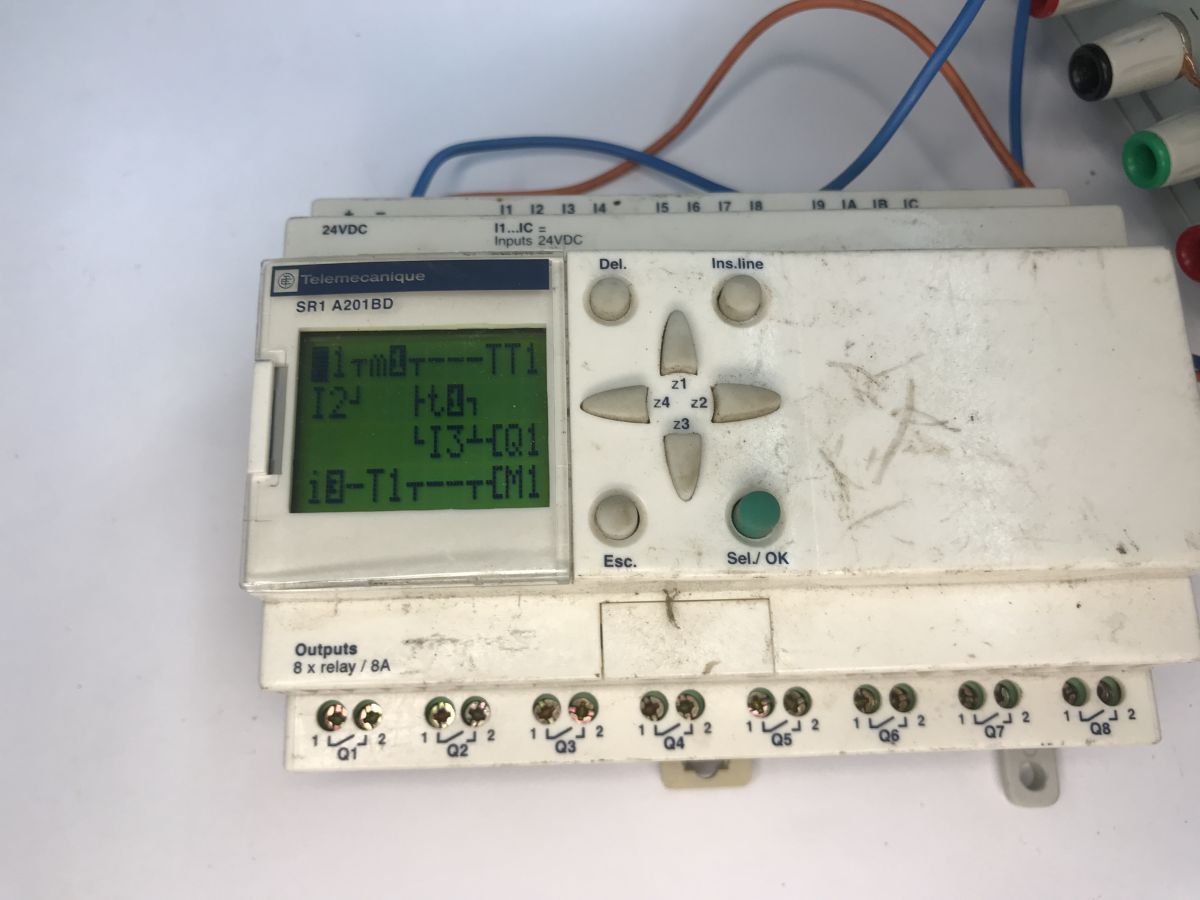
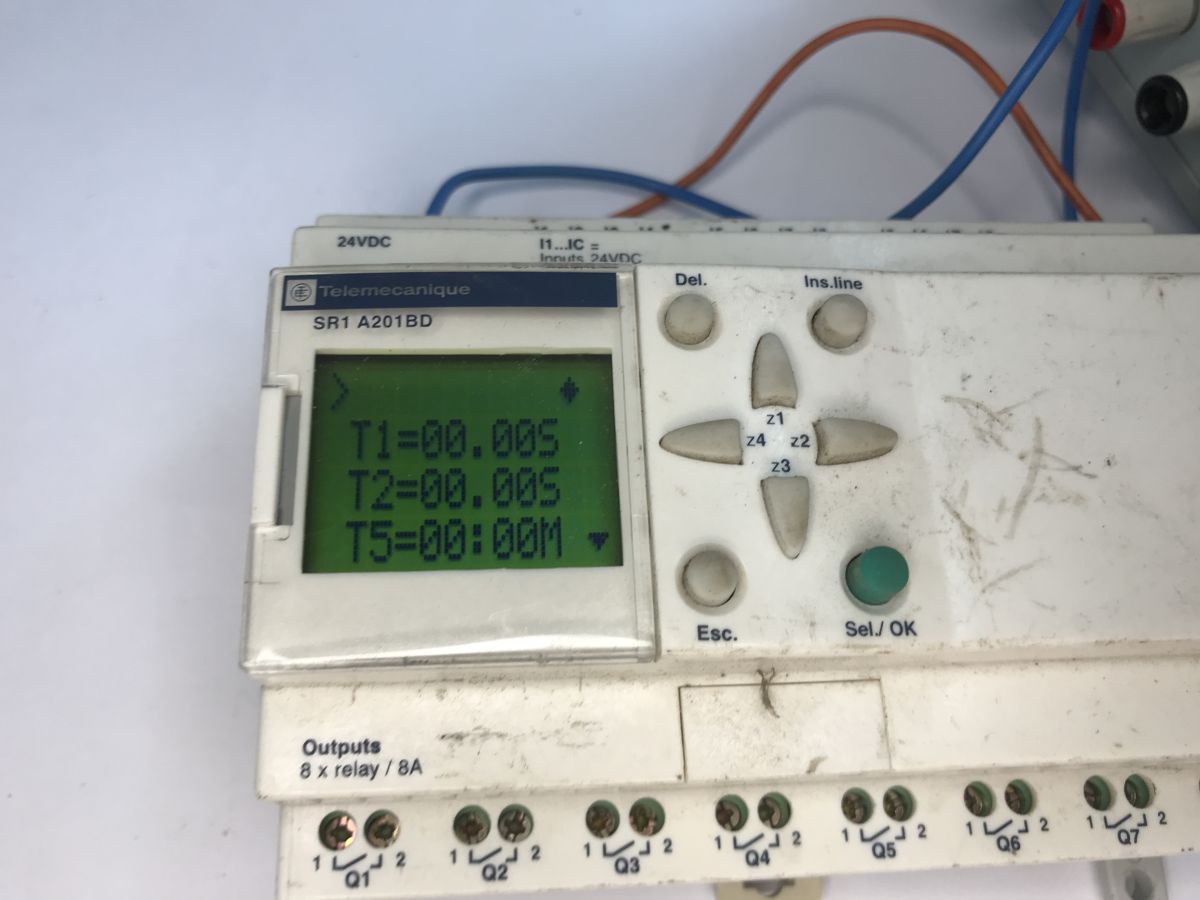
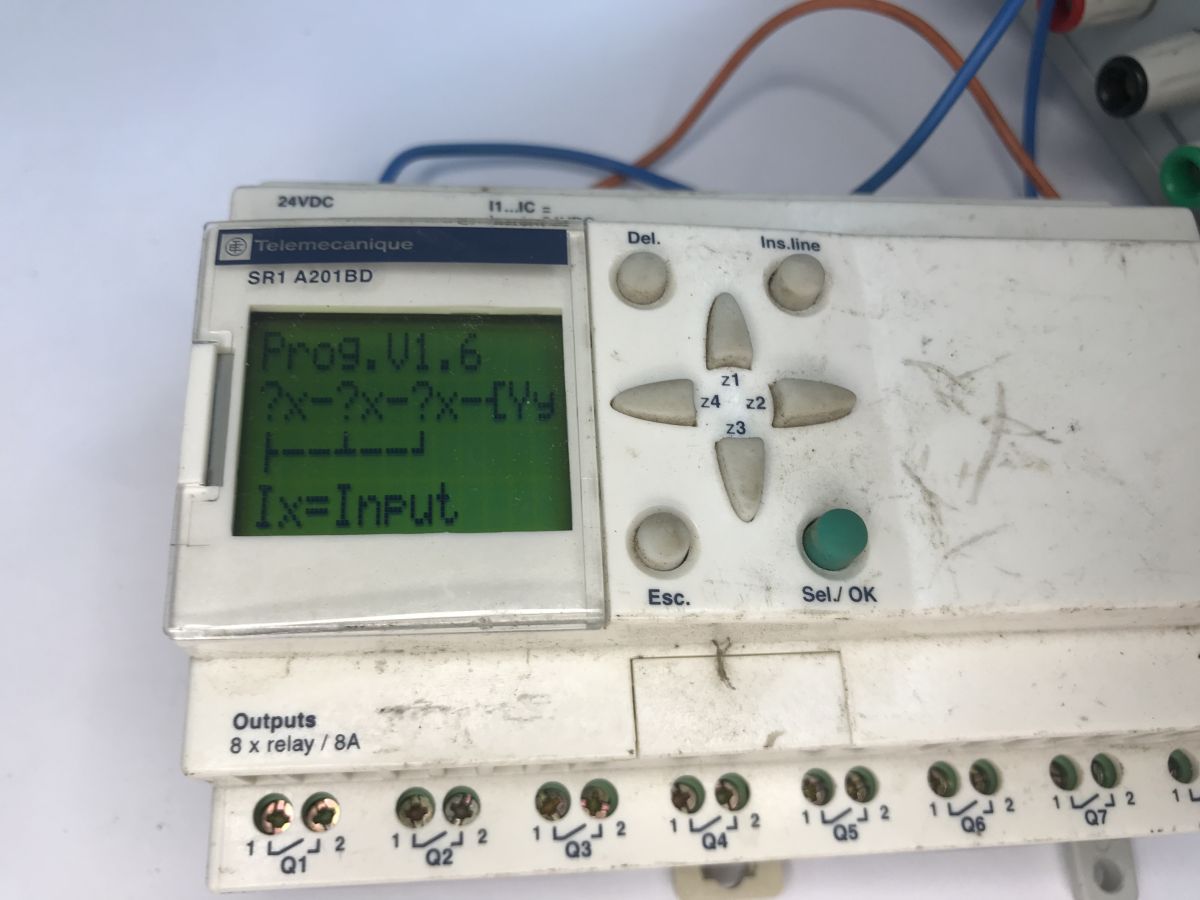
    It seems so – the programme runs and a message from that very programme is displayed. Using the keypad, you can exit the programme and navigate through the menu, which includes options such as PROGRAM, PARAMET, VISU and RUN/STOP
    The interior of an old Schneider Electric SR1 A201BD programmable logic controller The interior of an old Schneider Electric SR1 A201BD programmable logic controller The interior of an old Schneider Electric SR1 A201BD programmable logic controller
    The PROGRAM option provides a preview of the programme in ladder logic:
    Telemecanique Zelio Logic SR1 A201BD controller with LCD screen and keypad, terminal blocks below
    Under PARAMET, there is a list of parameters and their values, which can be changed. I can see times here in seconds and minutes.
    Telemecanique Zelio Logic SR1 A201BD controller with green LCD screen and keypad on the front panel
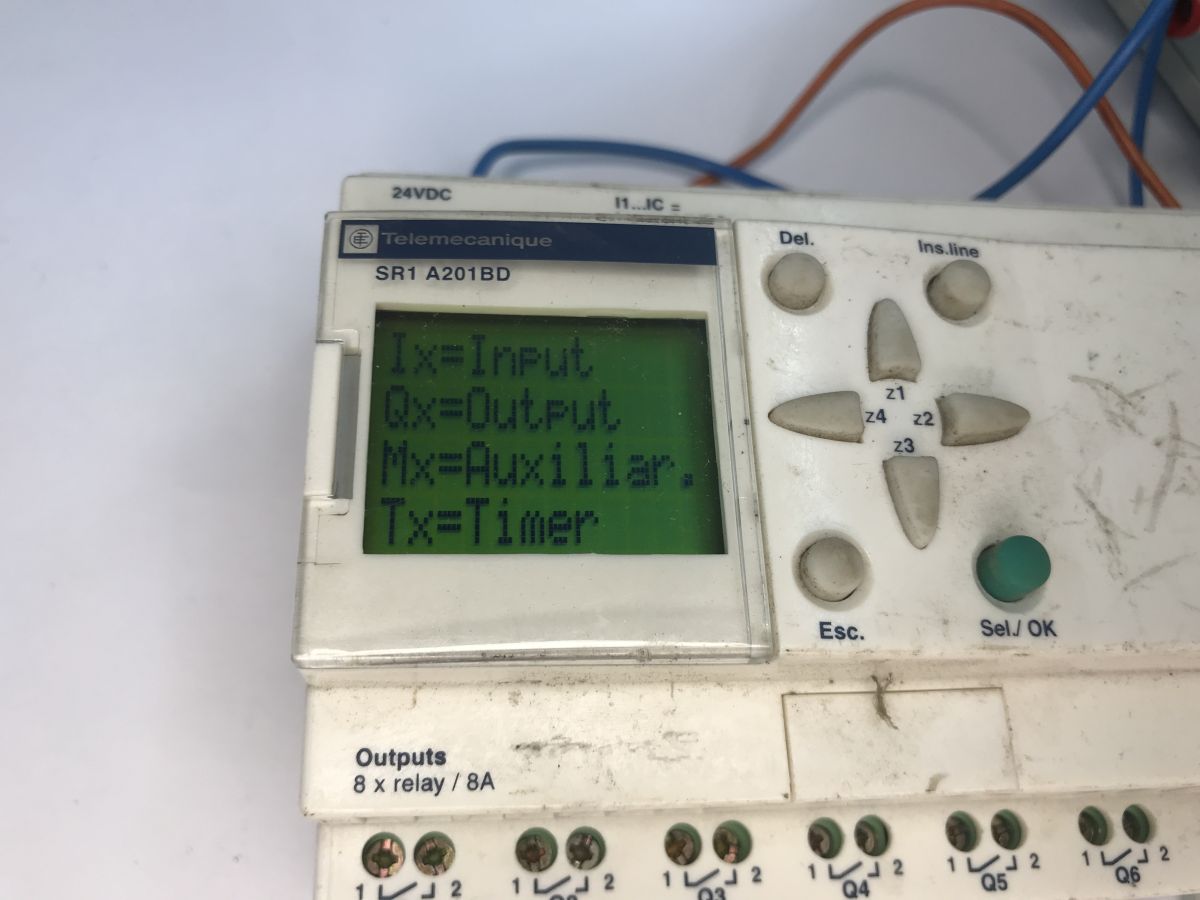
    Further options include CLEAR PROG (programme deletion) and TRANSFER (used to transfer a programme to or from the EEPROM memory module or a PC). There is also PROG INFO, which provides basic statistics on the saved programme and memory usage:
    The interior of an old Schneider Electric SR1 A201BD programmable logic controller The interior of an old Schneider Electric SR1 A201BD programmable logic controller
    That’s essentially all there is to navigating the device’s menu. It’s also worth mentioning that whilst entering ladder logic ‘by hand’ used to be quite impressive, more serious applications can, of course, be created much more conveniently on a PC using the free Zelio Soft software, and then uploaded via a dedicated cable.

    To sum up , this piece of kit has been through a lot, yet it still seems to be in quite good working order. The programme runs and the menu works, although I haven’t tested every input and relay individually. Potentially, the whole thing could be reused, either in practice or for educational purposes.
    Have you come across controllers of this type, and if so, what roles did they fulfil? Please feel free to comment.

    Cool? Ranking DIY
    Helpful post? Buy me a coffee.

    About Author
    p.kaczmarek2
    Moderator Smart Home
    Offline 
    p.kaczmarek2 wrote 14699 posts with rating 12741, helped 656 times. Been with us since 2014 year.
  • ADVERTISEMENT
  • #2 21932829
    krzbor
    Level 29  
    Posts: 1772
    Help: 41
    Rate: 1067
    A surprisingly clean interior. It looks as though the main board contains relays, an amplifier circuit for them, and inputs. Once the processor board has been desoldered, it can be replaced, for example, with something using ESP + Tasmote, giving us a controller to connect to the smart home system.
  • ADVERTISEMENT
  • #3 21932920
    p.kaczmarek2
    Moderator Smart Home
    Posts: 14699
    Help: 656
    Rate: 12741
    The only question is, what sort of LCD is it? You’d need to be able to control it. Perhaps an HD44780?
    Helpful post? Buy me a coffee.
  • Generic WD-C1204M character LCD module identified

    #4 21932940
    krzbor
    Level 29  
    Posts: 1772
    Help: 41
    Rate: 1067
    I sent the photo to Claude. Here is his analysis:

    Analysis of the WD-C1204M board
    This is a very typical LCD character display board (LCM – Liquid Crystal Module), rather than proprietary electronics from an industrial controller manufacturer. Several clues point to this:
    1. The WD-C1204M designation
    The ‘WD-’ prefix in this numbering format (WD-Cxxxx) is a typical naming convention used by the Taiwanese LCM manufacturer Wintek Corporation (and numerous companies cloning this catalogue, mainly Chinese ones). Similar designations include WD-C1602 (16x2 characters), WD-C2401 (24x1), and WD-C1204 (most likely 12 characters x 4 lines). This is not the PLC/HMI controller manufacturer’s internal code – it is the catalogue/order number for the LCD module.
    2. Controller on board (COB)
    The black ‘drop’ (chip-on-board) in the centre is the resin-encapsulated IC that controls the display – in modules of this class, it is almost always a chip compatible with the HD44780 (or its equivalent, e.g. ST7066, KS0066, etc.) – the most widespread standard for controlling character LCDs worldwide since the 1980s.
    3. JP1 connector (20-pin)
    Standard parallel interface (VSS, VDD, VO, RS, R/W, E, DB0–DB7, LED backlight +/–) – the same communication mechanism as in thousands of other LCD modules available on the market.
    4. Circuit layout
    Components R1–R12, C1–C5, D1, D2 are typical peripheral electronics: an LED backlight driver/current limiter, filter capacitors, and possibly a simple voltage converter for the backlight – a standard set of components, not something unique to this particular industrial controller.
    5. Compliance markings
    “E88391” and “94V-0” are standard UL markings and the flammability class of the PCB laminate – nothing specific to the industrial sector.
    Conclusion
    This is a generic, off-the-shelf LCD module, not a solution designed from scratch by the controller manufacturer. The manufacturer of the industrial device simply purchased a ready-made display module (from Wintek or one of its licensees/clones) and connected it to its motherboard via the JP1 connector.
    One caveat: the suffix ‘WD’ (as opposed to, for example, the ‘WM’ series) in Wintek’s catalogues is sometimes used for modules made to customer specification (non-standard character format, backlight colour, operating temperature range) – so it may not be easy to buy that exact catalogue number ‘off the shelf’. However, this does not alter the fact that, electrically and in terms of software, it is a standard HD44780-compatible display.
  • Suggesting a logic analyzer to identify LCD pinout

    #5 21932998
    p.kaczmarek2
    Moderator Smart Home
    Posts: 14699
    Help: 656
    Rate: 12741
    On the one hand, it’s a potentially useful analysis, although in practice the question is to what extent this information is accurate, and… essentially, it didn’t tell me anything new. I’m familiar with the HD44780 even without AI; it’s been run more than once, but it would be useful to at least know the pin assignments. Unless, of course, the pin order is the usual one. Ground and power can be detected. The rest is a bit trickier. Perhaps I could connect the Salae analyser:
    Salae 24MHz logic analyser for 40 zł – analysis of an unknown LED display protocol
    How many does it have… 8 channels – it’s not too bad, because as far as I remember, not all 8 data lines are used in these LCDs. So you could have a bit of a play around, but it’s not exactly a quick fix either. It would be easier if they’d labelled those pins.
    Helpful post? Buy me a coffee.
  • ADVERTISEMENT
  • Suggesting a standard 20-pin LCD module pinout

    #6 21933034
    krzbor
    Level 29  
    Posts: 1772
    Help: 41
    Rate: 1067
    I pressed Claude a bit further and he gave me this reply:

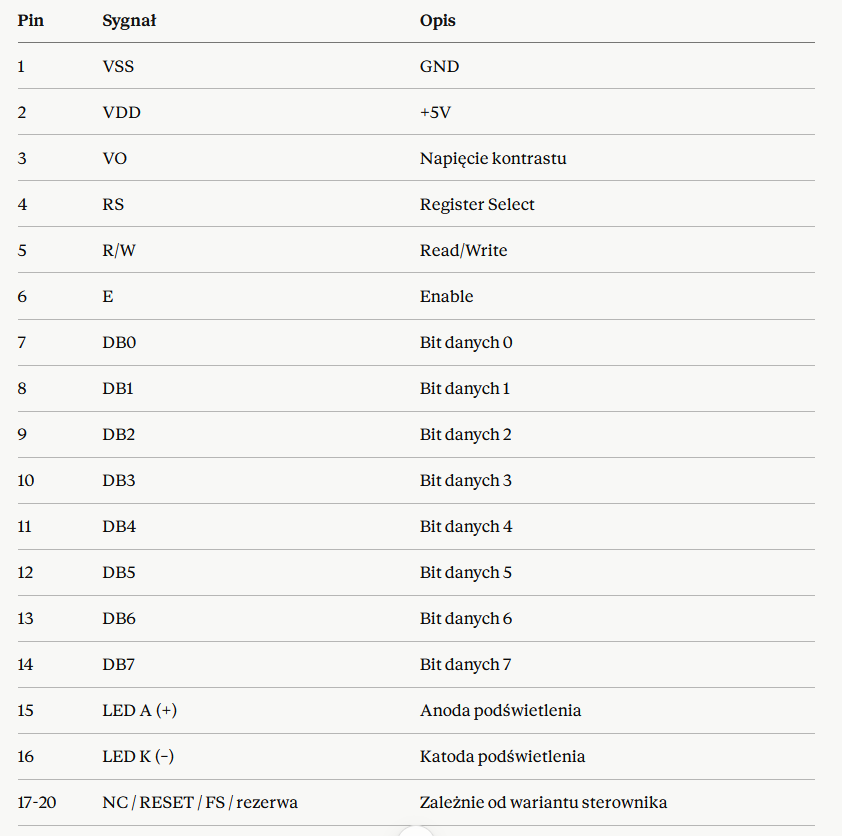
    I can give you the pinout, which is the most common industry standard for this type of 20-pin LCD character module (the HD44780/HD66717 family extended to 20 pins) – but this is an industry standard, not verified by measurement on your specific board:
    Screenshot of a pinout table for a 20‑pin LCD module, listing pin, signal, and Polish descriptions.
    It can’t do any harm to check.
  • #7 21933134
    lok56
    Level 13  
    Posts: 129
    Help: 2
    Rate: 33
    Contrary to appearances, this is a robust programmable relay. It can be used – though not as a donor; quite the opposite, in fact – by taking a few components and making a programming cable. The software is free and you can carry out a dozen or so projects; it would be a shame to strip it down for parts, as reusing them would be more difficult than making the programming cable.
  • ADVERTISEMENT
  • #8 21933399
    DJ MHz
    Level 26  
    Posts: 1160
    Help: 37
    Rate: 249
    Some good bits of kit for controlling garden irrigation ;) .

    Such devices are still in use in transformer stations within mine galleries. For example, they prevent the station from being switched on after the circuit breaker has tripped several times due to a residual current protection fault. Once the programme has been stopped and restarted, the lock is released.
  • Siemens Logo units as versatile low-cost controllers

    #9 21935886
    kotbury
    Gantry automation specialist
    Posts: 9565
    Help: 2096
    Rate: 3619
    These kinds of gadgets aren’t just for watering – I use old Siemens Logo series units for all sorts of purposes. For example, I’ve used them to control traffic at roadworks, in a few ‘smart’ boiler rooms, and even in one gate control unit.
    The Logo Soft Comfort programme has a handy FBD diagram option (as I’m not a fan of LAD ladder diagrams).
    And you can pick up older controllers on OLX for 80 zł.
    And where F&F relays aren’t an option and you don’t fancy building and programming microcontrollers (or putting together an Arduino with a thousand shields) – it’s just the ticket.
    However, as the previous speaker mentioned – you’ll need a cable, but the good old MAX232 is still cheap.
📢 Listen (AI):
ADVERTISEMENT