logo elektroda
logo elektroda
X
logo elektroda

Simple Python application for Fluke meters remote access via RS232 [early prototype]

p.kaczmarek2  0 1128 Cool? (+8)
📢 Listen (AI):

TL;DR

  • A Python app provides remote access to Fluke meters over RS232 using the CPL protocol, with basic communication and data retrieval for scopemeters.
  • It supports COM port and baud-rate selection, Live QM polling, screenshot grabbing, and waveform capture in separate tabs.
  • Testing focused mostly on Fluke 199C and Fluke 97, and the screenshot transfer at 19200bps takes about 15 seconds.
  • QW waveform queries work only on the 199C, exports are currently raw binary only, and not all CPL commands are implemented.
Generated by the language model.

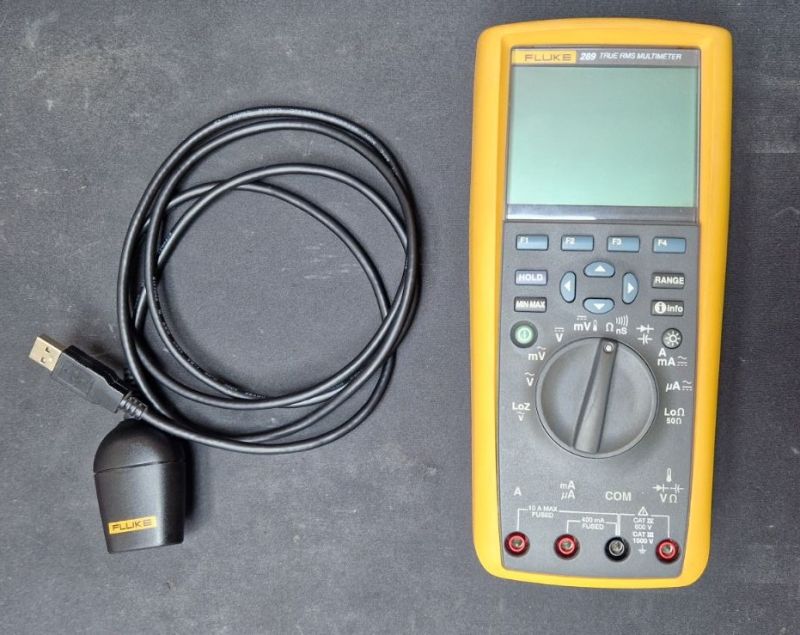
I’d like to share an early prototype of a Python app designed for remote access to Fluke meters using RS232. At the moment, it supports basic communication and data retrieval. It's using CPL protocol over RS232 connection to send commands and receive information from scopemeter. So far, it was tested mostly on Fluke 199C.

The app itself is written in Python with the help of AI by @DeDaMrAz, soon will be published on GitHub. Full script is in the topic attachment.
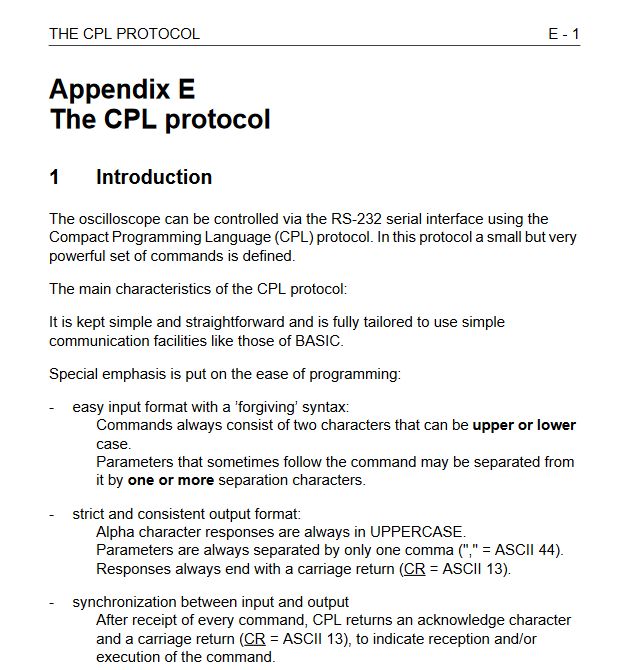
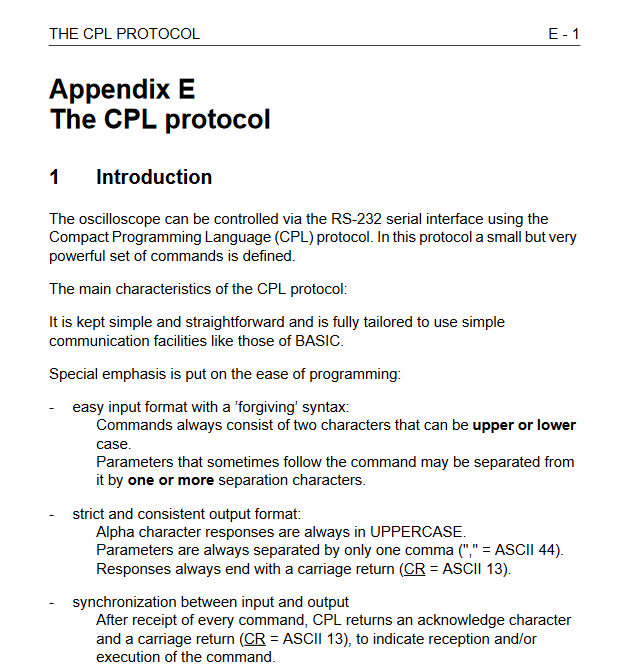
CPL Protocol
Fluke CPL is a proprietary protocol Fluke uses to talk to their calibration instruments and run automated calibration procedures. It’s basically a command/response protocol that lets software set ranges, trigger measurements, read values, and control instrument state over GPIB, RS-232, or USB. It's documention has been released by Fluke, so it's possible to integrate Fluke devices into custom workflows.
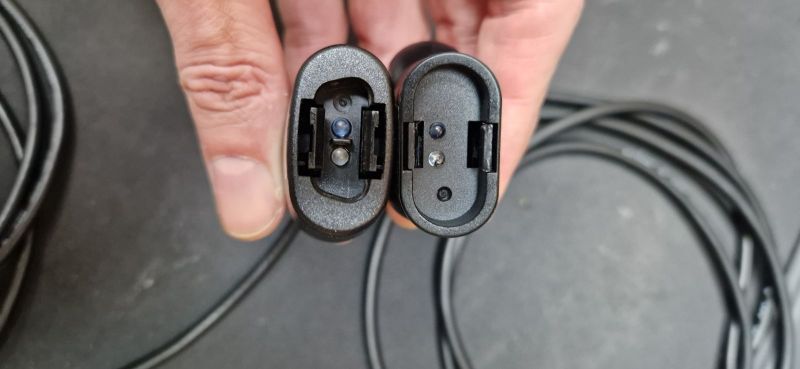
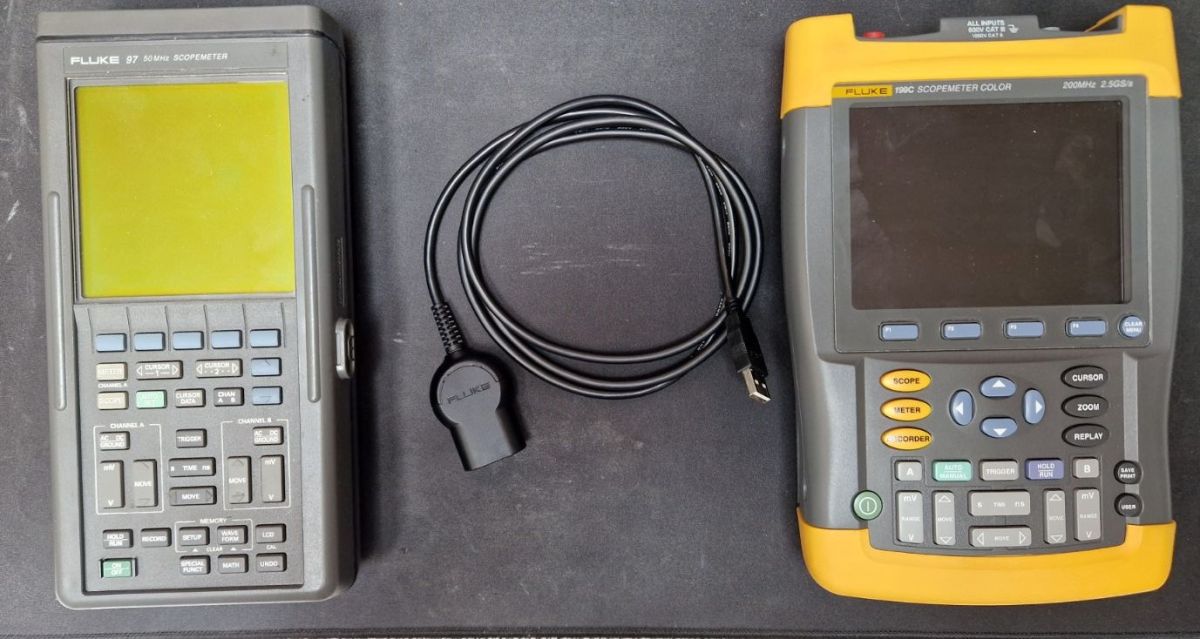
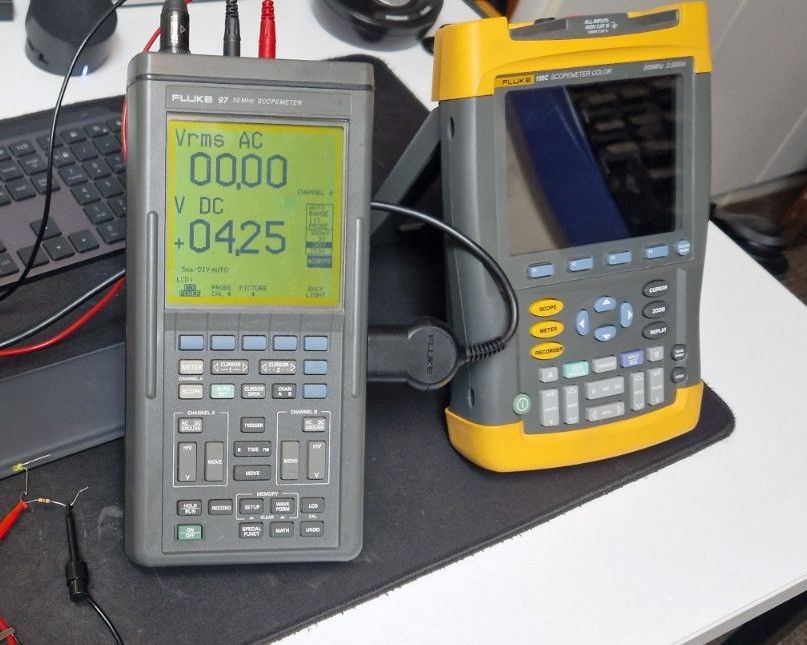

Device connection
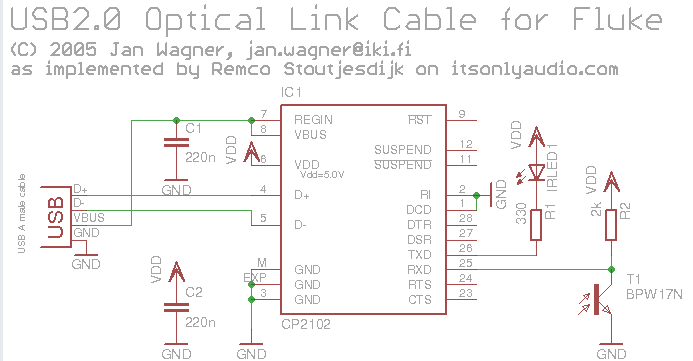
Many Fluke devices can be connected to a PC via an optical USB interface rather than a direct electrical connection. This USB-IR cable is essentially a USB-to-serial adapter with an infrared transceiver, designed to mate with the optical port on Fluke meters and calibrators. On the PC side it appears as a virtual COM port, and CPL communication runs over it like standard serial, while the optical link provides isolation and avoids grounding issues.

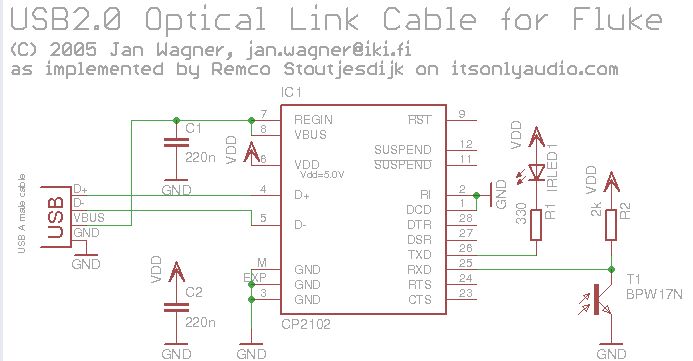
It's also possible to make a DIY version of this cable, as shown on schematic below:


Program features
The top bar contains COM port enumeration, baud rate configuration, connection control (open/close), and device model information.
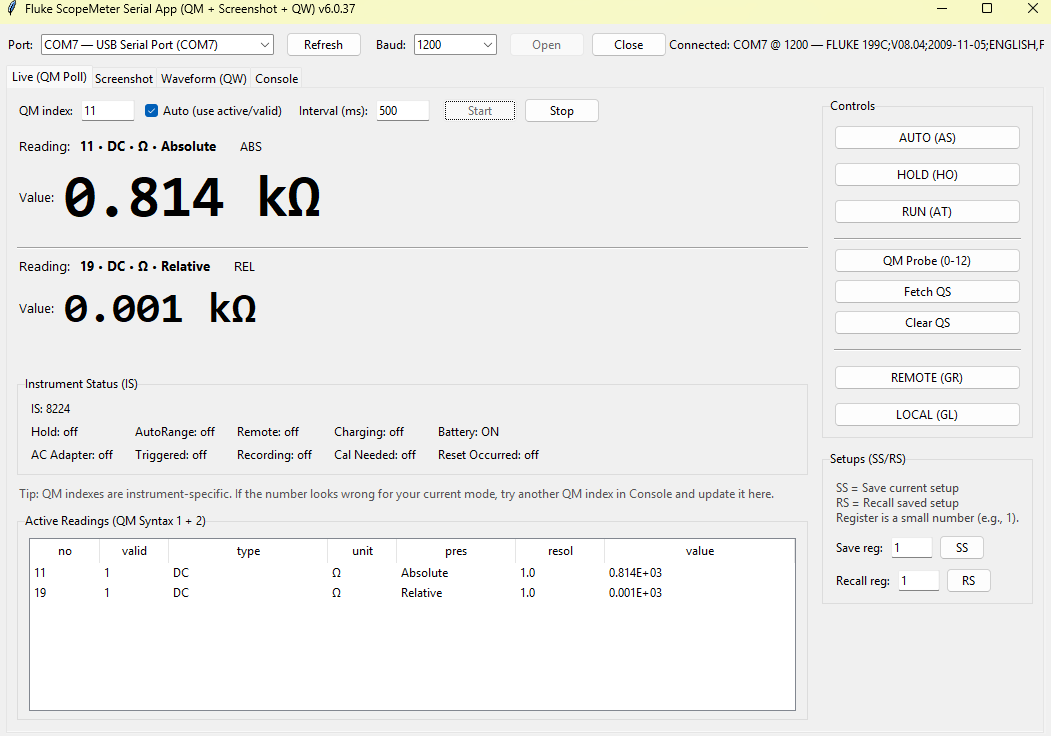
Then, there are separate tabs. First is Live (QM Poll):

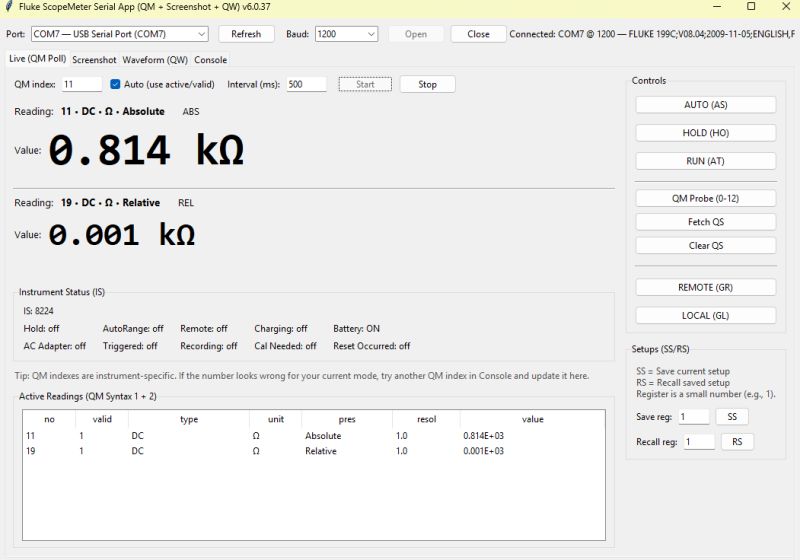
QM (Query measurements) and depending on the meter and measurement it exposes different indexes, for example, absolute measurement would be index 11, relative would be index 19 (or 21 on another meter). Usually you have min-max-total+absolute on some measurements so you'd have 4 indexes to read

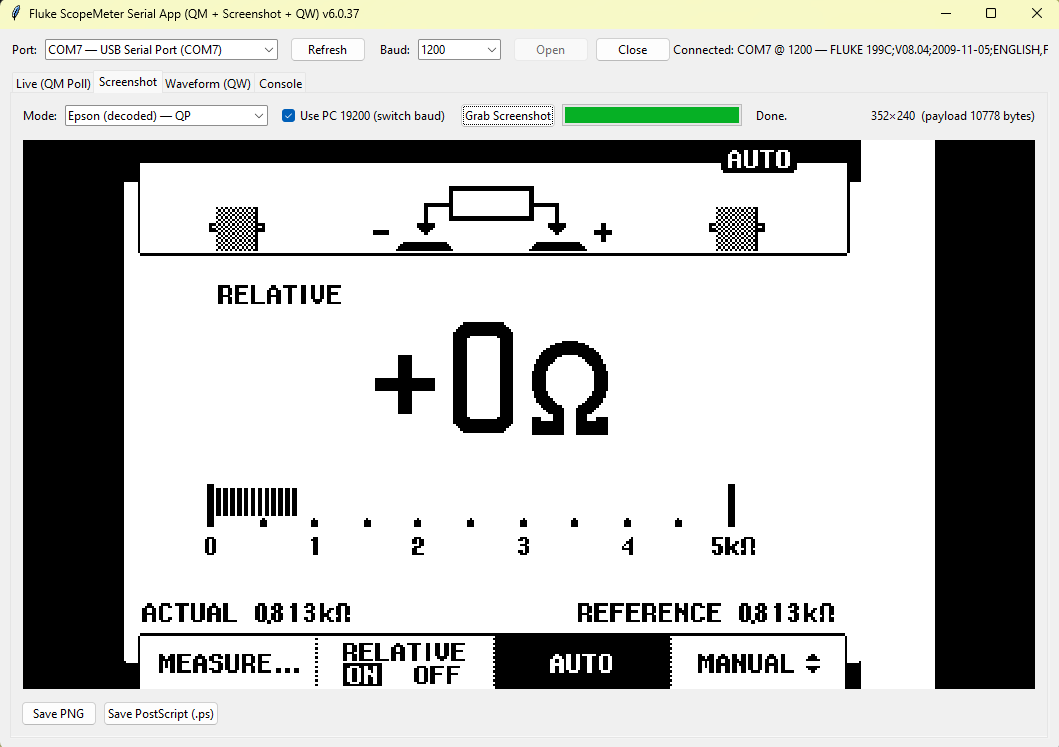
Second tab is Screenshot:

There you can grab the pixels data from the Fluke, so it's basically like a remote screen. It shows the same information that's on the physical screen. The only drawback is that it takes like 15 seconds to grab full screen at @19200bps. It probably could be improved by using other format than Epson Bitmap.

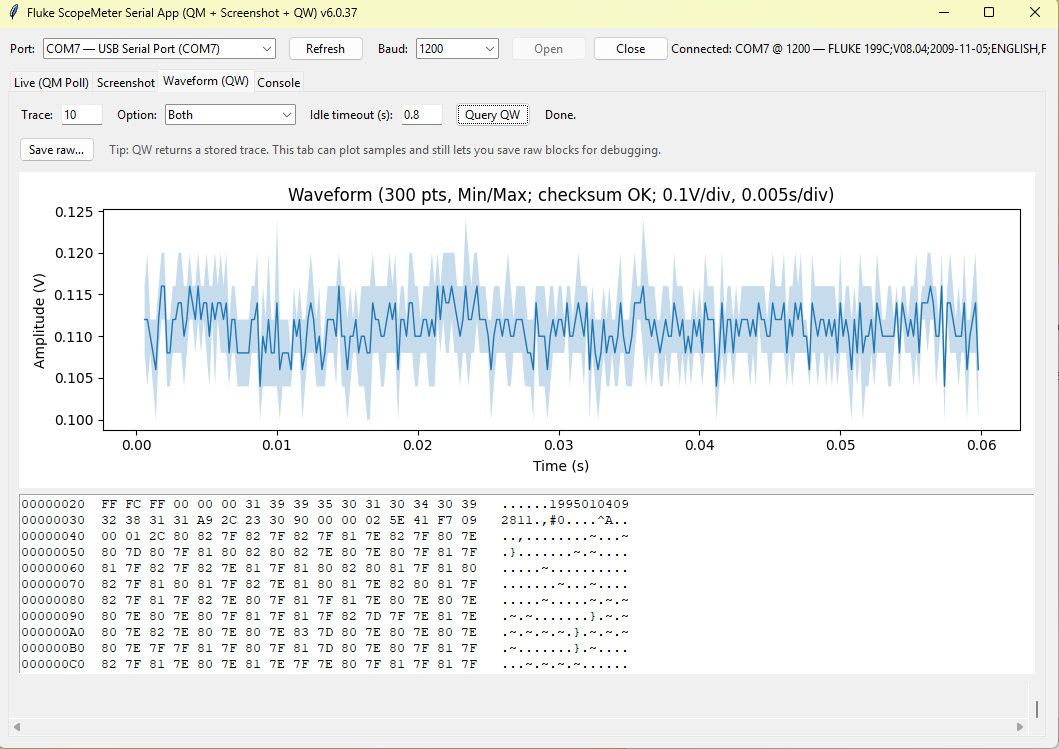
Third tab is Waveform:

QW (query waveform) is implemented in 199C only. It allows faster access to waveform shown on the screen. Captured waveform can be exported, but currently only to raw binary format.
Fluke ScopeMeter app connected to COM7 port with identification readout.

Usage
Just download script and run it with Python. You may also need to install dependencies:

py pip install pyserial numpy pillow matplotlib


Summary
This is the initial draft of Fluke Python tool. Not all commands are implemented, but it still provides a wide access to the variety of Fluke features. So far, it was tested mostly on Fluke 199C and Fluke 97. If anyone reading has another Fluke model that may be compatible, feel free to download the script and let us know how it works! Furthermore, which features do you think could be also useful and should be added in near future?
I am attaching the latest version of the script and Fluke documentation we used as reference.
Attachments:
  • 93-95-97_SM.pdf (9.71 MB) You must be logged in to download this attachment.
  • Fluke289_remote_spec28X.pdf (95.58 KB) You must be logged in to download this attachment.
  • FLUKE_CPL_protocol.pdf (82.15 KB) You must be logged in to download this attachment.
  • fluke_scope_app_v6.0.36 - FINAL.py.zip (31.94 KB) You must be logged in to download this attachment.

About Author
p.kaczmarek2
p.kaczmarek2 wrote 14439 posts with rating 12405 , helped 650 times. Been with us since 2014 year.

Comments

FAQ

TL;DR: Early Python app adds RS‑232 remote control for Fluke meters; full‑screen grabs take ≈15 seconds at 19200 bps; “It’s basically a command/response protocol.” For engineers needing quick live readings, screenshots, and waveforms via CPL without vendor software. [Elektroda, p.kaczmarek2, post #21798178]

Why it matters: It lets you automate measurements and capture screens or waveforms from supported Fluke meters using a simple, scriptable tool.

Quick Facts

What is the Fluke CPL protocol?

CPL is Fluke’s command/response protocol for instrument control and automated calibration. It lets software set ranges, trigger readings, and fetch data over RS‑232, GPIB, or USB. Fluke has released documentation, enabling custom integrations and automation workflows for compatible meters. [Elektroda, p.kaczmarek2, post #21798178]

Which Fluke meters work with this Python app right now?

The prototype was tested mostly with the Fluke 199C and also with the Fluke 97. Other CPL‑capable models may work, but they are unverified. The author invites users to try their models and report compatibility results after running the script. [Elektroda, p.kaczmarek2, post #21798178]

How do I connect my Fluke meter to a PC?

Use the Fluke USB‑IR optical cable. It behaves like a USB‑to‑serial adapter and appears as a virtual COM port. The optical link provides isolation and avoids grounding issues while carrying CPL serial data. Then select the COM port and baud rate in the app’s top bar. [Elektroda, p.kaczmarek2, post #21798178]

Can I build a DIY USB‑IR cable for Fluke meters?

Yes. The thread shows a DIY schematic for a USB‑to‑IR transceiver that mates with the meter’s optical port. It functions like the official cable by presenting a serial COM interface on the PC. Follow the schematic and ensure proper alignment at the IR window. [Elektroda, p.kaczmarek2, post #21798178]

How do I install and run the Python script?

Install Python and required packages, then run the script. Quick start:
  1. pip install pyserial numpy pillow matplotlib
  2. Connect the USB‑IR cable and note the COM port
  3. Launch the script and open the port from the top bar That’s it for basic operation. [Elektroda, p.kaczmarek2, post #21798178]

What does the Live (QM Poll) tab show?

QM reads measurement indexes exposed by the meter. Typical functions provide four indexes such as min, max, total, and absolute. Index numbers vary by model; for example, absolute may be 11, while relative could be 19 or 21. Verify indexes per meter. [Elektroda, p.kaczmarek2, post #21798178]

How fast is screen capture, and how can I improve it?

The Screenshot tab grabs pixel data identical to the device display. A full screen takes about 15 seconds at 19200 bps using the Epson Bitmap format. Faster capture may require a different transfer format when available, or using waveform export on supported models. [Elektroda, p.kaczmarek2, post #21798178]

How do I capture and export waveforms on a Fluke 199C?

Use the Waveform tab. The app implements QW on the 199C for faster access to the displayed waveform. You can export the captured trace as raw binary for analysis. “It allows faster access to waveform shown on the screen.” [Elektroda, p.kaczmarek2, post #21798178]

What COM port and baud rate settings should I choose?

Select the enumerated COM port created by the USB‑IR cable. Set the baud rate using the app’s top bar. The author cites 19200 bps for full‑screen capture timing; your meter may support other rates, but configure within the app’s controls. [Elektroda, p.kaczmarek2, post #21798178]

What if my meter’s QM indexes don’t match the examples?

Indexes differ across models and measurement modes. For example, relative may appear as index 19 on one meter and 21 on another. If readings look incorrect, map your model’s indexes by querying each and noting the returned values. [Elektroda, p.kaczmarek2, post #21798178]

Does the waveform (QW) feature work on all models?

No. QW is implemented in the app for the Fluke 199C only. Other models may not respond to QW, which is expected behavior. Use the Screenshot or QM features on unsupported models to extract data and monitor measurements. [Elektroda, p.kaczmarek2, post #21798178]

What exactly is the RS‑232 link used here?

RS‑232 is the serial transport carrying CPL commands between the PC and meter. In this setup, the USB‑IR cable provides a serial interface that appears as a COM port. CPL rides over that link to exchange commands and data reliably. [Elektroda, p.kaczmarek2, post #21798178]

Why use an optical link instead of a direct electrical cable?

The optical USB‑IR interface isolates the instrument from the PC. Isolation prevents ground loops and reduces noise coupling. It still behaves like standard serial on the PC side, ensuring familiar COM port workflows with CPL messaging. [Elektroda, p.kaczmarek2, post #21798178]

What output formats are supported for screenshots and waveforms?

Screenshots use an Epson Bitmap transfer, matching the instrument display. Waveform captures on the 199C export to a raw binary format. You can post‑process these files with Python tools like NumPy or visualize with matplotlib. [Elektroda, p.kaczmarek2, post #21798178]

Is the project open source and where can I get the code?

The full script is attached in the thread, and a GitHub release is planned. The author will publish the repository and welcomes testing on other models. Check the thread attachments for the latest version and documentation. [Elektroda, p.kaczmarek2, post #21798178]

What limitations should I expect in this early prototype?

Not all CPL commands are implemented yet. Screenshot transfers are relatively slow, and waveform export is limited to the 199C. Function indexes can differ between models, requiring manual mapping during setup. These are known early‑stage constraints. [Elektroda, p.kaczmarek2, post #21798178]
Generated by the language model.
%}