In today's article, I would like to present you a toy that is completely different than before. This time it is not a useful, more or less, gadget, but a seemingly ordinary toy. Seemingly, because it can give us something very valuable, but more on that later.
Let's start by presenting the object of today's review. It is a Chinese-made mini quadrocopter, with the KK2 symbol.
The cost of the version I have on the day of purchase was PLN 65.

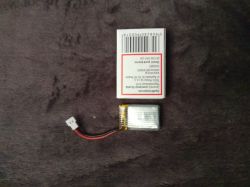
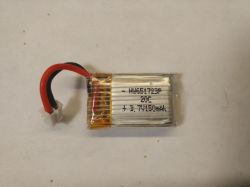
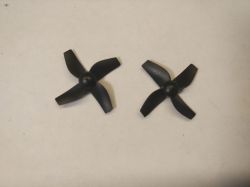
The set included two spare propellers (one "left" and one "right"), three batteries for the drone, a USB charger for these batteries, and of course the controller, but we'll talk about the contents of the box later ...
Let's start from the beginning...
Drones appeared on our market a few years ago, and their prices were counted in thousands of zlotys, however, nevertheless they settled on the market, or rather in the sky.
Currently, everyone can afford even a small UAV (unmanned aerial vehicle, UAV), because the simplest models can be purchased for less than 50 zlotys.
For as long as I can remember, I have never been attracted to such toys.
Because what's cool about some buzzing piece of plastic flying overhead. I looked at the topic differently when drones equipped with high-quality live view cameras became commonplace.
This is something and it makes sense, but it still didn't "turn me on". In addition, the issue of control, implemented by "raining". Similar to those known from game consoles. It was another thing that discouraged me from playing with flying toys. Due to the fear that I would never learn to fly it, I avoided all UAVs for a long time.
I don't know why, but in my teenage years, when I happened to play video games, I had a perfect keyboard skills, but in no way I could bring myself to pads, more extensive than those of the pegasus. Even in the titles where I was on the "master" level on the keyboard / mouse, trying to deal with even novice console players ended in failure, because I could not find myself "on the pad".
However, I thought that since all mini helicopters or quadrocopter are gaining such popularity, even as Communion gifts. This flying can't be as hard as it seems to me.
So I talked to the boss of all bosses if it would be possible to get a small drone for testing. And as you can see, Gulson agreed, and this is how I describe this fantastic toy for you today.
That's it for a long introduction. Now some photos.

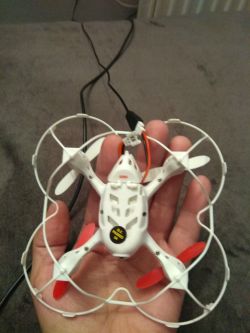
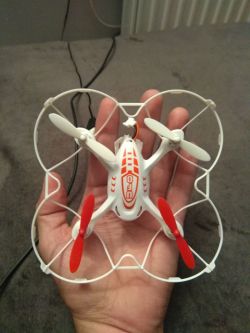
As you can see, it really is a baby (although they are much smaller).
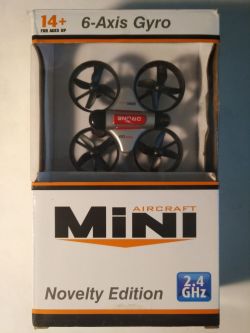
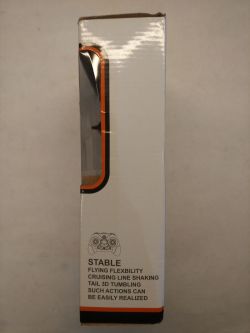
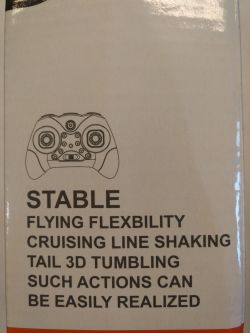
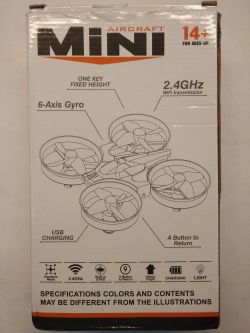
This is what the box and its contents look like.
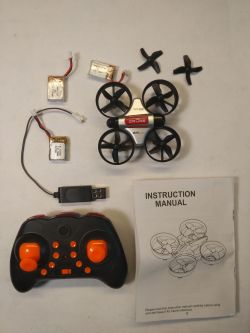
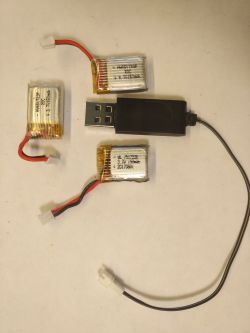
We have such a set in the box. It is enough to charge the batteries for the drone, arm the "pilot" with three AAA batteries (thin fingers) and we can fly.
Provided we have the ability.
How was it for me? ...
In short, very bad .
.
Let's start from the beginning. As soon as the postman delivered me the package with the quadrocopter, I quit my job and immediately started checking if and how this stuff works. Excited as a five-year-old on Star Day, I locked myself in the largest room in the company. I connected the power supply to the drone and turned on the "radio apparatus" to set it in motion.
After a while it turned out that it is not as beautiful as in the movies, or that I am even worse with these blocks than I thought.
The drone flew like a drunken bee, bumping into everything that was within range.
I thought to myself, well, if everything else fails, maybe it's worth reading the manual .
.
And Bingo! With difficulty deciphering the instruction written in "czinglisz" (I have the impression that it was translated from English to Mandarin, and then from Mandarin again to English, but never mind) I found information about the gyro calibration. Unfortunately, the description was quite intricate, and the directions in the accompanying picture did not match those in the content. When I finally figured out how to properly calibrate the gyroscope, it turned out that we have a significant improvement, because the drone goes crazy to a much lesser extent, and I already have some control over it, although flying is out of the question.
Oh, I manage to avoid every tenth collision .
.
Okay, maybe it's time to look at the instructions again.
There is something about buttons labeled "Trim". We can also find out that after calibrating the gyroscope, the drone will keep the level by itself, but almost always, it will run away in one of the six axes.
The "Trim" buttons are used to compensate for undesirable movements of the quadrocopter. There was also information that it can never be done perfectly and that you should always correct these small deviations during the flight.
Unfortunately, despite two days of trying, roughly 36 minutes a day, I did not manage to make the drone obey. I decided that since I cannot fly, I will learn first on the ground. And yes, I was tiring the poor UAV on the kitchen floor, only floating enough to move but not lifting it off the ground. At one point I noticed that when you wanted to start with very slow revolutions, one of the engines starts with a significant delay. It had no mechanical resistance, it reacted in the same way as the others when it slightly blew into the rotor, but it started later. I removed it and started testing it. It turned out that there was a propeller position where the motor required more than three times the current to take off than the others. It was enough, however, to turn the rotor a fraction of a degree and it started normally. Proposal. One of the windings is damaged.
I wrote to the Chinese and told him the same as you are now. I asked to send a new motor, or a refund of PLN 30, because at this price you can buy a set of these motors on Aliexpress. Although I had approved the transaction a few days earlier, "majfrend" returned me without saying PLN 30. In the meantime, I found a store in Warsaw, where I bought a set of these motors for PLN 16 and, just in case, additional two pairs of propellers for less than PLN 10. In addition, shipping, because the store was close enough, but somehow out of the way.
Now a curiosity about these motors. They are 6mm in diameter and 15mm in length. They are supplied with 1.5V - 4.2V, they consume about 1A under a load and spin to 60.000rpm (sixty thousand revolutions per minute ). They also have a serious drawback. Their service life is 5 to 6 hours of operation
  . Well, these are high-speed brush motors, so what is required here with this size and speed.
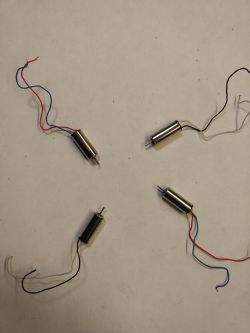
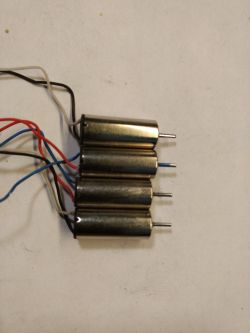
After replacing the engines with new ones, it turned out that it was not the fault of my tragic skills. After a while, the number of accidents and collisions dropped by 40%, and when I did all the calibrations again, by 80%. The remaining 20% are my skills, or rather the lack of them.
Now let's take a look inside, because that's what caused me a bit of a shock. There is practically nothing there. Before I show the photos, I will describe the content of the board that controls all of this.
- The drone communicates with the controller at 2.4GHz, using an antenna made of about 4 cm of cable. I was unable to disrupt communication by flying in a room with three routers, two from Orange and one LTE. On all devices connected to the routers, I launched the Speed Test, and Wi-Fi printing from three computers. I did not notice any problems with communication with the drone.
- The drive consists of four (two CW * and two CCW * - "left" and "right") brushed motors 6mm x 15mm 60.000RPM (life 5-6 hours).
- We also have two pairs of propellers, two "left" and two "right". The propellers are mounted "crosswise".
- Plus the frame on which it is held. It is made of a fairly flexible material and therefore resistant to any collisions.
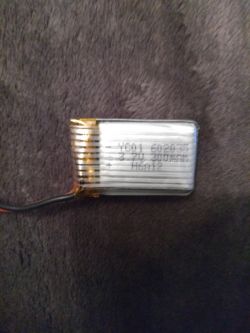
- The power source here is a 3.7V Lithium battery with a capacity of 150mAh and a load capacity of 20C.
- The heart of the UAV is a small board containing four smd transistors in the SOT23 housing marked as AOSHB, plus one 54QB and one ML5. We also have a red and blue LED (red on the front, blue on the back, I don't know why so strange), quartz, and two integrated circuits, the first one is a 16-pin no name (not even ground, you can see that it had no markings at the factory) and the other has the markings:
M540
0871P1
L1704
I haven't found anything about it, but I suspect it's the six-axis gyro.
And that's about it. There are a few more tiny SMD condensers. This is all that is needed for an unmanned flying machine to take off and be controlled from the ground. It doesn't fit in the head.
Drone dimensions are 80mm x 80mm x 35mm.
Weight with battery is 21.4 grams.
The flight time is five to six minutes.
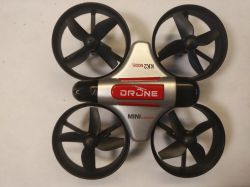
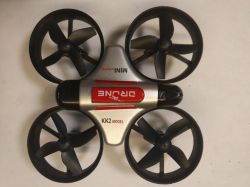
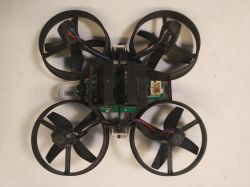
A few close-up photos.
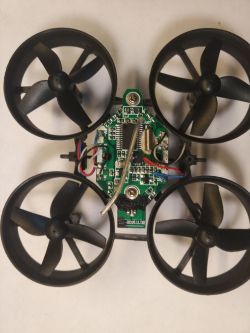
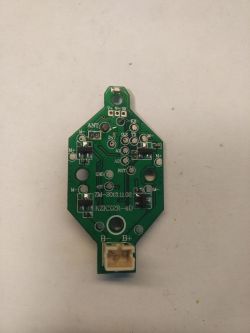
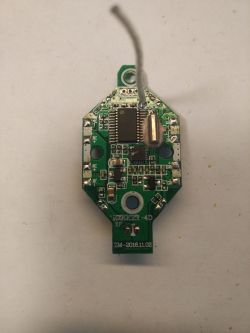
And even closer.
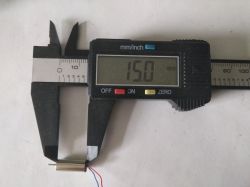
And also the engine.
No matter how hard you look, you won't be able to spot anything more than I have described here, and yet it flies, and it does so well.
When I more or less mastered the flight technique, I decided that in more advanced models it is certainly easier, due to the better quality sensors.
Unfortunately, I have a huge problem with the direction in the vertical axis and with controlling the downward flight and landing. I suspect that something else is wrong with the drone, because I have mastered the other flight directions so that I do not crash, and when climbing and landing I either stick to the ceiling, or fall like a stone, or I bounce off the floor like a ball .
.
Now something about the control itself. At the very beginning I mentioned that this toy can give us something valuable. My point is, from what I figured out, controlling a drone is like driving a car. No matter what car we learn to drive, because in all of them the basic functions and manipulators (steering wheel, pedals, gear selector) are always arranged in the same way and we can always handle them. The same is true for 99% of drones. If we learn to fly such for 50 zlotys, then we can easily manage the piloting of a larger and more expensive machine.
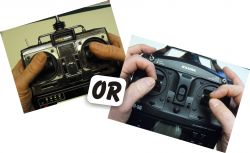
Now I will briefly describe the principle of flying drones. I will use an example of my controller:
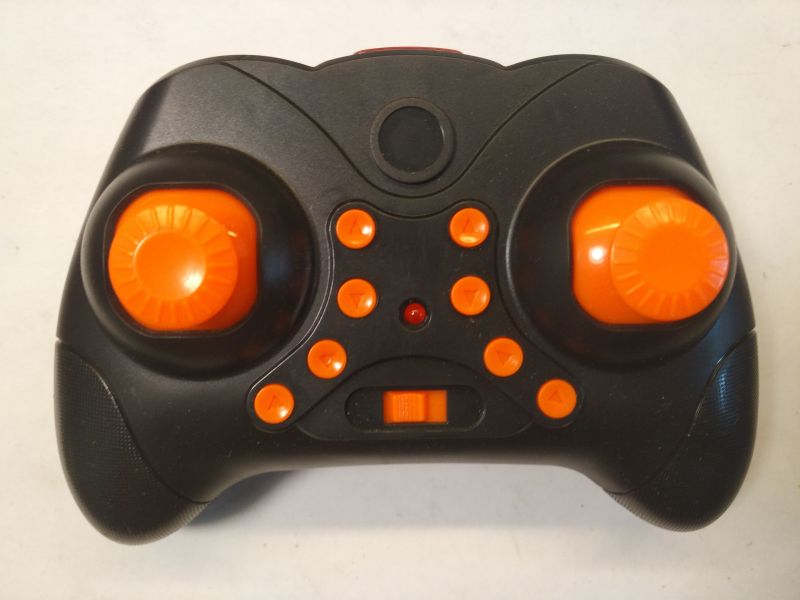
Before we start playing, we need to calibrate the gyro. In the case of my drone, to do this, place the connected UAV on a horizontal surface, then point the left stick to the 45 ° position to the lower right position, and then, keeping the left knob in this position, set the right knob in the same position. The aircraft will start flashing LEDs. Hold the joysticks without moving them until the quadrocopter LEDs stop blinking. At this point, the gyro is calibrated.
First, let's focus on the "knobs"
The left one is responsible for two functions:
- Throttle or throttle. By controlling the knob in the vertical axis, you steer the "gas" and go up or down. The thumb works almost all the time on this joystick. The knob in this direction of movement does not "spring" and stays in the position we set.
- Yaw - this function is used to rotate the quadrocopter around its axis in the horizontal plane and is performed by tilting the left knob to the right or left. The harder we do this, the faster the drone will spin. The knob springs in this plane and automatically returns to the center when released.
The right knob springs in all directions and always returns to the center when released. It also has two functions:
- Roll by moving the stick left or right, the UAV will fly in this direction. So if it is facing us, and we point the stick to the left, the drone will fly "left side forward", without turning forward to the direction of flight, we have to use the left knob to do that.
- Pitch, by controlling the joystick up and down, you will make the drone move in the direction "with its front" or fly backwards.
It's all hard to explain. Probably harder than just picking up the equipment and smashing yourself a few times :)
The little orange buttons are the trimmers for fine tuning your directions. The principle is simple, as it runs forward, we click the Trim button once or several times in the opposite direction. Same for all axes.
There is also the question of the headless mode ...
Here, let me quote the material from the page devoted to the topic of drones:
And next:
For detailed information, please refer to source page .
I personally did not even try to turn on this mode, because from the beginning I assumed a similar assumption as the author of the quoted article.
When I have to instill some habits related to controlling the UAV, it is better to be correct right away.
Now let's look inside our "radio equipment":
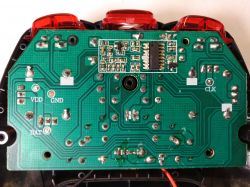
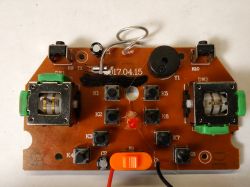
As you can see, we won't find much here either. The integrated circuit, as in the case of the UAV itself, has no markings.
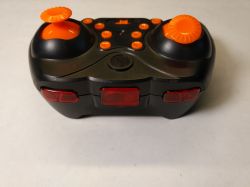
Since I already had a "pad" on the table, I decided to take the antenna outside, because it was factory-wound in a ball and stuffed in a red window between the buttons.
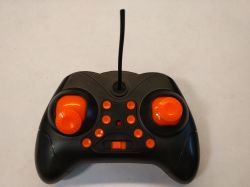
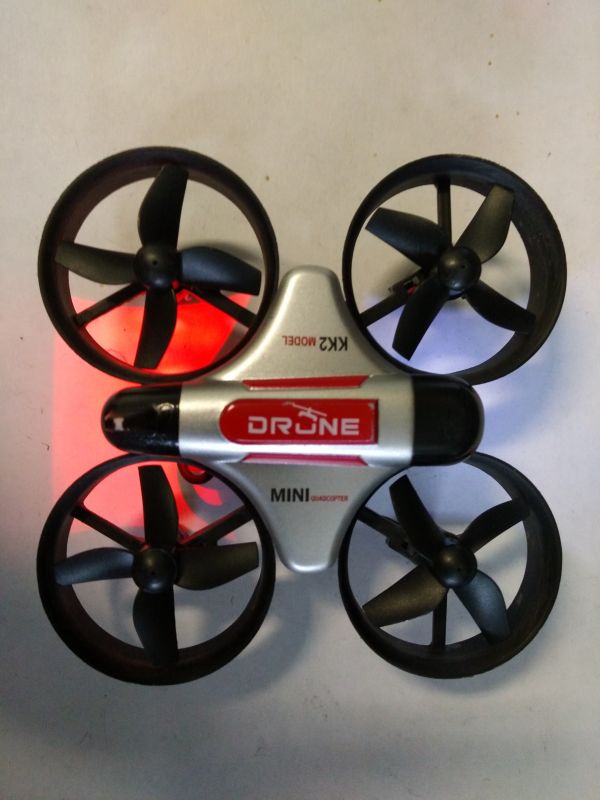
Let's go back to the topic of LEDs. As I mentioned, there is a red LED on the front of the drone, and a blue one on the back.
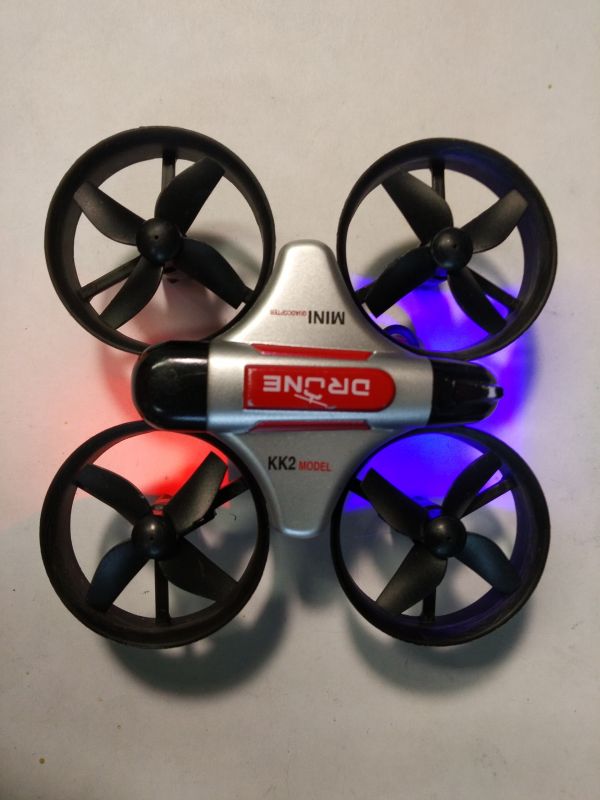
It has nothing to do with the standards. Because when it comes to flying objects, we have three position lights. White in the middle of the front, and red and green on the sides. So that in the air, you can easily judge in which direction the object is moving. Or, in ground movements, white in the front and red in the rear.
As there are only two LEDs in my drone, I decided to replace the front one with white and the rear one with red. By the way, I sold the entire PCB, because Chinese February was not of the best quality. I also treated the potentiometers with the Kontakt PR preparation.
Due to the fact that so far I fly very poorly, I will not post my embarrassing pilot shows for the time being, because there is nothing to brag about.
I suspect that outside, where I would have more space, I would be able to pilot better, but it has been blowing for several days and this tiny drone is very susceptible to even the slightest air turbulence.
So for the moment you have to enjoy the videos recorded by other owners of this toy.
These are all the same drones, just in different housings. Likewise, control "apparatus".
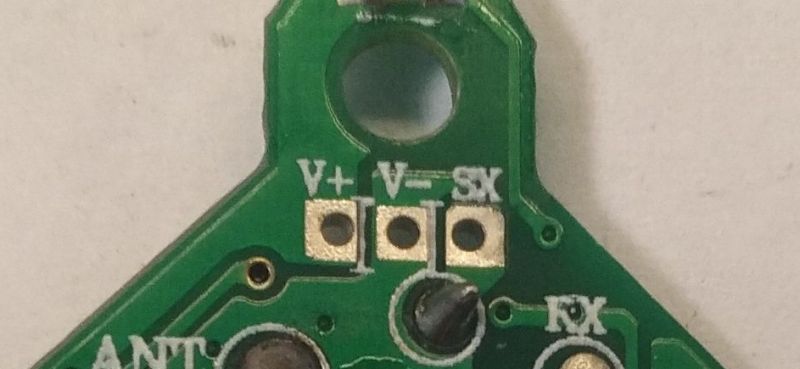
One more thing remains. There is a free space for a connector on the board that is the heart of the drone. The pads are labeled V +, V-, SX. Perhaps one of the colleagues more familiar with the subject will tell you what it can be used for?
Ah, yeah, I forgot to mention to you. This drone has a "trick" function. It is true that it comes down to making a 360 ° rotation (flip-flop) in the direction in which you move the right joystick, but it is always an interesting addition.
Finally, I would like to urge you to be very careful and familiar with the regulations if you would like to play with drones. On one of the YouTube videos, there was a great summary:
If you click on "one hundred pluses", then especially for you, I will disassemble this damaged micromotor and make photo documentation. I know that you, just like me, are very interested in its structure ...
...
EDIT June 28, 2018 4:18 PM
Colleague 398216 Deleted reminded me of one more important function of this drone. I haven't flown it outside yet and haven't had a chance to try this feature. So I will quote an excerpt from the instruction manual on this topic:
So we have an automatic return, but may require flight correction. I suspect he is coming back in a straight line to the starting point, but until I learn to fly well, I'm not going to hand over the controls to the Chinese autopilot.
Best regards.
CMS
* Maybe someone knows how to develop these shortcuts?
Let's start by presenting the object of today's review. It is a Chinese-made mini quadrocopter, with the KK2 symbol.
The cost of the version I have on the day of purchase was PLN 65.

The set included two spare propellers (one "left" and one "right"), three batteries for the drone, a USB charger for these batteries, and of course the controller, but we'll talk about the contents of the box later ...
Let's start from the beginning...
Drones appeared on our market a few years ago, and their prices were counted in thousands of zlotys, however, nevertheless they settled on the market, or rather in the sky.
Currently, everyone can afford even a small UAV (unmanned aerial vehicle, UAV), because the simplest models can be purchased for less than 50 zlotys.
For as long as I can remember, I have never been attracted to such toys.
Because what's cool about some buzzing piece of plastic flying overhead. I looked at the topic differently when drones equipped with high-quality live view cameras became commonplace.
This is something and it makes sense, but it still didn't "turn me on". In addition, the issue of control, implemented by "raining". Similar to those known from game consoles. It was another thing that discouraged me from playing with flying toys. Due to the fear that I would never learn to fly it, I avoided all UAVs for a long time.
I don't know why, but in my teenage years, when I happened to play video games, I had a perfect keyboard skills, but in no way I could bring myself to pads, more extensive than those of the pegasus. Even in the titles where I was on the "master" level on the keyboard / mouse, trying to deal with even novice console players ended in failure, because I could not find myself "on the pad".
However, I thought that since all mini helicopters or quadrocopter are gaining such popularity, even as Communion gifts. This flying can't be as hard as it seems to me.
So I talked to the boss of all bosses if it would be possible to get a small drone for testing. And as you can see, Gulson agreed, and this is how I describe this fantastic toy for you today.
That's it for a long introduction. Now some photos.

As you can see, it really is a baby (although they are much smaller).


This is what the box and its contents look like.


We have such a set in the box. It is enough to charge the batteries for the drone, arm the "pilot" with three AAA batteries (thin fingers) and we can fly.
Provided we have the ability.
How was it for me? ...
In short, very bad
Let's start from the beginning. As soon as the postman delivered me the package with the quadrocopter, I quit my job and immediately started checking if and how this stuff works. Excited as a five-year-old on Star Day, I locked myself in the largest room in the company. I connected the power supply to the drone and turned on the "radio apparatus" to set it in motion.
After a while it turned out that it is not as beautiful as in the movies, or that I am even worse with these blocks than I thought.
The drone flew like a drunken bee, bumping into everything that was within range.
I thought to myself, well, if everything else fails, maybe it's worth reading the manual
And Bingo! With difficulty deciphering the instruction written in "czinglisz" (I have the impression that it was translated from English to Mandarin, and then from Mandarin again to English, but never mind) I found information about the gyro calibration. Unfortunately, the description was quite intricate, and the directions in the accompanying picture did not match those in the content. When I finally figured out how to properly calibrate the gyroscope, it turned out that we have a significant improvement, because the drone goes crazy to a much lesser extent, and I already have some control over it, although flying is out of the question.
Oh, I manage to avoid every tenth collision
Okay, maybe it's time to look at the instructions again.
There is something about buttons labeled "Trim". We can also find out that after calibrating the gyroscope, the drone will keep the level by itself, but almost always, it will run away in one of the six axes.
The "Trim" buttons are used to compensate for undesirable movements of the quadrocopter. There was also information that it can never be done perfectly and that you should always correct these small deviations during the flight.
Unfortunately, despite two days of trying, roughly 36 minutes a day, I did not manage to make the drone obey. I decided that since I cannot fly, I will learn first on the ground. And yes, I was tiring the poor UAV on the kitchen floor, only floating enough to move but not lifting it off the ground. At one point I noticed that when you wanted to start with very slow revolutions, one of the engines starts with a significant delay. It had no mechanical resistance, it reacted in the same way as the others when it slightly blew into the rotor, but it started later. I removed it and started testing it. It turned out that there was a propeller position where the motor required more than three times the current to take off than the others. It was enough, however, to turn the rotor a fraction of a degree and it started normally. Proposal. One of the windings is damaged.
I wrote to the Chinese and told him the same as you are now. I asked to send a new motor, or a refund of PLN 30, because at this price you can buy a set of these motors on Aliexpress. Although I had approved the transaction a few days earlier, "majfrend" returned me without saying PLN 30. In the meantime, I found a store in Warsaw, where I bought a set of these motors for PLN 16 and, just in case, additional two pairs of propellers for less than PLN 10. In addition, shipping, because the store was close enough, but somehow out of the way.
Now a curiosity about these motors. They are 6mm in diameter and 15mm in length. They are supplied with 1.5V - 4.2V, they consume about 1A under a load and spin to 60.000rpm (sixty thousand revolutions per minute
 ). They also have a serious drawback. Their service life is 5 to 6 hours of operation

After replacing the engines with new ones, it turned out that it was not the fault of my tragic skills. After a while, the number of accidents and collisions dropped by 40%, and when I did all the calibrations again, by 80%. The remaining 20% are my skills, or rather the lack of them.
Now let's take a look inside, because that's what caused me a bit of a shock. There is practically nothing there. Before I show the photos, I will describe the content of the board that controls all of this.
- The drone communicates with the controller at 2.4GHz, using an antenna made of about 4 cm of cable. I was unable to disrupt communication by flying in a room with three routers, two from Orange and one LTE. On all devices connected to the routers, I launched the Speed Test, and Wi-Fi printing from three computers. I did not notice any problems with communication with the drone.
- The drive consists of four (two CW * and two CCW * - "left" and "right") brushed motors 6mm x 15mm 60.000RPM (life 5-6 hours).
- We also have two pairs of propellers, two "left" and two "right". The propellers are mounted "crosswise".
- Plus the frame on which it is held. It is made of a fairly flexible material and therefore resistant to any collisions.
- The power source here is a 3.7V Lithium battery with a capacity of 150mAh and a load capacity of 20C.
- The heart of the UAV is a small board containing four smd transistors in the SOT23 housing marked as AOSHB, plus one 54QB and one ML5. We also have a red and blue LED (red on the front, blue on the back, I don't know why so strange), quartz, and two integrated circuits, the first one is a 16-pin no name (not even ground, you can see that it had no markings at the factory) and the other has the markings:
M540
0871P1
L1704
I haven't found anything about it, but I suspect it's the six-axis gyro.
And that's about it. There are a few more tiny SMD condensers. This is all that is needed for an unmanned flying machine to take off and be controlled from the ground. It doesn't fit in the head.
Drone dimensions are 80mm x 80mm x 35mm.
Weight with battery is 21.4 grams.
The flight time is five to six minutes.


A few close-up photos.


And even closer.

And also the engine.
No matter how hard you look, you won't be able to spot anything more than I have described here, and yet it flies, and it does so well.
When I more or less mastered the flight technique, I decided that in more advanced models it is certainly easier, due to the better quality sensors.
Unfortunately, I have a huge problem with the direction in the vertical axis and with controlling the downward flight and landing. I suspect that something else is wrong with the drone, because I have mastered the other flight directions so that I do not crash, and when climbing and landing I either stick to the ceiling, or fall like a stone, or I bounce off the floor like a ball
Now something about the control itself. At the very beginning I mentioned that this toy can give us something valuable. My point is, from what I figured out, controlling a drone is like driving a car. No matter what car we learn to drive, because in all of them the basic functions and manipulators (steering wheel, pedals, gear selector) are always arranged in the same way and we can always handle them. The same is true for 99% of drones. If we learn to fly such for 50 zlotys, then we can easily manage the piloting of a larger and more expensive machine.
Now I will briefly describe the principle of flying drones. I will use an example of my controller:

Before we start playing, we need to calibrate the gyro. In the case of my drone, to do this, place the connected UAV on a horizontal surface, then point the left stick to the 45 ° position to the lower right position, and then, keeping the left knob in this position, set the right knob in the same position. The aircraft will start flashing LEDs. Hold the joysticks without moving them until the quadrocopter LEDs stop blinking. At this point, the gyro is calibrated.
First, let's focus on the "knobs"
The left one is responsible for two functions:
- Throttle or throttle. By controlling the knob in the vertical axis, you steer the "gas" and go up or down. The thumb works almost all the time on this joystick. The knob in this direction of movement does not "spring" and stays in the position we set.
- Yaw - this function is used to rotate the quadrocopter around its axis in the horizontal plane and is performed by tilting the left knob to the right or left. The harder we do this, the faster the drone will spin. The knob springs in this plane and automatically returns to the center when released.
The right knob springs in all directions and always returns to the center when released. It also has two functions:
- Roll by moving the stick left or right, the UAV will fly in this direction. So if it is facing us, and we point the stick to the left, the drone will fly "left side forward", without turning forward to the direction of flight, we have to use the left knob to do that.
- Pitch, by controlling the joystick up and down, you will make the drone move in the direction "with its front" or fly backwards.
It's all hard to explain. Probably harder than just picking up the equipment and smashing yourself a few times :)
The little orange buttons are the trimmers for fine tuning your directions. The principle is simple, as it runs forward, we click the Trim button once or several times in the opposite direction. Same for all axes.
There is also the question of the headless mode ...
Here, let me quote the material from the page devoted to the topic of drones:
Quote:Normal flight mode
The biggest problem when learning to fly a 4-channel model such as a quadrocopter is changing steering directions depending on the orientation of the model. When is he facing us? the right stick deflection directions correspond exactly to the directions in which the quadrocopter will go. But what if we turn it to face us? the left side will switch to the right side and the front side will change to the back side. Then manipulating the stick is not so easy.
And next:
Quote:Headless mode
Wouldn't it be easier if no matter which way the model is facing? always the stick forwards caused a flight? from us? back? to us? and respectively left and right? The authors of the mode called "Headless" followed this trail. It is based on a magnetometer, which is simply an electronic compass. On the basis of its readings, the quadrocopter sets itself absolute directions (always facing the same direction), regardless of how it is facing itself. Thus, in Headless mode, with a constant deflection of the right stick, the quadrocopter will still move in one direction, even if you turn it (yaw).
For detailed information, please refer to source page .
I personally did not even try to turn on this mode, because from the beginning I assumed a similar assumption as the author of the quoted article.
When I have to instill some habits related to controlling the UAV, it is better to be correct right away.
Now let's look inside our "radio equipment":


As you can see, we won't find much here either. The integrated circuit, as in the case of the UAV itself, has no markings.
Since I already had a "pad" on the table, I decided to take the antenna outside, because it was factory-wound in a ball and stuffed in a red window between the buttons.


Let's go back to the topic of LEDs. As I mentioned, there is a red LED on the front of the drone, and a blue one on the back.

It has nothing to do with the standards. Because when it comes to flying objects, we have three position lights. White in the middle of the front, and red and green on the sides. So that in the air, you can easily judge in which direction the object is moving. Or, in ground movements, white in the front and red in the rear.
As there are only two LEDs in my drone, I decided to replace the front one with white and the rear one with red. By the way, I sold the entire PCB, because Chinese February was not of the best quality. I also treated the potentiometers with the Kontakt PR preparation.

Due to the fact that so far I fly very poorly, I will not post my embarrassing pilot shows for the time being, because there is nothing to brag about.
I suspect that outside, where I would have more space, I would be able to pilot better, but it has been blowing for several days and this tiny drone is very susceptible to even the slightest air turbulence.
So for the moment you have to enjoy the videos recorded by other owners of this toy.
These are all the same drones, just in different housings. Likewise, control "apparatus".
One more thing remains. There is a free space for a connector on the board that is the heart of the drone. The pads are labeled V +, V-, SX. Perhaps one of the colleagues more familiar with the subject will tell you what it can be used for?

Ah, yeah, I forgot to mention to you. This drone has a "trick" function. It is true that it comes down to making a 360 ° rotation (flip-flop) in the direction in which you move the right joystick, but it is always an interesting addition.
Finally, I would like to urge you to be very careful and familiar with the regulations if you would like to play with drones. On one of the YouTube videos, there was a great summary:
Quote:"Remember that a drone is essentially a flying lawn mower"
If you click on "one hundred pluses", then especially for you, I will disassemble this damaged micromotor and make photo documentation. I know that you, just like me, are very interested in its structure
EDIT June 28, 2018 4:18 PM
Colleague 398216 Deleted reminded me of one more important function of this drone. I haven't flown it outside yet and haven't had a chance to try this feature. So I will quote an excerpt from the instruction manual on this topic:
Instrukcja obsługi wrote:One-key Return Press the One-key Return key on the transmitter, the Quad-rotor will make automatic return. If it deviates the track when return, please operate the right control lever so as to correct the flyying direction.
During the course of return press the functional combination key on the transmitter once again or push the right control lever "Forward", you can stop the action of Return.
So we have an automatic return, but may require flight correction. I suspect he is coming back in a straight line to the starting point, but until I learn to fly well, I'm not going to hand over the controls to the Chinese autopilot.
Best regards.
CMS
* Maybe someone knows how to develop these shortcuts?
Cool? Ranking DIY


