Unrelated: Hi, I am new here and would like to share progress I've made with a lightbulb in found in a flea market. Please message me if I haven't done something right or missed any information/rules. Thank you.
I initially ported this device onto the firmware 1.17.308 but it lacked PWM functionality (Hence why I did not publish it). Now I've managed to get it working fully on version 1.17.439 thanks to some commits which fixed W600 PWM functionality (thanks to whoever did that fix, this wouldn't be possible without that).
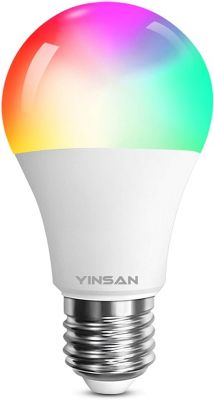
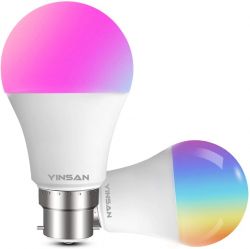
Amazon link
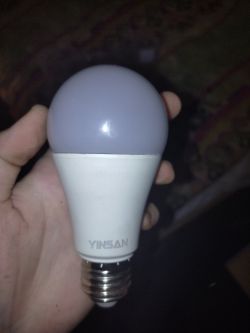
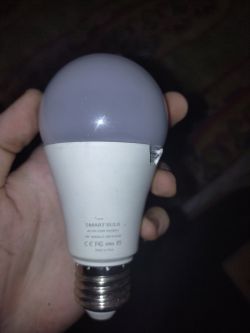
This device was quite tricky to reverse engineer, but I've been able to get it running after a bit of elbow grease, so to speak.
The first and trickiest part about this bulb is the disassembly because the bulb is glued together with silicon, which is quite tricky to remove.
You can see some of the resulting scars from that in the second attached image. (Battle wounds )
)
But, once opened, you could inspect further by removing the glue attached on the ring PCB and pulling it out of the light bulbs body.

An ESP-looking module would appear, that has the writing TW-05 on it. Now since I've partially destroyed mine while said disassembly, I'll attach an reference photo of what it USED to look like
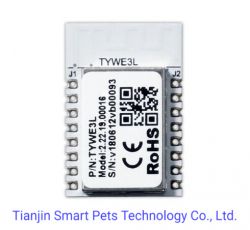
Except it has pins on the bottom and instead of the sticker it has TW-05 laser etched onto its metal case. A bit of imagination is required
Once pulled out, you'll be greeted with this. (Minus the debug wires I soldered onto it)
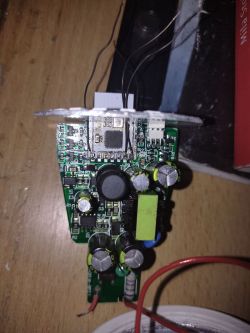
In order to make use of this destructive process you'll need a soldering iron, bit of solder, a UART adapter (any that supports 3.3V would work), some small wires and a bit of patience.
You'll need to solder 4 connections:
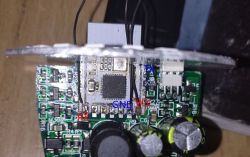
You can take off the white PCB above the main power board, but BE WARNED that you may damage the 6 pin header that's connecting the two. You HAVE BEEN WARNED.
Once those connections were completed you will have to wire the module to your UART adapter as such:
Once completed, you'll now have the ability to flash firmware for this device.
This should be obvious, but do not put LIVE electricity into this device while flashing firmware onto it. Only after the device has been assembled and configured should it be plugged back into the mains AC.
Download the firmware file off of the GitHub repository for the W600 specifcally. Make sure you get the FLS file.

Linux specific (This is what I use, might work on Windows but am not sure):
Download and install python3 and its appropriate pip package manager. This assumes you have serial drivers working and ready to use. If you don't, Google's your friend.
Once installed issue the following command:
Once that's installed, plug in the UART device and remove 3v3 from the board. This is important.
Once the UART device is plugged in, take note of its device name. Should be ttyUSB0 or ttyACM0 on most Linux distributions.
Issue the following command:
Once ran, it will get to the line.
You will QUICKLY have to plug in your 3v3 volts back onto the device. Might take a few tries, but once successful, you will have the firmware flashed onto the device.
Once completed, your lamp would create a Wi-Fi access point. Connect to it and configure it to work with your wifi network. It should be named OpenW600_some_hex_value.
In case you cant obtain the IP address on the new access point, try setting it to an static 192.168.4.10. Once done, you should be able to access the configuration interface on port 80 on IP 192.168.4.1.
From there you can configure it to connect to your Wi-Fi network. Once done the device will reboot, get its own IP address (you'll have to find it with a port scanner tool) and host the configuration interface from port 80 again.
Connect back to your main Wi-Fi, and find the new IP address of the bulb using a port scanner. Look for port 80.
Once the new IP has been obtained, you'll have to click on the Launch Web Application button.

Once in there, go to the Import tab.

From there download the attached w600.zip, in there you will have a w600.json file. Open that file and paste the contents of it into this text box.
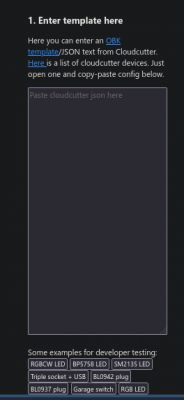
Once done, you will be able to control your Smart Light as you please.
Have a good day
I initially ported this device onto the firmware 1.17.308 but it lacked PWM functionality (Hence why I did not publish it). Now I've managed to get it working fully on version 1.17.439 thanks to some commits which fixed W600 PWM functionality (thanks to whoever did that fix, this wouldn't be possible without that).


Amazon link


This device was quite tricky to reverse engineer, but I've been able to get it running after a bit of elbow grease, so to speak.
The first and trickiest part about this bulb is the disassembly because the bulb is glued together with silicon, which is quite tricky to remove.
You can see some of the resulting scars from that in the second attached image. (Battle wounds
But, once opened, you could inspect further by removing the glue attached on the ring PCB and pulling it out of the light bulbs body.

An ESP-looking module would appear, that has the writing TW-05 on it. Now since I've partially destroyed mine while said disassembly, I'll attach an reference photo of what it USED to look like

Except it has pins on the bottom and instead of the sticker it has TW-05 laser etched onto its metal case. A bit of imagination is required
Once pulled out, you'll be greeted with this. (Minus the debug wires I soldered onto it)

In order to make use of this destructive process you'll need a soldering iron, bit of solder, a UART adapter (any that supports 3.3V would work), some small wires and a bit of patience.
You'll need to solder 4 connections:

You can take off the white PCB above the main power board, but BE WARNED that you may damage the 6 pin header that's connecting the two. You HAVE BEEN WARNED.
Once those connections were completed you will have to wire the module to your UART adapter as such:
| Module | UART |
| 3v3 | 3v3 |
| RX | TX |
| TX | RX |
| GND | GND |
Once completed, you'll now have the ability to flash firmware for this device.
This should be obvious, but do not put LIVE electricity into this device while flashing firmware onto it. Only after the device has been assembled and configured should it be plugged back into the mains AC.
Download the firmware file off of the GitHub repository for the W600 specifcally. Make sure you get the FLS file.

Linux specific (This is what I use, might work on Windows but am not sure):
Download and install python3 and its appropriate pip package manager. This assumes you have serial drivers working and ready to use. If you don't, Google's your friend.
Once installed issue the following command:
pip install w600tool
Once that's installed, plug in the UART device and remove 3v3 from the board. This is important.
Once the UART device is plugged in, take note of its device name. Should be ttyUSB0 or ttyACM0 on most Linux distributions.
Issue the following command:
w600tool.py -p /dev/ttyWhateverYourUARTAdapterIs -u the_file_you_downloaded.fls -b 115200 --upload-baud 115200
Once ran, it will get to the line.
Quote:
Push reset button to enter bootloader...
You will QUICKLY have to plug in your 3v3 volts back onto the device. Might take a few tries, but once successful, you will have the firmware flashed onto the device.
Once completed, your lamp would create a Wi-Fi access point. Connect to it and configure it to work with your wifi network. It should be named OpenW600_some_hex_value.
In case you cant obtain the IP address on the new access point, try setting it to an static 192.168.4.10. Once done, you should be able to access the configuration interface on port 80 on IP 192.168.4.1.
From there you can configure it to connect to your Wi-Fi network. Once done the device will reboot, get its own IP address (you'll have to find it with a port scanner tool) and host the configuration interface from port 80 again.
Connect back to your main Wi-Fi, and find the new IP address of the bulb using a port scanner. Look for port 80.
Once the new IP has been obtained, you'll have to click on the Launch Web Application button.

Once in there, go to the Import tab.

From there download the attached w600.zip, in there you will have a w600.json file. Open that file and paste the contents of it into this text box.

Once done, you will be able to control your Smart Light as you please.
Have a good day


